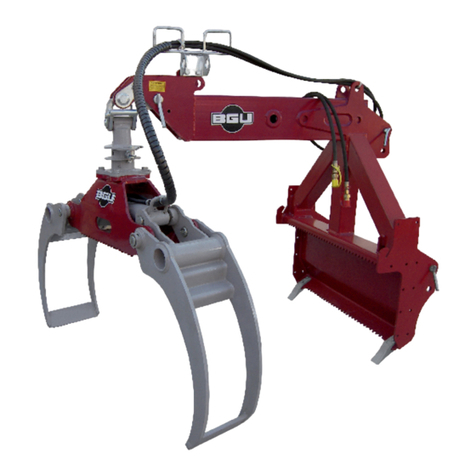
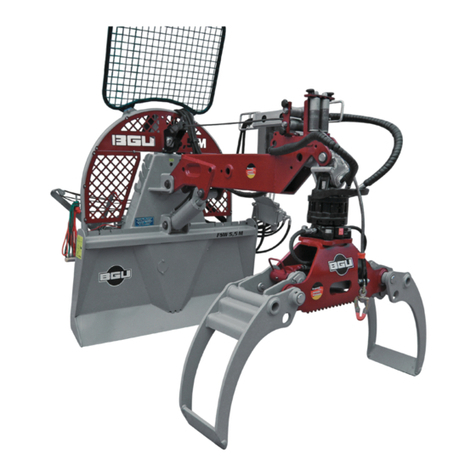
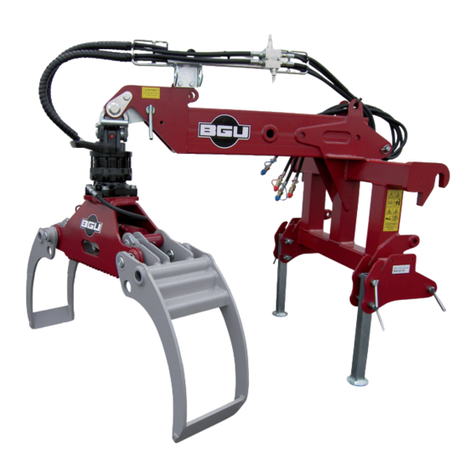
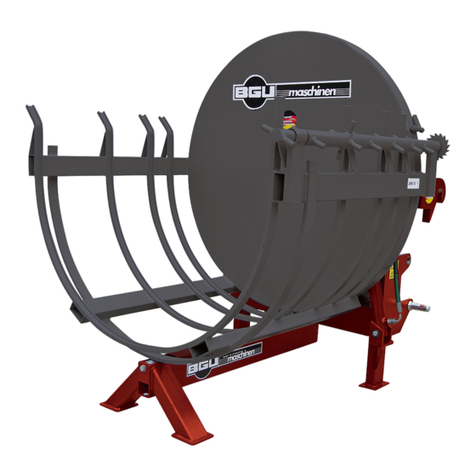
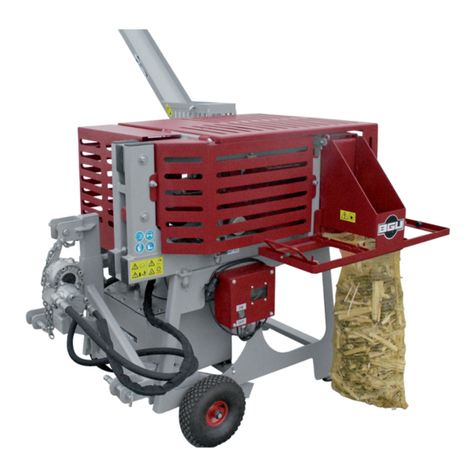
BGU HRZ Lader User manual

Südharzer Maschinenbau GmbH
Helmestraße 94 ∙ 99734 Nordhausen/Harz
Zentrale: 03631/6297-0 ∙ 7-111
Internet: www.bgu-maschinen.de
e-mail: [email protected]
USER‘S MANUAL
Carefully read these instructions before starting
and using your loader!
Grapple loader
HRZ Loader
We manufacture
in Germany!
Set-up & instal-
lation
Use
Maintenance
Accessories

2
CONTENTS
CONTENTS 2
1. General information 3
1.1 About this manual 3
1.2 Delivery and transport claims 3
2. Safty pictograms and warning labels 5
3. Safty 7
3.1 General safety rules and occupational safety 8
4. Operation 10
4.1 Mandatory application field 10
4.2 Preliminary controls before use 10
4.2.1 Attaching the loader to the tractor 10
4.2.2 Installing an additional control valve unit 11
4.3 Start-up 12
4.3.1 Start-up Joystick (optional) 13
4.3.2 Start-up proportional controls 14
4.4 Attachments 14
5. Hydraulic system 15
6. Repairs and maintenance 16
7. Accessories 17
8. Transport and handling 20
9. Dismounting and discarding an obsolete machine 20
10. Technical specifications 21
11. Other areas of possible harzard 22
11.1 Mechanical dangers 22
12. Warranty 22
13. Spare part list 23
14. EC – Statement of compliance 31

3
1. GENERAL INFORMATION
Dear customer, thank you very much for your trust and preference in
choosing our equipment and joining the number of our best customers
in the world. We are confident that our equipment will be up to all your
expectations and ensure you a long lasting quality and performance.
1.1 About this manual
Please take time to read this manual and learn to how operate and
maintain the equipment safely.
For your easier reading, this manual is laid out in several sections. The
sections are progressively numbered and listed on the “content” page.
The information, pictures and technical data in this document reflect
current or planned product features, functions, and characteristics as
of the publication date. Because of on-going product improvement and
feature additions, information in this document is subject to change
without notice.
If you are experiencing a problem or functional trouble on your equip-
ment, please read the “trouble-shooting” section to identify possible
causes and remedies.
When you have checked all the possible causes listed and you are
still experiencing the problem, ask your Authorized Service Centre for
help.
When you order parts for maintenance or repair services, your Autho-
rized Service Centre, your dealer or eventually the manufacturer need
your machine serial number and engine serial number. These are the
numbers that you have recorded on the product identification label of
the manufacturer on the machine.
1.2 Delivery and transport claims
Upon delivery of the machine please check for visual machine dama-
ges such as broken packing or scratched buckled parts. If so, make a
remark on all copies of the delivery bill (including the one for your own
use) before signing for acceptance.
The shipper/driver have to mandatorily countersign and accept
your remarks.
Should your shipper or the truck driver refuse to accept your claim and
countersign the delivery bill, fully reject delivery and make sure to in-
form us (the manufacturer) immediately. No claims shall be taken into
account by the shipper or by the insurance company, if a reservation
note is not made on the delivery bill.

4
All transport damages must be notified within latest 2 days from de-
livery. Therefore, delivery must be collected and inspected within this
term. Later claims shall be disregarded. In case of assumed but not
visually clear transport damages make sure to mark the following
sentence on the delivery bill: „Reserved delivery due to assumed
transportation damages“.
Insurance and shipping companies act with extreme caution in case
of transport damages and sometimes refuse to accept responsibility.
Please make sure to provide clear and exhaustive evidence (photos)
of the claimed damages.
Thank you in advance for your help and understanding in this matter.

5
2. SAFETY PICTOGRAMS AND WARNING
1. Pictogram: „Grapple Release/Grasp“
2.
Pictogram „Hydr. Motor“
3. Pictogram „Slewing arm to the right/left“
4. Pictogram „Extendible Arm, Retract/Extend“
5. Pictogram „Retract/Extend Top Link-Pin“
6. Pictogram „Pivotal Hanger UP/DOWN“
7. Pictogram „Boom Lift UP/DOWN“
8. Machine safety label
„Read the instructions before start-up“
Read, understand, and follow all instructions in this manual and on
the machine before starting!

6
9. Identification label „Product identification“
This label shows the company details of the manufacturer and the
main machine technical data.
10. „BGU-Maschinen“ Manufacturer‘s Logo
11. Safety pictogram
„Do not infringe the dangerous zone“
Avoid standing in the dangerous zone between the tractor and the log
loader.
12. Safety pictogram
„Danger Pinch Point“
Keep hands away from this danger zone till all moving parts have
come to a complete stop.
13. Safety pictogram
„Caution: operating zone“
Stand clear: do not allow bystanders in the dangerous operation area
while the machine is at work.
14. Safety pictogram
„max. operating pressure“

7
3. SAFETY
Strictly perform installation, set-up, maintenance, cleaning and
transportation with the machine switched off and all moving
parts firmly secured against accidental operation. Immediately
disconnect power off the machine in case of any eventual fault
or trouble.
The user shall strictly comply with these operation, set-up, mainte-
nance, repair and trouble-shooting instructions in order to assure safe
operation and no damages to the equipment. Moreover, we recommend
to let the machine be run and maintained strictly by trained and skilled
staff who must be familiar with the applicable occupational safety and
health administration rules as well as applicable transportation rules.
Incorrect use of the saw can cause serious injury or death.
No person under school leaving age should operate a log loader. Those
who have reached school leaving age but are below the age of 18 may
operate a log loader if supervised by a competent person of 18 years
or over. The machine shall be installed and kept in a suitable location
selected by the customer for safest operation.
Make sure that the equipment stands on a safe stable foundation.
Do not allow within the hazardous zone any unauthorized third
or persons who are not familiar with the dangers related to use
and operation of the machine. Allow no bystanders, especially
children and pets in the working area.
• Log loaders are not designed for passangers transportation.
• Strictly control/operate the log grapples from the driver‘s seat on
the tractor.
• Do not allow any thirds in the dangerous zone. The dangerous zone
includes the swivel/rotation area as well as the bucket and grapples
operation (grasp/release) area. Provide due clearance around the
log/timber handling zone.
• Make sure to firmly close the clamp and park it across travel
direction when at rest or travelling without load.
• Make sure that the grapple is hanging free so that slewing to both
sides is possible during travel on uneven ground/terrain.
• When you pull/handle timber always keep in mind that lurching or
other sudden, flicking movements of a suspended/pulled load may
occur due to timber flexibility and bounciness. Mind for the safety of
your fellow workers and take due measures to keep the work area
free from other thirds and obstacles. Maintain safe distances
from other ground workers and equipment units.

8
• Perform logs piling and general rolling operations with extreme care
and at very low tractor speed. DANGER: watch for timber/branches
that may fall on or enter the operator’s compartment.
• Changing the length setting of the extendible arm may be strictly
performed with the backhoe lowered on ground, the grapple
clamped and the tractor engine switched off. Also make sure to
disconnect the hydraulic system and protect it against accidental restart.
• When travelling across a slope or turning around a bend with a
suspended load, always maintain a low gear to avoid any danger to
the tractor in the event of possible skidding, jamming or canting of
a log and consequent dangerous rollover.
• Immediately repair or replace eventual faulty hydraulic components.
• Do not let hydraulic pressure hoses lay unprotected in the driver‘s
cabine after installing and connecting the control valve unit (control
slide valve / electric valve).
• Always wear suitable protective gloves when doing works on the
hydraulic system. AVOID HAND CONTACT with hydraulic oil.
• BEWARE: a log grapple attached to a U-joint cannot be firmly laid
down on ground. To avoid the grapple from rolling over or getting
tangled, make sure to secure it before laying down.
• Before replacing or servicing the grapple hanger, secure the clamp
against fallover and make sure to strictly grasp the clamp from the
sides. DANGER of legs/feet injuries.
• Pinch points will occur any time when converting from fixed to
mobile grapple attachment. BEWARE: injured fingers danger.
• If you are using a winch, account for a dangerous area same as at
least the length of the rope. Keep this area free from bystanders
and unauthorized thirds.
• A rescue/emergency kit for drivers and team safety are mandatory
and must be always available in the driver‘s cabin.
3.1 General safety rules and occupational safety
• Before each new use, check for your tractor operational and road travel safety!
• Mind for all safety pictograms and operation labels on your grapple
loader. They are all important for safe operation and travel!
• Before starting with loading operations, familiarize with all safeties and
controls on your equipment and with their functions. Do not expect to
learn as you practice. Grapple loaders are heavy-duty equipment requiring
preliminary training!
• Operators must wear steel toe safety shoes and snug-fitting, tear-resistant work cloths.
• Keep the equipment as free as possible of accumulated limbs and
debris, to avoid any fire danger!
• Know where crew members are at all times. Be alert to unexpected workers
or operations in the immediate skidding area. Before starting the tractor and
beginning to work, make sure that there are no bystanders (especially child
ren) in the surroundings. Be cautious of blind spots around the loader where
the operator’s visibility is limited!
• Do not allow anybody on the loader during loading or travel operations!!

9
• Connect the equipment in compliance with these instructions and
the applicable provisions!
• Work defensively. Think ahead and anticipate hazards. Take special care
in connecting/disconnecting eventual attachments to/from the tractor!
• Always have the unit firmly stand on the special outriggers when
performing mounting/dismounting works on the machine! (safety
and stability)
• Never overload a machine. Carry a load that is safe, within the capacity
of the machine, and suitably secured in the special fixation points on the
machine!
• Always comply with the admissible axis loads and transport
dimensions/clearance!
• Provide and check the functionality of all transport facilities as for instance
illumination, warning tools and devices, safeties and protections!
• The disconnectors of the quick-action couplings must hang loose.
Avoid self-disconnection in the lower section!
• Never leave the operator‘s stand during travel!
• Travel, steering and braking performance are affected by the use of
hanging ballast on the machine. Always keep at safe distance for
steering and braking!
• When taking turns please mind for both the outreach and/or rotating
mass of the equipment!
• Make sure that all safeties and protections are duly in place and
operating before starting to use your equipment!
• Strictly start log loading operations when all workers are clear of
the area!
• Keep the turning/slewing area of the equipment clear from any obstacle!
• Make sure that no persons and no obstacles are within the slew range
before operating any of the hydraulic folding frames.
• BEWARE of pinch hands danger on all moving parts (for instance
hydraulic attachments)!
• Always keep at safe distance from any manually folding/flapping
attachments!
• Before leaving the tractor, make sure to lower the grapple down on
ground, switch the engine off and remove the keys from the ignition!
• Make sure that no persons stand in the dangerous zone between
the tractor and the trailer unless due measures were taken to prevent
the vehicle from rolling away (for example engaging the parking
brakes and using additional wheel chocks for increased safe)!
• Folded frames and telescoping hoisting devices must be duly
secured in the transport position!

10
4. OPERATION
4.1 Mandatory application field
Grapple loaders are strictly designed for woodlot owners to pull, handle
and manipulate timber logs. They are purposely designed with attach-
ment lungs to allow for very practical pulling operations by means of log-
ging chains. The maximum working pressure of the grapple is 180 bar.
This loader is available in the following versions: HRZ LADER
for rear attachment to a 3-point linkage Cat. 2
Suitable for tractor power: 40-90 kW
DO NOT ATTACH THE LOADER to more powerful tractors. DANGERS of
even permanent loader damages.
Make sure that a suitable forestry/rescue kit is available in the driver‘s
cabin at all times and take due measures to ensure safety of the tractor
driver during all operations. If you are attaching a winch to your equip-
ment, mind for user instructions of the winch manufacturer too.
Any other application (i.e. handling loads off any higher le-
vel than the surface on which the tractor stands whenever the
load exceeds the capacity of the tractor inbuilt hydraulics) will
be considered as misuse and is therefore strictly prohibited!
Misuse will completely void your warranty.
The manufacturer accepts no liability for personal injuries and
damages to other equipment caused by misusing the machine.
4.2 Preliminary controls before use
4.2.1 Attaching the loader to the tractor
• Attach the equipment to the three-point linkage of your tractor using the
25 mm pins and cotters supplied by the manufacturer with the loader.
• Connect the hydraulic hoses of the loader to your tractor hydraulics.
• Provide for best linkage to your tractor making use of the most
convenient hitching points out of the ones available on the loader.
• Use your tractor hydraulics to pull and then gradually lift the loader
up. When lifting from the front the lift boom will go so far down so
that the cab might get damaged. Risk of getting jammed! Work with
extreme caution.
• Install the extendible arm acting in strict compliance to (see safety tips)

11
Südharzer Maschinenbau GmbH will accept no liability for the
state and conditions of your tractor three-point linkage. Make
sure to install the loader so that no damage can occur to the
driver‘s cab during off-road travel or with lifted hydraulics.
4.2.2 Installing an additional control valve unit
As soon as a hydraulic function is no longer required, you can use it to
control operation of the hydraulic top link-pin.
Hand control valve
• Install on a convenient mount inside the tractor cab
• Properly connect all hoses. WARNING: an inverted flow direction will
lead to control valve failure
• Never remove the check valve from the drain line
• Impress all operating symbols
Symbols – Hand control valve (Fig. 1)
A symbol is impressed/labelled in the back/front of each joystick to
show the respective corresponding loader functions. (see point 2 of the
safety instructions)
•
Perform a functional control of the hydraulics and make sure that
the functions of the grapple correspond to the control symbols and
connect the hoses accordingly.
123456
1 Rotator left/right (360°)
2 Top slewing arrangement UP/DOWN
3 Slewing to the left/right
4 Boom lift, sliding stage UP/DOWN
5 Grapple open/close
6 Extendible arm Retract/extend
Fig. 1

12
Close the grapple and position it across the travel direction when
travelling without a load. DANGER! Travelling with open grapples
may induce even permanent damages to your grapples.
Operating instructions
• Perform hydraulic operations while seated in the machine: never
from the ground.
• Always set the top grapples and the rotator on the float
position of the control valve before starting to winch heavy
trunks.
• Know where crew members are at all times. Be alert to unexpected
workers or operations in the immediate dangerous/loading area.
• Do not use the grapple to handle trunks that are smaller than 8 cm
in diameter unless you can bundle and lift them together.
• To assure trouble-free braking and steering of the loader travelling
with a suspended load, at least 20% of the vehicle own weight shall
still be arranged on the on the front axle. The exact amount of ballast
weight that one can use, must be obtained from your tractor supplier.
• Travel performance much depends on the ground/road conditions
and the attachments to our equipment. Always drive cautiously and
defensively minding for your route at all times.
• When not in operation, always lower the boom and rest the grapple
on the ground.
• Check the fixation bolts and the respective cotter pins before start-up.
• Close the grapple and set it across travel direction before operating
the unit without a load (unloaded state).
4.3 Start-up
Use rigid or movable grapple suspensions depending on the type of
timber to be handled.
• Rigid suspensions are not recommendable for hardwood that may
damage the loader or the tractor during travel under certain severe
conditions.
Eventually use a top slewing arrangement if required by the working
conditions on your site.
• Top slewing arrangements should be used every time when handling
of huge timber or entire trees comes into question. In this special
operation mode, the weight of the transported load is a crucial fea-
ture and should be given extremely accurate consideration.
• If you are winching heavy trunks, be sure that the floating mode is
elected on the control valve block for the rotator and top slewing
system.

13
4.3.1 Start-up Joystick (optional)
Before starting-up, dismount the brackets with the joystick
and the control valve and place them in the driver‘s cabin of
the tractor.
Operator‘s side: (Fig. 2)
Joystick operation North: „DOWN“
Joystick operation South: „UP“
Joystick operation East: „Slewing gear/ left“
Joystick operation West: „Slewing gear/ right“
1 = (yellow) Rotator, floating position, on/off
2 = (yellow) Top slewing, floating position on/off
3 = (red) Grapple /open
4 = (yellow) for grapple top-slewing only
The rotator controls are deactivated when the floating position
is („on“), and the top-slewing arrangement is in the floating
position!
Rear side: (Fig. 3)
1 = (red) Extendible arm, extended
2 = (red) Extendible arm, retracted
3 = (yellow) Grapple closed
4 = Rocker switch left/right
For storage and parking of the machine outdoor make sure to
protect the Joystick lever against weathering agents.
12
3
4
12
3
4
Fig. 2
Fig. 3

14
4.3.2 Start-up proportional controls
The proportional controls are operated with the Joystick.
1 Pivotal hanger
2 Boom lift
4 Extendible arm (extend)
6 Grapple
7 Activate the rotator
8 Activate the top-slewing arrangement
4.4 Attachments
• Before mounting and dismounting any attachment to/off the three-
point hitch, adjust the related operating controls so to avoid any acci-
dental raising/lowering.
•
Make sure to attach the loader to a tractor of required power and hit-
ching specifications!
• Typical injuries resulting from getting caught in a three-point-hitch
are amputations, lacerations and pinch hands. Account the 3-point
hitch a dangerous area and move cautiously around it!
• Never stand between the tractor and the loader when using three-
point linkage external operation!!
• While setting the equipment in its transport position always provide
for sufficient side detent of the three point hitch!
• While travelling on road with the raised loader, always secure the
control levers against accidental shifting down and make sure to dis-
connect power from the machine!
Fig. 4

15
5. HYDRAULIC SYSTEM
• DANGER: the hydraulic system operates at very high pressure!
• Mind the correct connection of all hydraulic hoses, as you perform
branching of the hydraulic cylinders and motors!
• For due connection of the hydraulic hoses to your tractor hydraulics
make sure that no pressure is available on both the tractor and the
attachment side!
• For connection of hydraulic loader functions to the tractor make su-
re to mark both the coupling sleeve and the relevant connector so
that no accidental faulty controls can occur! Hydraulic misconnec-
tions may lead to dangerously inverted functions (i.e. lifting
instead of lowering) and consequent risk of very severe acci
dents!
• Perform regular inspection of all hydraulic lines and immediately re-
place any defect or old tube/hose! Replacement hydraulic compon-
ents must comply with the technical specifications of the original
parts supplied by the manufacturer!
• Check the state of all hydraulic hoses, fittings and connectors and
seal eventual leaks, if required. Do not check for leaks with your
hand. Leaks can be located by passing a piece of cardboard or wood
around the suspected leak and looking for discoloration.
• High-pressure fluid (oil) escaping from a very small hole can be al-
most invisible. Escaping fluid under pressure can have sufficient
force to penetrate skin, causing serious injury or even death! In this
case seek immediate doctor help! (danger of infections)
• Make sure that the machine is fully disconnected and all moving
parts are secured before performing any maintenance/repair work
on the machine.
• Worn-out and slacked safety chains will hang out! (the cylinder must
be filled with oil)

16
Make sure that the machine is fully disconnected and all mo-
ving parts are secured before performing any maintenance/re-
pair work on the machine. In the event of any malfunctioning,
switch the machine off before trouble-shooting.
• Periodically check the tightness of all nuts and screws and retighten
them if necessary!
• When you perform maintenance works with the implement lifted up
make sure to efficiently secure it against accidental dropping!
• When changing or replacing any part of the machine make sure to
use appropriate tools and work gloves!
• Do not spill oil in the environment. Oils, grease and filters must be
disposed in accordance with applicable rules and regulations!
• When performing electric weldings on the tractor and/or eventual
attachments, make sure to first perform power disconnection from
both the generator and the battery!
• Strictly use original spare parts or parts with equivalent specificati-
ons as the original manufacturer‘s ones!
Completely open the grapples tines and lower the grapple on
ground. Disconnect the tractor (or other towing vehicle) be-
fore starting any repair or maintenance work. Beware: a loader
with the grapple pivotally connected to a universal joint (pi-
vot) will stand at tilt-over risk unless it is firmly supported and
secured against collapsing.
The following services must be provided at 10 hour operation inter-
vals:
• Lubricating all moving parts by means of the respective nipple head
• Recommended lubricant: universal lub grease
• Lubricating the extendible lifting arm using a grease brush
• Check the conditions of all hydraulic couplings and hoses
• Tightening all screwed/bolted joints, checking and replacing
eventual missing harware.
Monitoring procedures during work:
• Provide immediate replacement of defective hydraulic lines and cou-
plings or other hydraulic components.
• Rust, dirt and crop debris must be cleaned frequently to allow the
piston rod of both the grapple cylinder and the slewing cylinder to
operate trouble-free.
• Keep the log fork and the grapples tines clean.
• Replace any damaged, unradable or missing label on the machine.
6. REPAIRS AND MAINTENANCE

17
7. ACCESSORIES
Earth Auger : can be retrofitted on the grapple loader
Optional* earth augers can be equipped with additional augers avai-
lable in three sizes (Fig. 1)
Ø 200 mm Code 96322
Ø 300 mm Code 96323
Ø 500 mm Code 96324
Rotator
(replacement kit complete with hoses)
1400 Nm, 4.5t for 195 bar, Flange 140x140, 4x M16x50 (Fig. 3)
Code 96255
Rotator
1200 Nm, 4.5 t for 230 bar, Flange 140x140 4x16,
Code 96278
Fig. 1
telescopic
flange
Auger
*Accessories are not available on standard machine versions but can be bought
extra.
NEW :
Fig. 3

18
Backhoe
with 2 excavation teeth, Length=1500 mm
Code 96256
(Fig. 4)
Top link-pin for the backhoe
Code 96257
Required for use of the backhoe without grapples
(Fig. 5)
Hydraulic grapples - Top-slewing arrangement
Code 96260
180° - Slewing range (Fig. 7)
Hydraulic Control valve
Code 96263 4-sections
Code 96264 5-sections
Code 96268 6-sections
Single-lever, sectional construction (Fig. 8)
Fig. 5
Fig. 4
Fig. 7
Fig. 8

19
Professional Hightech Proportional Control VALVE
Code 95252
Sectional control block for HRZ Loaders, with 3x Proportional and 3x
S-W, 1x fl oating position), completely pre-assembled units ready for
use, with universal Joystick-control lever, it requires 12V power supp-
ly (control block installed on the machine). (Fig. 9)
Clip-in bracket
Code 96269
Suitable for valve installation for all control valve models.
(Fig. 10)
Wheel axle to be bolted on the bucket
Code 96251
composed of 2 wheeled axles seatings, wheel gauge: 2200 mm
and 260/70 - 15.3“ tires
(Fig. 11)
Float valve (overload safety)
Code 96273
for grapple top-slewing and 180° slewing arrangement.
To be ONLY used when the machine is powered directly from tractor hy-
draulics and therefore has no builtin hydraulic control valve.
(Fig. 12)
Coupling for hydraulic top link pin
Code 96259
(Set of hoses with quick couplings)
Fig. 9
NEW:
Fig. 10
Fig. 11
Fig. 12

20
8. TRANSPORT AND HANDLING
A switched-off loader stands at instability risk as the grapple
keeps hanging pivotally on the universal joint.
Always secure the loader agaist tipping over, folding up and/or
collapsing.
Make sure to close the grapple and set it across travel direction
prior to rolling without a load.
DANGER: failure to comply with this instruction may lead to grapple da
-
mages!
9. DISMOUNTING AND DISCARDING AN
OBSOLETE MACHINE
When a machine is fully obsolete and cannot be of use any longer, it
should be duly dismounted ahead of discarding. Certain components
need deactivation and dismantling in order to assure that no further
use is made by other parties and that no worn out parts are recycled
for other applications.
During dismantle be alert for possible recyclable materials and compo-
nents that belong to differentiated waste collection procedures applica-
ble in your country.
The manufacturer is not liable and undertakes no responsibility for per-
sonal injuries or damages that may result from the recycling of worn
out machine parts and eventual reuse in other applications different
than originally stated in this manual.
Dismantling procedure:
Take good note please: each and every dismantling task must be per-
formed by authorized service centres or trained skilled staff only!
• Pull the machine down into single components.
• Deliver each single component only to authorized waste manage-
ment facilities.
• Drain oil and fuel out of respective tanks and lines before disposal of
the machine.
• Remove rubber and plastic parts from the machine that must be se-
parately disposed of.
Deactivated, clamped moving/driving parts and components are of no
further risk and danger.
Table of contents
Other BGU Industrial Equipment manuals
Popular Industrial Equipment manuals by other brands
Lincoln industrial
Lincoln industrial 85250 Owner's/operator's manual

ABB
ABB HT578977 Operation manual
Siemens
Siemens SENTRON VL1250 operating instructions

Command access
Command access MLRK1 Series Insert Instructions
Multitel
Multitel MX 250 USE AND WARNING INSTRUCTIONS

BVA Hydraulics
BVA Hydraulics FT102 instruction manual
