BH 0190608 User manual

0190608/0190609
UNIDAD ELECTRÓNICA
ELECTRONIC MONITOR
UNITÉ ÉLECTRONIQUE
ELEKTRONIKEINHEIT
UNIDADE ELECTRÓNICA
IMPIANTO ELETTRONICO
ELEKTRONISCHER MONITOR

Fig. 1 Fig. 2
Fig. 3 Fig. 4

3
Español
PUESTA EN MARCHA.-
Para poner en marcha el monitor en
primer lugar tiene que enchufar el
adaptador que se suministra con la
máquina a un enchufe de corriente
(220v.- 240v) y el terminal del adaptador
a la clavija situada en la parte inferior
trasera de la máquina (Fig 4).
Si durante el desarrollo del ejercicio
pulsa el botón START/STOP todas las
funciones del electrónico se pararán.
Si pulsa de nuevo START/STOP
todas las funciones se pondrán de
nuevo en funcionamiento.
El monitor se apagará automática-
mente cuando la unidad esté 4
minutos parada.
Importante: Deposite los componen-
tes electrónicos en contenedores
especiales, Fig. 1.
FUNCIONES DEL MONITOR.-
Este monitor dispone de 5 teclas: UP,
DOWN, START/ STOP; ENTER,
RESET. En la esquina superior
derecha de la pantalla se muestra el
nivel de la frenada. En la parte inferior
del display se indica el TIEMPO,
RPM, la VELOCIDAD, la DISTANCIA;
las CALORIAS, los WATIOS; el
PULSO. Pulse ENTER durante el
ejercicio para cambiar el valor
visualizado.
Este monitor dispone también de 1
programa manual; 1 programa de
watios; 10 programas predefinidos; 1
programa random y 4 programas de
control de ritmo cardiaco.
PASO DE UN MODO DE
TRABAJO A OTRO.-
Este monitor tiene la posibilidad de
trabajar con 5 modos diferentes:
Manual, Programas, Watios (WATT),
Pulso (H.R.C.) y aleatorio (Random).
Para pasar de un modo a otro durante
el ejercicio hay que pulsar el botón
START/STOP para detener el
monitor, después pulsar RESET y,
usando los botones UP▲/DOWN▼
seleccionar el modo deseado.
FUNCION MANUAL.-
Pulsando las teclas UP▲/DOWN▼
seleccione el programa manual P1 y
pulse ENTER. Pulse la tecla
START/STOP para iniciar el ejercicio
y con las teclas UP▲/DOWN▼suba
o baje la resistencia del ejercicio,
teniendo 24 niveles de frenada. Si en
el estado inicial pulsa la tecla
START/STOP comenzará el ejercicio
en función manual directamente.
Programación de tiempo.-
Si tras seleccionar la función manual
pulsa la tecla ENTER, le parpadeará
la ventana del tiempo. Pulsando las
teclas UP▲/DOWN▼, puede
programar el tiempo de su ejercicio
entre (5-99 Minutos). Seleccione el
tiempo y pulse START/STOP para
comenzar el ejercicio. El tiempo irá
disminuyendo hasta alcanzar el valor
“cero“, y el monitor le emitirá unos
pitidos advirtiéndole que ha llegado al
valor programado.

4
Programación de la distancia.-
Si tras seleccionar la función manual
pulsa la tecla ENTER dos veces, le
parpadeará la ventana de la distancia.
Pulsando las teclas UP/DOWN, puede
programar la distancia de su ejercicio
entre (1- 99 Km). Seleccione la
distancia y pulse START/STOP para
comenzar el ejercicio. La distancia ira
disminuyendo hasta alcanzar el valor
«cero» y el monitor le emitirá unos
pitidos advirtiéndole que ha llegado al
valor programado.
Programación de las calorías.-
Si tras seleccionar la función manual
pulsa la tecla ENTER tres veces le
parpadeara la ventana de las calorías.
Pulsando las teclas UP▲/DOWN▼,
puede programar las calorías de su
ejercicio entre (10 - 990 Cal.).
Seleccione las calorías y pulse
START/STOP para comenzar el
ejercicio. Las calorías disminuirán
hasta alcanzar el valor “cero“, y el
monitor le emitirá unos pitidos
advirtiéndole que ha llegado al valor
programado.
FUNCIÓN PROGRAMAS.-
Pulsando las teclas UP▲/DOWN▼
seleccione entre el programa P3 –
P12. Pulse START/STOP para
comenzar el ejercicio.
Para programar tiempo, distancia y/o
calorías lleve a cabo los siguientes
pasos. Una vez seleccionado el
programa y antes de pulsar la tecla
START/STOP, pulse la tecla ENTER
para programar el tiempo utilizando
las teclas UP▲/DOWN▼. En este
caso la duración del programa será
repartido entre las 8 escalas. Pulse
ENTER para programar la distancia.
Vuelva a pulsar ENTER para
programar las calorías. Pulse la tecla
START/STOP para comenzar el
ejercicio.
Una vez comenzado el ejercicio usted
puede variar la resistencia de frenada
pulsando las teclas UP▲/DOWN▼.
PROGRAMA DE WATIOS
CONSTANTES
Pulsando las teclas UP▲/DOWN▼
seleccione el programa WATT P2 y
pulse ENTER.
Pulse ENTER para programar el
tiempo. Pulse ENTER para programar
la distancia. Vuelva a pulsar ENTER
para programar las calorías. Pulse la
tecla START/STOP para comenzar el
ejercicio.
Pulsando las teclas UP▲/DOWN,
puede programar los watios de su
ejercicio entre (30 - 260 Watt.)
El nivel de esfuerzo del ejercicio se
autoajustará en función de la
velocidad y los watios seleccionados.
PROGRAMAS DEL CONTROL
DEL RITMO CARDIACO.-
Con las teclas UP▲/DOWN▼
seleccione la opción deseada HRC60
(60%), HRC70, (70%), HRC85 (85%)
o THR y pulse la tecla ENTER. Las
tres primeras indican el porcentaje
respecto al pulso cardiaco máximo
(220-edad) y la cuarta se utiliza para
introducir el ritmo cardiaco objetivo de
forma manual. Si elige HRC60,
HRC70 o HRC85 deberá utilizar las
teclas UP▲/DOWN▼para introducir
la edad. Si elige THR, deberá utilizar
las teclas UP▲/DOWN▼para
seleccionar el ritmo cardiaco deseado
y pulsar ENTER. Pulse START/STOP
para comenzar el ejercicio.

5
El nivel de frenada se ajustará
automáticamente de acuerdo al valor
de pulso seleccionado. Si el valor de
pulso está por debajo del valor
objetivo, la frenada aumentará un
nivel cada 30 segundos hasta llegar al
máximo de 24. Si el valor de pulso
está por encima del valor objetivo el
monitor emitirá unos pitidos de aviso y
la frenada disminuirá un nivel cada 15
segundos hasta llegar al mínimo de 1.
Si aún así el valor del pulso se
mantiene por encima del valor objetivo
durante más de 30 segundos, el
mónitor se parará por protección del
usuario y emitirá unos pitidos de aviso.
Para programar tiempo, distancia y/o
calorías lleve a cabo los siguientes
pasos. Una vez seleccionado el
programa de pulso cardiaco y antes
de pulsar la tecla START/STOP, pulse
la tecla ENTER para programar el
tiempo utilizando las teclas
UP▲/DOWN▼. Vuelva a pulsar
ENTER para programar la distancia.
Por último vuelva a pulsar ENTER
para programar las calorias. Pulse la
tecla START/STOP para comenzar el
ejercicio.
En estos programas tienen que estar
las manos colocadas en los sensores
de pulso (R).
FUNCIÓN RANDOM.-
Pulsando las teclas UP▲/DOWN▼
seleccione la función P13 RANDOM.
Pulse START/STOP para comenzar el
ejercicio.
Para programar tiempo, distancia y/o
calorías lleve a cabo los siguientes
pasos. Una vez seleccionado el
programa y antes de pulsar la tecla
START/STOP, pulse la tecla ENTER
para programar el tiempo utilizando
las teclas UP▲/DOWN▼.
En este caso la duración del programa
será repartido entre las 10 escalas.
Pulse ENTER para programar la
distancia. Vuelva a pulsar ENTER
para programar las calorías. Pulse la
tecla START/STOP para comenzar el
ejercicio.
Una vez comenzado el ejercicio usted
puede variar la resistencia de frenada
pulsando las teclas UP▲/DOWN▼.
INSTRUCCIONES - USO DEL
HAND-GRIP MEDICION DE
PULSO.-
PULSO Hand-grip.
El pulso de este modelo se mide
colocando ambas manos en los
sensores (R), que están puestos en el
manillar como se indica en la Fig.2.
Una vez colocadas ambas manos en
los sensores, comenzará a parpadear
el corazón en la parte derecha de la
pantalla que indica PULSE de la
pantalla del monitor y al cabo de unos
segundos aparecerá el valor de su
ritmo cardíaco.
Si no tiene colocadas ambas manos
correctamente como muestra la Fig.3,
el pulso no funciona.
Si en pantalla aparece una «P» o no
parpadea el corazón, asegúrese de
que tiene colocadas ambas manos en
los sensores.

6
GUÍA DE PROBLEMAS.-
Problema: Se enciende el display y
sólo funciona la función de Tiempo
Solución:
a.-Compruebe si el cable de conexión
está conectado.
Problema: Si algún segmento de
alguna función no se enciende o si se
producen indicaciones erróneas en
alguna función.
Solución:
a.- Desconecte la conexión a 220V
durante 15 segundos y vuelva a
conectarlo.
b.-Si el paso anterior no le ayuda,
reemplace el monitor electrónico.
Transformador
Problema: No se enciende el monitor.
Solución:
a.-Compruebe la conexión a 220V.
b.-Compruebe la conexión de salida
del transformador, a la máquina.
c.-Compruebe la conexión de los
cables del tubo remo.
Evite que le dé a su monitor
electrónico la luz directa del sol, pues
se puede estropear la pantalla del
cristal líquido. No lo exponga tampoco
al agua ni a golpes.
Para cualquier consulta, no dude en
ponerse en contacto con el
(S.A.T).Servicio de Asistencia
Técnica, llamando al teléfono de
atención al cliente (ver página final del
presente manual).
BH SE RESERVA EL DERECHO A
MODIFICAR LAS ESPECIFICACIO-
NES DE SUS PRODUCTOS SIN
PREVIO AVISO.

7
English
STARTING.-
To switch the monitor on first plug the
adapter, supplied with the machine,
into the mains socket (220 V – 240 V)
and the jack on the adapter into the
socket at the bottom of the machine.
(Fig. 4)
If at any time during exercise you
press the START/STOP button then
all of the unit’s functions will stop.
Pressing the START/STOP button
again will restart the machine.
The monitor will switch itself off
automatically if the unit stands idle for
more than 4 minutes.
Important: Deposit electronic
components in special containers,
Fig.1.
MONITOR FUNCTIONS.-
This electronic unit has 5 function
keys: UP, DOWN, START/ STOP;
ENTER, RESET. In the right upper
corner you can see the intensity level.
In the lower part of the display you can
see the TIME, RPM, SPEED,
DISTANCE, CALORIES, WATTS and
PULSE RATE. During the exercise
press ENTER to change the showed
value.
This monitor also has 1 manual
program, 1 watt program, 10 pre-set
exertion level programs, 1 random
program and 4 Heart Rate Control
programs.
CHANGING FROM ONE
WORK MODE TO ANOTHER.-
This monitor allows you to work in 5
different modes: Manual, Program,
Watt, Pulse (HRC) and Random. In
order to pass from one mode to
another during the exercise, press the
START/STOP button to stop the
monitor, then press RESET and, with
the help of the UP▲/DOWN▼
buttons, select the desired mode.
MANUAL FUNCTION.-
Use the UP▲/DOWN▼keys to select
the manual program P1 and press
ENTER. Press the START/STOP key
to start exercising and use the
UP▲/DOWN▼keys to increase or
decrease the exertion level. There are
24 exertion levels. If you press the
START/STOP key while at the start
screen, exercise will begin directly in
manual mode.
Programming a time limit.-
If, after selecting manual mode, you
press the ENTER key the time window
will start flashing. By pressing the
UP▲/DOWN▼keys you can program
a time limit for the exercise (between
5-99 minutes). Select the time and
press START/STOP to begin the
exercise. The time will begin to count
down until it reaches zero and the
monitor will beep several times to
advise you that you have reached the
programmed value.
Programming a distance limit.-
If, after selecting manual mode, you
press the ENTER key twice the
distance window will start flashing. By
pressing the UP▲/DOWN▼keys you
can program a distance for your
exercise (between 1–99 km).

8
Select the distance and press
START/STOP to begin the exercise.
The distance will begin to count down
until it reaches zero and the monitor
will beep several times to advise you
that you have reached the
programmed value.
Programming a calorie limit.-
If, after selecting manual mode, you
press the ENTER key three times the
calorie window will start flashing. By
pressing the UP▲/DOWN▼keys you
can program the calories for the
exercise (between 10-990 Cal.).
Select the calories and press
START/STOP to begin the exercise.
The calories will begin to count down
until they reach zero and the monitor
will beep several times to advise you
that you have reached the
programmed value.
PROGRAM FUNCTION.-
Use the UP▲/DOWN▼keys to select
the PROGRAM function P3 – P12.
Press START/STOP to start the
exercise.
To program time, distance and/or
calories, go through the following
procedure: Once the program has
been selected and before pressing the
START/STOP key, press the ENTER
key to program the time using the
UP▲/DOWN▼keys. In this case the
time will be divided into 8 stages.
Press the ENTER key to program the
distance. Press ENTER again to
program the calories. Press
START/STOP to start the exercise.
You can vary the exertion level during
the exercise by pressing the
UP▲/DOWN▼keys.
STEADY WATT RATE
PROGRAM
Press the UP▲/DOWN▼keys to
select the WATT P2 function and
press ENTER. Press ENTER to
program the time. Press ENTER again
to program the distance. Press the
ENTER key one last time to program
the calories. Press START/STOP to
start the exercise.
By pressing the UP▲/DOWN▼keys,
you can program the watts of your
exercise between (30 - 260 Watt).
The exertion level for the exercise is
self adjusting based on the speed and
number of watts selected.
HEART RATE CONTROL
PROGRAMS.-
Use the UP▲/DOWN▼keys to select
the desired option HRC60 (60%),
HRC70, (70%), HRC85 (85%) or THR
and press the ENTER key. The first
three represent the percentage with
respect to maximum heart rate (220-
age) and the fourth is used to specify
the target heart rate manually. If you
choose HRC60, HRC70 o HRC85 you
should use the UP▲/DOWN▼keys to
select the age. If you choose THR then
you should use the UP▲/DOWN▼
keys to select the desired heart rate and
then press ENTER. Press
START/STOP to start the exercise. The
exertion level will adjust automatically in
accordance with the selected hart rate
value. If the pulse rate is below the
target value then the exertion setting will
increase by one level every 30 seconds
until it reaches the maximum 24.

9
If the pulse rate is above the target
value the monitor will give out warning
beeps and reduce the exertion settings
by one level every 15 seconds until it
reaches the minimum 1. If the pulse rate
still stays above the target value for
more than 30 seconds the monitor will
beep and stop in order to protect the
user.
To program time, distance, and/or
calories, go through the following
procedure: Once the heart rate program
has been selected and before pressing
the START/STOP key, press the
ENTER key to program the time limit
using the UP▲/DOWN▼keys. Press
ENTER again to program the distance.
Press the ENTER key one last time to
program the calories.
Press START/STOP to start the
exercise. Your hands must be placed
on the pulse sensors (R) when using
these programs.
RANDOM FUNCTION.-
Use the UP▲/DOWN▼keys to select
the P13 RANDOM function.
Press START/STOP to start the
exercise.
To program time, distance and/or
calories, go through the following
procedure: Once the program has
been selected and before pressing the
START/STOP key, press the ENTER
key to program the time using the
UP▲/DOWN▼keys. In this case the
time will be divided into 10 stages.
Press the ENTER key to program the
distance. Press ENTER again to
program the calories. Press
START/STOP to start the exercise.
You can vary the exertion level during
the exercise by pressing the
UP▲/DOWN▼keys.
HAND-GRIP PULSE
MEASUREMENT INSTRUCTIONS
–USE.-
PULSE Hand-grip.
On this model the pulse rate is
measured by placing both hands on
the sensors (R), located on the
handlebar, as shown in Fig.2.
When both hands are placed on the
sensors the heart symbol on the right-
hand side of the screen, marked
PULSE, will begin to flash and after a
few seconds a heart rate reading will
be displayed.
If both hands are not placed correctly
as shown in Fig.3 then the pulse
function will not work. If a «P» appears
on the screen or the heart symbol does
not flash, make sure that both hands
are placed correctly on the sensors.
TROUBLESHOOTING GUIDE.-
Problem: The display comes on but
only the Time function works.
Solution:
a.- Make sure that the connection
cable is connected.
Problem: Display segments of a
function read-out are not visible or
error messages for a particular
function appear.
Solution:
a.- Unplug it from the 220 V mains
socket for 15 seconds and then plug it
back in.
b.- If the above steps do not help then
replace the electronic monitor.

10
Transformer
Problem: The monitor does not switch
on.
Solution:
a.- Check the 220 V mains connection
b.- Check the output connection from
the transformer to the machine.
c.- Check the cable connections for
the main post.
Avoid leaving the electronic monitor in
direct sunlight as this might damage
the liquid crystal display. Similarly, do
not expose it to water or knocks.
Do not hesitate to get touch with the
Technical Assistance Service if you
have any queries by phoning customer
services (see last page in manual)
BH RESERVES THE RIGHT TO
MODIFY THE SPECIFICATIONS OF
ITS PRODUCTS WITHOUT PRIOR
NOTICE

11
Français
MISE EN MARCHE.-
Pour mettre en marche le moniteur
brancher d’abord l’adaptateur fourni
avec la machine, dans une prise de
courant (220 v.- 240 v) et le
connecteur de l’adaptateur à la fiche
qui se trouve en-bas derrière la
machine. (Fig. 4)
Si durant le déroulement de l'exercice,
vous appuyez sur le bouton
START/STOP, toutes les fonctions de
l'électronique s’arrêteront. Si vous
appuyez à nouveau sur
START/STOP, toutes les fonctions se
mettront à nouveau en marche.
Si l’unité est 4 minutes arrêtée, l’écran
s’éteint automatiquement.
Remarque importante: Les
composants électroniques hors
d’usage doivent être déposés dans
des conteneurs spécialement prévus à
cet effet. Fig.1.
FONCTIONS DU MONITEUR.-
Ce moniteur dispose de 5 touches: UP,
DOWN, START/ STOP; ENTER,
RESET. Dans le coin supérieur droit
de l’écran vous verrez afficher le
niveau d’intensité. Dans la partie
inférieure de l’écran s’affichera le
TEMPS, RPM, la VITESSE, la
DISTANCE, les CALORIES, les
WATTS, le POULS. Appuyez sur
ENTER durant l’exercice pour modifier
la valeur affichée.
Ce moniteur dispose également d'un
programme manuel, d’un programme
watt, de 10 programmes prédéfinis,
d’un programme aléatoire et de quatre
programmes pour le contrôle de la
fréquence cardiaque.
POUR PASSER D’UN MODE
DE TRAVAIL À L’AUTRE.-
Ce moniteur peut travailler avec 5
modes différents: Manuel,
Programmes, Watt, Pouls (H.R.C) et
aléatoire (RANDOM).
Pour passer d’un mode à l’autre
durant l’exercice, appuyer sur le
bouton START/STOP pour arrêter le
moniteur puis sur RESET et
sélectionner le mode souhaité avec
les boutons UP▲/DOWN▼.
FONCTION MANUELLE.-
Avec les touches UP▲/DOWN▼
sélectionner la fonction manuel P1 et
appuyer sur ENTER. Appuyer sur la
touche START/STOP pour démarrer
l’exercice et avec les touches
UP▲/DOWN▼augmenter ou baisser
la résistance de l’exercice. L’appareil
dispose de 24 niveaux de freinage. Si
dans l’état initial, vous appuyez sur la
touche START/STOP l’exercice
commencera directement en mode
manuel.
Programmation de la durée.-
Si après avoir sélectionné la fonction
manuelle, vous appuyez sur la touche
ENTER, la fenêtre durée clignotera.
En appuyant sur les touches
UP▲/DOWN▼, vous pourrez
programmer la durée de l’exercice
entre 5 et 99 minutes. Pour
commencer l’exercice, sélectionner la
durée et appuyer sur la touche
START/STOP.

12
La durée diminuera jusqu'à atteindre
la valeur "zéro" et le moniteur émettra
un signal sonore pour indiquer que la
valeur programmée a été atteinte.
Programmation de la distance.-
Si après avoir sélectionné la fonction
manuel, vous appuyez deux fois sur la
touche ENTER, la fenêtre distance
clignotera. En appuyant sur les
touches UP/DOWN, vous pourrez
programmer la distance de l’exercice
entre 1 et 99 km. Pour commencer
l’exercice, sélectionner la distance et
appuyer sur la touche START/STOP.
La distance diminuera jusqu'à
atteindre la valeur "zéro" et le
moniteur émettra un signal sonore
pour indiquer que la valeur
programmée a été atteinte.
Programmation des calories.-
Si après avoir sélectionné la fonction
manuelle, vous appuyez trois fois sur
la touche ENTER, la fenêtre calories
clignotera. En appuyant sur les
touches UP▲/DOWN▼, vous pourrez
programmer les calories de l’exercice
entre 10 et 990 calories. Pour
commencer l’exercice, sélectionner
les calories et appuyer sur la touche
START/STOP. Les calories
diminueront jusqu'à atteindre la valeur
"zéro" et le moniteur émettra un signal
sonore pour indiquer que la valeur
programmée a été atteinte.
FONCTION PROGRAMMES.-
Avec les touches UP▲/DOWN▼
sélectionner la fonction PROGRAM
P3 – P12. Pour commencer l’exercice,
appuyer sur la touche START/STOP.
Pour programmer la durée, la distance
et/ou les calories, faire comme indiqué
ci-après: Après avoir sélectionné le
programme et avant d’appuyer sur la
touche START/STOP.
Appuyer sur ENTER pour programmer
la durée avec les touches
UP▲/DOWN▼. Dans durée du
programme seront ainsi répartie dans
les 8 étapes. Pour programmer la
distance, appuyer sur ENTER. Pour
programmer les calories, appuyer à
nouveau sur ENTER. Pour
commencer l’exercice, appuyer sur la
touche START/STOP. Après avoir
commencé l'exercice, vous pouvez
modifier la résistance de freinage en
appuyant sur les touches
UP▲/DOWN▼.
PROGRAMME WATTS
CONSTANTS.
En appuyant sur les touches
UP▲/DOWN▼sélectionner la fonction
WATT P2 et appuyer sur ENTER.
Pour programmer la dureé appuyer sur
ENTER. Pour programmer la distance,
appuyer sur ENTER. Pour programmer
les calories, appuyer à nouveau sur
ENTER. Pour commencer l’exercice,
appuyer sur la touche START/STOP.
En appuyant sur les touches
UP▲/DOWN▼, vous pourrez
programmer les watts de l’exercice
entre 30 et 260 watts.
Le niveau de l’effort de l’exercice se
réglera automatiquement d’après la
vitesse et les watts sélectionnés.
PROGRAMMES POUR LE
CONTROLE DE LA
FREQUENCE CARDIAQUE.-
Avec les touches UP▲/DOWN▼
sélectionner l’option voulue HRC60
(60%), HRC70, (70%), HRC85 (85%)
ou THR et appuyer sur ENTER.
Les trois premières indiquent le

13
pourcentage concernant le pouls
cardiaque maximum (220-âge) et la
quatrième est utilisée pour introduire
manuellement la fréquence cardiaque
cible. Si vous choississez HRC60,
HRC70 ou HRC85 vous devrez utiliser
les touches UP▲/DOWN▼pour
introduire l’âge. Si vous choisissez
THR, il faudra utiliser les touches
UP▲/DOWN▼pour sélectionner la
fréquence cardiaque voulue puis
appuyer sur ENTER. Pour commencer
l’exercice, appuyer sur la touche
START/STOP.
Le niveau de freinage sera
automatiquement réglé d’après la
valeur du pouls sélectionnée. Si la
valeur du pouls est en dessous de la
valeur cible, le freinage augmenter un
niveau toutes les 30 secondes jusqu’à
atteindre le maximum de 24. Si la
valeur du pouls dépasse la valeur
cible, le moniteur émettra un signal
sonore et le freinage baissera d’un
niveau toutes les 15 secondes jusqu’à
atteindre le minium de 1. Si malgré
cela, la valeur du pouls dépasse
encore la valeur cible pendant plus de
30 secondes, le moniteur s’arrêtera
pour éviter tous risques à l’utilisateur
et il émettra un signal sonore
d’avertissement.
Pour programmer la durée, la distance
et les calories, faire comme indiqué ci-
après: Après avoir sélectionné le
programme du pouls cardiaque et
avant d’appuyer sur la touche
START/STOP, appuyer sur ENTER
pour programmer la durée avec les
touches UP▲/DOWN▼. Pour
programmer la distance, appuyer à
nouveau sur ENTER. Enfin, pour
programmer les calories, appuyer à
nouveau sur ENTER. Pour
commencer l’exercice, appuyer sur la
touche START/STOP.
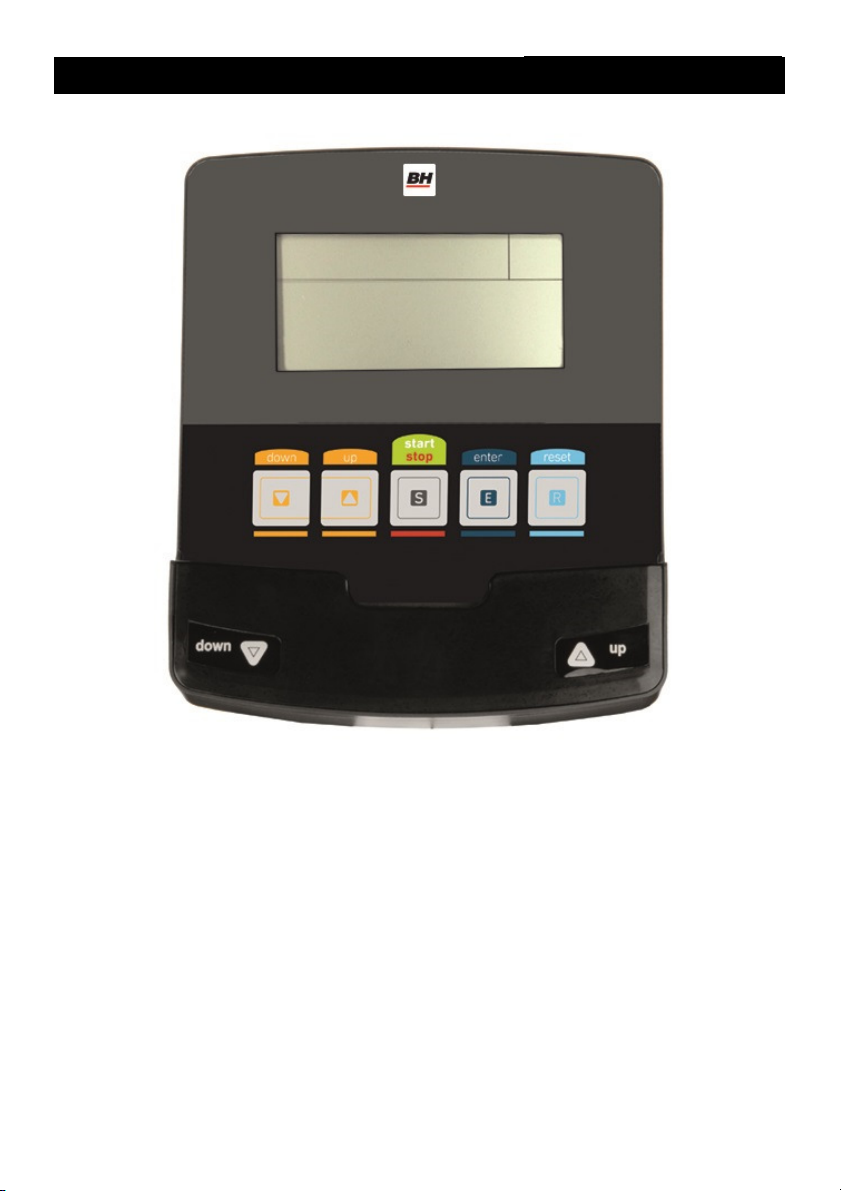
Pour pouvoir réaliser les exercices
avec ces programmes, les mains
doivent être bien posées sur les
senseurs de pouls (R).
FONCTION RANDOM.-
Avec les touches UP▲/DOWN▼
sélectionner la fonction P13 RANDOM.
Pour commencer l’exercice, appuyer
sur la touche START/STOP.
Pour programmer la durée, la distance
et/ou les calories, faire comme indiqué
ci-après: Après avoir sélectionné le
programme et avant d’appuyer sur la
touche START/STOP, appuyer sur
ENTER pour programmer la durée
avec les touches UP▲/DOWN▼.
Dans durée du programme seront
ainsi répartie dans les 10 étapes. Pour
programmer la distance, appuyer sur
ENTER. Pour programmer les
calories, appuyer à nouveau sur
ENTER. Pour commencer l’exercice,
appuyer sur la touche START/STOP.
Après avoir commencé l'exercice,
vous pouvez modifier la résistance de
freinage en appuyant sur les touches
UP▲/DOWN▼.
MODE D’EMPLOI DU HAND-
GRIP MESURE DU POULS.-
POULS Hand-grip.
Sur ce modèle, le pouls se mesure en
posant les deux mains sur les
senseurs (R) placés sur le guidon,
comme indiqué dans la Fig.2.
Dès que vos mains seront posées sur
les senseurs, un cœur commencera à
clignoter sur la droite de l’écran
PULSE de l’écran du moniteur et votre
fréquence cardiaque sera affichée
dans les secondes suivantes.
Si vos deux mains ne sont pas posées

14
correctement comme indiqué dans la
Fig.3, la fonction pouls ne
fonctionnera pas.
Si la lettre «P» s’affiche à l’écran ou si
le cœur ne clignote pas, vérifier que
vos mains sont bien posées sur les
senseurs.
GUIDE DES PROBLÈMES.-
Problème: Le display s’allume bien
mais seule fonctionne la fonction
durée.
Solution:
a- Vérifier si le cordon de connexion
est bien connecté.
Problème: Si un segment d’une
fonction ne s’allume pas ou si les
informations affichées sont faussées
Solution:
a.- Déconnecter 15 secondes, la
connexion 220V puis connectez-la à
nouveau.
b- Si les problèmes persistent après
avoir suivi l’instruction précédente,
remplacer le moniteur électronique.
Transformateur
Problème: Le moniteur ne s’allume
pas.
Solution:
a. Vérifier la connexion sur 220V.
b.- Vérifier la connexion de sortie du
transformateur à la machine.
c.- Vérifier la connexion des câbles du
tube rameur.
Garder le moniteur électronique à
l’abri du rayonnement direct du soleil
car cela risquerait d’endommager le
verre liquide. Tenir le moniteur à
l’écart de l’eau et éviter les coups.
Pour toute information complémentaire
et en cas de doute sur le bon état de
l’une quelconque partie de la machine,
l’hésitez pas à appeler le Service
d’Assistance Technique (SAT) au
numéro de téléphone d’Assistance
Clientèle qui figure à la dernière page
de cette notice.
BH SE RÉSERVE LE DROIT DE
MODIFIER LES
CARACTÉRISTIQUES DE SES
PRODUITS SANS PRÉAVIS.

15
Deutsch
ANSTELLEN.-
Um den Monitor anzustellen, müssen
Sie zuerst den Adapter in eine
Steckdose (220 V- 240 V) einstecken,
der mit der Maschine geliefert wird und
das Adapterterminal an den Stecker,
der sich im unteren hinteren Bereich der
Maschine befindet. (Abb. 4)
Wenn Sie während der Ausübung die
Taste START/STOP drücken, werden
alle Funktionen des Geräts gestoppt.
Wenn Sie erneut START/STOP
drücken, werden alle Funktionen
wieder aufgenommen.
Der Monitor geht automatisch aus,
wenn die Einheit mehr als 4 Minuten
still steht.
Wichtig: Entsorgen Sie elektronische
Komponenten in speziellen
Containern Fig.1.
FUNKTIONEN DES MONITORS.-
Dieser Monitor verfügt über 5 Tasten:
UP, DOWN, START/ STOP; ENTER,
RESET. In der oberen rechten Ecke
des Bildschirms wird die
bremsintensität angezeigt. Unten vom
Bildschirm wird ZEIT, RPM,
GESCHWINDIGKEIT; DISTANZ;
KALORIEN; WATT und PULS
angezeigt. Drücken Sie enter, um
während der Trainingseinheit den
angezeigten Wert zu ändern.
Dieser Monitor verfügt auch über 1
manuelles Programm, 1 Watt
Programm, 10 vordefinierte
Programme mit unterschiedlichem
Widerstand; 1 beliebiges Programm
und 4 Programm zur Kontrolle der
Herzfrequenz.
ÜBERGANG VON EINEM
ARBEITSMODUS ZUM
NÄCHSTEN.-
Dieser Monitor bietet die Möglichkeit
mit 5 verschiedenen Modi zu arbeiten:
Manuell, Programm, Watt, Puls
(H.R.C.) und beliebiges (RANDOM).
Um während der Trainingseinheit von
einem Modus zum nächsten zu
wechseln, drücken Sie die Taste
START/STOP, um den Monitor
anzuhalten, drücken Sie danach
RESET und wählen Sie mit den
Tasten UP▲/DOWN▼den
gewünschten Modus.
MANUELLE FUNKTION.-
Mit den Tasten UP▲/DOWN▼
wählen Sie die manuelle Funktion P1
und drücken Sie ENTER. Drücken Sie
die Taste START/STOP, um die
Übung zu beginnen und mit den
Tasten UP▲/DOWN▼erhöhen oder
verringern Sie den Widerstand der
Übung, wobei Ihnen 24 verschiedene
Niveaus zur Verfügung stehen. Wenn
Sie zu Beginn die Taste START/STOP
drücken, beginnt die Übung direkt in
der manuellen Funktion.
Programmierung der Zeit.-
Wenn Sie nach dem Wählen der
manuellen Funktion die Taste MODE
drücken, blinkt das Fenster der Zeit.
Sie können die Zeit Ihrer Übung
programmieren, indem Sie die Tasten
UP▲/DOWN▼drücken (5-99
Minuten).
Wählen Sie die Zeit und drücken Sie
START/STOP, um die Übung zu
beginnen.

16
Die Zeit wird zurücklaufen, bis der
Wert „Null“ erreicht wird und der
Monitor piept, um anzuzeigen, dass
der programmierte Wert erreicht ist.
Programmierung der Entfernung.-
Wenn Sie nach dem Wählen der
manuellen Funktion die Taste MODE
zwei Mal drücken, blinkt das Fenster
der Entfernung. Sie können die
Distanz Ihrer Übung programmieren,
indem Sie die Tasten UP▲/DOWN▼
drücken (1- 99 Km). Wählen Sie die
Distanz und drücken Sie
START/STOP, um die Übung zu
beginnen. Die Distanz wird
zurücklaufen, bis der Wert „Null“
erreicht wird und der Monitor piept, um
anzuzeigen, dass der programmierte
Wert erreicht ist.
Programmierung der Kalorien.-
Wenn Sie nach dem Wählen der
manuellen Funktion die Taste ENTER
drei Mal drücken, blinkt das Fenster
der Kalorien. Sie können die Kalorien
Ihrer Übung programmieren, indem
Sie die Tasten UP▲/DOWN▼
drücken (10 - 990 Kalorien). Wählen
Sie die Kalorien und drücken Sie
START/STOP, um die Übung zu
beginnen. Die Kalorien werden
zurücklaufen, bis der Wert „Null“
erreicht wird und der Monitor piept, um
anzuzeigen, dass der programmierte
Wert erreicht ist.
FUNKTION PROGRAMME.-
Mit den Tasten UP▲/DOWN▼
wählen Sie die Funktion PROGRAM
P3 – P12. Drücken Sie START/STOP,
um die Übung zu beginnen.
Zum Programmieren von Zeit, Distanz
und/oder Kalorien folgen Sie diesen
Schritten: Nachdem Sie das
Programm gewählt haben und bevor
Sie die Taste START/STOP drücken,
drücken Sie ENTER, um die Zeit mit
den Tasten UP▲/DOWN▼zu
programmieren. In diesem Fall ist die
Dauer des Programmes in 8 Stufen
unterteilt. Drücken Sie ENTER, um die
Distanz zu programmieren. Drücken
Sie erneut ENTER, um die Kalorien zu
programmieren. Drücken Sie
START/STOP, um die Übung zu
beginnen.
Nach Beginn der Übung können Sie
den Widerstand regulieren, indem Sie
UP▲/DOWN▼drücken.
PROGRAMM MIT
KONSTANTER WATTZAHL
Wählen Sie die Funktion WATT P2 mit
den Tasten UP▲/DOWN▼und
drücken Sie ENTER. Drücken Sie
ENTER, um der Zeit zu
programmieren. Drücken Sie ENTER,
um die Distanz zu programmieren.
Drücken Sie erneut ENTER, um die
Kalorien zu programmieren. Drücken
Sie START/STOP, um die Übung zu
beginnen.
Sie können die Wattzahl Ihrer Übung
programmieren, indem Sie die Tasten
UP▲/DOWN▼drücken (30 – 260
Watt).
Das Niveau der Anstrengung bei der
Übung passt sich automatisch in
Abhängigkeit von der gewählten
Geschwindigkeit und Wattzahl an.
PROGRAMME ZUR KONTROLLE
DER HERZFREQUENZ.-
Wählen Sie mit den Tasten
UP▲/DOWN▼die gewünschte
Option HRC60 (60%), HRC70, (70%),
HRC85 (85%) oder THR und drücken
Sie die Taste ENTER.

17
Die ersten drei geben den Prozentsatz
hinsichtlich der höchsten
Herzfrequenz (220 – Alter) an und die
vierte wird verwendet, um die
Zielfrequenz manuell einzugeben.
Wenn Sie HRC60, HRC70 oder
HRC85 wählen, geben Sie bitte über
die Tasten UP▲/DOWN▼Ihr Alter
an.. Wenn Sie THR wählen, müssen
Sie die Tasten
UP▲/DOWN▼benutzen, um die
gewünschte Herzfrequenz zu wählen
und ENTER drücken. Drücken Sie
START/STOP, um die Übung zu
beginnen. Der Widerstand wird
automatisch gemäss der gewünschten
Pulsfrequenz eingestellt. Ist der
Pulswert unter dem Zielwert, wird der
Widerstand automatisch alle 30
Sekunden erhöht bis zu einem
Höchstwert von 24. Ist der Pulswert
über dem Zielwert, piepst der Monitor
und der Widerstand verringert sich alle
15 Sekunden bis zu dem niedrigsten
Wert 1. Wenn selbst so noch der Puls
länger als 30 Sekunden über dem
Zielwert liegt, stellt sich der Monitor
zum Schutz des Nutzers aus und piept
zur Warnung.
Zum Programmieren von Zeit, Distanz
und Kalorien folgen Sie diesen
Schritten: Nachdem Sie das
Programm der Herzfrequenz gewählt
haben und bevor Sie die Taste
START/STOP drücken, drücken Sie
ENTER, um die Zeit mit den Tasten
UP▲/DOWN▼zu programmieren.
Drücken Sie erneut ENTER, um die
Distanz zu programmieren. Drücken
Sie erneut ENTER, um die Kalorien zu
programmieren. Drücken Sie
START/STOP, um die Übung zu
beginnen.
Bei diesen Programmen müssen die
Hände auf den Pulssensoren (R)
liegen.
FUNKTION RANDOM.-
Mit den Tasten UP▲/DOWN▼wählen
Sie die Funktion P13 RANDOM.
Drücken Sie START/STOP, um die
Übung zu beginnen. Zum
Programmieren von Zeit, Distanz
und/oder Kalorien folgen Sie diesen
Schritten: Nachdem Sie das Programm
gewählt haben und bevor Sie die Taste
START/STOP drücken, drücken Sie
ENTER, um die Zeit mit den Tasten
UP▲/DOWN▼zu programmieren. In
diesem Fall wird die Programmdauer
zwischen den 24 Niveaus aufgeteilt.
Drücken Sie ENTER, um die Distanz
zu programmieren. Drücken Sie erneut
ENTER, um die Kalorien zu
programmieren. Drücken Sie
START/STOP, um die Übung zu
beginnen.
Nach Beginn der Übung können Sie
den Widerstand regulieren, indem Sie
UP▲/DOWN▼drücken.
ANWEISUNGEN
VERWENDUNG DES HAND-
GRIP PULSMESSUNG.-
PULS Handgrip
Bei diesem Modell wird der Puls
gemessen, indem man beide Hände
auf die Sensoren (R) legt, die sich am
Lenker befinden, siehe Fig.2.
Wenn beide Hände auf den Sensoren
liegen, beginnt das Herz auf der
rechten Seite des Displays zu blinken,
das PULSE des Monitors anzeigt und
nach einigen Sekunden erscheint Ihre
Herzfrequenz.
Dies funktioniert nur, wenn Sie beide
Arme korrekt aufgelegt haben, wie die
Fig.3 zeigt.

18
Erscheint auf dem Bildschirm ein „P“
oder blinkt ein Herz, versichern Sie
sich, dass beide Hände auf den
Sensoren liegen.
PROBLEMLÖSUNG.-
Problem: Sie stellen das Display an
und es funktioniert nur die die
Funktion Zeit.
Lösung:
a.- Überprüfen Sie ob das
Verbindungskabel angeschlossen ist.
Problem: Ein Segment einer Funktion
geht nicht an oder es kommt zu
falschen Angaben bei einer Funktion.
Lösung:
a.- Nehmen Sie das Gerät 15
Sekunden lang von der 220V-
Spannung und schliessen Sie es
erneut an.
c.- Wenn der vorherige Schritt nicht
hilft, ersetzen Sie den Monitor.
Transformator
Problem: Der Motor geht nicht an.
Lösung:
a.-Überprüfen Sie den 220V-
Anschluss.
b. Überprüfen Sie den Anschluss des
Tranformators an die Maschine.
c.- Überprüfen Sie den Anschlus der
Kabel des Ruderrohrs.
Vermeiden Sie das direkte
Sonnenlicht auf den Monitor, da das
Flüssigkristalldisplay beschädigt
werden könnte. Setzen Sie ihn weder
Wasser noch Schlägen aus.
Sollten über den Zustand einer
Komponente Zweifel bestehen, setzen
Sie sich bitte mit dem (TKD)
Technischen Kundendienst in
Verbindung, indem Sie das
Servicetelefon anrufen (siehe letzte
Seite des Handbuchs).
BH BEHÄLT SICH DAS RECHT
VOR, DIE SPEZIFIKATIONEN DES
PRODUKTS OHNE
VORANKÜNDIGUNG ZU ÄNDERN.

19
Português
COLOCAÇÃO EM MARCHA.-
Para colocar em marcha o monitor,
em primeiro lugar tem que ligar o
adaptador, que se fornece com a
máquina, a uma ficha de electricidade
(220 v.- 240 v) e o terminal do
adaptador à tomada situada na parte
inferior traseira da máquina. (Fig 4)
Se durante a realização o exercício
carregar no botão START/STOP,
todas as funções do monitor
electrónico pararão. Se carregar de
novo em START/STOP, todas as
funções irão pôr-se de novo em
funcionamento.
O monitor apagar-se-á automatica-
mente quando a unidade estiver 4
minutos parada.
Importante: Deposite os compo-
nentes electrónicos em contentores
especiais, Fig.1.
FUNÇÕES DO MONITOR.-
Este monitor dispõe de 5 teclas: UP,
DOWN, START/ STOP; ENTER,
RESET. O nível de travagem é
mostrado no canto superior direito da
tela. O TIME, RPM, SPEED,
DISTANCE são indicados na parte
inferior da tela; as CALORIAS, as
WATIOS; O PULSO. Pressione
ENTER durante o exercício para
alterar o valor exibido.
Este monitor dispõe também de 1
programa manual, 1 programa de
watt, 10 programas pré-definidos de
níveis de dificuldade, 1 programa de
forma aleatória e 4 programas de
controlo de ritmo cardíaco.
PASSAGEM DE UM MODO DE
TRABALHO PARA OUTRO.-
Este monitor tem a possibilidade de
trabalhar com 5 modos diferentes:
Manual, Programas, Watt, Pulsação
(H.R.C.) e aleatório (RANDOM).
Para passar de um modo para outro
durante o exercício, é necessário
carregar no botão START/STOP para
parar o monitor, depois pressionar
RESET e, usando os botões
UP▲/DOWN▼, seleccionar o modo
desejado.
FUNÇÃO MANUAL.-
Carregando nas teclas
UP▲/DOWN▼, seleccione a função
Manual P1 e carregue em ENTER.
Carregue na tecla START / STOP
para iniciar o exercício e com as
teclas UP▲/DOWN▼suba ou baixe a
resistência do exercício, tendo 24
níveis de dificuldade. Se no estado
inicial carregar na tecla START /
STOP, começará o exercício em
função Manual directamente.
Programação de tempo.-
Se após seleccionar a função Manual
carregar na tecla ENTER, piscará a
janela do tempo. Carregando nas
teclas UP▲/DOWN▼, pode
programar o tempo do seu exercício
entre (5-99 Minutos). Seleccione o
tempo e carregue em START/STOP
para começar o exercício. O tempo irá
diminuindo até alcançar o valor “zero“,
e o monitor vai apitar para o advertir
de que chegou ao valor programado.

20
Programação da distância.-
Se após seleccionar a função Manual
carregar na tecla ENTER duas vezes,
piscará a janela da distância.
Carregando nas teclas UP/ DOWN,
pode programar a distância do seu
exercício entre (1- 99 Km). Seleccione
a distância e carregue em
START/STOP para começar o
exercício. A distância irá diminuindo
até alcançar o valor «zero» e o
monitor emitirá uns avisos sonoros,
advertindo-o que chegou ao valor
programado.
Programação das calorias.-
Se após seleccionar a função Manual
carregar na tecla ENTER três vezes,
piscará a janela das calorias.
Carregando nas teclas UP▲/DOWN▼,
pode programar as calorias do seu
exercício entre (10-990 Cal).
Seleccione as calorias e carregue em
START/STOP para começar o
exercício. As calorias diminuirão até
alcançar o valor “zero“, e o monitor
emitirá uns avisos sonoros, advertindo-
o que chegou ao valor programado.
FUNÇÃO PROGRAMAS.-
Carregando nas teclas
UP▲/DOWN▼, seleccione a função
PROGRAM P3 – P12. Carregue em
START/STOP para começar o
exercício.
Para programar tempo, distância e/ou
calorias leve a cabo os passos que se
indicam de seguida. Uma vez
seleccionado o programa e antes de
carregar na tecla START/STOP,
carregue na tecla ENTER para
programar o tempo utilizando as
teclas UP▲/DOWN▼. Neste caso, a
duração do programa será repartida
entre as 8 escalas. Carregue em
ENTER para programar a distância.
Volte a carregar em ENTER para
programar as calorias. Carregue na
tecla START/STOP para começar o
exercício.
Uma vez começado o exercício, pode
variar a resistência de dificuldade
carregando as teclas UP▲/DOWN▼.
PROGRAMA DE WATTS
CONSTANTES
Carregando nas teclas
UP▲/DOWN▼, seleccione a função
WATT P2 e carregue em ENTER.
Carregue em ENTER para programar
o tempo. Carregue em ENTER para
programar a distância. Volte a
carregar em ENTER para programar
as calorias. Carregue na tecla
START/STOP para começar o
exercício.
Carregando nas teclas
UP▲/DOWN▼, pode programar os
watts do seu exercício entre (30 - 260
Watt.).
O nível de esforço do exercício
autoajustar-se-á em função da
velocidade e dos watts seleccionados.
PROGRAMAS DO CONTROLO
DO RITMO CARDÍACO.-
Com as teclas UP▲/DOWN▼,
seleccione a opção desejada HRC60
(60%), HRC70, (70%), HRC85 (85%)
ou THR e carregue na tecla ENTER.
As três primeiras indicam a
percentagem relativamente à
pulsação cardíaca máxima (220-
idade) e a quarta utiliza-se para
introduzir o ritmo cardíaco objectivo
de forma manual. Se escolher HRC
60, HRC 70 ou HRC 85, deverá
utilizar as teclas UP▲/DOWN▼para
inserir a idade.
This manual suits for next models
1
Table of contents
Languages:
Other BH Bicycle Accessories manuals