A: 9300 S.W. Gemini Drive Beaverton, OR 97008 USA W: biamp.com
PRODUCT DESCRIPTION
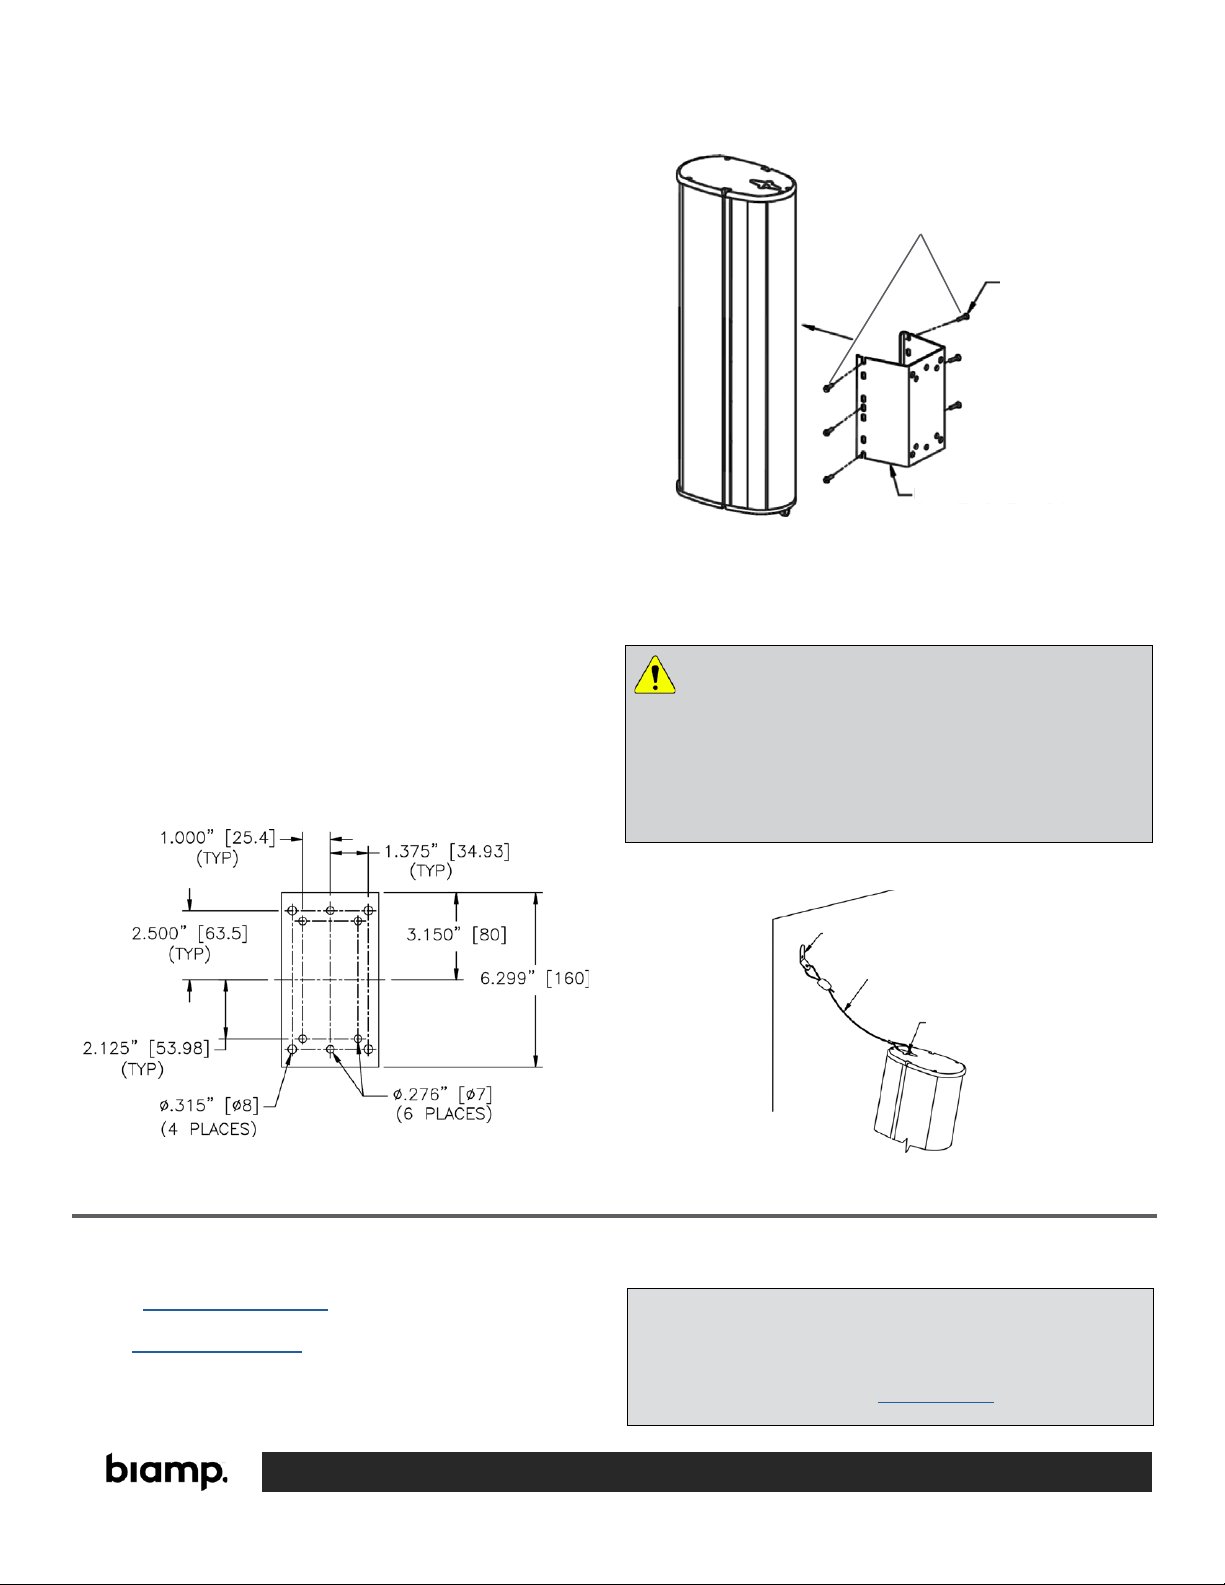
The E200-UMK is a rugged bracket designed to flush mount a single Desono™
ENT200 column loudspeaker enclosure tightly against a wall or ceiling, or to
accommodate third-party mounting brackets. Use with models ENT203, ENT206,
ENT212 and ENT220. Typically, one E200-UMK bracket is used per loudspeaker.
Kit includes:
• One (1) Universal Mount Bracket
• Six (6) M3.5x16 Philips truss-head sheet metal screws
FEATURES
• Mounting hole pattern has standard spacings to accommodate third-party 30
lb or 60 lb working load mounting brackets
• All parts are engineered to provide a high margin of safety for mounting and
suspending Desono ENT200 loudspeakers
• Steel construction finished with a durable dual-layer powder-coat finish
• Available in black (E200-UMKB) or white (E200-UMKW) to match the color
of the loudspeaker enclosure
CAUTION: It is strongly recommended that a licensed and
certied professional structural engineer approve the
mounting. Severe injury and/or loss of life may occur if this
product is improperly installed.
IMPORTANT: Installation of loudspeakers should only be
performed by trained and qualied personnel. All electrical
connections must conform to applicable city, county, state,
and national (NEC) electrical codes.
. DANGER: It is possible to experience severe electrical
shock from a power amplier. Always make sure that all
power ampliers are in the "OFF" position and unplugged
from an AC Mains supply before performing electrical work.
DANGER: It is essential that the secondary cable be
secured to a suitable load-bearing point separate from the
primary loudspeaker mounting point, with as little slack as
possible so as not to develop undue kinetic force if the
primary mount were to fail.
Desono™
E Series ENT200 Universal Mounting Kit (E200-UMK)
Installation & Operation Guide
RIGGING AND ELECTRICAL SAFETY
IMPORTANT: When attaching the E200-UMK to the
loudspeaker, tighten all fasteners rmly, but do not
over-tighten to avoid stripping the threads. Always use the
safety attachment point at the top of the loudspeaker
enclosure for a safety cable (not intended as a primary
suspension point). The E200-UMK is pre-drilled with
standard spacings to accommodate third-party 30 lb or 60
lb working load mounting brackets.
IMPORTANT: The E200-UMK is provided with the
hardware required to attach it to the loudspeaker
enclosure. No additional hardware is provided to attach
the bracket to the mounting surface, or to attach
suspension cables to the bracket. Such hardware must be
supplied by the installer and should be sized and rated for
the weight load of the loudspeaker. The installer is solely
responsible for determining if the mounting surface is
capable of safely supporting the weight load of the
loudspeaker, for selecting appropriate hardware to install
it, and for determining if all rigging components that are
used to suspend the enclosures are adequately sized and
rated and whether the structure they are suspended from
is capable of safely supporting the aggregate weight load.