BIGASUO F-1080P User manual

USER MANUAL
F-1080P Multimedia Projector
Before using the product, please read these instructions carefully, and kept it safe for future
reference.

Contents
Features and Design ..................................................................................................... 01
Safety Instructions and Operation Guideline .............................................................. 02
Compliance ................................................................................................................... 05
Accessory ..................................................................................................................... 06
Installation .................................................................................................................... 07
Connect the AC power cord ............................................................................................................. 07
Set up your projector .........................................................................................................................08
Basic operation ............................................................................................................. 09
Power on your projector .................................................................................................................... 09
Power off your projector .................................................................................................................... 09
Adjust the projected image ...............................................................................................................10
.............................................................................................. Adjust the Projector Zoom and Focus 11
Keystone adjustment 11.........................................................................................................................
H/V Keystone .................................................................................................................................... 12
.............................................................................................................................. 12Conner correction
.............................................................................................................................. 13Curved correction
.........................................................................................................................................13Reset value
Top control panel and indicators .......................................................................................................14
Remote controller ......................................................................................................... 15
Function of your projector ............................................................................................ 16
Connect to PC (Digital and Analog RGB) and VIDEO equipment ....................................................17
Connect to audio equipment, USB/Wireless card(USB-A and USB-B) ............................................ 18
Aspect ................................................................................................................................................19
Project way ......................................................................................................................................... 20
........................................................................................................................................ Color adjust 21
Auto setup 22..........................................................................................................................................
Logo 23...................................................................................................................................................
Useful function ............................................................................................................... 24
Memory Viewer function ..................................................................................................................... 24
USB display function .......................................................................................................................... 25
Maintenance and cleaning ............................................................................................ 26
Appendix ........................................................................................................................ 27
Troubleshooting ............................................................................................................. 28

us-projector[email protected]
01
Features
Simple Computer System Setting
The projector has the Multi-scan system to
conform to almost all computer output signals
quickly. Up to WUXGA resolution can be supported.
Useful Functions for Presentations
The digital zoom function allows you to focus on
the crucial information during a presentation.
Lamp Control
Brightness of the projection lamp can be selected.
Logo Function
The Logo function allows you to customize the
screen logo.
You can capture any image on the screen.
Multi language Menu Display
The screen menu of the projector is available in 26
languages: English, German, French, Italian,
Spanish, Polish, Swedish, Dutch, Portuguese,
Japanese, Simplied Chinese, traditional Chinese,
Korean, Russian, Arabic, Turkey, Finland, Norway,
Denmark, Indonesia, Hungary, Czech Republic,
Kazakhstan, Vietnamese, Thai, Farsi.
Convenient Maintenance Functions
Lamp and lter maintenance functions provide for
better and proper maintenance of the projector.
Security Function
The Security function helps you to ensure security
of the projector. With the Key lock function, you
can lock the operation on the control panel or
remote control. PIN code lock function prevents
unauthorized use of the projector
Auto Setup Function
This function enables input source search, AUTO
PC adjust and AUTO Keystone by simple pressing
the AUTO button on the remote control.
Note:
The screen menu and images in the manual may slightly differ from the real product.
The manual is subject to change without prior notice.
Color board Function
At the time of simple projection on the colored
wall, you can get the close color image to the
color image projected on a white screen by
selecting the similar color to the wall color from
the preset four colors.
Power Management
The Power management function reduces power
consumption and maintains the lamp life.
Closed Caption
This is a printed version of the program sound or
other information displayed on the screen.
You can turn on the feature and switch the
channels.
This Projector is designed with the most advanced technology for portability, durability, and ease of use.
This projector has built-in multimedia features.
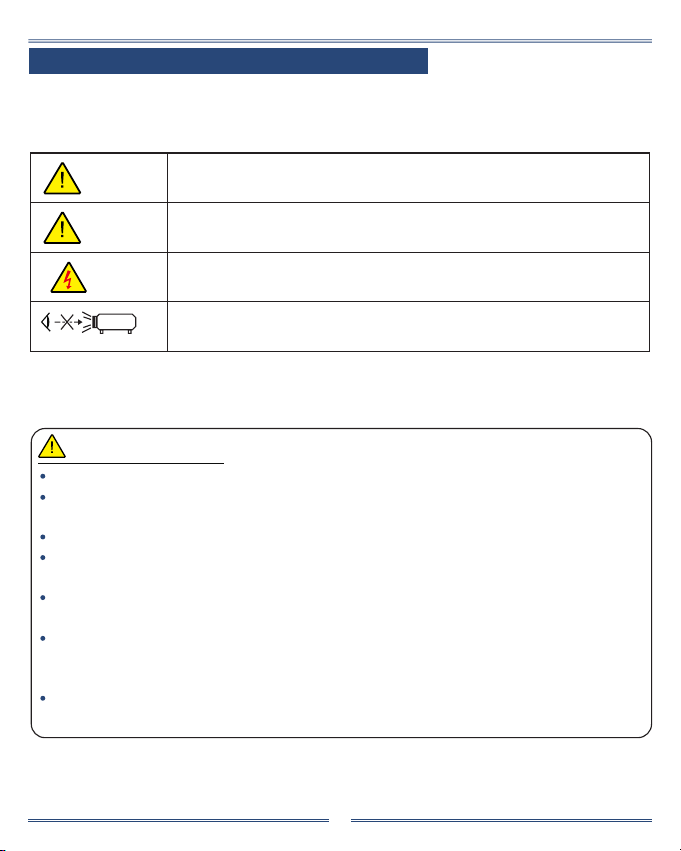
Safety Instructions and operation Guideline
Caution Ignoring messages indicated by this symbol may lead to personal injuries
or deaths due to human errors.
Note Ignoring messages indicated by this symbol may lead to personal injuries
or property damage.
High voltage inside with risks of electric shock.
RG2.DO NOT stare into the beam.
RG2.Ne regarde pas dans la poutre.
Rg2
02
us-projector[email protected]
Safety operation Guideline
GROUND your projector.
DO NOT look at the light beam directly. You may get your eyesight hurt. This is especially the case
with children.
Unplug the AC power plug if your projector will not be used for long time.
DO NOT overload the socket of power cord as it may lead to re or electric shock. DO NOT place
the projector where the power cord may be damaged by stepping on it.
Disconnect the power plug before cleaning your projector. DO NOT apply liquid or sprays to your
projector. DO NOT wipe your projector with wet cloth.
Please follow warnings and instructions given in labels attached to your projector. Unplug your
projector when your projector is exposed to thunderstorm weather, is unmanned, or not in use for
long periods to prevent damage caused by lightning and power surges.
DO NOT use accessories without recommendation by the manufacturer as it may result in potential
risks.
Safety precautions:
Safety Instructions
This document and your projector employ certain symbols to illustrate how to use your projector safely.
They are described below: Please get yourself familiar with them before going through this document.

03
Information for users in the European Union
This is a device to project images onto a screen, etc., and is not intended for use as indoor lighting
in a domestic environment. Directive 2009/125/EC.
NOTE FOR CUSTOMERS IN THE US
Hg LAMP(S) INSIDE THIS PRODUCT CONTAIN MERCURY AND MUST BE RECYCLED OR
DISPOSED OF ACCORDING TO LOCAL STATE OR FEDERAL LAWS.
us-projector[email protected]
The symbol mark and recycling systems described below apply to EU countries
and do not apply to countries in other areas of the world.
Your product is designed and manufactured with high quality materials and
components which can be recycled and/or reused.
The symbol mark means that electrical and electronic equipment, batteries and
accumulators, at their end-of-life, should be disposed of separately from your household waste.
Note:
If a chemical symbol is printed beneath the symbol mark, this chemical symbol means that the
battery or accumulator contains a heavy metal at a certain concentration.
This will be indicated as follows: Hg: mercury, Cd: cadmium, Pb: lead In the European
Union there are separate collection systems for used electrical and electronic equipment, batteries
and accumulators.
Please, dispose of them correctly at your local community waste collection/recycling center.
Please help us to conserve the environment we live in!
FOR EU USERS
For more information on safe handling procedures, the measures to be taken in case of accidental
breakage and safe disposal options visit: ec.gc.ca/mercure-mercury/
Dispose of or recycle in accordance with applicable laws.
Contains mercury:

04
Keep adequate clearance around your projector for its ventilation and cooling. See gure below for
the least clearance requirements. The least clearance is a MUST when your projector is placed
within a cabinet or other closed environment.
DO NOT cover the air outlet of your projector. Poor ventilation not only shorten life cycle of your
projector but also may lead to risks.
Slots and openings at rear and bottom of your projector are designed for ventilation. Keep your
projector from overheated to ensure its steady operation.
DO NOT cover the air outlet with cloth or other objects. DO NOT place your projector on the surface
of bed, sofa, carpets, or similar object as this may block the air outlets at its bottom.
DO NOT place your projector in closed environment, e.g. a bookcase, unless it is well ventilated.
Keep any matter from falling in your projector through the air outlets as they may touch high voltage
parts and lead to re or electric shock by short circuits. DO NOT splash liquid to your projector.
Precautions on air outlet:
Sides and bottom Rear
Note:
Heat exhaust at the air outlet Keep the following
in mind when using or installing your projector:
DO NOT place ammable materials or sprayers
near your projector.
Keep the air outlet one meter away from other
objects.
DO NOT touch the area close to the air outlet
especially the metal components, e.g. screws.
This area and parts will get very hot once your
projector starts operating.
DO NOT place any object atop your projector.
Cooling fans are designed for cooling your
projector. Fan speed is auto adjusted subject to
internal temperature of your projector.
us-projector[email protected]

05
Use your projector at specied location in correct way.
Invalid projector location may shorten life-cycle of lamps or even lead to severe incidents or re.
Note:
Avoid installing your projector as illustrated below.
Place your projector correctly:
DO NOT put the projector on
a horizontal projection.
DO NOT tilt your projector
more than 10 degrees.
DO NOT put the projector
on avertical projection.
DO NOT put the projector
upside down to make a projection.
DO NOT tilt your projector
more than 10 degrees.
us-projector[email protected]
FCC
Compliance
This equipment generates, uses, and can radiate radio frequency energy, and if not installed and
used in accordance with the instructions, may cause harmful interference to radio communications.
However, there is no guarantee that interference will not occur in a particular installation. If this
equipment does cause harmful interference to radio or television reception, which can be
determined by turning the equipment off and on, the user is encouraged to try to correct the
interference by one or more of the following measures:
Reorient or relocate the receiving antenna.
Increase the separation between the equipment and receiver.
Connect the equipment into an outlet on a circuit different from that to which the receiver is
connected.
Consult the dealer or an experienced radio/TV technician for help.
Note:
This equipment has been tested and found to comply with the limits for a Class B digital device,
pursuant to Part 15 of the FCC Rules.
These limits are designed to provide reasonable protection against harmful interference in a
residential installation.
Use of shielded cable is required to comply with class B limits in Subpart B of Part 15 of FCC Rules.
Do not make any changes or modications to the equipment unless otherwise specied in the
instructions. If such changes or modications should be made, you could be required to stop
operation of the equipment.

06
Accessory
Accessory for Solo high-end series as follows:
AC Power Cord
Note: the AC power cord specication
depand on the location of your projector. Remote Control
Quick Start Guide/ user manual HDMI Cable
HDMI HD MI
us-projector[email protected]

Connect the AC power cord
Standard voltage employed by your projector is AC 100-240V. It adapts to different input voltage
automatically. Your projector employs single-phase power cord with neutral ground cable.
Do not use any other type of power cords or you may face the risks of electric shock. In case you have
any doubt on type of power cord you are using, please call authorized dealer or service center for help.
Before powering on your projector, get all external equipment connected in advance.
Keep your AC power socket close to your
projector for easy plugging and unplugging.
Note:
Note:
For safety reasons, unplug the AC power cord when
your projector is not in use. Your projector will consume
a small amount of power when it is connected to AC
grid power and in standby mode.
Precautions on power cord
Your AC power cord should meet regulations of the country/district where your projector is used.
Please make sure the type of the power plug is compliant with those given in gure below.
Make sure you are using a valid AC power cord.
In case the included AC power cord does not comply with the AC power socket in your location,
call your dealer for replacement.
The projector side Connect to the AC power socket
Note:
1. Use of invalid power cord may hamper product performance or even lead to electric shock, re,
and other incidents. Please use power cord compliant with the included one to ensure product
performance and operation safety.
2. The frequently used cables are: AC power cord, VGA cable, audio cable, video cable, and serial
control cable.
07
us-projector[email protected]
Installation

08
Install battery of remote control
Fit the correct batteries(2XAAA batteries not included)
Open the battery cover. Insert a new battery in it. Put the cover back.
Set up your projector
For the optimal image effect, it is recommended to control brightness in your environment.
NOTE:
1. Data in the image are about the
maximum frame value.
2. Data in brackets are for 16:9.
Frame (Max.)
Frame (Min.)
Frame (Max.)
Frame (Min.)
us-projector[email protected]
Power on your projector
1. Connect AC Power cord of your projector to an AC power socket. The Power indicator turns on in red
(1-3seconds ash light)
2. Press the Power button when the light become steady.(Around 15-20seconds)
(The power indicator lights in green and the cooling fan starts running)
Basic operation
Note:
1. In case the “Logo Select” option is set to OFF, then no welcome image will display in screen.
2. You can do nothing but powering off your projector during the welcome image is displaying.
To maintain the life cycle of the lamp, power off your projector after it has been turn
on for at least ve minutes.
Do not use your projector without stop. As it may hurt the life cycle of your lamp.
Power off your projector at least once every 24 hours and have it idle for an hour.
Power off your projector
1. Press the Power button, the "Power Off ?" message display.
2. Press the Power button again in 4 seconds to conrm. The Power indicator ashes red while the
cooling fan continues running.
3. The Power indicator stop ashing once the projector has been cooled down.
Tips: Unplug the power cord until the fan stops running.
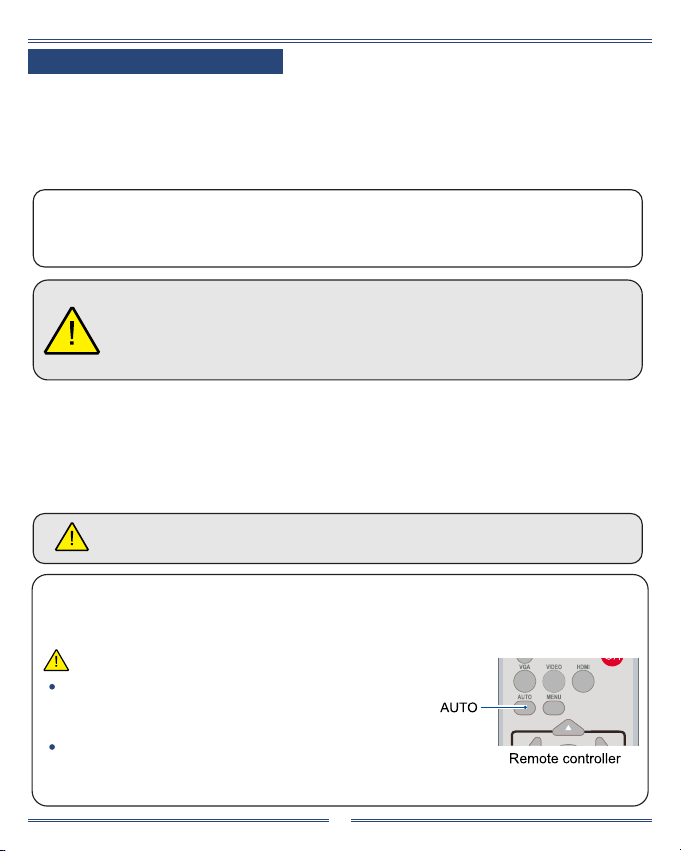
Auto setting function
Press the AUTO button on your remote controller to auto execute settings given in the Auto Setup
on the Expand menu (including input search, Auto PC adj. and Auto keystone).
If the " input search " function in the Auto Setup option is
set to "On", once you press the AUTO button, the projector
will search for input signals automatically.
The following function will be invalid Freeze, Aspect ratio,
Image mode, Auto setup, and Pattern and Screen, once "USB display",
"Memory viewer", "Network" has been selected as signal input.
Note:
09
us-projector[email protected]
10
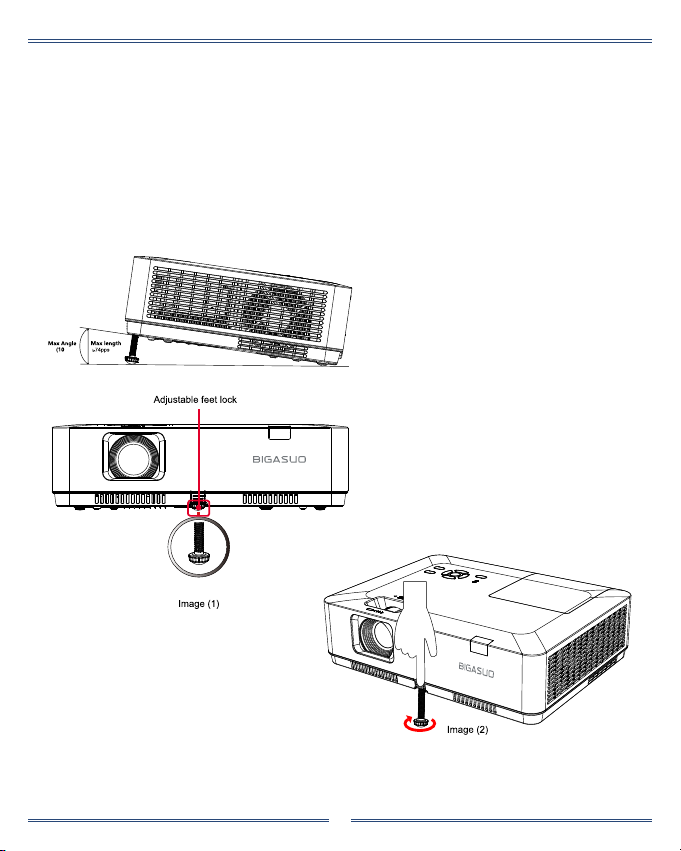
Adjust the projected image
Adjust the position of the projected image
1. Place the projector so that it is perpendicular to the screen, just show as below Image (1).
2. Raise the front of the projector and press the foot lock on the projector.
Loosen the foot lock can lock the adjustable foot. Rotate the adjustable foot to adjust the height.
Rotating the adjustable foot in the direction shown in the Image (2) to lengthens it, and rotating in the
opposite direction retracts it, thus adjusting the projection angle of the vertical direction.
us-projector[email protected]

Adjust the Projector Zoom and Focus
1. Zoom: Adjust the ZOOM ring to rotate the picture to the left to zoom out or the right to zoom in.
2. Focus: Adjust the FOCUS ring to adjust the clear picture.
Keystone adjustment
Press the KEYSTONE button on your remote controller.
The keystone adjustment dialog box displays
( including H/V Keystone, Corner correction, Curved correction,
Reset value) , press button to adjust keystone distortion.
You may save your settings for keystone adjustment.
H/V Keystone
Corner correction
Curved correction
Reset value
Adjust the projected image when the projector is on the horizontal or vertical
keystone distortion
Adjust the projected image when the projector is keystone distortion of four
corners.
Adjust the projected image when the projector linearity is uneven or the
projected images bent vertically and horizontally.
The correction values will be restored to the factory defaults.
11
us-projector[email protected]

Select this function to correct the projected images horizontally or vertically.
H/V Keystone
Press button to
reduce upper width
Press button to
reduce bottom width
Press button to
reduce left width
Press button to
reduce right width
Select this function to correct the projected images of four corners distorted.
Press button to keystone at four corners of the screen. The four corners are looped in sequence
shown below:
Conner correction
Conner correction
Upper left Upper right Bottom left Bottom right
12
us-projector[email protected]

Select this function to correct the projected images with linearity uneven or vertical and horizontal
bending deformation.
Press button to adjust options.
Curved correction
Press KEYSTONE button on the remote control , then the Keystone OSD menu appears
(includes: H / V keystone , Conner correction, Curved correction and Reset value), and press
button to switch the four options .
Maximum Keystone range up to ±30° vertically and ±15° horizontally . However, the image
quality will deteriorate, and become more difcult to focus. Install the projector with the minimal
correction value.
The screen size will be changed with various H/V Keystone adjustments .
Keystone may inuence image aspect .
Note
Reset value
Select this function to make adjustment value back to the factory default .
1) Press button to select [Reset value] option.
2) Press <OK> button.
Release Keystone mode.
13
us-projector[email protected]

14
Top control panel and indicators
POWER
Open or close the projector.
Arrow /UP/DOWN/VOL-/VOL+
Select items or adjust the data in the OSD menu.
Shift the image in the "Digital zoom +/-" mode.
Adjust the volume.
WARNING indicator
The indicator is ashing red, when the internal
temperature of the projector exceeds the
operating range.
POWER indicator
Steady red light: Standby mode
Steady green light: Working time
Flashing green light: Power management mode
Flashing red light: Cooling mode
Steady green yellow: Projector power is abnormal
MENU
Open or close the OSD menu.
OK
INPUT
Open or close the INPUT menu.
us-projector[email protected]

15
Remote controller
POWER: Power on or off your projector.
: Open or close the INPUT menu.INPUT
VGA: Select VGA input source.
AUTO: Keystone and Input Source.
VIDEO: Select VIDEO input source.
HDMI: Select HDMI 1/HDMI 2 input source.
MENU: Open or close the OSD menu.
Arrow :
Select items or adjust data in the OSD menu.
Select display area in digital zoom+ mode.
OK: Enter the OSD menu or select options in it.
IMAGE: Select image mode.
KEYSTONE: Keystone calibration.
SCREEN: Enter the screen size adjustment menu.
LAMP: Select LAMP mode.
FREEZE: Freeze projected images.
PATTERN: Select built-in test pattern of your projector.
INFO: Display current status info. of your projector.
MUTE: Turn off the sound Temporarily.
D.ZOOM +: Zoom in projected image.
D.ZOOM -: Zoom out projected image.
VOLUME +: Increase volume.
VOLUME - : Decrease volume.
BLANK: Dark out screen images temporarily.
TIMER: Enable the timer function .
PATTERN button on the remote controller is invalid when you choose USB display,
Memory viewer and Network as input signal.
us-projector[email protected]

16
MONO(L/R) terminal
A MoNo audio signal (A single audio terminal)
should be connected to the MONO (R / L)
interface.
AUDIO OUT terminal
Connect external audio devices to this terminal.
HDMI1/HDMI2 connector
Connect HDMI1 digital output signals or
HDMI2 digital output signals to this terminal.
COMPUTER IN
Connect RGB to this terminal.
RS-232C
When using the RS232 functional to operate the
projector, connect the serial communication to
this terminal.
USB-B connector
When using the "USB display" function, connect
your computer to this terminal via the USB cable.
USB-A connector
When using the Memory Viewer function, insert
the USB memory directly to this terminal.
VIDEO IN terminal
Connect video output signal to this terminal.
AUDIO IN terminal
Connect audio signal of the PC to this terminal.
MONITOR OUT terminal
For monitor output , output the signal from to
other monitors.
Remote Receiver (rear)
Use the remote control to operate the projector.
Kensington Security Slot
When using the "Kensington Security Slot"
function, it will help users to deter theft of the
projector.
LAN terminal
Connect mesh cable to this terminal when
using network control and operate your
projector.
Function of your projector
us-projector[email protected]

17
Connect to PC (Digital and Analog RGB) and VIDEO equipment
Cables for connection:
●VGA cable(not included) ●Serial cable (Cross type) ●HDMI cable
● VIDEO cable(not included)
VIDEO Output Signal
VIDEO Output Signal
us-projector[email protected]
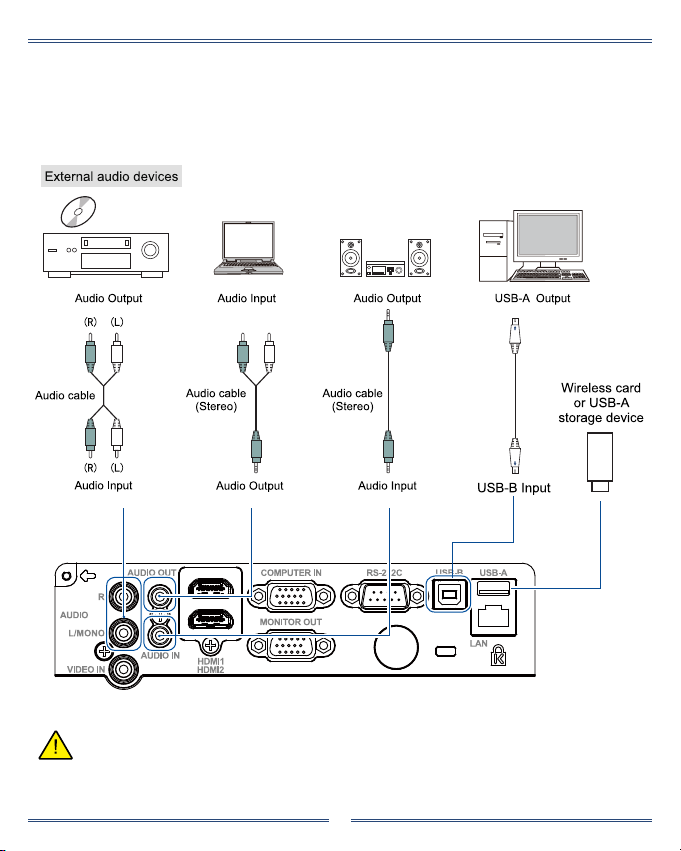
18
Connect to audio equipment, USB/Wireless card(USB-A and USB-B)
Cables for connection:
●Audio cable ( This cable is not included. )
● USB-A or USB-B cable ( This cable is not included.)
us-projector[email protected]
AV Port only support Blu-ray Dics. Other formats are not currently supported.
Note:
Table of contents
Other BIGASUO Projector manuals


