Rompa Super Solar 100C User manual

1. ProductName
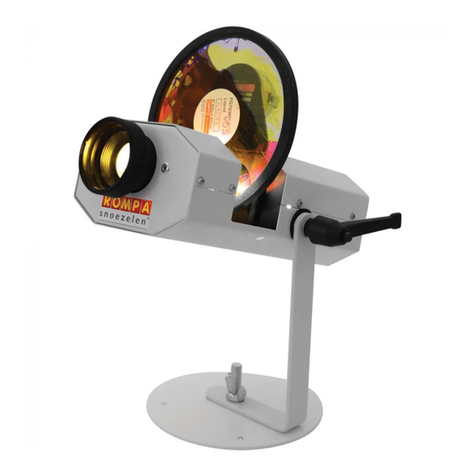
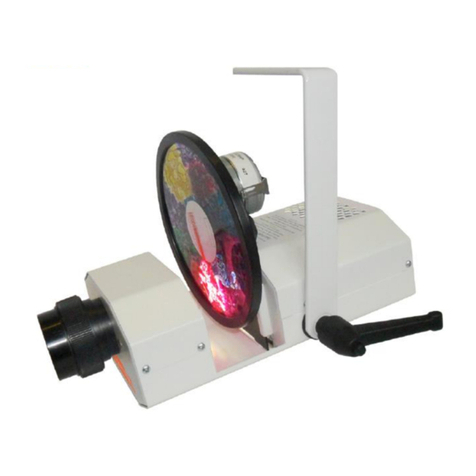
SuperSolar100CProjector
2. ProductCode
18530‐withStandardlens
18531‐with60mmlens
3. Colour
White
4. BriefDescription
Aquiet,lowheatoutputprojector.Light,compactandeasytouse.Canbesuspendedfrom
theceilingorclampedontoashelf.
5. Contents
SuperSolarProjector
IEClead(powercable)

6. Snoezelen®Stimulations
•Sight
7. BestUse
Forbesteffect,useinadarkenedroom.Theeffectsshouldbeprojectedontoapale
colouredandun‐patternedwall.
8. CompatibleROMPA®Products
TheSuperSolar100Cmustalsobeusedwithanaccessoryinthereargate,typicallyaWheel
Rotator:
13170WheelRotator–1revolutionin2minutes
16570WheelRotator–1revolutionin6minutes
Pleasenote:TheSuperSolar100CProjectorisnotcompatiblewiththe14719WheelSafe
Rotator.
AnEffectWheelmustbeusedintheWheelRotatore.g.13342Deep,20507Sensory…
Pleaseseewww.rompa.comforourextensiverangeofwheels
FurtheraccessoriesmaybeusedwiththeEffectWheelstomoveormultiplytheeffectse.g.
19742DistortionWheels,14024PanoramicRotator…
Pleaseseewww.rompa.comforourextensiverangeofaccessories
15980ReplacementbulbforROMPA®SolarProjector(12V,100W)
9. StartingUp
•ConnecttheIECleadtothesocketattherearoftheProjector.
•PlaceanEffectWheelonaWheelRotator.
•SlidetheWheelRotatorintothereargateoftheProjector.
•SwitchtheProjectoronusingtheON/OFFbuttonattherearoftheProjector.

10. DetailedDescription
Theperfectprojector!Notonlylight,compactandstraight‐forwardtouse,butalsovery
quiet,withcomparativelylowheatoutput.TheSuperSolar100CProjectorcanbe
suspendedfromaceilingorclampeddowntoashelf,andisakeycomponentina
Snoezelen®environment.
1. Selecttheeffect(s)Gandtheappropriateeffectaccessory.
Thisprojectorrequireseither:
AWheelRotatorandEffectWheels
OR
ACassetteRotatorandEffectCassettes
Ifusingcassettes,makesuretheCassetteRotatorisforthecorrectsize
cassette(50mmor76mm
2. Fittheeffectontotheeffectaccessory(e.g.puttheEffectWheelontotheWheel
Rotator).
3. SlidethebackplateoftheeffectaccessoryintothereargateAoftheProjector.
ImagealteringeffectslikeDistortionWheels(15425)canbefittedintothefrontgate
runners.Themaineffectshouldbefittedintothereargaterunnersformaximumlife.
4.Oncetheeffectsandeffectsaccessoriesareinplace,fittheplugintooneofthe12V~
socketsonthesideoftheProjector.
4. WhenpluggedinturntheProjectoronbytheON/OFFswitchonthebackpanelC.
5. AdjusttheangleandpositiontheProjector(usingtheknobwhich
connectsthebracketDtotheunit)toprojectyourimageinthe
desiredposition(s).
6. FocusyoureffectbytwistingthelensEinandouttillthedesired
focusisachieved.
7. SwitchoffbytheON/OFFswitchatthebackofthepanelafteruse.
WerecommendthatyoudonotusetheWheelSafeRotatororCrystal
Pulsewiththisprojector.


11. Safety
•Alwayssupervisetheuseofthisproduct
•Theprojectorcomeswitha2metre,3coreIEClead.Asuitable3Ampfuseshould
beconnectedasfollows:
Brown = Live
Blue =Neutral
Green/Yellow=Earth
•Whenhangingtheprojector,ensurethebeam/frameisstrongenoughtosupport
theweightoftheprojector
12. TechnicalSpecification
Lamp: 100W,Type‘ThornM28’
Lamplife: average2000hours
LightOutput: 575lumenswithnewlamp
Colourtemperature:3000K
PowerRating: 115Wmax,220‐240V50‐60Hz
Fuses: T1.6A/250V20mmx5mm(mainsfuse)Asparefuseisstoredinthe
backoftheprojector(abovethepowerswitch)
InternalAutoReset: 500mAmax
Weight: 3.4kg
CE: madeinaccordancewithBSIEN60335/1andEN60065

13. Installation
Pointstoconsider:
•Accesstotheprojectorifyouintendtofrequentlychangetheaccessories
•InstallOUTOFREACH‐theprojectorbecomeswarmwithuse
•Donotpositiontheprojectortoallowlighttoshinedirectlyintosomeone’seyes
Therearethreemethodsofmountingtheprojector.Pleasenotetheinformationbelowand
considerthemostappropriatewaytomounttheprojector.
I. Suspendfromaboveusingthehangingbracket,
firmlyfixedtoastrongbeamorframe.Itisyour
responsibilitytomakesurethatthebeam/frame
iscapableofsupportingtheweightofthe
projector.
Theholeinthebracketforafixinge.g.a
screw/boltetcis14mmdiameter.
Purchaseanappropriatefixing–thisisnotincluded.
Makesuretheprojectorissecurelyattachedtoanappropriatemountingpointand
thatthebracketknobsandlockingleversaswellasyourfixturesusedaresecurely
tightened.
Fitthesafetychainorcable!
Oneendofthechainorcableisfittedtotheeyeholeonthe
siderearfabgrillonthe
Solar100C.Theother
endissecurelyfittedas
tightaspossibletoan
immovableobject.
Methodsofmountingcontinued:
II. Mountedontopofaflatsurfacebyusingthe
hangingbracketasanadjustablestand.

III. Fixedwiththehangingbracketunderthe
projectorboltedtoanimmovableflat
surface.
Considertheprojectiondistancesshownbelow:

14. CareandMaintenance
Tochangethelamp:
Donothandlethelampwithbarehands–holdbythepins,wearingglovesetc.
1. SwitchofftheProjectorandunplug.Leavetocoolfor20minutes.
2. Removethecoverplatescrews.TherearefouroftheseandyouwillrequireaPhilips
(positive/cross‐head)screw‐driver.

3. RemovethecoverplateF.

4. Lifttheblackcoverflap.
(Screwsonblackflapmayneedtobeloosenedfirst)
Removeoldlampwithouttouchingitwithbarehands.
Cover flap

5. Replacewithanewlampnot
touchingitwithbarehands.
Alignthetwopinsofthelamp
withthe2holesinthelamp
housing.
6. Flattendowntheblackcover
flap.
Alignthe2holeswiththe2pins

7. Replaceandsecurethecoverplate.
Important:
a) Acolourwheeloreffectmustalwaysbeinthegateofthepropertywheninuse.
Failuretodosomayresultinthemeltingoftheplasticpartsintheassembly.
b) Theprojectorshouldalwaysbeusedwithin90°ofthehorizontal.
c) Donottouchthelampwithbarehands,usegloves,asoftclothortissue.
d) Donotattempttoservicetheprojectorwithoutthehelpofasuitablyqualified
individual.
Cleaning:
a) After3months(or500hours)use,orwhenchangingthebulb,theopticalsystemmayneed
cleaning.
b) Useasofttissueorlensclothwithalittlemethylatedspiritorpurealcoholtocleanthelens
c) Tocleanthemirror,firstremovethelamp
Pleasenote:anymarksontheoutsideoftheprojectorshouldbewipedoffusingadrycloth.
Adampclothcoulddamagethecomponentsinside.
15. Troubleshooting
•MakesuretheProjectorhasbeenpluggedinandswitchedon(switchattherearof
theProjector).
•TheEffectWheelshouldbeinthereargatesoitisprojectedthecorrectwayround.
•IfyourPrismorotherfront‐attachingaccessorywillnotfit,makesuretheextension
collar(theblackringatthefrontoftheProjectorthatissometimesreferredtoasa
‘Click‐Clack’)hasnotbeenremoved.

Furthercopiesoftheseinstructionscanbedownloadedatwww.rompa.com
Wehopeyoufindourinstructionsinvaluable.Ifyouhaveanysuggestionsforimproving
themfurtheryourcommentswillbegreatlyreceived–pleasecontactusat
SUPERSOLAR100CPROJECTOR18530‐1,June2011
CopyrightROMPA®Ltd
This manual suits for next models
2
Table of contents
Other Rompa Projector manuals

Rompa
Rompa LED100 User manual

Rompa
Rompa Rainbow User manual

Rompa
Rompa 19548 User manual

Rompa
Rompa 23008 User manual

Rompa
Rompa 20777 User manual

Rompa
Rompa 22126 User manual

Rompa
Rompa 20997 User manual

Rompa
Rompa 100 LED Mini Projector User manual

Rompa
Rompa Aura Projector User manual

Rompa
Rompa 20063 User manual