Bikecomm ALOHA User manual

Owners Manual
Bluetooth Helmet Headset
ALOHA

1 ACCESSORY PACKAGE ................................................................................................................ 8
2 INSTALLATION ........................................................................................................................... 9
2.1 HEADSET FIXTURE INSTALLATION ..................................................................................... 9
2.1.1 Adhesive type installation of Fixture: ............................................................................ 9
2.1.2 Spring-clip type installation for Fixture: ........................................................................ 9
2.2 INSTALLATION OF MINI USB SPEAKER ............................................................................ 10
2.3 MICROPHONE INSTALLATION ........................................................................................... 11
2.3.1 3/4-face Helmet installation ....................................................................................... 11
2.3.2 Full-face Helmet Installation ....................................................................................... 12
3 ALOHA BUTTONS .................................................................................................................... 13
4 ALOHA HEADSET OPERATION .................................................................................................. 14
5 POWER AND LED INDICATOR .................................................................................................. 14
6 HEADSET AND CELL PHONE PAIRING AND USAGE ................................................................... 14
6.1 PAIRING WITH A CELL PHONE........................................................................................... 14
6.2 SETTING CELL PHONE ANSWER MODE ............................................................................. 15
6.3 USING YOUR CELL PHONE ............................................................................................. 15
7 HEADSET AND GPS PAIRING AND USAGE ................................................................................ 16
7.1 PAIRING WITH A GPS ...................................................................................................... 16
7.2 GPS USAGE .................................................................................................................. 17
8 1-ON-1 INTERCOM HEADSET PAIRING AND USAGE ................................................................. 17
8.1 1-ON-1 INTERCOM PAIRING ............................................................................................ 18
8.2 1-ON-1 INTERCOM USAGE .............................................................................................. 19
8.2.1 Manual Mode for starting 1-on-1 Intercom:................................................................ 19
8.2.2 Manually Ending 1-on-1 Intercom .............................................................................. 21
8.2.3 VOX Mode.................................................................................................................. 21
8.3 VOICE ACTIVATION (VOX) .............................................................................................. 24
8.3.1 VOX Level: .................................................................................................................. 24
9 GROUP INTERCOM PAIRING AND USAGE ................................................................................ 25
9.1 ABOUT GROUP ............................................................................................................... 25
9.2 PAIRING FOR GROUP INTERCOM ..................................................................................... 25
9.2.1 Assign number (1,2,3,4,5) .......................................................................................... 26
9.2.2 Group Intercom Pairing .............................................................................................. 27

9.2.3 Group Intercom Usage ............................................................................................... 28
10 FM RADIO ............................................................................................................................... 29
11 RESET/ERASE PAIRING INFORMATION ..................................................................................... 30
12 VOICE NOTIFICATIONS LANGUAGE SELECTION ........................................................................ 31
13 QUICK OPERATION REFERENCE FOR ALOHA HEADSET ............................................................. 31
14 ALOHA VOICE NOTIFICATIONS QUICK REFERENCE ................................................................... 33

*Please read this manual before using any accessory and follow the
instructions.
*Please keep this manual for future reference.
*When you sell or give this product to another user, please also give them this
manual.
■Confirm Before Use■
※ The company will not be held responsible for any accidents or damages caused by the
user not complying with the cautions, notes and warnings in this manual.
※ The product warranty is indicated in the purchase certificate. Please read the warranty
and keep the purchase certificate with this manual.
Icons used in this manual
Warning: Not complying with this condition may lead to death or serious injury.
Caution: Not complying with this condition may lead to property damage or
personal injury.
Matters must be performed
Matters prohibited
Matters against the law
Other warnings and
cautions
Do not disassemble the
product
Do not saok in water

1. Prohibit to use this product in airplane, airport or hospital (turn off the power),
as it may interfere with air control communication and medical electronics.
2. Prohibit to use in the vicinity of the medical equipments, such as,
pacemakers, as it may have adverse effects and cause damage.
3. Prohibit the use of excessive volume, which may hinder hearing surrounding
traffic conditions and could lead to accidents.
4. Stop immediately when you hear thunder, as you may be struck by lightning.
Please evacuate to a safe place as soon as possible.
5. Do not attempt to disassemble, alteration, repair by yourself, as it may cause
fire, injury, electric shock or malfunction. When in need of repair, please
contact your local dealer or our company.
If odor, heat, discoloration, or deformation occurs during use, please
immediately stop using, and contact your dealer or the company.
・ Avoid placing or use in hot and humid environment or in heating
equipment, which may cause deformation of the product, heat, fire,
cracking, electric shock, or malfunction.
・ Beware of volume setting. Sudden or continuous loud volume may
damage the eardrum and cause hearing loss.
・ Enter the room from a cold environment may cause water condensation
inside the product, which may lead to heat, fire, cracking, electric shock,
malfunction when used.
・ Please do not use near automatic doors or fire alarms, where the use may
cause fire alarms and automatic doors malfunction.
・ If the radio waves of the product affects another wireless device, turn off
the power and use in unaffected areas.
・ Make sure to install fixedly to avoid the headset from falling off the helmet
while riding.
・ Avoid strong impact on the headset to avoid malfunction.
・ Do not any oil to the product. Oil adhesion may cause surface
deterioration or malfunction
・ Refrain from applying excessive force to bend the headset and the snake
tube of the microphone to avoid damage.
・ Do not hold the headset directly when the headset is mounted to the
helmet to avoid the risk of disengaging the headset from the helmet.
・ When plugging a microphone or a USB cable, grip the USB connector to

avoid a direct pull at the cable causing damage or malfunction.
・ When the product is installed on a helmet, avoid direct impact on the
headset.
・ This product has been certified to meet technical standards for wireless
regulations. If you want to use in a country other than Taiwan, follow the
laws and regulations of the country.
・ For using headsets when riding, please confirm compliance with local laws
and regulations.
・ Do not soak the product in water. The product is waterproof, but do not
operate in water. Note that the microphone and speaker are not
waterproof. Also, please do not disconnect the USB connector with wet
hands, which may cause heat, fire, breakdown, electric shock,or
malfunction.
・ Please keep out of the reach of children to avoid the children swallowing.

Dear Customer:
Thank you for choosing ALHOA. This product has been specifically designed
to meet your every communication need when riding a motorcycle. Should you
have any questions, suggestions or comments, please email us at
For a better and safer experience we recommend users familiarize themselves
with the owner's manual before using ALHOA to know about installation,
features and operations of ALHOA.
Safety is the foremost priority when riding. ALOHA is designed for
convenience while taking safety into consideration. Likewise, riders and the
passengers should prioritize safety at all times when operating a motorcycle
and using ALOHA.
Have a safe and enjoyable ride!

1 Accessory Package
(For the dual-pack, the number of each accessory item will be doubled.)
・
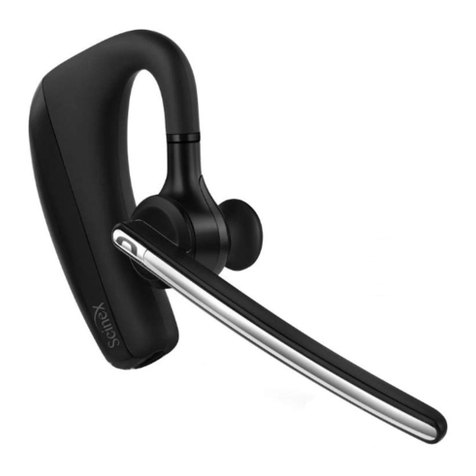
ALOHA headset
・
Headset fixture
・Spring clip
・Mini USB connector and speaker ・
Microphone for 3/4
-
face
helmet
・Microphone for full-face helmet ・USB to mini USB cable
・Cleaning-pad
・Pad for 3/4-face helmet
(fabric fastener)x2 pcs
・Speaker pad(fabric fastener)x2 pcs
・Sponge pad x2 pcs

2 Installation
ALOHA installation includes (1) installing headset fixture (2) installing Mini USB
speaker (3) installing microphone and (4) installing ALOHA headset.
2.1 Headset Fixture Installation
Select either (1) adhesive-type or (2) spring clip type to install your headset
fixture to your helmet.
Note: please do not remove the 3M adhesive-type pad once it is fixed to the
helmet.
2.1.1 Adhesive type installation of Fixture:
Remove the cover of the adhesive-type pad at the back of the fixture and fix to
the helmet. Note: Clean the area with the supplied cleaning pad before
applying the adhesive.
2.1.2 Spring-clip type installation for Fixture:
Insert the spring clip from the lower edge by pushing it into the slot. The spring
clip CANNOT be removed after fixed. Please make sure of the direction before
applying.

Mount the fixture to the helmet. Tear the cover off the adhesive pad, pull open
the spring clip to attach the helmet.
2.2 Installation of Mini USB speaker
Place the Mini USB speakers to both sides (inside) the helmet. Sponge
pads can be used to adjust the position before applying the adhesive pad.

Note: For optimal voice/audio clarity, the speakers should be placed as closely
as possible to your ears without compromising comfort.
2.3 Microphone Installation
The ALOHA headset comes with (1) microphone for 3/4-face helmet
types and (2) microphone for full-face helmet types.
2.3.1 3/4-face Helmet installation
Detach the inner left side lining of the helmet, and attach the fabric fastener for
microphone to the helmet behind the inner lining. Use a cleaning pad to clean the

surface before attaching. Then, connect the microphone for 3/4-face helmet to the
Mini USB speaker. Please refrain from unnecessary removal of the fabric fastener
from the helmet, as it may damage the adhesive on fabric fastener.
Note: ALOHA headset provides quality voice and VOX intercom. For optimal
performance, the microphone must be as close to the mouth (1-2 cm) of the
user as possible when installing the microphone.
.
2.3.2 Full-face Helmet Installation
Attach the fabric fastener for microphone to the position inside the helmet right
in front of mouth. Then, connect the microphone for full-face helmet to the Mini
USB speaker. Use a supplied cleaning pad to clean the surface before
attaching. Please refrain from unnecessary removal of the fabric fastener
from the helmet, as it may damage the adhesive on fabric fastener.

3 ALOHA Buttons
Button [A]: to select 1-on-1 intercom with A1, A2 or A3 headset
Button [C]: to start group intercom
Button [F]: to turn on/off FM
Button [M]: voice dial cell phone and redial the last dial-out number, start/end
music playback.
Mini USB: Connecting speaker, headset recharging
Knob [V]: To adjust sound volume, set activation mode for 1-on-1 intercom,
select next/previous music track, and select FM channel

4 ALOHA Headset Operation
This manual describes the following functions provided by the ALOHA headset:
<headset and cell phone pairing and usage>, <headset and GPS pairing and
usage>, <headset and headset pairing and usage>, <group intercom pairing
and usage>, <FM radio>. Each button on the ALOHA headset is designed to
provide a variety of functions and each function setting will be accompanied by
voice notification and is described in this manual.
5 Power and LED Indicator
1. Power ON: Press [A] and [F] until the LED indicates blue. A voice
notification will inform you of the current intercom mode.
2. Power OFF: Press [A] and [F] until the LED indicates red. A voice
notification will inform you of the remaining battery capacity.
3. Recharging: During recharging, the LED remains red. When
recharging is complete, the LED light indicates green. The headset
battery contains a slight charge when shipped. It is suggested to fully
recharge the battery prior to your first use. When fully recharged, the
LED flashes 5 times when powered on.
4. Insufficient power notification: when the battery charge is insufficient,
three consecutive <beep> sounds (i.e., <Beep, Beep, Beep> will be
heard to indicate the battery charge is low and the unit requires
recharging.
6 Headset and Cell phone Pairing and Usage
6.1 Pairing with a cell phone
1. Starting with the ALOHA headset in ON state, press the [M] button until the
LED flashes red/blue.
2. Activate the Bluetooth function on a cell phone to search for the ALOHA,
and connect.

3. If the device asks for a password, input password <0000> (four zeros) to
complete the connection. The LED flashes blue slowly to indicate successful
pairing.
6.2 Setting cell phone answer mode
Once paired, set the answering mode of the cell phone as (a) voice answer, or
(b) automatic answer.
(a) Voice Answer: push the [P] button upward for about 8 seconds. A
voice notification will confirm that you are in <Voice Answering
Mode>.
(b) Automatic answer: push the [P] button downward for about 8
seconds. A voice notification will confirm that you are in
<Automatic Answering Mode >.
Note: After the ALOHA headset has been paired with a cell phone, the
default answering mode is voice answering mode.
6.3 Using Your Cell Phone
ALOHA headset can be connected to two cell phones and can receive
calls from either cell phone. The last cell phone paired with the ALOHA
headset must support “voice dialing”, “reconnecting cell phone” and “A2DP
stereo music playing” for using each respective function.
Answering incoming calls or dialing out
1. Press the [M] button to answer an incoming call.
2. Using VOX activation to answer an incoming call by speaking into
microphone directly, for example, “aloha!!”
NOTE: The Voice Answering function for cell phone is set the same as the
Voice Activation (VOX) for intercom with another headset is set. For
setting Voice Answering to answer incoming calls and Voice Activation
(VOX) for intercom, please refer to: ALOHA Voice Activation settings
(VOX).

3. Using automatic answering, by setting the automatic answering function,
the incoming call will automatically be answered after 10 seconds of
ringing.
4. To reject an incoming call, press the [M] button for about 3 seconds. (note:
when automatic answering is not set, the incoming call will be rejected
after ringing for approx 16 seconds.)
5. Voice Dialing: press the [M] button once and speak into microphone (the
cell phone MUST provide voice dial function).
6. Re-dialing the last number: press [M] button twice rapidly.
7. To re-dial the last number of the second cell phone when paired with two
phones: press [M] 3 times quickly.
8. To reconnect a cell phone, press [M] once to reconnect headset and cell
phone. (When two cell phones are paired with the HOLA headset, both
two cell phones can be connected.)
9. When paired with two cell phones and the first cell is in talk, press [A] to
answer incoming call on the second cell phone, which puts the first cell
phone on hold and resume when finishing the call on the second cell
phone.
10. Cell phone music/audio playback (cell phone must support AVRCP)
Play/Pause: Press [M] for 2 seconds and release
Next: Push [V] upward for 2 seconds and release
Previous: Push [V] downward for 2 seconds and release
11. Adjusting cell phone volume
Press knob [V] on ALOHA headset upward or downward to adjust the
volume of the cell phone when connecting to the headset. During
adjustment, an audible tone will be heard. When the volume reaches the
maximum or the minimum setting, an audible tone/beep will be heard. The
cell phone must be activated and in talk mode or music playing mode to
adjust the volume of the cell phone in the headset.
7 Headset and GPS Pairing and Usage
7.1 Pairing with a GPS
1. Starting with the ALOHA headset in ON state, press the [M] button until the
LED flashes red/blue.
2. Activate the Bluetooth function on cell phone to search for the ALOHA,
and connect.

3. If the device asks for a password, input password <0000> (four zeros) to
complete the connection. The LED flashes blue slowly to indicate
successful pairing.
Note: ALOHA supports simultaneous connection to both GPS and cell
phone.
7.2 GPS Usage
If you have paired your ALOHA with a GPS, vocal GPS directions can be
heard through the headset. If you are on an intercom with another ALOHA
headset when the GPS audio instruction comes in, the intercom
connection will be automatically paused. The intercom connection
resumes after the GPS instruction is over. When your ALOHA headset is
connected to a cell phone and a GPS audio instruction comes in, you can
hear both the GPS instructions and the cell phone.
Adjusting GPS volume
Press the knob [P] and [P] buttons on ALOHA headset upward or downward
to adjust the volume of the GPS when connecting to the headset. During
adjustment, an audible tone will be heard. When the volume reaches the
maximum or the minimum setting, an audible tone/beep will be heard. The
GPS must be activated to adjust the volume of the GPS during GPS
broadcasting instruction.
8 1-On-1 Intercom Headset Pairing and Usage
Two ALOHA headsets must be paired for 1-on-1 intercom.
Each ALOHA can connect to 3 (at most) other ALOHA headsets for 1-on-1
intercom. The three ALOHA headsets will be defined, according to the
reverse time order they were paired, as: (i.e., the most recently paired has
the highest priority)
first priority: “Comm A1”, second priority: “Comm A2”, and third priority:
“Comm A3”。

8.1 1-on-1 Intercom Pairing
1. Press [A] on ALOHA#1 in ON state until the LED flashes green rapidly.
2. Press [M] on ALOHA#2 in ON state until the LED flashes red/blue rapidly.
The two headsets automatically start pairing steps 2, 3. When the LED
on both headset flashes in a blue-blue-green pattern and both headsets
hear the voice notification “Comm A Paired", the pairing is successful,
and both headsets are ready for intercom.
。
3. After pairing, ALHOA#1 places ALOHA#2 as its first priority (A1). If
ALHOA#1 paired with other headsets earlier, the previously A1 will be
pushed back as A2, and previously A2 becomes A3 and the previously
A3 will no longer be recorded.
4. Also, after pairing, ALHOA#2 places ALOHA#1 as its first priority (A1). If
ALHOA#2 paired with other headsets earlier, the previously A1 will be
pushed back as A2, and previously A2 becomes A3 and the previously
A3 will no longer be recorded.
EXAMPLE:
For 5 ALHOA headsets:

1. ALHOA#1 first pairs with ALHOA#5, then pairs with ALOHA#4,
ALOHA#3 and ALOHA#2, all for 1-on-1 intercom pairing.
At this point, for ALHOA#1, A1 refers to ALHOA#2, A2 refers to
ALOHA#3, and A3 refers to ALOHA #4. ALOHA#5 is no longer in
ALOHA#1’s 1-on-1 intercom pairing list.
2. If ALOHA#3 pairs with ALOHA#5 after paired with ALOHA#1 for 1-on-1
intercom, at this point for ALOHA#3, A1 refers to ALOHA#5 and A2 refers
to ALOHA#1.
8.2 1-on-1 Intercom Usage
Paired ALOHA headsets for 1-on-1 intercom can start intercom transmission in
two modes:
Manual mode and VOX mode.
The default mode when ALOHA headsets are shipped is manual mode. When
ALOHA is powered on, the user will hear “VOX sensitivity Manual Mode”
8.2.1 Manual Mode for starting 1-on-1 Intercom:
The ALOHA headsets already paired for 1-on-1 intercom can use [A] to select
one of the three headsets recorded in the list, as follows:
Press [A] once to start 1-on-1 intercom with A1; press [A] twice to start 1-on-1
intercom with A2; and press [A] three times to start 1-on-1 intercom with A3.

Example:
For 5 ALHOA headsets:
1. ALHOA#1 first pairs with ALHOA#5, then pairs with ALOHA#4, ALOHA#3
and ALOHA#2, all for 1-on-1 intercom pairing.
At this point, for ALHOA#1, A1 refers to ALHOA#2, A2 refers to
ALOHA#3, and A3 refers to ALOHA #4. ALOHA#5 is no longer in
ALOHA#1’s 1-on-1 intercom pairing list.
2. If ALOHA#3 pairs with ALOHA#5 after paired with ALOHA#1 for 1-on-1
intercom, at this point for ALOHA#3, A1 refers to ALOHA#5 and A2 refers
to ALOHA#1.
For ALHOA#1 to start 1-on-1 intercom with ALHOA#3, press [A] rapidly
twice. ALHOA#1 will hear voice notification “Comm A2 selected”.
At this point, if ALOHA#3 is within intercom distance of ALOHA#1 and is
currently engaged in cell phone or intercom with another headset,
ALOHA#1 will hear the voice notification "Party occupied", and ALOHA#3
will hear “Missed A1 page”.
If ALOHA#3 is within intercom distance of ALOHA#1 and is not engaged in
cell phone or intercom with another headset, both ALOHA#1 and
ALOHA#3 will hear double tone and start the intercom.
Table of contents
Other Bikecomm Headset manuals


