Bikes At Work 32ADX User manual
Bicycle Trailer Assembly Instructions
Tools Required
two 7/16” x 1/2” wrenches (included)
a 7/16” ratchet (not included) will speed
assembly
Before you Begin
Layout and identify all the parts before
starting
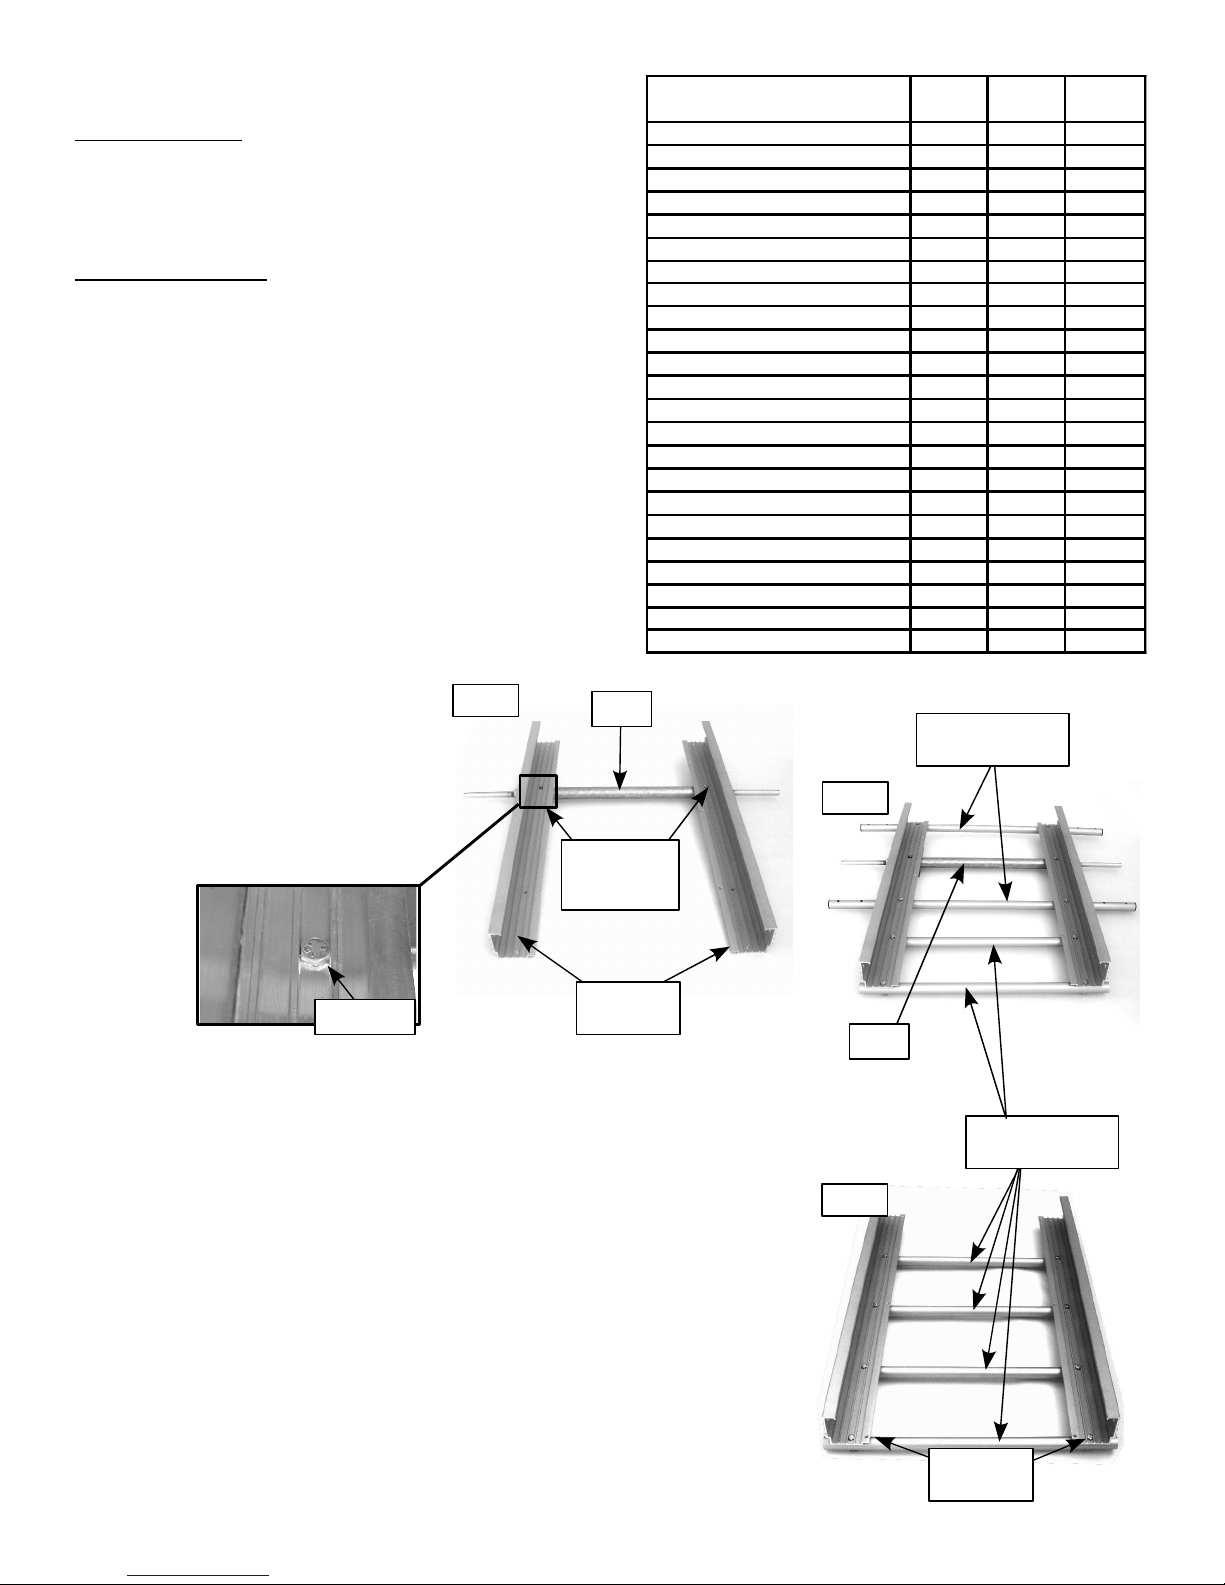
2 Attach the two long crossmembers (they have black caps on the
ends) and two short crossmembers to the channel segments
using 1-1/2” bolts and nuts as shown in Fig 2 The hex head of
the bolt should fit down between the ribs of the channel as
noted above
NOTE: Do not tighten the nuts on the crossmembers too tightly
or you will crimp the tubing!
1 Find the two 7-hole channel
segments These will have an
“A” (for axle) stamped on the
bottom of them Attach the
axle to the channel segments
using two 1-3/4” bolts and
locknuts as shown in Fig 1,
using the holes adjacent to the
A's The hex head of the bolt
should fit down between the
ribs of the channel as shown in
the detail
3 Model 32A skip to Step 6 Connect each
remaining pair of channel segments together
with four short crossmembers and eight
1-1/2” bolts and nuts The heads of the bolts
should fit between the ribs of the channel as
shown above
“A”
stamped
under here
Fig 1
Fig 2
Fig 3
axle
bolt head
long
crossmembers
axle
channel
segments
channel
segments
Parts List
channel segments-7 holes/leg 2 2 2
channel segments-5 holes/leg 0 2 4
axle 1 1 1
2 2 2
2 6 10
splice plates 0 2 4
3 3 3
corner brackets 4 4 4
1 1 1
square spacers 2 2 2
2 2 2
4 4 4
1/4” x 2-3/4” hex head bolts 4 4 4
1/4” x 1-3/4” hex head bolts 2 2 2
1/4” x 1-1/2” hex head bolts 20 28 36
1/4” x 3/4” hex head bolts 4 16 28
1/4” U-bolts & plain hex nuts 4 8 12
30 54 78
wheels, fenders 4 4 4
wheel spacers, pins, reflectors 2 2 2
hitch and mounting hardware 1 1 1
large round washers 4 12 20
elastic shock cords 2 4 6
Model
32ADX
Model
64ADX
Model
96ADX
long round crossmembers
short round crossmembers
rectangular crossmembers
towbar
towbar U-bolts, saddles, plates
5/16” locknuts
1/4” nylon insert locknuts
short
crossmembers
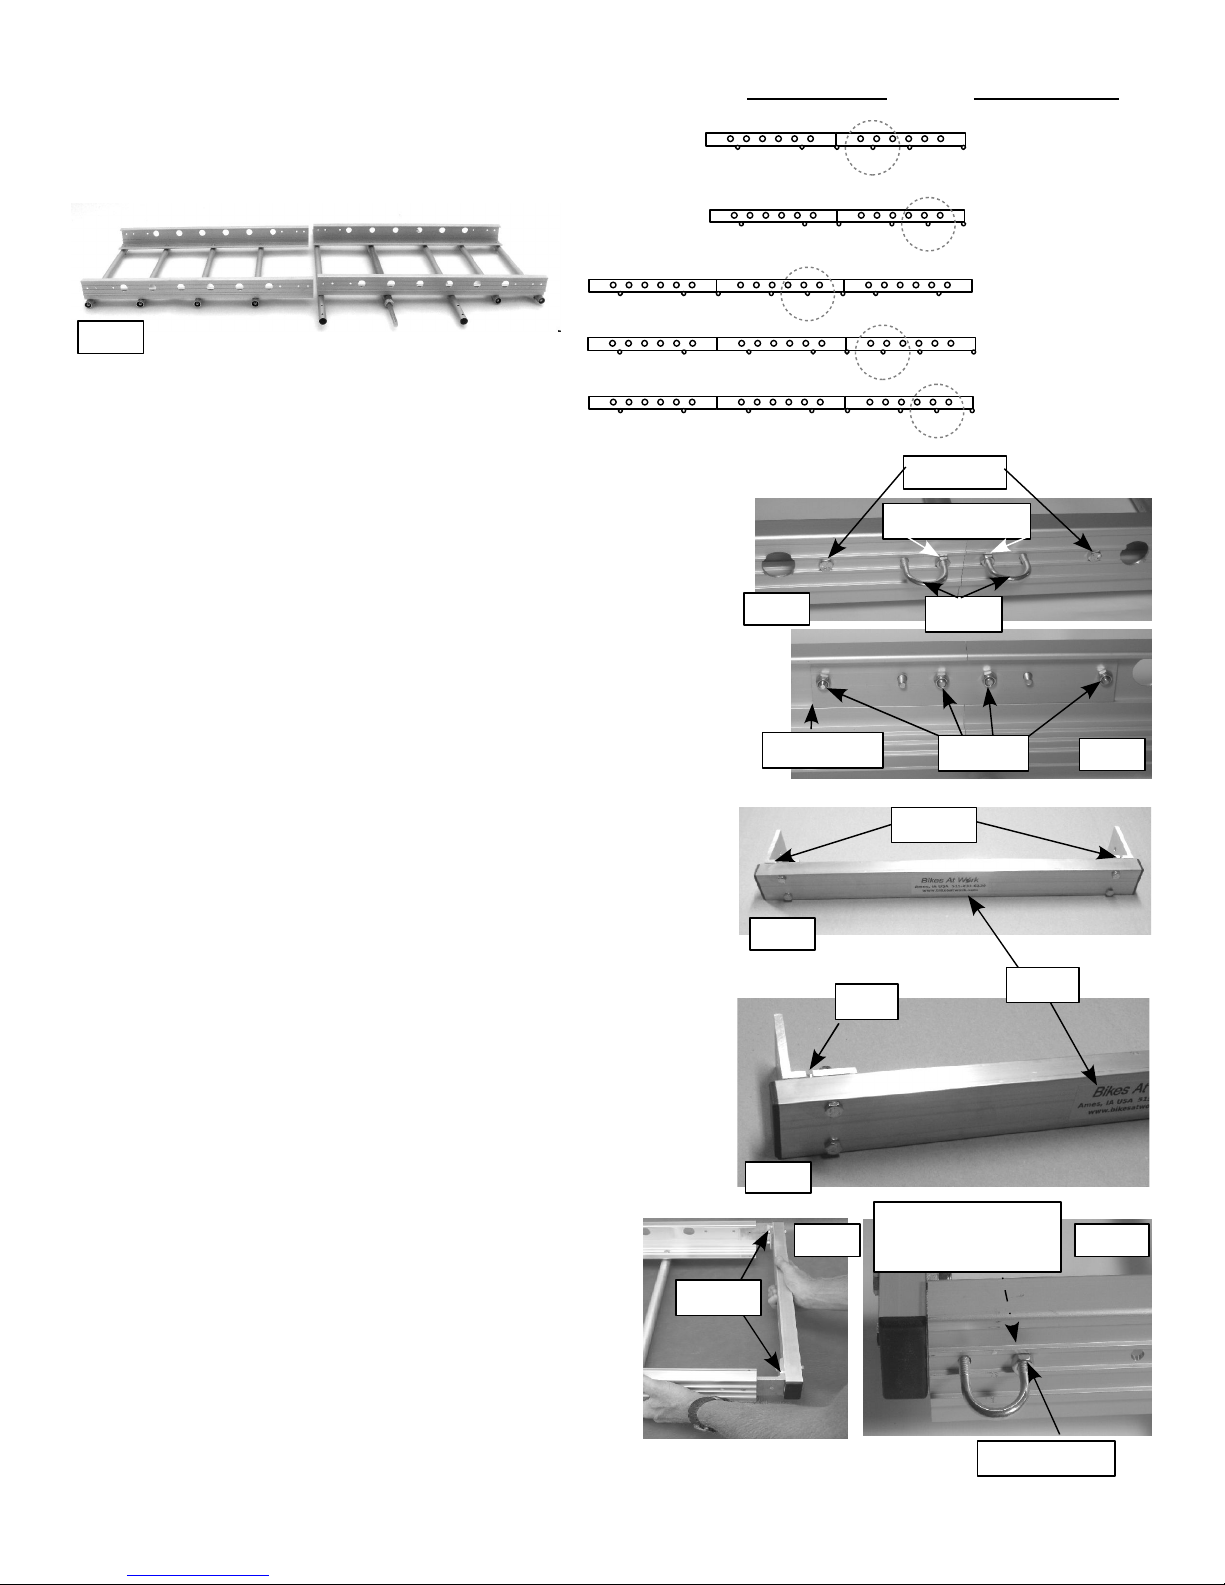
6 Mount the corner brackets on the rectangular rear
crossmember (the one with the sticker) using four 1-1/2”
bolts and locknuts (Fig 7) Note that the brackets are
mounted on the side opposite the sticker, and that the
notches on the brackets should point up in the same
direction as the BAW sticker (Fig 8) Fig 7
Fig 8
notch
notches
sticker
7 Slide the rear crossmember assembly into the
channel on the rear of the trailer as shown in
Fig 9 and secure using two U-bolts and two
locknuts (Fig 10) Install a locknut only on the
leg of the U-bolt with an exterior nut
Fig 9
notches
Fig 10
plain hex nut
4 Choose the preferred configuration for your trailer
from the table at right Lay out the completed
frame section assemblies end-to-end to match
your chosen configuration as seen in Fig 4 axle
axle
axle
axle
axle
< 5'6” long
(1 67m)
5' 6”- 9'
(1 67-2 74m)
< 8' long
(2 44 m)
8' - 12'
(2 44 - 3 66m)
12' - 15'
(3 66m - 4 57m)
length of load:configuration:
Fig 4
5 Connect the channel segments with splice plates and 3/4”
bolts in the outermost holes as shown in Fig 5 & 6 Thread
a plain hex nut on one leg of each U-bolt until the nut is
three-quarters up the leg of the U-bolt Insert two U-bolts
in the remaining holes as shown in Fig 5 Thread four
locknuts on the ends of the 3/4” bolts and on the ends of
the U-bolts that have a nut on the outside (Fig 6) Hold
the head of the bolts in the slot on the outside of the
channel with your thumb as you tighten the locknuts
securely
3/4” bolts
Fig 5
locknuts Fig 6
U-bolts
plain hex nuts
splice plate
locknut (on inside
of channel)
8 Assemble the two remaining rectangular
crossmembers and corner brackets
together using four 2-3/4” bolts and
locknuts like was done in Step 6 Mount the
assembly to the front end of the trailer
frame using the same technique as Step 7
9 Mount the U-bolts and saddles over the short end of the towbar (Fig 11) Make sure the bend in the
towbar is in the orientation as shown relative to the clamps Place the two square spacers on top of the
front rectangular crossmembers and put the U-bolts through the holes in the spacers and below the
rectangular crossmembers (Fig 12) Mount the two short plates over the ends of the U-bolts (Fig 13)
Center the towbar mounting assembly on the front crossmembers, then secure in place with 5/16”
locknuts on the ends of the U-bolts (Fig 14) With the towbar horizontal (parallel to the trailer frame),
tighten the nuts as tightly as you can to keep it from slipping When installed, the towbar should
resemble Fig 15
10 Attach the four fenders to the fender crossmembers
using 1-1/2” bolts and nuts (Fig 16) and tighten
completely
11 Place the wheels over the ends of the axle (Fig 17)
Fig 11 Fig 12 Fig 13
Fig 14 Fig 15
Fig 16
Fig 17
saddles
bend
U-bolts
towbar
5/16”
locknuts
plates
square
spacers

12 Place a wheel spacer over each end of the axle and insert a pin through the hole to secure it in place
as shown in Fig 18 The loop of each pin should snap over the axle when fully installed as shown in
Fig 19
13 Fasten a washer to each end of the short
crossmembers using a 3/4” bolt (Fig 20)
This will prevent the shock cords from
slipping off the end when they are used
as tie-down points
15 You can now hang your shock cords
around the crossmembers for easy access
as shown in Fig 22
The trailer assembly is complete See the:
Hitch Mounting Instructions,
Attaching the Trailer to the Hitch Instructions, and
Tips for Using Your Trailer Safely
and you'll soon be ready to use your new trailer
For minimal rolling resistance, check tire pressure before each
use
Fig 20
Fig 18 Fig 19
14 Mount the self-adhesive reflectors on the
rear trailer crossmember as shown in
Fig 21
Fig 22
Fig 21
reflectors
insert
straight
end of pin
from top
spacer
pin partly
inserted pin fully
inserted
This manual suits for next models
2
Popular Bicycle Accessories manuals by other brands


Specialized
Specialized Elite CylcoComputer user manual

Sigma
Sigma BC 16.16 manual

Playcore
Playcore Dero Setbacks installation instructions

VDO Cyclecomputing
VDO Cyclecomputing x3dw instruction manual

Cateye
Cateye RAPID X2 manual

buratti meccanica
buratti meccanica Clorofilla Trail Use and maintenance manual


