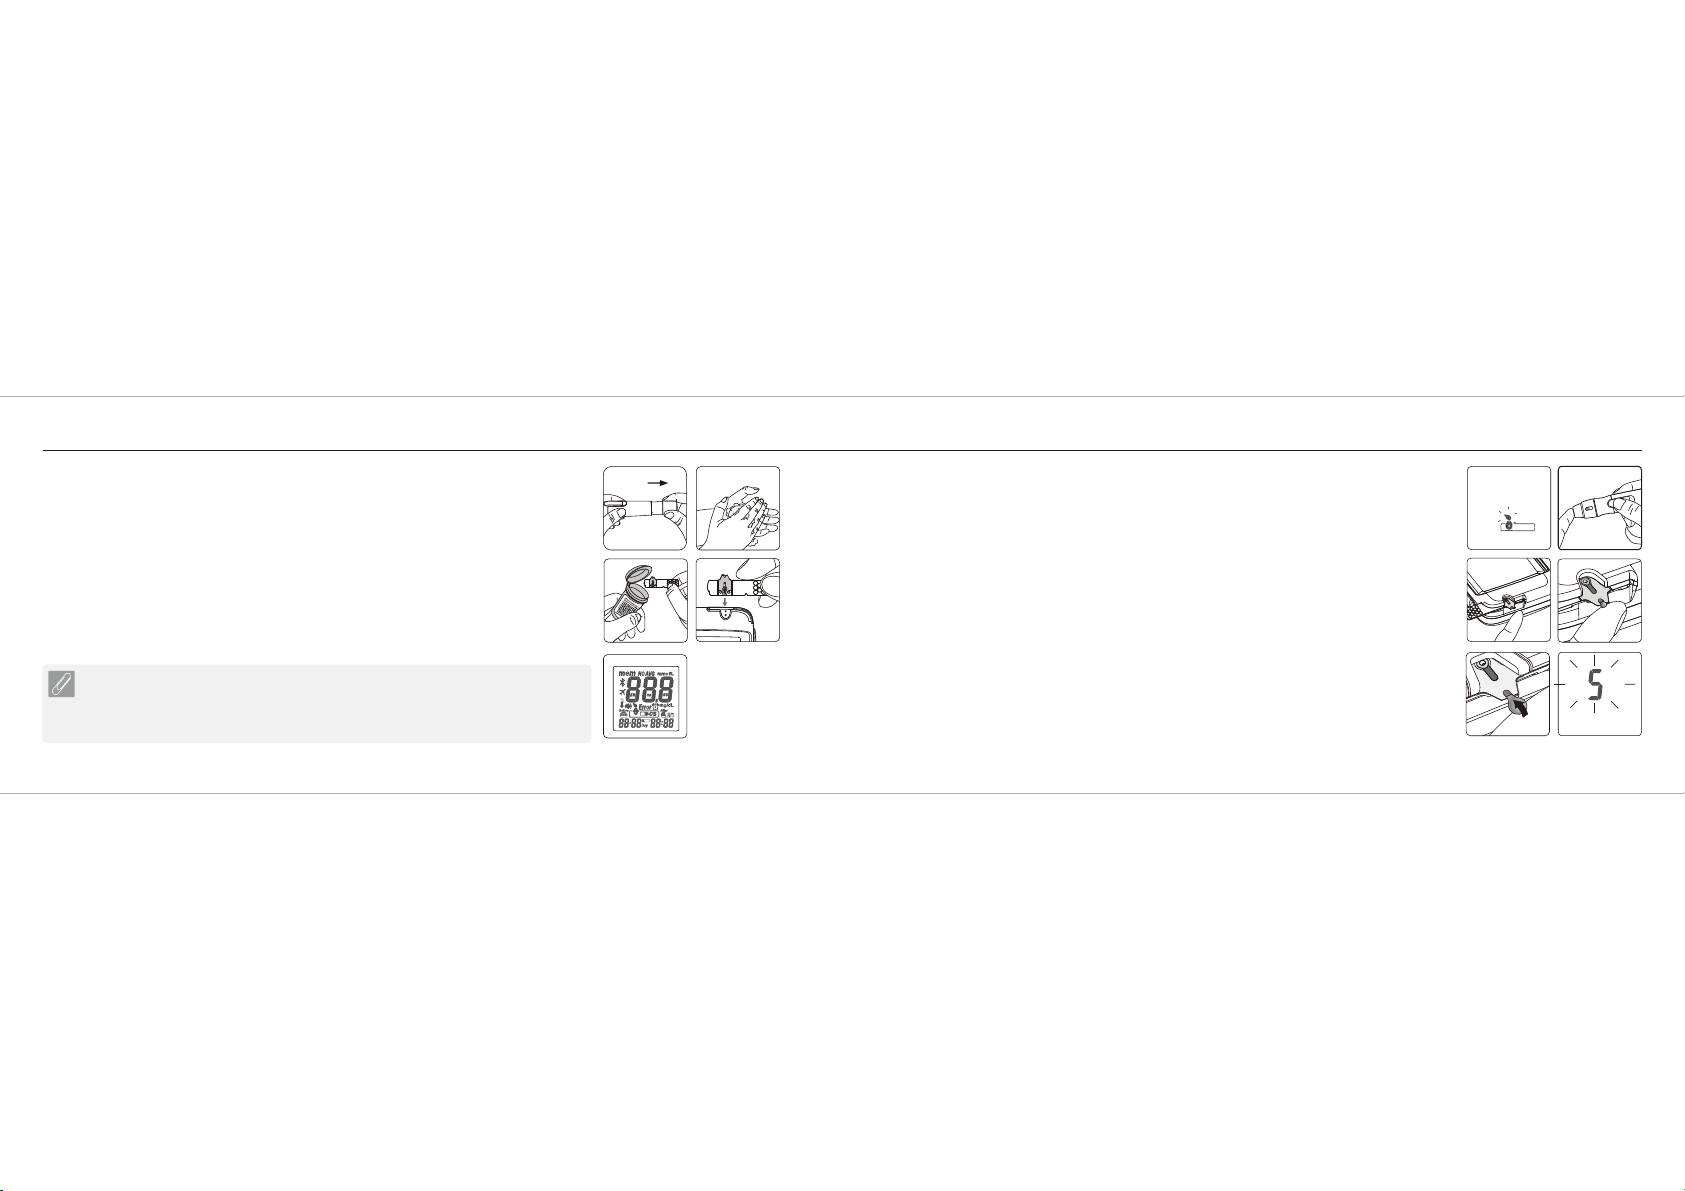
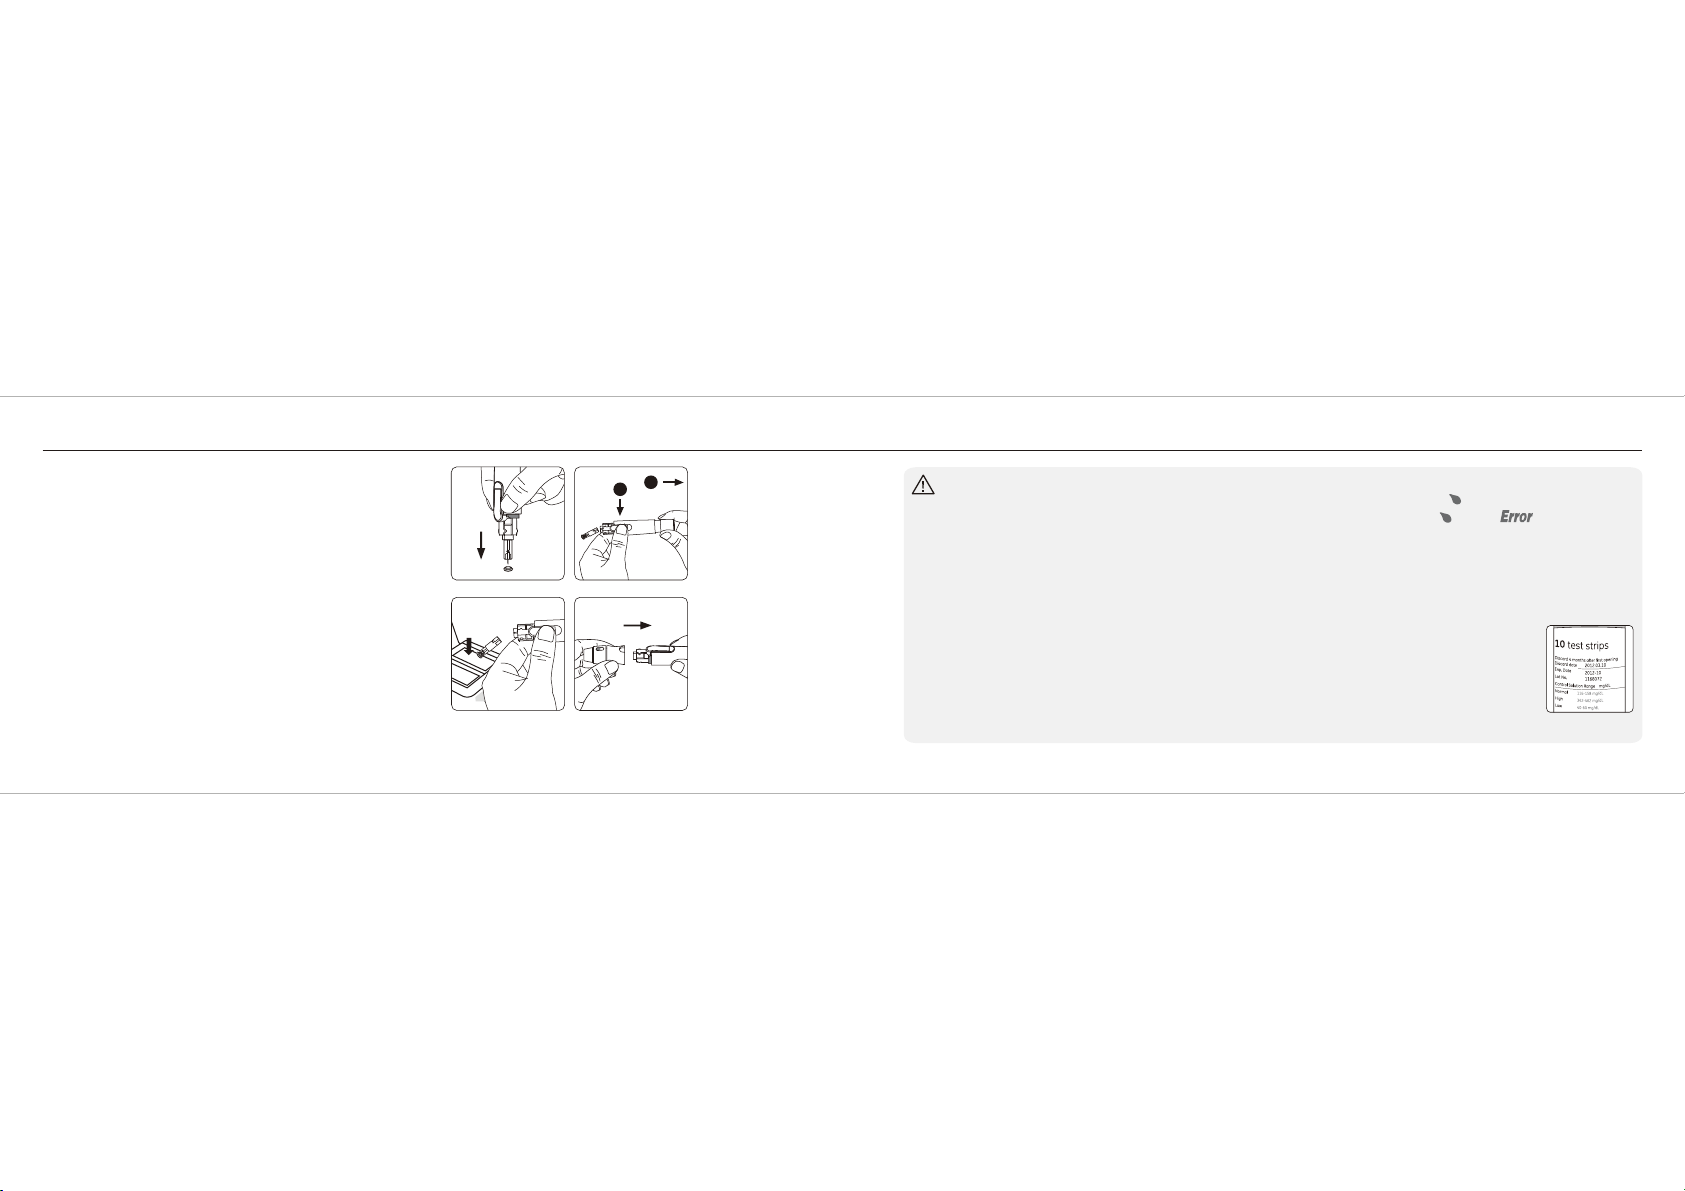
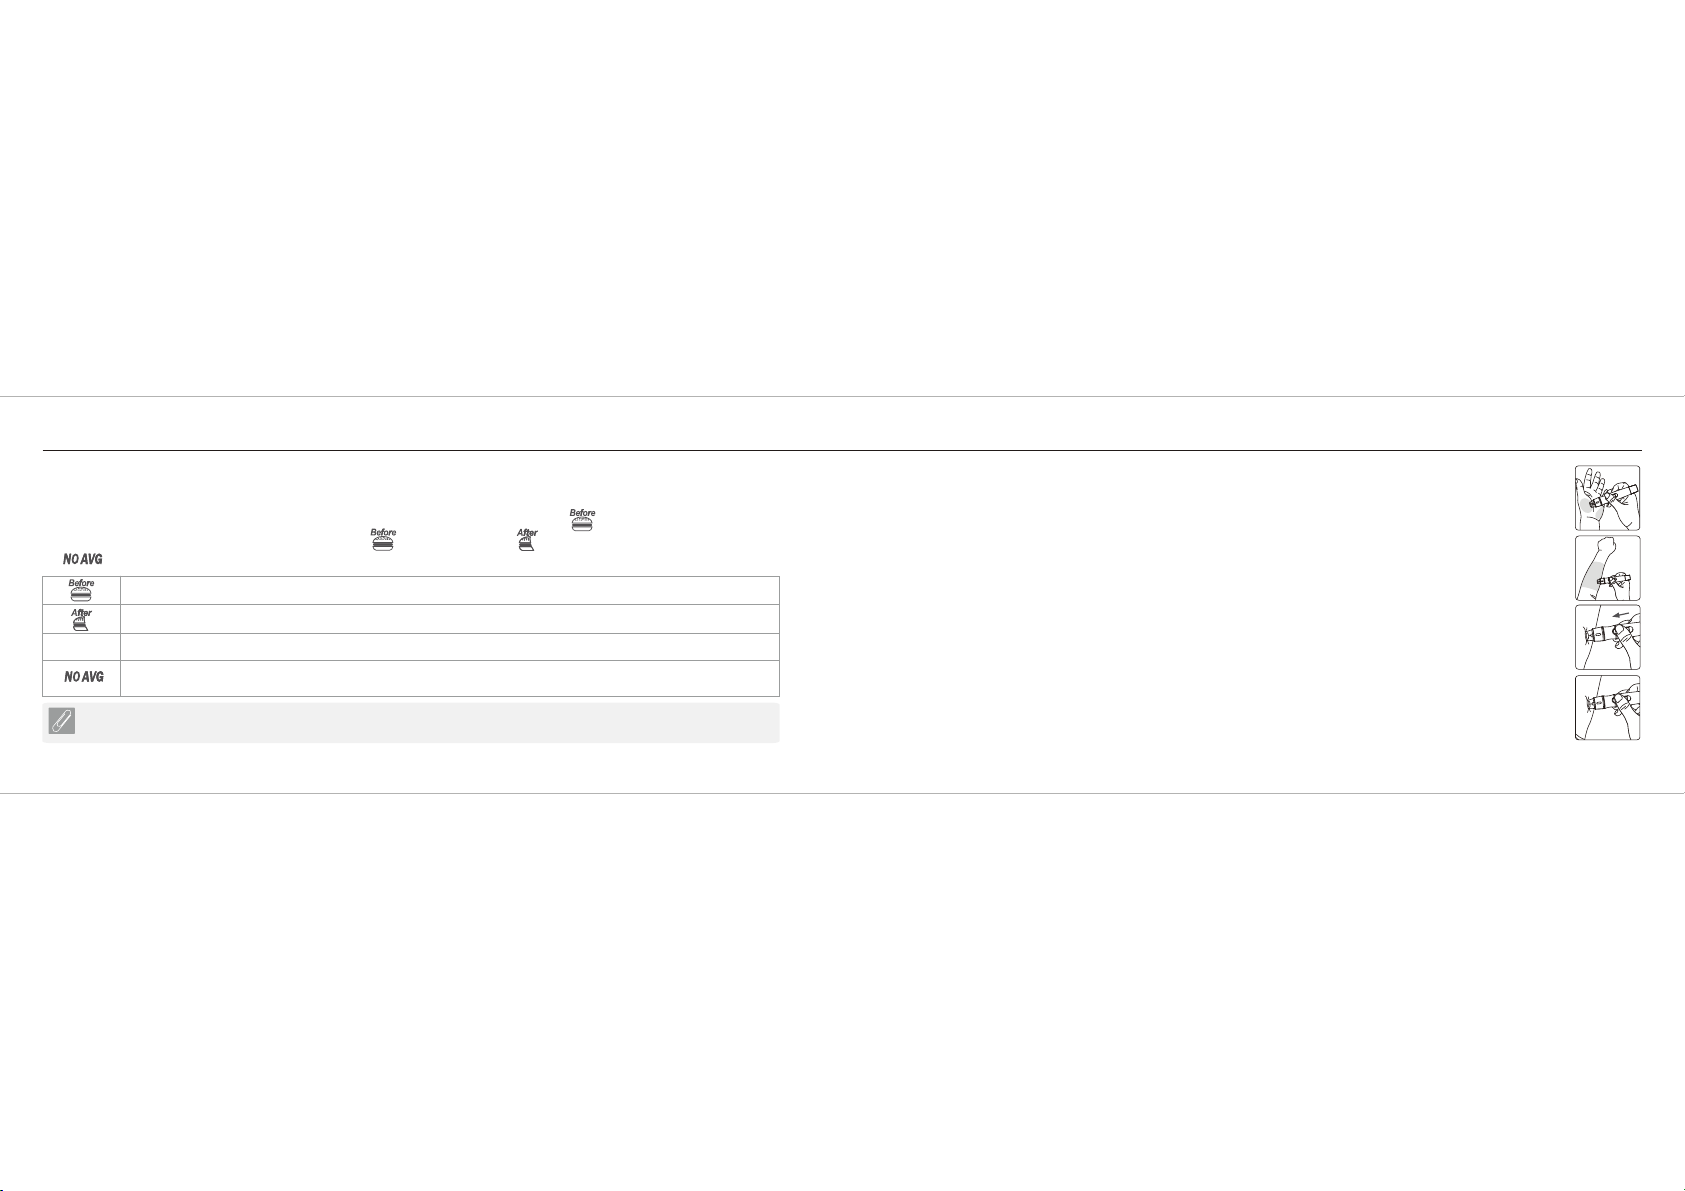
BIONIME GM232C User manual


Other BIONIME Blood Glucose Meter manuals

BIONIME
BIONIME RIGHTEST Max User manual

BIONIME
BIONIME GM232B User manual

BIONIME
BIONIME RIGHTEST GM280B User manual

BIONIME
BIONIME Rightest GM100 User manual

BIONIME
BIONIME Rightest GS260 User manual

BIONIME
BIONIME Rightest GM720 User manual

BIONIME
BIONIME GM232B User manual

BIONIME
BIONIME Rightest GM210 User manual

BIONIME
BIONIME GM550 User manual

BIONIME
BIONIME rightest GM700S User manual

BIONIME
BIONIME Rightest ALPHA User manual

BIONIME
BIONIME Rightest GM100 User manual

BIONIME
BIONIME Rightest Elsa User manual

BIONIME
BIONIME RIGHTEST GT333 User manual

BIONIME
BIONIME GM550 User manual

BIONIME
BIONIME RIGHTEST GM280B User manual

BIONIME
BIONIME Rightest GT100 User manual

BIONIME
BIONIME rightest GM260 User manual

BIONIME
BIONIME GM550 User manual

BIONIME
BIONIME Rightest GM300 User manual


