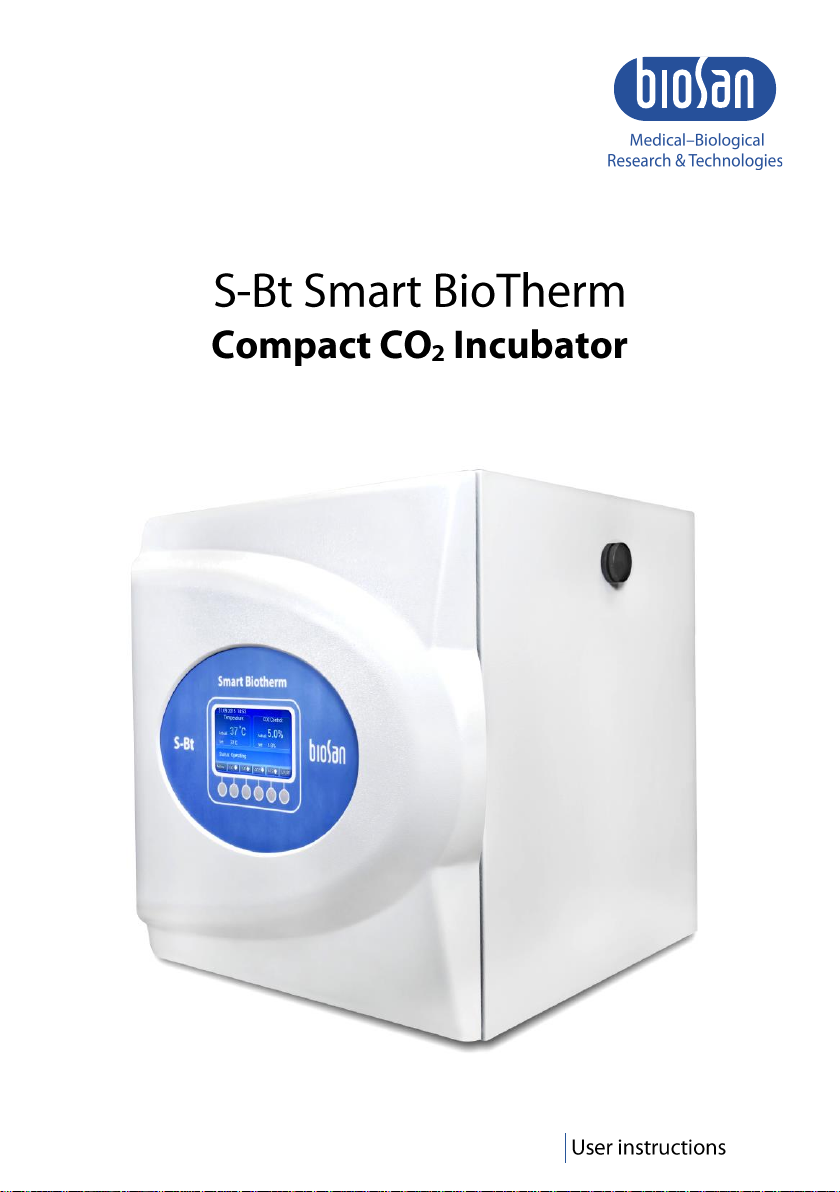
Biosan S-Bt Smart Biotherm V.1AW User manual


2

3
Contents
1. About this edition of user instructions.......................................................................4
2. Safety precautions ...................................................................................................4
3. General information..................................................................................................6
4. Getting started..........................................................................................................7
5. Operation .................................................................................................................8
6. Fault diagnostics ....................................................................................................12
7. Specifications.........................................................................................................13
8. Ordering information ..............................................................................................14
9. Care and maintenance...........................................................................................15
10. Warranty.................................................................................................................17
11. Notes......................................................................................................................18
12. EU Declaration of conformity..................................................................................19

4
1. About this edition of user instructions
The current edition of the user instructions applies to the following models and ver-
sions of Compact CO2Incubator:
S-Bt Smart Biotherm........ V.1AW, V.1AE
2. Safety precautions
Caution! Make sure you have fully read and understood the present Manual
before using the equipment. Please pay special attention to sections
marked by this symbol.
Caution! Biohazard. Incubator operations should comply criteria of biosafety in
microbiological and biomedical laboratories, according to working
material biohazard level.
Caution! Incubator is equipped with an audible signal to draw attention to sen-
sor data and warnings. Please follow the information on display. Error
and alarm descriptions can be found in the Fault Diagnostics sec-
tion.
Caution! The incubator contains a source of UV radiation. Do not start the unit
without the cover of the UV recirculator. Exposure to UV light is harm-
ful and can cause damage to unprotected eyes and skin.
GENERAL SAFETY
The protection provided can be ineffective if the operation of the appliance does not
comply with the manufacturer's requirements.
Save the unit from shocks and falling.
Do not use the unit if it has visible mechanical damage.
Store and transport the unit at ambient temperatures between -20°C and +60°C and
maximum relative humidity of 80%.
After transportation or storage and before connecting it to the electric circuit, keep the
unit under room temperature for 2-3 hrs.
Before using any cleaning or decontamination methods except those recommended
by the manufacturer, check with the manufacturer that the proposed method will not
damage the equipment.
Do not make modifications in design of the unit.
When handling hazardous substances, follow the instructions contained in the safety
data sheets for the individual substances that are used and observe the relevant ac-
cident prevention regulations.
Follow respective safety datasheet when installing and handling the CO2reservoir.

5
ELECTRICAL SAFETY
Connect only to the mains with voltage corresponding to that on the serial number
label.
Do not plug the unit into an ungrounded power socket, and do not use an ungrounded
extension lead.
Ensure that the power plug is easily accessible during use.
Disconnect the unit from the mains before moving.
If liquid penetrates into the unit, disconnect it from the mains and have it checked by
a repair and maintenance technician.
Do not operate the unit in premises where condensation can form. Operating condi-
tions of the unit are defined in the Specifications section.
DURING OPERATION
Do not operate the unit in environments with aggressive or explosive chemical mix-
tures. Please contact manufacturer for possible operation of the unit in specific at-
mospheres.
Do not operate the unit if it is faulty or has been installed incorrectly.
Do not use outside laboratory rooms.
BIOLOGICAL SAFETY
The user is responsible to carry out appropriate decontamination if hazardous mate-
rial spills on or penetrates into the equipment.
The user is responsible for decontaminate the unit before its decommissioning and
utilization.

6
3. General information
S-Bt Smart BioTherm is designed for work in the areas of cell biology (operations
with animal cell cultures and tissues), molecular biology (DNA/RNA reaction analysis, hy-
bridization reactions), biotechnology (synthesis of target proteins and other molecules) and
immunology (synthesis of antibodies and other proteins of immune system).
Unit provides a six-sided heating: the heating elements are located on the walls and
on the door, thus providing excellent uniform temperature distribution, regardless of external
factors, such as ambient temperature and positioning of the device.
Built-in infrared CO2sensor allows accurate control of the CO2level. The sensor
makes measurement non-sensitive to changes in temperature and humidity inside the incu-
bator. The chamber is made of stainless steel with smoothed seams to minimize contami-
nation and to facilitate cleaning.
S-Bt is equipped with a UV air recirculation system —1 UV lamp and a fan are
mounted behind the rear wall, providing decontamination of the working volume.
A convenient access port is built in the wall of the incubator for easy output of wire
sensors or devices' installed inside. The access port is heated independently to prevent for-
mation of condensate.
Unit is equipped with error tracing and alarm systems, which significantly lower po-
tential risks during operation.
Unit is equipped with a "black box" system that records temperature, humidity and
CO2levels as well as statuses for door opening, UV lamp, fan and errors to the inner
memory.
Bluetooth connection to PC is available.
Application areas:
Cell biology: operations with animal cell cultures and tissues
Molecular biology: DNA/RNA reaction analysis, hybridization reactions
Biotechnology: synthesis of target proteins and other molecules
Immunology: synthesis of antibodies and other proteins of immune system
Features:
Six-sided heating provides uniform distribution of the temperature inside the chamber
Infrared CO2sensor, non-sensitive to temperature and humidity changes
UV recirculation system for decontamination cycles
Bluetooth data transfer to PC
"Black box" parameter logging system
Error tracing and alarm system
Separately heated sealable port for chamber access for cables.

7
4. Getting started
4.1. Unpacking. Remove packing materials carefully and retain them for future shipment
or storage of the unit. Examine the unit carefully for any damage incurred during
transit. The warranty does notcover in-transit damage.Warranty covers only the units
transported in the original package.
Caution! Due to the high weight of the unit, its unpacking and installing must
be carried out by two persons.
4.2. Complete set. Package contents:
4.2.1. Standard set:
- S-Bt Smart Biotherm, Compact CO2Incubator..............................................1 pce.
- Power cable ....................................................................................................1 pce.
- Hydrophobic filter.............................................................................................2 pcs.
- Shelves ............................................................................................................3 pcs.
- Shelf rack.........................................................................................................1 pce.
- Water pan with lid...............................................................................................1 set
- Access port seal (foamed PE)........................................................................10 pcs.
- Calibration protocol .........................................................................................1 copy
- Operating manual, declaration of conformity ..................................................1 copy
4.2.2. Optional accessories:
- Bluetooth dongle and control/logging software for PC ..............................on request
- Additional shelves.....................................................................................on request
- Incubator stacking device..........................................................................on request
4.3. Setup.
- Position the incubator on a stable platform that can support the weight of the incuba-
tor and materials inside the incubator. Ensure access to an appropriate mains outlet.
- Connect the power cable to the socket on the rear panel ofthe unit. Check that power
switches and power plug are easily accessible.
- Locate the unit away from doors and windows and heating and air conditioning ducts.
Drafts or direct sunshine can affect thermal processes and cause condensation.
4.4. Before starting operations for the first time.
- Attach the hydrophobic filter to inlets on the top side of the rear panel. Pay attention
that “IN” marking must be facing right side when viewing the incubator from the front.
- Use 75% alcohol solution or any other decontaminating agent to clean the inner sur-
faces of the incubator and the water pan with lid.
- Switch on the recirculator for half an hour in an empty incubator to decontaminate air
in the incubator. To switch on the UV recirculator, see 5.9.2.1.
4.5. CO2tank requirements and setup.
- This incubator is designed for CO2gas only. Connecting any other gas can result in
a hazardous condition. The incubator works with food grade CO2or better rated. Do
not use a tank with siphon tube, the incubator can be damaged by liquid CO2.
- A two-stage reductor installation is mandatory. Pressure in the output must not be
higher than 1.0 bar. Follow gas supplier instructions on installing reductors and
valves. Gas inlet on the incubator is a 3/8” barb fitting, marked Supply port. Secure
the tube with appropriate clamps and check all connections for leaks. Gas flow should
be set at 6 l/min.
Caution! Pressure higher than 1.0 bar can damage the unit!

8
5. Operation
5.1. Connect the incubator to a grounded mains outlet. Turn the power switch on the rear
of the incubator to position I(on).
5.2. After initialization, display (fig. 1) shows:
Top line: current date and time, relative humidity inside, UV lamp icon (when the
lamp is on);
Middle left: temperature panel, current temperature in larger font, set temperature in
smaller;
Middle right: CO2control panel, current percentage in larger font, set percentage in
smaller;
Bottom line: Status bar, UV recirculator timer (when the lamp is on);
Bottom 22
5.3. Installing shelves. Open the front door and theinner glass door. Position the shelves
according to your specification.
5.4. Humidity delivery. Pull out the water pan located on the bottom of the inner camera
and fill with distilled water (~80% of volume). With the set temperature of +37°C,
incubator reaches 90% of relative humidity in 8-12 hours.
Note. When operating the incubator at 90% of relative humidity for longer
than 48 hours, humidity sensor values can have a measurement er-
ror.
5.5. Using access port. In order to use the access port, unscrew the cap of the access
port located on the right side of the incubator. Insert necessary cable through the port
and into the supplied PE seal. Install the seal into the access port. The access port
is individually heated to compensate for temperature loss and condensate formation.
5.6. Setting temperature. Using t°C ( and t°C ( buttons, set the necessary temperature.
5.7. Setting CO2levels. Using CO2( and CO2( buttons, set the necessary level of CO2.
Attention! Please make sure that the CO2tank is attached correctly, see 4.4.
Note. After reaching temperatures higher than 50°C, CO2level measure-
ment accuracy does not conform to specifications.
5.8. Locking the buttons. Lock button locks the use of all the buttons under the display
until Lock button is pressed again.
5.9. Incubator menu (fig. 2). Menu button opens incubator’s menu. Use Down and Up
buttons to navigate and Enter button to select. While browsing in the menu, select
the topmost Quit option in order to return to the previous level. Option GetID shows
the serial ID and name of the incubator.
5.9.1. Timer (fig. 3). In this submenu user can set UV decontamination timer and Auto UV
timer.
5.9.1.1UV Decontamination Timer. Timer parameters are set in HH:MM format. After set-
ting the timer, UV lamp automatically switches on, main working screen displays an
UV indicator (fig. 4, top right). After set time has passed, the UV lamp automatically
switches off. A timer is seen on the main working screen (fig. 4, bottom right). To
manually switch the lamp off, select the Turn Off UV option from the submenu.

9
5.9.1.2Auto UV Timer. Each time after closing the door, UV lamp automatically switches
on. After time set under this menu option has passed or the door was opened, the
UV lamp automatically switches off.
Note. A turned on UV lamp can rise the temperature above the set point:
the longer UV lamp stays on, the faster temperature jumps above the
set point. Use this feature at your own discretion.
Attention! UV recirculation should be used for decontamination cycle while set-
ting up and after operation, see 9.3.
Note. In case of manual UV lamp switch off, timer continues working de-
spite the UV lamp is off.
5.9.2. Date & Time (fig. 5). To set date and time in this submenu, press Enter button to
select the parameter, then Down and Up buttons to change the value and Enter
button to confirm changes.
5.9.3. Service (fig. 6). This submenu has available options Current Errors and Settings.
5.9.3.1Current Errors (fig. 7). This option allows user to view and reset the list of active
errors. See 6.3, for a list of possible errors.
5.9.3.2Settings (fig. 8). User can access the Alarm Settings and Auto Lock Delayoptions.
Alarm Settings (fig. 9). User can set the alarm settings based on values of temper-
ature, CO2level, and relative humidity. All alarms are working on the following princi-
ple, temperature taken as an example:
If Tact < Tthr.low or Tact > Tthr.high for tdelay minutes, then an alarm will be triggered.
Where Tact is the actual temperature inside the incubator, Tthr.low is the lower threshold
limit value, Tthr.high is the higher threshold limit value and tdelay is the time delay in
minutes. Time delay is used in order to avoid false triggering of the alarms. CO2level
and relative humidity alarms are operated using the same principle.
Auto Lock Delay (fig. 10). After being idle for several minutes, the incubator locks
the buttons (except the Lock button). This timer allows changing the idle time.
5.9.4. Active Alarms (fig. 11). This option allows user to view and reset the list of active
alarms. See 6.5, for a list of possible alarms.
5.9.5. Data Logger (fig. 12). Data logger features following options: View Plot T(t), View
Plot CO2%(t), View Plot RH%(t), Clear log, Logger on/off.
5.9.5.1All View Plot options use following interface. Figure 13 shows the temperature plot
in relation to time.
Use Left and Right buttons to move the plot along the x axis
Use Up and Down buttons to move the plot along the y axis.
Use <-xx-> button to choose the x axis navigational step. Available scales are 15
minutes, 1 hour, 1 day, 1 week and 1 month.
5.9.5.2Clear Log button clears the logger’s data.
5.9.5.3Logger On/Off button triggers the automatic logging of the data.
5.9.5.4Memory write location indicator. When the data logger uses up all allocated
memory, it begins overwriting data from beginning. 100% of memory is used up in
approximately 1 month.
5.10. After stabilization of temperature and CO2level, open the doors and load the materi-
als in the incubator according to methodological recommendations.
Note. If the door is left open for more than a minute, a short signal is
sounded every 20 seconds until the door is closed.

10
5.11. Incubator air sampling. Sampling can be performed through the capped opening
marked as “air sample”, on the rear access panel.
5.12. To turn off the incubator, set the power switch into position О(off) and detach the
mains plug from the mains outlet.
5.13. Operation recommendations.
The incubator saves settings even when switched off.
During decontamination treat every visible surface and door. When working with po-
tentially pathogenic material, use more potent decontamination method. See 9.3.
Figure 1. Working screen Figure 2. Menu
Figure 3. Timer menu Figure 4. UV recirculator is on
Figure 5. Date & Time menu Figure 6. Service menu

11
Figure 7. Current Errors menu Figure 8. Settings menu
Figure 9. Alarm Settings menu Figure 10. Auto Lock Delay menu
Figure 11. Active Alarms menu Figure 12. Data Logger
Figure 13. Temperature plot

12
6. Fault diagnostics
6.1. The incubator is equipped with an alarm and error system. Active alarms and errors
are appropriately indicated on the display. Alarms and errors are followed by sound
signal that can be turned off by pressing any button.
6.2. Error text can be found in Menu > Service > Settings > Current Errors, see 5.9.4.
Choose Errors Reset and confirm to reset the error list.
6.3. Error list can be found in the table below:
CO2 Sens. Err.
CO2sensor error
Back
Back temperature sensor error
Bott.
Bottom temperature sensor error
Left
Left wall temperature sensor error
Right
Right wall temperature sensor error
Up
Ceiling temperature sensor error
Door
Door temperature sensor error
Chmb.
Temperature sensor in the incubator error
Perimeter T.Sens. Err.
Perimeter temperature sensor error
Recirc. Lamp Err.
UV lamp error
Communication Err.
Error connecting to power board
CO2.Sens.Comm.Err.
Error connecting to CO2sensor board
6.4. Alarm text can be found in Menu > Active Alarms. Choose Alarms Reset and con-
firm to reset the alarm list.
6.5. Alarms list can be found in the table below. Alarms are adjustable, see 5.9.3.2.
Temp. High Alarm
Adjustable limit is exceeded.
Temp. Low Alarm
CO2High Alarm
CO2Low Alarm
Low Humidity
UV Lamp Hours > 9000h
Lamp reaches end of lifetime. Consider a replacement.

13
7. Specifications
The unit is designed for operation in cold rooms, incubators (except CO2incubators)
and closed laboratory rooms at ambient temperature from +4°C to +40°C in a non-condens-
ing atmosphere and maximum relative humidity 80% for temperatures up to 31°C decreasing
linearly to 50% relative humidity at 40°C.
Biosan is committed to a continuous programme of improvement and reserves the
right to alter design and specifications of the equipment without additional notice.
7.1. Chamber Material...............................................................................Stainless Steel
7.2. Temperature setting range................................................................+25°C ... +60°C
7.3. Temperature resolution.....................................................................................0.1°C
7.4. Temperature stability.......................................................................................±0.1°C
7.5. Temperature uniformity @37°C.......................................................................±0.3°C
7.6. Working volume ............................................................................................46 litres
7.7. Number of shelves ......................................................................6 max. (3 provided)
7.8. Outer door...............................................................................Heated, made of steel
7.9. Inner door....................................Lockable glass with UV protection film, 4 mil clear
7.10. Relative humidity.................................................................................>90% @ 37°C
7.11. Humidity delivery..................................................................water pan by ventilation
7.12. CO2control range
1
............................................................................ 0 - 20% ± 0.2%
7.13. CO2sensor.................................................................................Infrared CO2sensor
7.14. Display ............................................................................................................TFT 5’’
7.15. Recirculation system..................................................1 × 6 W UV lamp (TUV G6T5)
7.16. Recirculation system radiation type....................................................... UV (254 nm)
7.17. Average UV lamp life time...............................................................................9000 h
7.18. Data transfer ............................................................................. Wireless (Bluetooth)
7.19. Internal data memory ......................................................1 month of nonstop logging
7.20. Access port ........................................................................1 (ø 26 mm with PE seal)
7.21. Dimensions (L×W×H)....................................................................400×410×580 mm
7.22. Work area (each shelf)..........................................................................350х350 mm
7.23. Alarms.................Over-heating/cooling, CO2leakage, Humidity loss, UV lamp error
7.24. Working voltage ........................................................................230/115 V, 50/60 Hz
7.25. Weight
2
...........................................................................................................37.7 kg
1
At temperatures below 50°C
2
Accurate within ±10%

14
8. Ordering information
8.1. Models and versions available:
Model
Version
Description
Catalogue number
S-Bt Smart Biotherm,
Compact CO2Incubator
V.1AW
230 V, 50/60 Hz
BS-010425-A01
V.1AE
120 V, 50/60 Hz
8.2. To inquire about or order the optional accessories or the replacement parts, contact
Biosan or your local Biosan representative.
8.3. Optional accessories:
Optional accessories
Catalogue number
Shelf
BS-010425-AK
Shelf rack
on request
Bluetooth dongle and software for PC
BS-010425-BK
Incubator stacking device
BS-010425-CK
8.4. Replacement parts:
Replacement parts
Catalogue number
Hydrophobic filter with tubing
BS-010425-S01
Water pan and lid
BS-010425-S02
Access port seal, foamed PE
BS-010425-S03

15
9. Care and maintenance
9.1. If the unit requires maintenance, disconnect the unit from the mains and contact Bio-
san or your local Biosan representative.
9.2. All maintenance and repair operations must be performed only by qualified and spe-
cially trained personnel.
9.3. Regular service schedule
9.3.1. After operation. Switch on the recirculator running for 1 to 3 hours in an empty incu-
bator to decontaminate air in the incubator. To switch on the UV recirculator, see
5.9.1.1. After decontamination, slightly open the incubator doors –UV lamp has been
known to produce reactive oxygen species in minor concentrations.
9.3.2. Monthly (more frequently, if necessary):
- Rub the inner surfaces, water pan with lid and shelves of the incubator with 75%
ethanol solution or other acceptably disinfectant such as sodium hypochlorite solu-
tion, and allow them to dry.
- After cleaning the glass door, rinse with water and dry the excess to avoid streaks
and possible corrosion.
- Remove dust with moist cloth piece from outer incubator surface, especially front
screen and upper part of the incubator.
- Visually check the hydrophobic filter (see 9.7) and access port seal (see 9.8) and
replace if necessary.
- Check the accuracy of CO2sensor system by measuring the actual CO2concentra-
tion with a reference CO2analyser.
9.4. Expendable materials:
Name
Description
UV lamp
TUV 6W, T5, G6
Fuse
M 3.15 A
Hydrophobic filter
CO2filter
Hydrophobic filter set
Filter and tubing
Access port seal
Made from foamed PE
9.5. Fuse replacement. Disconnect incubator from the mains. Disconnect power plug
from power socket. Open fuse holder. Check and replace if necessary, 230 V –М
3.15 А (type М- time lag: Medium).

16
9.6. UV lamp replacement. Average lifetime of the supplied UV lamps is 9000 h. Re-
placement is necessary after lamp stops functioning or at the end of manufacturer
specified lifetime. Only the persons who have completed special training are allowed
to perform lamp replacement. UV lamp operation lifetime is checked and tracked by
the incubator.
9.7. Hydrophobic filter replacement. The filter should be replaced when it becomes
glazed with dirt or with sucked liquid. Maximum time of use is 30 days. We recom-
mend replacing the filter immediately after full cycle of maintenance.
Close the CO2valve on the gas reservoir and turn off the unit. Remove the filter from
the tubing. Insert a new filter into the socket and tighten it. Pay attention that “IN”
marking must be facing right side when viewing the incubator from the front.
9.8. Access port seal replacement. To prevent possible contamination of access port
seal (made from foamed polyethylene) and to ensure complete sealing of the port,
the seal should be replaced after 30 days from the first operation.
9.9. Calibration. Recalibrate the unit after the date on calibration certificate. To complete
the process, contact Biosan or your local Biosan representative.

17
10. Warranty
10.1. The Manufacturer guarantees the compliance of the unit with the requirements of
Specifications, provided the Customer follows the operation, storage and transporta-
tion instructions.
10.2. The warranted service life of the unit from the date of its delivery to the Customer is
24 months. For extended warranty, see 10.5.
10.3. Warranty covers only the units transported in the original package.
10.4. If any manufacturing defects are discovered by the Customer, an unsatisfactory
equipment report shall be compiled, certified and sent to the local distributor address.
To obtain the claim form, visit Technical support page on our website at link below.
10.5. Extended warranty. For S-Bt Smart Biotherm, the Smart class model, extended war-
ranty is a paid service. Contact your local Biosan representative or our service de-
partment through the Technical support section on our website at the link below.
10.6. Description of the classes of our products is available in the Product class descrip-
tion section on our website at the link below.
Technical support
Product class description
biosan.lv/en/support
biosan.lv/classes-en
10.7. The following information will be required in the event that warranty or post-warranty
service comes necessary. Complete the table below and retain for your records.
Model
S-Bt Smart Biotherm, Compact CO2Incubator
Serial number
Date of sale

18
11. Notes

19
12. EU Declaration of conformity
Unit type Compact CO2incubator
Models S-Bt Smart BioTherm
Serial number 14 digits styled XXXXXXYYMMZZZZ, where XXXXXX is
model code, YY and MM –year and month of production,
ZZZZ –unit number.
Manufacturer SIA BIOSAN
Latvia, LV-1067, Riga, Ratsupites str. 7/2
Applicable Directives EMC Directive 2014/30/EU
LVD Directive 2014/35/EU
RoHS2 2011/65/EU
WEEE 2012/19/EU
Applicable Standards LVS EN 61326-1: 2013
Electrical equipment for measurement, control and
laboratory use. EMC requirements. General requirements.
LVS EN 61010-1: 2011
Safety requirements for electrical equipment for
measurement, control, and laboratory use. General
requirements.
LVS EN 61010-2-010: 2015
Particular requirements for laboratory equipment for the
heating of materials.
We declare that this product conforms to the requirements of the above Directives
____________________ ____________________
Signature Signature
Svetlana Bankovska Aleksandr Shevchik
Managing director Engineer of R&D
____________________ ____________________
Date Date

Biosan SIA
Ratsupites 7, build.2, Riga, LV-1067, Latvia
Phone: +371 67426137 Fax: +371 67428101
http://www.biosan.lv
Edition 1.01 –February of 2019
This manual suits for next models
1
Table of contents
Other Biosan Accessories manuals
Popular Accessories manuals by other brands

Dimango
Dimango HS3600 Instruction guide

Sunjoy
Sunjoy 80QT Assembly and care instructions

Townshend Computer Tools
Townshend Computer Tools DAT-Link user manual

ekwb
ekwb EK-FC980 GTX TF5 R2.0 Backplate Installation and mounting manuals

Britax
Britax STEELCRAFT SA8343 SERIES manual

Elkay
Elkay LZ Series Installation, care & use manual