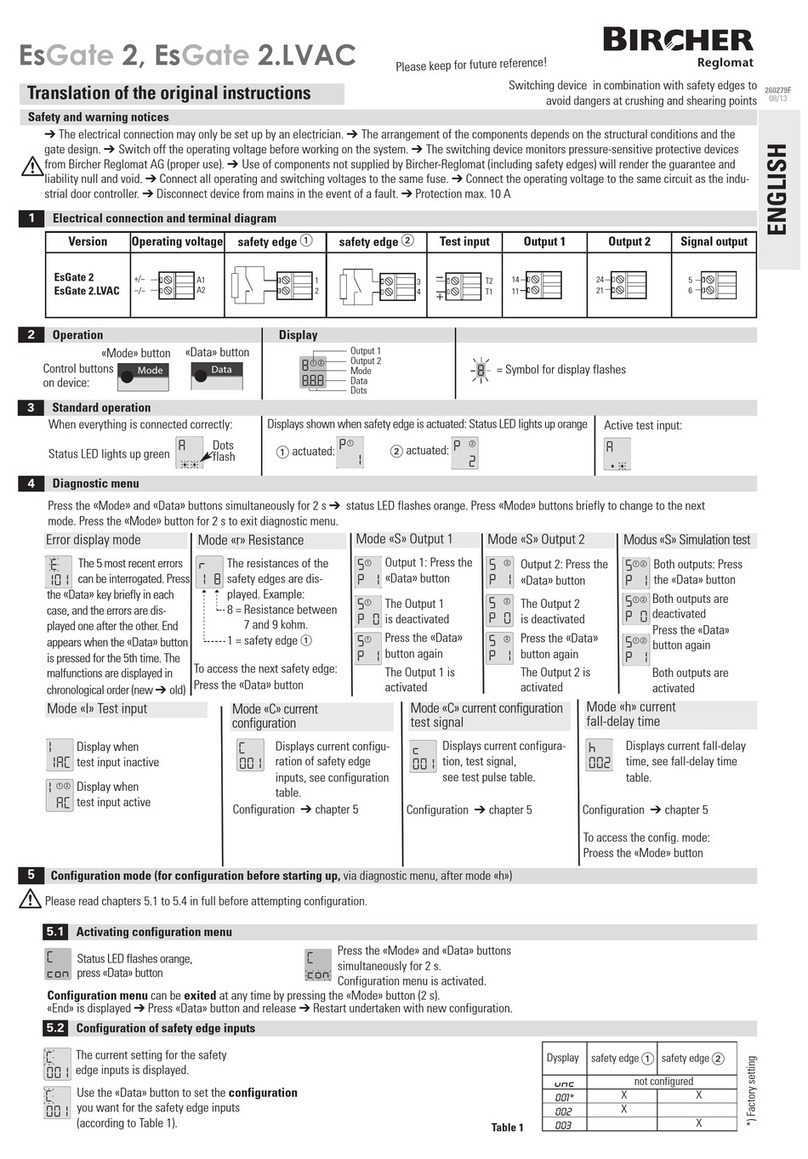
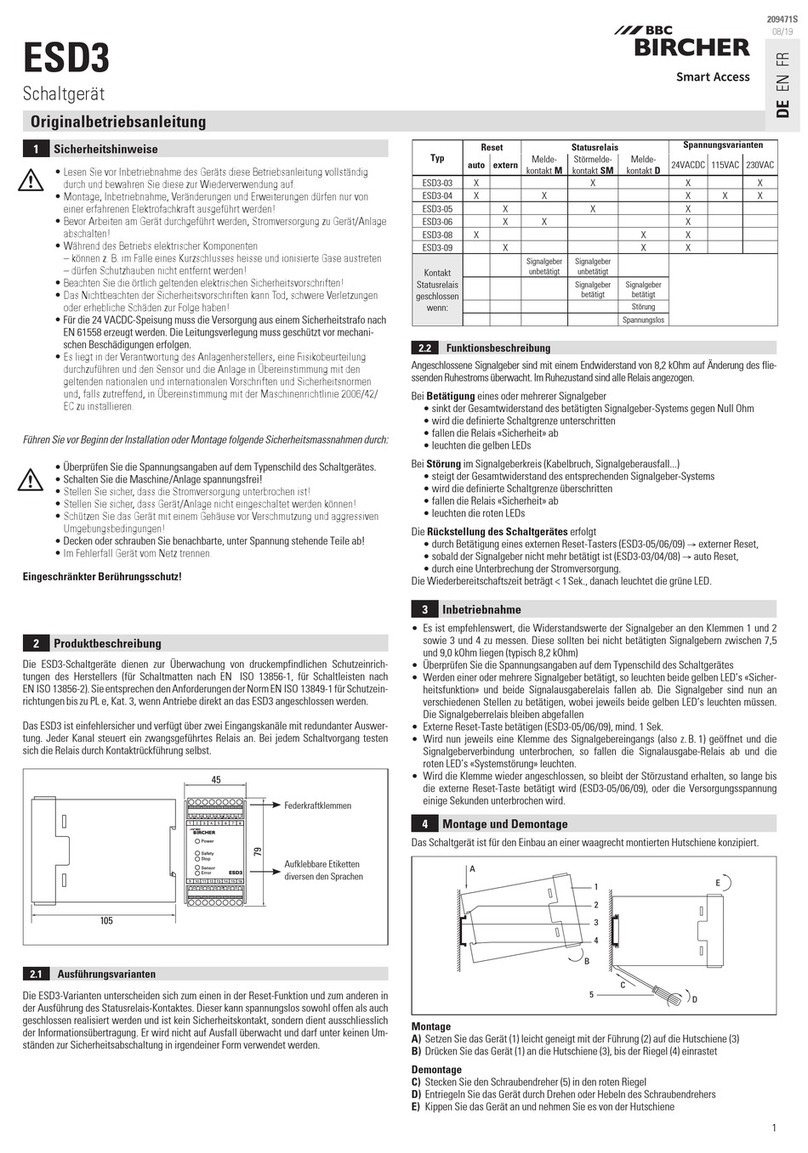
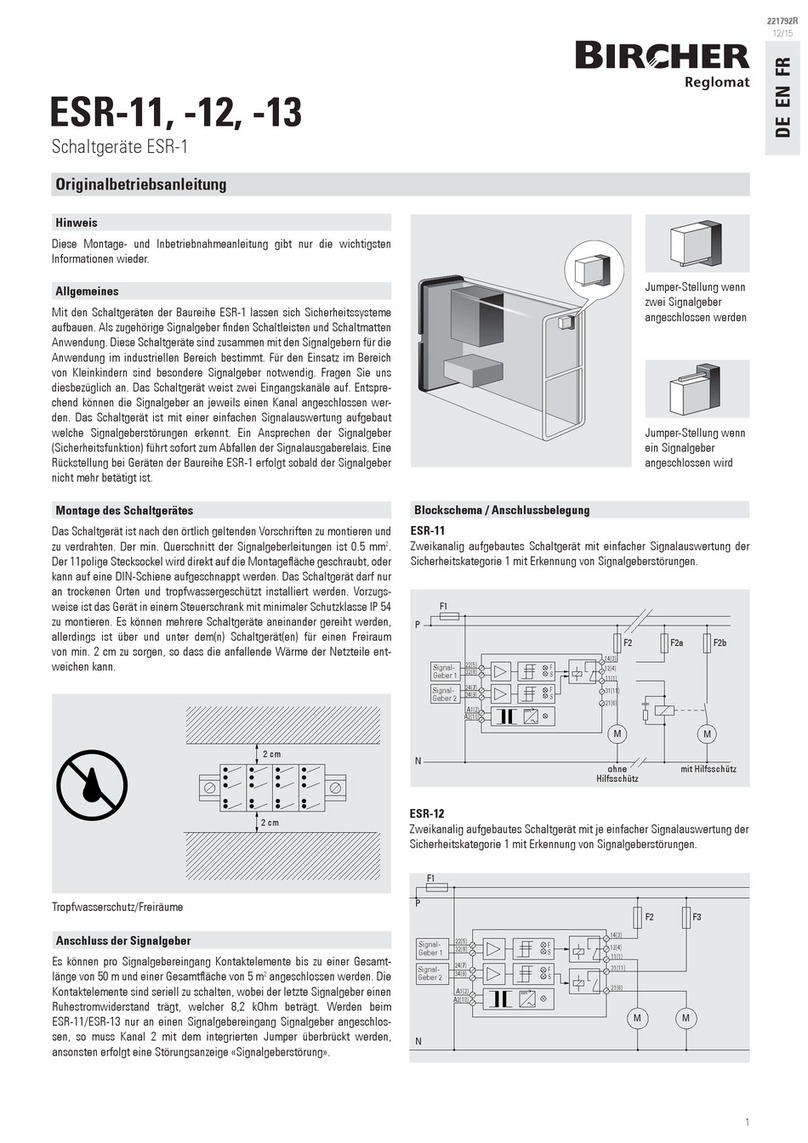
Bircher AirMission 2.W2 User manual

1
12 3 4 5
ON
80 45
121
162
178
AirMission 2.W2
56
95
73
Ø 3
31
45
70.5
10
Ø 4.5
57.6
1 7. 0
15.5
65.7
Wireless signal transmission system with integrated pressure-wave- and wicket-door-switch
Translation of the original operating instruction
General
1Safety instructions
2Common application
2.1 Industrial door with wicket door
ENGLISH
347973D
10/17
Warning: Switch off the operating voltage before working on the system.
Only trained, qualied personnel may perform installation and startup.
The unit may only be opened and repaired by Bircher Reglomat employ-
ees. The switching unit may only be used to protect against dangers at
crushing and shearing points and at automatic industrial doors (intended
use). National and international regulations on industrial door safety must
be complied with. Always consider the safety functions of your applica-
DIP switch 5 ON
tion as a whole, never just in relation to one individual section of the
system. A risk assessment in advance is mandatory. The installer is re-
sponsible for installing the industrial door system correctly.
i
It is recommended to change the batteries every year.
i
Transmitter 1 Transmitter 2 Receiver
Receiver Transmitter 1 input 1 corresponds to receiver output 1
Transmitter 2 input 1 corresponds to receiver output 2
Transmitter 1
Receiver
Pressure wave safety edge
Magnet
Transmitter 2
Drilling template enclosed

2
3 4 5 6 7 8
8K28K2
3 4 5 6 7 8
8K28K2
1 2 3 4 5
ON
ON
3 4 5 6 7 8
➔
➔
➔
3
2x
➔
➔
➔
Klick
OK?
3V
LITHIUM
CR 2032
+
3V
LITHIUM
CR 2032
+
i
+
3V
LITHIUM
CR 2032
+
3V
LITHIUM
CR 2032
+
< 5 mm
OK?
+/~ –/~
12/24V
AC/DC
1 2 3 4 5 6 7 8 9 10 11 12
VCC1
VCC2
COM1
OUT1
SOUT1
COM2
OUT2
SOUT2
TST1
COM.T1
TST2
COM.T2
Relay contacts are shown unpowered
3.2 Wiring: Outputs and control
3.3 DIP switches
3Receiver
4Installation
Gate control with
NC input
Gate control with
8.2 kOhm input
Gate control with
NO input
Remove jumper(s)
3.1 Wiring: Power supply and test inputs
1 2 3 4 5
ON *Safety application
Standard
according to EN ISO 13849-1
1 2 3 4 5
ON Inactive ➔ no safety function
(Radio connection is not monitored)
12 3 4 5
ON Transmission frequency
869.85 MHz:
Set DIP-switch before pairing trans-
mitter – receiver
12 3 4 5
ON *868.95 MHz:
Set DIP-switch before pairing trans-
mitter – receiver
12 34 5
ON Test input type
NC
activated = contact open
12 34 5
ON *NO
activated = contact closed
12 3 45
ON Automatic frequency adjustment
Active
Used only in case of severe radio disturbance
12 3 45
ON *Inactive
12 3 4 5
ON *Programming (2 transmitters)
Transmitter 1 corresponds to output 1
Transmitter 2 corresponds to output 2
12 3 4 5
ON Programming (for 2-channel transmitter)
Not for this application
*= factory setting
1.
Receiver:
Check DIP switch
settings
8.
Programming (Chapter 5.1):
Pair both transmitters with
receiver
3.
Receiver:
Turn on power supply
2.
Install and wire
receiver,
see 3
14.
Mount trans-
mitter 2 and
magnet
15.
Note: Distance magnet /
transmitter when doors are
closed
16.
System test:
Open and close wicket
door
4.
Transmitter 1
Open
5.
Carefully pull
out PCB
6.
Insert both batteries
(front/back)
7.
Transmitter 2
Insert
batteries
12.
Connect safety edge with
transmitter (rubber hose)
13.
System test:
Activate safety edge
9.
Transmitter 1
Slide PCB back into
housing
10.
Install
transmitter
11.
Close
Click
The distance between the trans-
mitter and receiver and additional
transmitters must be at least 1 m
correctly
positioned
Wicket
door
Test Common

3
i
12 3 4 5
ON
2x
2x
2x
12345
ON SAB
SELECT
REL 1 REL21
R2R1
1 2
12345
ON SAB
SELECT
REL 1 REL21
R2R1
1 2
4x
5.1 Pair transmitter with receiver
5Programming
2.
On the trans-
mitter 1
On the receiver
On the receiver
Press and
release button
Beep Wait 2 beeps
10 sec.
4.
On the trans-
mitter 2
Press and release button Beep Wait
10 sec.
3.
On the receiver
Beep BeepRelease button Release buttonLED lights up LED ashesPress button
> 1.5 sec.
> 1.5 sec.
Press
button
> 1.5 sec.
1.
On the receiver
Press button Beep
> 1.5 sec.
> 1.5 sec.
LED lights up
Release button
The distance between the transmit-
ter and receiver and additional
transmitters must be at least 1 m
2 beeps
Code saved
LED goes out
Code saved
LED goes out
Beep
Beep
BeepBeep
BeepBeep
Beep
6Operation
6.1 Receiver LED indicators
6.2 Warning indicator for low battery voltage
Object
detected
LED off
Wicket doors
open
LED off
LED 1 LED 2
Signal sounds each time a transmitter is activated
Safety OK Wicket doors
closed
LED on LED on
Low Battery
Beep
Channel 1:
Channel 2:
On the receiver
Press button Hold down button Short beepsBeep WaitRelease button 2x beeps
Memory cleared
on all transmitters
Beep 10 sec.
> 1.5 sec.
Beep
> 3 sec.
Beep Beep Beep
10 sec.
5.2 Transmitter reset (clear pairing between transmitters and receiver)
5.3 Memory full
Beep

4
Bircher Reglomat AG, Wiesengasse 20, CH-8222 Beringen, www.bircher-reglomat.com
OK?
Klick
➔
➔
2x 2x
3V
LITHIUM
CR 2032
+
3V
LITHIUM
CR 2032
+
3V
LITHIUM
CR 2032
+
3V
LITHIUM
CR 2032
+
9Technical data
10 Standards EN ISO 13856-2 and EN ISO 13849-1
11 EC-Declaration of Conformity
12 Contact / Danish seller
System
Frequency bands 868.95 MHz & 869.85 MHz
Range Under optimum conditions up to 100 m
Pollution degree 2
Working temperature -20 °C to +55 °C
Transmitter 1
Battery power 2 x Lithium 3 V Type CR2032
Power consumption Transmitting: 17 mA, standby: 16 µA
Protection class IEC 60529 IP54
The AirMission 2.W2 system itself is not able to check the function of the
sensor in response to a pressure pulse. In accordance with D 3.5 of
EN ISO 13856-2, a pressure wave system according to category 2 of
EN ISO 13849-1 can be designed by checking the pressure wave system
Manufacturer: Bircher Reglomat AG, Wiesengasse 20, CH-8222 Beringen
Following directives have been observed: MD 2006/42/EC, RoHS 2011/65/EU, RED 2014/53/EU
EC type-examination certicate: E6945
Notied inspection centre: Suva, technology division, SCESp 0008, ID no. 1246
Product variants: AirMission 2.x
Receiver
Supply voltage 12/24 V ACDC
Transmitter memory 7 + 7
Output 2 relays 24 V, 0.5 A; micro-disconnection 1B
Power consumption 0.5 W @ 12 V; 1.2 W @ 24 V
Test signal input 12/24 VACDC
Protection class IEC 60529 IP55
Transmitter 2
Battery power 2x Lithium 3 V type CR2032
Power consumption Transmitting: 17 mA, standby: 16 µA
Protection class IEC 60529 IP65
at every machine cycle. On the doors and gates the door/gate control
must assure this function in order to satisfy category 2. (➔Figure A.4 of
EN ISO 13856-2).
7Battery change
1.
Open
2.
Carefully pull out
PCB
3.
Replace both
batteries
(front/back)
4.
Slide PCB back into
housing
5.
Close
6.
System test:
Activate safety edge
Click
7.2 Transmitter 2
7.1 Transmitter 1
8Alternative installation with double sided tape (not supplied)
Caution!
Ensure surfaces are clean, dry and free of dust and grease.
Double-sided
adhesive tape
View of transmitter 2
(bottom)
Swissdoor ApS, Stenhuggervej 2, DK-5471 Soendersoe, Denmark, Tel.: +45 86 28 00 00, [email protected], www.swissdoor.dk
Other Bircher Switch manuals
Popular Switch manuals by other brands
Analog way
Analog way SmartEdge STE100 user manual
TRENDnet
TRENDnet TI-PG102 Quick installation guide
Exsys
Exsys EX-1183HMVS manual
Belden
Belden HIRSCHMANN IT MAMMUTHUS MTS2948X-6Q-A user manual
Nolatron
Nolatron TB-2SR owner's manual
Brocade Communications Systems
Brocade Communications Systems FCX Series Step-by-step guide
