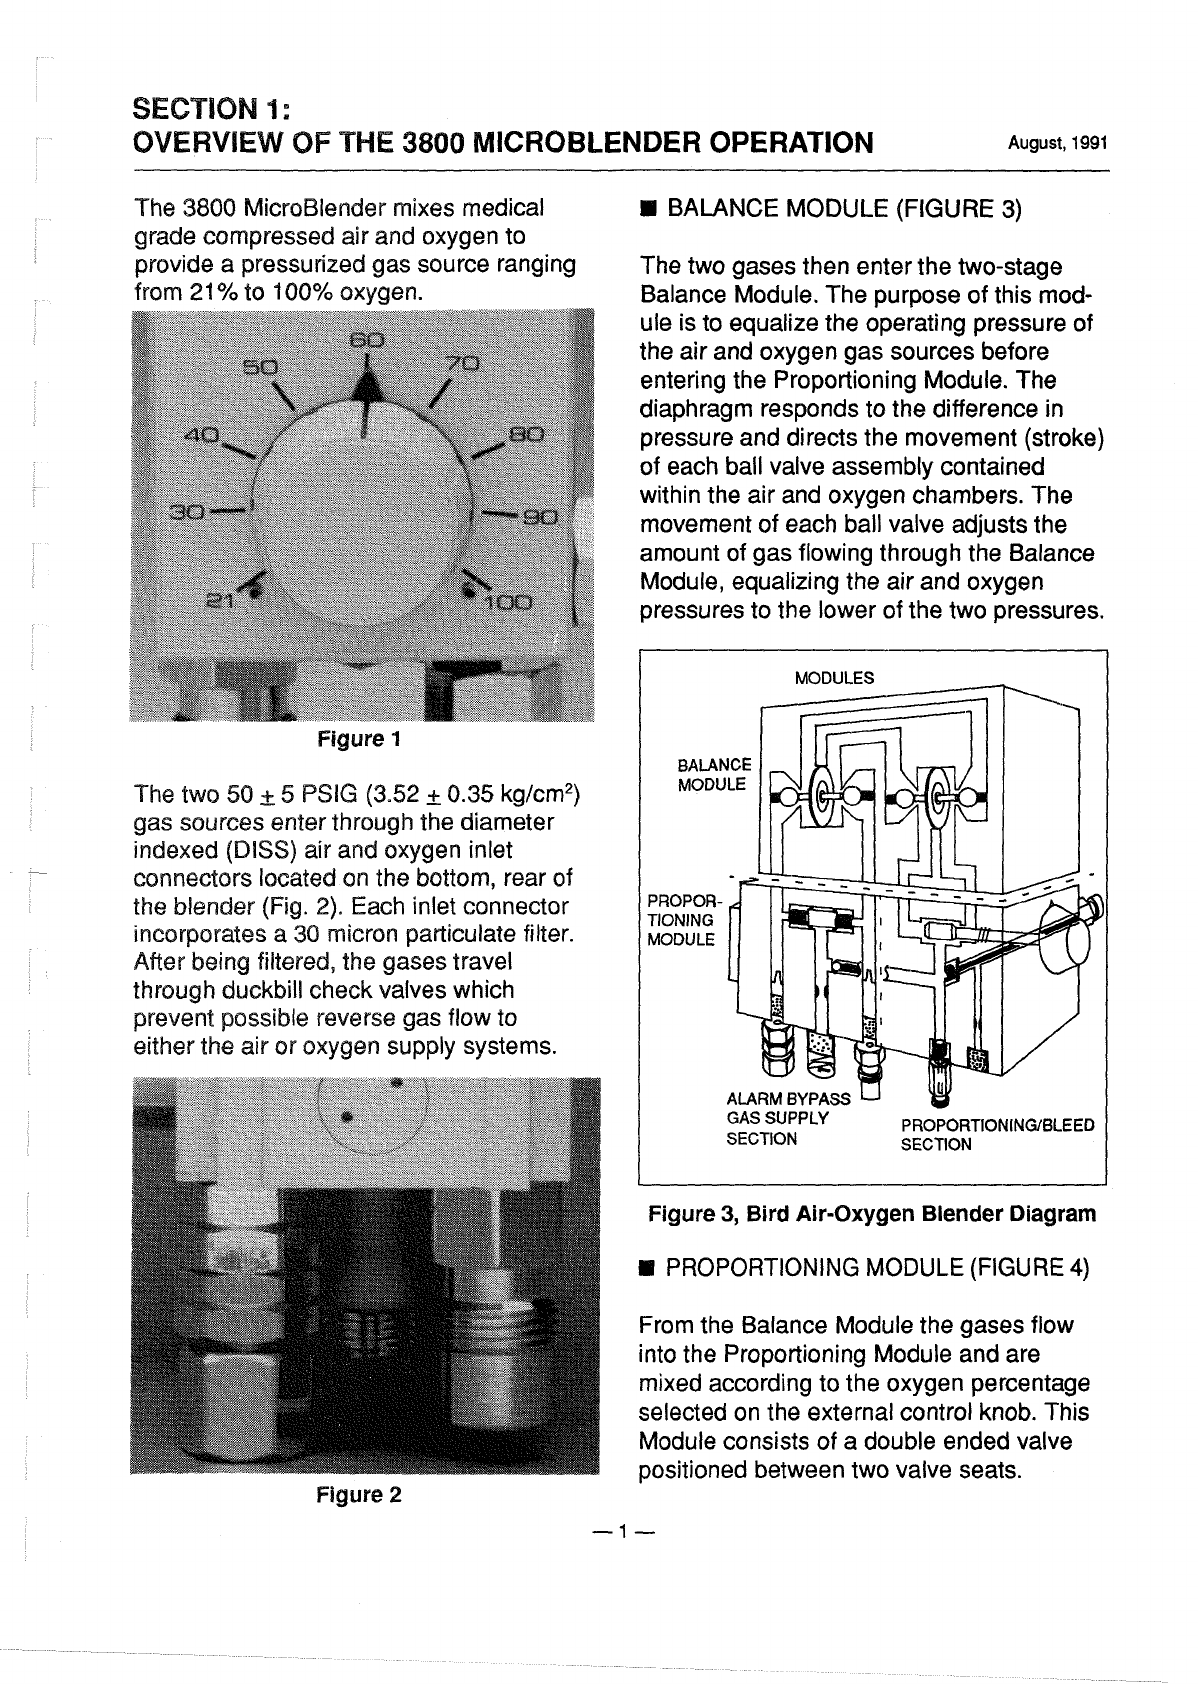
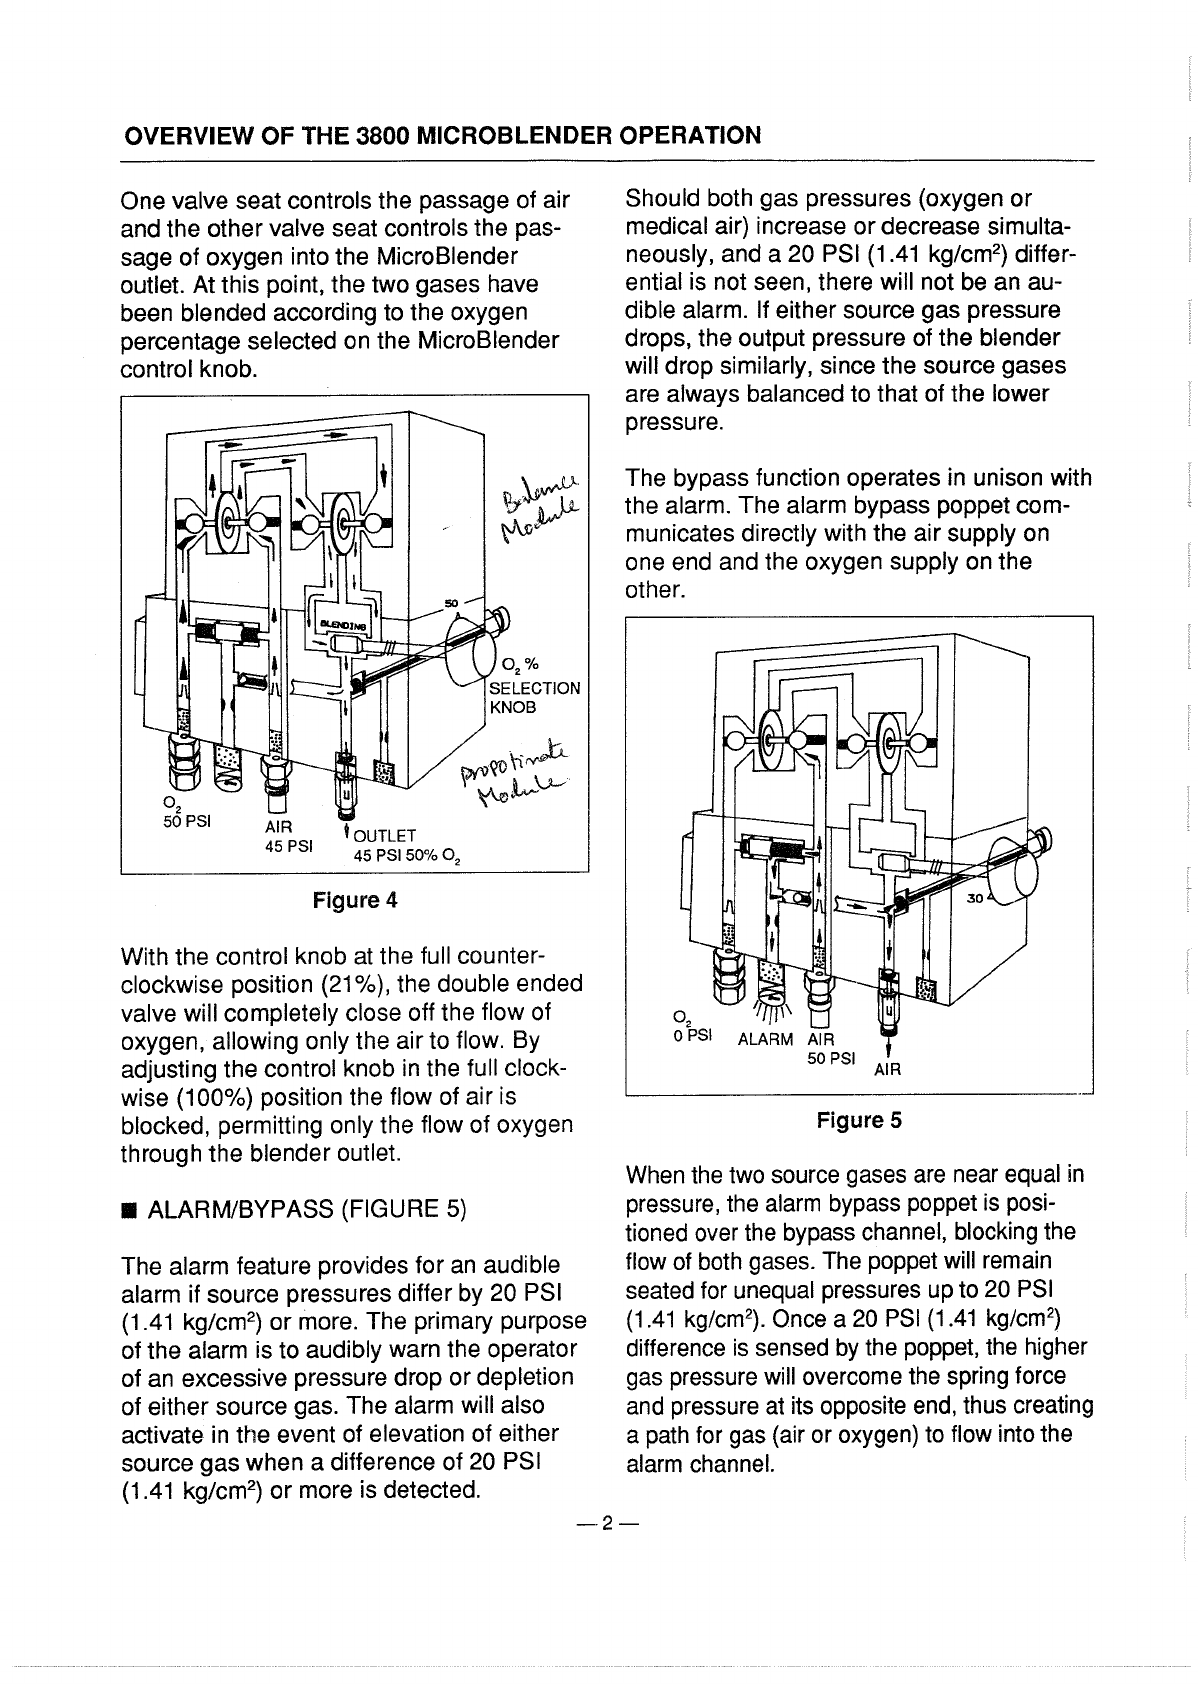
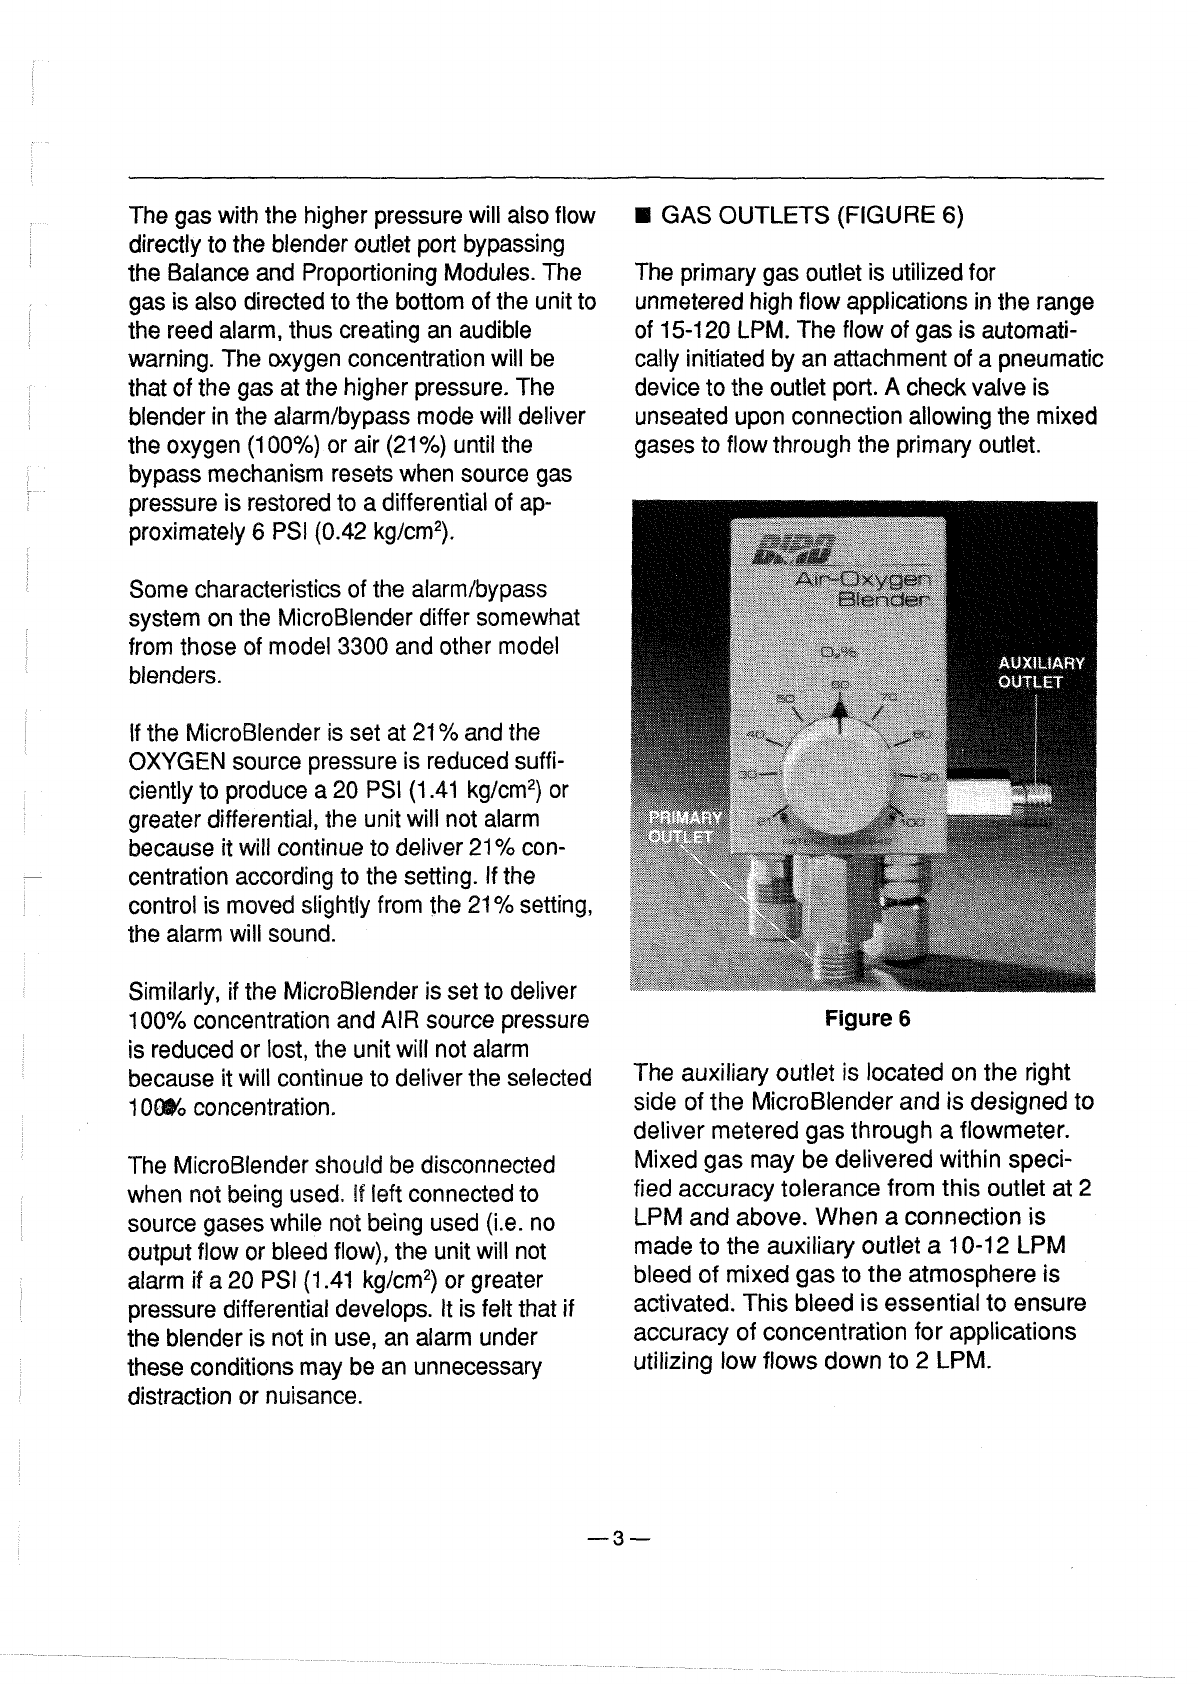
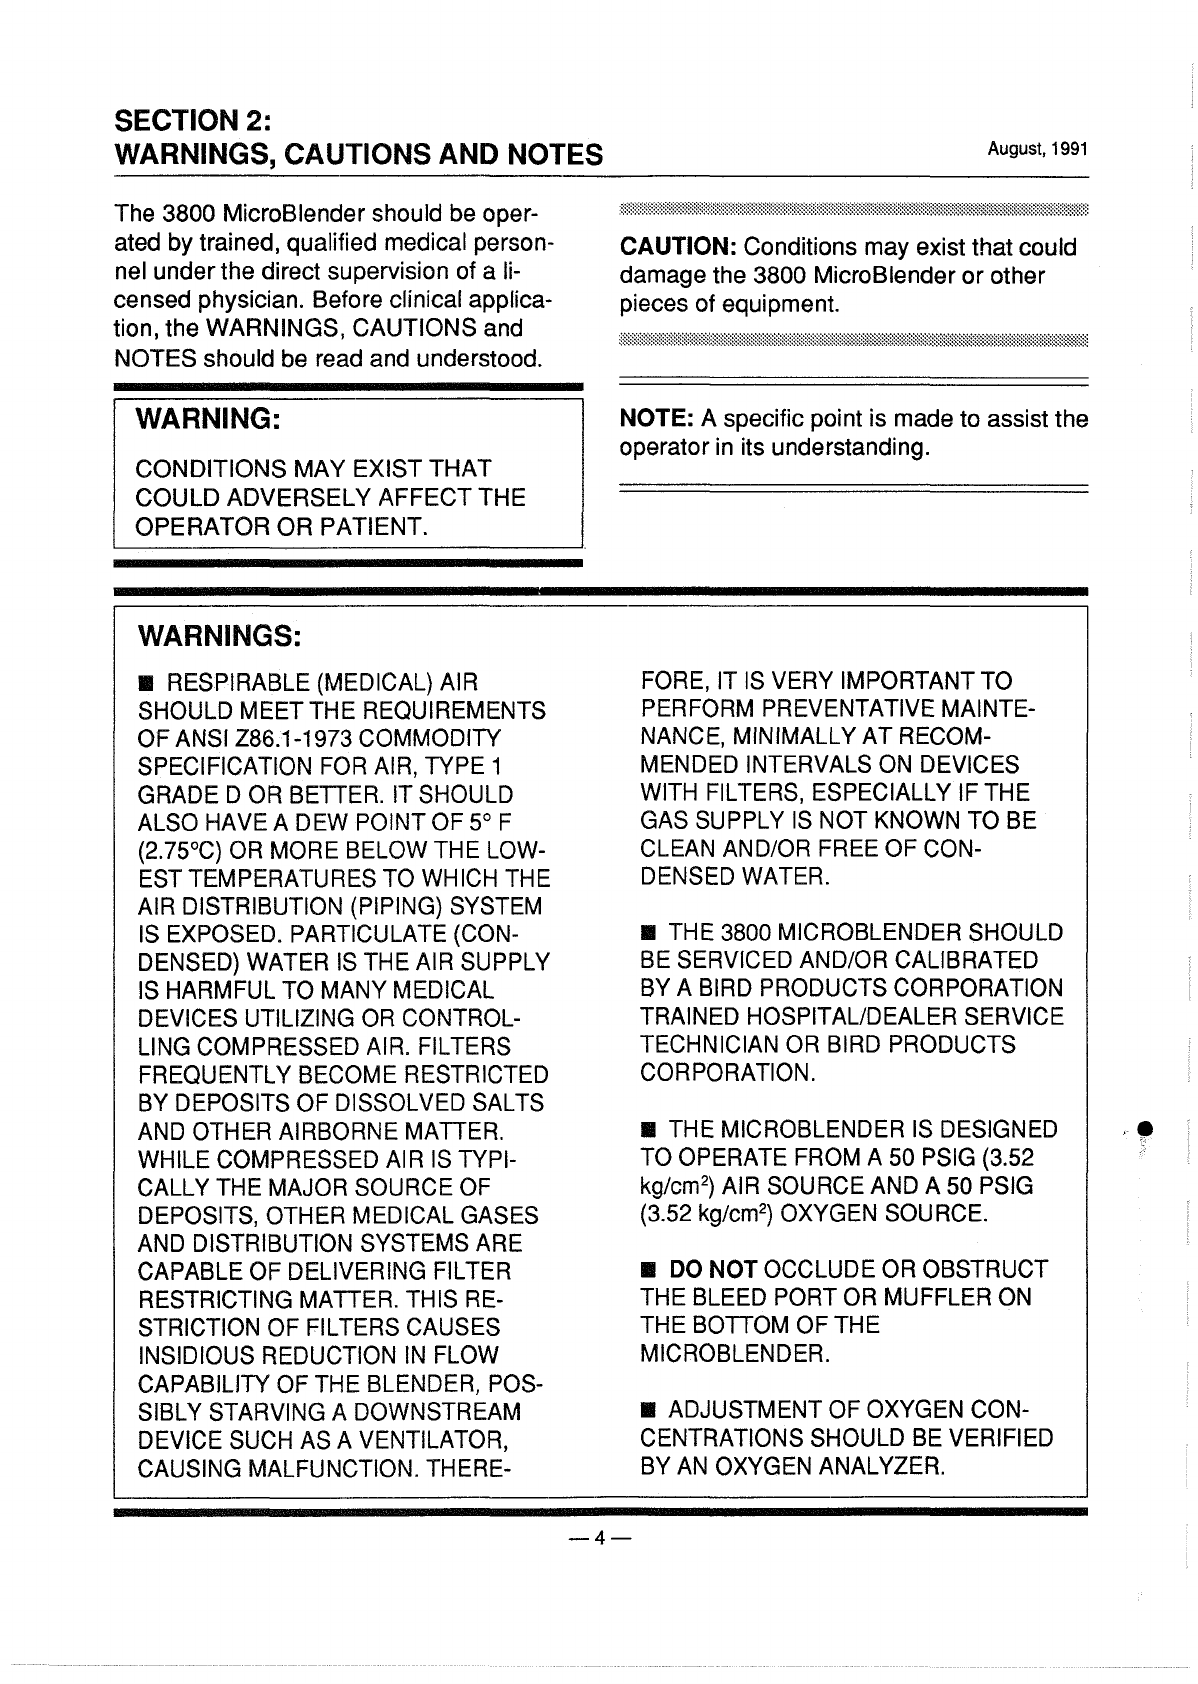
BIRD MicroBlender 3800 User manual
Other BIRD Industrial Equipment manuals

BIRD
BIRD TERMALINE 8860 Series User manual

BIRD
BIRD Moduload 8640 Series User manual

BIRD
BIRD 8640A930-1 User manual

BIRD
BIRD ECONOLOAD 8730 Series User manual

BIRD
BIRD Termaline 8930 Series User manual

BIRD
BIRD TERMALINE 8201 User manual

BIRD
BIRD Termaline 8920 Series User manual

BIRD
BIRD TERMALINE 8400 SERIES User manual

BIRD
BIRD TERMALINE 8251 Series User manual

BIRD
BIRD Termaline 8890 Series User manual