5
2012-10
For safe operation
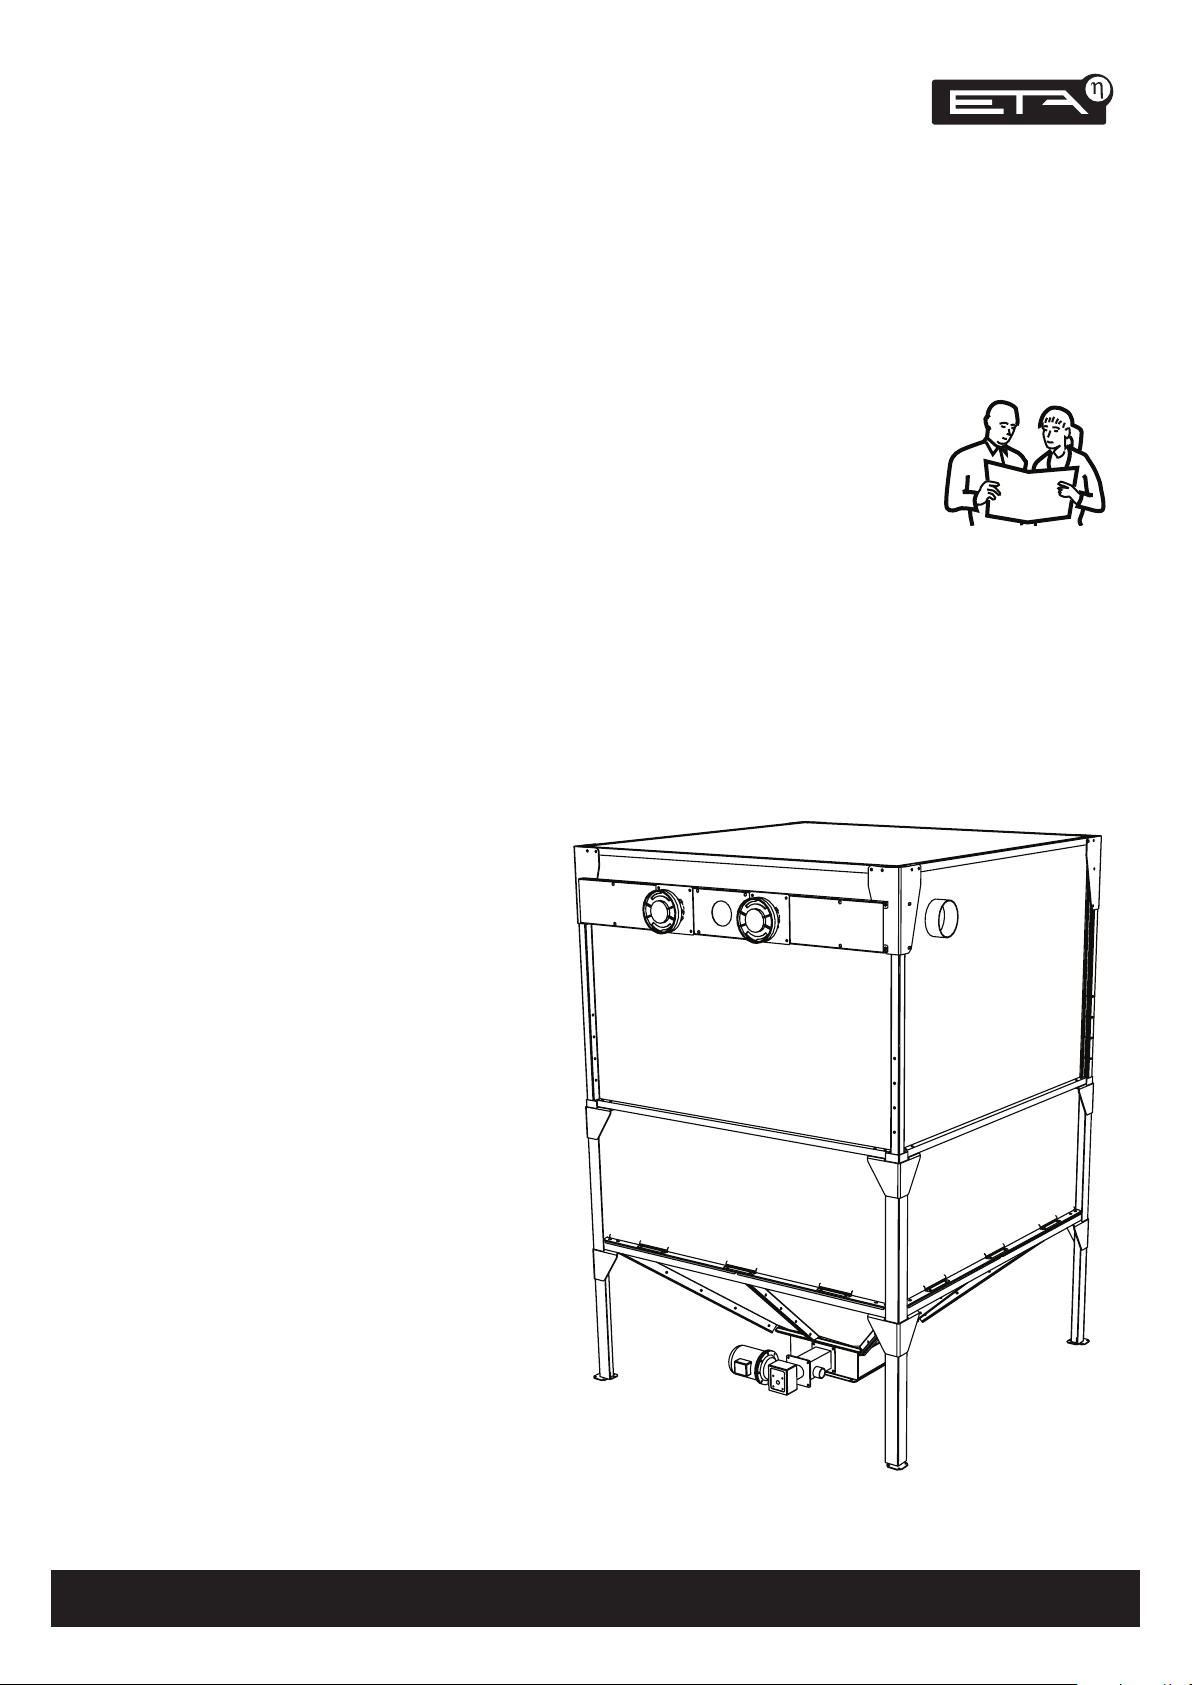
ETAbox Operation
For safe operation
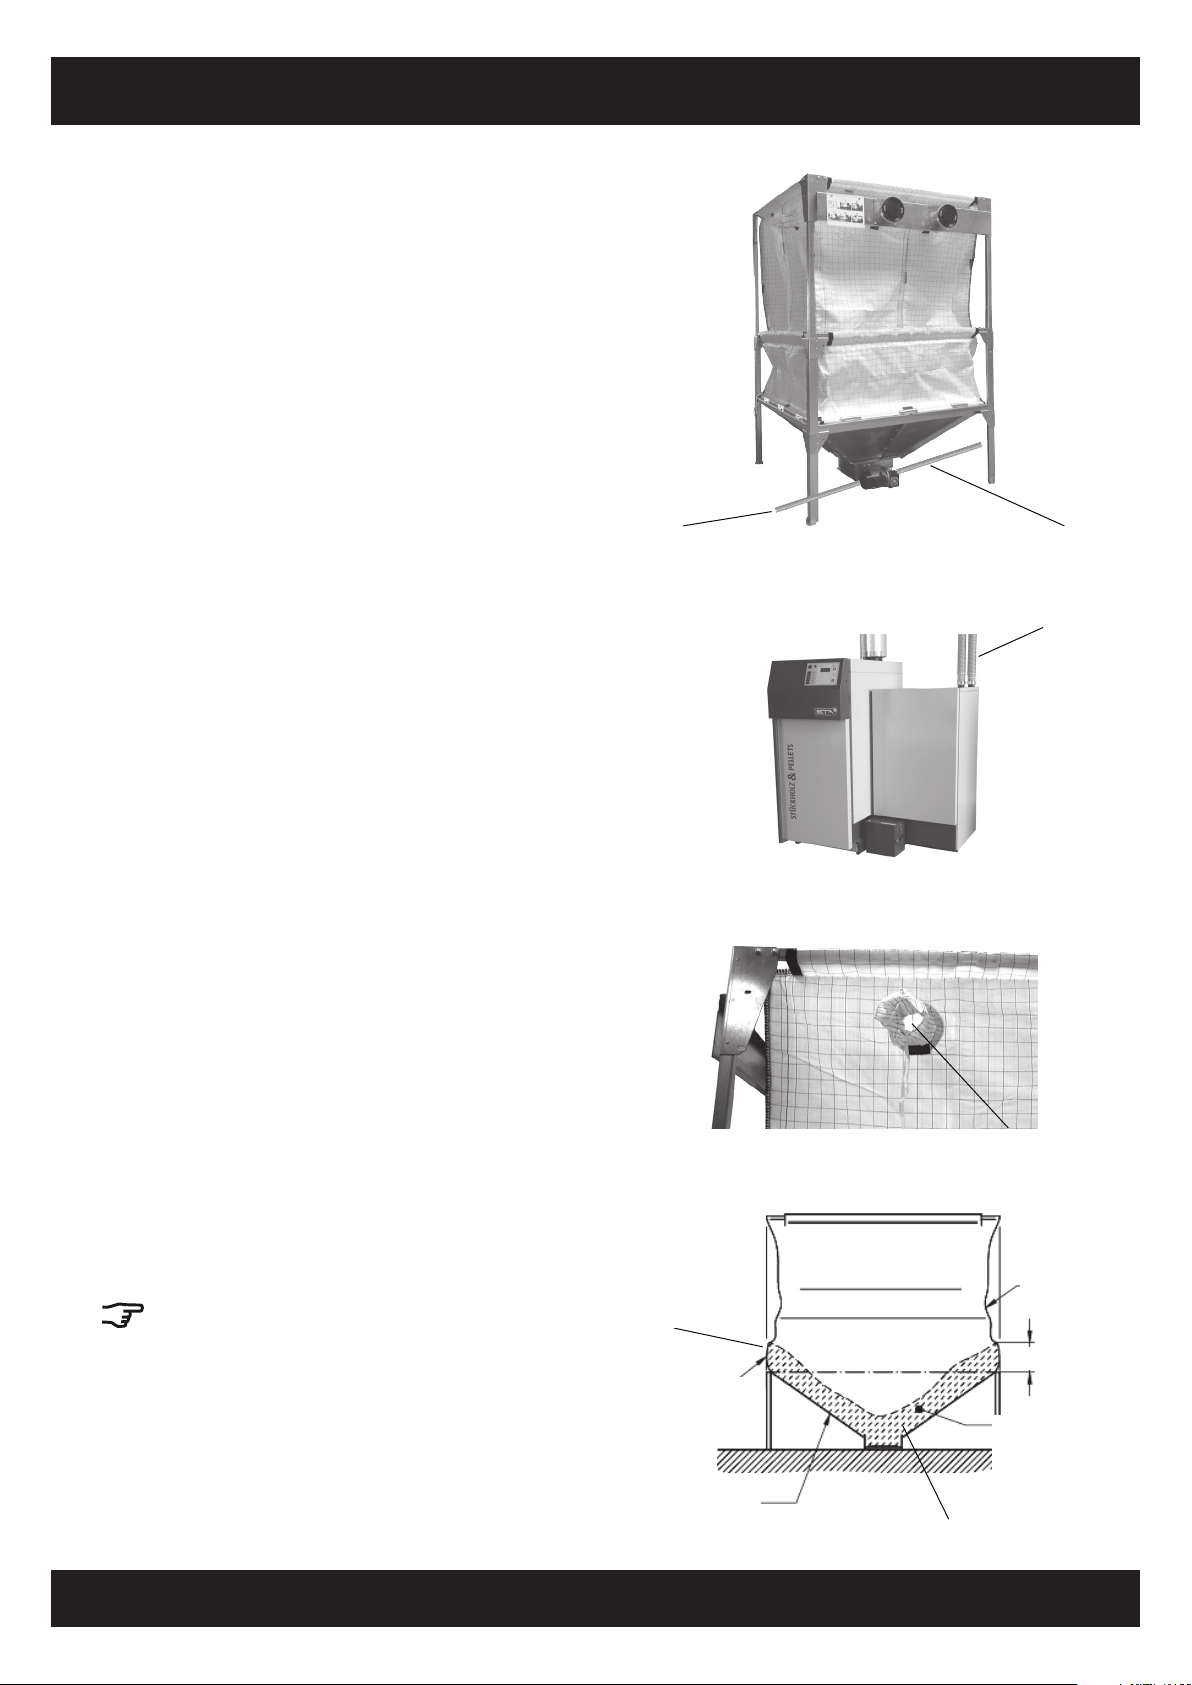
Ventilation
The store must be ventilated through windows,
doors or air inlets and outlets as carbon monoxide
can form where pellets are stored.
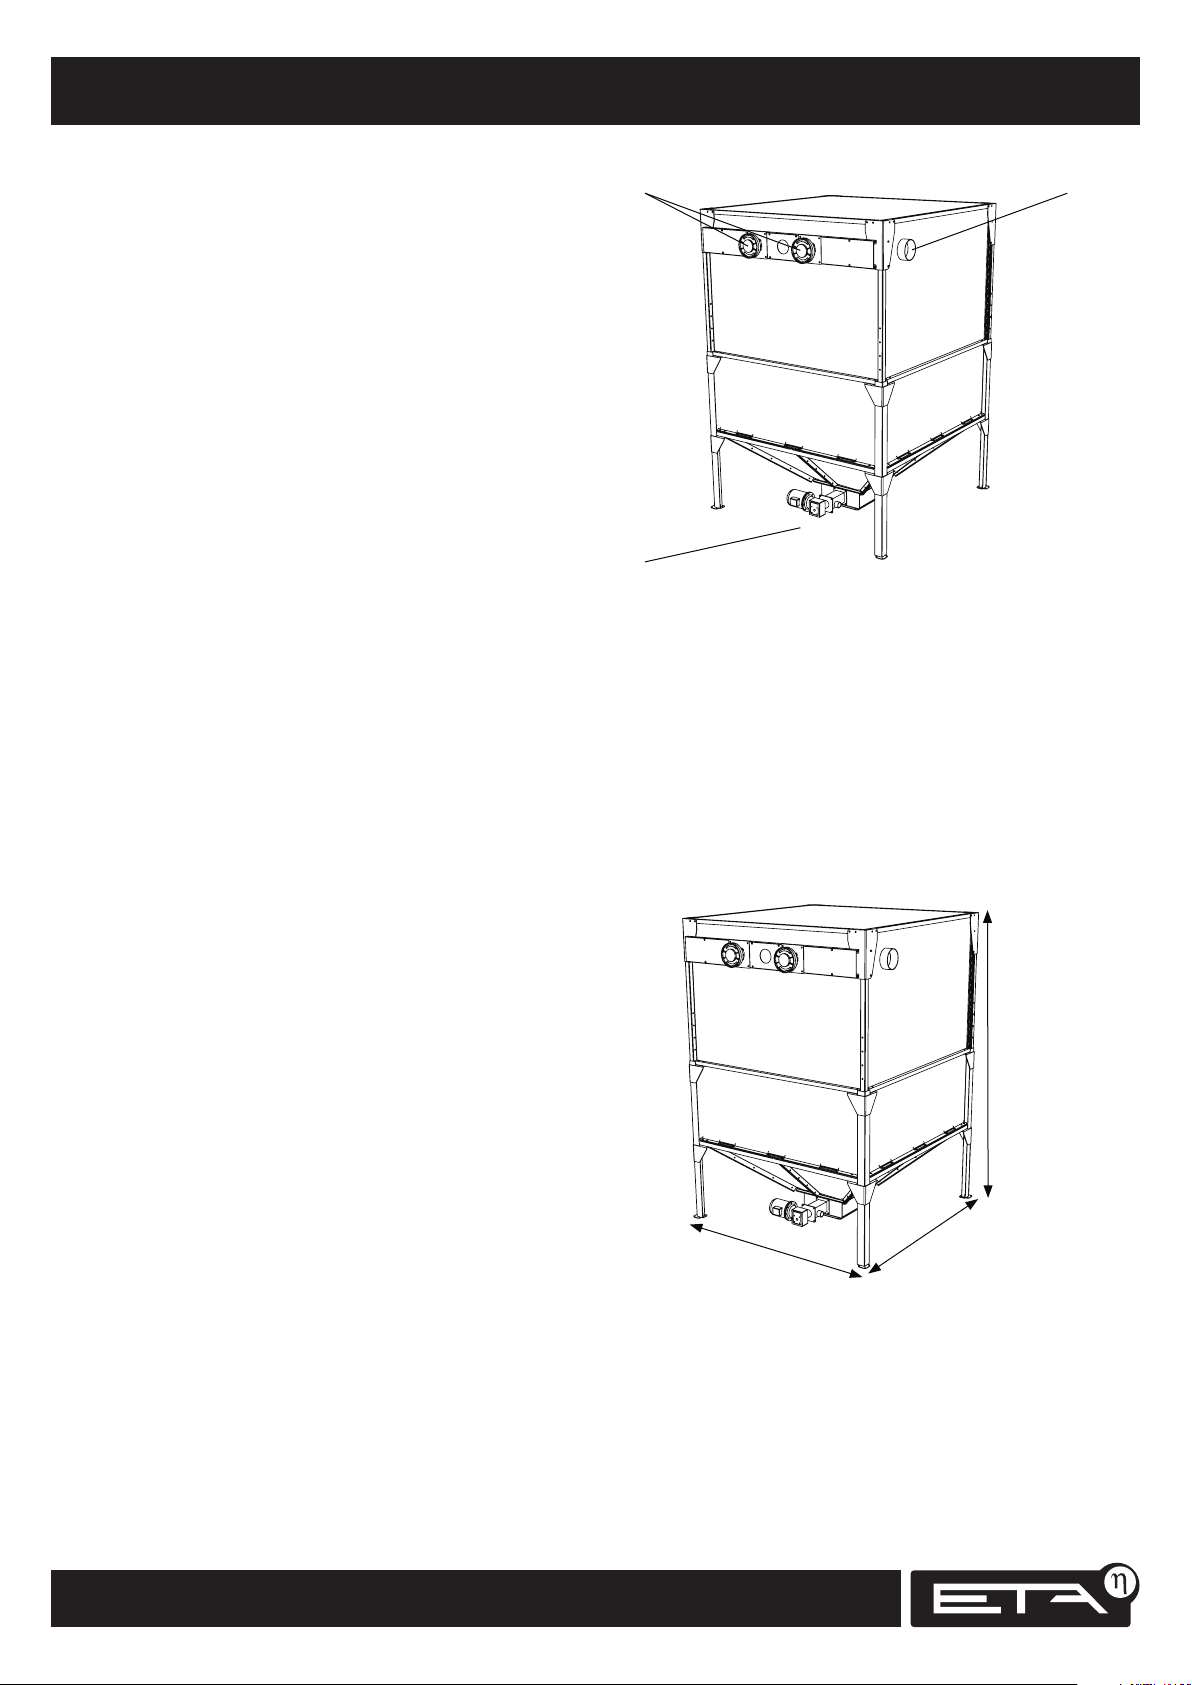
Container wall across from couplings must be 200
mm from wall
to cushion the impact of the pellet stream during
injection and avoid damage to the pellets while
filling.
ETAbox may not be in contact with damp walls
Rooms with the dampness of a normal cellar do
not pose a problem, but the ETAbox may not come
into contact with damp walls.
No sharp or pointed objects
No sharp or pointed objects that could damage the
fabric are permitted in the vicinity of the ETAbox.
No UV light
Do not allow the ETAbox to be exposed to UV light
under any circumstances. No fluorescent lamps
in the room. Cover cellar windows with dark
foil or use UV protective film if they must remain
transparent.
Outdoor set-up possible with rain shelter
In the event of outdoor set-up, the ETAbox must be
protected against weathering (rain, wind, exposure
to sunlight and UV light). A watertight roof and
side walls are an absolute requirement. The pellet
hoses must also be protected against UV light and
sunlight.
Official permits and fire safety
Official permits (building authorities, trade autho-
rities) may be needed for operation.
Local building and fire safety regulations must be
observed. Consult your local authorities.
Switch off heating system during maintenance
Switch off the main switch on the boiler before
any work on the ETAbox and the pellet conveyor
system. If the ETAbox has a power supply separate
from that of the boiler, switch that power supply
off as well. If there is no switch, isolate the ETAbox
from the mains using the trip switch (RCD).
Switch off 3 hours before filling?
If no ETA boiler is being used, switch off the
heating system at least 3 hours before filling the
ETAbox to avoid back-burning.
If the ETAbox is being used with an ETA pellet
boiler, the heating system may remain switched
on. An ETA boiler is equipped with a draught fan
and ventilated rotary valve to protect against
back-burning.
Use back air hose while filling
The ETAbox must be filled at underpressure. While
pellets are being blown in, air must be simultane-
ously removed through a second hose, ensuring
nearly dust-free fill-up.
Open door or window while filling
To minimize the amount of dust escaping from
the container during filling, more air should be
extracted than is blown in. To ensure the necessary
air supply for the room, open windows and/or
doors while filling.
Do not operate conveyor screw without vacuum
motor
Without removal of pellets, the conveyor screw
will jam. If the boiler's vacuum motor fails, the
conveyor screw will draw more current and the
fuel conveying system will be switched off before
the screw can jam.
Setting for current monitoring
To protect against jamming, current monitoring
must be correctly set on the boiler, for the ETAbox
2.1 A nominal current and 3.0 A maximum
current.
Prevent unauthorized access
Lock the room where the ETAbox is installed in
order to keep out children and pets.