Bisque GIOE-90-55/F User manual

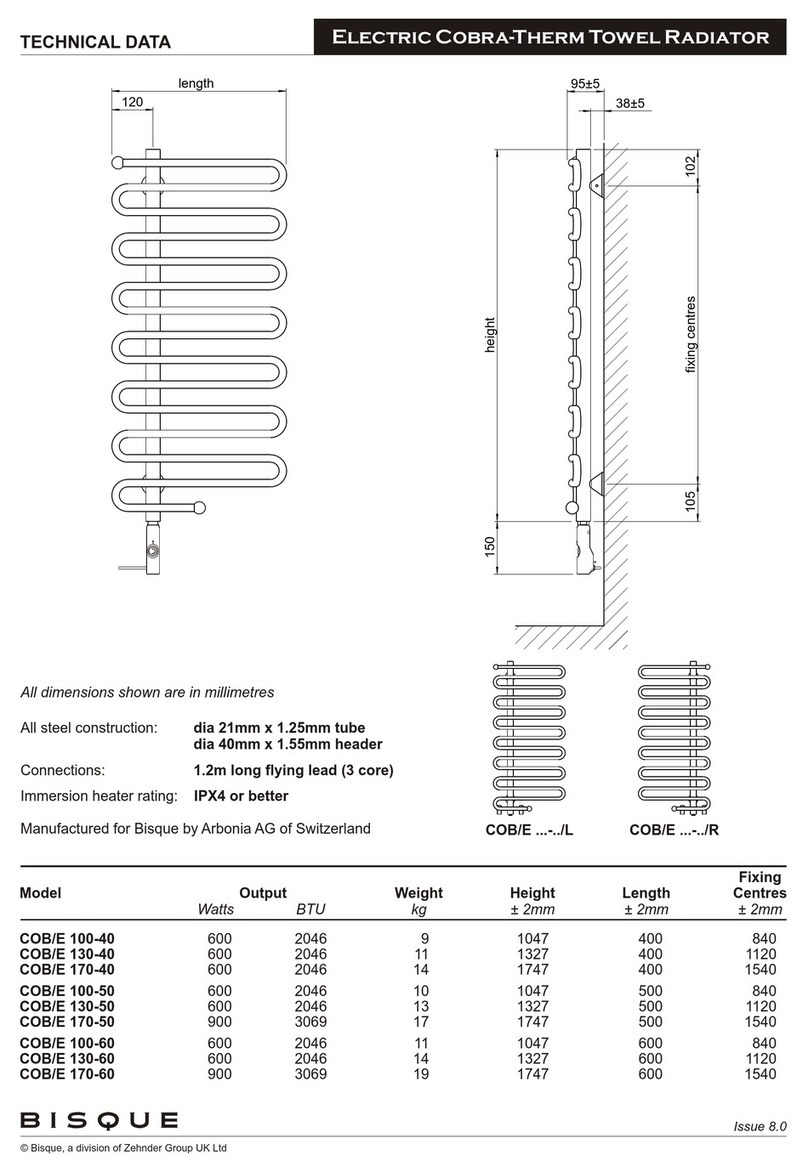
All dimensions shown are in millimetres
All stainless steel construction:
Connections:
30x30x1.5mm square headers
20x20x1.5mm square tubes
1.2m long flying lead (3 core)
IPX4 or betterImmersion heater rating:
TECHNICAL DATA Electric Gio Towel Radiator
Issue 5.2
Model
GIOE-90-55/F
GIOE-120-55/F
500
500
100
200
Output
Watts
6.6
8.6
Weight
kg
900
1200
Height
± 2mm
530
530
Length
± 2mm
Fixing
Centres
± 5mm
36 height
62.562.5
length
15 fixing centres 15
© Bisque, a division of Zehnder Group UK Ltd
75-105
GIOE-90 GIOE-120
348 205
498 205

This product has been manufactured in accordance with our stringent quality requirements to give you total satisfaction. To get the
most out of your radiator we advise you to read these instructions carefully and keep them to hand.
: to avoid any danger to very young children, you are advised to install this
appliance so that the lowest heating bar is at least 600mm off the floor.
: to avoid overheating, do not cover the appliance.
Do not sit on the heating appliance.
Caution, hot surface.
- some parts of this product can become very hot and cause burns. Particular attention has to be given where children and
vulnerable people are present.
Children of less than 3 years should be kept away unless continuously supervised.
Children aged from 3 years and less than 8 years shall only switch on/off the appliance provided that it has been placed or installed
in its intended normal operating position and they have been given supervision or instruction concerning the use of the appliance in
a safe way and understanding the hazards involved. Children aged from 3 years and less than 8 years shall not plug in, regulate and
clean the appliance or perform user maintenance.
This appliance can be used by children aged from 8 years and above and persons with reduced physical, sensory or mental
capabilities or lack of experience and knowledge if they have been given supervision or instruction concerning use of the appliance
in a safe way and understand the hazards involved. Children shall not play with the appliance. Cleaning and user maintenance shall
not be made by children without supervision.
This appliance should be connected, according to rules and standards in application, only by an authorized person.
A towel radiator must be used for the purpose for which it is intended and not as a table, chair, toy, ladder, etc.
It is protected from ingress of water and can be installed within zone 1 (bath and shower) for IPx5 or zone 1 (bath) and zone 2
(shower) for IPx4 (see section 2.1) as long as the electrical controls are out of reach of anyone using the bath or shower.
The electricity supply must be protected by a residual current device with a maximum of 30mA, especially when installed in a room
containing a bathtub or shower.
This heater is not equipped with a device to control the room temperature. Do not use this heater in small rooms when
they are occupied by persons not capable of leaving the room on their own, unless constant supervision is provided.
If the power cable is damaged, for safety reasons it must be replaced by the manufacturer, the manufacturer’s after-
sales service department or a similarly qualified person.
The heating appliance must not be placed underneath a power outlet.
This appliance is not intended for use at altitudes exceeding 2000 m.
This heating appliance is filed with a precise quantity of liquid. Any repair work requiring the product to be opened should only be
carried out by the manufacturer or their after-sales service department, which should also be contacted in the event of a leak.
When disposing of the heating appliance, comply with the local regulations.
This electrical appliance with circulating fluid is delivered ready to use. It is plugged and filled with fluid before leaving the factory.
This fluid requires no maintenance.
As soon as the appliance is switched on, you will notice certain differences compared to a standard electric heating system:
- the electric heating element heats the fluid, which gradually and naturally starts circulating in your appliance.
- the properties of the fluid are such that it takes approximately ten minutes for the radiator to reach its optimum surface temperature
depending on the model and the room temperature when the appliance is switched on.
- this principle also ensures consistent and sustained heating even when the element is no longer powered.
WARNINGS
OVERVIEW OF YOUR ELECTRICAL RADIATOR
CAUTION (TOWEL DRYER)
CAUTION (RADIATOR)
Caution
WARNING:
IMPORTANT:
IMPORTANT:
IMPORTANT:
WARNING: This appliance is intended only for drying textiles washed in water.
INSTRUCTIONS Electric Gio Towel Radiator
Issue 1.0
© Bisque, a division of Zehnder Group UK Ltd

The flexible cable supplied with your appliance is designed to be connected to the mains via a junction box that must be placed
behind the appliance.
In a kitchen or bathroom, the junction box must be positioned at least 25cm from the floor.
The appliance must be installed as described in this document and in accordance with the applicable European and local standards
as well as the rules of good professional practice.
The example shown only concerns a bathtub. For other bathroom fixtures please consult your installer.
The system must be fitted with an omni-polar circuit-breaker with a minimum contact opening of 3mm.
To ensure your system is safe:
- ensure that an area of at least 50cm in front of the appliance is clear of objects which might hinder air circulation
(furniture, chairs etc.);
- position a shelf at least 10cm above the top of your radiator;
- use mounting screws suitable for your wall.
Electric towel radiators are designed to be covered safely. However, to ensure that your appliance works efficiently, you are
advised not to cover it completely. Doing so will increase the temperature and cause the internal cutout to turn off the appliance.
Always turn off the electricity supply (circuit-braker or remove the fuse before making any connections
IMPORTANT:
IMPORTANT:
NOTE:
CAUTION
INSTRUCTIONS Electric Gio Towel Radiator
Issue 1.0
© Bisque, a division of Zehnder Group UK Ltd
10cm minimum
15cm minimum

INSTRUCTIONS Electric Gio Towel Radiator
Issue 1.0
© Bisque, a division of Zehnder Group UK Ltd
POSITIONING YOUR APPLIANCE
CONNECTING THE APPLIANCE
To get the most out of your appliance and enjoy the highest standards of comfort, we recommend that you install the appliance near
places with high heat loss (windows, dors, etc.) wherever possible.
You will find a complete set of assembly instructions in your appliance’s box.
The technical specifications of your radiator are shown on its nameplate. Please note these down before installing it and before
requesting any after-sales assistance.
When connecting the appliance to the mains, you must observe:
- the voltage indicated on the nameplate;
- conventional wire colour coding: blue or grey - neutral
brown or black - live
green or yellow - earth
IP: protection level of your appliance against the
ingress of solid foreign bodies and water spray
Voltage and power required for installation
Appliance reference number
Class I & Class II
OF: serial number
Manufacturer code
IP XX
XXX–XXX–XXX–XX
230V ~ XXXXW
OF: XXXXXXXXXX XXXXXX
N CONSTRUCTEUR XXXXXX
Class I : with earth
Class II : Double insulated
(no earth)
N (blue or grey)
L (brown or black)
E (green or yellow)
Neutral
Live
Earth
ROUTINE MAINTENANCE OPERATIONS
TROUBLESHOOTING
Before carrying out any maintenance operation on your appliance, ensure that it is switched off.
High-quality materials and surface treatment protect your radiator.
To maximise the service life of your radiator we recommend you take the following precations:
- to make the most of the performance of radiators containing a heat transfer fluid, it is advisable to check after five or six
years of operation the quality of the fluid and replace it if necessary.
- never use abrasive or corrosive products on the outer surfaces of the appliance (except the electrical parts); use warm,
soapy water.
- use a soft, dry cloth without any solvents to clean the control box.
Should your radiator fail to function, check that your radiator is properly connected to an appropriate power supply.
If your radiator is connected to a master device, timer or programming unit, please refer to the manufacturer’s instructions.
Nonetheless, should you fail to solve the problem encountered, please contact your supplier’s after-sales service for assistance.

INSTRUCTIONS Electric Gio Towel Radiator
AFTER-SALES SERVICE
GUARANTEE
ENVIRONMENTAL REGULATIONS
If your appliance stops working or you require spare parts, contact your installer or dealer.
Prior to making contact and to ensure your problem is dealt with quickly and effectively, please make a note of:
- the details shown on the appliance’s nameplate;
- the sales reference for your appliance shown on your dated purchase invoice.
The heating body of your electric radiator is guaranteed against manufacturing defects for five (5) years from the date of purchase,
while the other components are guaranteed for two (2) years.
It complies with the EMC Directive: 2004/108/EC regarding electromagnetic compatibility of equipment, with Low Voltage directive:
2006/95/EC regarding electrical equipment designed for use within certain voltage limits and with European standards EN 60.335.1,
EN 60.335.2.43 and EN 60.335.2.30 and subsequent amendments.
Dated proof of purchase must be presented to activate the guarantee. The guarantee does not cover radiator transport, removal and
installation costs.
The guarantee shall not apply if the appliance is installed, used or maintained in a way that does not comply with standards in force
in the relevant country, good professional practice or the manufacturer’s instructions.
RoHS: complies with Directive 2011/65/EU
WEEE: complies with Directive 2002/96/EC
Disposal of end-of-life electrical and electronic appliances. This symbol indicates that this product should not be
disposed of with household waste. It must be taken to a suitable collection point to be recycled. By disposing of
this product correctly, you will help prevent potential negative consequences for the environmental and human
health.
(See general conditions of sale for your country)
Issue 1.0
© Bisque, a division of Zehnder Group UK Ltd

FITTING INSTRUCTIONS
Screwdriver - crosshead
Pliers
Electric drill
Masonry drill bit - 10mm dia
Spirit level
Stepladder (for taller radiators)
A4
B4
C4
D4
E1
Wall Plug
Bracket
Screw - Crosshead, 6.3mm dia x 60mm
Grub Screw
Allen Key
Tools & Material Required Key Component Qty
Assembly Instructions
Accurately mark out bracket holes on wall using spirit level.
Drill four 10mm dia holes to a minimum depth of 70mm & insert wall
plugs (A).
Screw brackets (B) into wall plugs (A) with 6.3mm diameter x 60mm
screws (C).
Offer radiator up to wall and slide square posts on the rear of the
radiator into brackets (B).
Secure radiator in position by tightening grub screw (D) with Allen
key (E).
Electric radiators should be fitted only by a qualified electrician and
must be earthed and connected to a cable outlet in the bathroom in
accordance with I.E.E. wiring regulations. The electrical connection
should be made to a ‘5 amp fused fixed spur’ located outside the
bathroom.
Note: for maintenance purposes, cable outlets must remain
accessible and cables must not be buried directly into walls.
Issue 4.1
Electric Gio Towel Radiator
© Bisque, a division of Zehnder Group UK Ltd
E
B
C
A
D
This manual suits for next models
1
Table of contents
Other Bisque Heater manuals
Popular Heater manuals by other brands

JOCCA
JOCCA 2824 instruction manual

Blumfeldt
Blumfeldt 10032458 manual
Comfort Glow
Comfort Glow QWH2100 Operator's manual

Frost Fighter
Frost Fighter IDH200QR OIL Installation - Operation/Maintenance Instructions and Parts List
Hengjin Electron
Hengjin Electron PTC-2000 user manual
Ducasa
Ducasa M-28 SPLIT user manual
