Bistos BT-150 User manual
Electric breast pump
Operation Manual
.
Keep this manual for future reference
P/N: 150-ENG-OPM-EUR-R04

BT-150 Opeartion Manual
2
P/N: 150-ENG-OPM-EUR-R04
Bistos Co., Ltd.
2020,04
Proprietary Material
Information and descriptions contained in this manual are the property of Bistos Co., Ltd. and may not be
copied, reproduced, disseminated, or distributed without express written permission from Bistos Co., Ltd.
Information furnished by Bistos Co., Ltd is believed to be accurate and reliable. However, no responsibility
is assumed by Bistos for its use, or any infringements of patents or other rights of third parties that may
result from its use. No license is granted by implication or otherwise under any patent or patent rights of
Bistos Co., Ltd.
The information contained herein is subjects to change without notice.
Prepared by:
Bistos Co., Ltd.
7th FL., A Bldg., Woolim Lions Valley 5-cha,
302, Galmachi-ro, Jungwon-gu, Seongnam-si,
Gyeonggi-do, Korea
Telephone: +82 31 750 0340
Fax: +82 31 750 0344
Revision R04
April, 2020
Printed in Korea
Copyright © Bistos Corporation 2020. All rights reserved.

BT-150 Opeartion Manual
3
P/N: 150-ENG-OPM-EUR-R04
Bistos Co., Ltd.
2020,04
Table of Contents
Indication for use ----------------------------------------------------------------------------------------------------4
Product description -------------------------------------------------------------------------------------------------4
Contraindications ----------------------------------------------------------------------------------------------------4
1. Safety information ------------------------------------------------------------------------------------------4
- Meaning of symbols ---------------------------------------------------------------------------------------4
- WARNING ----------------------------------------------------------------------------------------------------5
- CAUTION -----------------------------------------------------------------------------------------------------6
2. Product configuration --------------------------------------------------------------------------------------7
3. Prepare to use ------------------------------------------------------------------------------------------------8
3.1 Air tube and connector assembling -------------------------------------------------------------------8
3.2 Assemble and disassemble -----------------------------------------------------------------------------8
3.3 Display -------------------------------------------------------------------------------------------------------9
3.4 Operating functions --------------------------------------------------------------------------------------10
3.5 Essential performance ----------------------------------------------------------------------------------13
4. Pumping ------------------------------------------------------------------------------------------------------13
4.1 Preparing to pump --------------------------------------------------------------------------------------13
4.2 Pumping ---------------------------------------------------------------------------------------------------14
5. Wash and Sanitize ----------------------------------------------------------------------------------------14
5.1 Wash -------------------------------------------------------------------------------------------------------14
5.2 Sanitize ----------------------------------------------------------------------------------------------------15
6. Storage of Breast milk -----------------------------------------------------------------------------------15
- After each pumping ------------------------------------------------------------------------------------15
- Tips for freezing milk -----------------------------------------------------------------------------------15
- Tips for thawing and warming up milk ------------------------------------------------------------15
- Guide to storing fresh breastmilk for use with healthy full-term infants ----------------16
- Guide to storing thawed breastmilk ----------------------------------------------------------------16
7. Trouble shooting ------------------------------------------------------------------------------------------16
8. Manufacturer’s declaration on EMC ----------------------------------------------------------------17
9. Technical specifications ---------------------------------------------------------------------------------20
Product Warranty ------------------------------------------------------------------------------------------------22
BT-150 Opeartion Manual
4
P/N: 150-ENG-OPM-EUR-R04
Bistos Co., Ltd.
2020,04
Intended use/population/user
The electric breast pump is intended to be used by a lactating woman for expressing and collecting milk
from her breasts.
The electric breast pump can be used to relieve engorged breasts and plugged milk ducts. (FDA,
05/04/2018, https://www.fda.gov/consumers/consumer-updates/what-know-when-buying-or-using-
breast-pump)
Product description
As the same principle with the baby sucking the mother's milk, the breast pump electronically operates the
vacuum pump and applies vacuum pressure generated at that time to the breast of the mother in order to
express the breast milk from the breasts to outside.
The electric breast pump is used in the home environment, which service massage and expression mode
and is capable of single and double pumping.
The operating life of this breast pump is expected to be approximately 150 minutes sessions per day, for
one year.
Contraindications
There are no known contraindications for the breast pump.
1. Safety Information
Before using the breast pump, read this entire manual and be fully understood and follow instructions and
safety information to prevent injury.
Warning symbols
The following symbols identify all instructions that are important to safety. Failure to follow these
instructions can lead to injury or damage to the breast pump. When used in conjunction with the following
words, the symbols indicate:
WARNING
A hazard of serious injury or death.
CAUTION
A hazard of minor injury or damage to the system.
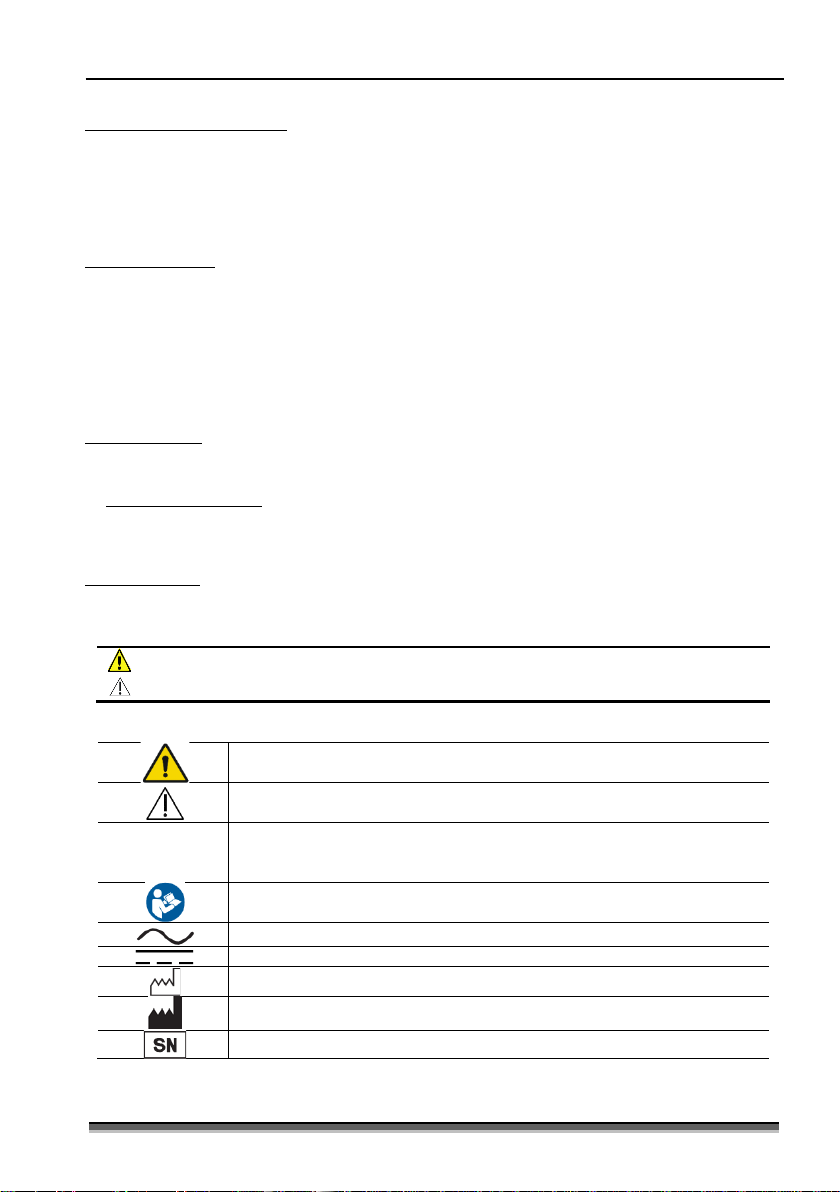
The following symbols are placed on product, label, packing and this manual in order to stand for the
information about:
Used to identify safety information for warning.
Be well-known this information thoroughly before using the device.
Used to identify safety information for caution.
Be well-known this information thoroughly before using the device
IP21
Indicates the protection level against the ingress of solid object and liquid.
IPX1 is protection against some falling water drops vertically.
IP2X is protection against solid foreign object like a finger.
Refer to operation manual. Read manual before placing the device.
This symbol indicates alternating current.
Indicates DC power supply.
Indicates the production date.
Indicates the manufacturer.
Indicates the serial number of the device.
BT-150 Opeartion Manual
5
P/N: 150-ENG-OPM-EUR-R04
Bistos Co., Ltd.
2020,04
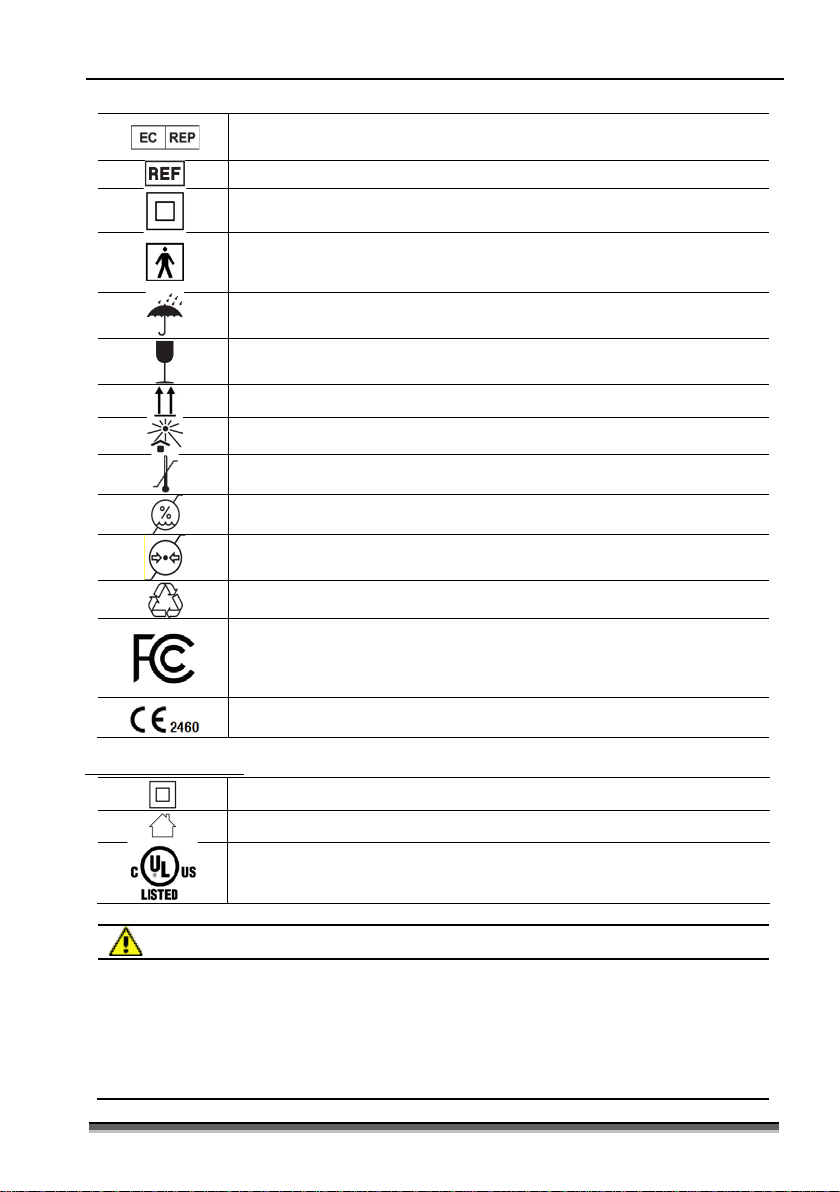
Indicates the authorized representative in the European Community of
manufacturer.
Indicates a reference number.
This symbol indicates that the power adaptor is a class II device.
Indicates the BF applied part.
It is applicable to Funnel, Funnel block, Air tube, Diaphragm Top, Diaphragm
bottom and Bottle.
Indicates to keep the device dry.
Indicates the medical device that can be broken or damaged if not handled
carefully.
Indicates to keep upright
Indicates to keep the device away from sunlight.
Indicates the temperature limitation for transport and storage.
Indicates the humidity limitation for transport and storage.
Indicates the range of atmospheric pressure to which the medical device can
be safely exposed for transport and storage.
Indicates the packing material is recyclable.
Indicates that the device complies with part 15 of the FCC Rules. Operation is
subject to the following two conditions: (1) This device may not cause
harmful interference, and (2) this device must accept any interference
received, including interference that may cause undesired operation.
The product is in conformity with European Medical Directive 93/42/EEC.
This has been verified by a notified body.
Symbols on the adaptor
This symbol indicates that the power adaptor is a class II device.
This symbol indicates that the power adaptor is for indoor use only.
This symbol indicates compliance with both Canadian and U.S. component
requirements.
(Recognized Component Mark for Canada and the United States)
WARNING
Do not touch or operate the device with wet hands to avoid electric shock.
Do not reach for the device if it has fallen into water. Unplug the power adapter immediately
from wall socket outlet.
Only use the breast pump for its intended use as described in this manual.
Never use while pregnant.
The breast pump should be used with hygienic. Using second hand or rental product can cause
cross contamination.

BT-150 Opeartion Manual
6
P/N: 150-ENG-OPM-EUR-R04
Bistos Co., Ltd.
2020,04
Keep away the main body from direct sunlight.
The pump and accessories are not heat-resistant. Keep away from radiators, open frame and
heated surface.
The pump is a personal care device. Do not use the device by more than one person.
Supervision is necessary when breast pump used in the vicinity of children or pets. And keep all
components not in use out of the reach of them.
Do not use the damaged components including power adapter.
Never use damaged device. Before each use visually inspect the individual components for
cracks, chips, tears, discoloration or deterioration. In the event that damage to the device is
observed, please discontinue use until the parts have been replaced.
Do not use in the out of range for humidity, temperature and atmospheric pressure environment
than indicated in this manual.
The electronic breast pump should not be used adjacent to or stacked with other equipment. If
adjacent or stacked use is necessary, the electric breast pump should be observed to verify
normal operation in the configuration in which it will be used.
Portable RF communications equipment (including peripherals such as antenna cables and
external antennas) should be used no closer than 30 cm (12 inches) to any part of the device,
including cables specified by the manufacturer. Otherwise, degradation of the performance of
this equipment could result.
Do not use the device as a general suction device for other purposes except the expression of
breast milk.
Do not disassemble the device. Only the qualified service personnel who authorized by the
manufacturer can open the battery compartment and replace the battery, and the battery of
same model and specification should be replaced.
The incorrect battery replacement could be caused danger such as excessive temperatures, fire
or explosion.
If the device is not used for long time, it should be stored that battery is removed. Charge the
battery and store it at room temperature in low humidity.
Use only AC/DC Adaptor supplied or appointed by Bistos Co., Ltd.
CAUTION
If you are a mother who is infected like Hepatitis B, Hepatitis C or Human Immunodeficiency
Virus (HIV), pumping breastmilk will not reduce or remove the risk of transmitting the virus to
your baby through your breastmilk.
If you feel pain in your breast or nipple, turn the pump off or slide a finger between the funnel
and your breast to break the suction.
You can experience some inconvenience in the early stage of usage. If the inconvenience is
persistent or injury or bleeding around the nipple appears, contact a healthcare professional or
breastfeeding specialist immediately.
For expressing breastmilk, make yourself comfortable and do not incline the bottle.
For operating pump, connect diaphragm assay tightly to prevent the expressed milk flow into the
main body.
Clean and sanitize all compartments that come into contact with breast and milk according to
this manual before and after every use.
Disassemble and wash all parts that come in contact with the breast and breast milk immediately
after use to avoid dry up of milk residue and to prevent the growth of bacteria.
Only use drinking-quality water for washing.
Keep dry the all components after clean and sanitize.
Be sure that the expressed milk does not flow into the main body by checking air tube. If milk

BT-150 Opeartion Manual
7
P/N: 150-ENG-OPM-EUR-R04
Bistos Co., Ltd.
2020,04
flow in reverse direction, turn the power off, remove the milk from air tube or diaphragm and
replace or clean as instructed this user manual.
If milk follows in reverse direction to the main body, stop using the product immediately and call
your nearest service center.
Do not fill up the bottle to avoid backflow.
Remove the power adapter from breast pump immediately when charging finished.
The fuel level displayed in LCD can differ from actual battery capacity. Use breast pump with full
charged battery when possible.
Charge the battery immediately when [Lo Bt] displayed.
If breast pump remain unused for a longer period of time, make sure that the battery full
charged before use.
Only authorized service personnel shall repair or replace of the device.
Do not use outdoors, or operate where aerosol (spray) products are being used or where oxygen
is being administered.
Mobile and portable radio frequency communications equipment can affect the operation of
breast pump.
Breast pump, plastic bottles and component parts may break when dropped.
Do not pumping while bathing or showering.
When disposing of the device, adhere to all applicable laws regarding recycling.
When handling package materials, abide by local waste disposal laws and regulations. Keep the
packaging materials away from children.
Properly dispose or recycle the depleted battery according to local regulations.
Always use accessories supplied by Bistos Co., Ltd.
2. Product configuration
The electric breast pump utilizes the vacuum to express the breastmilk. It is classified as a medium vacuum
and intermittent suction device.
When unpacking the box, check all the following components are enclosed. All components except main
body and adapter are consumables. The standard configuration is composed:
Name
User manual
Power adapter
Main Body
Nipple
Shape
Qty.
1
1
1
1
Name
Diaphragm Top
Diaphragm
Diaphragm Bottom
Air tube connector
Shape
Qty.
1
1
1
2
Name
Funnel
Funnel Block
Funnel cap
Air tube/80cm
Shape
Qty.
1
1
1
1
Name
Bottle/160 ml
Bottle cap
Bottle cover
Bottle disc
Shape
Qty.
1
1
1
1
The color of main body or components can be changed without notice but the performance characteristics

BT-150 Opeartion Manual
8
P/N: 150-ENG-OPM-EUR-R04
Bistos Co., Ltd.
2020,04
are not influenced by these changes.
CAUTION
Use Bistos original accessories only.
Check consumable set for wear or damage before use and replace if necessary. Especially, as for
the nipple, inspect before each use and pull in all directions. Throw away at the first signs of
damage or weakness.
The period of use for consumables excluding battery is recommended 1 to 3 months, but it might
be different for the use environment.
If air tube becomes moldy, discontinue use and replace it.
Do not leave a nipple in direct sunlight or heat or disinfectant (“sterilizing solution”) for longer
than recommended, as this may weaken the part.
To help maintain optimum performance, it is recommended to replace the consumables
periodically.
NOTE
Remove the protective film from the LCD window before use.
①
Basic tubing port:
Tubing port for single pumping
②Auxiliary tubing port:
Tubing port for double pumping
③Port plug
④Power adapter port
3. Prepare to use
3.1 Air tube and connector assembling
Insert the metal part of air tube connector into the end tip of air tube as
shown picture left.
3.2 Assemble and disassemble
⑥
① LCD Display
② Buttons
⑤

BT-150 Opeartion Manual
9
P/N: 150-ENG-OPM-EUR-R04
Bistos Co., Ltd.
2020,04
①Place the diaphragm in the diaphragm bottom in the direction that the cross lined surface facing to
bottom. Cover the diaphragm top and turn it to lock.
②Put the funnel to the funnel block.
③Put the funnel cap beneath the funnel block. Screw bottle into the funnel assembly.
④Connect the air hole of diaphragm bottom to the funnel assembly.
⑤Connects the air tube to basic tubing port on main body and diaphragm top
⑥Connects the air tube to the bottle block as shown in the picture.
⑦To clean or storing after use, disassemble the bottle assembly in the reverse order.
3.3 Display
Fig.
Name
Status
Description
Pressure Range
Off
SINGLE expression pressure range
On
DOUBLE expression pressure range
Adapter
connection
Off
Power adapter is not connected.
On Power adapter is connected.
Battery Fuel level
Full charged
75 ~ 100 %
50 ~ 75 %
25 ~ 50 %
0 ~ 25 %
Full discharge
Flashing means charging needed. Shut down automatically
when fully discharged.
Program
number
On Displays the currently specified program number
Pressure
level
Express
Mode
Display the pressure level from 1 to 16
Massage
Mode
The pressure level is displayed from 1 to 16, but the
maximum pressure level is adjusted according to the cycle.
Cycle
level
Express
Mode
Display the cycle level from 1 to 6
Massage
Mode
Display the cycle level from 1 to 3

BT-150 Opeartion Manual
10
P/N: 150-ENG-OPM-EUR-R04
Bistos Co., Ltd.
2020,04
Expression mode
On Operating in expression mode.
Flashing Operating in stored expression mode sequence.
Operating time On
Operating time after power on. After 30 minutes, the main
body will turned off automatically.
When the battery needs to be charged, [Lo bt] will be
displayed.
Massage mode
On Operating in massage mode
Flashing Operating in stored massage mode sequence.
Program
status
On There is an executable program sequence.
Flashing Currently, the program sequence is operating.
Program sequence
running
On Currently, the program sequence is playing
Program sequence
skip
On
Skips the currently playing program sequence one step.For
2 seconds
Program sequence
stop On Indicates that program sequence playback is stopped.
NOTE
The fuel level displayed in LCD can differ from actual battery capacity. Use breast pump with full
charged battery when possible.
Charge the battery immediately when [Lo Bt] displayed.
If breast pump remain unused for a longer period of time, make sure that the battery full
charged before use.
3.4 Operating functions
The breast pump has two operating functions: basic massage/express function and program function to
save the operating sequence. Using program function, comfortable and optimum massage/express mode,
level of speed/vacuum strength/cycle, massage/express time can be saved and restored anytime.
The massage mode relatively services the light suction pressure at fast speed. And about the expression
mode, it services the strong suction pressure at slow speed.
Starting the sessions for the massage mode is recommended to stimulate the breast before the milk is
flowing. And during the expression, it is important to set the pump at your maximum comfort vacuum. It
helps to maintain and increase milk production. Because the maximum comfort vacuum level is different
by individuals, you have to find and set the proper vacuum and cycle of the expression mode by increasing
the suction level gradually or starting a similar level with your previous experience. If you feel slightly
uncomfortable at a certain level, decrease a level. At first, keep the session short and the suction level low.
Yo can increase the settings once you are used to pumping
Type BT-150 and BT-150B are able to control by Application, HI-bebe Super for Android/iOS. Refer to the
enclosed Application User Manual (document no. 150APP-ENG-OPM-EUR)
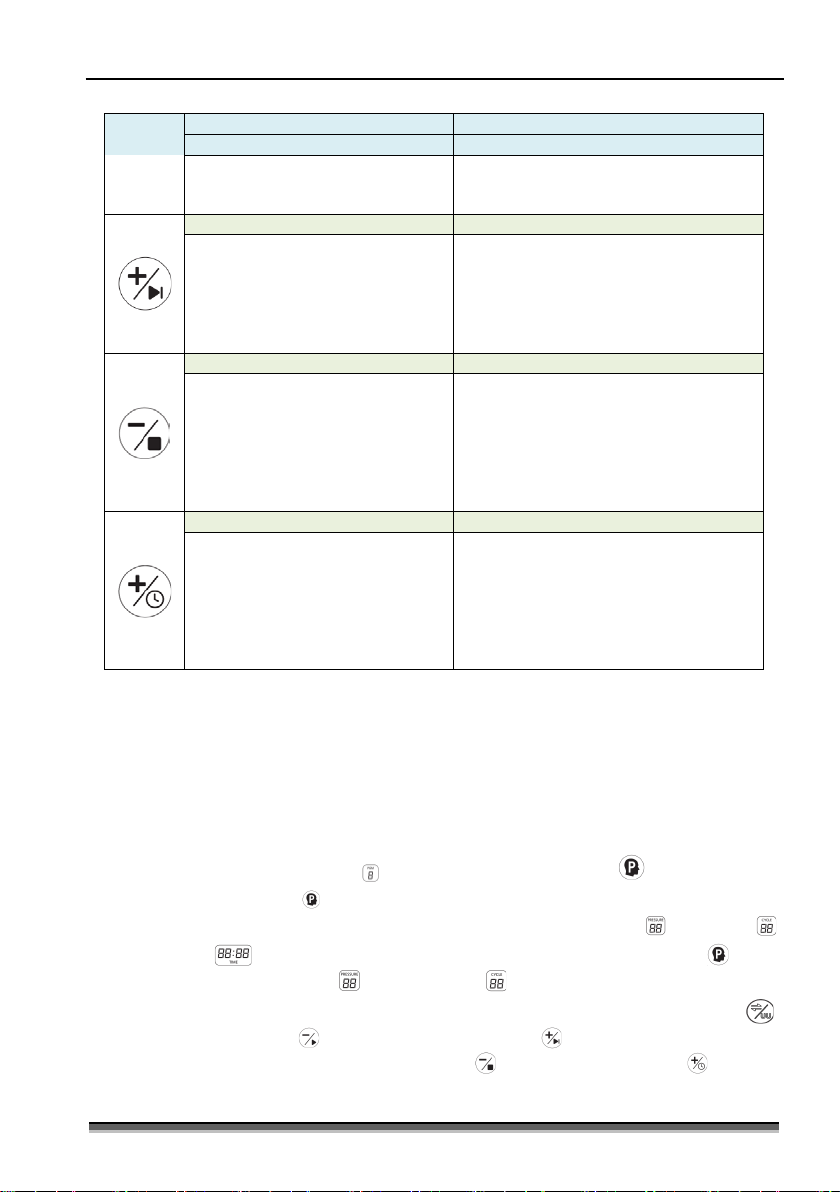
(1) Buttons
Several buttons have two functions. Pressing shortly will make it perform basic functions and press longer
more than 2 seconds will make it perform program functions.
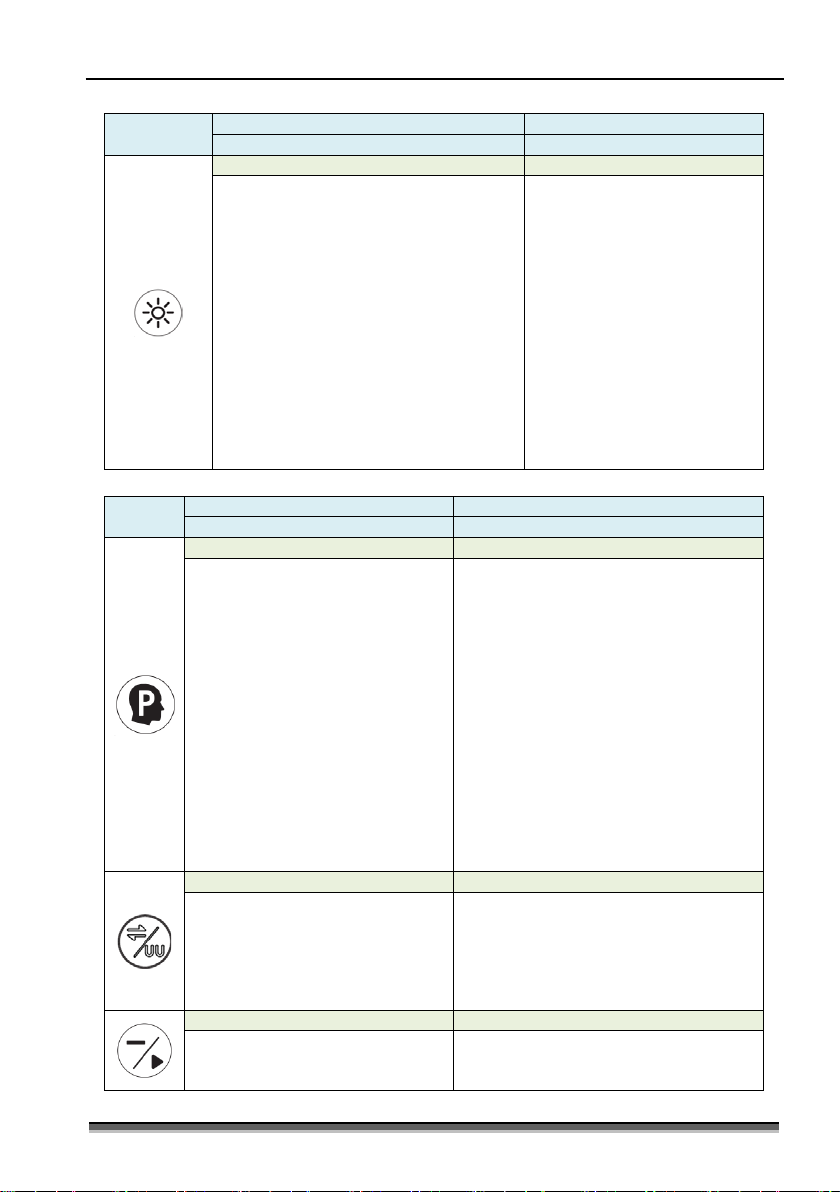
Button
Basic function
Program function
Short Press
Press & Long Hold
Power On/Off button Memory start/stop button
Turn on and off the power.
BT-150 Opeartion Manual
11
P/N: 150-ENG-OPM-EUR-R04
Bistos Co., Ltd.
2020,04
Button
Basic function
Program function
Short Press
Press & Long Hold
Lamp On/Off button
Turn on, change the lamp brightness and
turn off the lamp
When purchasing a product with a lamp
option, Press the lamp button on the power-
off pump to turn on the lamp. Each time the
button is pressed again, the brightness of
the lamp becomes bright. Press the button
fourth times to turn off the lamp.
If you purchase a product without a lamp
option, When you press the lamp button on
the power-off pump, the LCD back light
turns on. After that, the LCD back light
brightness becomes bright each time you
press it again, and the LCD back light turns
off when you press the third time.
Button
Basic function
Program function
Short Press
Press & Long Hold
Change Program ID button
Start/stop program storage button
Press shortly to change the active
program ID which is able to check
through the PGM screen.
The device stores the 8 different
program IDs.
Program IDs from 1 to 4 are provided
by the default setting and
unchangeable by the user. Program
IDs from 5 to 8 are able to set by the
user.
Button for entering the mode for setting
the program sequence of a Program.
Pressing this button for more than 2
seconds starts to save the operation
sequence to the Program ID number from 5
to 8 currently displayed on the LCD screen.
One program is composed of 8 program
sequences and each program sequence
consists the operation mode, pressure
level, cycle level and running time.
Once all of above the operation sequences
have been saved, and then press and hold
this button for more than 2 seconds to store
as the assigned Program ID.
See the next (2) How to use the program
function for more details of the setting.
Mode change button
SINGLE/DOUBLE pressure change button
Toggle between massage and express
mode.
In the program sequence input mode,
the button is used for selecting the
mode of a program sequence
between massage and express mode.
Toggle between SINGLE and DOUBLE
pressure mode
Vacuum decrease button
Start button
Decrease the vacuum in the operating
mode.
In the program sequence input mode,
Start to operate as saved sequence.
No response when no sequence saved.
BT-150 Opeartion Manual
12
P/N: 150-ENG-OPM-EUR-R04
Bistos Co., Ltd.
2020,04
Button
Basic function
Program function
Short Press
Press & Long Hold
the button is used for setting the
decreasing value of the pressure level
and minute.
Vacuum increase button
Skip button
Increase the vacuum in the operating
mode. (Level 1 ~ 16)
In the program sequence input mode,
the button is used for setting the
increasing value of the pressure level
and minute.
It is possible to skip a specific operation
sequence during program operation
sequence reproduction.
If this button is pressed for longer than 2
seconds during program playback, the
current program sequence step is ignored
Cycle decrease button
Stop button
Increase the speed the operating
mode. (Level 1~6 for express mode,
Level 1~3 for massage mode)
In the program sequence input mode,
the button is used for setting the
decreasing value of the cycle level
and second.
Stop to operate as saved sequence.
No response when not operating according
to saved sequence.
Cycle increase button
Increase the speed in the operating
mode. (Level 1 ~ 6 for express mode,
Level1~3 for massage mode)
In the program sequence input mode,
the button is used for setting the
increasing value of the pressure level
and minute.
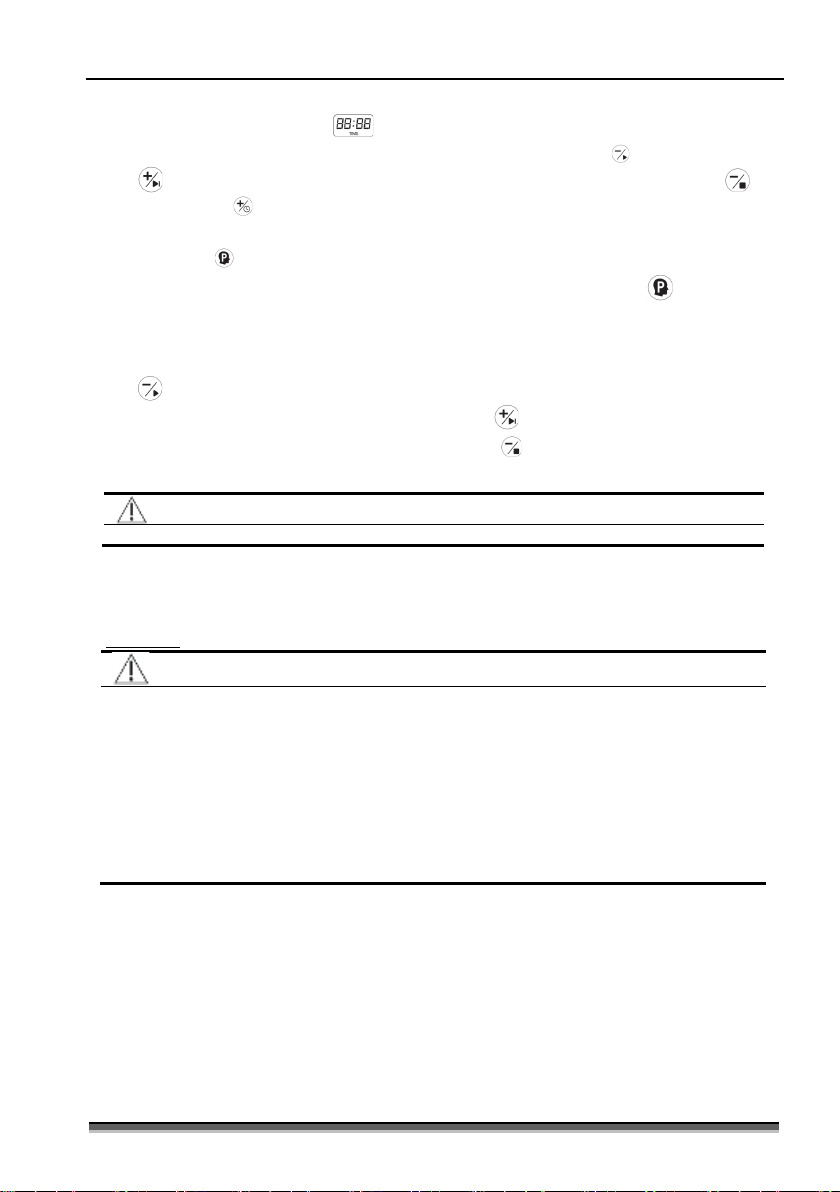
(2) How to use the program function
You can save and restore the convenient and optimum massage/express mode, speed/vacuum level
and operating time.
①Able to use the below Program IDs provided as the default setting.
- Program ID number 1 considering the single pumping for mothers with newborn
- Program ID number 2 considering the dual pumping for mothers with newborn
- Program ID number 3 considering the single pumping for mothers with infants
- Program ID number 4 considering the dual pumping for mothers with infants.
Able to set the desired operation sequence to the 5 to 8 Program IDs by the below procedure.
②Select the proper Program ID number ( ) by pressing the Program ID button ( ) shortly.
③Press the Program ID button ( ) for long to start a mode for setting the operating sequence.
④Able to identify the possible state for input by the blinked box of pressure level ( ), cycle level ( )
and operating time( ). Entering the next input is made by pressing the Program ID button ( ) shortly.
⑤While the box of pressure level ( ) and cycle level ( ) is blinking, start to set each operation
sequence for a program sequence. The operation mode can select through the Mode change button ( ).
The Vacuum decrease button ( ) and Vacuum increase button ( ) is used to set a decrease and
increase of the pressure level. The Cycle decrease button ( ) and Cycle increase button ( ) is used to
set a decrease and increase of the cycle level.
BT-150 Opeartion Manual
13
P/N: 150-ENG-OPM-EUR-R04
Bistos Co., Ltd.
2020,04
⑥While the box of operating time ( ) is blinking, start to set the operation time for previously set
operation mode, pressure level and cycle level. The Vacuum decrease button ( ) and Vacuum increase
button ( ) is used to set a decrease and increase of the minute. And the Cycle decrease button ( ) and
Cycle increase button ( ) is used to set a decrease and increase of the second.
⑦If you want to add another program sequence(a next program sequence) within the Program, press the
Program ID button ( ) shortly and repeat the above instruction from ④to ⑥.
⑧When you finish all set for the program sequences, press the Program ID button( ) for long to exit
and store the program sequence input mode.Operate the device the following instruction:
⑨The program ID 5 to 8 which have been set up the program sequences through the ②to ⑧
instruction or the program ID 1 to 4 provided as the default setting are able to play by pressing the Start
button ( ) for long.
⑩To skip a certain program sequence, press the Skip button ( ) for long.
⑪Anytime, to exit the playing Program, press the Stop button( ) for long.
⑫In the operation mode, pressure level and cycle level can change even while playing the program.
CAUTION
Increasing the Frequency might be accompanied by an increase in noise and vibration.
3.5 Essential performance
The breast pump specifies to limit the vacuum pressure as - 290 mmHg.
4. Pumping
CAUTION
Before each use visually inspect the individual components for cracks, chips, tears, discoloration
or deterioration. In the event that damage to the device is observed, please discontinue use
until the parts have been replaced.
Clean and sanitize all compartments that come into contact with breast and milk according to
this manual before first use and after every use.
Do not use the components if dirt, mold or other residual is visible when they do not be gone
even after clean and sanitizing.
Do not use the device with a position that air tube or other lines are possible to be entangled.
Make sure that the air tubes not to get tangled while double pumping.
Do not use the device while sleeping or overly drowsy.
4.1 Prepare to pump
(1) Wash hands thoroughly (at least one minute) with soap and water before touching the breast
and pump parts.
(2) Check pump set components for wear or damage before use and replace if necessary.
(3) Make sure that the components that come into contact with breastmilk are cleaned and
sanitized appropriately. Assemble the funnel, diaphragm and bottle according to this manual
and connect to main body via air tube. As to funnel, choose the proper size by individuals.
(4) Check the air tube connected tightly to prevent the vacuum leakage. When single pumping
covers the auxiliary tubing port with port cover to prevent the air flow into the breast pump.
BT-150 Opeartion Manual
14
P/N: 150-ENG-OPM-EUR-R04
Bistos Co., Ltd.
2020,04
(5) Check the battery capacity and connect the power adapter necessary.
(6) Massage the breast for about 5 minutes with warm towel to promote expression.
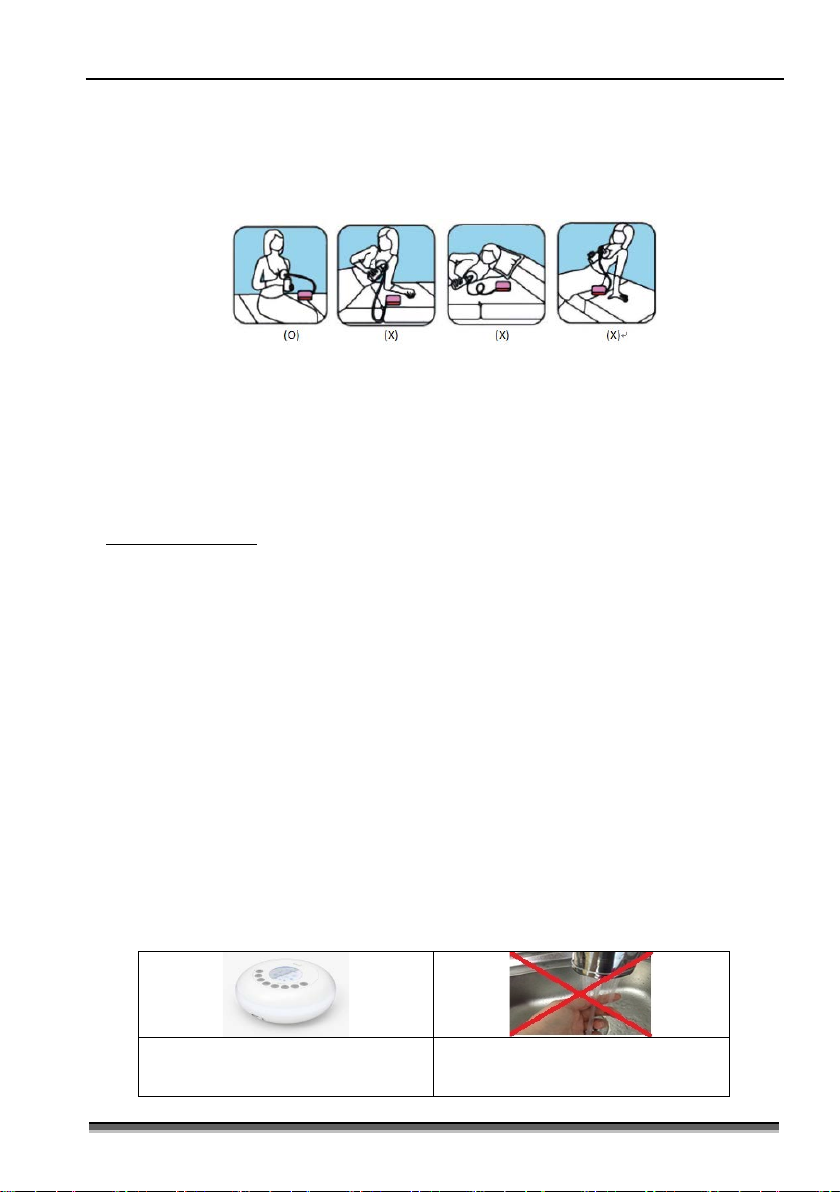
4.2 Pumping
(1) To prevent the backflow, always pumping while seated.
(2) Place the funnel on your breast so that your nipple is centered.
(3) Turn the breast pump on to pumping.
(4) Adjust the speed/vacuum to a comfortable level. Increase speed/vacuum level until pumping
feels slightly uncomfortable (not painful), then decrease it slightly to find the comfortable level.
(5) Normal pumping times are from 15 minutes to 30 minutes but it can vary individually.
(6) When the pumping session is over, turn off the power and slide a finger between the funnel and
your breast to separate the funnel from your breast.
5. Wash and Sanitize
(1) Clean all parts before using the pump for the first time. Especially, all parts that come in contact
with breast milk including the bottle set, before the first use, must be place in boiling water for
5 minutes following the ‘5.2 sanitize’ instruction. This is to ensure hygiene.
(2) Clean the device (main body) after each use with clean and dry towel.
5.1 Wash
(1) Disassemble the bottle block for washing.
(2) Rinse all separated parts that came in contact with breast and breast milk in cool water in order
to remove breast milk residue.
(3) Wash in sink, or
•Soak all separated parts in warm, soapy water for 5 minutes.
•Wash each part with a clean dish-cloth or soft brush.
•Rinse all separate parte with clear water.
(4) Wash in dishwasher
•Wash all separated parts on top rack of dishwasher.
•Allow all breast pump parts to air dry in a clean area.
(5) Place parts on a clean surface and/or towel.
(6) Allow all parts to air dry.
(7) Store dry parts in a clean, cool place when not in use. Do not store wet or damp parts.
Main body
when dirty wipe with a clean dry towel
after each pumping session
Air tube
Do not clean tubing, replace damaged or
dirty tubing with a new set

BT-150 Opeartion Manual
15
P/N: 150-ENG-OPM-EUR-R04
Bistos Co., Ltd.
2020,04
CAUTION
Disassemble and wash all parts that come in contact with the breast and breastmilk
immediately after use to avoid dry up of milk residue and to prevent the growth of bacteria.
Only use drinking-quality water for washing.
Do not use strong detergent to clean.
5.2 Sanitize
(1) Disassemble all parts that come in contact with breastmilk.
(2) Fill a pot with enough water to cover all parts.
(3) Boil the water for 5 minutes while parts in the water.
(4) Allow water to cool and gently remove parts from water with
tongs.
(5) Place parts on a clean surface and/or towel.
(6) Allow all parts to air dry.
(7) Store dry parts in a clean, cool place when not in use.
Do not store wet or damp parts.
Boiling water
6. Storage of breastmilk
The information below is referenced from website of Office of Women’s Health.
Store your breastmilk in clean glass or hard BPA-free plastic bottles with tight-fitting lids. You can also use
milk storage bags, which are made for freezing human milk. Do not use disposable bottle liners or other
plastic bags to store breastmilk.
After each pumping
Label the date on the storage container. Include your child’s name if you are giving the milk
to a child care provider.
Gently swirl the container to mix the cream part of the breastmilk that may rise to the top
back into the rest of the milk. Do not shake the milk. This can cause some of the milk’s
valuable parts to break down.
Refrigerate or chill milk right after it is expressed. You can put it in the refrigerator, place it
is a cooler or insulated cooler pack, or freeze it in small (2 to 4 ounce/60 to 110 g) batches
for later feeding.
Tips for freezing milk
Wait to tighten bottle caps or lids until milk is completely frozen.
Try to leave an inch or so from the milk to the top of the container because it will expand
when freezing.
Store milk in the back of the freezer, not on the shelf of the freezer door.
If you are adding expressed breastmilk to a container of already frozen breastmilk, make
sure to add a lesser amount than the already frozen amount.
Tips for thawing and warming up milk
Clearly label milk containers with the date the milk was expressed. Use the oldest stored
milk first.
Breastmilk does not need to be warmed. Some moms prefer to take the chill off and serve
at room temperature. Some moms serve it cold.
Thaw the bottle or bag of frozen milk (1) by putting it in the refrigerator overnight
(24hours), (2) by holding it under warm running water, or (3) by setting it is a container of
warm water (over 20 minutes, be careful not to infiltrate water into bag or bottle of
breastmilk).

BT-150 Opeartion Manual
16
P/N: 150-ENG-OPM-EUR-R04
Bistos Co., Ltd.
2020,04
Never put a bottle or bag of breastmilk in the microwave. Microwaving creates hot spots
that could cause the burn to the mouth of your baby and damage the milk.
Swirl the milk, and test the temperature by dropping some on your wrist. The milk should
be comfortably warm, not hot.
Use thawed breast milk within 24 hours. Do not refreeze thawed breastmilk.
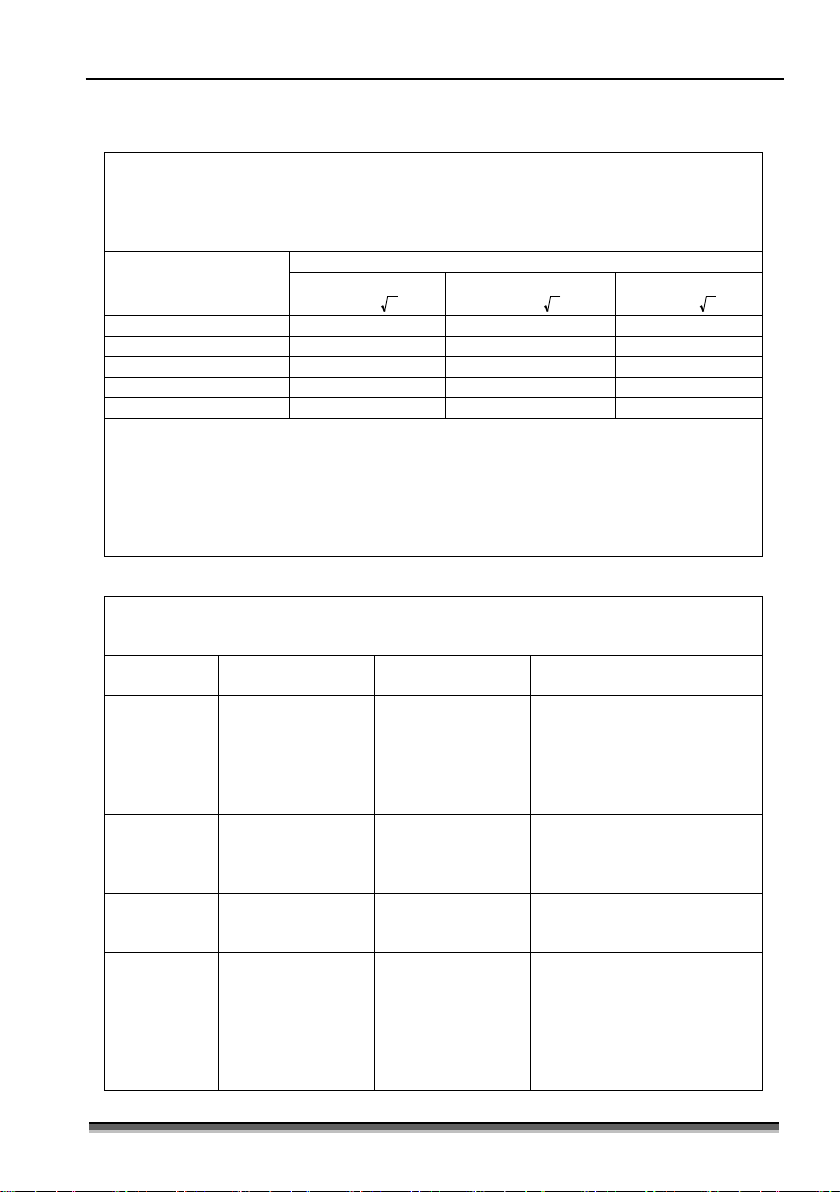
Guide to storing fresh breastmilk for use with healthy full-term infants
Place
Temperature
How long
Things to Know
Countertop,
table
Room temp
(up to 77℉
(25℃))
Up to 3 to 4 hours is
best.
Up to 6 to 8 hours is
okay for very clean
expressed milk.
Containers should be covered and
kept as cool as possible. Cover the
container with a clean cool towel
may keep milk cooler. Throw out
any leftover milk within 1 to 2
hours after the baby is finished
feeding.
Refrigerator 39℉(4℃) or
colder
Up to 3 days is best.
Up to 5 days is okay for
very clean expressed
milk.
Store milk in the back of the main
body of the refrigerator. When at
work, you can place your expressed
milk in the refrigerator.
Freezer 0℉(-18℃) or
colder
Up to 3-6 months is
best.
Up to 9 months is okay
for very clean
expressed milk.
Store milk toward the back of the
freezer where the temperature is
most constant. Milk stored at 0℉
or colder is safe for longer
durations, but the quality of the
milk might not be as high.
Deep
freezer
-4℉(-20℃) or
colder
Up to 6 months.
Up to 12 months is
okay for very clean
expressed milk.
Store milk toward the back of the
freezer where the temperature is
most constant. Milk stored at 0℉
or colder is safe for longer
durations, but the quality of the
milk might not be as high.
Guide to storing thawed breastmilk
Room temperature
(60℉to 85℉/16℃to 29℃)
Refrigerator
(39℉/4℃or colder)
Any freezers
Thawed
breastmilk
Up to 1 to 2 hours is best. Up
to 3 to 4 hours is okay.
24 hours Do not refreeze.
7. Trouble shooting
No or low expression
•Check the power button.
•Ensure the funnel, diaphragm assembly
and bottle
assembled correctly.
•Inspect all components for tear, cracks or bending.
Battery not charged
•Check the adapter connected correctly.
•If you still have a problem with charging, replace the
adapter with new one.
Does not power on
•Inspect the power on/off button and case for any foreign
materials.

BT-150 Opeartion Manual
17
P/N: 150-ENG-OPM-EUR-R04
Bistos Co., Ltd.
2020,04
Main body becomes wet
•Unplug the power adapter from the socket.
•Turn off the main body.
•Wipe main body with dry cloth and store the main body in a
warm, dry place more than 12 hours.
Breastmilk in tube
•Turn off the main body.
•Disconnect the air tube from diaphragm top.
•Remove the milk from tube and diaphragm.
Milk flow in reverse direction
up to Main Body
•Stop using the product immediately.
•Contact service center.
※
If you have not resolved the problem with breast pump or you have further questions, please contact
Bistos customer center.
8. Manufacturer’s declaration on EMC
The electric breast pump needs special precautions regarding EMC (Electromagnetic compatibility) and
needs to be used according to the EMC information provided in this user manual. Wireless communications
equipment such as wireless home network devices, mobile phones, cordless telephones and their base
stations, walkie-talkies can affect the electric breast pump and should be kept at least 1 m away from the
equipment. And it does not suitable for use in an MRI environment.
8.1 Electromagnetic emissions
The electric breast pump is intended for use in the electromagnetic environment specified
below. The customer or the user of the electric breast pump should assure that it is used in such
an environment.
Emissions test
Compliance
Electromagnetic environment-guidance
RF emissions
CISPR 11 Group 1
The electric breast pump uses RF energy
only for its internal function. Therefore, its
RF emissions are very low and are not likely
to cause interference in nearby electronic
equipment.
RF emissions CISPR 11
Class B
The electric breast pump is suitable for use
in all establishments, including domestic and
those directly connected to the public low-
voltage power supply network that supplies
buildings used for domestic purposes.
Harmonic emission
IEC61000-3-2
Class A
Voltage fulctuations /flicker
emissionsIEC61000-3-3
Complies
WARNING
The electric breast pump should not be used adjacent to or stacked with other equipment. If
adjacent or stacked use is necessary, the electric breast pump should be observed to verify
normal operation in the configuration in which it will be used.
Portable RF communications equipment (including peripherals such as antenna cables and
external antennas) should be used no closer than 30 cm (12 inches) to any part of the pump,
including cables specified by the manufacturer. Otherwise, degradation of the performance of
this equipment could result.
Use of adapter other than those specified or provided by the manufacturer of this equipment
could results in increased electromagnetic emissions or decreased electromagnetic immunity
of this equipment and result in improper operation.
BT-150 Opeartion Manual
18
P/N: 150-ENG-OPM-EUR-R04
Bistos Co., Ltd.
2020,04
8.2 Recommended separation distances between portable and mobile RF communications equipment
and the electric breast pump
The electric breast pump is intended for use in the electromagnetic environment in which
radiated RF disturbances are controlled. The customer or the user of the electric breast pump can
help prevent electromagnetic interference by maintaining a minimum distance between portable
and mobile RF communications equipment and the electric breast pump as recommended below,
according to the maximum output power of the communications equipment.
Rated maximum output
power of transmitter [W]
Separation distance according to frequency of transmitter [m]
150 kHz ~ 80 MHz
d = 1.2
P
80 MHz ~ 800 MHz
d = 1.2
P
800 MHz ~ 2.5 GHz
d = 2.3
P
0.01
0.12
0.12
0.23
0.1
0.38
0.38
0.73
1
1.2
1.2
2.3
10
3.8
3.8
7.3
100
12
12
23
For transmitters at a maximum output power not listed above, the recommended separation
distance d in meters (m) can be estimated using the equation applicable to the frequency of the
transmitter, where pis the maximum output power rating of the transmitter in watts (W)
according to the transmitter manufacturer.
NOTE 1) At 80 MHz and 800 MHz, the separation distance for the higher frequency range applies.
NOTE2) These guidelines may not apply in all situations. Electromagnetic propagation is affected
by absorption and reflection from structures, objects and people.
8.3 Electromagnetic immunity
The electric breast pump is intended for use in the electromagnetic environment specified below.
The customer or the user of the electric breast pump should assure that it is used in such an
environment.
Immunity test Test level Compliance level
Electromagnetic
environment-guidance
Electrostatic
discharge(ESD)
IEC 61000-4-2
contact discharge
±8kV
air discharge:
±2kV, ±4kV,
±8kV, ±15kV
contact discharge
±8kV
air discharge:
±2kV, ±4kV,
±8kV, ±15kV
Floors should be wood, concrete
or ceramic tile. If floors are
covered with synthetic material,
the relative humidity should be
at least 30%.
Electrical fast
transient/burs
t
IEC61000-4-4
± 2 kV
100 kHz repetition
frequency
± 2 kV
100 kHz repetition
frequency
Mains power quality should be
that of a typical commercial or
domestic environment.
Surge
IEC61000-4-5
± 0,5 kV , ± 1 kV
Line-to-line
± 0,5 kV , ± 1 kV
Line-to-line
Mains power quality should be
that of a typical commercial or
domestic environment.
Voltage dips,
short
interruptions
and voltage
variations on
power supply
input lines
0 % U
T
; 0,5 cycle
At 0°, 45°, 90°, 135°,
180°, 225°, 270°,
and
315°
0% UT ; 1 cycle and
0 % U
T
; 0,5 cycle
At 0°, 45°, 90°, 135°,
180°, 225°, 270°,
and
315°
0% UT ; 1 cycle and
Mains power quality should be
that of a typical commercial or
domestic environment.
If the user of the electric breast
pump requires continued
operation during power mains
interruptions, it is recommended
BT-150 Opeartion Manual
19
P/N: 150-ENG-OPM-EUR-R04
Bistos Co., Ltd.
2020,04
IEC61000-4-11
70% U
T
; 25/30
cycles
Single Phase; at 0°
0% UT ; 250/300
cycles
Single Phase; at 0°
70% U
T
; 25/30
cycles
Single Phase; at 0°
0% UT ; 250/300
cycles
Single Phase; at 0°
that the electric breast pump is
powered from an uninterruptible
power supply or a battery.
Power
frequency
(50/60 ㎐)
magnetic field
IEC61000-4-8
30 A/m, 50 or 60 Hz 30 A/m, 50 or 60 Hz
Power frequency magnetic fields
should be at levels characteristic
of a typical commercial or
domestic environment.
NOTE: UTis the a.c. mains voltage prior to application of the test level.
Immunity test
Test level
Compliance level
Electromagnetic environment-guidance
Conducted RF
IEC 61000-4-6
3 Vrms
150 kHz to
80 MHz
6 Vrms in
ISM bands
between
0.15 MHz and
80 MHz
3 Vrms
150 kHz to
80 MHz
6 Vrms in ISM
bands between
0.15 MHz and
80 MHz
Portable and mobile RF communications
equipment should be used no closer to
any part of the electric breast pump,
including cables, than the recommended
separation distance calculated from the
equation applicable to the frequency of
the transmitter.
Recommended separation distance:
d = 1.2
P
d = 1.2
P
80 MHz ~ 800 MHz
d = 2.3
P
800 MHz ~ 2.7 MHz
where p is the maximum output power
rating of the transmitter (W) according to
the transmitter manufacturer and d is the
recommended separation distance in
meters(m)
Field strengths from fixed RF transmitters,
as determined by an electromagnetic site
survey a, should be less than the
compliance level in each frequency range
b.
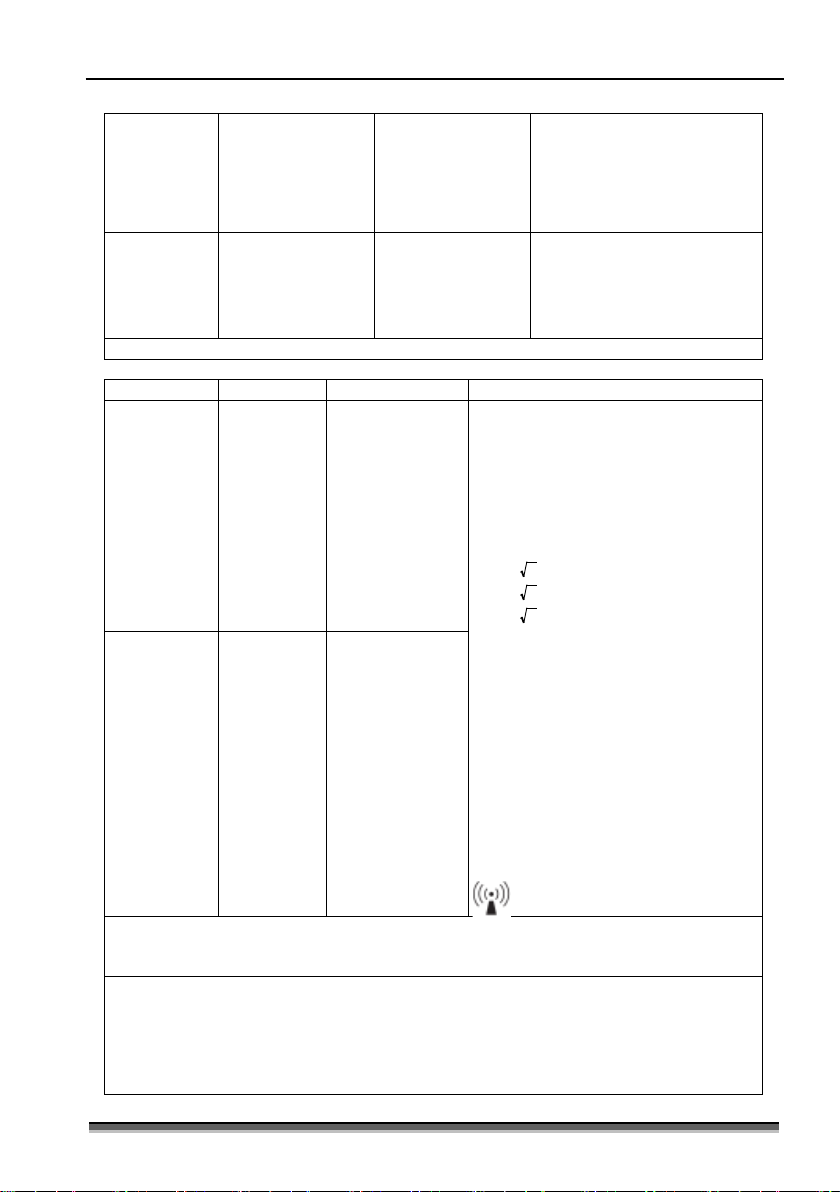
Interference may occur in the vicinity of
equipment marked with the following
symbol:
Radiated RF
IEC 61000-4-3
10 V/m
80 MHz to
2.7 GHz 80%,
1 kHz AM
RF Wireless C
omm.
10 V/m
80 MHz to
2.7 GHz 80%,
1 kHz AM
RF Wireless Comm.
NOTE 1) At 80 MHz and 800 MHz, the higher frequency range applies.
NOTE 2)These guidelines may not apply in all situations. Electromagnetic propagation is affected
by absorption and reflection from structures, objects and people.
a Field strengths from fixed transmitters, such as base stations for radio (cellular/cordless)
telephones and land mobile radios, amateur radio, AM and FM radio broadcast and TV broadcast
cannot be predicted theoretically with accuracy. To assess the electromagnetic environment due
to fixed RF transmitters, an electromagnetic site survey should be considered. If the measured
field strength in the location in which the electric breast pump is used exceeds the applicable RF
compliance level above, the electric breast pump should be observed to verify normal operation.

BT-150 Opeartion Manual
20
P/N: 150-ENG-OPM-EUR-R04
Bistos Co., Ltd.
2020,04
If abnormal performance is observed, additional measures may be necessary, such as re-orienting
or relocating the electric breast pump.
b
Over the frequency range 150 kHz to 80 MHz, field strengths should be less than 10 V/m.
WARNING
Excessive ambient EM (Electromagnetic) DISTURBANCES can cause the pressure of the unit to be temporarily
excessively high or low. Please use in environments below the above test standards.
9. Technical specifications
Functional Characteristics
Type
Electric Breast Pump
Pumping pressure(Vacuum)
MAX. - 290mmHg
Display
Type
6 cm diameter Mono LCD
Pressure Level
Numeric Display
Operating Time
Numeric Display (min:sec)
Battery Level
3 levels
Function
Mode
expression mode
-16 pressure levels
-6 cycle levels
massage mode
-16 pressure levels
-3 cycle levels
Auto Shut Off
30 minutes
Program
8 Program IDs.
8 Program Sequences for each IDs
Backflow protection
Power
Adaptor
The certified adaptor in accordance with IEC 60601-1 or IEC
60950-1 should be used for electric safety.
Input: AC 100 ~ 240V (50/60 Hz)
Output: DC 12V/2.0A
Main body
Input: DC12V/1.3A
Rechargeable Battery
7.4 V Li-ion Polymer 2200 mA
Operating Time: 120 min
Charging Time: 150 min (100%)
Maximum charge-discharge cycles: 300 cycles
Standard Configuration
Operation manual
1ea
Power Adaptor
1ea
Funnel & Bottle Set
1ea(default: 24 mm)
Options
Nursing Night Lamp
3 step brightness control
Table of contents


