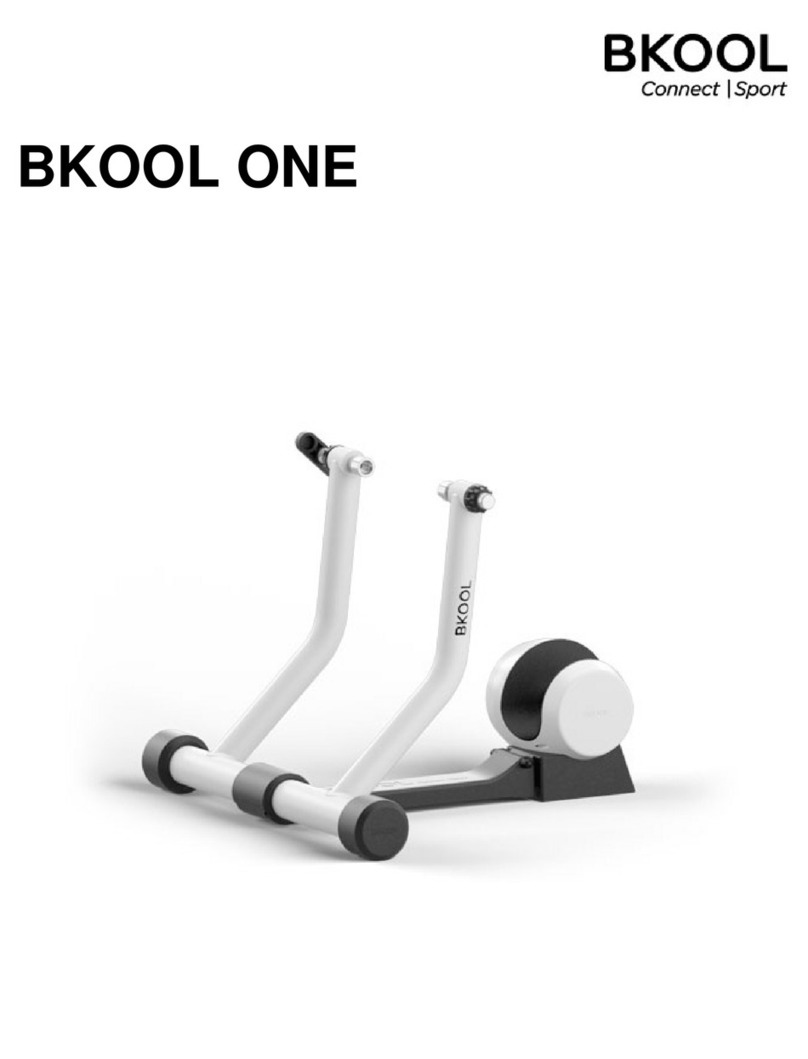
Bkool Smart Air User manual

INSTRUCTIONS
INSTRUCCIONES
MODE D’EMPLOI
ISTRUZIONI
ANLEITUNG
Air_instructions_v01_2018.indd 1 11/12/18 13:05
Bkool Smart Air

2
Componentes ES
01. Bastidor
02. Barras estabilizadoras
03. Separador 9 /10 (20410)
04. Adaptador de corriente
05. Sensor de cadencia
06. Antena USB ANT+
07. Adaptador eje pasante
08. Cupón Simulador
Composants FR
01. Châssis
02. Barres stabilisatrices
03. Séparateur 9 /10 (20410)
04. Adaptateur secteur
05. Capteur de cadence
06. Antenne USB ANT+
07. Adaptateur axe traversant
08. Coupon simulateur
Components EN
01. Stand
02. Stabilizer bars
03. Spacer 9 /10 (20410)
04. AC adaptor
05. Cadence sensor
06. USB ANT+ antenna
07. Thru-axle adapter
08. Simulator coupon
Componenti IT
01. Telaio
02. Barre stabilizzatrici
03. Separatore 9 /10 (20410)
04. Adattatore di corrente
05. Cadenzimetro
06. Antenna USB ANT+
07. Adattatore perno passante
08. Buono Simulatore
Komponenten DE
01. Gestell
02. Stabilisationsrohre
03. Distanzring 9 /10 (20410)
04. Netzteil
05. Trittfrequenzmesser
06. ANT+-USB-Antenne
07. Steckachsenadapter
08. Coupon für den Simulator
Air_instructions_v01_2018.indd 2 11/12/18 13:05

3
6
20410 (x1)
3
BKOOL
5Cadence
1
2
2
4
8
*Simulator coupon not included in products sold through bkool.com
7
Air_instructions_v01_2018.indd 3 11/12/18 13:05

4
Assembling the Bkool Smart Air
Montar el Bkool Smart Air
Montage de la Bkool Smart Air
Montare la Bkool Smart Air
Aufbau des Bkool Smart Air
Air_instructions_v01_2018.indd 4 11/12/18 13:05

5
1
1.3
1.4 1.5
1.2
1.1
Air_instructions_v01_2018.indd 5 11/12/18 13:05

6
2
Adjust
Adjust
Air_instructions_v01_2018.indd 6 11/12/18 13:05

7
3
3.1
3.2 3.3
11
8/10
Not
included
Number of speeds
Not
included
Not
included
Not
included
Air_instructions_v01_2018.indd 7 11/12/18 13:05

8
4
9mm
* Bike axle
4.1
Air_instructions_v01_2018.indd 8 11/12/18 13:05

9
BKOOL
4.2
4.3
Air_instructions_v01_2018.indd 9 11/12/18 13:05

10
5.1
BKOOL
BKOOL
5.2
5
12mm
* Bike axle
Not
included
Not
included
5.3
Air_instructions_v01_2018.indd 10 11/12/18 13:05

11
5.4
5.5
BKOOL
Air_instructions_v01_2018.indd 11 11/12/18 13:05

12
BKOOL
Cadence
BKOOL
Cadence
Cadence
BKOOL
Cadence
BKOOL
Cadence
Remove
battery isolator
Cadence
6
7
840 mm
700 mm
Cadence sensor
Danger (+-5º)
Do not exceed the limit +- 6º
Peligro (+-5º)
No exceder el límite +- 6º
Danger (+- 5º)
Ne pas dépasser la limite +- 6º
Pericolo (+-5º)
Non superare il limite + - 6º
Gefahr (+-5º)
Überschreiten Sie nicht die Grenze von +-6º
Warning
Air_instructions_v01_2018.indd 12 11/12/18 13:05

13
1ENGLISH 14
2ESPAÑOL 18
3FRANÇAIS 22
4ITALIANO 26
5DEUTSCH 30
Air_instructions_v01_2018.indd 13 11/12/18 13:05

14
Thank you for purchasing a Bkool trainer. We want your
experience to be perfect and for you to be part of
our Bkool community.
1SET UP SMART AIR 15
2SIMULATOR AND CONTROL 15
3START-UP 16
4YOUR FIRST RIDE 16
5WHAT TO DO IF... 16
6SAFETY WARNINGS 17
7
WARRANTY 17
English
Air_instructions_v01_2018.indd 14 11/12/18 13:05

15
Set up the Smart Air
See the illustrations on pages 5to 11.
Stand the box on the oor vertically. Open the side
aps and take out the rst white protective piece,
which contains the accessories supplied with the
trainer. Take out the resistance unit by pulling on the
metal stand such that it remains in a vertical position.
Finally, remove the second white protective piece,
where you will nd the legs of the trainer.
Place the trainer vertically on a rm, level surface.
Screw in the legs by rotating them to the right
(illustration 2). To make it easier, you can lift the
trainer using the block provided in the box.
Installing the cassette
10-, 9- or 7-speed cassettes. Insert the spacer (part 3)
in the center of the trainer.
11-speed road cassettes. No spacer is needed.
BKOOL recommends cassettes with a maximumof
25 teeth.
Now insert the cassette.
Tighten the locking nut on the cassette (part 4) with
the knurled nut (part 5).
Remove the rear wheel.
Now place the bike in front of the Bkool Smart Air.
Lifting the frame by the seat, place the chain on the
smallest cassette sprocket.
Fit in the gear hangers and support them on the
trainer axle.
9-mm axles
Insert the bike axle to set the bike in the Smart Air.
12-mm axles
Remove the cartridges that come with the trainer (on
the other side of the cassette) and replace them with
the 12-mm ones.
Now put the bike in front of the Bkool Smart Air.
Keeping the front wheel straight, lift the frame by the
seatstays and put the chain on the smallest cassette
sprocket. Fit in the gear hangers and support them
on the trainer axle. Insert the cassette into the axle.
Power supply
Plug the 12V transformer into the connector at the
rear of the trainer.
Cadence sensor installation.
Open the cadence sensor and remove the sticker
that keeps the battery from discharging. Place the
cadence meter on one of the cranks and use the
bands to keep it rmly attached so it does not move
while pedaling.”
Simulator and control
1. Register.
If you are not registered at bkool.com, do so now. You will
need to use the same registration email and password to
log into the Bkool Simulator.
Activate your coupon. If you have a discount coupon for
Bkool Premium, activate it now at activation.bkool.com.
2. Download the Bkool simulator.
On your PC or Mac, from bkool.com. On your tablet and
smartphone, from the App Store or Google Play.
3. Download the Bkool Remote app (optional).
To your smartphone from the Apple Store or Google Play. This
app works like a remote control that lets you move through
the simulator menus.
1
2
1
2
3
4
5
6
123
XXX XXX 34
SIMULATOR
SIMULATOR
REMOTE
7
Air_instructions_v01_2018.indd 15 11/12/18 13:05

16
Start-up
1. Make sure you have a good internet connection.
In the area where the Smart Air is located.
2. Plug the Smart Air into the outlet.
3. Connecting trainer to Bkool Simulator:
ANT+: connect the USB ANT+ antenna to the PC or tablet.
If using an Android tablet, you will need an additional
adapter (OTG cable, not included). The included USB ANT+
antenna is not compatible with the iPad.
Bluetooth: In Windows, pair the Smart Bike to your PC
(not needed for Mac, iPad or Android tablets).
Remember that your Smart Air can only be connected
to one Bluetooth device at a time.
4. Pairing the Smart Air:
Log into the Bkool simulator with your email and
password.
Your rst ride
1. Make sure you have a good internet connection and
log into the simulator with your email and password.
2. Place your phone on the stand (see illustration in
step 7 of the assembly) and open the Bkool Remote app.
You will use this app to control the resistance of your
Smart Air automatically or manually and to interact with
the Bkool simulator. If you have any questions, see the
Bkool Remote app manual in the “Help” section.
What to do if...
The simulator doesn’t detect the trainer.
Make sure the trainer is plugged in. If using Windows,
the trainer must be connected to your computer via
Bluetooth before it can be synced with the simulator.
Make sure it
is properly connected. If using an ANT+ connection, the
USB ANT+ must be connected to the computer or tablet.
A device isn’t detected.
Make sure the device is active. To detect a heart rate
monitor the strap must be rmly around the chest. To
detect a cadence sensor, the pedals must be turning. The
USB ANT+ must be connected to the computer or tablet.
You can’t log into the simulator.
Make sure you’ve entered the same email and password
you used to register at bkool.com.
3. In the simulator, select the session you want to do, click
on it and then click on the “Start” button.
And remember, if you want reliable data, we recommend
doing an FTP test (5 or 20 minutes) as quickly as possible.
That way you’ll know your exact tness level and the Smart
Air will automatically adjust to it.
You can nd it in the Bkool simulator in “Search > Create
FTP Test > 5-min FTP test”.
Make sure you have internet access and that your antivirus
or rewall aren’t preventing the simulator from connecting
to the internet.
Help.
If you have any questions, see the help section at bkool.com
I want to update the FW version.
TThe Bkool Smart Air trainer can only be updated via
Bluetooth using the “Bkool Toolkit” smartphone app,
available in the Apple Store and Google Play. From the
main screen, look for the trainer. Once it nds it, if the app
determines that your Smart Air doesn’t have the latest
rmware version installed, it will give you the option to
download it. Remember to keep your Smart Air plugged in
throughout the entire process.
The Bkool simulator will automatically detect the Smart Air.
If not, go to “Settings > Pair my devices”.
5. Pair your heart rate monitor.
The Bkool simulator is compatible with any ANT+
or Bluetooth heart rate monitor (not included with the
Bkool unit; you can get one at bkool.com > Store).
Keep the heart rate monitor activated and close to your
computer or tablet. The Bkool simulator will automatically
detect the monitor. If not, go to “Settings > Pair my devices”
For greater convenience, if you are going to use a tablet,
use the right stand for it. It is not included in the box; you
can get one at the bkool.com store.
If you have any questions, see the simulator manual in
the “Help” section.
3
4
5
Air_instructions_v01_2018.indd 16 11/12/18 13:05

17
Bkool, S.L. CIF: B 98125024. Dirección: San Joaquín 3 , 28231 Las Rozas - Madrid. ESPAÑA [email protected]
Safety warnings
Smart Air
Make sure that all of the components described in the
assembly section are securely attached to the trainer.
If they are not, the user could fall of the bicycle.
Electrical connection.
Properly plug the transformer into the outlet and to the
connection on the trainer. Your electrical installation must
conform to the standards or regulations in eect in the
country where the trainer is being used. The connection to
the mains must be easily accessible..
Use original spare parts.
If the transformer is damaged, it must be replaced with
another supplied by Bkool or by its after-sales service.
Cleaning.
To clean the trainer, use a cloth dipped in water or a mild
cleaning solution. Be sure to unplug it before cleaning it.
Do not allow any cleaning products to enter the resistance
unit.
Warranty
BKOOL S.L. OFFERS A LIMITED TWO-YEAR WARRANTY
FROM THE ORIGINAL PURCHASE DATE. DURING THIS
PERIOD, BKOOL S.L. GUARANTEES THAT THE TRAINER
WILL BE FREE FROM MATERIAL AND MANUFACTURING
DEFECTS. BKOOL S.L. SHALL NOT BE LIABLE FOR DAMAGE
RESULTING FROM IMPROPER USE OF THIS PRODUCT.
Applicability.
This warranty is oered only to the original owner for
trainers purchased through the Bkool website, or its
authorized distributors and stores.
Limitations and Voiding of the Warranty.
The warranty does not cover any causes not attributable
to the manufacturer. The warranty does not cover normal
wear and tear of the trainer. It also does not cover any
damage caused by accidents, improper use, improper care
or negligence.
Warranty limitation and cancellation.
Causes not attributable to the manufacturer are excluded
from the warranty.
Users
Users who can use the trainer.
The trainer is intended for use only by people who have
the physical, sensory and mental abilities needed to
make the eort required by any exercise routine. We
recommend asking your doctor if you are t enough to
engage in the physical activity required to use the trainer.
Even if you meet the above requirements, you must have
sucient experience or knowledge, or have received
adequate training, to use this exercise equipment.
Users who can NOT use the trainer.
Under no circumstances should the trainer be used by
individuals with diminished physical, sensory or mental
capacities. It is also not intended for children. The trainer
must be kept out of the reach of these individuals.
Health recommendations.
If you do not feel well while exercising, or if you feel weak,
discomfort, pain or tightness of the chest, or if you are
short of breath or have an irregular heartbeat, stop using
the trainer. We recommend checking with your doctor.
The warranty does not cover parts are worn out by the
trainer’s normal use. Neither does it cover damage caused
by accidents, abuse, misuse, or neglect. The warranty is
voided when: (1) the trainer is used in any way dierent
from that for which it was designed, (2) the assembly
and maintenance instructions are not followed (3) the
trainer has undergone repairs or attempted repairs not
performed by the ocial technical service.
Under the aforementioned circumstances Bkool S.L.
declines any responsibility for damages arisingindirectly or
directly as a result.
Technical Assistance.
On bkool.com you will nd information on how to get
personalized technical assistance. You can also contact us
via email at [email protected].
You may be asked to provide proof of purchase (including
the date), so please keep your receipt.
6
7
Air_instructions_v01_2018.indd 17 11/12/18 13:05

18
Gracias por adquirir el rodillo Bkool. Deseamos que tu experiencia
sea plenamente satisfactoria y que formes parte de la extensa
comunidad de Bkoolers.
1MONTAR EL SMART AIR 19
2SIMULADOR Y CONTROL 19
3PUESTA EN MARCHA 20
4TU PRIMERA SESIÓN 20
5QUÉ HACER SI … 20
6ADVERTENCIAS DE SEGURIDAD 21
7
GARANTÍA 21
Español
Air_instructions_v01_2018.indd 18 11/12/18 13:05

19
Montar el Smart Air
Guíate por las ilustraciones de las páginas 5a 10.
Apoya la caja en el suelo en posición vertical.
Abre las solapas laterales y saca la primera pieza
blanca de protección donde se sitúan los accesorios
que vienen junto al rodillo. Extrae la unidad de
resistencia estirando del bastidor metálico de
manera que permanezca siempre en posición
vertical. Finalmente saca la segunda pieza blanca
de protección donde podrás encontrar las patas
del rodillo.
Coloca el rodillo sobre una supercie rme y
nivelada. Enrosca las patas girándolas a la derecha.
Gira los apoyos de los extremos de las patas hasta
dejarlos perfectamente rectos con el suelo.
Recuerda que en la parte trasera del rodillo dispones
de reguladores que te permitirán adecuar el rodillo
a suelos desnivelados.
Montaje del Cassette.
Cassettes de 10, 9 u 7 velocidades. Introduce el
separador (pieza 3) en el núcleo del rodillo.
Cassettes de 11 velocidades carretera. No es
necesario utilizar ningún separador.
BKOOL recomienda usar como máximo Cassettes
de 25 dientes.
Introduce ahora el Cassette.
Aprieta la tuerca de cierre del Cassette (pieza 4)
con la tuerca estriada (pieza 5).
Quita la rueda trasera.
Ahora coloca la bicicleta delante del Bkool Smart Air.
Cogiendo el cuadro por el sillín, coloca la cadena en
la corona pequeña del cassette. Encaja las punteras
de cambio y apoyalas en el eje del rodillo.
Ejes de 9 mm.
Introduce el eje de tu bicicleta para jar la bici con
el Smart Air.
Ejes de 12 mm.
Retira los casquillos que vienen con el rodillo
(al otro lado del Cassette) y reemplazalos por
los de 12 mm.
Ahora coloca la bicicleta delante del Bkool Smart
Air. Mantén la rueda delantera recta y, cogiendo el
cuadro por los tirantes, coloca la cadena en la corona
pequeña del piñón. Encaja las punteras de cambio
y apoyalas en el eje del rodillo. Introduce el eje en
el Cassette.
Alimentación eléctrica:
Conecta el transformador de 12 V en la clavija de
la parte posterior del rodillo.
Montaje Cadenciometro.
Abre el sensor de cadencia y retira la pegatina
que evita que se descargue la batería, Coloca el
cadenciomento en una de tus bielas y utiliza las
gomas para que quede perfectamente jado y no
se mueva al pedalear.
1
1
2
3
4
5
7
6
Simulador y control
1. Regístrate.
Si no estás registrado en bkool.com, hazlo ahora.
Necesitarás el mismo email y contraseña
de tu registro para acceder al Simulador de Bkool.
Activa tu cupón.
Si tienes un cupón de descuento para Bkool Premium
es el momento de activarlo en activation.bkool.com
2. Descárgate el Simulador Bkool.
Para PC / Mac podrás hacerlo desde bkool.com.
En tu tablet y smartphone, desde App Store o Google Play.
3. Descárgate la App Bkool Remote (Opcional).
En tu smartphone desde Apple Store o Google Play. Esta App
funciona como un mando a distancia que te permite moverte
por los menus del simulador.
2
123
XXX XXX 34
SIMULATOR
SIMULATOR
REMOTE
Air_instructions_v01_2018.indd 19 11/12/18 13:05

20
Puesta en marcha
1. Asegúrate de que tienes buena conexión a internet
en la zona donde está el Smart Air.
2. Conecta el Smart Air a la corriente eléctrica.
3. Prepara el sistema local de comunicaciones:
ANT+: conecta la antena USB ANT+ a tu PC o tablet.
Si utilizas una tablet Android necesitarás un adaptador
adicional (cable OTG, no suministrado). La antena USB
ANT+ incluida no es compatible con iPad.
Bluetooth: En Windows vincula el Smart Air a tu PC
(no es necesario en Mac, iPad o tablets Android).
Recuerda que tu Smart Air sólo puede estar conectado
a un dispositivo Bluetooth a la vez.
4. Empareja el Smart Air:
Entra en el Simulador Bkool con tu correo electrónico
y contraseña.
Tu primera sesión
1. Asegúrate de que tienes buena conexión a internet
y accede al Simulador con tu correo electrónico y
contraseña.
2. En el Simulador, selecciona la sesión que quieras hacer,
haz click sobre ella y luego click en el botón “Empezar“.
Qué hacer si …
El simulador no detecta el rodillo.
Comprueba que el rodillo está conectado a la red eléctrica.
Si utilizas Windows, el rodillo debe estar conectado vía
Bluetooth a tu ordenador antes de sincronizarlo con el
simulador. Comprueba que está correctamente conectado.
Si utilizas conexión ANT+, el USB ANT+ debe estar
conectado al ordenador o tablet.
No detecta un dispositivo.
El dispositivo debe estar activo. Para detectar el sensor
de frecuencia cardíaca, éste debe estar bien colocado
al pecho. Para detectar el sensor de cadencia debes
pedalear. El USB ANT+ debe estar conectado al ordenador
o tablet.
Y recuerda: si quieres tener datos ables, lo mejor es
que cuanto antes hagas una sesión de test UPF (de 5 o 20
minutos). Así sabrás exactamente tu forma física y el Smart
Air se ajustará a ella automáticamente.
La puedes encontrar en el Simulador Bkool en “Buscar>
Crear test UPF > Test FTP 5 min
No puedes entrar al simulador.
Comprueba que estás introduciendo correctamente
tu email y contraseña que utilizas en bkool.com.
Verica que dispones de acceso a internet, y que tu antivirus
o cortafuegos no impide la conexión del simulador a internet.
Ayuda.
Si tienes alguna duda, ve a la sección de Ayuda en bkool.com.
Quiero actualizar la versión de FW.
El rodillo Bkool Smart Air solo se puede actualizar a través
de Bluetooth mediante la aplicación para smartphone
“Bkool Toolkit” disponible en Apple Store y Google Play.
Desde la pantalla principal haz una búsqueda del rodillo
y una vez localizado, si la app detecta que tu Smart Air
no tiene instalada la última versión de FW te ofrecerá la
posibilidad de poder descargarla. Recuerda tener conectado
a la red eléctrica tu Smart Air durante todo este proceso.
El Simulador Bkool detecta automáticamente el Smart Air.
Si no lo ha detectado accede a “Conguración > conectar
mis dispositivos”.
5. Empareja tu cadenciometro de biela.
El simulador intentara detectar automáticamente
el sensor. Si lo consigue hacer, accede a:
“Conguración” > “Conectar mis dispositivso”
Si vas a usar una tablet, para mayor comodidad utiliza el
soporte adecuado para ello. No esta incluido en la caja,
puedes encontrarlo en la tienda bkool.com
Para cualquier duda, visita la seccion de ayuda en bkool.com
3
4
5
Air_instructions_v01_2018.indd 20 11/12/18 13:05
Table of contents
Languages:
Other Bkool Fitness Equipment manuals
