Black Lion Audio Revolution 6x6 User manual

Revolution 6x6
6-in / 6-out USB audio interface / word clock / DAC / ADC
with USB OTG
Quick Start Guide
SOFTWARE REGISTRATION CODE
IMPORTANT SAFETY INSTRUCTIONS
1. Read these instructions.
2. Keep these instructions
3. Heed all warnings.
4. Follow all instructions.
5. Do not use this apparatus near water.
6. Clean only with dry cloth.
7. Install in accordance with the manufacturer’s instructions.
8. Do not install near any heat sources such as radiators, heat regis-
ters, stoves, or other apparatus that produce heat.
9. Do not defeat the safety purpose of the polarized or grounding-type
plug. A polarized plug has two blades with one wider than the other.
A grounding-type plug has two blades and a third grounding prong.
The wide blade or third prong is provided for your safety. If the pro-
vided plug does not t into your outlet, consult an electrician for
replacement of the obsolete outlet.
10. Protect the power cord from being walked on or pinched particular-
ly at plugs, convenience receptacles, and the point where they exit
from the apparatus. If the power cord becomes frayed, stop using
immediately.
11. Use only attachments/accessories specied by the manufacturer
12. Use only with a cart, stand, tripod, bracket or table specied by the
manufacturer, or sold with the apparatus. When a cart is used, use
caution when moving the cart/apparatus combination to avoid in-
jury from tip-over.
13. Unplug this apparatus during lightning storms or when unused for
long periods of time.
14. Refer all servicing to qualied service personnel. Servicing is re-
quired when the apparatus has been damaged in any way, such as
power supply cord or plug is damaged, liquid has been spilled or
objects have fallen into the apparatus, the apparatus has been ex-
posed to rain or moisture, does not operate normally, or has been
dropped.
15. This apparatus shall not be exposed to dripping or splashing, and
no object lled with liquids, such as vases, shall be placed on the
apparatus.
16. Note that this apparatus is not completely disconnected from the
AC mains service when the power switch is in the OFF position.
17. The mains plug or power inlet on the product is used as the discon-
nect device, so the disconnected device shall remain readily opera-
ble when reconnected.
18. Any changes or modications not expressly approved in this manu-
al could void your authority to operate this apparatus.
19. Only use power supplies and accessories provided with the product
or approved by the manufacturer.
The lightning ash with an arrow-
head symbol within an equilateral
triangle is intended to alert the
user to the presence of uninsu-
lated “dangerous voltage” within
the product’s enclosure that may
be of sucient magnitude to
constitute a risk of electric shock
to persons.
The exclamation point within an equilateral triangle is intended to alert
the user to the presence of important operating and maintenance
(servicing) instructions in the literature accompanying the product.
The Black Lion Audio Revolution 6x6 complies with all applicable
RoHS / WEEE European Union directives.
Do not attempt to service this unit yourself, as it will void your warran-
ty. Please check your unit carefully upon receipt and return to place
of purchase immediately if there are any problems with the product.
After that, the standard Black Lion Audio 3 YEAR warranty will apply
to defects in materials and workmanship.
U.S.A.
Should your Black Lion Audio product require service,
please contact the Black Lion Audio Service Department:
https://www.blacklionaudio.com/contact. You must obtain an RA #
(Return Authorization number) from us before shipping a unit back to
us. This RA # must be clearly written on the outside of the box.
Please safely pack the units…It is best to use the original packing
materials. Black Lion Audio cannot be responsible for any damag-
es incurred in shipping to us due to poor packaging. PLEASE PACK
CAREFULLY and FULLY INSURE THE SHIPMENT.
INTERNATIONAL
For service or warranty assistance, please contact the Black Lion Au-
dio distributor in your country through the dealer from whom you pur-
chased this product.
LIMITED 3 YEAR WARRANTY
Black Lion Audio’s Revolution 6x6 is warranted by Black Lion Audio to
be free from defects in materials and workmanship for the period of
THREE (3) YEARS to the original purchaser. In the event of such defects,
the product will be repaired without charge or, at our option, replaced
with a new one if delivered to Black Lion Audio prepaid, together with a
copy of the sales slip or other proof of purchase date. The warranty ex-
cludes problems due to normal wear, abuse, shipping damage or failure
to use the product in accordance with the specications.
All parts and labor are covered under this Limited Warranty. However,
if it is determined by Black Lion Audio that the device was damaged or
made defective through abuse, we reserve the right to charge the cus-
tomer for the cost of the repair.
Black Lion Audio shall not be liable for damages based upon inconve-
nience, loss of use of the product, loss of time, interrupted operation or
commercial loss or any other damages, whether incidental, consequen-
tial or otherwise. This warranty gives you specic legal rights, and you
may have other rights, which will vary from state to state.
This warranty is not transferable.
RAD Distribution
180 Carpenter Ave. Middletown,
New York 10940, US
Revised 01/17/24

LET’S GET STARTED! GETTING TO KNOW THE REVOLUTION 6X6.
Windows users: Install the Revolution 6x6 Windows ASIO driver. This
installer was designed to be easy to use. Simply follow the on-screen in-
structions. You will be alerted that the installer has successfully nished
and it will prompt you to reboot your computer. Click “Finish” to automat-
ically restart your computer.
The ASIO drivers are available for download on the Black Lion Audio
website on the bottom of the Revolution 6x6 page.
MacOS users: The Revolution 6x6 is a class-compliant Core Audio de-
vice, so no installation is necessary. Simply connect your Revolution 6x6
to your computer to begin using it.
1. Turn the Mixer knob on the front panel of your Revolution 6x6 to the
12 o’clock position. This will allow you to hear both your inputs and
the playback from the computer.
2. Connect a pair of headphones to the Revolution 6x6 headphone out-
put and turn the Phones volume control to the 12 o‘clock position.
1. Go to www.blacklionaudio.com
2. Click on the “REGISTER PRODUCT” button on the upper right corner.
3. Click “Create an Account” and follow the on-screen instructions.
You’ll need to verify your email address once submitted.
4. Return to blacklionaudio.com and click on the “REGISTER PROD-
UCT” button on the upper right corner. Log in to your new account.
5. Click “Register a product” in the blue bar on the top left.
6. Enter serial number of the unit. It’s located on the bottom of the unit.
7. Enter software number. It’s located on the front cover of this man-
ual.
8. Click “Verify.” The following screen will contain your software codes
and download instructions.
1. Connect a microphone then speak into it while watching the input
meter in your DAW. Slowly turn the Revolution 6x6’s Input 1 Preamp
Gain knob clockwise to establish a suitable recording level.
2. Engage MONO button for input monitor summing.
3. Click the “Record“ button in your DAW to begin recording your rst
track!
Product registration and software download instructions Front Panel
Rear Panel
Connecting to a Computer (Mac & Windows)
Connect the Revolution 6x6 to your computer using a USB cable. Note: if your Revolution 6x6’s USB light does not light green when connecting to a
computer, it may be in Standalone mode. Press and hold the Stand-alone button for 5 seconds to switch to interface mode.
Prepping for Playback
Recording
Advanced Features
More advanced features of the Revolution 6x6 including USB OTG, Standalone mode, and more, are covered in the advanced manual available at black-
lionaudio.com at the bottom of the Revolution 6x6 page.
1. Inputs: XLR-Combo inputs for connecting microphones,
instruments, and line-level equipment. Use the center-balanced
1/4” connection in this jack for line-level and Hi-Z devices (electric
guitars and basses.)
2. Instrument Input Switches: This selects between unbalanced
instrument level and balanced line level for the 1/4” input on the
XLR-Combo inputs.
3. Preamp Gain: This knob controls gain on the preamplier.
4. Input LED: This LED indicates the levels coming into the interface.
Green=signal received; Red=clipping.
5. 48V Buttons: These buttons turn on 48V phantom power per chan-
nel.
6. Main Meter: This meters the analog input or playback levels. When
set to Input Metering mode, signals hitting 0 dBFS are clipping.
S/PDIF and OTG connections are not metered unless in Standalone
mode.
1. 5V Power Connector: USB-C Connection for power only.
2. Power Switch: Turns the unit off or on.
3. USB-C to Computer: Connect computer or mobile device here
for recording with applications that support multi-channel audio
interfaces.
4. OTG Connector: Connect devices that support USB OTG (On the
Go) here.
5. S/PDIF Output: Use this to output mic/inst channels 1 and 2 via a
digital S/PDIF connection to another device.
6. S/PDIF Input: Connect S/PDIF digital outputs from devices here.
7. Word Clock Output: Use this to use the Revolution 6x6 as a primary
clock for your other devices.
8. Word Clock Input: Use this to sync Revolution 6x6 to your primary
clock when in standalone mode.
9. Monitor Output: Main outputs. Connect your monitor speakers here.
A note on the power supply: While Revolution 6x6 can be run over
bus power via the USB connection, we recommend using the included
power supply to use the headphones at full volume or standalone mode.
When connecting to AC power using the included power supply, use one
of the included USB cables for power and the other for your computer
connection.
A note on USB OTG: USB OTG (On-the-go) allows you to connect a mo-
bile USB device to the Revolution 6x6 and send audio to and from the
device. Sample from your phone to your laptop, or livestream a laptop
session from your phone! The OTG port does not facilitate power to or
from the mobile device.
7. Monitor: This attenuates the monitor output level.
8. USB Status: This LED indicates the status of USB connectivity:
ĥ Blinking Red: Unit is powered on; no secure connection to host
via USB or OTG (when not in Standalone mode).
ĥ Solid Red: OTG Source is connected and secure, but there is no
USB source securely connected.
ĥ Solid Yellow: USB source is connected and has a secure connec-
tion to the host AND there is a secure OTG connection as well.
ĥ Solid Green: USB source is connected and has a secure connec-
tion to host.
9. Direct Mixer: This knob is a direct mixer for monitoring inputs in re-
al-time. Turn left for analog inputs 1/2, and turn right for playback.
When in Standalone Mode the digital inputs (OTG and S/PDIF) can be
monitored through the playback setting.
10. Headphone Volume: This controls the headphone volume level.
11. Headphone Output: Connect your headphones here.
12. Mono HP: Engaging this switch performs mono summing of the
headphone outputs in Interface mode and both headphone and
monitor outputs in Stand-alone mode. For monitoring stereo inputs,
make sure this button is disengaged. This button only affects input
monitoring, and not playback monitoring.
13. Stand-Alone: Press and hold to engage Standalone mode to use
the Revolution 6x6 without a computer as a primary clock, DAC, or
ADC. Press to cycle through available sample rate options. BNC and
S/PDIF are external clock input sources for Standalone mode.
14. InputMeter:Toggles the MainMeter betweendisplayinganalog input
or playback levels. Lit=input metering; unlit=playback metering.
Connect microphone here.
Connect headphones here.
10
11
987
61 2
3
13 12
4
1 2 3 4 5 7 9
6 8
14
5
Other Black Lion Audio Recording Equipment manuals

Black Lion Audio
Black Lion Audio Bluey 500 Series User manual
Black Lion Audio
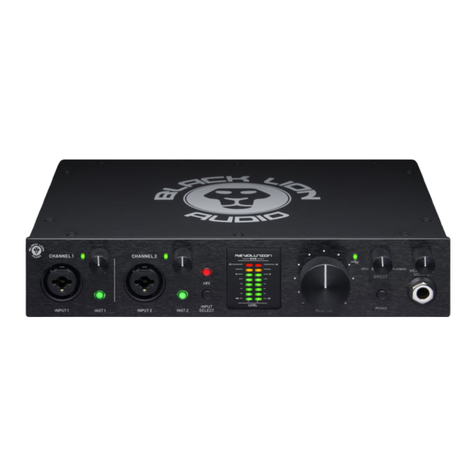
Black Lion Audio Revolution 2x2 User manual
Black Lion Audio
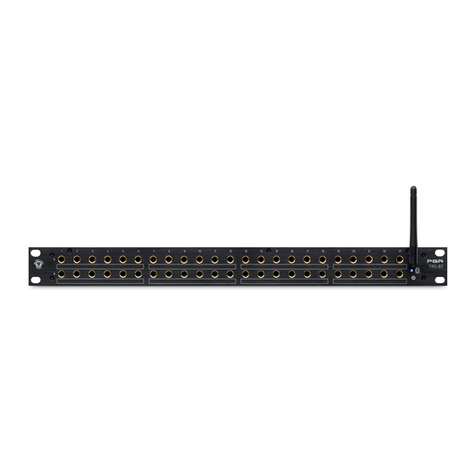
Black Lion Audio PBR TRS-BT User manual

Black Lion Audio
Black Lion Audio Revolution 6x6 Assembly instructions
Black Lion Audio
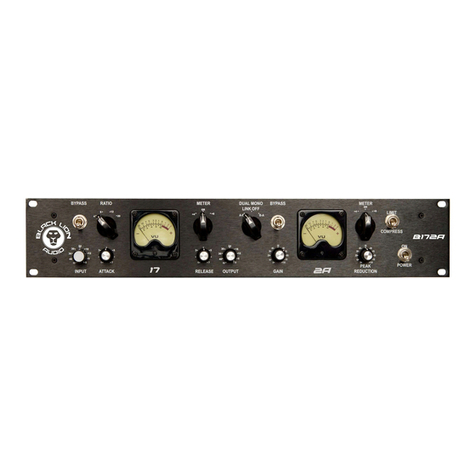
Black Lion Audio B172A User manual
Black Lion Audio
Black Lion Audio PBR XLR 32 DSub User manual
Black Lion Audio
Black Lion Audio PBR TT User manual
Black Lion Audio
Black Lion Audio PG-1 Type C User manual
Black Lion Audio
Black Lion Audio PBR TRS3 Patchbay User manual

Black Lion Audio
Black Lion Audio 500 Series User manual


