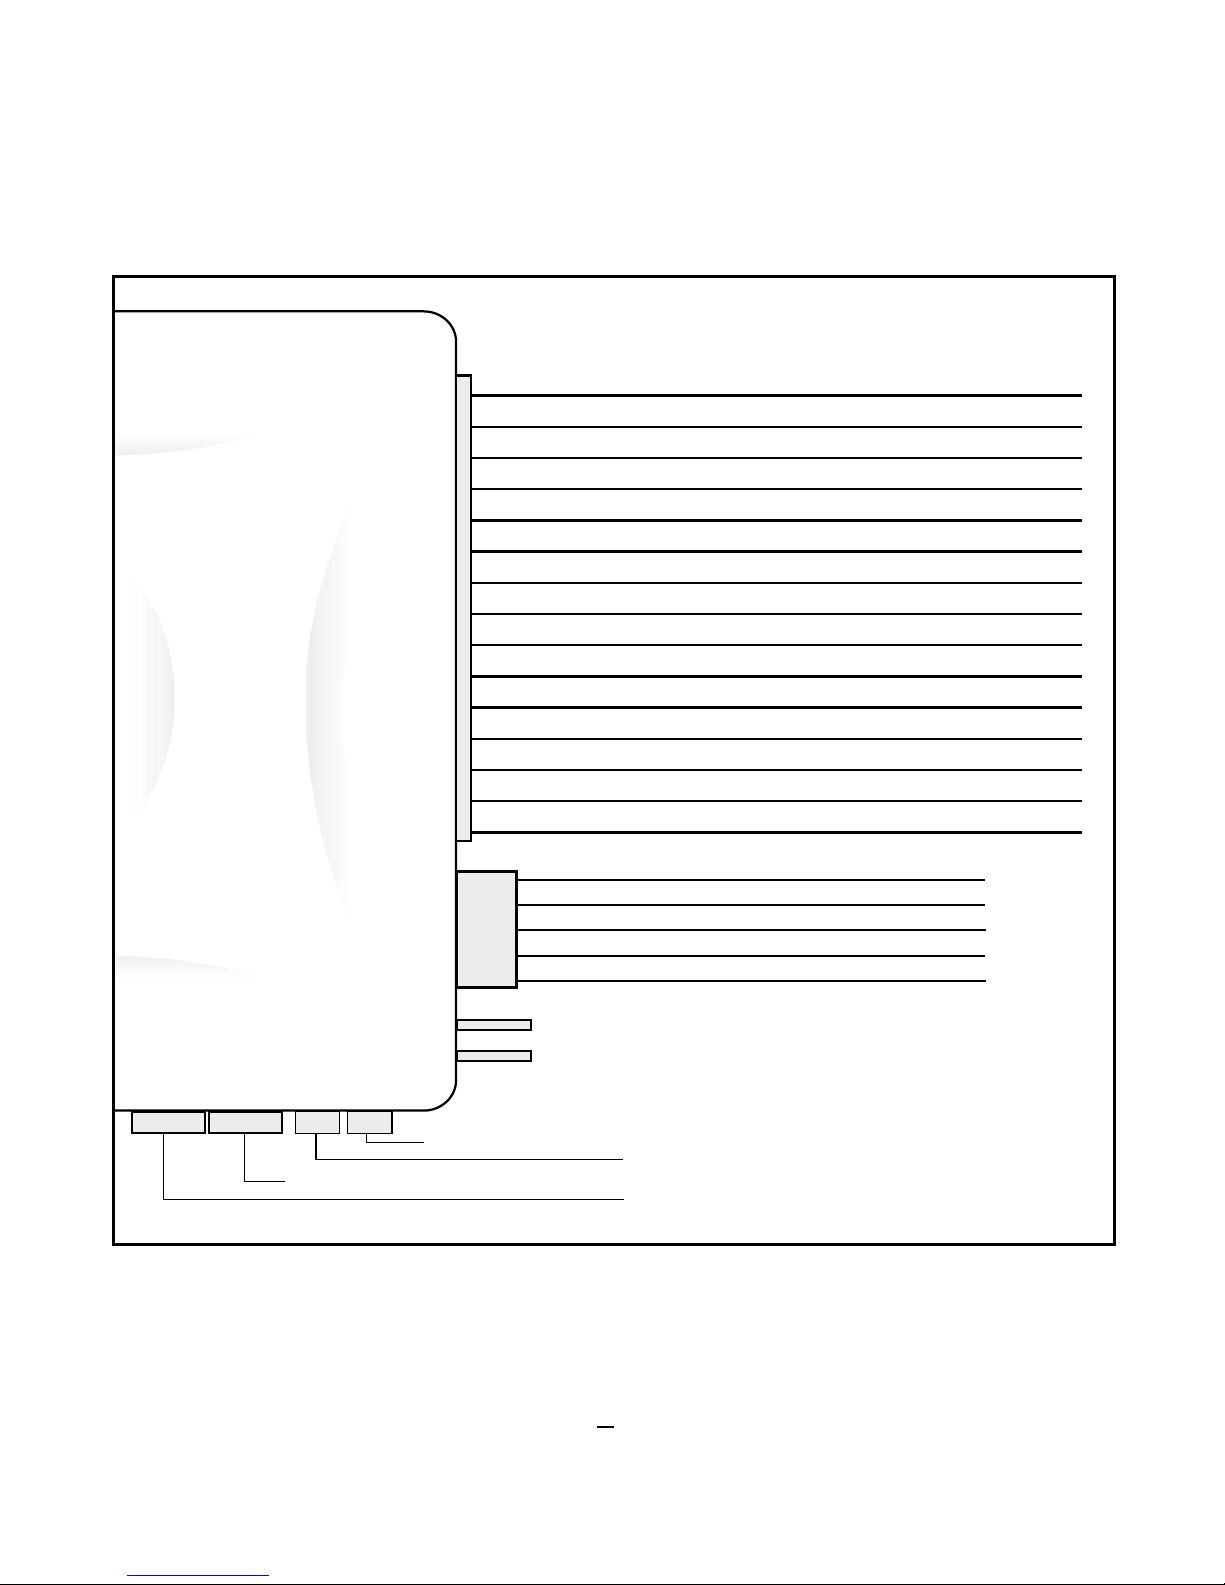
Plug in Connectors:
4-Pin White Connector: Plug-in connector port for
dual stage shock sensor.
•GREEN WIRE - negative lock output (-).
2-Pin Red Connector: Plug-in connector port for
LED. Mount LED in an area where it may be easily seen
from either side of the vehicle.
2-Pin Blue Connector: Plug-in connector port for
program/service switch. Mount program switch in an
area that is easily accessible from the driver’s position.
5-Pin White Door Lock Connector:
•WHITE - Lock Switch (87a)
•GREEN - Lock Motor (30)
•BLUE - Unlock Motor (30)
•BROWN - Unlock Switch (87a)
•VIOLET - Polarity Select (87)
Operation
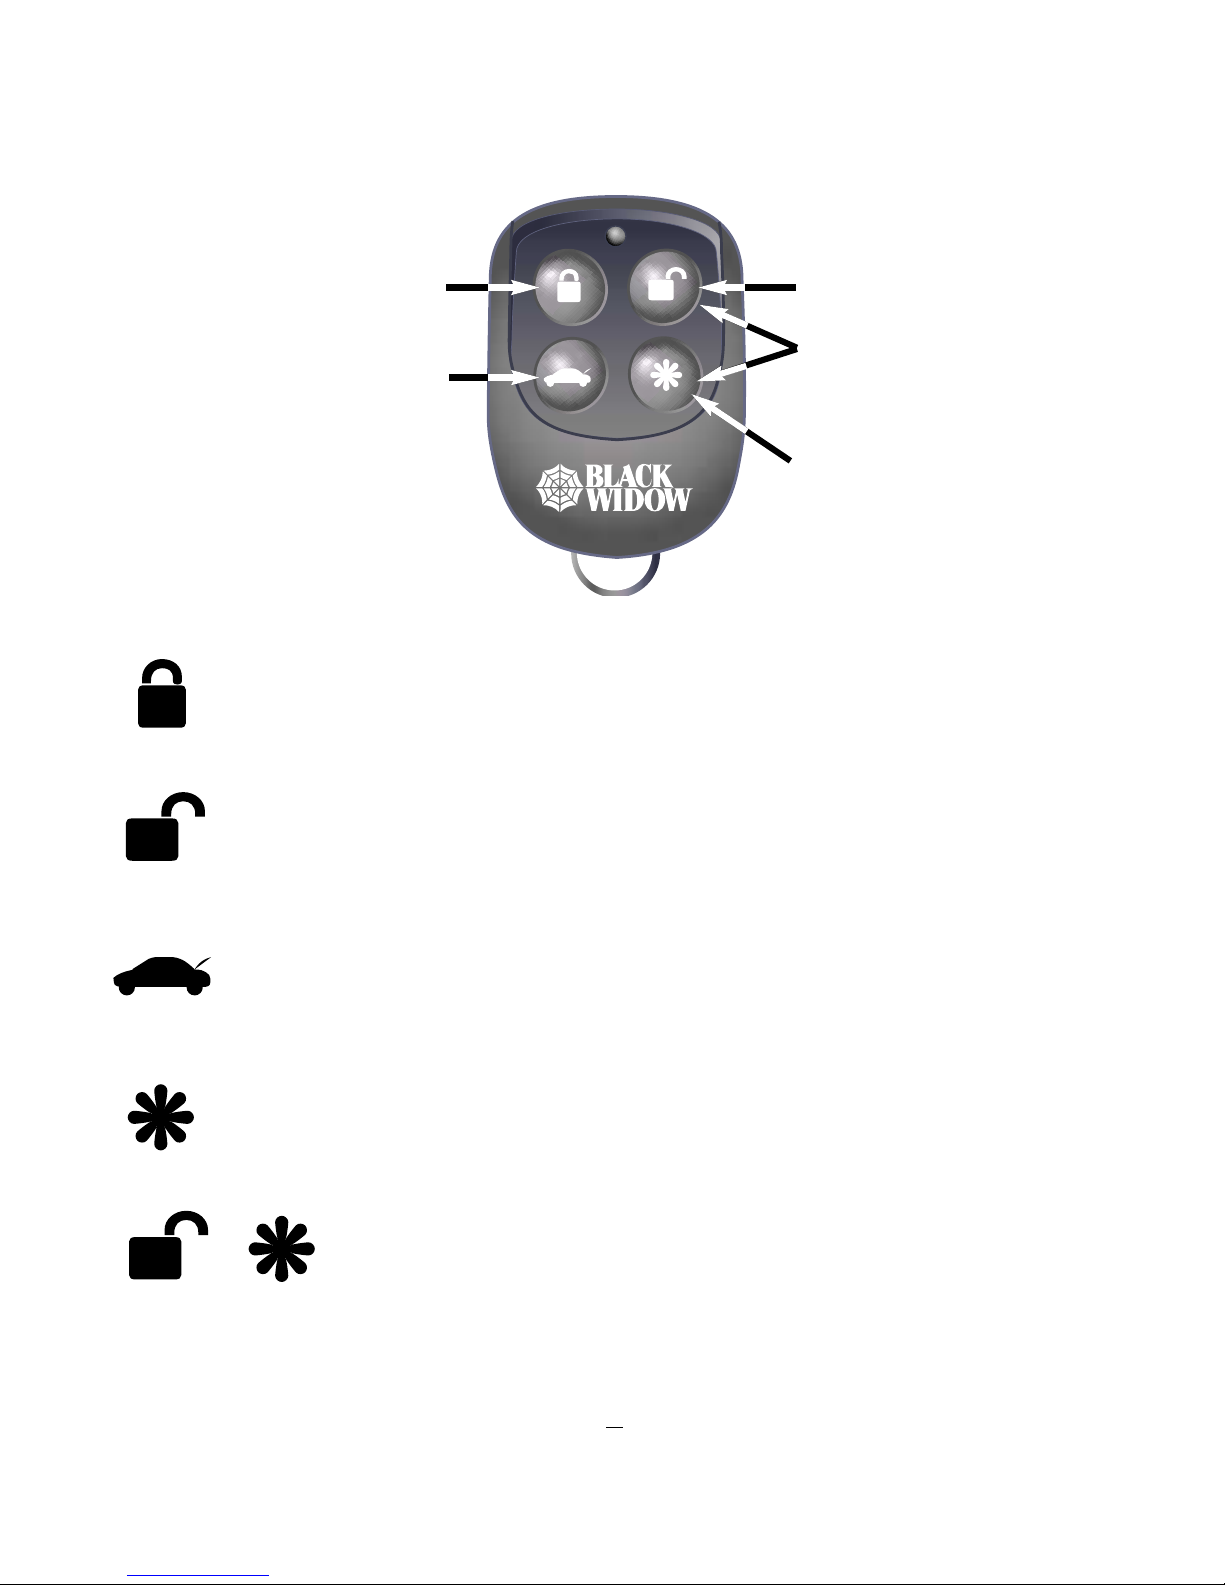
Remote Arming
When Armed, the system monitors and protects 4
independent areas, or zones, including the doors,
hood/trunk, shock, and an
optional sensor.
To Arm the System:
1 .Turn off the ignition.
2. Press the Lock Button.
•The siren will chirp once
•The doors will lock.
•The parking lights will flash once.
•The LED will begin flashing indicating the doors,
hood and trunk inputs are activated.
•The siren chirp(s) during Arming will alert you
the condition of the system and vehicle when the
system is armed.
1 chirp = normal arming
4 chirps = hood or trunk open
4 chirps after normal arming = door open
During Arming, if the system detects a bad sensor or
an open zone, the system will ignore that input, but
keep all other areas protected.
3.After 10 seconds:
•The LED will begin blinking, indicating that the
shock sensor input is activated.
While the system is Armed, the system will trigger if:
•The doors are opened.
•The shock sensor detects an impact to the vehicle.
•The hood or trunk is opened.
When triggered, the siren will sound, the horn will
honk, and the parking lights will flash. If the system is
triggered by the ignition, doors, hood, or trunk, the
system will alarm for 40 seconds. If triggered by the
sensor inputs, the system will alarm for 20 seconds.*
If the same input triggers the system 3 times during a
single arming cycle, the system will bypass that input,
keeping the other zones protected, until the next
time the system is armed.
If the shock sensor detects a light impact to the car
or the radar sensor detects an exterior zone
disturbance, the system win sound 5 chirps to warn
away the potential intruder.
Remote Disarming
To Disarm the System:
Press the Unlock Button:
•The siren will chirp twice.*
•The doors will unlock.
•The parking lights will flash twice.
•The dome light will turn on.
•The LED will turn off.
The siren chirps during disarming will alert you if the
system had been triggered while armed.
2 chirps = normal disarming
3 chirps = Tamper Alert - system was triggered
Tamper alert with zone indication - If the
system is was triggered while away from the vehicle,
the system will respond by giving 3
chirps to indicate the system was triggered.The LED
will flash for 60 seconds after disarming to indicate
which zone was triggered.The LED will stop flashing
after 60 seconds or after the ignition is turned on or
the system is rearmed.The LED will indicate the zone
by flashing a number of times then pausing and
repeating the number again.
1flash = door
2 flashes = trunk
3 flashes = shock sensor
4 flashes = ignition
example:
flash-flash-pause-flash-flash-pause = Trunk
2