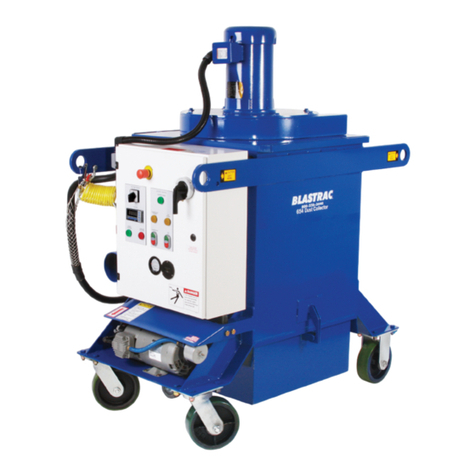
Blastrac 2-48DC User manual

Original instructions in English language
OPERATING INSTRUCTIONS 2-48DC
VERSION 1.4

2
Inspection comments
Recurring inspections / maintenance log
*Competent person
Date / Hour counter
Findings
Repairs / Cleaning
Test
on
By*
Inspection before initial operation on: __________________________________________
By: __________________________________________
Date of initial operation: __________________________________________
Serial number & Year of manufacture: __________________________ _____________

3
Table of contents
Maintenance log 2
1. Introduction 4
2. Machine description 4
3. Safety 6
3.1 Work area safety 6
3.2 Electrical safety 6
3.3 Personal safety 7
3.4 Machine safety 7
3.5 Dust collector safety 8
3.6 Maintenance safety 8
3.7 Transport safety 9
3.8 Signs on the machine 10
4. Before operation 11
4.1 Checkpoints of electrical safety 11
4.2 Checkpoints of the machine 11
4.3 Transport 11
4.4 Drive control 12
4.5 Driving 13
5. Operation 14
5.1 Before operation 14
5.2 Starting / stopping the machine 15
5.3 Work with the machine 15
5.4 Interrupting work 15
5.5 Start-up Problems 16
5.6 Replacing a bigbag 16
5.7 Silencers 16
6. Maintenance 17
6.1 When to change the filters? 19
6.2 Filter replacement 20
6.3 Pulse system 22
6.4 Water separator 23
6.5 Compressor 24
6.6 Rotating valves 25
6.7 The V-belts 27
6.8 V-belt mounting 27
6.9 V-belt tension 27
6.10 The chain drive 28
7. Troubleshooting 29
8. Technical data 31
Contact

4
1. Introduction
Before use, operators must be provided with information, instruction and training for the use of the machine
and the substances for which it is to be used, including the safe method of removal and disposal of the
material collected. All persons who are working with or maintaining this machine must read the manual
carefully and understand it fully. In case you sell the unit, hand it on to the next owner.
Keep this manual always with the machine, to enable it to be referred to at any time.
Any other work not covered by this operating manual must not be carried out.
This machine is designed for industrial use by professionals. Only authorized and trained personnel may
operate this machine. This machine is not intended for use by persons (including children) with reduced
physical, sensory or mental capabilities, or lack of experience and knowledge. Blastrac BV offers a course on
the use of the machine in order to make the operating and maintenance personnel familiar with all elements of
the machine. Always use common sense when using machinery.
2. Machine description
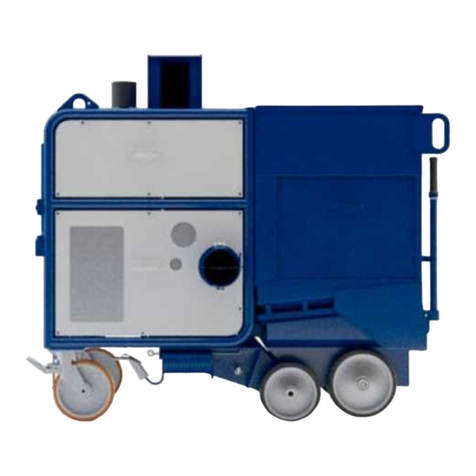
The Blastrac dust collector 2-48DC is a high performance machine which is exclusively designed and built to be
used in combination with the Blastrac 2-48DS blast cleaning machine. It is equipped with 20 pieces of specially
designed high quality Blastrac cartridge filters. The rotating valves transport all generated debris directly into
BigBags for easy removal. The 2-48DC can only be used for dry cleaning.
It should only be used for removing noncombustible/non-explosive dust or substances.
The 2-48DC must not be used for pathogenic or carcinogenic or asbestos substances.
Do not use the machine in the presence of dangerous atmospheres.
The machine is designed for usage in conditions according to classification M (see below).
Classification acc. standard EN 60335-2-69 –Annexe AA
Class
Designation
L
(light hazard) suitable for separating dust with a limit value of
occupational exposure of
greater than 1 mg/m3;
M
(medium hazard) for separating dust with a limit
value of occupational exposure not
less than 0,1 mg/m3
H
(high hazard) for separating all dusts with all limit
values of occupational exposure,
including carcinogenic and pathogenic dusts.
Dust emissions into the environment
Class
Value of performance
L
Retains at least 99 % of Most Penetrating Particle Size (MPPS) 0.3 μm
M
Retains at least 99,9 % of Most Penetrating Particle Size (MPPS) 0.3 μm
H
Retains at least 99,995 % of Most Penetrating Particle Size (MPPS) 0.3 μm
Application
The 2-48DC is especially designed to be used in combination with Blastrac machines.
Contact Blastrac B.V. for the correct execution and combinations.

5
01
Tension system filter bracket
07
Manometer, shows the pressure of the air
tank. The pulse to clean the filters must be
given between 6 - 7 bar.
02
Air pistol. Use this pistol regular to
remove water from the air tank.
08
Safety valve
03
Silencer with air flow pressure regulator.
09
Vacuum gauge, replace filters when indicating
15cm.H2O
04
Drive system with quick release pin
10
Control valve compressor
05
Height adjusting swivel castors
11
Compressor
06
Rotating valve drive motor
12
Gland seal adjusting nut
The dust extractor is provided with an air pulse cleaning system which increases the life of the filter cartridges.
This system works by use of pressurized air, built up by a belt driven compressor. The air is led through a
water separator to the pulse system.
The conditioned air then passes a control valve which regulates the system pressure, and then builds up
pressure in the pulse tank.
The pressurized air is used to generate a pulse of air which cleans the filters from the inside. With every pulse
of the pulse system all dust and particles are released from the filter surface and end up in the dust hoppers
below the filters, where it travels through the rotating valves to be stored in big bags.
In the case of dust harmful to health, contact the local health and safety authorities, and observe national
regulations in force both during use and disposal.
In addition to the Operating Instructions general and legal regulations regarding accident prevention and
environmental protection must be complied with and indicated!
Such duties may for example relate to the handling of hazardous substances or to the provision and wearing of
personal protection equipment.

6
3. Safety
Warning!
Read all safety warnings and all instructions. Failure to follow the warnings and
instructions may result in electric shock, fire, explosions and / or serious injuries.
The machine should not be used in the presence of an explosive atmosphere.
It is the responsibility of the user to analyse the surface to be treated. The surface may not
contain any substances which could pose a fire or explosion risk when treated. It is also the responsibility of
the user to make a risk assessment on the basis of the information obtained about the surface to be treated
and take proper precautions for the work to be performed.
Only authorized and trained personnel may operate this machine.
This machine is not intended for use by persons (including children) with reduced physical, sensory or mental
capabilities, or lack of experience and knowledge.
In case of any inappropriate usage, improper operation or repair, the producer shall be exempt from liability.
3.1 Work area safety
a) Do not use the machine in rain, damp or wet locations.
b) Avoid dangerous environments: do not work in the presence of explosive atmospheres, in the presence of
flammable liquids, gases or dust. Remove materials or debris that may be ignited by sparks.
c) In some cases sparks could be created by the blast cleaning process.
d) The surface to be treated must be clean, make sure to remove all stones, screws etc..
Any stones, screws, bolts, pieces of wire etc. could cause serious damage to the machine if it gets inside
the machine!
e) Make sure there is enough ambient light on the work area. Cluttered or dark areas invite accidents.
f) Keep children and bystanders away while operating the machine. They are likely not to foresee the
potential dangers of the machine. Distractions could cause you to lose control of the machine.
g) Persons who are not operating the machine must not be permitted to stay in the surrounding area of at
least 5 meter from the machine.
h) Never use the machine when the surface is not clear and if there is a risk of stumbling or tripping.
i) Remove electrical cables and dust hose(s) from the surface to be treated.
j) Make sure that there are no cables or hoses in the driving direction of the machine.
k) Make sure that there is nothing standing or situated on the surface to be treated.
l) Make sure the machine can travel over all inequalities on the surface, small inequalities like weld seams or
(floor) joints are no barriers for the machine.
m) Never operate the machine when workplace is wet. Never stay in the rain with the machine.
n) Check if there are any obstacles that can snag the cables when the machine is moving.
o) Warning! Make sure that the surface to be treated does not contain dangerous materials such
as: - combustible or explosive dusts or substances.
- carcinogenic or pathogenic substances.
In these cases, additional safety measures should be used. Always mind the local safety
requirements. Contact your dealer for additional options.
p) It is necessary to provide for an adequate air change rate L in the room if the exhaust air from the dust
collector is returned to the room. Comply with the National regulations.
q) Secure the work area around the machine in public areas providing an adequate safety distance from the
machine. Use a red and white safety chain and danger sign to enclose the work area.
3.2 Electrical safety
a) Use only extension cables for extending the main cable that are sized and marked in accordance with the
overall power consumption of the machine. Do not use damaged extension cables.
b) Electrical cables must be rolled entirely off of the reels.
c) Any damage to the electric cables and/or electrical components is not permitted.
d) If the power supply cable or plug is damaged, it must be replaced immediately. Only use original Blastrac
parts.
e) The voltage on the identification plate must comply with the power supply.
f) Use an electrical power supply connection with earth connection and earth leakage circuit breaker.

7
g) The circuit breaker of the power supply must have a ‘’D’’ characteristic. Circuit breakers with a “C” or “B”
characteristic can give problems when switching the machine on.
h) Keep the machine original; The machine is always equipped with an earthed connection, do not
change this and always use earthed cables with an earthed plug.
i) Inspect and test the electrical components regularly. The electrical components have to satisfy with the
requirements set out in the harmonised norm EN60204-1.
j) Always call a skilled electrician or your distributor when you have questions about the safety of the
electrical components.
k) Work on electrical equipment or operating materials may only be undertaken by a skilled electrician or by
trained persons under the guidance and supervision of a skilled electrician as well as in accordance with
the electrical engineering regulations.
l) Always use tools that are insulated against voltages.
m) Do not abuse the cables. Never use the cables for carrying, pulling or unplugging the machine. Keep
cables away from heat, oil, sharp edges or moving parts. Damaged or entangled cables increase the risk
of electric shock. Do not fold the cable or clamp it.
n) Don’t pull out the power supply cable out by the wire, but by the connector.
o) Be careful with water on the treated surface. Electrical cables must not come into contact with water.
p) During a long standstill of the machine, pull out the main plug.
q) If the machine is to be operated using power from a generator, the generator must be operated in
accordance with the current legal regulations and directives in force. (this applies to the protective earth
conductor in particular) in order to ensure that all safety devices are functioning and to eliminate possible
damage to electrical components.
3.3 Personal safety
a) Always wear Personal Protective Equipment while working with the machine.
-Dust mask class FFP3 or higher
-Ear protection
-Safety glasses with lateral protection
-Protecting gloves
-Safety shoes
b) Dress properly. Do not wear loose clothing or jewellery. Keep your hair, clothing and gloves away from
moving parts.
c) Personnel must tie back long hair and not wear loose clothing or jewellery including rings.
d) Stay alert, watch what you are doing and use common sense when operating the machine.
e) Always use the operator support bracket for your own safety.
f) Always seek professional medical attention immediately in case of injury.
g) All persons surrounding the machine should wear Personal Protective Equipment.
3.4 Machine safety general
a) Safety functions and operating functions must work correct.
b) No loose bolts and nuts permitted.
c) Never operate machine without the guards and/or safety devices in place.
d) Never change anything on the safety devices on the machine!
e) Do not use the machine when it is damaged.
f) Do not open or remove protective guards while driving gears are running.
g) Hoses and pipe work can be under high pressure. The temperature can be above 37° C. Use only hoses
and pipe work that are sized and marked in accordance with the machine’s overall power consumption.
h) The temperature of the machine can be above 37° C.
i) The machine, specially the handle grips and control devices must be dry and free of fats/oils.
j) All repair work has to be done by qualified Blastrac personnel, this guarantees a safe and reliable
machine.
k) Always use original Blastrac spare parts filters. This will ensure the best performance.
Only original parts meet the factory specifications and quality. Otherwise Blastrac BV cannot guarantee
the safety of the machine.
The part numbers can be found in the Service Manual.
l) Check the rotating direction of the motor before operation. The correct direction is given with an arrow on
the housing of the motor.
m) If safety-critical changes occur to the machine or its working method, the machine must be shut down
immediately! The cause of the fault must be established, and rectified.
n) In the event of operational malfunctions the machine must be shut down immediately and secured!

8
3.5 Dustcollector safety
a) The Blastrac dust collector can only be used for dry cleaning.
b) It should only be used for removing noncombustible/non-explosive dust or substances.
c) The machine may not be used for pathogenic or carcinogenic or asbestos substances without
additional safety measures. Always mind the local safety requirements. Contact your dealer for
additional options.
d) Do not use the machine in the presence of dangerous atmospheres like flammable gasses or dusts.
e) The machine is designed for usage in conditions according to classification M.
f) The dust hoses must be undamaged and free of obstructions. They must be connected properly with hose
clamps and industrial tape.
g) Do not point hoses at people or animals.
h) Never use this machine for sucking water or liquids.
i) Acids, acetone or solvents can damage the machine.
j) Never use the machine without the filters in place!
k) Be sure that rotating valve motor is switched on. This will increase the life-time of the filter cartridges.
l) Never use the machine without a big bag/dustbin attached.
m) Regular check the contents of the bigbag. Always wear a dust mask of at least class FFP3 when
changing the bigbag. Comply with the local waste treatment regulations considering the removed
material.
n) Regularly use the air pistol and drain valve to remove water from the air tank.
o) When temporarily interrupting the work (1/2 hour –1 hour), turn off the fan unit only. Pulse cleaning of
the filter system will continue and will increase the life-time of the filter cartridges.
p) During a longer stand still of the dust collector, first switch off the fan unit. Let the pulse cleaning cycle
run for +/- 5 minutes. Switch off the compressor. Remove water from the air tank.
q) Always close off the inlets of the dust collector when running the pulse cleaning cycle! Failure to do so
results in blown out dust, which can be hazardous to the health !
r) Close the sliding cover of the silencers when the machine is turned off. This prevents moisture, dust and
other contaminants to enter the machine.
s) If dust leaves the filter unit instead of clean air, this is a sign that the filter cartridges are damaged or not
fixed correctly inside the chamber.
t) When a filter is leaking it has to be replaced. The compartment above the filters and silencer also have to
be cleaned thoroughly.
u) Compartments that are not dust-tight must be opened with suitable tools and thoroughly cleaned.
v) Operators should observe any safety regulations appropriate to the materials being handled.
w) Make sure the machine is parked on a flat and horizontal surface before operation.
x) The machine must be braked by actuating the levers on the wheels with brakes.
y) Do not allow the operation of the machine while it is moving, during operation the machine must be
braked.
3.6 Maintenance safety
a) Pull out the main plug and place it in sight, before starting inspections and repairing on the machine, and
press Emergency shutdown.
b) Wait for standstill of all drives before any inspections, adjustments and/or maintenance work is started.
c) Block machine in stable position before doing any maintenance work.
d) Failures due to inadequate or incorrect maintenance may generate very high repair costs and long
standstill periods of the machine. Regular maintenance therefore is imperative.
e) Operational safety and service life of the machine depends, among other things, on proper maintenance.
f) Prevent premature wear by keeping the machine as dust free as possible. Clean the machine for this
reason regularly with a dust collector and non-aggressive materials. Never use a high pressure water
cleaner to clean the machine.
g) Do not use any aggressive cleaning materials!
h) Use lint-free cleaning cloths!
i) It is advisable to stock all spare parts or wear parts that cannot be supplied quickly. As a rule, production
standstill periods are more expensive than the cost for the corresponding spare part.
j) *** WARNING! Do not weld, flame cut or perform grinding works on or near the dust collector. Danger of
fire or explosion exists!
k) To allow the user to carry out maintenance operations, the dust collector must be disassembled, cleaned
and inspected as far as reasonably possible, without causing hazards for the maintenance staff or other
people.
9
l) The suitable precautions include decontamination before disassembling the dust collector, adequate
filtered ventilation of the exhaust air from the room in which it is disassembled, cleaning of the
maintenance area and suitable personal protection equipment.
m) When maintenance or repair procedures are carried out, all the contaminated elements that cannot be
properly cleaned, must be destroyed.
n) These elements must be disposed of in sealed bags according to the applicable regulations and in
accordance with the local laws governing the disposal of such material.
o) This procedure must also be followed when the filters have to be disposed.
p) Use only original Blastrac parts.
q) The dust collector must be yearly overhauled by a skilled technician.
3.7 Transport safety
a) Remove the dust from the dust collector before the dust collector is transported.
b) Always dispose the contents of the dust collector before the end of the working day. Observe the local
waste disposal regulations!
c) Before the dust collector is removed from the hazardous zone, take precautions to prevent dust from
escaping.
d) For class H and M machines, the outside of the machine should be decontaminated by cleaning and
vacuuming methods, de-dusted before being taken out from the hazardous zone. All parts of the dust
collector must be considered as contaminated when they are removed from the hazardous zone and
appropriate actions must be taken to prevent dust from dispersing.
e) Always close the inlet of the dust collector with the appropriate plug when the dust hose is disconnected.
f) Make sure the dust hoses are disconnected and put away properly before transport.
g) Be aware of your surroundings and machine operating level. Do not side hill, do not run on steep incline,
this could cause machine to tip over.
h) The weight of the 2-48DC is 1107 kg. Use a crane or lift when transporting the machine, use the lifting
eyes / lugs of the machine.
i) Before every use check the lifting eyes/lugs and welds for:
deformation, damages, cracks, corrosion and wear.
j) Each lifting lug has a WLL of 1500kg.
k) Pay attention that the drive unit does not turn away during lifting of the machine.
Hold on to the steering handle until the machine is of the ground.
l) When lifting the machine from the ground, always use the lowest lifting speed. The cables must first be
tensioned at this speed; they must not be slack when the machine is lifted from the ground.
m) During hoisting make sure to be at a safe distance from the machine with the most optimal view on the
machine and working environment.
n) Never stand directly below the machine.
o) When transporting the machine do so in such a manner that damage due to the effects of the use of force
or incorrect loading and unloading is avoided.
p) The lifting eyes/lugs can also be used to fasten the machine on a pallet or during transport.
q) Always drive backwards when driving up to a ramp or grade, and forwards when driving of the ramp.
r) Chock wheels for transport and keep control handle in neutral position. use the brakes on the wheels.
s) Don’t leave the machine unsecured on jobsites.
t) Park the machine always on a flat horizontal and levelled surface.
u) Make sure the electrical cable and dust hose are disconnected before transport.
v) Store the cleaned and dry machine in a humid free room. Protect the electrical motor from moisture, heat
dust and shocks.
w) Never use the machine for lifting persons or items.

10
3.8 Signs on the machine
The following stickers are placed on the machine. Meanings of these symbols are:
Type plate:
EU Declaration of Conformity:
Wear a dust mask class FFP2 or
higher.
Hearing protection is obliged.
Safety glasses with lateral protection
are obliged.
CE-mark on this machine.
Wear protecting gloves.
Safety shoes obliged.
Consult the manual before operating
the machine.
Name, address and CE mark.
The machine type.
The net weight of the machine in kilogram.
The year of manufacture.
The serial number of the machine.
Email address, Website, Telephone & fax number.
DANGER Hazardous voltage in motor
even when solid state controller is OFF.
Disconnect main power before servicing
motor, controller or associated wiring.
No lifting point.
Lifting point.
DANGER Rotating parts inside.
Keep hands clear.
Lock-out / shut down before servicing.

11
4. Before operation
Before using the machine it is essential to inspect the machine.
It is not permitted to use the machine if the machine safety is not according the checkpoints below.
4.1 Checkpoints power supply
Use only extension cables for extending the main cable that are sized and marked in accordance with
the overall power consumption of the machine.
Electrical cables must be fully unwind of their reels.
No damage is permitted for electrical cables.
Use an electrical power supply connection with earth connecting.
The main switch of the machine should be put to ‘Off’ before connecting to the power supply.
Make sure the power supply is in accordance with the machine specifications.
The circuit breaker of the power supply must have a ‘’D’’ characteristic. Circuit breakers with a “C” or
“B” characteristic can give problems when switching the machine on.
If the machine is to be operated using power from a generator, the generator must be operated in
accordance with the current legal regulations and directives in force. (this applies to the protective
earth conductor in particular) in order to ensure that all safety devices are functioning and to eliminate
possible damage to electrical components.
4.2 Checkpoints of machine
Safety functions and operating functions must work correct.
Check all screws and other fasteners for tightness. No loose bolts and/or nuts are permitted.
Check the electrical components, cables and connections for wear and/or damages.
Dust hose connection must be reliable: use hose clamps and industrial tape.
Dust hoses must be undamaged and free of obstructions
Make sure that the Big Bags are empty and connected properly. Put a pallet underneath the BigBags.
If dust leaves the filter unit instead of clean air, this is a sign that the filter cartridges are damaged or
not fixed correctly inside the chamber. Do not proceed! Rectify immediately!
All water must be removed from the air tank. Excessive water can have a negative impact on the pulse
power and shortens the life-time of the filter cartridges.
Check all air hoses for leakage.
Make sure the machine is parked on a flat and horizontal surface before operation.
The machine must be braked by actuating the levers on the wheels with brakes.
Do not allow the operation of the machine while it is moving, during operation the machine must be
braked.
4.3 Transport
Be careful! Make sure nobodies feet get under the wheels. Wear appropriate safety shoes when you drive the
machine to or from the work area.
Remove the dust from the dust collector before it is transported. The dust
collector may only be lifted by using the suspension eyelets. The weight and
dimensions of the dust collector are shown in Chapter "Technical data“.
Make sure that no vehicles, such as forklift trucks and other equipment run over the electric cable and the dust
hose.

12
4.4 Drive control
The drive control to move the 2-48DC around can be used as followed:
Connect the dust collector to the power supply.
Make sure the machine stands on its 4 transport wheels, put the 2 swivel castor wheels on the brakes.
Make sure the wheel of the drive unit is loose from the ground.
Follow the next steps to connect the drive wheel to the drive motor.
Connecting the drive motor to the traction wheel
Set the drive speed
knob to the lowest
possible setting,
approximately 0,5.
Open the wheel guard.
Insert the quick release
pin inside the hole.
!WARNING!
Use only 1 finger to
press the button of the
quick release pin, and
keep applying
pressure.
Push the green button
“DRIVE”
Danger of crushing!
Use common sense, do
not get distracted
during the activities.
Use your other hand to
operate the drive-
motor handle (10).
1
5
6
When the drive-motor
and wheel are aligned,
the quick release pin
will lock into place.
Close wheel guard.
4
8
2
3
7
Dial for setting the drive speed
Buttons for:
Forward driving (Hold to run)
Overdrive (Hold to run)
Drive handle (Hold to run) to activate
the drive motor. When the lever is
released the drive motor switches off.

13
Use the 2 height adjustment handles (5) to crank up the 2 swivel castors
wheels until the machine rests on the drive unit.
4.5 Driving with connected drive motor
Set the driving speed at the desired speed using the speed control knob. Place
1 hand on the handle grip and squeeze the switch lever, this will move the
machine towards you, this is the normal driving direction. Release the switch
lever to stop. The driving speed can be adjusted while driving by turning the
speed control knob.
The OVERDRIVE-button makes it possible to drive at maximum speed without
having to adjust the speed control knob. To do so, press and hold the
OVERDRIVE-button while driving. WARNING! Mind your surroundings at
maximum speed!
The FORWARD-button is used to drive forward, press and hold the button to do
so. WARNING! Make sure there is nobody standing behind the machine! This
function is only used for short maneuvering. Make sure the dust hoses and
electrical cable are out the way when driving forward.
When the dust collector is not being moved around, it should always stand on its 4 transport wheels.
Make sure the dust collector is parked on a flat horizontal and levelled surface.
Put the 2 swivel castor wheels on the brakes.

14
5. Operation
During operating the machine, the following additional safety instructions must be followed closely. Before
switching on the machine make sure that no-one can be endangered when the machine starts up.
5.1 Before operation
1. Close both silencers
2. Fasten both dusthoses
3. Place a bigbag underneath the dust collector and fasten it. Put a pallet underneath the bigbag.

15
5.2 Starting / stopping the machine
Make sure both silencers on top of the machines are closed
before every startup!
Starting up with opened silencers can cause start-up failures and
could cause excessive wear of
the v-belts.
Connect the dust hoses to the machine.
Connect the dust collector to the power supply.
Check the warning lights, if a warning light is lit, see 5.5 Startup
Problems for guidance.
Switch on the compressor motor (1).
Switch on the rotating valve motor (4).
Switch on the fan motors (2) wait for the fans to get at full
speed.
Open the silencers on top of the machine.
Carry out this actions in opposite sequence to stop the machine.
5.3 Work with the machine
Be sure that rotating valve motor is switched on and the compressor pulses at the correct pressure.
This will increase the life-time of the filter cartridges.
Regularly check the contents of the big bag, exchanging the big bag too late can cause a big mess and
be potential dangerous to the health.
Regularly use the air pistol to remove water from the air tank.
Excessive water can have a negative impact on the pulse power and shortens the life-time of the filter
cartridges.
The suction power of the dust collector can be adjusted with the air flow pressure regulators on the
silencer. Slide the hoods open for more power, and close them for less power.
5.4 Interrupting work
This machine is built to work with continuously, leave the 2-48DC running during short interruptions.
When temporarily interrupting the work (1/2 hour –1 hour), turn off the fan unit only and close the
silencers. Pulse cleaning of the filter system will continue and will increase the life-time of the filter
cartridges.
During a longer stand still of the dust collector, first switch off the fan unit. Let the pulse cleaning cycle
run for +/- 5 minutes. Switch off the compressor unit and rotating valves.
Disconnect the power-supply cable.
Close the sliding covers of the silencers when the machine is turned off. This prevents moisture, dust
and other contaminants to enter the machine.
Prevent unauthorized persons from getting access to the dust collector or take measurements to
prevent unauthorized working with the equipment.
5.5 Startup Problems
If the light ‘Failure’ (6) is lit up, a fault has been detected and the system has shut down.
If the light ‘Phase Incorrect’ (5) is lit up, the phases of the power connection are wrong. Correct this by
changing the phase inverter inside the main power plug.
If the light ‘Control Voltage’ (7) is not lit up, the machine has no power supply.
1
2
3
4
5
6
7
8

16
5.6 Replacing a bigbag
ATTENTION! Wear a dust mask of at least class FFP3!
1Shut down the rotating valves by pushing the red button the control box.
2Remove and close the funnel of the BigBag.
3Remove the bigbag from the dust collector.
4Place a new pallet and bigbag, sleeve the funnel on and secure it with the pull strap.
5Turn the rotating valves on by pushing the green button on the control box.
5.7 Silencers
The silencers on top of the dust extractor reduce the noise emission.
The 1st silencer will close automatically when starting up the fan-units.
Starting up with open silencers can cause start-up failures and could cause excessive wear of the v-belts.
IMPORTANT NOTE !
Always close off the inlet of the dust collector when running the pulse cleaning cycle!
Failure to do so results in blown out dust, which can be hazardous to the health !

17
6. Maintenance
Pay attention to Chapter 3 "Safety" during maintenance and repair works.
Failures due to inadequate or incorrect maintenance may generate very high repair costs and long standstill
periods of the dust collector. Regular maintenance therefore is imperative.
Operational safety and service life of the dust collector depend, among other things, on proper maintenance.
The following table shows recommendations about time, inspection and maintenance for the normal use of the
dust collector.
The time indications are based on uninterrupted operation. When the indicated number of working hours is not
achieved during the corresponding period, the period can be extended. However a full overhaul and a technical
inspection must be carried out at least once a year, consisting of inspection of filters for damage, air tightness
of the machine and proper function of the control mechanism. This technical inspection shall be carried out by
the manufacturer or an instructed person.
Due to different working conditions it can’t be foreseen how frequently inspections for wear check’s,
inspection, maintenance and repair works ought to be carried out. Prepare a suitable inspection schedule
considering your own working conditions and experience.
Pay attention to unusual noises or strong vibrations. Check for the cause of every big change. Call a technician
if you have doubts about the cause or when a repair without a technician seems not possible without damages.
Only use genuine Blastrac spare parts.
Our specialists will be happy to assist you with more advice.
Operating hours/
time period
Inspection points, maintenance instructions
12 h after repairing
Check all accessible screw connections for tight seat.
Daily and prior to
starting work
Check all safety devices working adequate.
Check the function of the residual current operated device.
Check the hose connections for tightness and fixed seat.
Check the hose to the filter for damages.
Make sure there is no water in the air pressure tank.
Check the electric connections and motors for sediments of dirt,
foreign bodies and other contaminants.
Check the belt tension of the compressor.
Weekly
Clean the air filter of the compressor.
Check the oil level and quality of the compressor.
Check the shaft seals of the rotating valves for release of dust.
Every month
Check the bearings of the rotating valves for more/higher noises.
Check the motor and drives of the rotating valves for oil leakage.
Check the rotor blades of the rotating valves for wear and leaking air.
Every 3 months
Clean the upper section of the filter unit.
Clean or replace the air filter of the compressor.
Clean or replace the filter inside the water separator.
Check the tension of the V-belts
Clean the chain drive of the drive unit and check the tension.
Annually or 400 hours,
whatever comes first
Full overhaul and cleaning of the complete dust collector.
Change oil of compressor unit.

18
Prior to any repair works on the dust collector and its drives, secure the dust collector against
unintentional switching on. Put the dust collector to its safety off position. Also make sure there is
no air pressure on the pulse system. The machine is in a safe condition when it cannot generate any
hazard.
Follow additional operating and maintenance instructions of Original Equipment Manufacturers if
included during your service and maintenance work.
Further is advised:
Store the cleaned and dry machine in a dry and humid free room. Protect the electrical motors from moisture,
heat, dust and shocks.
All repair work must to be done by qualified Blastrac personnel, this to guarantee a safe and reliable machine.
Any guarantee on the machine is expired when:
Non original Blastrac parts have been used
Repair work is not done by qualified Blastrac personnel
Changes, add on’s or conversions are undertaken without written permission of Blastrac BV
Screws, bolts etc. that have been removed must be replaced with those of the same quality, strength, material
and design.
Do not weld, flame cut or perform grinding works on or near the machine. Danger of fire or explosion exists!
Provide adequate ventilation when working in a confided space.
Secure the maintenance area if necessary.

19
A vacuum gauge measures the difference between the under pressure above the filters and inner filter house.
This readout indicates the degree of pollution of the filters, with this system you can always keep an eye on
the condition and pollution of the filters inside the dust extractor. It can also help you fine-tune the airflow
when precise adjustment is required for the job.
6.1 When to change the filters?
When the “Pressure Diff” gauge is above 20 cm H2O, the filters are probably clogged.
If the vacuum cleaner loses suction power first try the following before continuing:
1. Check if the blower throttles on the silencers are fully opened.
2. Ensure that the compressor is fully pressurized and then turn it off. Remove all moisture from the
compressed air tank by using the drain valve. Turn on the compressor again until it is fully pressurized
again, now use the air gun to completely empty the pulse tank.
3. Only turn on the compressor, and keep the fan unit turned off. Let the machine pulse for about a half
an hour. This action will clean the filters from the inside.
When the “Pressure Diff” gauge keeps indicating more than 20 cm H2O, the filters probably need to be
exchanged.
Or when the machine still does not perform adequately, the filters probably need to be exchanged.
If the silencers blow out dust, stop the machine immediately!
This means probably that a filter is damaged or not fitted properly inside the filter chamber.
Check the filters and replace if necessary.
When a filter was damaged, has leaked or was mounted incorrect,
it has to be replaced. The compartment above the filters, the
connecting air hoses and the silencer also have to be cleaned
thoroughly.
Continuing work with a broken/leaking filter can cause serious
damage to the machine and is a health hazard!
Never expose the filter cartridges to moisture!
Pressure Diff.
This indicates the pressure difference
between the clean and dirty side of the
filters. To check the status of the filters.
Blastrac Cartridge Filter
IFA/BIA certificate M-class
Order nr. E10600

20
6.2 Changing the filters
Read chapter 3 Safety before changing the filters.
Operators should observe any safety regulations appropriate to the materials being handled.
Warning! Always wear Personal Protective Equipment, the dust can be hazardous to the health!
Make sure you have enough sturdy plastic bags or use big bags for the disposal of the old filters.
Observe the national regulations in force both during exchange and disposal of the old filters.
Remove the filter house door.
Loosen the nut+washer (2).
Remove the locking bar (1).
The filter bracket will now be tilted downwards so the
filters can be taken out easily.
Slide out the filters (3) and put it in a sturdy plastic
bag.
Close the bags properly.
When a filter was damaged, has leaked or was mounted incorrect, it has to be replaced. The compartment
above the filters, the connecting air hoses and the silencer also have to be cleaned thoroughly.
Pull out the mains plug before you start
Always wear gloves and a dust mask of at least class FFP3
Use an extra vacuum cleaner in order to work as dust free as possible
1: Locking bar
2: Nut + washer
3: Filter
Table of contents
Other Blastrac Dust Collector manuals

Blastrac
Blastrac BDC-99 User manual

Blastrac
Blastrac BDC122M User manual

Blastrac
Blastrac BDC 1216 User manual

Blastrac
Blastrac 655DC User manual

Blastrac
Blastrac BDC-1112 User manual

Blastrac
Blastrac BDC-1114PM User manual

Blastrac
Blastrac BDC-22 User manual

Blastrac
Blastrac BDC-66 User manual

Blastrac
Blastrac BDC-1133PM User manual

Blastrac
Blastrac BDC-955 User manual

Blastrac
Blastrac BMR-75D User manual

Blastrac
Blastrac BDC317P User manual

Blastrac
Blastrac BDC-655 User manual

Blastrac
Blastrac BDC-44 User manual

Blastrac
Blastrac BDC-66 User manual

Blastrac
Blastrac BDC-44 User manual

Blastrac
Blastrac BDC-454 User manual

Blastrac
Blastrac 6-54DC User manual

Blastrac
Blastrac BDC-99 User manual