manuals.online logo
Brands
  1. Home
  2. •
  3. Brands
  4. •
  5. Blaupunkt
  6. •
  7. Amplifier
  8. •
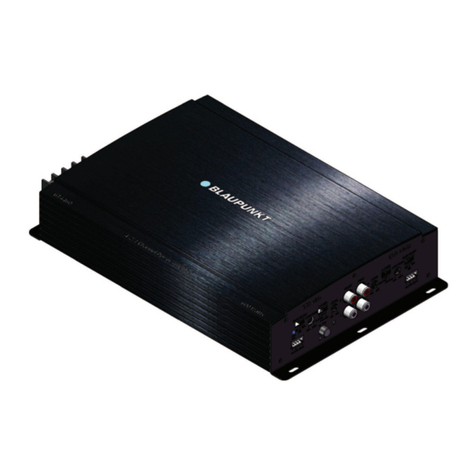
  9. Blaupunkt GTA 1500 D User manual

Blaupunkt GTA 1500 D User manual

Amplifier
GTA
1500
D 1
051
210
415
www.blaupunkt.com
GTA
1500
D
DEUTSCH...................................................... 3
Einbau I Anschluss...........................
..
...
.............................28
ENGLISH ....................................................... 4
Installation
I
connection
..................
....
........................
....
28
FRANc;AIS
....................................................
6
Montage
I
Raccordement
..
.........
.
..
.
..........
.
.......
.
......
...
..
..28
ESPANOL
......................................................
8
lnstalaci6n
I
Conexi6n
......................................................28
PORTUGUES ..............................................
10
Montagem
I Liga<;ao
..........
.
............
..
..................
.
...
..
........
28
ITALIANO ................................................... 12
Montaggio
I
Collegamento
...
.
...
....................................28
POLSKI
........................................................
14
Montaz
I Podtqczenie .
..
..
..
..
....
........................
....
.....
.
........
28
C
ES
KY
......................................................... 16
Montciz
I
Pfipojenf
...............
.
.........
..
..
..
...............................28
PYCCKII1111
................................................... 18
YcraHOBKa I
no~KniD4eHllle
.......
..
..
.
..
...
...
........
.
....
.....
...
....28
ROMANA .................................................... 20
Montare
I Racordare .........................................................28
6bn
rAPCKII1
............................................... 22
MoHTa>K
I Csbp3BaHe ..................................................
.....
28
SRPSKI
........................................................ 24
Ugradnja
I
Prikljucak
..........................
..
.............................28
SLOVENSCINA ...........................................
25
Vgradnja
I
Priklop
..
.................
..................................
......
.
...
28
2
GTA
15000
Klangeinstellungen
Um den Klang
fur
die Verwendung eines Subwoofers zu
optimieren stehen folgende Moglichkeiten zurVerfugung:
-X-OVER Regier
4
Beim
GTA
1500 D kann die Art des Frequenzubergangs
(,Low-Pass") eingestellt werden. Wahlen
Sie
die Grenz-
frequenz, bis
zu
derhohere Frequenzen blockiertwerden
sollen. Nur Frequenzen,
die
unter
der
Grenzfrequenz
liegen, werden
an
die Lautsprecher weitergeleitet.
Beispiel:
Bei
einer Einstellung von 80
Hz
hat der Verstarker einen
Frequenzbereich von
10
Hz
bis
80
Hz.
SUBSONIC Regier
Um Storungen durch extrem tiefe Frequenzen zu ver-
meiden, konnen
Sie
den Subsonic-Filter einsetzen, um
den Frequenzgang des Gerates nach unten
zu
beschran-
ken.
Mit
der
Einstellung des Subsonic-Filters werden
aile Frequenzen unterhalb der eingestellten Frequenz
unterdruckt.
Beispiel:
Bei
einerEinstellung von
40Hz
wird derFrequenzbereich
von 0
Hz
bis
40Hz
unterdruckt.
PHASE Regier
Dieser Regier ermoglichtdie stufenloseVeranderung der
Phasenlage des Subwoofers von
oo
bis 180°.
Er
dient
der
Feinabstimmung
mit
den anderen angeschlossenen Laut-
sprechern und kann bei richtiger Einstellung das
mog-
licherweise auftretende gegenseitige Ausloschen von
tiefen Frequenzen innerhalbderAudioanlageverhindern.
GAIN Regier
Mit
Hilfe des
GAIN
Reglers kann die Eingangsempfind-
lichkeit
der
Endstufe
an
die Ausgangsspannung lhres
Autoradio-Vorverstarkerausganges angepasst werden.
Der Einstellbereich reicht jeweils von 0,2 V bis 5
V.
Bei
Anschluss eines Autoradios anderer Hersteller ist
die
Eingangsempfindlichkeit entsprechend den Hersteller-
angaben anzupassen.
Der
GAIN
Regier kann auch uber die beiliegende Kabel-
fernbedienung
betatigt
werden. Dazu muss die Fern-
bedienung
an
der Buchse
REMOTE
angeschlossen sein.
Solange
die
Fernbedienung angeschlossen ist, haben
Veranderungen, die am GAIN Regier des
GTA
1500 D
vorgenommen werden keine Auswirkungen.
Hierzu noch einige wichtige Erlauterungen:
Durch Drehen des
GAIN
Reglers im Uhrzeigersinn
erhoht
sich die Eingangsempfindlichkeit des Verstarkers
und
damit
auch die Lautstarke.
Es
handelt sich jedoch nicht
um
eine Lautstarkeregelung.ln der
End
position lasst sich
keine hohereVerstarkerleistung erzielen, auch wenn sich
dies zunachst
so
anhort.
Das
System steigert lediglich
schneller die Lautstarke, wenn die Lautstarkeregelung
des Autoradios aufgedreht wird.
X-OVER Schalter
Die Schalterstellung
ON
aktiviert
die Regier
X-OVER,
SUBSONIC
und
PHASE
sowie den REMOTE-Anschluss.
Die Schalterstellung
OFF
ermoglichtden Anschluss eines
BlaupunktVerstarkers
mit
integriertem
DSP
(GTA
270
DSPI
GTA
470
DSP)
und dessen Einstellmoglichkeiten
zu
nut-
zen.
Betriebsanzeige (PWR/PRO)
Grunes Licht:
Endstufe an, regularer Betriebszustand.
Rotes Licht:
Endstufe istelektronisch abgeschaltet, da Fehlerfall vorliegt.
Technische Daten
Max
Power 1X
soow
I 4 0
Max
Power 1X 1000WI 2 0
Fig.
5
RMS
Power 1X
250W
I 4 0
RMS
Power 1X
soow
I 2 0
Frequenzgang
10Hz-200Hz
Signai-Rauschabstand >
92
dB@
RMS
Power
Signai-Rauschabstand >
75
dB@ 1
WI
1
kHz
Klirrfaktor (RMS) <0,05%
Stabilitat
20140
Eingangs-
0,2V-
5V
empfindlichkeit
Tiefpassfilter
40Hz-200Hz
(Low-Pass)
Subsonic-Filter
10Hz-80Hz
Abmessungen
Bx H
xT
(mm) 263 X 54 X 198
Bx H
xT
(")
10.4 X
2.1
X
7.8
Recycling und Entsorgung
~
Bitte nutzen
Sie
zur Entsorgung des Produktes die
A zurVerfugung stehenden Ruckgabe- und
Sam
mel-
-systeme.
Anderungen vorbehalten.
ENGLISH
Warranty
We
provide amanufacturer's warrantyfor products
bought
within
the European Union.
For
devices purchased outside
the European Union, the warranty terms issued by our re-
spective responsible domesticagencyare valid.The warranty
terms
can
be called up from www.blaupunkt.com.
Recommendation
The performance
of
an
amplifier can
only
be
as
good
as
its installation. A correct installation increases the overall
performance
of
your car sound system. The
GTA
amplifier
should be installed byatrained person.lfyouwould
to
install
it
yourself, please read these installation instructions very
carefullyand allowyourselfsufficienttimeforthe installation.
In conclusion,
allow
us
a
few
words
about
the
topic
of
health
protection: .
During
the
playback
of
music in
your
vehicle, please cons1der
that
continuous
sound-pressure levels
above
1
00
dB can
lead
to
permanent
damages
to
the
human
ear and even
to
loss
of
hearing. Using today's
high-performance
systems
and loudspeaker
configurations
allows
for
reaching sound-
pressure levels above
130
dB.
Safety notes
Please observe
the
following
safety notes
during
the
instal-
lation
and
connection.
Disconnect
the
negative
pole
of
the
battery! Observe
the
safety notes
of
the
vehicle manufacturer.
-When
you
drill
holes, ensure
that
you
do
not
damage
any
vehicle
components.
-The cross section
of
the
plus and
minus
cable
may
not
be less
than
6
mm
2•
-Use cable
glands
for
holes
with
sharp edges.
-An
incorrect
installation
can result in
malfunctions
of
the
electronic
vehicle systems
or
your
car
sound
system.
Installation and connection instructions
With
respect
to
accident
safety,
the
GTA
1500 D
must
be
secured in a professional way.
When selecting
the
installation location,selecta
dry
location
that
offers
sufficient
air circulation
for
cooling
the
amplifier.
The
GTA
1500 D
must
not
be
installed
on
rear shelves, rear
seats
or
other
locations
that
are
open
to
the
front.
The
installation
surface
must
be suitable
to
accept
the
ac-
companying
screws and
provide
a
firm
support.
The
amplifier
power
cable
must
be
fitted
with
afuse
no
more
than
30
em
from
the
battery
to
protect
the
vehicle
battery
in
case
of
a
short
circuit
between
power
amplifier
and battery.
The fuse
of
the
amplifier
protects
only
the
amplifier,
not
the
vehicle battery.
Only
loudspeakers
with
2 - 4
n
impedance
may
be
used
(see
table
or
installation drawings). Observe
the
maximum
power
handling
capacity (music
output).
Do
not
connect
loudspeakers
to
earth, use
only
the
referenced terminals.
Audio inputs
The
preamplifier
outputs
are
connected
to
the
cinch
(RCA)
sockets via a shielded
audio
line (see
Fig.
3).
Plus
I
minus connection
-We
recommend
a
minimum
cross section
of
6
mm
2•
-Route
commercially
available plus cables
to
the
battery
and
connect
via fuse holder.
Use
cable glands
for
holes
with
sharp edges.
-Securelyfasten
commercially
available
minus
cables
to
a
noise-free
earth
point
(chassis screw, chassis metal)
(not
to
the
minus
pole
of
the
battery).
-Scrap
the
contact
surfaces
of
the
earth
point
until
they
are
bright
and
grease
with
graphite
grease.
GTA
1500
D
Integrated fuses
{2
x
25
A}
The fuses
integrated
in
the
amplifier
protect
the
power
amplifier
and
the
entire electrical system in case
of
an error.
If
a replacement fuse
is
used, never
bridge
fuses
or
replace
them
with
a
type
with
higher
current.
Connection examples
Connection
of
the
voltage
supply
..................................
Fig. 2
Audio
inputs
...........................................................................
Fig.
3-4
Loudspeaker
connections
.................................................
Fig.
5
Remote control connection
................................................
Fig. 6
I
-/o-
+12V
I
Remote
connection
of
the
amplifier
with
switchable
+
12
V
voltage
source.
This allows
the
amplifier
to
be
switched
on
and
off
using
the
on/off-switch
of
the
car
sound
system.
Subwoofer connection
As
with
every
audio
component,
the
correct polarisation
of
amplifier
and loudspeakers
is
of
essentially
importance
for
a
good
bass response. For this reason, ensure
that
the
positive
connection
(+)
of
the
amplifier
is
connected
with
the
positive
connection
(+)
of
the
loudspeaker;
the
same
applies
to
the
negative
connections
(-). In
addition,
the
left
amplifier
channel
must
be
connected
with
the
left
loudspeaker and
the
right
amplifier
channel
with
the
right
loudspeaker. Positive (+)
and
negative
(-)
connections
are
wired
parallel internally.
Sound settings
The
following
options
are available
to
optimise
the
sound
for
the
use
of
a subwoofer:
-X-OVER control
For
the
GTA
1500
D,
the
type
of
frequency
crossover
("Low-Pass") can beadjusted. Select
the
cut-off
frequency
up
to
which
higher
frequencies should be blocked.
Only
frequencies
that
are
below
the
cut-off
frequency
are
passed
on
to
the
loudspeakers.
Example:
At
a
setting
of
80Hz,
the
amplifier
has a
frequency
range
of
1
0 Hz
to
80
Hz.
SUBSONIC control
To
avoid interferences
from
extremely
low
frequencies,
you can use
the
subsonic
filter
to
limit
the
low-frequency
response
of
the
device.The
setting
of
the
subsonic
filter
suppresses all frequencies
below
the
defined
frequency.
Example:
At
a
setting
of
40
Hz,
the
frequency
range
from
0 Hz
to
40Hz
is
being
suppressed.
PHASE
control
This
control
allows
the
stepless change
of
the
phase posi-
tion
of
the
subwoofer
from
oo
to
180°.
It
is
used
for
the
fine
tuning
with
the
other
connected
loudspeakers and
if
set correctly,
it
can
prevent
anypossiblyoccurring
mutual
cancellation
of
low
frequencies
within
the
audio
system.
5
GTA
1500
D
-GAIN control
The
GAIN
control
is
used
to
adjust the
input
sensitivity
of
the
power amplifier
to
the
output
voltage
of
your car
sound system
preamplifier
output.
In each case,
the
adjustment
range
is
from
0.2 V
to
5
V.
If
a car sound
system
of
a third party manufacturer
is
connected,
the
input
sensitivity must be adjusted corresponding
to
the
manufacturer data.
The
GAIN
control
can
also be operated via
the
enclosed
cable remote control.
For
this purpose,the remote control
mustbe connected
to
the
REMOTE
socket.
As
long
as
the
remotecontrol
is
connected,changes made
with
the
GAIN
control
of
the
GTA
1500 D have no effect.
A few
important
explanations in this context:
By
turningthe
GAIN
control clockwise, the
input
sensitivity
of
the
amplifierand, therefore, also the volume increases.
However,this
is
not
avolume control.
In
the
end position,
it
is
not
possible
to
achieve ahigheramplifieroutput,even
if
it
sounds like
that
at first. The system merely increases
the
volume faster
if
the volume control
of
the
car sound
system
is
turned
up.
-X-OVER switch
The switch setting
ON
activates
the
controls
X-OVER,
SUBSONIC
and
PHASE
as
well
as
the
REMOTE
connection.
The switch setting
OFF
allows connecting a Blaupunkt
amplifier
with
integrated
DSP
(GTA
270
DSPIGTA
470
DSP)
and
to
use its setting options.
Power-on indicator (PWR I
PRO)
Green
LED:
Output
stage on, regular operating status.
Red
LED:
Output
stage
is
electronically switched off
due
to
an
error.
Technical
data
Max
power 1
X
soow
I 4 0
Max
power 1
X
1000WI 2 0
Fig.
5
RMS
power 1
X
250W
I 4 0
RMSpower
1
X
soow
I 2 0
Frequency response
10Hz-200Hz
Signal-to-noise ratio
>
92
dB@
RMS
power
Signal-to-noise ratio
>
75
dB
@1w
I 1 kHz
Distortion factor (RMS)
<
0.05%
Stability
20140
Input
sensitivity
0.2
v-
5
v
Low-pass filter
40Hz-200Hz
(Low-Pass)
Subsonic filter
10Hz-80Hz
Dimensions
Wx
H x D (mm) 263
X
54
X
198
w
X
H
X
D (
11
)
10.4
X
2.1
X
7.8
6
Recycling and disposal
~
Please
use
the return and collection systems avail-
~
able
to
dispose
of
the
product.
-
Subject
to
changes.
FRANc;AIS
Garantie
Notregarantie constructeurs'etend
a
to
us
nos produitsache-
tes
au
sein de I'Union Europeenne. Pour
les
appareils vend
us
en dehors de
I'
Union europeenne,
les
conditionsde garantie
applicables sontcelles definies par notre representantagree
dans
le
pays.
Les
conditions de garantiesont disponibles sur
le
site www.blaupunkt.com.
Recommandation
Les
performances d'un amplificateur ne serontjamais meil-
leures que son installation ne le permet. Une installation
correcte augmente
les
performances d'ensemble de votre
systeme audio. Vous devriez confier
le
montage de l'ampli-
ficateur
GTA
a
un specialiste.
Si
vous souhaitez cependant
effectuer
vous-meme
ce
travail, lisez
soigneusement
Ia
presente Noticedemontageetaccordez-vous suffisamment
de temps pour
le
montage.
Permettez-nous enfin de vous dire quelques mots sur
Ia
protection en matiere
de
sante :
N'oubliez pas
que
lorsque vous ecoutez de
Ia
musique
dans votre vehicule, un niveau de pression sonore perma-
nent
superieure
a
100 dB
peut
entralner des dommages
irreversibles
au
niveau de l'ou·le, voire une perte complete
de celle-ci.
Les
systemes haute puissance modernes et
les
configurations etablies avec des haut-parleurs de haute
qualite
permettent
d'atteindre
des niveaux de pression
sonore superieurs
a
130
dB.
Consignes
de
securite
Veuillez respecter
les
consignes de securite suivantes pen-
dant
Ia
duree du montage et du raccordement.
-Debranchez
Ia
borne negative de
Ia
batterie !Respectez
pour cela
les
consignes de securite du constructeur du
vehicule.
-
Faites
attention de ne
pas
endommager
les
elements du
vehicule en per<;ant des trous.
-
La
section des cables plus
et
moins ne
doit
pas etre
inferieure
a
6
mm
2•
-Utilisez des passe-cables
au
niveau de trous aux bords
coupants.
-
En
cas
d'installation incorrecte, des dysfonctionnements
peuvent survenir
au
niveau du systeme electronique du
vehicule ou de l'autoradio.
GTA
15000
Anschluss •Connection •Raccordement•Conexi6n •
Liga~ao
•Collegamento•
PodJ~czenie
•
Pripojenl.
noAKniO'IeHIIIe. Racordare. CBbp3BaHe.
Prikljucak.
Priklop
Fig.1
Fig.2
(±)
(±)
8 8
25A
25A
li~~~~~~~l
~
~
SPEAKERS
FUSE
2s
I
+12V
~.
*
\
SUPPLY
REMOTE
GROUND
~
~
~
-
~
-
r-
-
= = =
=
--
G
-
ROUND
~~
I
+12V
-o......._
+
12V
FUSE
>"'
~
GTA
1500
D
Anschluss •Connection • Raccordement •Conexion •
Liga~ao
•Collegamento•
Podl~czenie
•
Pripojeni.
noAKniO"'eHMe
• Racordare • CBbp3BaHe •
Prikljucak.
Priklop
Fig. 3
X-OVER
SUBSONIC
PHASE
GAIN
~~).::
/~).::
~ra:=
X-OVER
~ra:=
lmCJ
•
@)
PWRIPRO
REMOTE
40Hz
200Hz
10Hz
80Hz
0
180
ON
OFF
5V
200mV
INPUT
Fig.4
FRONT
REAR
FRONT
REAR
SUBWOOFER
;0.::
;0,::
;0,;
~ ~ ~
50Hz
5kHz
SV
200mV
5V
200mV
X-?Y~R
SU~~~NIC
P~~~E
~
~
=:~x
~a:= ~a:=
~ ~
40Hz
200Hz
o
80Hz
o
1SO
INPUT
SUBWOOFER
GTA
270
DSP
or
GTA
470
DSP
GTA
15000
X-OVER
SUBSONIC
PHASE
GAIN
•
@)
~ra:=
~ra:=
~ra:=
X-OVER
c:Jm]
~ra:=
R
PWRIPRO
REMOTE
40Hz
200Hz
10Hz
80Hz
0
180
ON
OFF
SV
200mV
INPUT
29
GTA
15000
Anschluss •Connection • Raccordement •Conexion •
Liga~ao
• Collegamento• Podlctczenie •
Pripojeni.
noAKniO'IeHMe • Racordare • Cabp3BaHe • Prikljucak. Priklop
Fig.S
+12V
tl"'e
-:!:-
<B
<B
e e
25A 25A
SUPPLY
REMOTE
GROUND
fa
1--
fa
~
-
~
-
1--
SPEAKERS
FUSE
min.20hm
Fig.6
Remote
LEVEL
:.0..:
~
L
X-OVER
SUBSONIC
PHASE
GAIN
•
(@
::~::
~~;
::~::
X-OVER
::~::
~
R
lmCJ
PWRIPRO
REMOTE
40Hz
200Hz
10Hz
80Hz
0
180
ON
OFF
SY
200mV
INPUT
30 I

Other manuals for GTA 1500 D

1

Other Blaupunkt Amplifier manuals

Blaupunkt Velocity V7000 User manual

Blaupunkt

Blaupunkt Velocity V7000 User manual

Blaupunkt GTA 1300 User manual

Blaupunkt

Blaupunkt GTA 1300 User manual

Blaupunkt MPA 400 User manual

Blaupunkt

Blaupunkt MPA 400 User manual

Blaupunkt GTA 270 Mystic Series Specification sheet

Blaupunkt

Blaupunkt GTA 270 Mystic Series Specification sheet

Blaupunkt BQX 320 User manual

Blaupunkt

Blaupunkt BQX 320 User manual

Blaupunkt GTA 2200 User manual

Blaupunkt

Blaupunkt GTA 2200 User manual

Blaupunkt GTA 270 DSP User manual

Blaupunkt

Blaupunkt GTA 270 DSP User manual

Blaupunkt 7 607 792 118 User manual

Blaupunkt

Blaupunkt 7 607 792 118 User manual

Blaupunkt EMA 265 User manual

Blaupunkt

Blaupunkt EMA 265 User manual

Blaupunkt THA 275 PnP User manual

Blaupunkt

Blaupunkt THA 275 PnP User manual

Blaupunkt THA 555 PnP User manual

Blaupunkt

Blaupunkt THA 555 PnP User manual

Blaupunkt GTA 4 Special User manual

Blaupunkt

Blaupunkt GTA 4 Special User manual

Blaupunkt Velocity VA4100 User manual

Blaupunkt

Blaupunkt Velocity VA4100 User manual

Blaupunkt THA 475 PnP User manual

Blaupunkt

Blaupunkt THA 475 PnP User manual

Blaupunkt THA1350 User manual

Blaupunkt

Blaupunkt THA1350 User manual

Blaupunkt GTA 270 SF User manual

Blaupunkt

Blaupunkt GTA 270 SF User manual

Blaupunkt 7 607 792 007 User manual

Blaupunkt

Blaupunkt 7 607 792 007 User manual

Blaupunkt MPA 3 User manual

Blaupunkt

Blaupunkt MPA 3 User manual

Blaupunkt GTA 11200 User manual

Blaupunkt

Blaupunkt GTA 11200 User manual

Blaupunkt GTA 470 Mystic Series Specification sheet

Blaupunkt

Blaupunkt GTA 470 Mystic Series Specification sheet

Blaupunkt MPA 5 User manual

Blaupunkt

Blaupunkt MPA 5 User manual

Blaupunkt MPA 4 User manual

Blaupunkt

Blaupunkt MPA 4 User manual

Blaupunkt GTA 1500 D Guide

Blaupunkt

Blaupunkt GTA 1500 D Guide

Blaupunkt MPD 460 A User manual

Blaupunkt

Blaupunkt MPD 460 A User manual

Popular Amplifier manuals by other brands

OSD Audio BLACK THEATRO X11 install guide

OSD Audio

OSD Audio BLACK THEATRO X11 install guide

Avaya HIS user guide

Avaya

Avaya HIS user guide

Viking DVA-2WA product manual

Viking

Viking DVA-2WA product manual

Master audio DX Series user manual

Master audio

Master audio DX Series user manual

Mitsubishi Electric MELSERVO MR-J2S- A instruction manual

Mitsubishi Electric

Mitsubishi Electric MELSERVO MR-J2S- A instruction manual

SPL Phonitor 2 user manual

SPL

SPL Phonitor 2 user manual

CYP CPRO-UHH Operation manual

CYP

CYP CPRO-UHH Operation manual

Triax TMB 100S Mounting instruction

Triax

Triax TMB 100S Mounting instruction

Biamp VOCIA VA-8600 manual&nbsp;

Biamp

Biamp VOCIA VA-8600 manual&nbsp;

JL Audio 1000/1 owner's manual

JL Audio

JL Audio 1000/1 owner's manual

D.A.S. PA Series user manual

D.A.S.

D.A.S. PA Series user manual

Trilogy 909 user manual

Trilogy

Trilogy 909 user manual

PROception proAMP108U installation instructions

PROception

PROception proAMP108U installation instructions

Pioneer GM-X404 Service manual

Pioneer

Pioneer GM-X404 Service manual

Art HEADAMP 6 Operation manual

Art

Art HEADAMP 6 Operation manual

EMP-Centauri A1/1PCU15dB-1 instruction manual

EMP-Centauri

EMP-Centauri A1/1PCU15dB-1 instruction manual

Pioneer PRS-D2000SPL - Premier Amplifier owner's manual

Pioneer

Pioneer PRS-D2000SPL - Premier Amplifier owner's manual

JUMA PA-100D operating manual

JUMA

JUMA PA-100D operating manual

manuals.online logo
manuals.online logoBrands
  • About & Mission
  • Contact us
  • Privacy Policy
  • Terms and Conditions

Copyright 2025 Manuals.Online. All Rights Reserved.