manuals.online logo
Brands
  1. Home
  2. •
  3. Brands
  4. •
  5. Blaupunkt
  6. •
  7. Amplifier
  8. •
  9. Blaupunkt GTA 470 SF Product guide

Blaupunkt GTA 470 SF Product guide

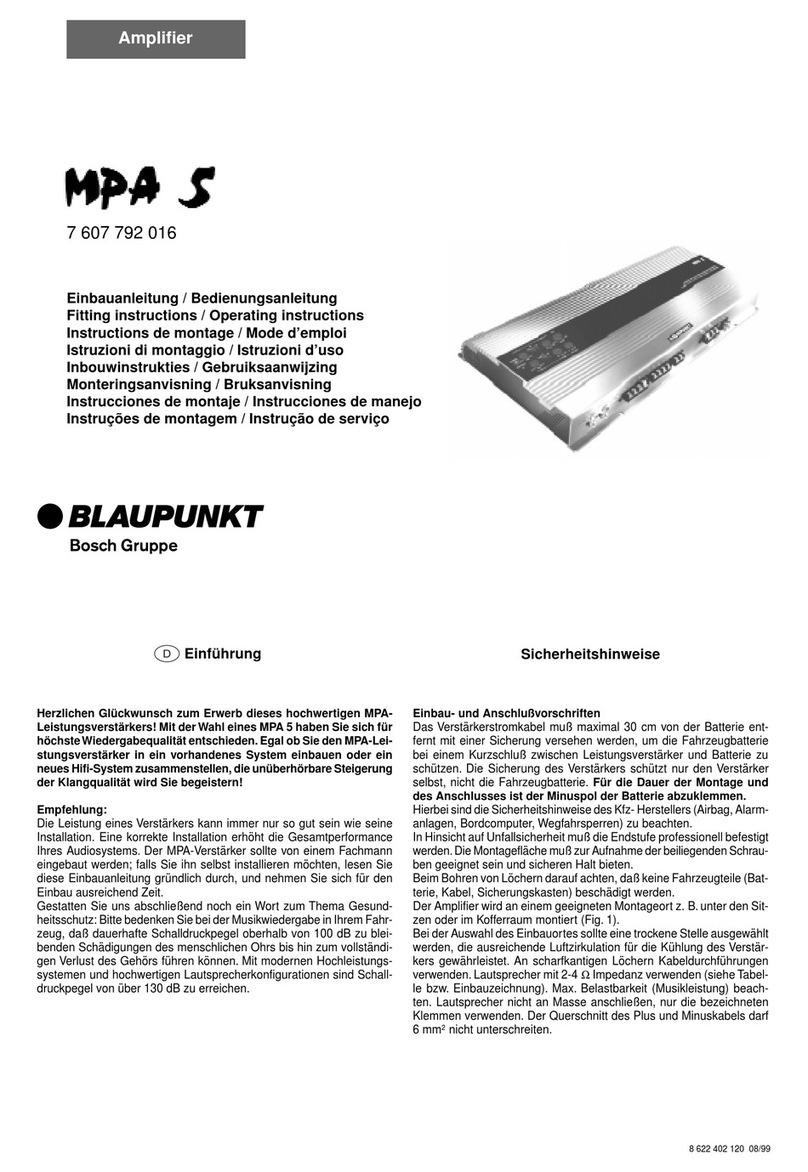
GTA
470
SF
DEUTSCH...................................................... 3
POLSKI
........................................................ 26
Einbau I Anschluss
.............................................................
48
Montaz
I Podtqczenie
......................................................
.48
ENGLISH ....................................................... 5
CESKY
......................................................... 28
Installation I
Connection
................................................
.48
Montaz
I Pripojenf
..............................................................
48
FRAN<;AIS
.................................................... 6 SLOVENSKY ............................................... 30
Montage
I Raccordement
..............................................
.48
Montaz
I Pripojenie
..........................................................
.48
ESPANOL
...................................................... 8 MAGYAR ..................................................... 32
lnstalaci6n I Conexi6n
.....................................................
.48 Beszereles I Csatlakozas
...................................................
48
PORTUGUES .............................................. 10
PYCCKif11f1
................................................... 34
Montagem
I Liga<;ao
........................................................
.48
YcraHOBKa
I nogKnt04eHII1e
............................................
.48
ITALIANO ................................................... 12 ROMANA ....................................................
36
Montaggio
I
Collegamento
...........................................
.48
Montare
I Racordare
.........................................................
48
NEDERLANDS ............................................ 15 6bnrAPCKII1 ............................................... 38
lnbouw
I Aansluiting
.......................................................
.48
MoHTa>K
I Csbp3BaHe
.......................................................
.48
DANSK........................................................ 16
SRPSKI
........................................................40
Montering
I
Tilslutning
....................................................
.48 Ugradnja I Prikljucak
........................................................
.48
SVENSKA.................................................... 18 SLOVENSCINA ........................................... 42
lnmontering
I
Anslutning
..............................................
.48 Vgradnja I Priklop
..............................................................
.48
SUOMI ........................................................20 H
RVATSKI
...................................................43
Asennus I Liitanta
..............................................................
.48 Ugradnja I Prikljucivanje
.................................................
.48
E/\1\HNIKA.................................................. 22
USA
............................................................. 45
EyKOTOOTOOJ1
I
LUVCEOJ1
.................................................
.48 Installation I Connection
................................................
.48
TU
RK<;E
......................................................24
Montaj
I Baglantt
...............................................................
.48
2
DEUTSCH
Garantie
Fur innerhalb der Europaischen Union gekaufte Produkte
geben
wir
eine
Herstellergarantie.
Fur
au~erhalb
der
Europaischen Union gekaufteGerate gelten dievon unserer
jeweils zustandigen Landesvertretung herausgegebenen
Garantiebedingungen. Die Garantiebedingungen konnen
Sie
unter
www.blaupunkt.com
abrufen.
Empfehlung
Die Leistung eines Verstarkers kann
immer
nur
so
gut
sein
wie seine Installation. Eine korrekte Installation
erhoht
die
Gesamtperformance lhres Audiosystems. DerGTA-Verstarker
sollte von einem Fachmann eingebaut werden.
Falls
Sie
ihn
selbst installieren mochten, lesen
Sie
bitte
diese Einbauan-
leitung grundlich durch
und
nehmen sich fur den Einbau
ausreichend Zeit.
Gestatten
Sie
uns
abschlie~end
noch ein Wort zum Thema
Gesundheitsschutz:
Bitte bedenken
Sie
bei derMusikwiedergabe in lhrem Fahr-
zeug,
dass
dauerhafteSchalldruckpegel oberhalbvon 100
dB
zu bleibenden Schadigungen des menschlichen Ohrs bis
hin zum vollstandigen Verlust des Gehors fuhren konnen.
Mit
modernen Hochleistungssystemen und hochwertigen
Lautsprecherkonfigurationen
sind Schalldruckpegel von
uber
130
dB
zu
erreichen.
Sicherheitshinweise
Fur die Dauer der
Montage
und
des Anschlusses beachten
Sie
bitte
folgende Sicherheitshinweise.
-Minuspol derBatterie abklemmen! Dabei die Sicherheits-
hinweise des Kfz-Herstellers beachten.
-Beim Bohren
von
Lochern
darauf
achten, dass keine
Fahrzeugteile beschadigt werden.
-Der Querschnitt des Plus-
und
Minuskabels
darf
6
mm
2
nicht unterschreiten.
-An scharfkantigen Lochern Kabeldurchfuhrungen ver-
wenden.
-
Bei
fehlerhafter Installation konnen Storungen in elek-
tronischen
Fahrzeugsystemen
oder
lhrem
Autoradio
auftreten.
Einbau- und Anschlussvorschriften
In Hinsicht
auf
die
Unfallsicherheit muss der
GTA
470
SF
professionell befestigt werden.
Bei
der Auswahl des Einbauortes sollte eine trockene Stelle
ausgewahltwerden, dieausreichende Luftzirkulation fur die
Kuhlung des Verstarkers gewahrleistet.
Der
GTA
470
SF
darf
nichtaufHeckablagen, Ruckbanken oder
sonstigen nach vorne offenen Orten verbaut werden.
Die Montageflache muss zur Aufnahme der beiliegenden
Schrauben geeignet sein und sicheren Halt bieten.
Das
Verstarkerstromkabel muss maximal 30
em
von der
Batterie
entfernt
mit
einer
Sicherung versehen werden,
um
die Fahrzeugbatterie bei einem Kurzschluss zwischen
Leistungsverstarker
und
Batterie
zu
schutzen. Die Sicherung
des Verstarkers schutzt
nur
den Verstarker selbst, nicht die
Fahrzeugbatterie.
GTA470
SF
Lautsprecher
mit
2-4
n
lmpedanzverwenden (sieheTabelle
bzw. Einbauzeichnung). Max. Belastbarkeit (Musikleistung)
beachten. Lautsprecher
nicht
an Masse
anschlie~en,
nur
die
bezeichneten Klemmen verwenden.
Amplifier
GTA
470
SF
Der Amplifier eignet sich zum Anschluss
an
Autoradios
mit
Cinch-Anschluss.
Fur den Anschluss
an
Autoradios
mit
ISO-Anschluss Blau-
punkt
ISO-Cinch Adapter verwenden
(7
607 893 093 oder
7 607 855 094).
Einsatzmoglichkeiten
und
Lautsprecheranschluss
Quadro-Mode
Max Power 4
X
140W
I
4 0
Fig.
4,
5
Stereo-Mode
Max Power 2
x420W
I
40
Fig.
6
Quadro-Mode
Max Power
4x
200W
12
0
Fig.
4,
5
Quadro-Mode
RMS
Power 4
X
70W
I
40
Fig.
4,
5
Stereo-Mode
RMS
Power
2x200WI40
Fig.
6
Quadro-Mode
RMS
Power 4
X
100W
I
2 0
Fig.
4,
5
Frequenzgang
10
Hz
-30.000
Hz
Signai-Rauschab-
stand
>
92
dB@
RMS
Power
Signai-Rauschab-
stand
>
75
dB@ 1
WI
1 kHz
Klirrfaktor (RMS)
<0,05%
Stabilitat
2 0
(4
0 im Bruckenbetrieb)
Eingangsempfind-
lichkeit
0,1
-8
v
TiefpassfiIter
(Low
Pass)
50-250Hz
Hochpassfilter
(High
Pass)
80Hz
Bass
Boost
0
I
6
I
12
dB
Abmessungen
Bx H
xT
(mm) 197
X
52
X
426
Bx H
xT
(")
7.8x2.1 x16.8
Plus-/ Minus-Anschluss
-Wir empfehlen einen Mindestquerschnitt von 6
mm
2•
-Handelsubliche Pluskabel zur Batterieverlegen und uber
Sicherungshalter
anschlie~en.
-An scharfkantigen Lochern Kabeldurchfuhrungen ver-
wenden.
3
GTA470
SF
-Handelsubliche Minuskabel an einen storfreien Masse-
punkt
(Karosserieschraube, Karosserieblech) sicher an-
schrauben (nicht am Minuspol der Batterie).
-Kontaktf1ache des Massepunktes metalIisch blankkratzen
und
mit
Graphitfett einfetten.
lntegrierte Sicherungen {Fuse)
Die im Amplifier integrierten Sicherungen
(Fuse)
schutzen
die Endstufe und das gesamte elektrische System im
Feh-
lerfall.
Bei
dem Einsatz einer Ersatzsicherung bitte niemals
Sicherungen uberbrucken oder gegen Typen
mit
hbherem
Strom auswechseln.
Anschlussbeispiele
Anschluss der Spannungsversorgung
.......................
Fig.
2
Anschluss
an
Autoradios
mit
Cinch-Ausgang
.........
Fig.
3
Lautsprecheranschlusse
.................................................
Fig.
41516
I
-/o-
+12V I
Remote-Anschluss des Verstarkers
mit
schaltbarer +
12
V
Spannungsquelle verbinden.
Auf
dieseWeise kann derVerstarker uberden
Ein-1
Ausschal-
ter des Radiogerats ein- und ausgeschaltet werden.
Level Regier
Mit
Hilfedes Level Reglers kann die Eingangsempfindlichkeit
der Endstufe
an
die Ausgangsspannung lhres Autoradio-
Vorverstarkerausganges angepasst werden.
Der Einstellbereich reicht von
0,1
V bis 8
V.
Bei
Anschluss eines Autoradios anderer Hersteller ist die
Eingangsempfindlichkeit entsprechend den Herstelleran-
gaben anzupassen.
Hierzu noch einige wichtige ErUiuterungen:
Durch Drehen des Reglers im Uhrzeigersinn
erhoht
sich
die
Eingangsempfindlichkeit
des Verstarkers
und
damit
auch die Lautstarke.
Es
handelt sich jedoch nicht urn eine
Lautstarkeregelung; in
der
Endposition
lasst sich keine
hohereVerstarkerleistung erzielen, auch wenn sich dies zu-
nachst
so
anhort.
Das
System steigert lediglich schnellerdie
Lautstarke, wenn die Lautstarkeregelung des Radiogerates
aufgedreht wird.
Lautsprecheranschlusse
(Falls der Verstarker in Brucke geschaltet werden soli,
an
dieser Stelle direkt
mit
dem Abschnitt ,Oberbruckte Laut-
sprecheranschlusse" fortfahren).
Wie beijeder
Audiokomponente
ist die korrekte Polung von
Verstarker und Lautsprechern von essentieller Bedeutung
fUr
eine
gute
Basswiedergabe. Deshalb ist bei den Anschlussen
darauf
zu
achten, dass der positive
(+)
Anschluss des Ver-
starkers
mit
dem positiven Anschluss(+) des Lautsprechers
verbunden wird; entsprechendes
gilt
fur die negativen
(-)
Anschlusse.
Au~erdem
muss der Iinke Verstarkerkanal
mit
dem linken Lautsprecher und derrechteVerstarkerkanal
mit
dem rechten Lautsprecher verbunden werden.
Oberbruckte Lautsprecheranschlusse
Der GTA-Verstarker kann
fur
eine Monokonfiguration auch
in Brucke geschaltet werden.
Auf
diese Weise kann
der
Verstarker
fur
einen
oder
mehrere Subwoofer bzw. einen
4
Mitteltoner
verwendet werden.
In
dieser Konfiguration ad-
diert
derVerstarker den rechten und linken
Kana
I
zu
einem
Einkanalausgang (Monoausgang).
Hinweis:
Der Verstarker kann die rechte und Iinke Signalinformation
nur
dann addieren, wenn sowohl der rechte
als
auch der
Iinke RCA-Anschluss vorgenommen wurde.
Achtung:
In Bruckenschaltung muss
die
Verstarkerlast 4 Ohm
oderhoher betragen. Eine niedrigere Last
fuhrt
zu einer
Oberhitzung oderAbschaltung des Verstarkers und kann
dauerhafte Schaden verursachen.
Art
und Bereich der Frequenzubergange
einstellen
Beim
GTA
470
SF
kann
die
Art
des Frequenzubergangs
(d.
h.
,Low-Pass" oder,Hi-Pass") und die gewunschte Ein-
stiegsfrequenz eingestellt werden. Wenn beispielsweise
ein Subwoofer-Paar angeschlossen werden soli, sind
die
abgebildeten,Low-Pass"-Einstellungen erforderlich
(Fig.
3).
Die Einstiegsfrequenz ist abhangig vom Frequenzbereich
der Lautsprecher (siehe empfohlener Frequenzbereich der
Lautsprecher).
,High-Pass"
Bei
der Einstellung von 80
Hz
hat der Verstarker einen Fre-
quenzbereich von
80Hz
bis 30.000
Hz.
,Low-
Pass"- Frequenzregelung
Dieser Regier ist aktiv, wenn sich derSchalter in derPosition
,Low-Pass" befindet, und
ermoglicht
die Einstellung
der
gewunschten Einstiegsfrequenz.
Beispiel:
Bei
einer Einstellung von 150
Hz
hat der Verstarker einen
Frequenzbereich von
10
Hz
bis 150
Hz.
Bass
Boost
Mit
Hilfe des
Bass
Boost Reglers kann die Basswiedergabe
des Verstarkers eingestellt werden.
Die Einstellmoglichkeiten sind: 0
dB
I +6
dB
I+
12
dB.
Betriebsanzeige
(POWER
I
PROTECTION)
Grunes Licht:
Endstufe
an,
regularer Betriebszustand.
Rotes Licht:
Endstufe ist elektronisch abgeschaltet, da Fehlerfall vor-
liegt.
Recycling und Entsorgung
~
Bitte nutzen
Sie
zur Entsorgung des Produktes die
~
zurVerfugung stehenden Ruckgabe-
und
Sam
mel-
-systeme.
Anderungen vorbehalten.

ENGLISH
Warranty
We
provide a manufacturer's warranty for products
bought
within
the European Union. For devices purchased outside
the European Union,
the
warranty terms issued by
our
re-
spective responsible domesticagency
are
valid.The warranty
terms can be called
up
from www.blaupunkt.com.
Recommendation
The performance
of
an
amplifier
can
onlybe
as
good
as
its in-
stallation. Acorrect installation increases the overall perform-
ance
of
your car sound system.The
GTA
amplifiershould be
installed byatrained person. If
you would
to
install
it
yourself,
please read these installation instructionsvery carefully and
allow yourselfsufficient
time
for the installation.
In conclusion, allow
us
afew words aboutthe topic
of
health
protection:
During theplayback
of
music in yourvehicle, please consider
that
continuous sound-pressure levels above 100
dB
can
lead
to
permanent damages
to
the human ear and even
to
loss
of
hearing. Using today's high-performance systems
and loudspeaker configurations allows for reaching sound-
pressure levels above 130
dB.
Safety notes
Please
observe
the
following
safety notes during the instal-
lation and connection.
-Disconnect
the
negative pole
of
the
battery! Observethe
safety notes
of
the
vehicle manufacturer.
When you drill holes, ensure
that
you
do
not
damage any
vehicle components.
The cross section
of
the plus and minus cable may
not
be
less
than 6
mm
2•
Use
cable glands for holes
with
sharp edges.
-
An
incorrect installation can result in malfunctions
of
the
electronic vehicle systems
or
your car sound system.
Installation
and
connection instructions
With respect
to
accident safety,
the
GTA
470
SF
must be
secured in a professional way.
When selecting
the
installation location, select a
dry
loca-
tion
that
offers
sufficient
air
circulation for
cooling
the
amplifier.
The
GTA
470
SF
must
not
be installed on rear shelves, rear
seats or other locations
that
are open
to
the front.
The installation location must be suitable
to
accept the
ac-
companying screws and provide afirm support.
The amplifierpowercable must be fitted with afuse no more
than
30
em
from
the
battery
to
protectthevehicle battery in
case
of
ashort circuit between
power
amplifierand battery.
The fuse
of
the amplifierprotects onlythe amplifier,
not
the
vehicle battery.
Use
loudspeakers
with
2-4
n
impedance
(see
table or in-·
stallation drawing). Observe
the
maximum power handling
capacity (music output). Do
not
connect loudspeakers
to
earth,
use
only
the
referenced terminals.
GTA470SF
Amplifier
GTA
470
SF
The amplifier
is
suitable for connecting a car sound system
with
cinch connections.
For
the
connection
to
car sound systems
with
ISO
connec-
tion,
use
Blaupunkt
ISO
cinch adapters
(7
607 893 093
or
7 607 855 094).
Application options and loudspeakerconnection
Quadro mode
Max power
4x
140W
I
4
0
Fig.
4,
5
Stereo mode
Max power 2
x420W
I
4
0
Fig.
6
Quadromode
Max power
4x
200W
I
2
0
Fig.
4,5
Quadro mode
RMS
power
4x70W
140
Fig.4,5
Stereo mode
RMS
power 2
X
200W
I
4
0
Fig.
6
Quadro mode
RMS
power 4
X
100W
I
2
0
Fig.
4,
5
Frequency response 10
Hz
-30,000
Hz
Signal-to-noise ratio
>
92
dB@
RMS
power
Signal-to-noise ratio
>
75
dB@ 1
WI
1 kHz
Distortion factor (RMS)
<
0.05%
Stability 2
0
(4
0
in bridge mode)
Input sensitivity
0.1
-8
v
Low-pass filter
(Low
Pass)
50-250Hz
High-pass filter
(High
Pass)
80Hz
Bass
boost 0
I
6
I
12
dB
Dimensions
Wx
H x D (mm) 197
X
52
X
426
Wx
H x D
(")
7.8x2.1 x 16.8
Plus I minus connection
-
We
recommend a
minimum
cross section
of
6
mm
2•
-Route commercially available plus cables
to
the battery
and connect via fuse holder.
-
Use
cable glands for holes
with
sharp edges.
-Securely fasten commercially available minus cables
to
a
noise-free earth
point
(chassis screw, chassis metal) (not
to
the minus pole
of
the battery).
-Scrap the contact surfaces
of
the earth
point
until they
are
bright
and grease
with
graphite grease.
Integrated
fuses (Fuse)
The fuses integrated in theamplifier
(Fuse)
protectthe power
amplifierand the entire electrical system in
case
of
an
error.
5
GTA470SF
Ifa replacement fuse
is
used, never bridge fuses or replace
them
with
a type
with
higher current.
Connection examples
Connection
of
the
voltage supply
...............................
Fig.
2
Connection
to
car sound system
with
cinch
output
......................................................
.
................
Fig.
3
Loudspeaker connections
.............................................
Fig.
4/5/6
I
-/o-
+12V I
Remote connection
of
the amplifier with switchable +
12
V
voltage source.
This allows the amplifier
to
be switched on and
off
using the
on/off-switch
of
the radio device.
Level control
The Level control
is
used
to
adjust the
input
sensitivity
of
the poweramplifier
to
the
output
voltage
of
yourcar sound
system preamplifier
output.
The adjustment range
is
from
0.1
V
to
8
V.
If
a car sound system
of
a
third
party manufacturer
is
con-
nected,the
input
sensitivitymustbe adjusted corresponding
to
the manufacturer data.
A few
important
explanations in this context:
By
turning
the control clockwise, the
input
sensitivity
of
the
amplifierand, therefore, also the volume increases. However,
this
is
not
a
volume
control;
no
further
amplifier
output
can
be achieved in
the
end position, even
if
it may sound
like
that
at the beginning.The system merely increases the
volume faster
if
the
volume control
of
the car sound system
is
turned up.
Loudspeaker connections
(Ifthe amplifier
is
to
bejumpered,continue with the section
"Bridged loudspeaker connections" at this point).
As
with
every audio component, the correct polarisation
of
amplifierand loudspeakers
is
of
essentially importancefora
good
bass
response.
For
this reason, ensure
that
the positive
(+)connection
of
the
amplifier
is
connected
with
the posi-
tive
connection(+)
of
the loudspeaker; the same applies
to
the negative
(-)
connections. In addition, the left amplifier
channel must be connected
with
the left loudspeaker and
the right amplifier channel
with
the right loudspeaker.
Bridged loudspeaker connections
The
GTA
amplifiercan also be bridged fora
mono
configura-
tion. This allows
the
amplifier
to
be used for one or several
subwoofers or mid-range drivers.
In
this configuration, the
amplifier combines the right and left channel
to
a single-
channel
output
(mono output).
Note:
The amplifier can add the right and left signal information
only
if
the
right
as
well
as
the
left
RCA
connection were
carried out.
Caution:
In a bridge circuit,
the
amplifier load must be 4 ohm or
higher.Alowerload leads
to
an overheating or switch-off
of
the
amplifier and can cause permanent damages.
6
Adjusting
the
type
and range
of
the
frequency crossovers
With the
GTA
470
SF,
the type
of
frequency crossover
(i.e.
"Low
Pass"
or "Hi-Pass") and the desired
entry
frequency
can
be adjusted.
For
example,
if
apair
of
subwoofers
is
to
be
connected, the low-pass settings shown are required
(Fig.
3).
The entryfrequency
is
dependentupon the frequency range
of
the loudspeakers
(see
recommended frequency range
of
the loudspeakers).
High-Pass
At asetting
of
80
Hz,
the amplifier
has
afrequency range
of
80
Hz
to
30,000
Hz.
Low-pass frequency control
This control
is
active
if
the switch
is
in
the position
"Low-Pass'~
and allows for setting the desired entry frequency.
Example:
At a setting
of
150
Hz,
the amplifier
has
a frequency range
of
1
0
Hz
to
1
50
Hz.
Bass
boost
The
bass
boost control
is
used
to
adjust the
bass
response
of
the amplifier.
The setting options
are:
0
dB
I
+6
dB
I+
12
dB.
Power-on indicator
(POWER
I
PROTECTION)
Green
LED:
Output
stage on, regular operating status.
Red
LED:
Output
stage
is
electronically switched
off
due
to
an
error.
Recycling and disposal
~
Please
use
the return and collection systems avail-
A
able
to
dispose
of
the product.
-
Subject
to
changes
FRANc;AIS
Garantie
Notre garantie constructeur s'etend
a
tous nos
produits
achetes
au
sein de I'Union Europeenne. Pour
les
appareils
vend
us
en
dehors de I'Union europeenne,
les
conditions de
garantie applicables sontcelles definies par notre represen-
tant
agree dans
le
pays.
Vous
pouvezconsulter
les
conditions
de garantie sur
le
site www.blaupunkt.com.
Recommandation
Les
performances
d'un
amplificateur
ne
seront
jamais
meilleures que son installation
ne
le
permet. Une installa-
tion
correcte augmente
les
performances d'ensemble de
votre systeme audio. Vous devriez confier le montage de
l'amplificateur
GTA
a
un
specialiste.
Si
vous souhaitez cepen-
dant
effectuervous-meme
ce
travail, lisez soigneusement
Ia
Nekoliko vaznih napomena o tome:
Okretanjem kontrole u smjeru kazaljke
na
satu povecava
se
ulazna osjetljivost pojacala,kao i glasnoca. No
to
nije
regulatorglasnoce.
Na
krajnjem polozaju ne moze
se
postici
povecani izlaz pojacala, iako
se
tako moze ciniti
na
pocetku.
Sustav samo brze pojacava glasnocu kada
se
regulator
glasnoce autoradio sustava pojaca.
Prikljucci zvucnika
(Ako
ce
se
pojacalo premostiti, prijedite
na
odlomak
»Pre-
mosceni prikljucci zvucnika«).
Kao
i kod svih audio uredaja, ispravna polarizacija pojacala
i zvucnika nuzna
je
za
dobru
reakciju niskih tonova. Zbog
toga
osigurajte
da
je
pozitivan
(+)
prikljucak
pojacala
prikljucen
na
pozitivan
(+)
prikljucak zvucnika. lsto vrijedi
i
za
negativan
(-)
prikljucak. Osim toga, lijevi kanal pojacala
mora
se
spojiti s lijevim zvucnikom, a desni kanal pojacala
sdesnim zvucnikom.
Premosceni prikljucci zvucnika
Pojacalo
GTA
moze
se
premostiti
za
mono
konfiguraciju.
Time
se
pojacalo moze koristitis
jednim
iii dvama subwoo-
ferima iii uredajima u srednjem rasponu frekvencija. U
toj
konfiguraciji pojacalo spaja desni ilijevi kanaIujednokanalni
izlaz (mono izlaz).
Napomena:
Pojacalo moze
dodati
informacije signa
Ia
iz
desnog i lijevog
kana
Ia
samo ako
su
obavljeni desni i lijevi
RCA
spojevi.
Oprez:
Upremoscenom krugu opterecenje pojacala mora izno-
siti najmanje 4
n.
Nize opterecenje uzrokovat
ce
pre-
grijavanje i iskljucivanje pojacala
te
moze uzrokovati
trajna ostecenja.
Podesavanje vrste i raspona frekvencijskih
prolaza
Kod zvucnika
GTA
470
SF
mogu
se
podesiti vrsta frekven-
cijskih prolaza (tj. »Low
Pass«
iii
»Hi-Pass«)
te zeljena ulazna
frekvencija.
Na
primjer, ako je
potrebno
prikljuciti dva sub-
woofera, potrebne
su
postavke niskoprolaznog filtra
(sl.
3).
Ulazna frekvencija ovisi o frekvencijskom rasponu zvucnika
(vidi preporuceni frekvencijski raspon zvucnika).
Visokoprolazna frekvencija
Na
postavci od 80
Hz
pojacalo ima frekvencijski raspon od
80
Hz
do
30.000
Hz.
Regulacija niskoprolazne frekvencije
Regulacija je aktivna ako
je
prekidac u polozaju
»Low-Pass«
i omogucava namjestanje zeljene ulazne frekvencije.
Primjer:
Na
postavci od
150Hz
pojacalo ima frekvencijski raspon od
1
0
Hz
do
150
Hz.
Pojacanje niskih tonova
Regulacija pojacanja niskih
tonova
sluzi
za
podesavanje
reakcije niskih tonova pojacala.
Podrucje podesavanja
je
od 0
dB
I
+6
dB
I+
12
dB.
GTA470
SF
Pokazivac ukljucivanja
(POWER
I
PROTECTION)
Zeleno svjetlo:
Ukljucen izlazni stupanj, redovni radni status.
Crveno svjetlo:
lzlazni stupanj
se
elektronicki iskljucuje zbog pogreske.
Recikliranje i zbrinjavanje u otpad
~
Koristite postojece sustave povrata i prikupljanja
~
otpada
za
ovaj proizvod.
-
Zadrzavamo pravo
na
promjene
USA
Please read these operating instructions before using
the equipment for the first time.
Recommendation
The performance
of
an
amplifier
can
only be
as
good
as
its
installation.Acorrect installation increases theoverall perfor-
mance
of
yourcar sound system.The
GTA
amplifiershould be
installed byatrained person. If
you would
to
install
it
yourself,
please read these installation instructionsvery carefully and
allow yourselfsufficient
time
for the installation.
In conclusion, allow
us
afew words about
the
topic
of
health
protection:
Duringthe playback
of
music in yourvehicle, please consider
that
continuous sound-pressure levels above 100
dB
can
lead
to
permanent damages
to
the human ear and even
to
loss
of
hearing. Using today's high-performance systems
and loudspeaker configurations allows for reaching sound-
pressure levels above 1
30
dB.
Safety notes
Please
observethefollowing safety notes
during
the
installation and connection.
-Disconnectthenegativeterminal
of
thebatterybefore
carrying
out
installation and connection work.
-Observethevehicle manufacturer'ssafety instructions
(regarding airbags, alarm systems,
trip
computers,
vehicle immobilisers).
-When you drill holes, ensure
that
you
do
not
damageany
vehicle components.
-The cross section
of
the plus and minus cable may
not
be
less
than 6
mm
2•
-
Use
cable glands for holes
with
sharp edges.
-
An
incorrect installation can result in malfunctions
of
the
electronic vehicle systems
or
your car sound system.
Installation and connection instructions
With respect
to
accident safety,
the
GTA
470
SF
must
be
secured in a professional way.
I 45
GTA470
SF
When selecting the installation location, select a dry loca-
tion
that
offers
sufficient
air
circulation
for
cooling
the
amplifier.
The
GTA
470
SF
must
not
be installed on rear shelves, rear
seats
or other locations
that
are
open
to
the front.
The installation location must be suitable
to
accept the
ac-
companying screws and provide a firm support.
The amplifierpowercable must be fitted
with
afuse no more
than
30
em
from the battery
to
protectthevehicle batteryin
case
of
ashort circuit between power amplifierand battery.
The fuse
of
the amplifier protects onlythe amplifier,
not
the
vehicle battery.
Use
loudspeakers
with
2-
4 n impedance
(see
table or in-
stallation drawing). Observe the maximum power handling
capacity (music output). Do
not
connect loudspeakers
to
earth,
use
only the referenced terminals.
Amplifier
GTA
470
SF
The amplifier
is
suitable for connecting a car sound system
with
cinch connections.
For
the connection
to
car sound systems
with
ISO
connec-
tion,
use
Blaupunkt
ISO
cinch adapters
(7
607 893
093
or
7607
855
094).
Application optionsand loudspeakerconnection
Quadro mode
Max power
4x
140W
I
40
Fig.4, 5
Stereo mode
Max power
2x420W
I
40
Fig.
6
Quadro mode
Max power
4x
200W
I 2 0
Fig.
4,
5
Quadro mode
RMS
power
4x
70W
I4 0
Fig.
4,
5
Stereo mode
RMS
power 2 X
200W
I 4 0
Fig.
6
Quadro mode
RMS
power 4 X
100W
I 2 0
Fig.
4,
5
Frequency response 10
Hz
-30,000
Hz
Signal-to-noise ratio >92 dB@
RMS
power
Signal-to-noise ratio >
75
dB@ 1
WI
1kHz
Distortion factor (RMS) <0.05%
Stability 2 0
(4
0 in bridge mode)
Input sensitivity
0.1
-8
v
Low-pass filter
(Low
Pass)
50-250Hz
High-pass filter
(High
Pass)
80Hz
Bass
boost 0
/6/12dB
Dimensions
Wx
Hx 0 (mm) 197 X
52
X 426
Wx
Hx D (
11
)
7.8
X
2.1
X 1
6.8
46
1
Plus I minus connection
-
We
recommend a
minimum
cross section
of
6
mm
2•
-Route commercially available plus cables
to
the battery
and connect via fuse holder.
-
Use
cable glands for holes
with
sharp edges.
-Securely fasten commercially available minus cables
to
a
noise-free earth
point
(chassis screw, chassis metal) (not
to
the minus pole
of
the battery).
-Scrap the contact surfaces
of
the earth
point
until they
are
bright
and grease
with
graphite grease.
Integrated
fuses (Fuse)
The fuses integrated in theamplifier
(Fuse)
protectthepower
amplifierand
the
entire electrical system in
case
of
an
error.
If
a replacement fuse
is
used, never bridge fuses or replace
them
with
a
type
with
higher current.
Connection examples
Connection
of
the
voltage supply
...............................
Fig.
2
Connection
to
car sound system
with
cinch
output
.......................................................................
Fig.
3
Loudspeaker connections
.............................................
Fig.
4/5/6
I
-/o-
+12V I
Remote connection
of
the amplifier
with
switchable +12 V
voltage source.
This allows the amplifier
to
be switched on and
off
using the
on/off-switch
of
the radio device.
Level control
The Level control
is
used
to
adjust the
input
sensitivity
of
the
poweramplifier
to
the
output
voltage
of
yourcar sound
system preamplifier output.
The adjustment range
is
from
0.1
V
to
8
V.
If
a car sound system
of
a third party manufacturer
is
con-
nected,the
input
sensitivitymust be adjusted corresponding
to
the
manufacturer data.
A few
important
explanations in this context:
By
turning
the
control clockwise, the
input
sensitivity
of
the
amplifierand, therefore, also thevolume increases. However,
this
is
not
a
volume
control; no
further
amplifier
output
can
be achieved in the end position, even
if
it
may sound
like
that
at the beginning.The system merely increases the
volume faster
if
the
volume control
of
the car sound system
is
turned up.
Loudspeaker connections
(Ifthe amplifier
is
to
be jumpered,continue
with
the
section
II
Bridged loudspeaker connections
II
at this point).
As
with
every audio component, the correct polarisation
of
amplifierand loudspeakers
is
of
essentially importancefor a
good
bass
response.
For
this reason, ensure
that
the
positive
(+)connection
of
the amplifier
is
connected
with
the posi-
tive
connection(+)
of
the loudspeaker; the same applies
to
the negative
(-)
connections.
In
addition,
the
left amplifier
channel must be connected
with
the left loudspeaker and
the
right amplifier channel
with
the right loudspeaker.
Bridged loudspeaker connections
The
GTA
amplifiercan also be bridged for a
mono
configura-
tion. This allows
the
amplifier
to
be used for one
or
several
subwoofers or mid-range drivers.
In
this configuration, the
amplifier combines
the
right
and left channel
to
a single-
channel
output
(mono
output).
Note:
The amplifier can add
the
right
and left signal information
only
if
the
right
as
well
as
the
left
RCA
connection were
carried out.
Caution:
In a bridge circuit,
the
amplifier load must be 4 ohm or
higher.Alowerload leads
to
an overheating orswitch-off
of
the
amplifier and can cause permanent damages.
Adjusting
the
type
and range
of
the
frequency crossovers
With
the
GTA
470
SF,
the
type
of
frequency crossover
(i.e.
"Low
Pass"
or
"Hi-Pass") and
the
desired
entry
frequency
can be adjusted. For example,
if
apair
of
subwoofers
is
to
be
connected, the low-pass settings shown
are
required
(Fig.
3).
The entryfrequency
is
dependentupon thefrequency range
of
the
loudspeakers
(see
recommended frequency range
of
the
loudspeakers).
High-Pass
At a setting
of
80
Hz,
the
amplifier
has
afrequency range
of
80
Hz
to
30,000
Hz.
Low-pass frequency control
This control
is
active
if
the
switch
is
in the position
"Low-Pass'~
and allows for setting
the
desired
entry
frequency.
Example:
At a setting
of
150
Hz,
the
amplifier
has
a frequency range
of
10
Hz
to
150
Hz.
Bass
boost
The
bass
boost control
is
used
to
adjust the
bass
response
of
the
amplifier.
The setting options are: 0
dB
I
+6
dB
I+
12
dB.
Power-on indicator
(POWER
I
PROTECTION)
Green
LED:
Output
stage on, regular operating status.
Red
LED:
Output
stage
is
electronically switched
off
due
to
an
error.
Recycling and disposal
~
Please
use
the
return and collection systems avail-
A able
to
dispose
of
the product.
-
Subject
to
changes
GTA
470
SF
I 47
GTA470
SF
Einbau •Installation• Montage•lnstalacion •Montagem •Montaggio
•lnbouw
•Montering•
lnmontering • Asennus • EyKaTciaTaa'l • Montaj •
Montaz
• Montaz • Montaz • Beszereh!s •
YcTaHOBKa
• Montare •
MoHTa>K
• Ugradnja •Vgradnja • Ugradnja • Installation
Fig.1
Fig.2
Fig.3
48 I
-
BRIDGE
MODE
+
~REAR
~FRONT
- R
+ -
L
+
SPEAKERS
FUSE
~
~
25A 25A
+12V
-"
•
-=1::-
SUPPL
Y
REMOTE
GROUND
~==~
---------------------1---
X-OVER
LOW
PASS
PROT
BASS
~
O
O![J
5o
250
II
12cfslo~B
LOW
PA~&T
6d8
80Hz
HIGH
PASS
GROUND
'---~-=1::-
+12V
FUSE~
+12V~
REAR
FRONT
4/3/2
Channel
Power
Amplifier
~
~
X-OVER
LEVEL
R
~ ~
R
LEVEL
LOW
PASS
~
~
~
~
~
BASS
POW
8V
100mVL
~
~
L
8V
100mV
II
50
250
O![J
O
INPUT
FL~~W
PASS
12cfslo~B
80Hz
HIGH
PASS
6dB
GTA470
SF
Einbau
•Installation
•
Montage
•lnstalaci6n
•
Montagem
•
Montaggio
•lnbouw
•
Montering
•
lnmontering
• Asennus • EyKaTaaTaa., •
Montaj
•
Montaz
•
Montaz
•
Montaz
• Beszereles •
YcTaHOBKa
•
Montare
•
MoHTa*
• Ugradnja •
Vgradnja
• Ugradnja •
Installation
Fig.4
min.
2
Ohm
min.
2
Ohm
+
12V
tJI"'
•
~
SUPPLY
REMOTE
GROUND
1~1
min.
2
Ohm
min.
2
Ohm
Fig.S
min.
2 x 2
Ohm
+
12V
tJI"'
•
~
SUPPLY
REMOTE
GROUND
1~1
min. 2
Ohm
min. 2
Ohm
I 49
GTA470
SF
Einbau
•Installation
•
Montage
•lnstalaci6n
•
Montagem
•
Montaggio
•lnbouw
•
Montering
•
lnmontering
• Asennus • EyKaTciaTaa'l •
Montaj
•
Montaz
•
Montaz
•
Montaz
• Beszereh!s •
YcTaHOBKa
•
Montare
•
MoHTa)K
•
Ugradnja
•
Vgradnja
•
Ugradnja
•
Installation
Fig. Sa min. 2 x 2
Ohm
+12V
fl".
--4:-
SUPPLY
REMOTE
GROUND
1~1
min. 2x 2
Ohm
Fig.6
min.
4
Ohm
+12V
fl".
--4:-
SUPPL
Y
REMOTE
GROUND
1~1
min. 4
Ohm
50 I

Other Blaupunkt Amplifier manuals

Blaupunkt EMA 265 User manual

Blaupunkt

Blaupunkt EMA 265 User manual

Blaupunkt GTA 470 User manual

Blaupunkt

Blaupunkt GTA 470 User manual

Blaupunkt VPA 4130 Pro User manual

Blaupunkt

Blaupunkt VPA 4130 Pro User manual

Blaupunkt THA 1250 PnP User manual

Blaupunkt

Blaupunkt THA 1250 PnP User manual

Blaupunkt THA1350 User manual

Blaupunkt

Blaupunkt THA1350 User manual

Blaupunkt THA 475 PnP User manual

Blaupunkt

Blaupunkt THA 475 PnP User manual

Blaupunkt MPA 4 User manual

Blaupunkt

Blaupunkt MPA 4 User manual

Blaupunkt GTA 480 User manual

Blaupunkt

Blaupunkt GTA 480 User manual

Blaupunkt MPD 460 A User manual

Blaupunkt

Blaupunkt MPD 460 A User manual

Blaupunkt GTA 270 Mystic Series Specification sheet

Blaupunkt

Blaupunkt GTA 270 Mystic Series Specification sheet

Blaupunkt 7 607 792 007 User manual

Blaupunkt

Blaupunkt 7 607 792 007 User manual

Blaupunkt BSA 160 User manual

Blaupunkt

Blaupunkt BSA 160 User manual

Blaupunkt GTA 270 SF User manual

Blaupunkt

Blaupunkt GTA 270 SF User manual

Blaupunkt GTA 280 User manual

Blaupunkt

Blaupunkt GTA 280 User manual

Blaupunkt Velocity VA 1004 User manual

Blaupunkt

Blaupunkt Velocity VA 1004 User manual

Blaupunkt GTA 1500 D User manual

Blaupunkt

Blaupunkt GTA 1500 D User manual

Blaupunkt GTA 11250 DSP User manual

Blaupunkt

Blaupunkt GTA 11250 DSP User manual

Blaupunkt GTA 2100 User manual

Blaupunkt

Blaupunkt GTA 2100 User manual

Blaupunkt GTA 200 Flash User manual

Blaupunkt

Blaupunkt GTA 200 Flash User manual

Blaupunkt MPA 400 User manual

Blaupunkt

Blaupunkt MPA 400 User manual

Blaupunkt THA 275 PnP User manual

Blaupunkt

Blaupunkt THA 275 PnP User manual

Blaupunkt GTA 475 Specification sheet

Blaupunkt

Blaupunkt GTA 475 Specification sheet

Blaupunkt TSA 1300 Manual

Blaupunkt

Blaupunkt TSA 1300 Manual

Blaupunkt TSA 280 Manual

Blaupunkt

Blaupunkt TSA 280 Manual

Popular Amplifier manuals by other brands

Northern Airborne Technology AA23 Installation and operation manual

Northern Airborne Technology

Northern Airborne Technology AA23 Installation and operation manual

NAD C340 Service manual

NAD

NAD C340 Service manual

National Instruments VXI-SC-1102 user manual

National Instruments

National Instruments VXI-SC-1102 user manual

Boston Acoustics GT-20 GT-222 owner's manual

Boston Acoustics

Boston Acoustics GT-20 GT-222 owner's manual

Mobridge K2 MOST25 8.1.1 Installation and user guide

Mobridge

Mobridge K2 MOST25 8.1.1 Installation and user guide

Technics SU-A900 operating instructions

Technics

Technics SU-A900 operating instructions

Fusion SG-DA41400 User and installation guide

Fusion

Fusion SG-DA41400 User and installation guide

Onkyo A-9377 instruction manual

Onkyo

Onkyo A-9377 instruction manual

Audio Note JINRO Shochu Owner's Information

Audio Note

Audio Note JINRO Shochu Owner's Information

Alpine PDX-1.600 owner's manual

Alpine

Alpine PDX-1.600 owner's manual

EBS Classic session 120 user manual

EBS

EBS Classic session 120 user manual

StetSom Digital 3K3 ES user guide

StetSom

StetSom Digital 3K3 ES user guide

Denon POA-6600 Service manual

Denon

Denon POA-6600 Service manual

Stagg SPA-SUB 1208 EUR user guide

Stagg

Stagg SPA-SUB 1208 EUR user guide

Hubbell Gai-Tronics HUBBCOM Quick installation guide

Hubbell

Hubbell Gai-Tronics HUBBCOM Quick installation guide

Technics SU-X320 Service manual

Technics

Technics SU-X320 Service manual

Ashdown ORIGINal HEAD user manual

Ashdown

Ashdown ORIGINal HEAD user manual

NAD 3020B Service manual

NAD

NAD 3020B Service manual

manuals.online logo
manuals.online logoBrands
  • About & Mission
  • Contact us
  • Privacy Policy
  • Terms and Conditions

Copyright 2025 Manuals.Online. All Rights Reserved.