Block R 100+ User manual

Hi-Fi Stereo DAB+/FM-RDS Radio R 100+
Instruction Manual
1--12 13--23
R 100+
DAB+ /FM -RD S Rad io
MEMOR Y PRESE T+PRESE T- STR/M ON O AUTO INFO DAB/F M STAN DB Y
Hi-Fi Stereo DAB+/FM-RDS Radio R 100+

Herzlichen Glückwunsch zu Ihrem Kauf! Ihr neues Radio R 100+
ist entwickelt worden, um den Ansprüchen eines High – End
Produktes zu entsprechen und darauf ausgelegt, Ihnen über viele
Jahre ungetrübten Klanggenuss zu bereiten!
Nehmen Sie sich die Zeit, die Anleitung sorgfältig durchzulesen,
damit Sie Ihr Radio fehlerfrei anschließen können!
Inhalt:
Anleitung und Inhalt----------------------------------------------1
Sicherheitshinweise--------------------------------------------2-3
Fernbedienung--------------------------------------------------4-5
Bedienung am Gerät----------------------------------------------6
Anschlüsse am Gerät---------------------------------------------7
Problembehebung; Technische Daten-------------------------8
Anleitung :
Seite -1-

Seite -2-

Bitte halten Sie das Gerät fern von
Hitze- quellen. Sorgen Sie für
genügend Luftzirkulation bei dem
Einbau in einem Rack
Behandeln Sie das Stromkabel mit
Vorsicht
Halten Sie das Gerät fern von
Feuchtigkeit Achten Sie darauf, dass keine
Gegenstände ins Gerät fallen
Nehmen Sie das Gerät vom Netz, wenn es
lange Zeit nicht genutzt wird
Achten Sie darauf, dass keine Sprays oder
Chemie an Ihr Gerät kommen
Achten Sie darauf, dass Ihr Gerät nicht
abgedeckt wird
Achten Sie darauf, dass das Gerät nur von
autorisierten Personen geöffnet wird
Seite -3-

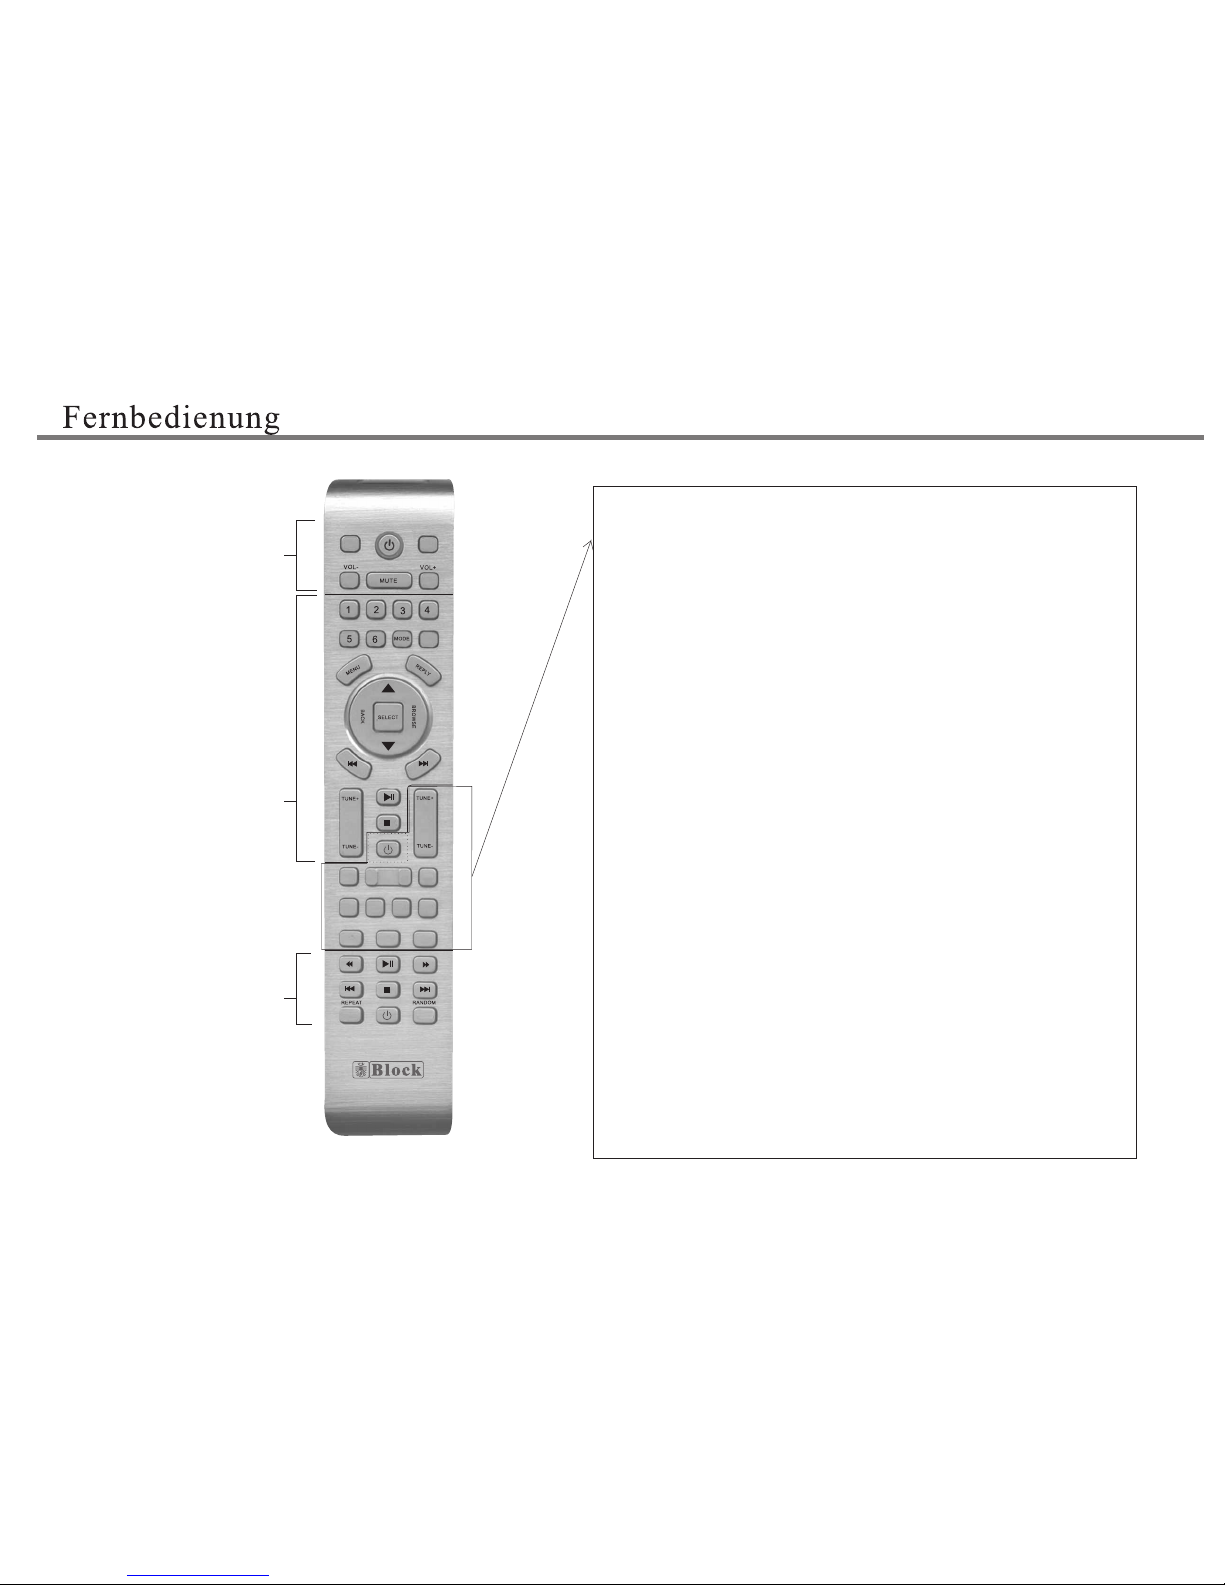
1. Nehmen Sie die Batterien aus
ihrer Verpackung
2. Legen Sie die 2 „AAA“ Batterien
unter Beachtung der Polarität
seitenrichtig ein.
3. Wenn die Distanz zwischen der
Fernbedienung und dem Gerät
abnimmt, liegt das an der Ladung
der Batterien. In diesem Fall
entnehmen Sie die Batterien und
legen Sie neue ein.
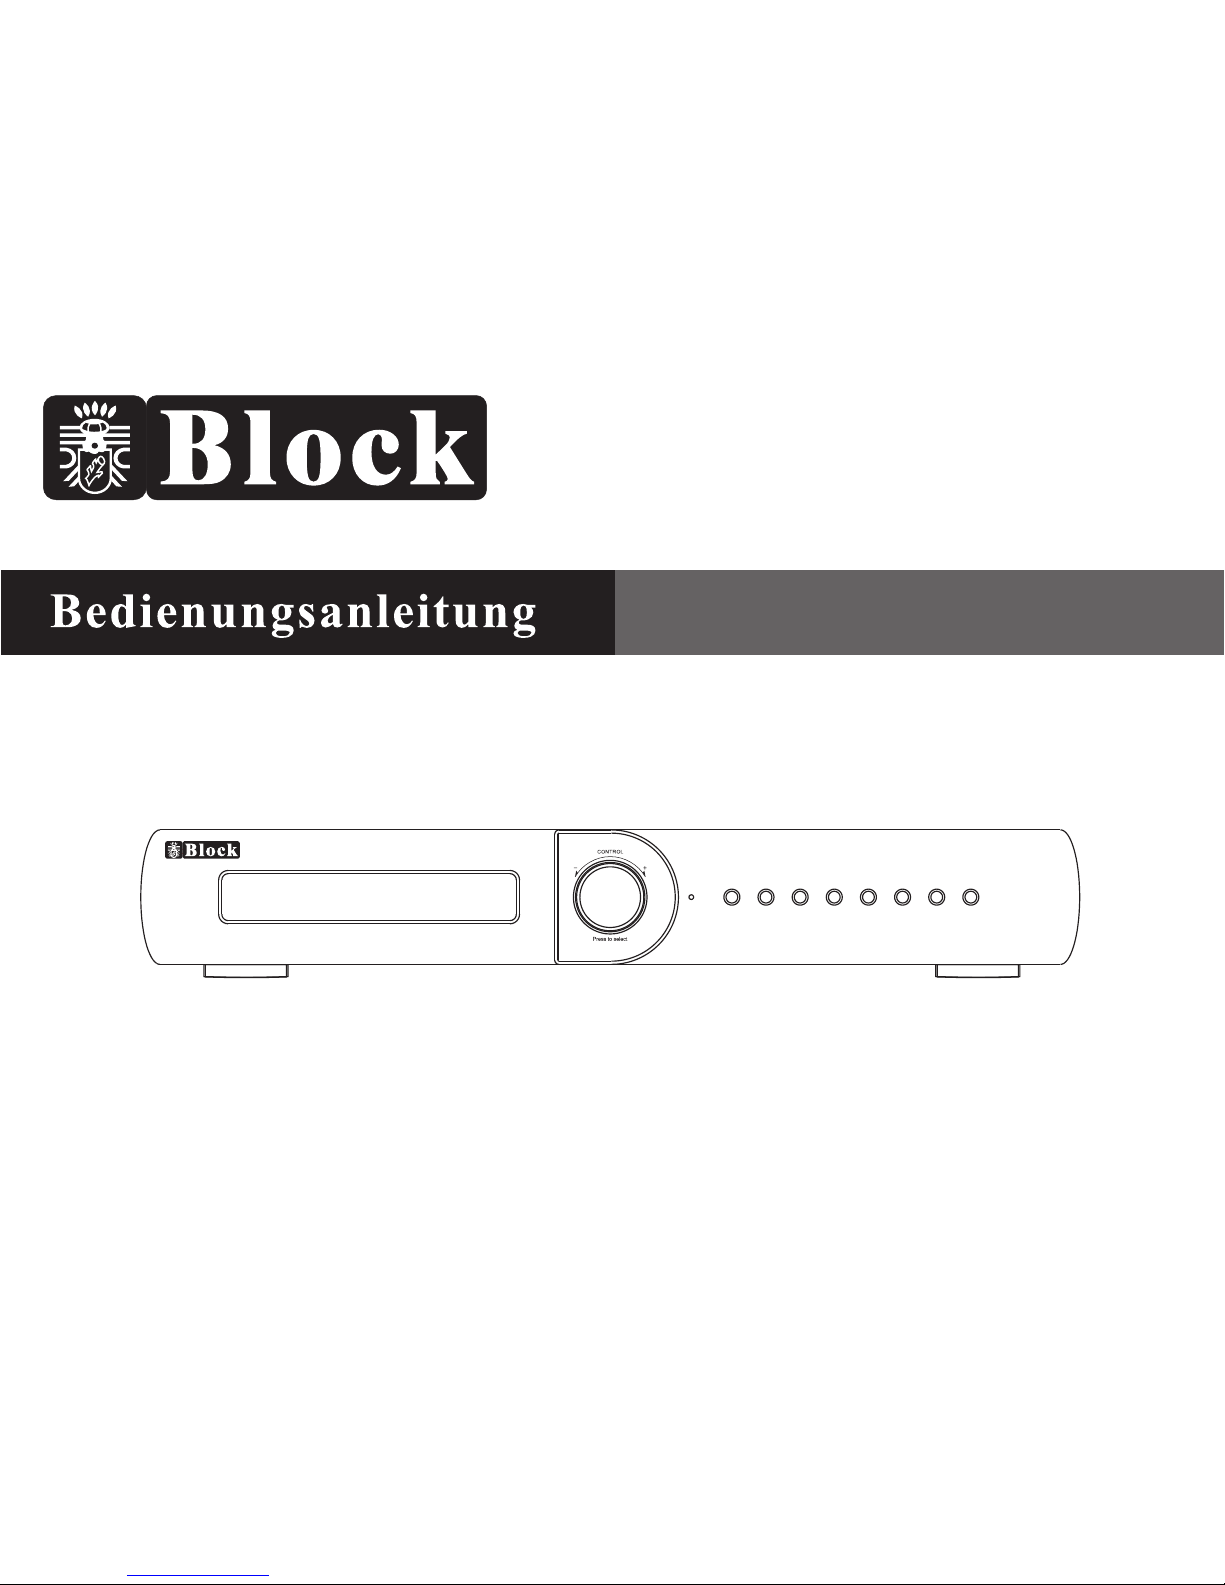
Sie können Ihren R 100+ über die Systemfernbedienung
(optional) fern bedienen. Richten Sie von Ihrer Sitzposition
aus die Fernbedienung in Richtung Ihres Gerätes.
Achtung:
- Wenn sich ein Hindernis zwischen der Fernbedienung und
Ihrem Gerät befindet, kann das die Bedienung
beeinträchtigen.
- Wenn Sie andere Fernbedienungen oder Sender in der
Nähe benutzen, kann das ebenfalls zu Störungen führen.
- Achten Sie darauf, dass Sie die Batterien richtig einlegen
Polarisierung plus zu + minus zu -
- Benutzen Sie zwei gleiche Alkali Batterien
- Aufladbare Batterien können benutzt werden, wir raten
jedoch davon ab.
- Entfernen Sie die Batterien, wenn die Fernbedienung
längere Zeit nicht benutzt wird (6 Monate oder länger)
- Entsorgen Sie Ihre Altbatterien nur in der dafür
vorgesehenen Wertstoffentsorgung (bei Ihrem Händler)
Wirkungsbereich der Fernbedienung
- Die Reichweite der Fernbedienung beträgt ca. 7 Meter.
Sie sollte auf das Infrarotfenster des Gerätes gerichtet
werden.
Dabei ist eine seitliche Abweichung von 30 Grad möglich.
Seite -4-

Bedienung C 100
Bedienung IR 100
CD STAND BY
RADIO STANDBY
AMP STAN DBY
SPK A/B SPK A+B
IR10 0
INFO
MEMO RY
P-M OD E
F-SC AN
STER EO M ON O
AM
PR+
PR-
FM
INFO
R100
AUT O+
AUT O-
(FUN CT IO N) ( IN PUT)
Memory: Manuelle Möglichkeit Sender zu speichern
a. Wählen Sie mit+/- den Speicherplatz.
b. Drücken Sie TUN+/-, um den Sender zu wählen.
c. Drücken Sie MEMORY, um den Sender auf dem gewünschten
Platz zu speichern.
** die maximale Speicherkapazität liegt bei 10 Sendern.
Standby:
- Um das Gerät an und aus zu schalten, drücken Sie diese Taste.
Tune +/-:
- Manuelle Frequenzeinstellung in 0.05 MHz Schritten im UKW Betrieb.
Wählen Sie im DAB Betrieb Sender auf/ab.
DAB/FM:
- Wählen Sie zwischen DAB und UKW.
INFO:
- Drücken Sie die Taste für ein RDS Signal oder DAB Informationen.
Stereo:
- Stereo/Mono Umschaltung.
F-Scan:
- Drücken Sie diese Taste für 2 Sek., um alle Sender im DAB Betrieb
automatisch zu speichern.
PR+/-:
- um gespeicherte Sender auszuwählen auf/ab.
Auto +/-:
- um im UKW Betrieb den nächsten Sender zu suchen.
DAB
Für Block Verstärker
Seite -5-

Bedienung am Gerät
Um das Gerät in den Betrieb zu nehmen,
muss auf der Rückseite des Gerätes der
Power Schalter auf „on“ stehen.
Power
1. Das VFD Display: Anzeige für Frequenz,RDS Textinformation usw.
2. Drehknopf: Mit dem Knopf können Sie die Frequenz, und bei
DAB die Station wählen.Um Stereo/Mono zu wählen oder einen
DAB Sender zu wählen, drücken Sie den Knopf.
3. LED Anzeige: Leuchtet rot, wenn das Gerät ausgeschaltet ist.
4. Memory Taste: Drücken Sie die Taste, um einen Sender auf den
gewählten Platz zu speichern.
a. Nutzen Sie PR+/- für den gewünschten Platz.
b. Nutzen Sie TUN+/- für den gewünschten Sender.
c. Drücken Sie nun diese Taste zum Speichern.
** Speicherplätze 10.
5. Preset-: Wählen Sie Speicher abwärts.
6. Preset+: Wählen Sie Sender aufwärts.
7. STR/MONO Taste: Mit dieser Taste wählen Sie zwischen Mono/Stereo.
8. Auto: Mit dieser Taste starten Sie auf DAB die automatische Suchfunktion
Bei FM Betrieb drücken Sie diese Taste kurz, um den nächsten Sender zu suchen.
Drücken Sie die Taste länger als 2 Sek., um eine komplette Suche zu starten.
9. Info: Drücken Sie diese Taste, um RDS oder DAB Funktionen zu erhalten.
10. DAB/FM: Mit dieser Taste wählen Sie zwischen DAB und FM.
11. Standby: Mit dieser Taste schalten Sie das Gerät ein und aus.
R 100+
DAB+ /FM -RD S Rad io
MEMOR Y PRESE T+PRESE T- STR/M ON O AUTO INFO DAB/F M STAN DB Y
Seite -6-

POWER
Antenna
Antenna
Model : R 100+
DAB+/ FM-R DS Radio
Power R atin g: AC 230V 50H z
Max Pow er Con sumptio n: 20W
FU S E: T 1A 2 5 0V
Optic al Out put Analo g Outp ut
Analo g Outp ut Optic al Out put
1. Power Schalter: Dieser Hauptschalter schaltet das Gerät ein oder aus.
Beachten Sie: Wenn dieser Schalter auf aus steht,
ist das Gerät komplett vom Netz getrennt.
2. Sicherungshalter: In diesem Halter befindet sich Eeine 20mm T 1A Sicherung.
Wichtig!
Beim Wechseln der Sicherung nehmen Sie das Netzkabel ab.
3. Netzkabelanschluss: Gehen Sie sicher, dass das Netzkabel
nicht beschädigt wird.
4. Warnhinweise: Die Schilder zeigen an, dass es um hohe
Spannungen geht. (näheres auf Seite 2).
4.
Spannungen geht. (näheres auf Seite 2).
5. Digital Signal: Optischer Ausgang.
6.Analoger Signal Ausgang.
7. Radio Antennenanschluss.
Warnhinweise: Die Schilder zeigen an, dass es um hohe
Seite -7-

Radio Frequenzband
DAB Band 3: 5A 174.928 MHz – 13F 239.200 MHZ
FM: 87,5 – 108 MHz
Senderspeicher: DAB 10, FM 10
Allgemein
Netzteil: AC 230 Volt 50Hz
Leistungsaufnahme: 20 Watt
Abmessungen: 440 x 283 x 79mm
Seite -8-

INTRODUCTION & CONTENTS
Contents
Introduction & Contents
Safety instructions
Remote control
Front panel controls
Rear panel connections
Trouble shooting and Specifications
9
10,11
12-13
14
15
16
Congratulations on purchasing this R 100+ Tuner. It has been
developed following an extensive research and development program
that has culminated in what we regard as an exceptional mid-range
hi-fi product.
We trust that this amplifier will give you hours of listening pleasure,
and provide years of unparalleled performance.
Introduction
P9

SAFETY INSTRUCTIONS
Safety Instructions
CAUTION: To reduce the risk of electric shock, do not remove any
cover.
N O U S E R -S E R V I CE A B LE PA RTS IN S I D E, R E F E R A N Y
SERVICING TO QUALIFIED SERVICE PERSONNEL.
IMPORTANT SAFETY INSTRUCTIONS
* Read and keep these instructions available for future reference.
* For indoor use only.
* The unit must only be connected to a suitable mains power supply
using the mains power lead provided.
* To reduce the risk of fire or electrical shock, do not expose this
unit to rain or moisture.
* The apparatus shall not be exposed to dripping or splashing.
* No objects filled with liquids, such as vases, shall be placed on
the apparatus.
* Unplug the unit from the wall socket during lightning storms and
when it is not going to be used for a long period of time.
* Take care that foreign objects do not enter, or liquids are not
spilled, into the enclosure through any openings. If this should
happen, refer to qualified service personnel before attempting to
use.
* Ensure adequate ventilation - do not cover this unit with curtains,
etc.
* Do not install near any heat source, such as radiators, or other
equipment that produces heat.
* Protect the mains power cable from being damaged.
The lightning flash symbol with the arrowhead within an equilateral
triangle is intended to alert the user to the presence of uninsulated
'dangerous voltage' within the product's enclosure that may be
sufficient to constitute a risk of electric shock to persons.
The exclamation point within an equilateral triangle is intended to
alert the user to important operating and maintenance instructions
in the service literature relevant to this appliance.
"Information for the consumer"
Disposal of your old product
Your product is designed and manufactured with high quality materials and components,
which can be recycled and reused.
When this crossed out wheeled bin symbol is attached to a product it means the product is
covered by the European Directive 2002/96/EC.
Please make yourself aware of the local collection system for electrical and
electronic products.
Please act according to your loca rules and do not dispose of your old products with
your normal household waste. The correct disposal of your old product will help prevent
potential negative consequences for the environment and human health.
This product complies with European low votage (73/23/EEC)
and electromagnetic compatibility (89/336/EEC) directives.
P10

SAFETY INSTRUCTIONS
Notes On Use
P11

BATTERY INSTALLATION
By using the provided remote control unit the R 100+ can be
controlled from your listening position. To use the remote
control unit, point it at the REMOTE SENSOR window of the
receiver.
Notes:
-Even if the remote control unit is operated within the
effective range, remote control operation may be impossible if
there are any obstacles between the unit and the remote
control.
-If the remote control unit is operated near other appliance
which generate infrared rays, or if other remote control
devices using infrared rays are used near the unit, it may
operate incorrectly.
Precautions concerning batteries
-Be sure to insert the batteries with correct positive+ and
negative - polarities.
-Use batteries of the same type. Never use different types of
batteries together.
- Rechargeable and non-rechargeable batteries can be used.
Refer to the precautions on their labels.
-When the remote control unit is not to be used for a long
time(more than a month), remove the batteries from the
remote control unit to prevent them from leaking. If the leak,
wipe away the liquid inside the battery compartment and
replace the batteries with new ones.
-Do not heat or disassemble batteries and never dispose of
old batteries by throwing them in a fire.
REMOTE CONTROL OPERATION RANGE
Use the remote control unit within a range of about 7
meters and the angles of up to 30 degrees aiming at
the remote sensor.
REMOTE CONTROL
P12
1. Remove the battery compartment cover.
2. Insert two "AAA" dry batteries.
Make sure that the batteries are inserted with their
positive "+" and negative "-" poles positioned correctly.
3. Close the cover until it clicks.
If the distance required between the remote control unit and
main unit decreases, the batteries are exhausted. In this case,
replace the batteries with new one.

FOR CD PLAYER
C 100
CD STAND BY
RADIO STANDBY
AMP STAN DBY
SPK A/B SPK A+B
IR10 0
INFO
MEMO RY
P-M OD E
F-SC AN
STER EO M ON O
AM
PR+
PR-
FM
INFO
R100
AUT O+
AUT O-
(FUN CT IO N) ( IN PUT)
FOR INTERNET
RADIO IR 100
REMOTE CONTROL
MEMORY: Manual save the station to preset number.
a. Use PR+/- key to select the preset number.
b. Press TUN+/- key to select the station.
c. Press MEMORY key to save the station to current preset number.
** The Max preset number is 10.
STANDBY:
Press this button to turn the unit into standby mode, press
again to turn on the unit.
TUN+/-:
Manual adjust the frequency by step 0.05MHz for FM mode.
Select the DAB station up/down in the station list.
DAB/FM:
Band change. (DAB/FM)
INFO:
Press this button to see information of DAB or FM RDS.
STEREO:
For the model VR100+, press stereo key to active stereo (auto)
mode, press again to mono mode.
F-SCAN:
Press and hold for 2 seconds to active auto full scan function
for DAB mode.
PR+/-:
Select preset station number up or down.
AUTO+/-:
Press to auto search next/previous station for FM mode.
P13
DAB
FOR BLOCK AMPLIFIER

FRONT PANEL CONTROLS
1. VFD DISPLAY. Will give the indication of radio info.
2. ROTARY CONTROL KNOB. This allows adjustment of
FM frequency or select DAB station.
Press to select audio mode stereo/mono in FM mode,
Or to select station, as a confirm enter key in DAB mode.
3. LED INDICATOR, it will be turn on in red colour when the unit
is in standby mode.
4. MEMORY BUTTON. Press to save station to preset number.
a. Use PR+/- key to select the preset number.
b. Use TUN+/- key to select the station.
c. Press this key to save the station to current preset number.
** The Max preset number is 10.
5. PRESET-. Preset station down select.
6. PRESET+. Preset station up select.
7. STR/MONO BUTTON. Press to select audio mode stereo/mono in FM mode
8. AUTO. In DAB mode press this key to active auto scan function.
In FM mode press this key once to auto search next station,
press and hold this for about 2 seconds to auto search previous station.
9. INFO. Press this key to see information of DAB or FM RDS.
10. DAB/FM. DAB/FM band mode change switch.
11. STANDBY: Press this button to go to standby mode, press this button again
return to normal mode.
P14
POWER SWITCH ON REAR PANEL,
TURN IT ON BEFORE USE THE UNIT.
R 100+
DAB+ /FM -RD S Rad io
MEMOR Y PRESE T+PRESE T- STR/M ON O AUTO INFO DAB/F M STAN DB Y

REAR PANEL CONNECTIONS
P15
1. POWER SWITCH: Switches mains power on/off to internal
components, however please note that mains power is still
applied to this unit even though this switch may be off.
2. FUSE HOLDER: fitted with 20mm T 1A fuse inside.
" IMPORTANT:"
Remove the mains plug from the mains socket before attempting
to check/ replace the fuse located on this fuse holder.
3. MAINS CABLE INLET JACK: Please ensure that the input cable strain relief
bush is intact and has not been damaged.
POWER
Antenna
Antenna
Model : R 100+
DAB+/ FM-R DS Radio
Power R atin g: AC 230V 50H z
Max Pow er Con sumptio n: 20W
FU S E: T 1A 2 5 0V
Optic al Out put Analo g Outp ut
Analo g Outp ut Optic al Out put
4. WARNING ICONS: Please be aware that this unit contains high voltages,
and should not be opened.
5. Digital signal: Optical output
6. Analog signal output.
7. Radio antenna connector jack.

P16
TROUBLE AND SHOOTING / SPECIFICATION
CARE AND MAINTENANCE
Connection leads to amplifier not made
correctly.
Speakers not connected to amplifier.
Power of the tuner or connected amplifier
not turned on.
Ensure that the tuner has been able to
locate radio stations.
Noise is excessive in both
stereo and monaural
broadcasts.
Poor location and/or direction of the
antenna. Transmitted station is too far
away.
An unusual hissing noise is
heard when listening to the
broadcast in stereo, but not
heard when listening
monaurally.
A slight noise may be heard because the
method used for modulation of FM
stereo broadcasts in different than that
used for monaural broadcasts.
SPECIFICATIONS
GENERAL
Power supply : AC 230V 50Hz
Max Power Consumption: 20 Watts
DIMENSIONS 430 x 283 x 79mm (with feet)
NOTE: Specifications and design are subject to possible modifications without notice
TUNER FREQUENCY RANGE
DAB BAND 3: 5A 174.928MHz - 13F 239.200MHz
FM 87.5MHz - 108MHz
Preset Stations : DAB 10, FM 10.

Table of contents
Languages:
Other Block Stereo Receiver manuals