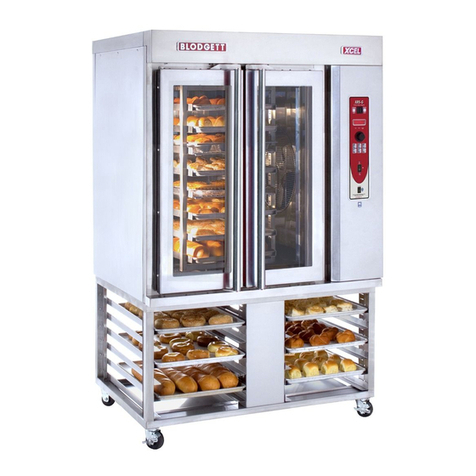
Blodgett BLCT-6E User manual

TABLE OF CONTENTS
Oven Models
4
Location of the Serial Number
5
USING THE TOUCH DISPLAY
6
Basic Operations 6
SETTINGS MENU
7
CHANGING SETTINGS ON THE USER MENU
8
Setting the Oven Light 8
Setting the Screen Saver 8
Setting the Language 8
Setting the Setup Clock 9
Viewing the Software Version 9
CHANGING SETTINGS ON THE SUPERUSER
DISPLAY
11
Setting Alarm Sounds 11
Changing Settings 13
Adjustments 15
Calibrating CombiOptima Auto Humidity 17
Calibrating the Oven Door Sensor 18
Logs and Statistics 19
SETTINGS ON THE TECHNICIAN MENU
21
Using the Test Functions 21
Changing the Oven Set-up 26
Gas Settings 27
Making Temperature Adjustments 29
Changing Oven Settings 30
Deliming Settings 31
Making Corrections to Bake Time 32
Specifying Middle East Specific Settings 33
Enabling Demo mode 33
TROUBLESHOOTING
34
General Error Codes 34
Gas Error Codes 49
2SERVICE MANUAL

TABLE OF CONTENTS
APPENDIX A:
BURNER ELECTRODE ADJUSTMENTS
53
APPENDIX B:
MEASURING GAS PRESSURE
55
APPENDIX C:
GAS BURNER SETTINGS
56
APPENDIX D:
TOUCH CONTROLLER “XPE” – SET-UP AND
ADJUSTMENT
59
Converting A Gas Oven to Another Gas Type
59
APPENDIX E:
GAS PRESSURE-SWITCH ADJUSTMENT
60
APPENDIX F:
GAS SEQUENCE DIAGRAM
62
APPENDIX G:
GAS COMPONENTS POSITION
63
APPENDIX H:
GAS COMPONENTS
65
APPENDIX I:
IDENTIFYING GAS-AIR UNITS AND COIL
66
APPENDIX J:
ERROR CODES ON DUNGS’ CONTROL BOX
67
SAFETY
71
SERVICE AND REPAIR
72
WARRANTY
73
Excluded from Warranty 73
SERVICE MANUAL 3

4SERVICE MANUAL
Oven Models with the Touch Screen Control
BLCT-6E
BLCT-23E
BLCT-10E
BCT-61E or Gas
BLCT-61E or Gas
BCT-62E or Gas
BLCT-62E or Gas
BCT-101E or Gas
BLCT-101E or Gas
BCT-102E or Gas
BLCT-102E or Gas
BCT-202E or Gas
BLCT-202E or Gas
Note:
BCT - has a boiler
BLCT –is a boilerless
All gas ovens are
boilerless.

Locating the Serial Number of the Oven
LOCATING THE SERIAL
NUMBER ON THE OVEN
When you order parts or request service for your Blodgett Combi oven, you
need both of the oven’s Serial Numbers,
You can find the Serial Number and Type information as shown in the illustration
below.
5 SERVICE MANUAL
On the 61,62,101,102 and 202 the serial number will
be located on the right side of the unit in the lower left
corner and the second one will be behind the control
cover above the I.O. board.
On the Mini 6, 10 and 23 the number is located on the
right side of the unit in the lower left corner and the
second is on top under the control cover.

Using the Touch Display
USING TOUCH
DISPLAY
The Touch display provides a friendly and easy way for you to operate and
interact with the BCT and BLCT Combi ovens. You simply use the pads of your
fingertips to perform the operations.
Basic Operations
••To select an item, touch the icon.
••To scroll through a list, drag your finger up or down.
••To return to the previous display push the arrow button in the upper left
corner.
••To change cooking function while the oven is operating, push the down
arrow button in the upper right corner.
••To save current settings and move on to the next step, push the right
arrow button in the upper right corner.
SERVICE MANUAL 6
To select an item, touch the icon.
To scroll through a list, drag your finger up or down.
To return to the previous display push the arrow icon
in the upper left corner.
To change User Level press the key icon a code
may be required to access a higher user level.
To change Settings press the cog icon the
availability of settings to view or change will differ
from user level to user level.

Settings Menu
SETTINGS MENU
Before you can start the maintenance process or change settings, you have to
open the Settings Menu.
••On the Main Menu, touch the gear wheel icon
to enter the Settings Menu.
Access rights
Role
User
Access to the User menu
SuperUser
Access to the User and SuperUser menus
Technician
Access to User, SuperUser, and
Technician menus
The settings you have access to depend on the role you have been assigned.
SuperUser Code
If start-up permission is set to User, you have to enter the SuperUser code to gain
access to the SuperUser menu.
1.
On the Main Menu, touch the key icon .
2.
On the
Choose menu
, touch the key icon , and then enter the code. The
code is 876412.
Technician Code
If start-up permission is set to User or SuperUser, you have to enter the
Technician code to gain access to the Technician menu.
1.
On the Main Menu, touch the key icon .
2.
On the
Choose menu
, touch the key icon , and then enter the code. The
code is 576021.
Note The computer has been thoroughly tested by the manufacturer prior to delivery, and
the settings have been carefully reviewed. You should therefore only allow qualified
personnel to make changes to the settings. Contact your BLODGETT for more information.
7 SERVICE MANUAL
On the Main Menu, touch the cog icon to enter the Settings menu.
1. On the Main Menu, touch the key icon
2. On the Choose menu, touch the key icon above OK and then enter the
code. 876412
1. On the Main Menu, touch the key icon
2. On the Choose menu, touch the key icon above OK and then enter the
code. 576021

Changing Settings on the User Menu
CHANGING SETTINGS
ON THE USER MENU
You can change the basic settings from the User Menu.
••On the Settings Menu, touch the User button.
Setting the Oven Light
1. To set oven light, touch Oven light.
2. Drag your finger up or down to select Continuous or 5 min., and then touch
OK.
Setting the Screen Saver
1. To set the screen saver, touch Screen saver.
2. Drag your finger up or down to select the desired setting. Select how much
time elapses before the screen saver becomes active. Select Off if you do
not want the screen saver on.
3. Touch OK.
Setting the Language
1. To set the language, touch Language.
2. Drag your finger up or down to select the desired language, and then touch OK.
SERVICE MANUAL 9

Changing Settings on the User Menu
Setting the Setup Clock
1. To set the clock, touch Setup clock.
2. In the hour and min. lists drag your finger up or down to select the desired time.
3. In the day, month and year lists drag your finger up or down to select
the desired date.
4. Touch OK.
Viewing the Software Version
The current software version is displayed on the Software version button.
••To view which software version is installed touch Software version.
10 SERVICE MANUAL

Changing Settings on the SuperUser Display
CHANGING SETTINGS ON
THE SUPERUSER DISPLAY
You can access the following areas on the super user display.
••Sounds (See Setting Alarm Sounds on page 11)
••Settings (See Changing Settings on page 13)
••Adjustments (See Adjustments on page 15)
••Calibrate auto humidity
(See Calibrating CombiOptima Auto Humidity on page 17)
••Calibrate (See Calibrating the Oven Door Sensor on page 18)
••Logs and statistics (See Logs and Statistics on page 19)
••USB system report
••Install new software
••Restart oven
Setting Alarm Sounds
You can have the Visual Cooking oven play a sound (alarm) when certain events occur.
You have a number of options when you assign a sound to an event. It is possible to
adjust, among other things, the volume and the time elapsed between each reminder.
1. On the SuperUser display, touch Sounds.
2. To change a sound, touch the event that you want to assign a sound
for. The following events are available:
••Finished
••Recipe notification
••Racktimer finish
••Door open
••Probe missing
••Insert product
••Error
••Timer start
SERVICE MANUAL 11

Changing Settings on the SuperUser Display
3. Set the desired sound properties. For each event, you can specify the
following properties.
Property
What it does
Sound Set
Used to select the desired sound set for the alarm. The default
sound set is Android.
Sound File
Used to select the specific sound from the set. You can then
test the sound by touching the Test Sound button.
Repeat
Used to specify for how many times the alarm should be
repeated.
Start repeat delay
Used to specify the interval between the first and the second
sounding of the alarm.
End repeat delay
Used to specify the interval between the second to last and
the final sounding of the alarm.
End repeat delay
Used to specify the interval between the sounding of the
after
alarm after the first sounding of the alarm.
Start volume
Used to specify the volume at the first sounding of the alarm.
End volume
Used to specify the volume after the final sounding of the
alarm.
End volume after
Used to specify how many times the sound should be
repeated until it reaches the volume specified in End volume.
Start playback rate
Used to specify the playback frequency of the first sounding
of the alarm. The interval ranges from 0.5 to 2.0 with intervals
of 0.1.
End playback rate
Used to specify the playback frequency at the final sounding
of the alarm.
End playback rate
Used to specify the playback frequency of the alarm while it is
after
being repeated.
Test sound
Used to test the sound specified in Sound File.
4. Follow the steps above for all events to which you want to assign a sound.
12 SERVICE MANUAL

Changing Settings on the SuperUser Display
Changing Settings
The following describes the settings you can change via the SuperUser Menu.
HACCP Logging
You can specify whether you want the oven to automatically store and save HACCP
(Hazard Analysis and Critical Control Points) data about the preparation process. If you
enable this option, you can access information about production time and duration as
well as production temperature and core temperature. The default setting is No.
1. On the SuperUser display, touch Settings, and then touch HACCP logging.
2. Drag your finger up or down to select Yes or No, and then touch OK.
Menu Start
You use Menu Start to specify which display is the first display the user sees. The
default setting is No, which means that the first display is the Menu display. If the
setting is Yes, the first display is Recipes.
However, some users only have access to a limited number of functions and
it can therefore be useful to specify that a different display is shown.
1. On the SuperUser display, touch Settings, and then touch Menu Start.
2. Select No for Menu as the first display, and Yesfor Recipes as the first display.
Start Up Permission
You use Start up permission to specify whether the oven starts up in User or
SuperUser mode. The default setting is SuperUser.
1. On the SuperUser display, touch Settings, and then touch Start up permission.
2. Drag your finger up or down to select User or SuperUser, and then touch OK.
SERVICE MANUAL 13

Changing Settings on the SuperUser Display
Core Temperature
You use the Core temp. setting to specify whether the oven comes with a core
temper-ature probe. The default setting is Yes.
1. On the SuperUser display, touch Settings, and then touch Core temp.
2. Drag your finger up or down to select Yes or No, and then touch OK.
Core Temperature Sous Vide
You use the Core temp sous vide setting to specify whether the oven comes with a
thin probe that is used specifically for sous vide products. The default setting is No.
1. On the SuperUser display, touch Settings, and then touch Core temp
sous vide.
2. Drag your finger up or down to select Yes or No, and then touch OK.
Time Format
You use the Time format setting to specify whether you want the oven to use a
24-hour time format or a 12-hour time format. The default setting is 24.
1. On the SuperUser display, touch Settings, and then touch Time format.
2. Drag your finger up or down to select 24 or 12, and then touch OK.
Date Format
You use the Date format setting to specify how you want the date displayed. The
default setting is DD-MM-YYYY.
1. On the SuperUser display, touch Settings, and then touch Date format.
2. Drag your finger up or down to select DD-MM-YYYY (Canada) or
MM-DD-YYYY (USA) , and then touch OK.
14 SERVICE MANUAL

Changing Settings on the SuperUser Display
Temperature Unit
You use the Temp. unit setting to specify which temperature unit you want to
use. The default setting is Celsius.
1. On the SuperUser display, touch Settings, and then touch Temp. unit.
2. Drag your finger up or down to select Celsius or Fahrenheit, and then touch
OK.
Adjustments
Cook and Hold Offset
You use the Cook and hold offset setting to specify the difference between the
core temperature and the oven chamber temperature when Cook & Hold
cooking mode is used. The default setting is 5.
1. On the SuperUser display, touch Adjustments, and then touch Cook and
hold offset.
2. Drag your finger up or down to select 3, 5 or 10 and then touch OK.
DeltaT Offset
You use the DeltaT offset setting to specify the difference between the core
temperature and the oven chamber temperature when DeltaT cooking mode is
used. The default setting is 20.
1. On the SuperUser display, touch Adjustments, and then touch DeltaT offset.
2. Drag your finger up or down to select a setting between 10 and 70 and
then touch OK.
SERVICE MANUAL 15

Changing Settings on the SuperUser Display
Reheat Pulse Interval
You use the Reheat pulse interval setting to specify the interval in seconds between
injec-tions of water during the regeneration process. The injection itself lasts 1/10 of
a second. The default setting is 8 seconds.
1. On the SuperUser display, touch Adjustments, and then touch Reheat
pulse interval.
2. Drag your finger up or down to select from 4s to 24s in intervals of 2 and
then touch OK.
Proving Pulse Interval
You use the Proving pulse interval setting to specify the interval in seconds between
injec-tions of water during the proving process. The injection itself lasts 1/10 of a
second. The default setting is 20 seconds.
1. On the SuperUser display, touch Adjustments, and then touch Proving
pulse interval.
2. Drag your finger up or down to select from 12s to 44s in intervals of 4,
and then touch OK.
Proving Pulse Length
You use the Proving pulse interval setting to specify for how long each injection of
water lasts during the proving process. The default setting is 1 second.
1. On the SuperUser display, touch Adjustments, and then touch Proving
pulse length.
2. Drag your finger up or down to select the preferred length: 0.6, 1.0 or
2.0 seconds, and then touch OK.
16 SERVICE MANUAL

Changing Settings on the SuperUser Display
Calibrating ClimaOptima Auto Humidity
You use the Calibrate auto humidity setting to calibrate the ClimaOptima humidity
sensor. The oven has been calibrated prior to delivery, but we recommend that
you calibrate the oven after the oven has been installed in its proper location.
Calibration is Required After the Following Events:
••The CPU board has been replaced.
••The differential sensor has been replaced.
••The fan wheel has been removed and mounted.
••The fan wheel has been replaced.
••The filter housing has been replaced.
Warning. Before you begin the calibration process, take the following precautions:
••The oven must be dry
••The oven temperature must not exceed 40°C/104°F.
Do not interrupt the calibration process, and do not open the oven door. If the
calibration process is started by mistake, turn off the oven.
Starting the ClimaOptima Calibration Process
1. On the SuperUser display, touch Calibrate auto humid. Calibrate
ClimaOptima is displayed.
2. Touch Start to begin the calibration process.
The following table lists the steps involved in the calibration process.
SERVICE MANUAL 17

Changing Settings on the SuperUser Display
Step
Time
Temp. (Celsius)
Oven
Exhaust
1
Cal.
Approx. 15 min.
70
Dry
Open
2
Cal.
Approx. 2 min.
70
Dry
Open
3
Cal.
Approx. 2 min.
70
Dry
Closed
4
Cal.
Approx. 8 min.
250
Dry
Open
5
Cal.
Approx. 3 min.
250
Dry
Closed
6
Cal.
Approx. 5 min.
190
Wet
Closed
7
Cooling
Approx. 30 sec.
105
Open
8
Cal.
Approx. 5 min.
130
Wet
Closed
9
Cooling
Approx. 8 min.
45
Open
10
Cal.
Approx. 4 min.
70
Wet
Closed
Calibrating the Oven Door Sensor
You use the Calibrate setting to calibrate the oven door sensor. The oven door sensor has
been calibrated prior to delivery, but we recommend that you calibrate the oven after the
oven has been installed in its proper location and when the CPU has been replaced.
If you have a Pass-Through oven with both a front and a back door, you have to
calibrate both sensors.
The measurement is an internal value that expresses the distance between the
magnet and the sensor.
Starting the Oven Door Calibration Process
1. On the SuperUser display, touch Calibrate front door.
2. On the Calibrate front door display, you can see the status of the door.
3. Close the door so that the door status is Closed, and then touch Press
when door closed.
18 SERVICE MANUAL

Changing Settings on the SuperUser Display
4. Open the door so that the door is in the first step open position and then touch
Press when door open.
5. Look at the Threshold and Actual values.
••The Threshold value displays the value that marks the shift between
status door open and the status door closed.
••The Actual value displays the actual input from the sensor. The actual
value must be greater than 10 when the door is closed.
6. Verify that a green checkmark is displayed next to Press when door closed and
Press when door open. If the values are not acceptable, the display shows Door
sensor error. See Troubleshooting on page 22 for more information.
7. Touch Done to end the calibration process.
If the door has not been calibrated, a warning is displayed asking if you
want to exit anyway.
Note If the oven has both a front and a back door, you calibrate the sensor of
the back door by touching Calibrate back door. You then go through the same
steps as described above.
Logs and Statistics
You can use the logs and statistics to see which processes failed and when they failed.
Fault Log
The Fault log displays the latest thirty errors in a list with the most recent error on top.
1. On the SuperUser display, touch Logs and statistics, and then touch
Fault log. The fault log is displayed.
SERVICE MANUAL 19

Changing Settings on the SuperUser Display
Fault Statistics
The Fault statistics list displays a list of all error codes, the number of times each
error code has been displayed, and the date the error code was last displayed.
1. On the SuperUser display, touch Logs and statistics, and then touch
Fault statistics. The fault statistics list is displayed.
2. To clear the fault statistics list and the fault log list, touch Reset, and then touch
Yes.
Service Counters
The Service Counters list displays how often a component has been activated
and for how long.
1. On the SuperUser display, touch Logs and statistics, and then touch
Service counters. The service counter list is displayed.
2. To clear the service counter list, touch Reset, and then touch Yes.
Install new software
You use the Install new software to upload the latest software version.
1. On the SuperUser display, touch Install new software, and then touch
OK. The OvenApp is displayed.
2. Touch Install to install the latest software.
20 SERVICE MANUAL

Settings on the Technician Menu
SETTINGS ON THE
TECHNICIAN MENU
You can access the following areas on the Technician Menu.
••Test Functions (See Using the Test Functions on page 21)
••Oven setup (See Changing the Oven Set-up on page 26)
••Gas settings (See Gas Settings on page 27)
••Adjustments (See Making Temperature Adjustments on page 29)
••Settings (See Changing Oven Settings on page 30)
••Delime (See Deliming Settings on page 31)
••Bake time correction (See Making Corrections to Bake Time on page 32)
••Middle East (See Specifying Middle East Specific Settings on page 33)
••Demo mode (See Enabling Demo mode on page 33)
Using the Test Functions
The test functions are useful for fault finding. You can test the following functions.
••Oven
••Fan
••Steam
••Wash
••Miscellaneous
••Main alarm
••Gas
SERVICE MANUAL 21
This manual suits for next models
12
Table of contents
Other Blodgett Commercial Food Equipment manuals
Popular Commercial Food Equipment manuals by other brands

Rieber
Rieber BKW Series Operation instructions

Henny Penny
Henny Penny EPC-2 Operator's manual

STODDART
STODDART airex AXA.FDFSSQ.09 Specification, installation and operation manual

Optimum
Optimum XS430 Instructions for Use, Maintenance and Safety

Diamond
Diamond MD15/A7-R2 Technical instructions

Exos
Exos Mini user manual