Blue Line GSP1 User manual

DIN EN ISO 9001:2000
Zertifikat: 01 100 050394
Version: 09.2006
Part-No.: 22628
o
Subject to technical
changes!
User Manual
for Gas Detector with graphical LED-Indicator
Read the instructions before using the instrument!
Consider security advice!
Keep instructions for further questions!


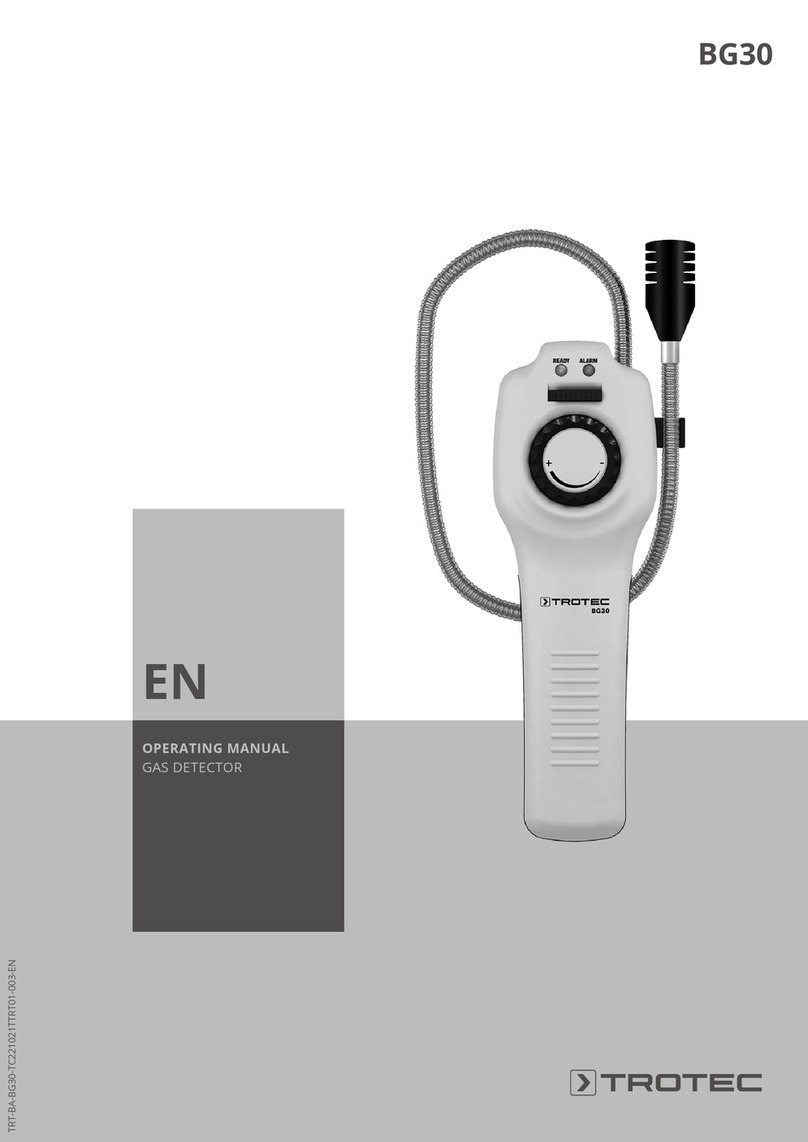
Gas Detector – GSP1
Function
button
Graphical LED-Indicator
Measuring unit
with gas sensor
Flex arm
ON/OFF
button
Button for
setting alerts


Contents
1. General instructions .................................................................................................................................................. 1
2. Safety instructions..................................................................................................................................................... 1
3. Battery and device disposal ...................................................................................................................................... 2
4. Application area ........................................................................................................................................................ 2
5. Product description.................................................................................................................................................... 2
6. Technical data........................................................................................................................................................... 3
7. Use............................................................................................................................................................................ 4
8. Setting of the acoustic alerts ..................................................................................................................................... 5
9. Charging.................................................................................................................................................................... 6
10. Safety instructions................................................................................................................................................... 7
11. Sensor protection & service .................................................................................................................................... 8
12. Notes....................................................................................................................................................................... 9


1
2
1
1
1. General instructions
Please read this user’s manual carefully and make sure to know how the instrument works before
using it. Keep the user’s manual to read up on details when required.
2. Safety instructions
Avoidance of electric danger
- Never touch parts on voltage with the device or sensors!
Protection of the measuring instrument
- Keep the instrument away from paint, solvent and glue and store it in a dry place.
Safety measures in order to maintain product warranty
- The instrument can only be used within the specified data.
- Treat the instrument according to its purpose.
- Do not use force!
- Only authorised staff is allowed to repair the instrument, otherwise the manufacturer is not
responsible for functioning. This is the same for the validity of licence.

2
U
=
P
=
1
Note!
3. Battery and device disposal
Empty or damaged batteries are to deliver to authorised collection points.
After removal from service, the instrument has to be disposed of eco-friendly.
4. Application area
The Gas detector GSP-1 is a high quality instrument and determined only for the detection of leaks within gas pipelines,
gas tanks, gas meters and facilities for liquefied and natural gas.
5. Product description
The gas detector GSP1 is suitable in an outstanding way for the use within the area of heating and gas installations.
The GSP1 can be used to examine gas pipelines, gas meters, gas tanks and other gas conducting components. The
GSP1 can be used for room monitoring and concentration measurements as well.
The gas sensor responds to all kinds of explosive gases (e.g. methane, propane, butane, etc.). The device is cali-
brated on the basis of room temperature and a density of 60% r.h. of methane (CH4).
In delivery status the GSP1 is set to optical signals. However, acoustic alerts can be activated at any time and how
they are needed by the user.
Please charge batteries before using the device for the first time!

3
6. Technical data
Range: 0 ... 2.000 ppm (Methane)
Sensitivity: 20 ... 50 ppm (Methane)
Batteries: NiMH
Hours of use: approx. 24 hours
Auto-off: 5 minutes
Size (device): 72 x 130 x 26 mm
Size (flex arm): 295 mm (incl. sensor)
Temperature/humidity for storage: - 5°C ... + 40°C (23°F to 104°F) / 20 ... 80 % r.h.
GSP1-charger: input: 230 V~/50Hz
output: 6V=/500mA

4
7. Use
After the device is switched on a quick test of the LED segments (basic initialisation) will be carried out and the cur-
rent battery status will be displayed for approx. 1.5 seconds.
The battery level will be displayed by means of the LED segments. For instance if the segment in the middle glows
the battery is half full/half empty.
Right after switching-on the warm-up phase for the sensors starts. The warm-up period should always take place
within an area of “clean air”, i.e. not on the designated place of measuring. The length of the warm-up phase depends
on the condition of the sensors. The longer the GSP1 was not in use, the longer takes the warm-up phase for the
sensors.
During the warm-up phase the graphical LED-Indicator goes back steadily. As soon as no more than one LED-
segment is glowing measuring can be started.
Leaks can be detected in a qualitative way if the sensor is moved along the places where they are assumed to be.
The measured concentration can be read of the graphical LED-Indicator. If the display has reached its highest status
there is a constant beep as acoustic alert.
During active measuring the battery status can be displayed by a short press (approx. 1.5 sec.) of the ON/OFF-
button.
Residues of gas, humidity and surrounding temperature can influence the zero point. The zero point can be corrected
manually. In order to do so the CAL-button has to be pressed for about a second. The new zero point remains as
long until the device is either switched off or a new zero point calibration is carried out.
The device switches off automatically if no button is pressed for more than 5 minutes or if no gas concentration above
80 ppm is measured during this period.
Directly before the device switches off there is an acoustic alert (approx. 5 sec.). If any button is pressed during this
period the device continues working until the next auto-off period.
If there is no sufficient voltage anymore the LowBatt-LED starts to blink. The device will eventually switch off without
any further warnings.

5
8. Setting of the acoustic alerts
The acoustic alert can be activated by a short press of the Loudspeaker-Symbol-button (LS). At the same time the
yellow ALERT-LED starts blinking.
The existence of gases can therefore be detected in an audio-visual way. The frequency of the acoustic alert is
thereby positively related to the increasing gas concentration.
The acoustic alert (permanent beep) that is preset for a concentration of >2,000 ppm (Methane) can be altered within
the active range of measuring. This can be done as explained in the following:
Press the button with the loudspeaker symbol (LS) for about a second and press the CAL-button very briefly at the
same time.
The blinking ALARM-LED shows the active mode that can now be changed upwards or downwards by pressing the
CAL-button and ON/OFF-button respectively.
The current mode is thereby indicated by a glowing LED-segment. The setting can be finished by a short press of the
LS-button. From now on the permanent alert will go off when the gas concentration exceeds the new set limit (e.g.
500 ppm).

6
1
Note!
9. Charging
For charging please use the device-specific charger only!
After the charger is connected to the device the modern charge management software works completely autono-
mous. It guarantees recharging that is optimised in terms of necessity as well as function. When the charger is
plugged in the GSP1 switches on automatically and indicates the current battery status by a blinking LED-segment.
During recharging the green „POWER“-LED is blinking whereas the red „LowBatt“-LED is glowing permanently.
When the battery is recharged completely both LEDs turn off and the GSP1 switches to the trickle charging mode.
This status will be maintained until the device is unplugged. Charging the battery completely usually takes between
four and five hours. It should be aimed at recharging without interruptions. This will maximise hours of use.
Usually battery capacity is sufficient for 24 hours of use.

7
10. Safety instructions
In order to operate the device it is vital to have a detailed knowledge and to be aware of the user manual. The
gas detector GSP1 may only be used for purposes described in this manual.
The gas detector GSP1 is calibrated for methane gas (CH4). Other gases can be detected as well but their
indicated intensity deviates from the calibrated data. For CxHy-gases (butane, propane, etc.) the deviation is
relatively small.
Don’t expose the GSP1-device to extreme temperature deviations. If the device is stored at a temperature
below 0°C (32°F) it should be switched on at least 10 minutes before starting to work with it.
The gas detector GSP1 is not explosion-protected and may therefore not be used within explosive atmos-
pheres.
The sensor should not be exposed to both silicone and silicone vapours. These will lead to its destruction.
Testing its function by exposing it to lighter gas and / or gas concentrations (> 3,000 ppm) could destroy the
sensor as well.
The GSP1 may only be repaired by instructed experts.
If the instrument is repaired by unauthorised staff the manufacturer is not
responsible for any malfunctions. The same applies if the device is not used according to its purpose.

8
11. Sensor protection & service
If there is a gas concentration (>2,000ppm) the sensor will switch off automatically.
This avoids its irreversible destruction.
In this case there are optical (LED elements are flashing) and acoustic (ALARM-LED
blinks) warnings. Measuring can be started again by the ON/OFF-button.
A defect sensor is indicated by all segments glowing except these two that are in the
middle of the LED-Indicator.
In this case please contact the producer or an authorised service point.

9
12. Notes


Table of contents
