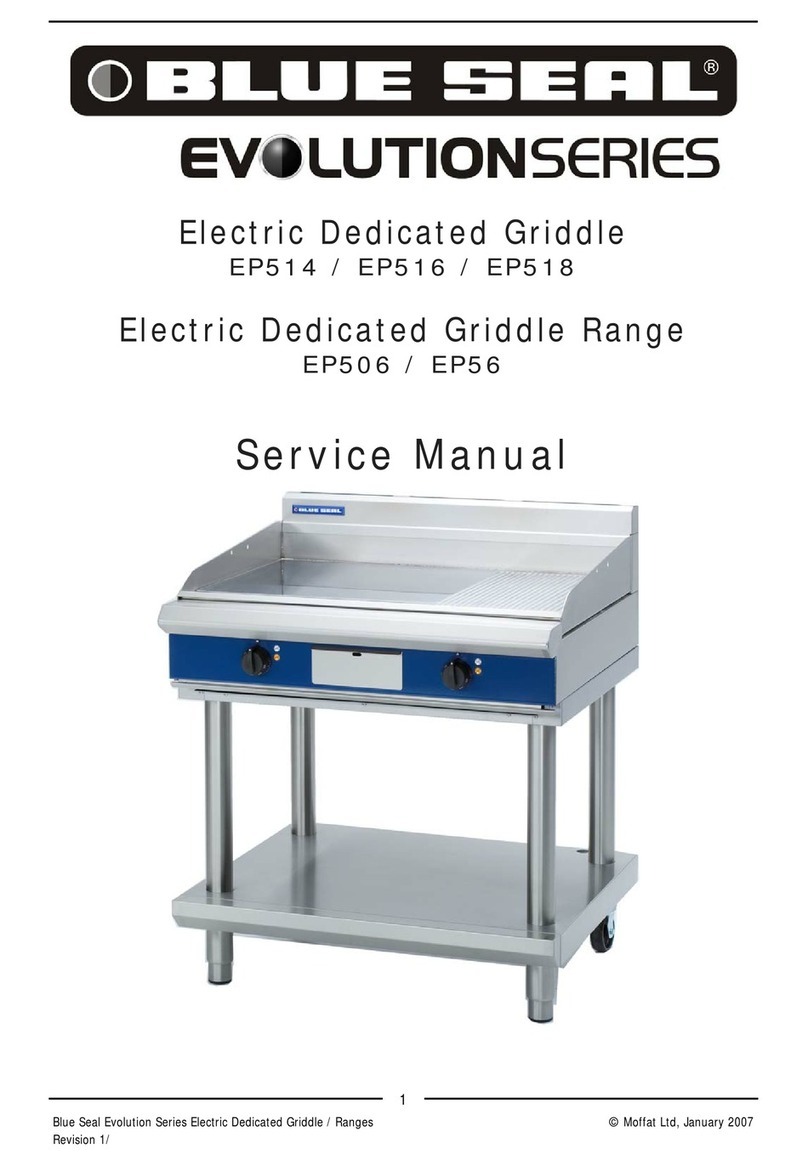
Blue Seal GP51 User manual

© Moffat Ltd, January 2007
Revision 1/
Blue Seal Evolution Series Gas Griddles
Service Manual
Gas Griddles
GP51

© Moffat Ltd, January 2007
Revision 1/
Blue Seal Evolution Series Gas Griddles
ALL INSTALLATION AND SERVICE REPAIR WORK MUST BE CARRIED OUT BY
QUALIFIED PERSONS ONLY.
WARNING:
MAKING ALTERATIONS MAY VOID WARRANTIES AND APPROVALS.
IMPORTANT:

© Moffat Ltd, January 2007
Revision 1/
Blue Seal Evolution Series Gas Griddles
This manual is designed to take a more in depth look at the Blue Seal Gas Griddles for the purpose of
making the units more understandable to service people.
There are settings explained in this manual that should never require to be adjusted, but for completeness
and those special cases where these settings are required to change, this manual gives a full explanation
as to how, and what effects will result.
Section Page Number
1. Specifications ............................................................................................ 1
2. Installation ................................................................................................7
3. Operation.................................................................................................10
3.1 Description of Controls
3.2 Explanation of Control System
4. Maintenance ............................................................................................12
5. Trouble-shooting Guide...........................................................................15
5.1 Trouble-shooting Chart
5.2 Fault Diagnosis
6. Service Procedures ..................................................................................18
6.1 Access
6.2 Replacement
6.3 Adjustment / Calibration
7. Accessories ..............................................................................................23
8. Exploded Parts Diagrams ........................................................................24
8.1 G514 600mm Griddle
8.2 G516 900mm Griddle
8.3 G518 1200mm Griddle
8.4 Base Options
9. Service Contacts......................................................................................33
Appendix A: Gas Type Conversion .................................................................35
Contents

© Moffat Ltd, January 2007
Revision 1/
Blue Seal Evolution Series Gas Griddles

1
Specifications
1
© Moffat Ltd, January 2007
Revision 1/
Blue Seal Evolution Series Gas Griddles
Model Numbers covered in this Specification
GP514 - B Gas Griddle 600mm wide Bench Model.
GP514 - CB Gas Griddle 600mm wide with Cabinet Base.
GP514 - LS Gas Griddle 600mm wide on Leg Stand.
GP516 - B Gas Griddle 900mm wide Bench Model.
GP516 - CB Gas Griddle 900mm wide with Cabinet Base.
GP516 - LS Gas Griddle 900mm wide on Leg Stand.
GP516 - RB Gas Griddle 900mm wide with Refrigerated Base.
GP518 - B Gas Griddle 1200mm wide Bench Model.
GP518 - CB Gas Griddle 1200mm wide with Cabinet Base.
GP518 - LS Gas Griddle 1200mm wide on Leg Stand.
GP518 - RB Gas Griddle 1200mm wide with Refrigerated Base.
Gas Supply (Non UK models)
Natural Gas LP Gas (Propane)
GP514 GP516 GP518 GP514 GP516 GP518
Input
Rating 53 MJ/hr
(50,234 BTU) 80 MJ/hr
(75,825 BTU) 108 MJ/hr
(102,364 BTU) 53 MJ/hr
(50,234 BTU) 80 MJ/hr
(75,825 BTU) 108 MJ/hr
(102,364 BTU)
Supply
Pressure 1.13 - 3.40 kPa
(4.5” - 13.5” w.c.) 2.75 - 3.40 kPa
(11” - 13.5” w.c.)
Operating
Pressure 0.85 kPa (*)
(3.4” w.c.) 0.90 kPa (*)
(3.6”w.c.) 2.5 kPa (*)
(9.8” w.c.)
Gas
Connection ¾” BSP Male
2.6 kPa (*)
(10.2” w.c.)
Natural Gas (G20) Propane (G31)
GP514 GP516 GP518 GP514 GP516 GP518
Heat Input (nett) 13.3 kW 21 kW 28.5 kW 13.3 kW 21 kW 28.5 kW
Gas Rate (nett) 1.41 m3/hr 2.22 m3/hr 3.02 m3/hr 1.03 kg/hr 1.63 kg/hr 2.21 kg/hr
Supply Pressure 20 mbar 37 mbar
Burner Operating
Pressure 8.5 mbar (*) 8.2 mbar (*)
Gas Connection 3/4” BSP Male
26 mbar (*)
Gas Supply (Non UK models)
*The burner operating pressure is to be measured at the gas control valve outlet test point with one
griddle burner operating at ‘High’ setting. The operating pressure is ex-factory set, through the
appliance regulator and not to be adjusted, apart from when carrying out gas conversion, if required.
(Refer to the ‘Gas Conversion’ section for details).

2
1
Specifications
© Moffat Ltd, January 2007
Revision 1/
Blue Seal Evolution Series Gas Griddles
Injector Sizes
Natural Gas LP Gas (Propane)
G514 G516 G518 G514 G516 G518
Main Injector
(Non-UK models) 3.60 mm 3.00 mm 2.85 mm 2.10 mm 1.80 mm 1.70 mm
Pilot Injector 0.41 mm 0.25 mm
Main Injector
(UK models) 3.40 mm 3.00 mm 2.85 mm 2.10 mm 1.80 mm 1.70 mm
G514 50 Kgs (approx.)
G516 75 Kgs (approx.)
G518 100 Kgs (approx.)
Removable Griddle Plate Weights

1
Specifications
3
© Moffat Ltd, January 2007
Revision 1/
Blue Seal Evolution Series Gas Griddles
GP514 - B
GP516 - B
GP518 - B
Dimensions for Bench Models

4
1
Specifications
© Moffat Ltd, January 2007
Revision 1/
Blue Seal Evolution Series Gas Griddles
GP514 - CB
GP516 - CB
GP518 - CB
Dimensions for Cabinet Base Models

1
Specifications
5
© Moffat Ltd, January 2007
Revision 1/
Blue Seal Evolution Series Gas Griddles
GP514 - LS
GP516 - LS
GP518 - LS
Dimensions for Leg Stand Models

6
1
Specifications
© Moffat Ltd, January 2007
Revision 1/
Blue Seal Evolution Series Gas Griddles
GP516 - RB
GP518 - RB
Dimensions for Refrigeration Base Models

2
Installation
7
© Moffat Ltd, January 2007
Revision 1/
Blue Seal Evolution Series Gas Griddles
Installation Requirements
NOTE:
• It is most important that this appliance is installed correctly and that operation is correct before use.
Installation shall comply with local gas, health and safety requirements.
• This appliance shall be installed with sufficient ventilation to prevent the occurrence of
unacceptable concentrations of health harmful substances in the room, the appliance is installed in.
Blue Seal Gas Griddles are designed to provide years of satisfactory service and correct installation is
essential to achieve the best performance, efficiency and trouble-free operation.
This appliance must be installed in accordance with National installation codes and in addition, in
accordance with relevant National / Local codes covering gas and fire safety.
Australia: - AS5601 - Gas Installations.
New Zealand: - NZS5261 - Gas Installation.
United Kingdom: - Gas Safety (Installation & Use) Regulations 1998.
- BS6173 - Installation of Catering Appliances.
- BS5440 - 1 & 2 Installation Flueing & Ventilation.
Ireland: - IS 820 - Non - Domestic Gas Installations.
Installations must be carried out by authorised persons only. Failure to install equipment to the
relevant codes and manufacturer’s specifications shown in this section will void the
warranty.
Components having adjustments protected (e.g. paint sealed) by the manufacturer are only
allowed to be adjusted by an authorised service agent. They are not to be adjusted by the
installation person.
Unpacking
• Remove all packaging and transit protection from the appliance including all protective plastic
coating from the exterior stainless steel panels.
• Check equipment and parts for damage. Report any damage immediately to the carrier and
distributor.
• Ensure that the 4 adjustable feet are fitted with the protruding centre screw.
• Report any deficiencies to the distributor who supplied the appliance.
• Check that the available gas supply is correct to that shown on the rating plate located behind the front
control panel and on the inner face of the right hand panel.
Location
1. Installation must allow for a sufficient flow of fresh air for the combustion air supply.
2. Installation must include adequate ventilation means, to prevent dangerous build up of combustion prod-
ucts.
3. Any gas burning appliance requires adequate clearance and ventilation for optimum and
trouble-free operation. The minimum installation clearances shown below are to be adhered to.
4. Position the appliance in its approximate working position.
5. All air for burner combustion is supplied from underneath the unit. The legs must always be fitted and no
obstructions placed on the underside or around the base of the unit, as obstructions will cause incorrect
operation and/or failure of the appliance.
6. Components having adjustments protected (e.g. paint sealed) by manufacturer are only allowed to be
adjusted by an authorised service agent. They are not to be adjusted by the installation person.
NOTE: Do not obstruct or block the appliances flue. Never directly connect a ventilation
system to the appliance flue outlet.
Combustion Air Requirements:
GP514 GP516 GP518
Natural Gas (G20) 14 m3/hr 21 m3/hr 28 m3/hr
LPG / Propane (G31) 15 m3/hr 22 m3/hr 29 m3/hr

2
Installation
8
© Moffat Ltd, January 2007
Revision 1/
Blue Seal Evolution Series Gas Griddles
Clearances
NOTE: Only non-combustible materials can be used in close proximity to this appliance.
Assembly
NOTE:
• All Models are delivered completely assembled. No further assembly is required.
• This appliance is fitted with adjustable feet to enable the appliance to be positioned
securely and level. This should be carried out on completion of the gas connection. Refer
to the ‘Gas Connection’ section.
Optional Accessories (Refer to Replacement Parts List)
• Rear Roller Kit. For installation details, refer to the instructions supplied with each kit.
• Plinth Kit. For installation details, refer to the instructions supplied with each kit.
Gas Connection
NOTE: ALL GAS FITTING MUST ONLY BE CARRIED OUT BY AN AUTHORISED PERSON.
1. Blue Seal Gas Griddles do not require an electrical connection, as they function totally on the gas
supply only.
2. It is essential that the gas supply is correct for the appliance to be installed and that adequate
supply pressure and volume is available. The following checks should therefore be made before
installation:-
a. Gas Type the appliance has been supplied for is
shown on coloured stickers located above the gas
connection and next to the rating plate. Check that
this is correct for the gas supply the appliance is be-
ing installed for. The gas conversion procedure is
detailed in this manual.
b. Supply Pressure required for this appliance is
shown in the “Specifications” section of this manual.
Check the gas supply to ensure adequate supply
pressure exists.
c. Input Rate of this appliance is stated on the Rating
Plate, refer to the ‘Dimensions’ section for rating plate
locations for the different models. The input rate
should be checked against the available gas supply
line capacity. Particular note should be taken if
the appliance is being added to an existing
installation.
NOTE: It is important that adequately sized piping runs directly to the connection joint on the
appliance with as few tees and elbows as possible to give maximum supply volume.
3. Fit the gas regulator supplied, into the gas supply line as close to the appliance as possible.
NOTE: The gas pressure regulator provided with this appliance is convertible between Natural Gas
and LPG and is already converted ex-factory to the gas type labelled beside the gas
connection point. The regulator outlet pressure is fixed ex-factory and it is NOT to be
adjusted.
Combustible Surface Non Combustible Surface
Left/Right Hand Side 50 mm 0 mm
Rear 50 mm 0 mm
Rating Plate Location
for Leg Stand Models
Fig 1

2
Installation
9
© Moffat Ltd, January 2007
Revision 1/
Blue Seal Evolution Series Gas Griddles
The regulator connections are 3/4" BSP female.
The connection to the appliance is 3/4" BSP male.
(Refer to the “Specifications” section for the gas supply location dimensions).
NOTE: A Manual Isolation Valve must be fitted to the individual appliance supply line.
4. Correctly locate the appliance into its final operating position and using a spirit level, adjust the legs
so that the unit is level and at the correct height.
5. Connect the gas supply to the appliance. A suitable jointing compound which resists the
breakdown action of LPG must be used on every gas line connection, unless compression fittings are
used.
6. Check all gas connections for leakages using soapy water or other gas detecting equipment.
7. Check that the gas operating pressure is as shown in the “Specifications” section.
NOTE: The operating pressure is to be
measured at the burner operating
pressure test point outlet and with one
griddle burner operating at the “High
Flame” setting.
8. Turn off the mains gas supply and bleed the
gas out of the appliance gas lines.
9. Turn on the gas supply and the appliance.
10. Verify the operating pressure remains
correct.
Commissioning
Before leaving the new installation;
Check the following functions in accordance with the operating instructions specified in the
“Operation” section of the User manual.
• Light the Pilot Burner.
• Light the Main Burner.
• Turning 'Off' the Main Burner / Pilot.
Ensure that the operator has been instructed in the areas of correct lighting, operation, and
shutdown procedure for the appliance.
The User manual must be kept by the owner for future reference and a record of the
Date of
Purchase,
Date of Installation
and the
Serial Number of the Appliance
must be recorded and kept
with the manual. (These details can be found on the Rating Plate, refer to the ‘Dimensions’
section for the locations of the Rating Plate for different applications. Also refer to the ‘Gas
Connection’ section).
NOTE: If for some reason it is not possible to get the appliance to operate correctly, shut off the
gas supply and contact the supplier of this appliance.
WARNING:
DONOT USE ANAKED FLAME TO CHECK FOR GAS LEAKAGES.
For the Refrigeration Cabinet Installation refer to the Refrigeration Cabinet Installation and
Operation Manual supplied with the appliance.
Burner Operating Pressure
Test Point (Outlet) Fig 2

3
Operation
10
© Moffat Ltd, January 2007
Revision 1/
Blue Seal Evolution Series Gas Griddles
3.1 Description of Controls
Gas Griddle Controls
Piezo Igniter with
Viewing Hole
OFF Position
PILOT Burner
Temperature Gradient
Fig 3

3
Operation
11
© Moffat Ltd, January 2007
Revision 1/
Blue Seal Evolution Series Gas Griddles
Safety System
The purpose of the safety system is to shut off
the flow of gas if the pilot flame goes out. It is
comprised of the flame itself, the thermocouple,
and the flame failure gas valve.
The pilot flame is lit by holding in the gas
control knob, which in turn temporarily pushes
the plunger inside the safety valve open and
allows gas to flow through. Once the burner is
lit, the thermocouple will begin to generate
millivolts (after about 10 to 30 seconds of being
heated) and will energize the electromagnet
inside the gas valve. Once energized the
electromagnet holds the plunger inside the gas
valve in the open position. The plunger has to
have been pushed all the way in for the
electromagnet to be able to hold it in place. If
the burner flame goes out for some reason, the
thermocouple will cool after about 10 to 30
seconds and stop generating millivolts. The
electromagnet will then de-energize, and the
plunger will snap shut, cutting off the flow of gas.
Detail of each component in the safety system is
explained below.
Thermocouple
The thermocouple is a device that generates
electricity when heat is applied to the tip.
Millivolts are provided to the electromagnet by
the thermocouple (not shown) which generates
millivolts when heated. The thermocouple screws
into a fitting at the back of the gas valve to make
an electric connection. By pressing in the gas
control knob, the plunger can be temporarily held
open while lighting. There's two reasons for this;
gas has to flow through the safety valve to make
it possible to light the pilot burner, and secondly
the plunger has to be pushed all the way in for
the electromagnet to hold it in. I.e.; the
electromagnet is strong enough to hold the
plunger in once there, but is not strong enough
to pull it in by itself. Sometimes a problem with
the flame not staying lit after releasing the button
can be attributed to not pushing the plunger all
the way in.
The tip of the thermocouple is located in the pilot
burner flame, and the nut at the other end of the
thermocouple screws into the back of the gas
valve. Inside the copper tubing is a wire which is
joined at the tip but insulated from the rest of the
tubing. These two parts (the copper tubing and
wire) make up the "wiring" for an electrical
circuit. When these two dissimilar metals, wire
and tip, are heated an electrical voltage is
produced. This type of thermocouple generates
between 7 and 30 millivolts when heated in the
pilot flame.
Electromagnetic Flame Failure Gas Valve
The purpose of the safety valve is to shut off the
flow of gas if the pilot flame goes out.
Inside the body of the gas valve is an
electromagnet connected to a spring loaded
plunger. When the electromagnet is energized, it
holds the plunger in, allowing gas to flow through
the valve. When the electromagnet is
de-energized, the plunger snaps to the closed
position, stopping the flow of gas.
Figure 3.2a
Figure 3.2b
Thermocouple
Gas flow
Electromagnet
Plunger
Shaft
Knob
Gas flow Plunger
Insulator Nut Conductor Tip
Internal
Wire
3.2 Explanation of Control
System

4
Cleaning / Maintenance
12
© Moffat Ltd, January 2007
Revision 1/
Blue Seal Evolution Series Gas Griddles
CAUTION:
Always turn off the gas supply before cleaning.
This unit is not water proof.
Do not use water jet spray to clean interior or exterior of this appliance.
Routine Maintenance
To achieve the best results cleaning must be regular and thorough and all controls and mechanical
parts checked and adjusted periodically by a competent serviceman. If any small faults occur, have
them attended to promptly. Don't wait until they cause a complete breakdown. It is recommended
that the appliance is serviced every 6 months.
Clean the griddle regularly. A clean appliance looks better, will last longer and will perform better.
Carbonised grease on the surface or on the griddle plate will hinder the transfer of heat from the
cooking surface to the food. This will result in loss of cooking efficiency.
NOTE: Each griddle is supplied with a scraper tool and a pack of blades for cleaning the griddle
surface. Griddles with both ribbed and flat surfaces are supplied with two scraper tools and
two packs of blades for use with both flat and ribbed surfaces. These are for use with both
chromed and steel surfaced griddles. NEVER use the ribbed scraper blade on the flat
chrome surfaced griddle plate.
DO NOT use water on the griddle plate while this item is still hot as warping and
cracking may occur. Allow the griddle plate to cool down before cleaning.
NOTE:
• DO NOT use abrasive detergents, strong solvents or caustic detergents as they could cor-
rode or damage the range.
• In order to prevent the forming of rust on the griddle plate (Steel Plate), ensure that any
detergent or cleaning material has been completely removed after each cleaning. The ap-
pliance should be switched on briefly to ensure the griddle plate becomes dry. Oil or
grease should be spread over the griddle surface in order to form a thin protective greasy
film.
To keep your griddle clean and operating at peak efficiency, follow the procedures shown below:-
After Each Use
1. Clean the griddle with the supplied scraper tools to remove any food debris.
2. Always ensure that the scraper tool blades are changed regularly to ensure that the scraper tool
works efficiently and prevents damage to the griddle plate surface.
WARNING
THE BLADES FITTED TO THE SCRAPER TOOL ARE EXTREMELY SHARP AND ARE TO BE USED WITH CARE.
CAUTION
Always ensure that an even pressure is applied over the whole surface of the
scraper tool when using on the flat chromed surface of the griddle, to prevent
scoring of the surface.
NEVER bang the sharp edge of the scraper tool on the flat chromed surface of
the griddle as this will damage the chrome finish and invalidate the warranty.

4
Cleaning / Maintenance
13
© Moffat Ltd, January 2007
Revision 1/
Blue Seal Evolution Series Gas Griddles
Daily Cleaning
1. The grease drawer should be checked and emptied frequently to prevent overflow and spillage.
Remove the grease drawer while still warm so that the grease is in a liquid state. Empty any grease
from the drawer and wash thoroughly in the same manner as any cooking utensil.
2. Thoroughly clean the splash back, the interior and exterior surfaces of the range with hot water, a
detergent solution and a soft scrubbing brush.
3. Brush the griddle surface with a soft bristled brush. Any carbon deposits should be removed using
the supplied scraper tool followed by wiping with a cloth to prevent accumulation of food
deposits.
4. Dry the griddle thoroughly with a dry cloth and polish with a soft dry cloth.
NOTE: Chrome Griddle Plate;DO NOT use abrasive detergents, strong solvents or caustic deter-
gents as they could corrode or damage the chrome plate.
Weekly Cleaning
NOTE:
• If the griddle usage is very high, we recommend that the weekly cleaning procedure is
carried out on a more frequent basis.
• Ensure that protective gloves are worn during the cleaning process.
• DO NOT use harsh abrasive detergents, strong solvents or caustic detergents as they will
damage the range and burners.
• DO NOT use water on the griddle plates while they are still hot as warping may occur.
Allow these items castings to cool and remove for cleaning.
Griddle - Steel Plate
NOTE: In order to prevent the forming of rust on the griddle plate, ensure that all detergent and
cleaning material has been entirely removed after each cleaning process. The appliance
should be switched on briefly to ensure the griddle plate becomes dry. Oil or grease should
be spread over the griddle surface in order to form a thin protective greasy film.
a. Remove and clean the grease collection drawer frequently to prevent over spills.
b. Clean the griddle surface thoroughly with the supplied scraper tool or a wire brush. If necessary
use a griddle stone or a scotch bright pad on the griddle surface for the removal of stubborn or
accumulated carbon deposits..
c. Occasionally bleach the griddle plate with vinegar when the plate is cold.
d. Clean with hot water, a mild detergent solution and a scrubbing brush. Dry all components thor-
oughly with a dry cloth.
e. The griddle should be switched on briefly to ensure that the griddle plate becomes dry. A thin
smear of cooking oil should be spread over the griddle in order to form a protective film.

4
Cleaning / Maintenance
14
© Moffat Ltd, January 2007
Revision 1/
Blue Seal Evolution Series Gas Griddles
Griddle - Chrome Plate
NOTE: In order to maintain the finish on the chrome griddle plate, ensure that all detergent and
cleaning material has been entirely removed after each cleaning process. The appliance
should be switched on briefly to ensure the griddle plate becomes dry.
a. Remove and clean the grease collection drawer frequently to prevent over spills.
b. Clean the griddle surface thoroughly with the supplied scraper tool.
c. Allow the plate to cool, then clean the plate with a scrubbing brush, a mild non-abrasive
detergent and water.
d. Occasionally bleach the plate with vinegar when cold.
e. Dry the griddle thoroughly with a dry cloth and polish with a soft dry cloth.
f. The griddle should be switched on briefly to ensure that the griddle plate becomes dry.
Griddle Cooking Area
a. Clean the griddle cooking area with a soft cloth and a mild detergent and hot water solution.
b. Baked on deposits or discolouration may require a good quality stainless steel cleaner or stainless
steel wool. Always apply cleaner when the appliance is cold and rub in the direction of the grain.
c. Remove the grease drawer and clean with a mild anti bacterial detergent and hot water solution
using a soft bristled brush. Dry the grease drawer thoroughly with a dry cloth.
Stainless Steel Surfaces
a. Clean the exterior surfaces of the griddle with hot water, a mild detergent solution and a soft
scrubbing brush. Note that the gas control knobs are a push fit onto the gas control valve
spindles and can be removed to allow cleaning of the front control panel.
b. Baked on deposits or discolouration may require a good quality stainless steel cleaner or stainless
steel wool. Always apply cleaner when the appliance is cold and rub in the direction of the grain.
c. To remove any discolouration, use an approved stainless steel cleaner or stainless steel wool.
Always rub in the direction of the grain.
d. Remove the grease tray and clean with a mild anti bacterial detergent and hot water solution
using a soft bristled brush.
e. Dry the grease tray thoroughly with a dry cloth.
f. Dry all components thoroughly with a dry cloth and polish with a soft dry cloth.
For the Refrigeration Cabinet Cleaning and Maintenance refer to the Refrigeration Cabinet
Installation and Operation Manual supplied with the appliance.
CAUTION
Always ensure that an even pressure is applied over the whole surface of the
scraper tool when using on the flat chromed surface of the griddle, to prevent
scoring of the surface.
NEVER bang the sharp edge of the scraper tool on the flat chromed surface of
the griddle as this will damage the chrome finish and invalidate the warranty.

5
Trouble-shooting
15
© Moffat Ltd, January 2007
Revision 1/
Blue Seal Evolution Series Gas Griddles
ALL INSTALLATION AND SERVICE REPAIR WORK MUST BE CARRIED OUT BY
QUALIFIED PERSONS ONLY.
WARNING:
5.1 Trouble Shooting Chart
Fault Possible cause Remedy
Pilot won’t light
Gas control knob not being held
in.
No gas supply.
Gas pressure too low.
Blocked pilot injector.
Gas control faulty.
Hold in button while lighting pilot.
Ensure gas is connected and on
(bottles not empty).
Check gas supply pressure.
(Refer specifications section)
Clean or replace pilot injector.
(Refer service section 6.2.8)
Replace.
(Refer service section 6.2.12)
Pilot flame small / lazy / yellow. Gas pressure too low.
Blocked / incorrect size pilot
injector.
Check gas supply pressure.
(Refer specifications section)
Clean or replace pilot injector.
(Refer service section 6.2.8)
Pilot goes out when knob
released. Releasing knob before the
thermocouple is heated.
Pilot flame too small.
(Refer fault:Pilot Flame Small)
Thermocouple faulty.
(Refer fault diagnosis 5.2.1)
Gas magnet faulty.
(Refer fault diagnosis 5.2.1)
Hold control in for longer (10 s),
see if pilot will stay lit.
Correct fault.
Replace thermocouple.
(Refer service section 6.2.9)
Replace gas magnet.
(Refer service section 6.2.13)
Main burners will not light. Wrong size or blocked injectors.
Obstruction in burner.
Incorrect supply pressure.
Faulty gas control.
Replace / clean injectors.
(Refer service section 6.2.6)
Clean burner.
Check supply pressure.
Replace gas control.
(Refer service section 6.2.12)
Piezo ignitor not sparking. Short in high tension lead.
(Refer fault diagnosis 5.2.2)
Piezo faulty.
(Refer fault diagnosis 5.2.2)
Replace lead.
(Refer service section 6.2.11)
Replace piezo.
(Refer service section 6.2.14)

5
Trouble-shooting
16
© Moffat Ltd, January 2007
Revision 1/
Blue Seal Evolution Series Gas Griddles
Fault Possible cause Remedy
Main burner flame
incorrect colour (yellow / wavy). Aeration setting incorrect.
Incorrect gas pressure.
Incorrect injector size.
Obstruction in burner.
Adjust aeration.
(Refer service section 6.4.4)
Check supply pressure.
Check injector correct size.
Inspect burner for obstruction.
Pilot goes out when main burner
comes on. Incorrect gas pressure.
Faulty gas control.
Check supply / adjust pressure.
(Refer specifications section)
Replace gas control.
(Refer service section 6.2.12)
Table of contents
Other Blue Seal Griddle manuals

Blue Seal
Blue Seal Evolution GP514 User manual

Blue Seal
Blue Seal Evolution EP514 User manual

Blue Seal
Blue Seal Evolution GP514 User manual

Blue Seal
Blue Seal GP513 User manual

Blue Seal
Blue Seal GP8600G User manual

Blue Seal
Blue Seal Evolution G55T User manual
Blue Seal
Blue Seal Evolution GP516 User manual
Popular Griddle manuals by other brands
NISBETS ESSENTIALS
NISBETS ESSENTIALS DA397 instruction manual

Alice's Garden
Alice's Garden PORTHOS manual

Kamado Joe
Kamado Joe KJ15094522 quick start guide

Kalorik
Kalorik CRM 43667 BK manual

Wells
Wells G13 Operation manual

Nostalgia Electrics
Nostalgia Electrics LIving Collection NGD200 Instructions and recipes