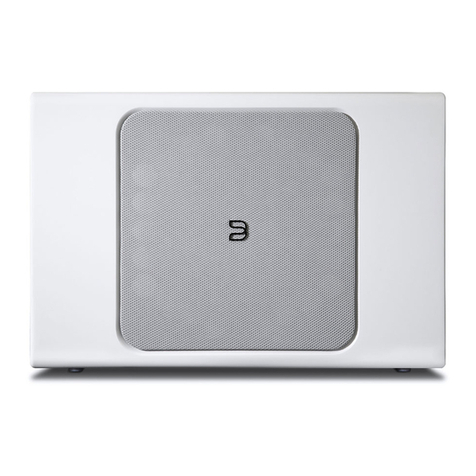
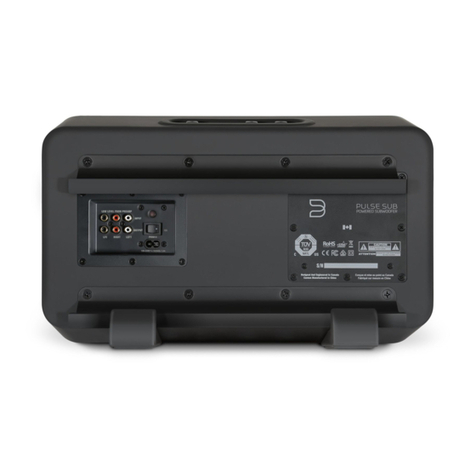
Bluesound BSW150 User manual

ENGLISH
Owner’s Manual
BSW150 Network
Powered Subwoofer

IMPORTANT SAFETY INSTRUCTIONS
• Read instructions - All the safety and operating instructions should be read
before the product is operated.
• Retain instructions - The safety and operating instructions should be retained
for future reference.
• Heed Warnings - All warnings on the product and in the operating instructions
should be adhered to.
• Follow Instructions - All operating and use instructions should be followed.
• Cleaning - Unplug this product from the wall outlet before cleaning. Do not use
liquid cleaners or aerosol cleaners. Use a dry cloth for cleaning.
• Attachments - Do not use attachments not recommended by the product
manufacturer as they may cause hazards.
• Water and Moisture - Do not use this product near water-for example, near a
bath tub, wash bowl, kitchen sink, or laundry tub; in a wet basement; or near a
swimming pool; and the like.
• Accessories - Do not place this product on an unstable cart, stand, tripod,
bracket, or table. The product may fall, causing serious injury to a child or
adult and serious damage to the product. Use only with a cart, stand, tripod,
bracket, or table recommended by the manufacturer, or sold with the product.
Any mounting of the product should follow the manufacturer’s instructions,
and should use a mounting accessory recommended by the manufacturer.
• Cart - A product and cart combination should be moved with care.
Quick stops, excessive force, and uneven surfaces may cause the
product and cart combination to overturn.
• Ventilation - Slots and openings in the cabinet are provided for ventilation to
ensure reliable operation of the product and to protect it from overheating.
These openings must not be blocked or covered. The openings should never
be blocked by placing the product on a bed, sofa, rug, or other similar surface.
This product should not be placed in a built-in installation such as a bookcase
or rack unless proper ventilation is provided or the manufacturer’s instructions
have been adhered to.
• Power Sources - This product should be operated only from the type of power
source indicated on the marking label and connected to a MAINS socket outlet
with a protective earthing connection. If you are not sure of the type of power
supply to your home, consult your product dealer or local power company.
• Power–Cord Protection - Power-supply cords should be routed so that they are
not likely to be walked on or pinched by items placed upon or against them,
paying particular attention to cords at plugs, convenience receptacles, and the
point where they exit from the product.
• Mains Plug - Where the mains plug or an appliance coupler is used as the
disconnect device, the disconnect device shall remain readily operable.
• Outdoor Antenna Grounding - If an outside antenna or cable system is
connected to the product, be sure the antenna or cable system is grounded
so as to provide some protection against voltage surges and built-up static
charges. Article 810 of the National Electrical Code, ANSI/NFPA 70, provides
information with regard to proper grounding of the mast and supporting
structure, grounding of the lead-in wire to an antenna discharge unit, size
of grounding conductors, location of antenna discharge unit, connection to
grounding electrodes, and requirements for the grounding electrode.
• Lightning - For added protection for this product during a lightning storm, or
when it is left unattended and unused for long periods of time, unplug it from
the wall outlet and disconnect the antenna or cable system. This will prevent
damage to the product due to lightning and power-line surges.
• Power Lines - An outside antenna system should not be located in the vicinity
of overhead power lines or other electric light or power circuits, or where it
can fall into such power lines or circuits. When installing an outside antenna
system, extreme care should be taken to keep from touching such power lines
or circuits as contact with them might be fatal.
• Overloading - Do not overload wall outlets, extension cords, or integral
convenience receptacles as this can result in a risk of fire or electric shock.
• Flame Sources - No naked flame sources, such as lighted candles, should be
placed on the product.
• Object and Liquid Entry - Never push objects of any kind into this product
through openings as they may touch dangerous voltage points or short-out
parts that could result in a fire or electric shock. Never spill liquid of any kind
on the product.
• Headphones - Excessive sound pressure form earphones and headphones can
cause hearing loss.
• Damage Requiring Service - Unplug this product from the wall outlet and refer
servicing to qualified service personnel under the following conditions:
– When the power-supply cord or plug is damaged.
– If liquid has been spilled, or objects have fallen into the product.
– If the product has been exposed to rain or water.
– If the product does not operate normally by following the operating
instructions. Adjust only those controls that are covered by the operating
instructions as an improper adjustment of other controls may result in
damage and will often require extensive work by a qualified technician to
restore the product to its normal operation.
– If the product has been dropped or damaged in any way.
– When the product exhibits a distinct change in performance-this indicates a
need for service.
• Replacement Parts - When replacement parts are required, be sure the service
technician has used replacement parts specified by the manufacturer or have
the same characteristics as the original part. Unauthorized substitutions may
result in fire, electric shock, or other hazards.
• Battery Disposal - When disposing of used batteries, please comply with
governmental regulations or environmental public instruction’s rules that apply
in your country or area.
• Safety Check - Upon completion of any service or repairs to this product, ask
the service technician to perform safety checks to determine that the product
is in proper operating condition.
• Wall or Ceiling Mounting - The product should be mounted to a wall or ceiling
only as recommended by the manufacturer.
THE LIGHTNING FLASH WITH ARROWHEAD SYMBOL,
WITHIN AN EQUILATERAL TRIANGLE, IS INTENDED TO
ALERT THE USER TO THE PRESENCE OF UNINSULATED
“DANGEROUS VOLTAGE” WITHIN THE PRODUCT’S
ENCLOSURE THAT MAY BE OF SUFFICIENT MAGNITUDE TO
CONSTITUTE A RISK OF ELECTRIC SHOCK TO PERSONS
THE EXCLAMATION POINT WITHIN AN EQUILATERAL
TRIANGLE IS INTENDED TO ALERT THE USER TO THE
PRESENCE OF IMPORTANT OPERATING AND MAINTENANCE
(SERVICING) INSTRUCTIONS IN THE LITERATURE
ACCOMPANYING THE APPLIANCE.
WARNING
CAUTION REGARDING PLACEMENT
To maintain proper ventilation, be sure to leave a space around the unit (from the
largest outer dimensions including projections) than is equal to, or greater than
shown below.
Left and Right Panels: 10 cm
Rear Panel: 10 cm
Top Panel: 10 cm
Do not install near any heat sources such as radiators, heat registers, stoves, or
other apparatus (including amplifiers) that produce heat.
Do not defeat the safety purpose of the polarized or grounding - type plug. A
polarized plug has two blades with one wider than the other. A grounding type
plug has two blades and a third grounding prong. The wide blade or the third
prong is provided for your safety. When the provided plug does not fit into your
outlet, consult an electrician for replacement of the obsolete outlet.
The apparatus should only be used in moderate climates.
ENGLISH

IMPORTANT SAFETY INSTRUCTIONS
FCC STATEMENT
This equipment has been tested and found to comply with the limits for Class B
digital device, pursuant to Part 15 of the FCC Rules. These limits are designed
to provide reasonable protection against harmful interference in a residential
installation. This equipment generates, uses, and can radiate radio frequency
energy and, if not installed and used in accordance with the instructions,
may cause harmful interference to radio communications. However, there is
no guarantee that interference will not occur in a particular installation. If this
equipment does cause harmful interference to radio or television reception, which
can be determined by turning the equipment off and on, the user is encouraged to
try to correct the interference by one or more of the following measures:
• Reorient or relocate the receiving antenna.
• Increase the separation between the equipment and receiver.
• Connect the equipment into an outlet on a circuit different from that to which
the receiver is connected.
• Consult the dealer or an experienced radio TV technician for help.
CAUTION
• Changes or modifications to this equipment not expressly approved by
Bluesound Professional for compliance could void the user’s authority to
operate this equipment.
• This device complies with Part 15 of the FCC Rules. Operation is subject to the
following two conditions:
1. this device may not cause harmful interference, and
2. this device must accept any interference received, including interference
that may cause undesired operation.
• This device contains licence-exempt transmitter(s)/receiver(s) that comply with
Innovation, Science and Economic Development Canada’s licence-exempt
RSS(s). Operation is subject to the following two conditions:
1. This device may not cause interference.
2. This device must accept any interference, including interference that may
cause undesired operation of the device.
• Under Industry Canada regulations, this radio transmitter may only operate
using an antenna of a type and maximum (or lesser) gain approved for the
transmitter by Industry Canada. To reduce potential radio interference to other
users, the antenna type and its gain should be so chosen that the equivalent
isotropically radiated power (e.i.r.p.) is not more than that necessary for
successful communication. This device may not cause interference.
1. The device for operation in the band 5150-5250 MHz is only for indoor
use to reduce the potential for harmful interference to co-channel mobile
satellite systems;
• To prevent electric shock, match wide blade of plug to wide slot, fully insert.
• Marking and rating plate can be found at the rear panel of the apparatus.
• To reduce the risk of fire or electric shock, do not expose this apparatus to rain
or moisture. The apparatus shall not be exposed to dripping or splashing and
that no objects filled with liquids, such as vases, shall be placed on apparatus.
• Mains plug is used as disconnect device and it should remain readily operable
during intended use. In order to disconnect the apparatus from the mains
completely, the mains plug should be disconnected from the mains socket
outlet completely.
• Battery shall not be exposed to excessive heat such as sunshine, fire or the
like.
• Danger of explosion if battery is incorrectly replaced. Replace only with the
same or equivalent type.
• An appliance with a protective earth terminal should be connected to a mains
outlet with a protective earth connection.
• Operating temperature: 0~35 degrees
RESPONSIBLE PARTY
Lenbrook International
633 Granite Court, Pickering, ON L1W 3K1 Canada Tel: 1 905 8316555
MPE REMINDER
To satisfy FCC/IC RF exposure requirements, a separation distance of 20 cm
or more should be maintained between the antenna of this device and persons
during device operation. To ensure compliance, operations at closer than this
distance is not recommended.
IF IN DOUBT CONSULT A COMPETENT ELECTRICIAN.
This product is manufactured to comply with the radio interference
requirements of EEC DIRECTIVE 2004/108/EC.
NOTES ON ENVIRONMENTAL PROTECTION
At the end of its useful life, this product must not be disposed of with
regular household waste but must be returned to a collection point
for the recycling of electrical and electronic equipment. The symbol
on the product, user’s manual and packaging point this out.
The materials can be reused in accordance with their markings.
Through re-use, recycling of raw materials, or other forms of recycling of old
products, you are making an important contribution to the protection of our
environment.
Your local administrative office can advise you of the responsible waste disposal
point.
INFORMATION ABOUT COLLECTION AND DISPOSAL OF WASTE BATTERIES
(DIRECTIVE 2006/66/EC OF THE EUROPEAN PARLIAMENT AND THE
COUNCIL OF EUROPEAN UNION) (FOR EUROPEAN CUSTOMERS ONLY)
Batteries bearing any of these symbols indicate
that they should be treated as “separate collection”
and not as municipal waste. It is encouraged that
necessary measures are implemented to maximize
the separate collection of waste batteries and
to minimize the disposal of batteries as mixed
municipal waste.
End-users are exhorted not to dispose waste
batteries as unsorted municipal waste. In order to
achieve a high level of recycling waste batteries,
discard waste batteries separately and properly
through an accessible collection point in your
vicinity. For more information about collection and recycling of waste batteries,
please contact your local municipality, your waste disposal service or the point of
sale where you purchased the items.
By ensuring compliance and conformance to proper disposal of waste batteries,
potential hazardous effects on human health is prevented and the negative
impact of batteries and waste batteries on the environment is minimized, thus
contributing to the protection, preservation and quality improvement of the
environment.
ENGLISH

GETTING STARTED
SAVE THE PACKAGING
QUICK START
WHAT’S IN THE BOX
Included Accessories
Please save the box and all of the packaging in which your BSW 150 arrived.
Should you need to transport your BSW150 to another location this is by far the
safest container to do so. We’ve seen too many otherwise perfect components
damaged in transit for lack of a proper shipping carton, So please; Save the box.
This simple guide will help you get started with your BSW150.
Your BSW150 can be connected to your network via Wired Ethernet or WiFi
connection.
Important Setup Notes
• Connect ethernet cable(not supplied) to BSW150’s RJ45 connector on
back.
• Tablets, smartphones and other applicable devices that support iOS (Apple)
or Android operating system can be used as mobile device Controller.
These devices are not supplied with your BSW150.
• Download and install the corresponding “BluOS Controller” App for your
device.
• The BluOS App is available as a Mobile App for Android, iOS, Kindle and
Desktop App Windows and macOS Computers.
• Mobile Apps are handled by the respective Application Store of the Mobile
devices.
Packed with your BSW150 you will find
• Quick Setup Guide
Magnetic Rubber Feet
Wall Mount Bracket
ENGLISH

INPUT SERVICE 100-240V~50/60Hz USB SERVICE LAN USB
WIRELESS POWERED SUBWOOFER
2
1
3
4 5 76 8 99 1110
1STATUS INDICATOR
Below is a table of the LED blink codes and their corresponding descriptions.
LED BLINK CODE DESCRIPTION
Short blue flash, then red Powering up, rebooting the unit
Solid green Hotspot Mode
Flashing green Connecting to Network
Long blue flash, short purple flash Connected to Network - ready to be paired
White pulse Software update available
Solid red Upgrade mode
Alternate flashing red and green Upgrading
Flashing blue Mute mode
Solid blue Connected to Network – ready to use with BluOS App
Flashing red Factory reset in progress
+/- VOLUME : Toggle either button to vary volume level. When the BSW150 is network-paired to another
Player, the volume buttons act as a +/- dB trim in relation to the primary Player’s volume level. When the
BSW150 is not network-paired to another Player, the volume buttons control the full volume range of the
BSW150.
2
IDENTIFICATION OF CONTROLS
ENGLISH

6
FUNCTION BUTTON :
A) TOGGLE SUB ON/OFF: When the BSW150 is network-paired to another Player, pressing the Function
Button once will toggle the Player’s Subwoofer ON/OFF switch in the BluOS App. With the switch set to
ON, a crossover is engaged: the BSW150 will handle the low frequency while the paired Player will handle
the higher frequency content, as dictated by the crossover level. With the switch set to OFF, the crossover is
disengaged and the paired Player handles the full frequency range. The BSW150 will be silent in this case.
Note that using this toggle does not unpair the BSW150 from a Player. Further, this function does not work
when multiple BSW150 are paired to a Player.
B) STANDBY: Press and hold the Function button for 5 seconds to place the BSW150 into Vacation Mode
(0.5W Standby). In Vacation Mode, all network activity will cease and the subwoofer will not appear in the
BluOS App. Press the Function button again to restore the BSW150 to Ready Mode.
C) UPGRADE MODE: To manually place the BSW150 into Upgrade Mode, first disconnect it from electrical
power. Wait a moment, then reconnect power. Press and hold the Function button until the LED turns Green
and then back to RED, then release. The LED will immediately turn Green and then back to Red. The BSW150
is now in Upgrade Mode. This is only necessary in specific cases with authorization from a Bluesound support
representative.
D) FACTORY RESET – more information on Factory Reset is available on page 9 of this manual.
MOUNTING FOOT : The BSW150 can be placed in several orientations, including (but not limited to) laying
flat on its back or mounted to the wall. The back panel Mounting Foot (x4) provides the necessary cushion
to help prevent unwanted vibrations when the BSW150 is laying on its back. The Mounting Foot is also the
attachment point for wall mounting; the shaped groove in the Mounting Foot slides onto the rubber foot on the
supplied wall mount bracket and uses gravity to lock into place.
LOW/LINE LEVEL INPUT : For connecting the BSW150 via wire to another Bluesound Player that has a wired
SUB OUT, or alternatively to a separate component preamplifier, integrated amplifier, or receiver, at line level.
SERVICE : Use the Service port in conjunction with USB (Type B Mini) to load firmware on the BSW150. This
is not for consumer use. Only Authorized Bluesound Service personnel can access this USB port and Service
control button.
AC MAINS INPUT : Select the AC power cord appropriate for your region (included). Before connecting the plug
to the wall outlet, firmly connect the other end of the AC power cord to the BSW150 AC Mains input socket.
Never force the plug into a wall outlet. An adaptor may be necessary in certain regions. Always disconnect the
plug from the wall outlet first, before disconnecting the cable from the BSW150 AC Mains input socket.
USB (TYPE B) : Use the Service port in conjunction with USB (Type B Mini) to load firmware on the BSW150.
This is not for consumer use. Only Authorized Bluesound Service personnel can access this USB port and
Service control button.
USB (TYPE A) : Use the USB (Type A) port for manual software upgrades. This is only necessary in specific
cases with authorization from the Bluesound Support Crew.
LAN PORT : The LAN port connection is used with an Ethernet cable (not provided) for network connection
and control. This is an optional connection since the BSW150 can be connected to the network through Wi-Fi.
If you are using wired Ethernet for network, connect one end of the Ethernet cable to the BSW150 LAN port,
and the other end directly to your router or switch.
MAGNETIC RUBBER FEET : When the BSW150 is placed in a standing position, use the supplied magnetic
rubber feet (x2) to help prevent unwanted vibrations. The magnets are mounted inside the cabinet of the
BSW150. Simply place the magnetic rubber feet near the required location and they will snap into place.
3
4
5
7
6
8
9
10
11
ENGLISH
IDENTIFICATION OF CONTROLS

Room Acoustics
If you are critical about low-frequency response, there’s quite a bit of useful experimentation you can do, especially
in combination with the crossover, level, and phase controls of the BSW150.
Begin by considering the size of the listening room. The larger the volume of air a speaker must move, the more
acoustic output is required to achieve the sound levels you want. In smaller rooms, sound attenuation tends to be
offset by reinforcement from wall reflections. In larger spaces, sound has to travel to reach the reflecting surfaces
and then to your ears, which means it has to be louder to begin with.
After size, the most important aspect of a listening room is its shape. In any room, sound reflects off the walls,
ceiling, and floor. If the distance between two opposite parallel surfaces is a simple fraction of the wavelength of
a particular frequency, notes of that frequency will bounce back and forth in perfect phase—an effect called a
standing wave or room mode. At some point in the room, this note will be reinforced substantially; at others it will
cancel out almost entirely. If the prime listening seat is placed at either of these locations, the note will be a horrible
boom or virtually non-existent. Almost all rooms are susceptible to some standing waves at low frequencies, but
careful positioning of the speakers and the listening seat can minimize the effects. The only way to find out what
works best is by experimentation. Positioning of a bass speaker has almost no impact on imaging, so the BSW150
can be positioned almost anywhere.
Subwoofer Placement
The loudest bass output from a subwoofer comes from corner placement. The outward flaring of walls from a corner
focuses low frequencies, giving them no place to go but toward the listener.
If you are seated in a null spot where sound from the BSW150 is canceled or diminished by out-of-phase
reflections, you will have to move either the subwoofer or your listening position until you get the desired bass.
Adjusting the phase control 180 degrees may make a difference, especially if the null is a product of cancellations
caused by interaction with low frequencies from your main speaker(s). If the opposite is happening, where direct and
reflected bass waves converge in phase and produce too strong a peak at your listening position, you can change
position or change your sub’s level control (or possibly the crossover frequency chosen).
The best method for positioning the BSW150 is to put it in your listening chair, then play music with lots of bass
through the system (something with steady and obvious low frequencies). Move around the room and note where
the bass sounds best; if you place the BSW150 in that location, you should get the same bass performance. This
test only works if you have your ears at the same height as where the BSW150 will be, so you may have to get
down low. A recommended starting point for placement would be in either of the front corners of the room.
Multiple Subwoofers—Why Two Subs Are Better Than One
Sometimes the listening room is not conducive to achieving satisfying amounts or quality of bass. There are rooms
with troublesome dimensions, especially those that are more cubical. In such a case, two subwoofers placed
carefully to work with each other are recommended to handle acoustical anomalies. This can also be applied when
the problem is too much, or too uneven, bass. The overall system benefits from each subwoofer correcting the
acoustic problems caused by the other.
A very good starting point for positioning two subwoofers is to place one each on the centre of opposing walls.
Experimenting with positioning as previously described should be used for determining the location of the second
subwoofer, except in this instance one is listening for the minimum amount of bass output.
7
ENGLISH
CHOOSE PLACEMENT

There are several ways to connect the BSW150 to your audio system.
Wired Network Connection
To use the BSW150 wired to your network, you need to connect it via Ethernet to your router or switch. An Ethernet
cable is not included in the box.
Follow the steps in the Quick Setup Guide to get your BSW150 positioned and powered on. Open the BluOS App
on your phone or tablet. In the right-hand Player Drawer, select Add A Player, and when prompted, select Add
Subwoofer. Follow the guided wizard to add your BSW150 to the network and ensure it upgrades to the latest
BluOS firmware.
Once connected and updated, your BSW150 will show up as ‘Unpaired’ in the My Subwoofers section of the Player
Drawer. The LED indicator on the BSW150 flashes long Blue and short Purple when it is on the network and ready
to be paired. Select the Link/Pairing icon to open the Pairing wizard and select the Player you want to pair with
your BSW150.
The BSW150 is now paired and ready to use. You can access advanced audio controls through the Audio Settings
menu of its paired Player.
Wireless Connection
The BSW150 is also designed as a wireless subwoofer solution to be used with other Bluesound Players. To use
the BSW150 wirelessly, you need to connect it to your desired network. A simple App-based process will help you
connect your BSW150 and pair it with another Bluesound Player.
Follow the steps in the Quick Setup Guide to get your BSW150 positioned and powered on. Open the BluOS App
on your phone or tablet. In the right-hand Player Drawer, select Add A Player, and when prompted, select Add
Subwoofer. Follow the guided wizard to add your BSW150 to the network via Wi-Fi and ensure it upgrades to the
latest BluOS firmware. This can take a few minutes.
Once connected and updated, your BSW150 will show up as ‘Unpaired’ in the My Subwoofers section of the Player
Drawer. The LED indicator on the BSW150 flashes long Blue and short Purple when it is on the network and ready
to be paired. Select the Link/Pairing icon to open the Pairing wizard and select the Player you want to pair with
your BSW150.
The BSW150 is now paired and ready to use. You can access advanced audio controls through the Audio Settings
menu of its paired Player.
Analog Low/Line Level Connection
The BSW150 has been designed to allow you to use an analog RCA cable to connect for sound, instead of sending
audio over your network. If you are using your BSW150 with a receiver or integrated amplifier with preamplifier
outputs, or if you are using a separate preamplifier, the best connection is from the Preamplifier Output of your
electronics to the RCA Input of the BSW150.
The BSW150 will work with a simple low/line level RCA. However, to pair with another Player and use the
advanced audio controls via the BluOS App, you must connect it to the network via Ethernet or Wi-Fi, even if you
will transmit audio to the BSW150 via RCA cable.
Please see the previous Wireless and Wired connection information for more details on setting up your subwoofer
via WiFi or Ethernet.
8
ENGLISH
CONNECT FOR SOUND

The settings in the BSW150 have been set to default levels in order to work well with your Bluesound Player in
most listening environments. However, you may still require some adjustments to the settings based on placement
and personal preference.
The following procedure assumes your BSW150 is installed, connected to the network, and paired with a Player. If
you are using the BSW150 as a non-networked, powered subwoofer, your ability to do next-level calibration will be
limited.
With the Subwoofer audio settings menu open in the BluOS App, use these steps to fine-tune your subwoofer setup.
1. Set BSW150 volume to the lowest possible level. Set the crossover frequency to the lowest level,
meaning the crossover slider is set all the way to the left side. Set any special audio features, bass and
treble, or EQ controls on your paired Player to their nominal (midpoint or off) positions.
2. Play a familiar music source that includes substantial deep-bass content over an extended section.
3. Gradually turn up the volume of the BSW150 until you achieve natural balance between the
subwoofer’s deep-bass output and your speaker(s).
4. Gradually adjust the crossover up to reach the best mid-bass blend with your speaker(s). This will be
the point at which the upper bass retains solid impact and fullness. Boom or muddiness is the result
if the crossover is too high. A thin, ‘reedy’ quality to the mid-bass such as deep male voices (FM
announcers; Darth Vader) is the result if the crossover is too low.
5. Toggle the Phase control between 0° and 180° several times, leaving it in the position that yields
the fullest low to mid-bass output. You will now likely want to repeat steps 3 and 4 to check your
subwoofer blend.
Cycling through steps 3 and 4 several times with slightly different settings of both the volume and crossover
controls will help you get the most musical performance from your BSW150. The best combination is one that
yields the most solid very-low bass sounds, without mid-bass boom or a gap in response between the BSW150 and
other speaker(s).
The crossover and volume controls are interactive. Raising the latter while lowering the former can have the effect
of extending deep-bass response somewhat, with a small sacrifice in overall loudness capability. In general, for
well-recorded acoustic music the lowest crossover setting that still yields a smooth transition between subwoofer
and the main speaker(s) is often the best choice, and will promote deeper low-bass extension.
Note: The BSW150 volume control is not intended as a bass boost or daily volume control. It is designed as a set-
and-forget adjustment, and not for day-to-day use.
9
ENGLISH
NEXT-LEVEL CALIBRATION

Symptom Action
No sound
10
Ensure the power cord is connected to the subwoofer and plugged into a live AC
outlet.
The BSW150 utilizes signal sensing auto on/off circuitry. If no signal is sent
to the subwoofer, it will not power up. When using the subwoofer output of a
receiver or processor, no signal may be immediately present in this output. The
subwoofer will only power up when bass signal appears at the subwoofer input.
If the wireless connection or low level cable is poor or has been severed, the
subwoofer may not make a sound.
Lower volume if the subwoofer begins to sound distorted to determine if
playback at a lower level solves the problem. If a slight reduction in level solves
the problem, then the subwoofer level was too high. If the distorted sound
remains at a low level, the driver may be damaged.
Hum that appears when using the BSW150’s low level input(s) is usually caused
by using an inferior, damaged, exceptionally long low level cable or cables
routed near high current wiring/appliances. Replace/shorten the low level cable
connecting the subwoofer to the source equipment (receiver or processor). Low
level cable runs of longer than 20 feet may require the use of a line driver (not
available from Bluesound).
See your dealer if you require service. Authorized Bluesound dealers are equipped to handle almost all problems.
You may locate your nearest Bluesound authorized dealer online at www.bluesound.com. If the problem is not
resolved, please contact us, providing the model name, serial number, date of purchase, dealer name, and a full
description of the problem.
Hum
Sounds distorted
ENGLISH
TROUBLESHOOTING

FACTORY RESET
ENGLISH
WARNING!
THIS IS A FACTORY RESET OF YOUR PLAYER. ALL CUSTOMIZATION INCLUDING WI-FI
NETWORK CONFIGURATION, FILE SHARES AND SAVED PLAYLISTS WILL BE LOST. YOU WILL
HAVE TO RE-CREATE THESE ONCE COMPLETE. THIS PROCESS IS ONLY RECOMMENDED IF
YOUR PLAYER IS NOT FUNCTIONING AND AN INTERNET FIRMWARE UPGRADE HAS FAILED.
FOR ANY QUESTIONS OR CONCERNS CONTACT AN AUTHORISED BLUESOUND CUSTOMER
REPRESENTATIVE BEFORE PROCEEDING!
Steps to Factory Reset:
1. Disconnect the player from electrical power.
2. Wait 30 seconds.
3. Reconnect the power.
4. Once the LED turns Red, press and hold the Function button on the side of the player. The LED
will immediately turn Green and then back to Red – continue to hold the button for 30 seconds.
5. After 30 seconds, the LED will begin to blink red – then release the button.
6. All customization to the Bluesound player will be removed and restored to factory settings.
IMPORTANT: Removing your finger from the Function button at any time before the LED begins flashing
red will cancel the factory reset and leave the player in Upgrade Mode. Just start the steps again to factory reset
the player.
You will know the factory reset is successful if the player returns to Hotspot mode (wireless connection –
the LED will turn solid green). If the player is connected to your network through a wired Ethernet connection, it will
simply connect as if it was a new player (LED will turn solid blue).

ENGLISH
SPECIFICATIONS
456.65
300.00
www.bluesoundprofessional.com
©2020 BLUESOUND INTERNATIONAL
A DIVISION OF LENBROOK INDUSTRIES LIMITED
All rights reserved. Bluesound International, Bluesound Professional, Bluesound, the stylized wordmark and “B” logotype and all other Bluesound product names and taglines
are trademarks or registered trademarks of Bluesound International, a division of Lenbrook Industries Limited.
No part of this publication may be reproduced, stored or transmitted in any form without the written permission of Bluesound International.
BSW150 -OM-EN-V01-NOV 2020
Table of contents
Other Bluesound Subwoofer manuals
