Bobbin Gingersnap Administrator Guide

How to Assemble your Bobbin Junior Bike
Gingersnap / Moonbug models
All sizes

Introduction
Congratulations on getting a new Bobbin!
Parenting level = Elite
Assembling a Bobbin junior bike is really easy and fun.
It’s also a good chance to get to know how it works.
Allow 15-25 minutes to put your bike together and have it ready to ride.
Happy Cycling!

Tools
Your bike comes with a basic set of tools included. You will also need:
• Scissors
• Pump
• Phillips Screwdriver

Unpacking
• Stand the bike box upright. Make sure you have enough
space to work. Put your tools on a table.
• Remove the large staples from the box. Warning – they
are very sharp. Take care.
• Open the top of the box and pull the bike out.
• Place the bike upright on the oor, resting on its rear
wheel and front forks.
• Taking care not to scratch the paintwork, remove all the
packaging and tidy away.
• Turning the forks the right way around (front brake
points forwards). The forks should be curving slightly
forwards. Your bike now looks like this
Box contents

Chain case
• Gingersnap and Moonbug models 12-16” all use
an injection-moulded plastic chaincase to save
weight
• All chaincases feature a cut-out section
• The cut-out section can vary from model-to-
model, and can also look like this
• It is a necessary design feature to enable
assembly, and replacement if necessary
Box contents

Handlebars
a. Remove and discard the black plastic cap from
the bottom of the handlebar stem. Simply use
your allen key to loosen the bolt at the top of
the handle; the plastic cap will then pull o.
b. Insert the stem into the hole in the frame. The
‘minimum insertion line’ is marked on the stem.
Make sure the fork is the correct way round,
with front brake facing forwards not behind the
wheel.
c. Use your allen key to tighten the bolt on the top
of the handlebar. Make sure it is very tight.
d. You can adjust the angle of the bars. Horizontal
is best. Use your allen key to tighten the clamp
bolt. It is on the front of the stem. Make sure it
is very tight.
a. b.
c. d.

Front Mudguard
a. Using the 10mm spanner, unfasten the front
brake bolt nut.
b. Fasten the front mudguard behind the fork like
this.
c. Using a 10mm spanner, unfasten the nuts at the
bottom of the fork.
d. Attach the mudguard stays (metal arms) to the
fork, using these nuts.
e. If the mudguard is not aligned completely
straight, you can gently straighten it by hand.
Use a Phillips screwdriver to loosen the
attachment bracket at the back of the
mudguard, then re-tighten when the mudguard
is straight.
a. b.
c. d.

Front Wheel
a. Loosely t the nuts and washers to the front
wheel axle. There is a ‘tab’ on the washer. This
must point inwards towards the wheel.
b. The tyres have a “tread”. It’s best to have this
facing forwards.
c. Lower the fork onto the wheel.
d. The “tab” on the washer ts into the little hole
in the fork. Fasten the domed nuts with the
15mm spanner.
e. If you can’t t the tyre through the gap
between the brake pads, you will need to
loosen the brakes rst to t the wheel. See
page 16. Alternatively you can simply squeeze
the deated tyre with your ngers, so that is
ts through the gap. You can inate the tyre
later.
Spin the wheel to check it is straight.
a. b.
c. d.

Saddle
a. Insert the seat post into the frame
Warning! Don’t exceed the minimum insertion
mark.
b. Tighten the seat collar using the allen key.
“What is the correct saddle height?”
Sitting on the saddle, the rider should be able to
touch the oor with their toes. Lower = harder to
ride!
IMPORTANT! As with all your adjustments, check
all bolts are secure and tight before riding.
a. b.
b.

Pedals
IMPORTANT! Left and Right pedals are NOT THE SAME.
Fitting them on the wrong side will break the crank. The
pedals should go in easily; if not STOP! Check you have
the correct pedal and check you are screwing in straight
not at an angle.
If you have any bike grease, apply a little to the thread of
each pedal before you attach them.
“R” is for right. This goes on the CHAIN SIDE of the bike.
“L” is for left. This goes on the OTHER SIDE OF THE BIKE.
• Fit the the“R” pedal to the right side crank arm with
your ngers and turn gently in a clockwise direction.
• Once it is loosely tted tighten securely with a 15mm
spanner.
• Fit the “L” pedal to the LEFT side crank with your
ngers and turn gently in an anti-clockwise direction.
Once it is loosely tted tighten securely with a 15mm
spanner.
LEFT RIGHT
LEFT
RIGHT
LEFT SIDE
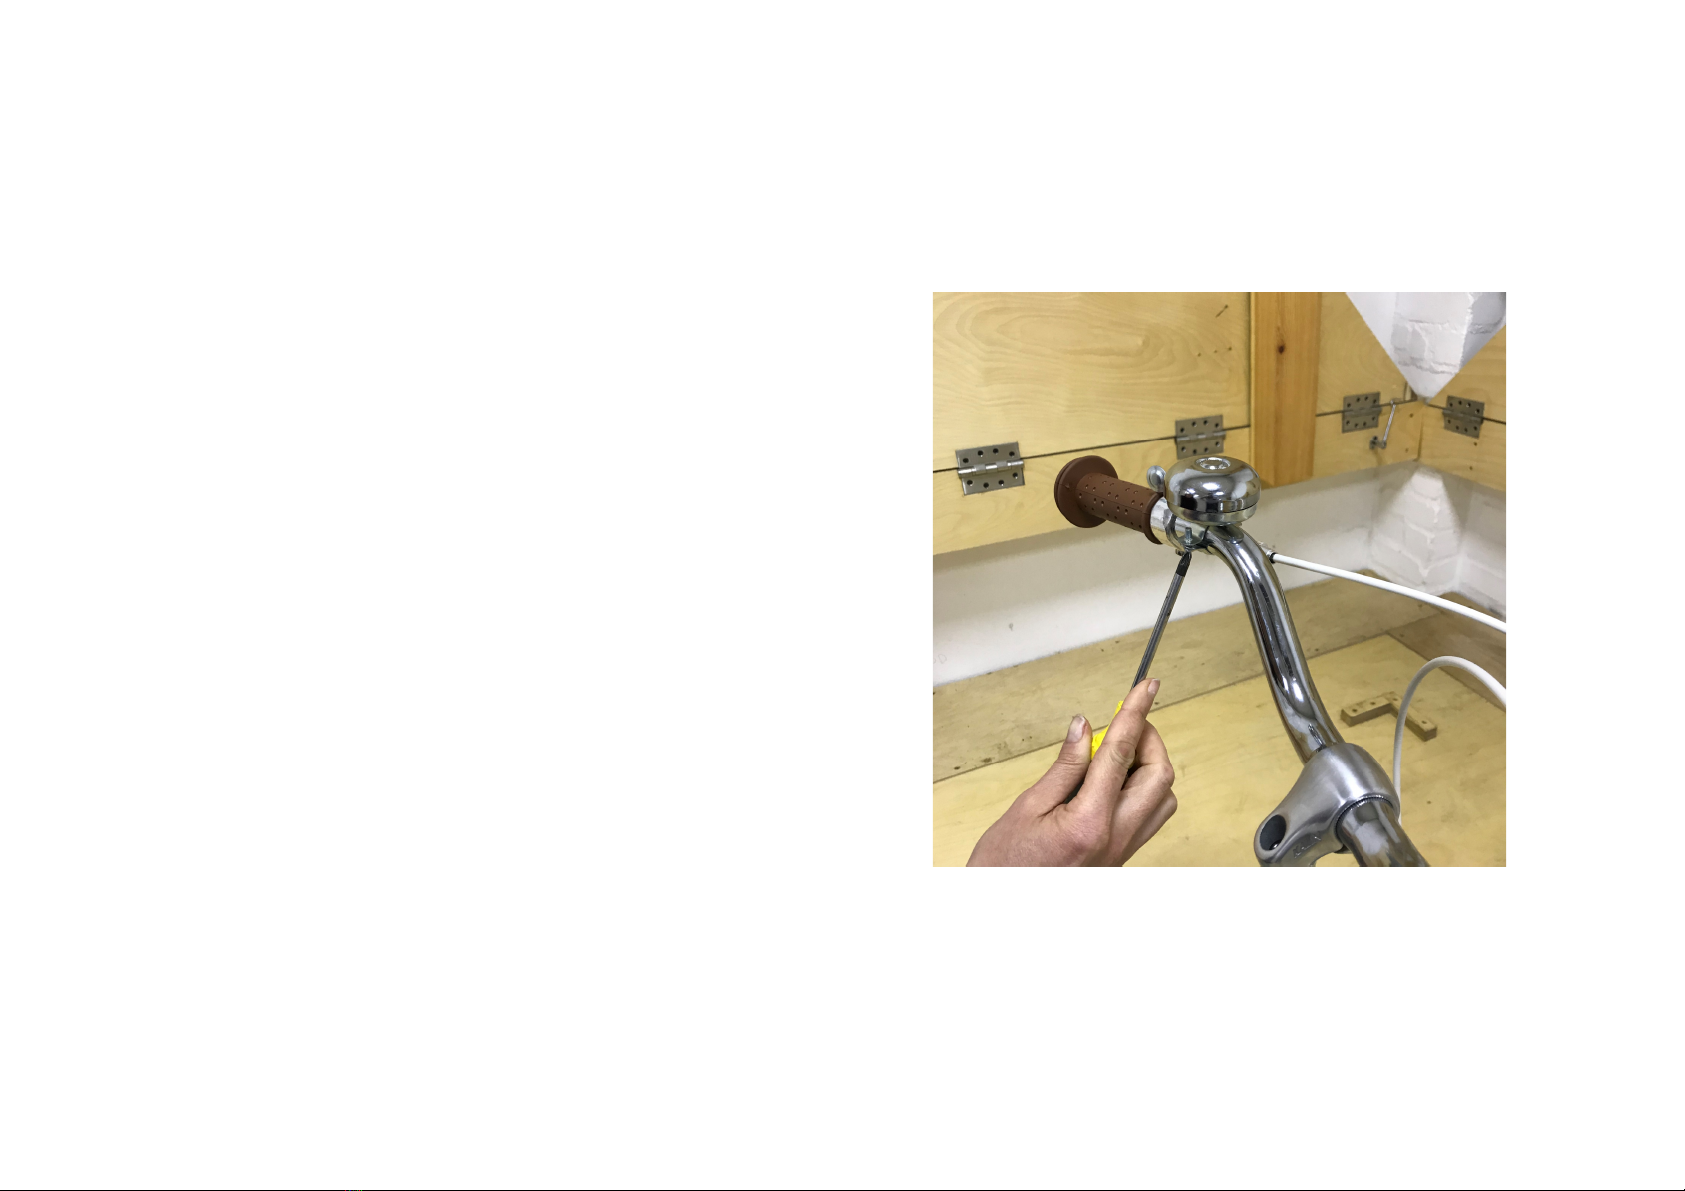
Bell
• The bell goes on the left hand side of the
handlebars.
• The bell is tted with a Philips screwdriver.

Basket
12”, 16” and 20” bikes
• Your basket is tted to the handlebars using the
straps provided.
• Make sure the straps are tight and the basket is
not touching the front wheel/mudguard.
• Wicker baskets are hand-made from natural
materials. They may not be uniform. Each basket
is dierent and this is part of their charm.
• Note: they can carry small light items but not
heavy items. Overloading or dropping may
cause splitting.

Basket – Gingersnap 24”
• Fit the support legs on the front wheel axle,
using the 15mm spanner to remove then re-
tighten the wheel nuts.
• Attach the bracket base plate onto the base of
the basket, about 5cm from the front of the
basket.
• Tighten up the bracket base plate so that the
legs are held securely onto the bottom of the
basket.

Basket – Gingersnap 24”
…continued
• Attach the 2nd support plate onto the back of the
basket. This ts onto the bracket mounted on
the bike’s head tube.
• Tighten up both brackets.

Fitting Stabilisers (training wheels)
- Go to p.16 if you have the nut & bolt attachment
versions
• Attach the stabiliser wheel bolt at the back using a
12mm spanner.
• Tighten the front bolt using an allen key.
• Remove rear wheel bolt on the bike using a 15mm
spanner. Pull othe loop of the mudguard stay
(arm).
• Attach the stabiliser arm to the wheel axle.

Fitting Stabilisers (training wheels)
…continued
• Re-attach the mudguard stay and re-attach the
wheel bolt on top.
• Tighten the wheel bolt securely with the 15mm
spanner.

Attach wheel to stabiliser leg and tighten nut on reverse using 12mm spanner.
Tighten the nut on reverse using a 12mm spanner (1), holding the nut on front (2) with either a 12mm
socket spanner or pliers. Be careful to not strip the nut. Then go back to page 15 for instructions.
1. 2.
Nut & Bolt Attachment Stabilisers ( if you do not have allen key ones)
2.

Adjusting the brakes
If you need to adjust the brakes, there are 3 ways
to it:
• Use a 10mm spanner to adjust cable tension
(image 1 & 2). Pulling the cable through makes
the brakes sharper.
• Using your ngers, adjust the barrel adjuster
(image 3). Turning anti-clockwise makes the
brakes sharper.
• Using your ngers, adhust the 2nd barrel adjuster
at the brake levers. Turning anti-clockwise
makes the brakes sharper. (image 4)
When the brake is applied, the wheel should lock
without you having to squeeze the brake lever too
much.
1.# 2.#
3.# 4.#

Adjusting the Gears
Gingersnap 20” and Gingersnap 24”
The gears will probably not need adjustment
straight away, however after a few weeks of riding
the gear cable will loosen a little and they may
need adjustment then. This is completely normal
on all bikes using derailleur gears and is not a fault.
Adjustment is simple.
Before you begin the adjustment, click through the
gears so that the chain is on the smallest cog.
• Turn the barrel adjuster ¼turn to the left (anti-
clockwise if viewed from the rear of the bike)
• Click through the gears again to check
everything is smooth. Turn ¼again if necessary.

Recommended Maintenance
• Check that the tyres are inated regularly
• To keep your Bobbin running beautifully we
recommend regular servicing with a qualied
mechanic
• Keeping your Bobbin clean and serviced will
signicantly extend the life of your bike and
makes for happier cycling all around. (For more
information on servicing and maintenance
please check your user manual) .
This manual suits for next models
1
Table of contents
Other Bobbin Bicycle manuals


