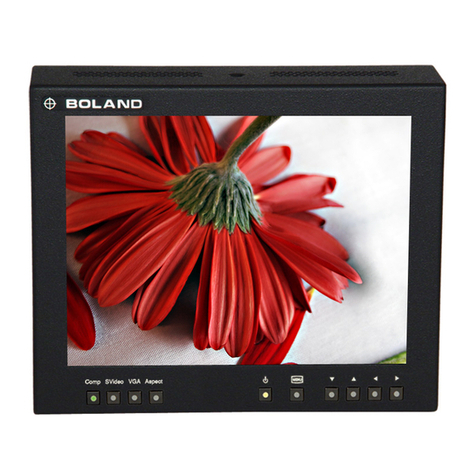
Boland BVB07 User manual

User Manual 1 of 24
High-Definition Serial Digital Interface
High Bright / 2-Way Cross-Conversion Monitor
BVB07 User Manual
BVB07, BVB07a, BVB07b

User Manual 2 of 24
CAUTION ...................................................................................................................................................... 4
FEATURES ................................................................................................................................................... 6
CONTROLS, INDICATORS AND CONNECTIONS ..................................................................................... 7
BVB7 FRONT............................................................................................................................................... 7
BVB7 REAR................................................................................................................................................. 7
FRONT KEYS OPERATIONS ........................................................................................................................... 8
REAR PANEL .............................................................................................................................................. 9
MENU BASIC OPERATION ....................................................................................................................... 10
TO SHOW AND REMOVE THE MENU .............................................................................................................. 10
TO GO TO THE NEXT LEVEL.......................................................................................................................... 10
TO GO BACK TO THE PREVIOUS LEVEL.......................................................................................................... 10
TYPICAL MENU OPERATION ........................................................................................................................ 10
TURNING ON THE MONITOR ........................................................................................................................ 10
VOLUME ADJUSTMENT................................................................................................................................ 10
ON SCREEN MENUS LANGUAGE SELECTION ................................................................................................ 11
HOW TO SELECT VIDEO SOURCE BY OSD................................................................................................... 11
PICTURE MENU ......................................................................................................................................... 12
VIDEO MENUS OF EACH INPUT MODES ......................................................................................................... 12
ADJUST ..................................................................................................................................................... 12
COLOR TEMPERATURE CONTROL................................................................................................................ 12
SCAN ....................................................................................................................................................... 12
ASPECT RATIO ........................................................................................................................................... 13
ZOOM ........................................................................................................................................................ 13
PICTURE OPTION........................................................................................................................................ 13
PIP (PICTURE IN PICTURE)......................................................................................................................... 14
DUAL LINK MODE (SDI ONLY) ..................................................................................................................... 15
PEAKING FILTER......................................................................................................................................... 15
MAX BRIGHTNESS ...................................................................................................................................... 15
BACK LIGHT ............................................................................................................................................... 15
AUDIO MENU ............................................................................................................................................. 16
AUDIO OUTPUT .......................................................................................................................................... 16
AUDIO SELECTION...................................................................................................................................... 16
SDI OUT .................................................................................................................................................... 16
VOLUME .................................................................................................................................................... 16
DISPLAY MENU ......................................................................................................................................... 17
MARKER .................................................................................................................................................... 17
WAVEFORM ............................................................................................................................................... 17
LEVEL METER ............................................................................................................................................ 17
TIME CODE................................................................................................................................................. 18
CAPTION.................................................................................................................................................... 18
OSD SET .................................................................................................................................................. 18
U.M.D ....................................................................................................................................................... 19
INPUT I.D................................................................................................................................................... 19
VIDEO RANGE ............................................................................................................................................ 19
REMOTE MENU.......................................................................................................................................... 20
GPI CONTROL &GPI # .............................................................................................................................. 20

User Manual 3 of 24
SETUP MENU ............................................................................................................................................. 21
SETUP LOAD &SETUP SAVE....................................................................................................................... 21
FUNCTION SWITCH ..................................................................................................................................... 21
CONTROL................................................................................................................................................... 21
COMMUNICATION........................................................................................................................................ 22
IP CONFIG ................................................................................................................................................. 22
SCREEN SAVER.......................................................................................................................................... 22
SYNC CHECK PERIOD................................................................................................................................. 22
SDI OUT /HDMI OUT ................................................................................................................................ 22
INFO MENU ................................................................................................................................................ 23
INPUT SUPPORT MODE............................................................................................................................ 23
SUPPORT SIGNALS..................................................................................................................................... 23
SUPPORT TIMINGS ..................................................................................................................................... 23
MECHANICAL DIMENSION ....................................................................................................................... 24
BVB7 ........................................................................................................................................................ 24

User Manual 4 of 24
Caution
Before operating the set, please read this manual carefully.
WARNING:
To reduce the risk of electric shock does not remove cover (or back). No user serviceable parts inside.
Refer servicing to qualified service personnel. To prevent fire or shock hazard, do not expose the rear of
the set to rain or moisture. Do not rub or strike the Active Matrix LCD with anything hard as this may
scratch, mark, or damage the Active Matrix LCD permanently.
Unauthorized tampering with the inside of the monitor invalidates the warranty.
The manufacturer shall not warrant for any damage caused by improper maintenance and/or repair. Work
by third parties.
Important safeguards for you and your new product:
Your product has been manufactured and tested with your safety in mind. However, improper use can
result in potential electrical shock or fire hazards. To avoid defeating the safeguards that have been built
into your new product, please read and observe the following safety points when installing and using your
new product and save them for future reference.
Read Instructions
Follow Instructions
All operating and use instructions should be followed.
Retain Instructions
The safety and operating instructions should be retained for future reference.
Heed Warnings
All warnings on the product and in the operating instructions should be adhered to.
Cleaning
Disconnect the unit from the electricity supply before cleaning. Do not use abrasive cleaners. Use a damp
cloth for cleaning.
Water and Moisture
Do not use this apparatus near water.
Transporting Product
A product and cart combination should be moved with care. Quick stops, excessive force and uneven
surfaces may cause the product and cart combination to overturn.
Attachments
Do not use attachments not recommended by Boland as they may cause hazards.
Ventilation
Do not block any of the ventilation openings.
Install in accordance with the manufacturer¶s instructions.
Power Sources
This product should be operated only from the type of power source indicated on the marking label. If you
are not sure of the type of power supply to your home, consult your supplying dealer.
Power Lead Polarization
This product is equipped with a three-wire grounding-type cord. This is a safety feature. Do not defeat the
safety purpose of the grounding-type cord.
Power Cord Protection
Power-supply cords should be routed so that they are not likely to be walked on or pinched by items
placed upon or against them, paying particular attention to cords at plugs, convenience receptacles and
the point where they exit from the product.
Outdoor Cable Grounding

User Manual 5 of 24
Caution
If an outside antenna or cable system is connected to the product, be sure the antenna or cable system is
grounded so as to provide some protection against voltage surges and built-XSVWDWLFFKDUJHV$³IDFH
SODWH´DOVRQHHGVWREHLQVWDOOHGZLWKDQLVRODWLQJFDpacitor to prevent any damage from static.
Lightning
For added protection for this product during a lightning storm, or when it is left unattended and unused for
long periods of time, unplug it from the wall outlet and disconnect the antenna or cable system. This will
prevent possible damage to the product due to lightning and power-line surges.
Power Lines
An outside antenna system should not be located in the vicinity of overhead power lines or other electric
light or power circuits, or where it can fall into such power lines or circuits. When installing an outside
antenna system, extreme care should be taken to avoid contact with such power lines or circuits, as
contact with them might be fatal.
Earthing the product
This product must be earthed properly to comply with the safety regulations in the country of use. If you
are unsure of these regulations, please consult a qualified electrician.
Servicing
Do not attempt to service this product yourself as opening or removing covers may expose you to
dangerous voltages or other hazards. Refer all servicing to qualified service personnel. If the Set does not
operate properly, switch it off and call your dealer.
Damage Requiring Service
Isolate this product from the mains supply and refer servicing to qualified service personnel under the
following conditions:
If the power-supply cord or plug is damaged.
If the glass front has been damaged.
If there is ingress of water between the glass and the LCD screen.
If the product does not operate normally by following the operating instructions. Adjust only those
controls that are covered by the operating instructions as an improper adjustment of other controls
may result in damage and will often require extensive work by a qualified technician to restore the
product to its normal operation.
If the product has been dropped or the cabinet has been damaged.
If the product exhibits a distinct change in performance.
Safety Check
Upon completion of any service or repairs to this product, ask the service technician to perform safety
checks to determine that the product is in proper operating condition and the front seal is intact.
Mounting
The product should be mounted on a wall only as recommended in the instructions.
Power
Thisset operates on a DCsupply; the voltage is as indicated on the label on the Monitor.

User Manual 6 of 24
Features
This product is the multi-format Digital LCD Panel to display various kinds of digital video input signal as
HD/SD-SDI/DVI/HDMI Digital and analog signal such as Composite/S-Video/RGB/PC-RGB/ Component.
This is also High Definition Broadcasting Monitor which can make it available to do output of stable video
signal with the menu of considering convenient user interface and the easy control for brightness and
color, and by EQ function of HD-SDI input part.
3G/HD/SD SDI 2 Inputs / 1 Output.
2-Way Cross Conversion (SDI to HDMI / HDMI to SDI)
High Brightness LCD Panel (LED backlight)
:$9()250(Y.Cb.Cr / G.B.R Parade) & Vector Scope & Histogram (SDI/HDMI Only).
16 ch Audio Lever Meter Display. (SDI only)
$QDORJ'LJLWDO6LJQDO$XGLR/HYHU0HWHU'LVSOD\
- Lever Meter Position/Scale display selectable
'XDO/LQN02'(S&RPSDWLEOH
Closed caption. (CEA608 & 708, SDI Only)
+9'HOD\
$XGLR'LVHPEHGGHU,QWHUQDO6SHDNHU0RQLWRURXW
&RORU7HPSHUDWXUH± User, VAR, 9300K, 6500K, 5400K, 3200K
2YHU6FDQ=HUR6FDQ8QGHU6FDQ3L[HOWR3L[HO
3,33LFWXUH,Q3LFWXUH3,3%OHQG
Tally LED function (Green/Red/AMBER)
+'0,+'&3IXQFWLRQ
6LQJOHERDUGLVVXLWDEOHIRUPRXQWLQJEHKLQGDQ/&'SDQHO
6XSSRUWHGRS-232C.
6XSSRUWHG([WHUQDO*3,&RQWURO5--45).
26'*UDSKLFEDVHG26'6 Languages (UNICODE System).
/&''LPPLQJ&ontrol
- Manual Dimming Level Control.
UMD
Auto Calibration: CA-310 (Minolta), K-10 (Klein)
10bits 3D LUT Color Calibration (BT.709, SMPTE-C, EBU, NTSC, D-Cinema) (optional)
ETHERNET: Network System Controller / Update
Time code Display.
Marker Display.
Peaking Filter/Zoom function/False Color

User Manual 7 of 24
Controls, Indicators and Connections
BVB7 Front
F4
DOWN
SEL/INPUT
SPEAKER_R
MENU
F3
Composite
F2
SDI2
SDI1
STANDBY
HDMI
F1
ADJUST
UP
SPEAKER_L
BVB7 Rear
AUDIO IN
HDMI IN
SDI OUT
SDI 1 IN
HDMI OUT
AUDIO OUT
SDI 2 IN
COMPOSITE
DC 12V IN
GPI
ETHERNET
UPDATE
RS232C
See Next Pages >>


Pin Signal Description
1
2RX Rx(PC to Monitor)
3TX Tx(Monitor to PC)
4
5 GND SIGNAL GROUND
6
7
8
9
Pin Signal Description
1GPI1 PORTGPI1 Control (Menu Selected)
2GPI2 PORTGPI2 Control (Menu Selected)
3GPI3 PORTGPI3 Control (Menu Selected)
4GPI4 PORTGPI4 Control (Menu Selected)
5GPI5 PORTGPI5 Control (Menu Selected)
6GPI6 PORTGPI6 Control (Menu Selected)
7GPI7 PORTPowerOn/Off Only (Fixed)
8GND COMMON(GND)
PinSignalDescription
1TxD- TxD- (Monitor to Controller, Not Used)
2GND
SIGNALGROUND
3RxD+ RxD+ (Controller to Monitor)
4RxD- RxD-(Controller to Monitor)
5-
6TxD+ TxD+ (Monitor to Controller, Not Used)
RJ-11 6P MALE
RS-232 / GPI / RS-422 PIN Assignment
1.RS-232Connector
D-sub 9P MALE
RS-232 SERIAL CONTROL PC CONNECTION
2.GPI Connector (Contact Closure to Ground)
RJ-45 8P MALE
3.RS-422Connector (UMD/IMD)
Monitor
PC
Contact Point Switch
It is possible to attach
pin one by one.
6
5
4
3
2
1
6
5
4
3
2
1
7
8
boland
RS-232,GPI,RS-422_PIN_Assignments.pdf 9 Feb 18 mb


User Manual 8 of 24
Controls, Indicators and Connections
Front Keys Operations
zSTANDBY
Power On/Off Button. This button is operated after being pressed about 3 seconds.
zSDI 1 / SDI 2
Select SDI 1/ SDI 2 source directly
zHDMI
Select HDMI source directly
zComposite
Select ANALOG source directly
zFUNCTION 1 ~ 4
Executes functions of user selected
(Undefined, Scan, Marker, Level Meter, Waveform, Aspect, Time Code, Color Only, Audio Group,
Audio Channel, Audio mute, Still image, Caption, False Color, Aspect/Area Marker, PIP func & Input,
Zoom, Gamma Select, WFM Line Select, Peaking Filter, Max Brightness)
zMENU
Activates main OSD menu
Navigates higher menu in main OSD menu
Exits OSD menu
zDOWN
Decreases sound volume of speaker
Decreases values of user menu in main OSD menu
Executes function (by OSD help commands) in main OSD menu
zUP
Increases sound volume of speaker.
Increases values of user menu in main OSD menu
Executes function (by OSD help commands) in main OSD menu
zSEL/INPUT
Activates OSD menu of input source selecting
Changes input source by selecting
Executes functions (by OSD help commands) in main OSD menu
Activates child menu
zADJUST
Adjust Picture Menu (Volume ->Brightness -> Contrast -> Color -> Sharpness->Phase & Tint-
>Backlight Adjust ->Max Brightness)
Turn Right (with µUP' button is same)
Turn Left (with µDOWN' button is same)

User Manual 9 of 24
Controls, Indicators and Connections
Rear Panel
zSDI 1/SDI 2 IN
3G / HD / SD SDI Input
zSDI OUT
SDI to SDI Out / HDMI to SDI Out
zRS-232C IN
Update /Auto color calibration
zHDMI
High Definition Multimedia Input
zCVBS1 In
CVBS1 Input
zAUDIO IN
CVBS1 Sound Input
zAUDIO OUT
AUDIO MONITOR OUT
zETHERNET
Network System Control/ Firmware Upgrade
zGPI
GPI 1 ~ 7 Control Port
zDC 12V IN
PIN NO
Description
1
+ 12V
2
GND
3,4
+ 12V
-
+
LEMO 8 PIN
DC 12v Power, Composite Video, Tally*(Tri-State**, Hi or Lo = ON)
*Tally: Red LED light at top of screen.
**Tri-State: The tally pin on the Lemo rests at +1.7 volts (open circuit). Exerting either a Gnd or +5v onto the pin causes the
Tally to light. The Lemo's pin assignments are marked on the back of the cabinet. Experiment on one of the monitors.

User Manual 10 of 24
MENU Basic Operation
In this menu system, there are several ways to customize the menu settings provided.
Most menus consist of three levels to set up the options, but some require greater depth for the variety of
settings. If you press the MENU button, only the first and second level of the menu system will appear on
the monitor screen. The third level can be displayed by pressing SEL/INPUT. If a menu has more than
three levels, the pop-up dialogue box will be displayed as the fourth or fifth level.
To show and remove the Menu
Press the MENU button to display the menu. A second press of the MENU button will take you back to
monitor viewing.
To go to the next level
Press SEL/INPUT button.
To go back to the previous level
Press MENU button
Typical Menu Operation
1. Press MENU button: The main menu will appear.
2. Use UP/DOWN button to select the desired menu option (icon).
3. While the desired menu option is selected, press SEL/INPUT to move to the second level.
4. Use UP/DOWN button to select the second menu option.
5. Press SEL/INPUT to move to the third level: Some menu options require additional steps.
6. Press MENU to return to the previous menu to return to monitor viewing.
Turning On the Monitor
1. First, connect power cord correctly. At this moment, the monitor switches to standby or power on mode.
In standby mode, in order to turn monitor on, press the ST-BY button.
2. Select the viewing source by using SEL/INPUT button on Keypad in front of monitor
Volume Adjustment
1. Press the Adjust button on Keypad.(Turn Right / Turn Left)
2. If you want to switch the sound off, press the FUNCTION (Audio mute) button.
3. You can cancel this function by pressing the FUNCTION (Audio mute) or volume control button.

User Manual 11 of 24
MENU Basic Operation
On Screen Menus Language Selection
- Display -> OSD Set -> Language
- The menus can be shown on the screen in the selected
language.
- Supported Language: English, Spanish, Portuguese, German,
French, Italiano
How to Select Video Source by OSD
1. Press the SET/INPUT button and then UP/DOWN button to select each video source.
2. Press the SET/INPUT button to go to desired video source.
3. If Input Name is enabled, The SET/INPUT button goes into input name edit mode instead of selecting
source.

User Manual 12 of 24
PICTURE MENU
Video Menus of each Input modes
< Video (NTSC) Picture menu> < SDI, HDMI Picture menu>
Adjust
- Adjust the values of Brightness, Contrast, Color, Tint and
Sharpness directly from -50 to 50
- Brightness, Contrast, Color, Sharpness, Tint
Color Temperature Control
- For Setting the Color temperature or adjusting RGB Gain/Offset value directly
- User (User setting RGB gain value), VAR(3200K ~ 11000K), Often used value(11000K, 9300K, 6500K,
5400K,3200K) and 3D LUT Calibration value(D65 ±6504K/C-6774K/D-Cinema 6302K)
-Color Space: Native
SCAN
1. Over Scan ±95% input size and fit the selected display size
2. Zero Scan ±100% Input size and fit the selected display size
3. Under Scan ±105% Input size and fit the selected display
size
4. Pixel to Pixel ±Display size is an input size. If input
resolution is bigger than panel size, fit the panel size

User Manual 13 of 24
PICTURE MENU
Aspect Ratio
- For setting the aspect ratio.
- Full Screen: The images are displayed with a panel size.
- Full Screen, 16:9, 4:3, 14:9, 13:9, 1.85:1, 2.35:1: The images
are displayed with each aspect ratio.
- Function-key operate Rotation, Full Screen, 16:9, 4:3, 14:9,
13:9, 1.85:1, 2.35:1
- AFD function Added
Zoom
- Can see the enlarged picture by (2X, 3X, 4X, 5X) ratios.
- If user select the Zoom 2X, can see the below yellow box in
picture.
- Press Select or Enter button, user can see the enlarged
picture.
- Menu key escape the zoom mode.
Picture Option
zI/P Mode
Æ
Line Doubler/inter-Field/Field Merge function on/off
zGamma Select
Æ
Gamma Level Select (0.8 ~ 3.0)
zColor Only
Æ
Mono Color/Blue only Function on/off
- Mono color: For selecting monochrome images.
- Blue Only: Images have only blue color expect red and green color
zFlip
Æ
H Flip on/off
zPatterns
Æ
Auto Run, 100% Color Bars, 75% Color Bars, Luma, RGB, White, Black, RED, Blue, Green
zHV Delay
Æ
Off/ / H / V / H+V
zOutput Range
Æ
Normal (16~235)/Full (0~255)
zFalse Color
Æ
False Color on/off
zNoise Reduction
Æ
Noise Reduction on/off. (NR is for Video signal (HD-SDI, CVBS) & DTV timing.

User Manual 14 of 24
PICTURE MENU
PIP (Picture IN Picture)
- Watch two programs or source at the same time. And set up PIP size and position.
zPIP on/off
- Control PIP function On/Off.
zInput Source
- PIP input Source can operate with different signal and type.
- Analog (CVBS 1) inputs + Digital (HDMI) + SDI (SDI1, SDI2) inputs
-SDI + SDI input PIP
- PIP MATRIX TABLE
SDI 1 SDI 2 HDMI CVBS1
SDI 1 X O O O
SDI 2 O X O O
HDMI O O X O
CVBS1 O O O X
zAspect Ratio
- Choose PIP size of Small/POP1/POP2
zPosition
- Choose the pip position on the each corner of the pane
zPIP Blend
-Blend to PIP size of Small. (0~100)
zPIP Swap
- Using Swap option, you can exchange two programs or source at the same time.
PIP POP1 POP2

User Manual 15 of 24
PICTURE MENU
Dual Link Mode (SDI only)
-Dual Link Mode select.
(Auto/Off/RGB444/YCbCr444/YCbCr422)
Peaking Filter
-Peaking Filter: Peaking Filter On/Off.
-Peaking Color: Red/Blue/White/Violet.
-Peaking Level: 0~100.
Max Brightness
-Max Brightness On/Off.
Back Light
-Inverter dimming Level select (0~100)

User Manual 16 of 24
AUDIO MENU
Audio Output
- Select Internal Speaker out. (Auto/SDI1/SDI2/HDMI/Line in)
Audio Selection
-PIP & W/F Double mode only. Select the Main or Sub.
SDI out
-SDI Audio output Group & Channel source select
zSDI Gr/Ch
- Audio output Group source select. (Group1, 2, 3, 4)
- Audio output Channel source select. (Channel1~16, Channel1/2,3/4,5/6,7/8,9/10,11/12,13/14,15/16 off)
zSD2 Gr/Ch
- Audio output Group source select. (Group1, 2, 3, 4)
- Audio output Channel source select. (Channel1~16, Channel1/2,3/4,5/6,7/8,9/10,11/12,13/14,15/16 off)
Volume
- Adjust the speaker or headphone Volume level.
This manual suits for next models
2
Table of contents
Other Boland Monitor manuals
Boland
Boland Vp Series User manual
Boland
Boland BVB4K-24 User manual
Boland
Boland VIEWPORT v4x4b User manual
Boland
Boland ViewPort d084c User manual
Boland
Boland BVB4K-65 User manual
Boland
Boland viewport v084a User manual
Boland
Boland BVB4K-55 User manual

Boland
Boland BVB Series User manual
Boland
Boland 4K49aHDR5 User manual

Boland
Boland PVB17 User manual
