Bona Caeli AIRKit User manual

AIRKitv1
User Guide

1 | P a g e
Index
Welcome ....................................................................................................... 2
Kit Contents ................................................................................................ 3
Overview ....................................................................................................... 5
Setup .............................................................................................................. 6
Step 1 Prepare the case!............................................................ 6
Step 2 Insert the brains, connect the nose ........................7
Step 3 POOOOOWER!................................................................ 8
Step 4 Start measuring ............................................................... 9
Using your AIRKit................................................................................... 10
Troubleshooting .......................................................................................12
Warnings......................................................................................................13
Notes ............................................................................................................ 14
Version 1ab, NovDec 19
2 | P a g e
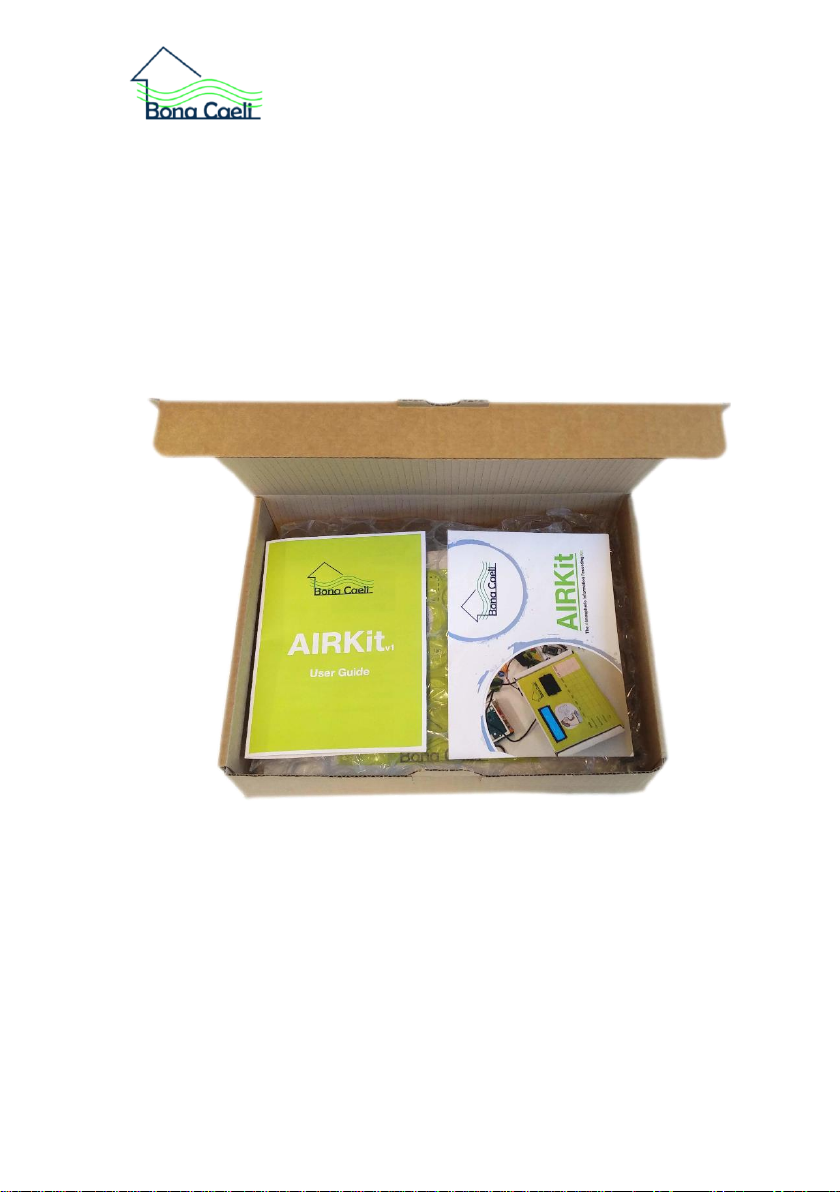
Welcome
Welcome to your own personal AIRKit!
This guide will help you assemble your AIRKit and give you
a glimpse into the effects of CO2.
With AIRKit, you will assemble your own CO2sensor and be
able to record the levels of carbon dioxide in the air around
you –wherever you may be!

3 | P a g e
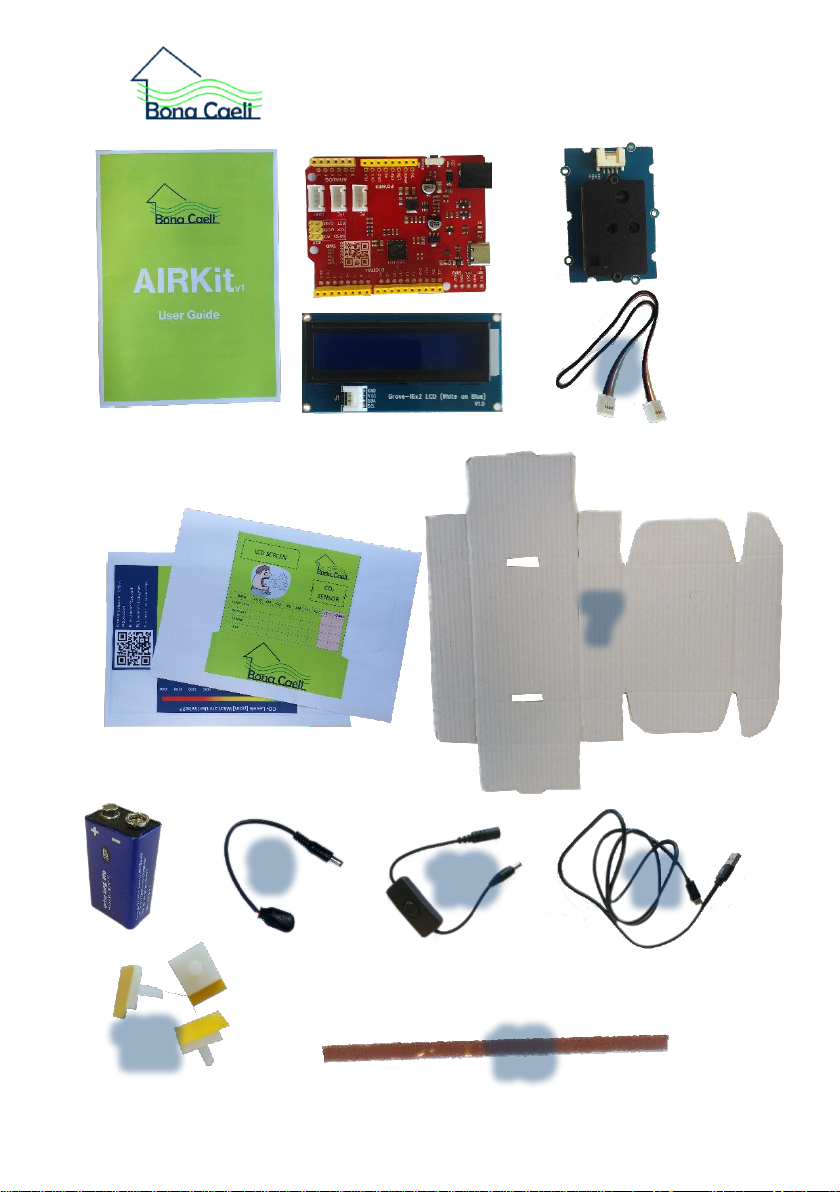
Kit Contents
1. User manual (probably in your hands)
2. Microcontroller board (the brains)
3. CO2sensor (the nose)
4. LCD Screen (how the kit communicates)
5. I2C cables x2 (to connect things)
6. The AIRKit case! (just a box)
7. The case cover (to make it look good)
8. 9 Volt battery (for POOOOWER!)
9. Battery connector (to transfer the power)
10. Switch (to switch the AIRKit on and off)
11. USB C cable (alternative power or re-programming)
12. Plastic feet x3 (to keep the microcontroller in place)
13. 20 cm of sticky foam (to keep other bits in place)
4 | P a g e
1
2
3
4
5
6
8
7
9
10
11
12
13

5 | P a g e
Overview
Carbon Dioxide (CO2) is everywhere around us. It
is safe in low concentrations, however spending
long periods of time in higher levels may cause
long term health issues and affect our wellbeing.
In 2018, average atmospheric carbon dioxide
levels were 407ppm. This is the highest level in
800,000 years!
Measuring and becoming aware of the CO2levels
around us can help us avoid high CO2
concentrations, so we can live healthier lives.
With AIRKit, you will assemble your personal CO2
sensor and record the levels of CO2in the air
around you –wherever you may be!
6 | P a g e
Setup
Setup time required: 20 minutes
Additional materials:
•Scissors
•Pritt stick (or any other brand of glue)
Step 1 Prepare the case!
Cut the case cover (7) along the solid black lines.
Glue the cover to the outside of the AIRKit case (6).
Taking care, follow the scissor markings on the template
and cut out holes for the following: CO2sensor, LED screen.
Assemble the box by folding the printed ‘fold’ lines.
Make a hole on the back of the box, large enough to thread
the USB cable (11) through.
7 | P a g e
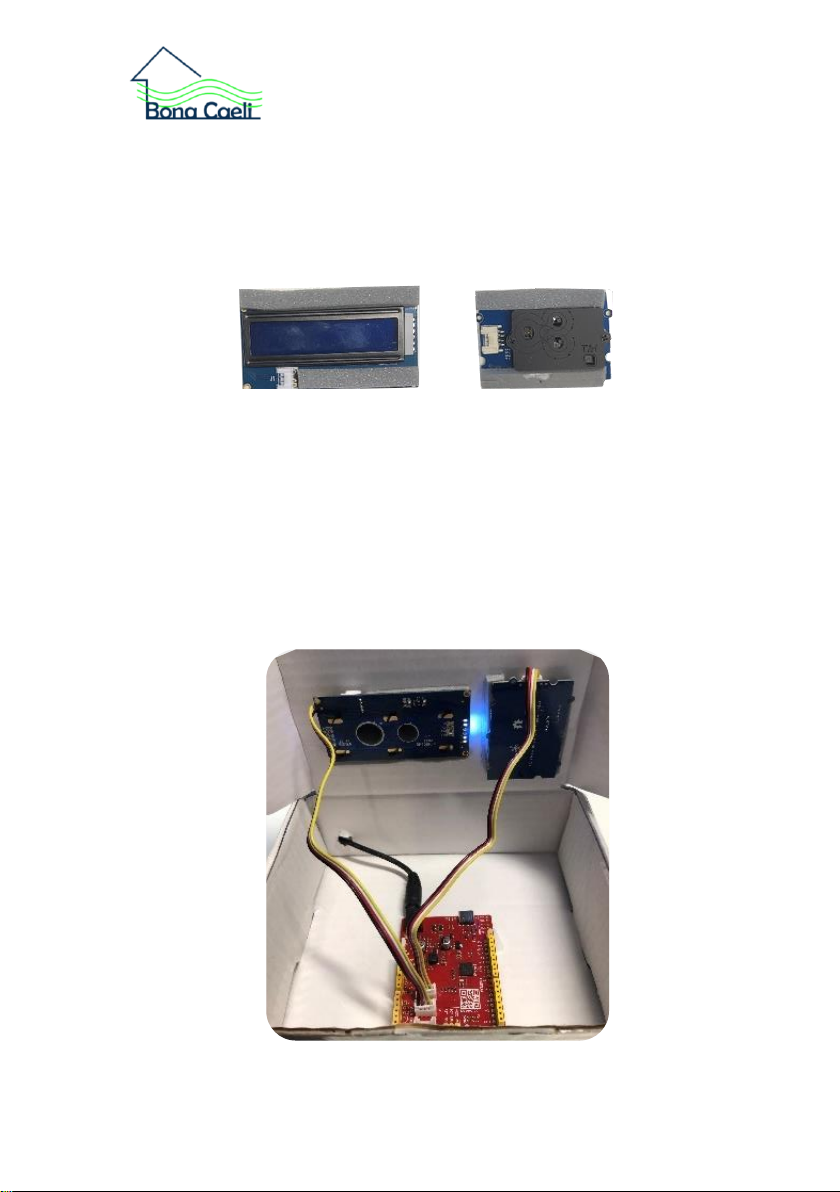
Step 2 Insert the brains, connect the nose
Cut the foam into five equal sized pieces. Save one of them
for later, take the other four and stick them to LCD screen
(4) and the CO2sensor (3).
Push the feet (12) through the holes on the microcontroller
board (2) stick it to the inside of the box.
Using the I2C cables (5) connect the microcontroller board
(2) to the CO2sensor (3) and the LCD Screen (4). The I2C
connectors only fit one way. Make sure you are connecting
them to the I2C ports on the board, not the UART - they are
labelled. Once everything is connected, place all the
components in the box.

8 | P a g e
Step 3 POOOOOWER!
Clip the 9V battery (8) to the battery connection cord (9) and
connect the battery connection cord to the power switch
(10).
Connect the power switch cable to the round jack barrel
power socket on the Microcontroller board (2).
Leave the 9V battery and power switch inside the box, you
can use the saved piece of foam to stick them to the box.
9 | P a g e
Step 4 Start measuring
Flip on the power switch (10). The LED Screen (4) will turn
on and the first reading will be displayed. There will also be
a green light on the microcontroller board (2).
If you wish to power the AIRKit for a long period of time,
connect the AIRKit to a USB power source by connecting
the USB-C cable to the micro controller board.
Close the box so that the CO2Sensor is exposed to your
surroundings.
Leave for 10 seconds to allow the sensor to settle and
display the first true value of your CO2exposure.
Enjoy and start experimenting!

10 | P a g e
Using your AIRKit
The AIRKit measures CO2 levels in the air.
CO2levels are measured in parts per millions (ppm) which
quite simply denotes that for a reading of 100 ppm, there
would be 100 particles of CO2for every 1,000,000 particles
of surrounding air.
People are affected in various ways when subject to high
concentrations of CO2. These are displayed in the table
below.
CO2(ppm)
Likely Effects
250-350
background (normal) outdoor air level.
350-1,000
typical level found in occupied spaces
with good air exchange.
1,000-2,000
level associated with complaints of
drowsiness and poor air.
2,000-5,000
level associated with headaches,
sleepiness, and stagnant, stale, stuffy
air.
Poor concentration, loss of attention,
increased heart rate and slight nausea
may also be present.
5,000
this indicates unusual air conditions
where high levels of other gases could
also be present. Toxicity or oxygen
deprivation could occur.
This is the permissible exposure limit
for daily workplace exposures.
>40,000
Exposure may lead to serious oxygen
deprivation and is immediately harmful

11 | P a g e
Increasing the number of people in the room or being in a
confined space are some of the reasons for an increased
CO2concentration.
To reduce the levels, you can try opening a window or
increase the air flow around the area you are in.
Try to work out what else makes the CO2reading change!
Note: The CO2sensor will record ±30ppm of the true
concentration level.
Take you AIRKit with you, make a note of the levels of CO2
displayed on the chart printed on the box.
DATA
<500
500
600
700
800
900
1000
1500
>2000
Classroom
Bedroom
Kitchen
Car

12 | P a g e
Troubleshooting
If the LED Screen is on, but no figures are being displayed,
press the reset button on the Micro Controller Board. This
will reset the board and it should power up properly.
If the LED screen has no power all together, reset the board.
If the CO2levels have not varied in a while, check the CO2
sensor connection. Disconnect and reconnect the I2C cable
on both ends and reset the board.
If this still doesn’t work, it is likely to be a power supply issue.
Therefore, check the battery is not flat or that the USB cable
is plugged in correctly.
If the LED screen starts flickering or buzzing check the
battery level. Sometimes a low battery can have this effect.
The 9V battery is only intended to power the device for short
periods of time. For continued data logging make use of the
USB C cable connected to a phone charger, laptop or even
a portable power bank.

13 | P a g e
Warnings
Do not operate outside temperatures of 0C - 50C.
Do not leave running for longer than 12 hours.
Disconnect the power supply (battery or mains) before
touching any of the components.
Running time can be limited when using the battery. For long
running times, use the supplied USB-C cable.
Attempting to re-program the micro controller board will
void any warranty.
AIRKit is made for 8-18yrs. Small components are a choking
hazard.
Do not leave within reach of children below 6 years old.
Do not have any liquids around the device at any time.
The warranty provides 12 months full cover against a faulty
or non-functional component. If you find a faulty component,
simply return the whole kit to us together with proof of
purchase. We will send a replacement AIRKit to you.
BonaCaeli is a trade name of BPP Technical Services Ltd.
The BonaCaeli project aims to educate and inform its
sponsors on how to measure and mitigate the
concentrations of carbon dioxide that they are exposed to.
For more information visit: bonacaeli.com

14 | P a g e
Notes

Table of contents


