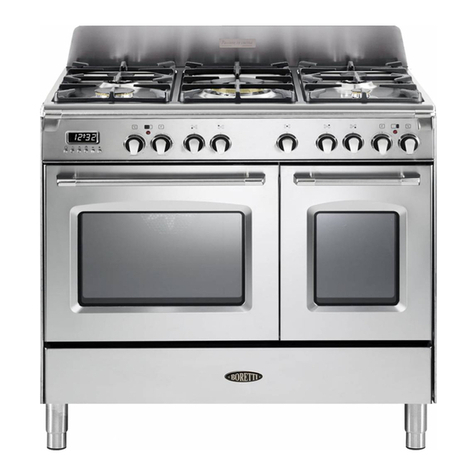
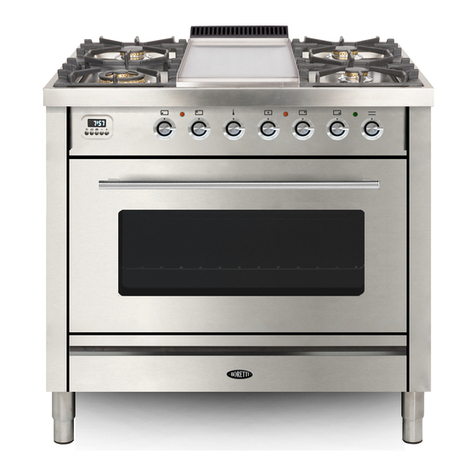
BORETTI MLG96BMAT Instruction Manual

MLG96BMAT / MLG96BZW
EN | USER GUIDE - INSTALLATION ADVICE
www.boretti.com

2
Dear customer,
Thank you for having purchased and given your preference to our product.
The safety precautions and recommendations reported below are for your
own safety and that of others. They will also provide a means by which to
make full use of the features offered by your appliance. Please preserve
this booklet carefully. It may be useful in future, either to yourself or to
others in the event that doubts should arise relating to its operation.
This appliance must be used only for the task it has explicitly been
designed for, that is for cooking foodstuffs. Any other form of usage
is to be considered as inappropriate and therefore dangerous. The
manufacturer declines all responsibility in the event of damage caused
by improper, incorrect or illogical use of the appliance.
DECLARATION OF CE CONFORMITY
This appliance has been designed to be used only for cooking. Any other
use (such as heating a room) is improper and dangerous.
This appliance has been designed, constructed, and marketed in
compliance with:
*Safety requirements of the “Gas” Regulation (EU) 2016/426;
*Safety requirements of the “Low voltage” Directive 2014/35/EU;
*Safety requirements of the “EMC” Directive 2014/30/EU;
*Requirements of EU Directive 93/68/EEC;
*Requirements of EU Directive 2011/65/EU.
IMPORTANT INFORMATION FOR CORRECT DISPOSAL OF THE
PRODUCT IN ACCORDANCE WITH EC DIRECTIVE 2012/19/EC.
At the end of its working life, the product must not be disposed of as
urban waste. It must be taken to a special local
authority differentiated waste collection centre or to
a dealer providing this service.
Disposing of a household appliance separately
avoids possible negative consequences for the
environment and health deriving from inappropriate
disposal and enables the constituent materials to
be recovered to obtain significant savings in energy
and resources. As a reminder of the need to dispose
of household appliances separately, the product is
marked with a crossed-out wheeled dustbin.
GB
ENBoretti Milano / User guide - Installation advice
3
Important safety precautions and recommendations
Important
This appliance is designed and manufactured solely for the
cooking of domestic (household) food and is not suitable for any
non domestic application and therefore should not be used in a
commercial environment. The appliance guarantee will be void
if the appliance is used within a non domestic environment i.e.
asemi commercial, commercial or communal environment.
Read the instructions carefully before installing and using the
appliance.
*This appliance has been designed and manufactured in compliance with
the applicable standards for the household cooking products and it fulfills
all the safety requirements shown in this manual, including those for
surface temperatures.
Some people with sensitive skin may have a more pronounced temperature
perception with some components although these parts are within the
limits allowed by the norms. The complete safety of the appliance also
depends on the correct use, we therefore recommend to always pay a
extreme attention while using the product, especially in the presence of
children.
*After having unpacked the appliance, check to ensure that it is not
damaged and that the oven door closes correctly. In case of doubt, do not
use it and consult your supplier or a professionally qualified technician.
*Packing elements (i.e. plastic bags, polystyrene foam, nails, packing straps,
etc.) should not be left around within easy reach of children, as these may
cause serious injuries.
*Some appliances are supplied with a protective film on steel and
aluminium parts. This film must be removed before using the appliance.
Important
The use of suitable protective clothing/gloves is recommended when
handling or cleaning this appliance.
*Do not attempt to modify the technical characteristics of the appliance
as this may become dangerous to use. The manufacturer declines all
responsibility for any inconvenience resulting from the inobservance of this
condition.
ENBoretti Milano / User guide - Installation advice
4
*
Caution
This appIiance must only be installed in a permanently ventilated
room in compliance with the applicable regulations.
Do not operate your appliance by means of an external timer or separate
remote-control system.
*Do not carry out cleaning or maintenance operations on the appliance
without having previously disconnected it from the electric power supply.
Warning:
Ensure that the appliance is switched off before replacing the oven
lamp to avoid the possibility of electric shock.
*Do not use a steam cleaner because the moisture can get into the
appliance therefore making it unsafe.
*Do not touch the appliance with wet or damp hands (or feet).
*Do not use the appliance whilst in bare feet.
*If you should decide not to use this appliance any longer (or decide to
substitute another model), before disposing of it, it is recommended that
it be made inoperative in an appropriate manner in accordance to health
and environmental protection regulations, ensuring in particular that all
potentially hazardous parts be made harmless, especially in relation to
children who could play with unused appliances.
*The various components of the appliance are recyclable. Dispose of them
in accordance with the regulations in force in your country. If the appliance
is to be scrapped, remove the power cord.
*After use, ensure that the knobs are in the off position.
*Children less than 8 years of age shall be kept away unless continuously
supervised.
*This appliance can be used by children aged from 8 years and above
and persons with reduced physical, sensory or mental capabilities or
lack of experience and knowledge if they have been given supervision or
instruction concerning use of the appliance in a safe way and understand
the hazards involved. Children shall not play with the appliance. Cleaning
and user maintenance shall not be made by children without supervision.
*The manufacturer declines all liability for injury to persons or damage to
property caused by incorrect or improper use of the appliance.
ENBoretti Milano / User guide - Installation advice
5
*Make sure that electrical cables connecting other appliances in the
proximity of the cooker cannot come into contact with the hob or become
entrapped in the oven door.
Warning
Unattended cooking on a hob with fat or oil can be dangerous and
may result in fire. NEVER try to extinguish a fire with water, but switch
off the appliance and then cover flame e.g. with a lid or a fire blanket.
Warning
Danger of fire: do not store items on the cooking surfaces.
Warning
When correctly installed, your product meets all safety requirements
laid down for this type of product category. However special care
should be taken around the rear or the underneath of the appliance
as these areas are not designed or intended to be touched and may
contain sharp or rough edges, that may cause injury.
First use of the oven
It is advised to follow these instructions:
*Furnish the interior of the oven as described in the chapter
“CLEANING AND MAINTENANCE”.
*Switch on the empty oven on max to eliminate grease from the
heating elements.
*Disconnect the appliance from the electrical power supply, let
the oven cool down and clean the interior of the oven with a cloth
soaked in water and neutral detergent; then dry carefully.
Warning
During use the appliance and its accessible parts become hot; they
remain hot for some time after use.
*Care should be taken to avoid touching heating elements (on the
hob and inside the oven).
*The door is hot, use the handle.
*To avoid burns and scalds, young children should be kept away.
ENBoretti Milano / User guide - Installation advice
6
Caution:
Do not use harsh abrasive cleaners or sharp metal scrapers to clean
the oven door glass since they can scratch the surface, which may
result in shattering of the glass.
*Do not line the oven walls or base with aluminium foil. Do not place baking
trays or the drip tray on the base of the oven chamber.
*Do not cover the hob with aluminium foils.
*Always use oven gloves when removing the shelves and food trays from
the oven whilst hot.
*Do not hang towels, dishcloths or other items on the appliance or its handle
– as this could be a fire hazard.
*Clean the oven regularly and do not allow fat or oils to build up in the oven
base or tray. Remove spillages as soon as they occur.
*Do not stand on the cooker or on the open oven door.
*Always stand back from the appliance when opening the oven door to
allow steam and hot air to escape before removing the food.
Safe food handling:
Leave food in the oven for as short a time as possible before and after
cooking. This is to avoid contamination by organisms which may
cause food poisoning. Take particular care during warmer weather.
Caution:
The cooking process has to be supervised. A short term cooking
process has to be supervised continuously.
Warning:
Take care NOT to lift the cooker by the door handle.
*The appliance must not be installed behind a decorative door in order to
avoid overheating.
*The oven accessories (e.g. oven wire rack) must be fitted correctly as
indicated at page 49.
ENBoretti Milano / User guide - Installation advice

7
* If the power supply cable is damaged, it must be replaced only by an
authorized service agent in order to avoid a hazard.
Energy labelling/ecodesign
*Commission delegated regulation (EU) No 65/2014 (supplementing
Directive 2010/30/EU of the European Parliament and of the Council).
*Commission regulation (EU) No 66/2014 (implementing Directive
2009/125/EC of the European Parliament and of the Council).
Reference to the measurement and calculation methods used to
establish compliance with the above requirements:
*Standard EN 60350-1 (electric ovens).
*Standard EN30-2-1 (hobs: gas fired burners).
ENBoretti Milano / User guide - Installation advice
* IMPORTANT NOTE: The oven shelves (for some products one shelf
only is provided) have not been designed to place the food directly on
the shelf itself. When cooking, always place the food in special
containers or use specific materials suitable for the food contact.
* If the power supply cable is damaged, it must be replaced only by an
authorized service agent in order to avoid a hazard.
* If the appliance is not fitted with a supply cord and a plug, or with
other means for disconnection from the supply mains having a contact
separation in all poles that provide full disconnection under overvoltage
category III conditions, means for disconnection must be incorporated
in the fixed wiring in accordance with the wiring rules.
* WARNING: The appliance and its accessible parts become hot during
use.Care should be taken to avoid touching heating elements. Children
less than 8 years of age shall be kept away unless continuously
supervised.
* WARNING: Use only hob guards designed by the manufacturer of the
cooking appliance or indicated by the manufacturer of the appliance in
the instructions for use as suitable or hob guards incorporated in the
appliance. The use of inappropriate guards can cause accidents.

8
Advice for the installer
*Cooker installation must only be carried out by QUALIFIED
TECHNICIANS and in compliance with local safety standards.
Failure to install the appliance correctly could invalidate any
manufacturer’s warranty.
*The appliance must be installed in compliance with regulations
in force in your country and in observation of the manufacturer’s
instructions.
*Always disconnect the appliance from the electrical supply
before carrying out any maintenance operations or repairs.
*Some appliances are supplied with a protective film on steel
and aluminium parts. This film must be removed before using
the cooker.
ENBoretti Milano / User guide - Installation advice
Use of the appliance, energy saving tips oven
Oven
*Check the oven door always closes properly and the door gasket is clean
and in order. During use, open the oven door only when strictly necessary to
avoid heat losses (for some functions it may be necessary to use the oven
with the door half-closed, check the oven operating instructions).
*Turn off the oven 5-10 minutes before the end of the theoretical cooking
time to recuperate the stored heat.
*We recommend using oven proof dishes and adjusting the oven
temperature during cooking if necessary.
Hob
Gas fired burners
*It is important that the diameter of the pot be suitable to the size of the
burner so as not to compromise the high output of the burners and therefore
energy waste. A small pot on a large burner does not give you a boiling point
in a shorter amount of time since the capacity of heat absorption of a liquid
mass depends on the volume and the surface of the pot.
*Avoid keeping a burner on without something on it (without pot).

9
1 Installation
This cooker has class “2/1” overheating protection so that it can be
installed next to a cabinet.
If the cooker is installed adjacent to furniture which is higher than the gas
hob cooktop, a gap of at least 200 mm must be left between the side of
the cooker and the furniture.
The walls and kitchen furniture surrounding the appliance must be made
of non-flammable material. The veneered synthetical material and the glue
used must be resistant to a temperature of 90°C in order to avoid ungluing
or deformations. It is recommended that a 10 mm gap to each side is made
if the adjacent kitchen furniture is made of a plastic laminate wrap.
Curtains must not be fitted immediately behind appliance or within
500mm of the sides.
It is essential that the cooker is positioned as stated below.
We do not recommend the cooker is located on a plinth. If this is
unavoidable, it will be necessary to provide safety measures to prevent the
appliance falling off.
The cooker must be installed by a suitably qualified technician and in
compliance with local safety standards.
200 mm
650 mm
500 mm
450 mm
Fig. 1.1
ENBoretti Milano / User guide - Installation advice
10
Fitting the adjustable feet
The adjustable feet must be fitted
to the base of the cooker before
use (fig. 1.2). Rest the rear of the
cooker on a piece of the polystyrene
packaging exposing the base for the
fitting of the feet.
Fit the 4 legs by screwing them tight
into the support base as shown in
figure 1.3.
Fig. 1.2
Levelling the cooker
The cooker may be levelled by screwing the lower ends of the feet IN or
OUT (fig.1.4)
Fig. 1.4 Fig. 1.3
Backguard
Before installing the cooker,
assemble the backguard “C” (fig. 1.5).
*The backguard “C” can be found
packed at the rear of the cooker.
*Before assembling remove any
protective film/adhesive tape.
*Remove the two spacers “A” and
the screw “B” from the rear of the
cooktop.
*Assemble the backguard as shown
in figure 1.5 and fix it by screwing
the central screw “B” and the
spacers “A”.
C
B
A
Fig. 1.5
ENBoretti Milano / User guide - Installation advice

11
Moving the cooker
WARNING: When raising cooker to upright position always ensure two
people carry out this manoeuvre to prevent damage to the adjustable feet
(fig. 1.6).
Fig. 1.6
Warning:
Be carefull: do not lift the cooker
by the door handle when raising
to the upright position (fig. 1.7).
Warning:
When moving cooker to its final
position DO NOT DRAG (fig. 1.8).
Lift feet clear of floor (fig. 1.6).
Fig. 1.7 Fig. 1.8
ENBoretti Milano / User guide - Installation advice

12
Ventilation requirements
The appliance must be installed in compliance with applicable local
regulations concerning ventilation and the evacuation of exhaust gases.
Intensive and prolonged use may require extra ventilation, e.g. opening
a window, or more efficient ventilation increasing the mechanical
suction power if this is fitted.
Choosing suitable surroundings
The room where the gas appliance is to be installed must have a natural
flow of air so that the gas can burn (in compliance with applicable
local regulations). The flow of air must come directly from one or more
openings made in the outside walls with a free area of at least 100 cm2
(orrefer to applicable local regulations).
The openings should be near the floor and preferably on the side opposite
the exhaust for combustion products and must be made so that they
cannot be blocked from either the inside or the outside.
When these openings cannot be made, the necessary air can come from
an adjacent room which is ventilated as required, as long as it is not a bed
room or a danger area (in compliance with applicable local regulations).
In this case, the kitchen door must allow the passage of the air.
Discharging products of combustion
Extractor hoods connected directly to the outside must be provided, to allow
the products of combustion of the gas appliance to be discharged (fig. 1.9).
If this is not possible, an electric fan may be used, attached to the external
wall or the window; the fan should have a capacity to circulate air at an
hourly rate of 3-5 times the total volume of the kitchen (fig. 1.10).
The fan can only be installed if the room has suitable vents to allow air to
enter, as described under the heading “Choosing suitable surroundings”.
Extractor hood
for products of
combustion
Air vent
Air vent
Electric fan to
extract products
of combustion
Fig. 1.10
Fig. 1.9
H min 650 mm
ENBoretti Milano / User guide - Installation advice

13
Anti-tilt bracket
Important!
To restrain the appliance and prevent it tipping accidentally, fit a bracket
to its rear to fix it securely to the wall.
To fit the anti-tilt bracket:
1. After you have located where the cooker is to be positioned, mark on the
wall the placewhere the two screws of the anti-tilt bracket have to be fitted.
2. Please follow the indications given in fig. 1.11.
3. Drill two 8 mm diameter holes in the wall and insert the plastic plugs supplied.
Important!
Before drilling the holes, check that you will not damage any pipes or
electricalwires.
4. Loosely attach the anti-tilt bracket with the two screws supplied.
5. Move the cooker to the wall and adjust the height of the anti-tilt bracket so
that it canengage in the slot on the cooker’s back, as shown in fig. 1.11.
6. Tighten the screws attaching the anti-tilt bracket.
7. Push the cooker against the wall so that the anti-tilt bracket is fully
inserted in the sloton the cooker’s back.
Attention!
When sliding the cooker into place pay special attention not to trap the
powersupply cable in the stability bracket.
Pay special attention to the gas connection hose.
900 mm
Fig. 1.11
ENBoretti Milano / User guide - Installation advice

14
2 Gas section
The walls adjacent to the cooker must be of material resistant to heat.
Gas connection
the connection must be executed by a qualified tecnician according to the
relevant standards.
The appliance is predisposed and calibrated to operate with the gas
indicated on the specifications plate.
Ensure that the room in which the cooker is to be installed is adequately
ventilated, in compliance with applicable regulations.
Connection to the gas supply pipe or gas cylinder must be made in
accordance with the requirements of the applicable regulations.
The gas supply is connected at the rear of the cooker (fig. 2.1) the
connection pipe must not cross the rear of the appliance.
Before installation, make sure that the local distribution conditions
(type of gas and its pressure) and the adjustment of this appliance
are compatible. The appliance adjustment conditions are given on the
plate or the label.
Fig. 2.1
Gas inlet pipe
Connector
ENBoretti Milano / User guide - Installation advice

15
A) Gas connection
NL Cat: II 2EK3B/P
The gases used for the operation of cooking appliances may be grouped
by their characteristics into two types:
*G25.3 Natural gas
*G20 Natural gas
*G30 / G31 Butane/Propane
The fitting (fig. 2.2) is made up of:
A - Gas train terminal fitting
B - Gasket
C - Conical connector
Use rigid or flexible connection pipes which comply with applicable regulations.
If compression fittings are used, tighten firmly using two spanners (fig. 2.4).
In particular, make sure that:
*the flexible hose does not come into contact with any parts of the cooker
with surface temperatures in excess of 70˚C;
*the flexible hose does not exceed 75 cm in length and does not come into
contact with sharp edges or corners;
*the hose is not under tension or twisted and is not kinked or too tightly bent;
*the connection with rigid metal pipes should not cause stresses to the gas ramp.
*we advise replacing the gasket on the slightest sign of deformation or
imperfection.
*the hose can easily be inspected along its entire length to check its
condition; hoses should replaced after a maximum of three years.
*the cylinder cock or the supply cock immediately ahead of the appliance
isclosed whenever the cooker is not in use.
ENBoretti Milano / User guide - Installation advice

16
Fig. 2.2
B
C
1/2” gaz conique
A
NL
This appliance was configured for the appliance category K (I2K) and
is suitable for the use of G and G+ distribution gases according to
the specifications as included in the NTA 8837:2012 Annex D with a
Wobbe index of 43.46 – 45.3 MJ/m3(dry, 0 °C, upper value) or 41.23
– 42.98 (dry, 15 °C, upper value). This appliance can moreover be
converted and/or again be calibrated for the appliance category E (I2E).
This therefore implies that the appliance: “is suitable for G+ gas and
H gas or is demonstrably suitable for G+ gas and can demonstrably
be made suitable for H gas” within the meaning of the “Dutch Decree
of 10 May 2016 regarding amendment of the Dutch Gas Appliances
Decree...”.
ENBoretti Milano / User guide - Installation advice

17
B) Connections to the gas supply for:
BE Cat: II 2E+3+
The gas connections are made at the rear of the appliance, in such a way
that the pipe never passes behind the cooker.
*Installation can only be carried out by a qualified technician, and must
conform with the local regulations in force (NBN Standard D 51-003).
*The surfaces next to the cooker must either be made of a heat resistant
material, or must be covered by such a material.
*Ventilation of the room - the combustion of gas can only occur because
there is oxygen present in the air. The air must therefore be able to be
renewed, and the products of combustion must be able to be expelled.
Thevolume of renewed air must be at least 2m3/h for each kW.
Gases normally used can be grouped into two main families:
*Liquid Gas: Butane Gas (G30); Propane Gas (G31)
*Natural Gas (G20/G25)
The cooker is supplied ready to operate, using the type of gas which
is indicated on the label attached to it. Sometimes, however, it may be
necessary to change from one gas to another.
Whatever type of gas the cooker is designed for, the following procedures
must be followed:
*Connection to the gas supply.
*Replacement of the burners on the cooking surface.
*Adjustment of the gas flow to the burners on the cooking surface.
Ensure that the cooker is equipped for the type of gas it is to be supplied
with (see label).
The gas supply circuit must conform to the local regulations in force.
ENBoretti Milano / User guide - Installation advice

18
The group of attachments (fig. 2.3) is made up of:
*1 nut “A” ( external cylindrical thread ISO 228-1)
*1 sealing washer “D”
*1 conical connection “B” (internal cylindrical thread ISO 228-1, external
conical thread ISO 7-1)
*1 Butane/Propane Gas connector “C”.
DD
BC
Fig. 2.3
A
BE
Cookers must be connected using RHT materials downstream from the
AGB/BGV certificated gas stop-cock, except for single unit cookers that
are not built-in.
As a general rule, cookers are connected downstream from the gas stop-
cock, by:
*copper pipes having an appropriate wall thickness, or;
*steel pipes, or;
*flexible RHT metal pipes with AGB certification, fitted in such a way that
they will not be crushed or pulled during use. Their bending radius must not
be less than that specified by the manufacturer.
Exception for single unit cookers that are not built-in.
*These cookers must be connected by a flexible elastomer hose with a
built–in undetachable mechanical nozzle. Only use those hoses that are
authorised with the label “AGB/BGV”.
*Two types of flexible elastomer hoses: until April 2005, there were 2 types
of flexible elastomer hoses on the market:
*the old assymetrical model, including an end with a fixed nozzle at the side of
the cooker, and a nozzle with a loose nut and a built-in flat sealed joint at the
side of the inside fitting (stop cock).
*the new symmetrical model, including a nozzle with a loose nut at both sides,
with a built-in flat sealed joint. This symmetrical model is the only one that will
be available after the time limit.
When installing a new cooker, or replacing an existing one, the
symmetrical model must always be used.
ENBoretti Milano / User guide - Installation advice

19
Assembly
The gas inlet on the old cookers is equipped with a conical thread ISO 7-1 –
and the hose is assembled as follows:
1. apply a sealing product to the thread on the appliance: a strip of teflon or
sealing paste for threads (colmat) plus some acrylic wool;
2. tighten up the linking component (the cylindrical inside thread ISO 7-1 to
the cylindrical ouside thread ISO 228-1) with the two keys on the cooker;
3. check that the sealed joint is firmly inserted inside the moveable
connection on the elastomer hose (new model);
4. tighten up by hand the elastomer hose on both sides;
5. tighten up with a spanner;
6. open the stop cock and check that there are no leaks (soap bubbles) by
smearing on a frothing product ).
Fig. 2.4
The gas inlet on the new appliances is equipped with a parallel thread
ISO228-1. To assemble it, follow stages 3, 4, 5, and 6 as described below.
Precautions to take
*the flexible pipe must be mountedso that it will not be subjected
tomechanical stresses, such as beingtwisted, compressed or pulled;
*the flexible pipe must be fitted so thatit will not come into contact with
anyother movable piece of furniture;
*it must have a bending radius of atleast ten times its outside diameter;
*it must not come into contact with anyhot surfaces;
*ensure that it is installed in a placewith easy access, so that its entirelength
can be checked.
*it should not be located in anoverheated environment. and must
beprotected from sunlight and ultravioletrays
ENBoretti Milano / User guide - Installation advice

20
Periodical checks and replacement
The gas connection pipe must be checked at least annually to ensure that
there is no visible deterioration. The hose must be replaced no later than
the replacement date indicated.
Important
Take the precaution of using two keys when screwing up the
components. (fig. 2.4).
After connecting the gas, use a soapy solution to check that the
connections are sealed tight, and never use an open flame.
ENBoretti Milano / User guide - Installation advice
This manual suits for next models
1
Table of contents
Other BORETTI Cooker manuals

BORETTI
BORETTI CFBG901 Series Technical manual

BORETTI
BORETTI ML9015IFSIX Instruction Manual

BORETTI
BORETTI VT96ZW User manual

BORETTI
BORETTI ML9016GSIX User manual

BORETTI
BORETTI MLI95BMAT Instruction Manual

BORETTI
BORETTI CFBG902AN Technical manual

BORETTI
BORETTI CFBI9015IX Technical manual

BORETTI
BORETTI LUCIANO User manual

BORETTI
BORETTI VFP93IXG User manual