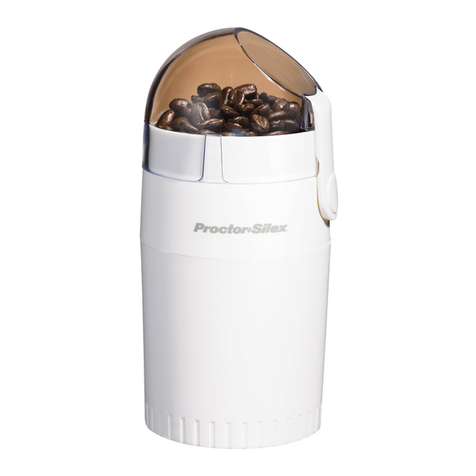
BORK J700 User manual

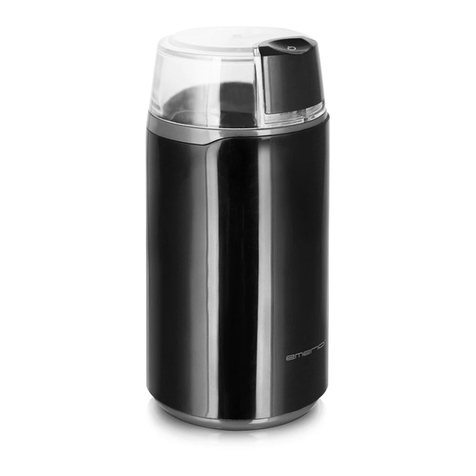
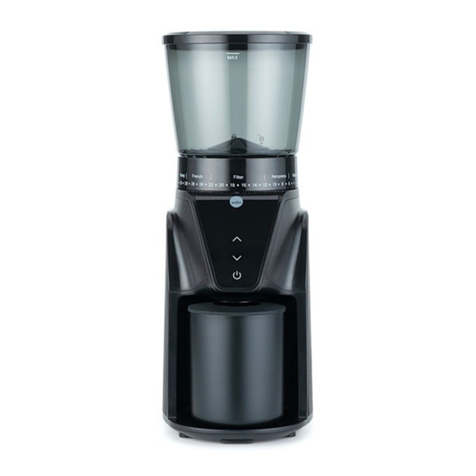
COFFEE GRINDER J700
OPERATING MANUAL

OPERATING MANUAL
COFFEE GRINDER
J700

2 3
DESCRIPTIONDESCRIPTION
2 3
STAINLESS STEEL BLADES
The durable stainless steel blades have a prolonged useful life ensuring perfect
results. High performance and design of the blades make the grinding process
highly efficient.
5 GRIND DEGREES
Grind degree control allows you to vary coffee beans grinding depending on
the variety of coffee, type of roasting and different ways of making coffee: in
espresso coffee machines, drip and geyser coffee makers. The thinnest grind
degree will allow you to make real Turkish coffee and to chop spices.

4 5
CONFIGURATION
DESCRIPTION
4
GROUND COFFEE QUANTITY CONTROL
To preserve coffee aroma and flavor, it is essential to brew it immediately after
grinding. You can set the required amount of ground coffee for 2, 4, 8, and 12
cups.
Blades with antiskid coating
Transparent lid
Removable container
Power button
Grind degree control
Ground coffee quantity control
Adjustment is meant for 2, 4, 8 and 12 cups

7
OPERATION
5 GRIND DEGREES
The grind degree control is meant to give you an
opportunity to brew coffee in different ways.
Grind degree 1 (COARSE)
Coarse grind. Suits for brewing coffee in a piston
coffee maker (coffee press).
Grind degree 2
Medium grind. Used for many types of brewing.
Grind degree 3
Fine grind. Used for brewing coffee in drip coffee
makers with filters.
Grind degree 4
Fine grind for espresso. Ideally suits to brew
espresso.
Grind degree 5 (FINE)
Ultra-fine grind. Suits for brewing Turkish coffee.
Note. In order to grind dry seeds, spices or other
dry plants place 1-4 spoons of the dry product
into the removable bowl. Select the desired grind
degree and set the cup quantity control. If you are
not sure of the required grind degree, start from
setting of the coarse grind and repeat the operation
for several times to achieve the desired result.
GROUND COFFEE QUANTITY CONTROL
You can set the necessary quantity of ground coffee.
Adjustment is meant for 2, 4, 8 and 12 cups. Place
such amount of coffee in the removable bowl, so
that its level corresponded to the mark of 2, 4, 8
or 12. With the help of the CUPS control set the
analogous position of 2, 4, 8 or 12.
Note. In order to have a precise grind result ensure
that the coffee level mark in the removable bowl
corresponded to the control’s position.

8 9
OPERATIONOPERATION
• Close the bowl with the transparent lid and fix it
by turning it slightly clockwise.
ALIGN symbol must coincide with the LOCK mark
behind the coffee grinder.
Caution! The coffee grinder will not work if the
transparent lid is not fixed in the closed position.
• Remove the cord from the cord compartment
and plug in the appliance.
• Set the grind control in the necessary position.
You can vary the grind degree from COARSE to
FINE.
• Set the ground coffee quantity control in position
2, 4, 8 or 12, so that it coincided with the level of
the added coffee.
You can vary the quantity of ground coffee from
minimum 2 to maximum 12.
BEFORE THE FIRST USAGE
• Take the coffee grinder from the package.
Remove all packing materials, squibs and
stickers from the casing of the coffee grinder.
• Wash the transparent lid of the coffee maker
with running water and wipe the base with a wet
napkin to remove mechanical particles and dust,
which count get inside the coffee maker in the
course of manufacture or transportation. OPERATION
• Take off the transparent lid by turning it
counterclockwise.
• Put roasted coffee beans in the removable bowl
to one of the levels marked on the internal
surface of the bowl.
The minimum quantity of coffee beans shall
correspond to level 2, the maximum – to level 12.

10 11
CLEANINGOPERATION
Before cleaning always unplug the appliance.
Never immerse the coffee grinder, the power
cord or the plug of the power cord into water or
any other liquid. Do not allow formation of water
condensate thereon and do not use the coffee
grinder in places with increased humidity.
• Take off the transparent lid by slightly turning it
counterclockwise.
• Take off the removable container by slightly
turning it counterclockwise.
• Wash the container and the lid in soapy water,
then rinse and dry carefully.
• Wipe the surface of the coffee grinder with a wet
napkin soaked in soapy solution, then wipe it
with a soft dry napkin or use a special agent for
cleaning of plastic surfaces.
Do not use wire wools, chemical agents or abrasive
cleaning agents to clean the external surface of the
coffee grinder.
• Place the cord in the casing of the coffee grinder
by turning clockwise the lever located on the
bottom of the coffee grinder.
Store the coffee grinder in the vertical position on
an even dry surface.
• Press the START button, and the coffee grinder
will start operation. The coffee grinder will
automatically stop when grinding will be
completed.
Press the START button to stop grinding at any
time. If you press the button again the coffee
grinder will start grinding from the beginning.
• After grinding unplug the appliance.
• Take off the transparent lid by slightly turning
it counterclockwise.
• Take off the removable container by slightly
turning it counterclockwise. Ground coffee
is ready for use.

12 13
SAFETY PRECAUTIONSSAFETY PRECAUTIONS
• Before operation make sure that the coffee
grinder is correctly assembled and the
transparent lid is fixed.
• Do not touch sharp blades in the base of the
coffee grinder.
• Do not operate the coffee grinder for over 60
seconds without a pause. The motor must cool
down periodically.
• For safety reasons all operations on repair
and maintenance of the coffee station shall be
performed only by authorized representatives of
BORK certified service centers.
• Before usage of the coffee grinder carefully
read the operating manual. It contains important
information on safety methods, operation and
care of the coffee grinder. Keep this operating
manual, so that it can be referred to in the future,
and if the coffee grinder passes to another owner
give the manual together with the appliance.
• The coffee grinder is not meant for operation by
unattended children and disabled adults.
• It is forbidden to use the coffee grinder outside
premises and in moving vehicles.
• Keep the coffee grinder’s casing clean. During
cleaning observe the instructions specified in
section “Maintenance and Cleaning”.
• Avoid overhanging of the power cord from the
edge of the table, do not lay it on heated surfaces,
avoid twisting of the cord.
• Place the coffee grinder only on a dry even
surface.
• Always unplug the appliance when you leave the
coffee grinder unattended, after usage, as well
as before assembly, dismantling, cleaning and
storage.
• Regularly check the power cord, the plug of the
power cord and the coffee grinder for damages.
Upon detection of any damages immediately
suspend operation of the coffee grinder and bring
it to the nearest service center for testing, repair
or replacement.
• Do not leave the operating coffee grinder
unattended.
• Do not place the coffee grinder on a gas or
electric oven, and in close proximity to sources
of heat.

14
SPECIFICATIONS
Voltage: ~220–240 V
Frequency: 50 Hz
Power: 250–270 W
Caution! The manufacturer reserves the right
to make changes to specifications as a result of
continuous product updating without additional
notice thereon.
CONFIGURATION
Coffee grinder: 1 pc.
Operating manual with guarantee card: 1 pc.

Table of contents
Other BORK Coffee Grinder manuals

