9
Engine oil alarm
The engine oil alarm is designed to funcon when the engine oil in the
crankcase is insucient. Lack of engine oil may damage the engine. Once
oil level in the crankcase is too low, the engine oil alarm will stall the engine
automacally to make it free of damage while the engine switch is sll at
"ON".
CAUTION:
If cannot restart the engine, check the engine oil level rst before go to
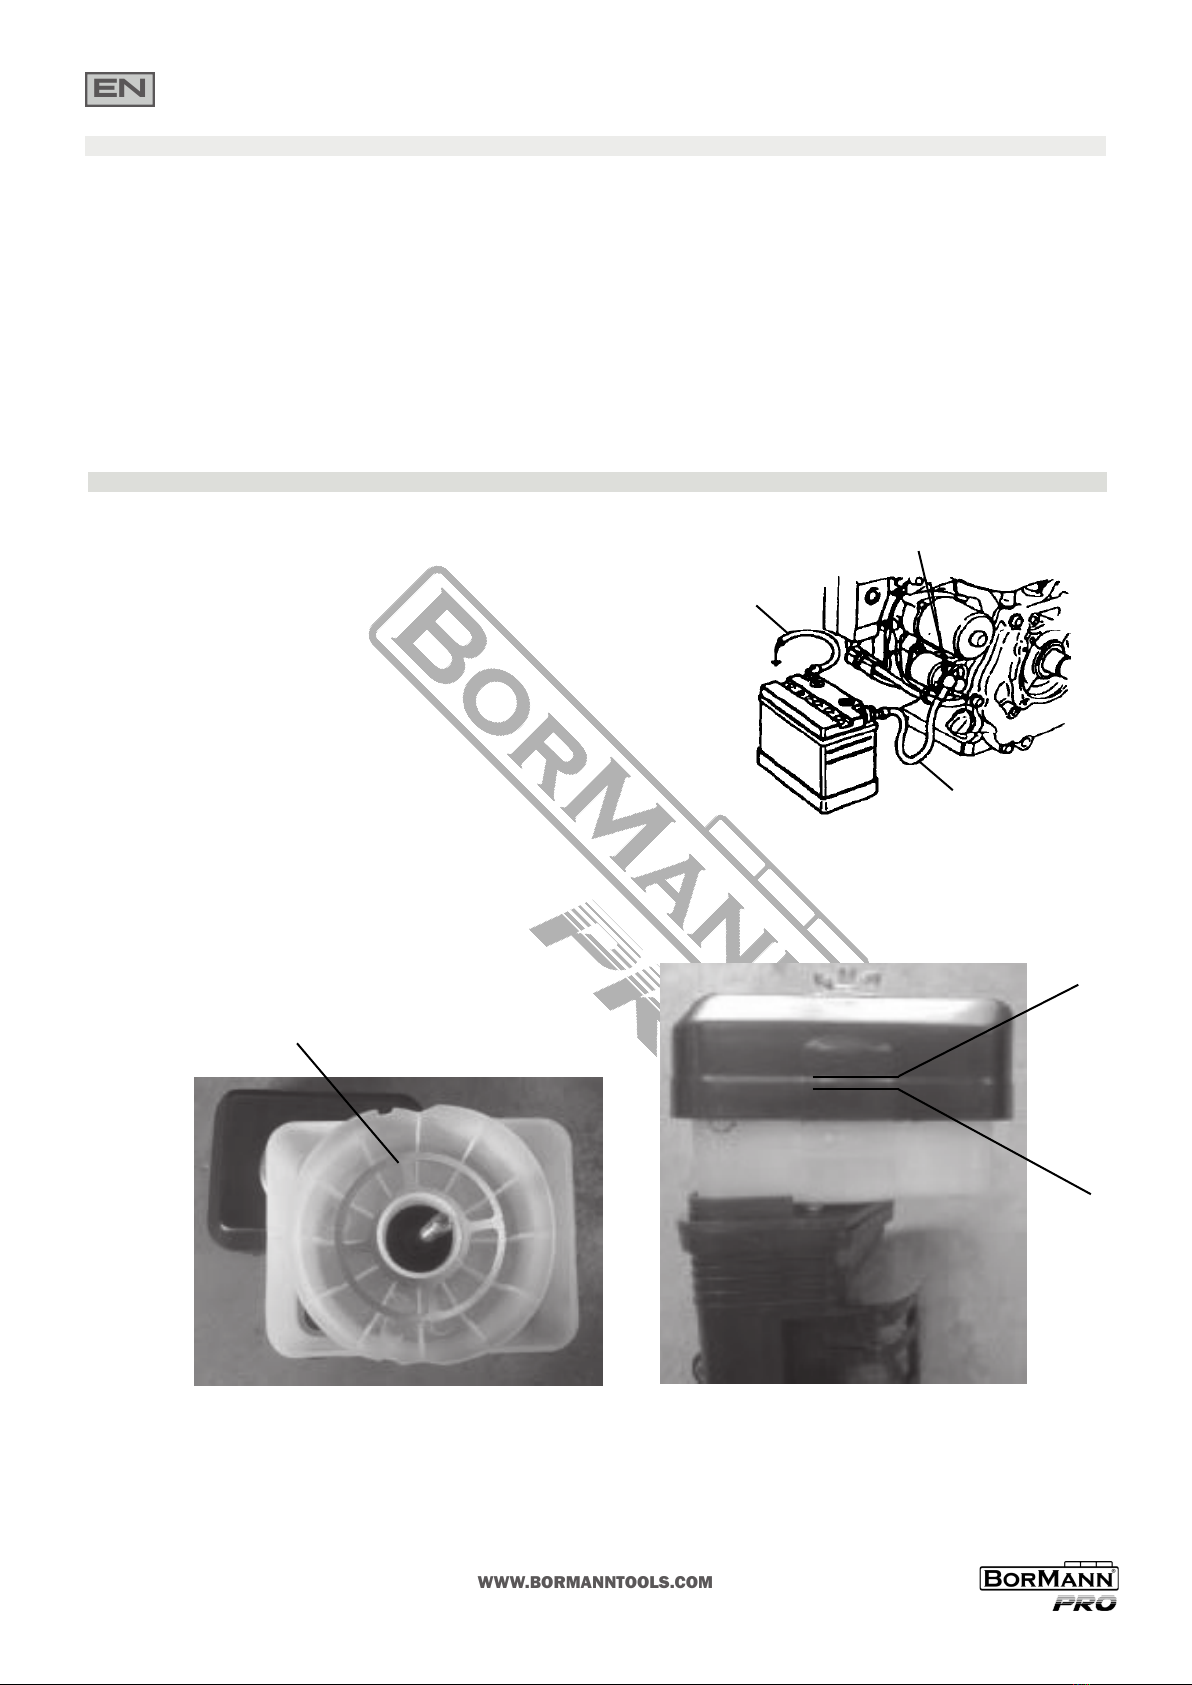
other check items. BREAKER (Electric-start type).
The breaker will cut o automacally to protect the charging circuit of the
baery in the case that short circuit or incorrect connecon of the baery
poles occurs. The green indicator in the breaker will jump out with the
circuit cung o. Aer nding troubles and troubleshoong, depress the
breaker buon to tun the breaker on.
Operang on mountainous areas
On mountainous areas, the standard mixture rao is relavely too big so the engine performance may be impaired while the fuel consumpon may increase,
besides, too big mixture rao will pollute the spark plug to result in starng the engine dicultly. This' problern can be solved by amending the carburetor
technological status. If always using on highlands with a height above sea level of 1800 meters, ask your dealer for doing the job. However, the engine power
will decrease by about 3.5% with every 305 meters up in height.
CAUTION : Amended engine applicable to highlands may be damaged seriously in area below altude of 1800 meters for overheang, because its mixture
rao is too small tor operaon in low altude area. In the case, ask your dealer to recover the engine to its normal technical status.
STOP
In emergency, push the engine switch to "OFF" to stall the engine; to stop it in normal, do
as follows:
1. Push right the throle lever to the boom.
2. Push the engine switch to "OFF".
3. Set the fuel cock to "OFF".
CAUTION: Sudden stopping at high speed under heavy load is forbidden, otherwise damage will result.
Exhaust control system
With the engine running, carbon monoxibe, oxide of nitrogen and hydrocarbon will produce, and in certain condions, oxide of nitrogen and hydrocarbon will
react chemically each other to make smoke while carbon monoxide is toxic, so exhaust control of them is very important. The company decreases the exhaust
emissions by introducing poor-fuel carburetors and other devices into the engine to solve the problem. To keep the exhaust of your engine with in the standard
exhaust emission, pay aenon to the following :
1. Maintenance
maintain the engine periodically in accordance with the maintenance schedule in the manual. The aintenance schedule is made out on the base of normal use
in normal condions, if using under heavy load, dusty or wet circumstances or in high temperature, service of -the engine should be done more oen.
2. Replacement of Parts
We recommend that you should choose such parts which are manufactured by the company or equivalent to these in quality as replacement ones. Replacement
without so high quality as the original ay the exhaust conbrol systan in eecveness.
3.Modifying
Modifying the exhaust control system may make actual exhaust emissions exceeding statutory limit values. Illegal modicaons as such:
a) Dismantle or modify any part of air intake or exhaust system.
b) Modify or take o speed - adjusng connecon device or speed adjustment device to result in the engine's running beyond the set parameters.
Exhaust control system
Fuel cock
OFF
Engine switch Throle valve
lever
Low speed
Throle lever
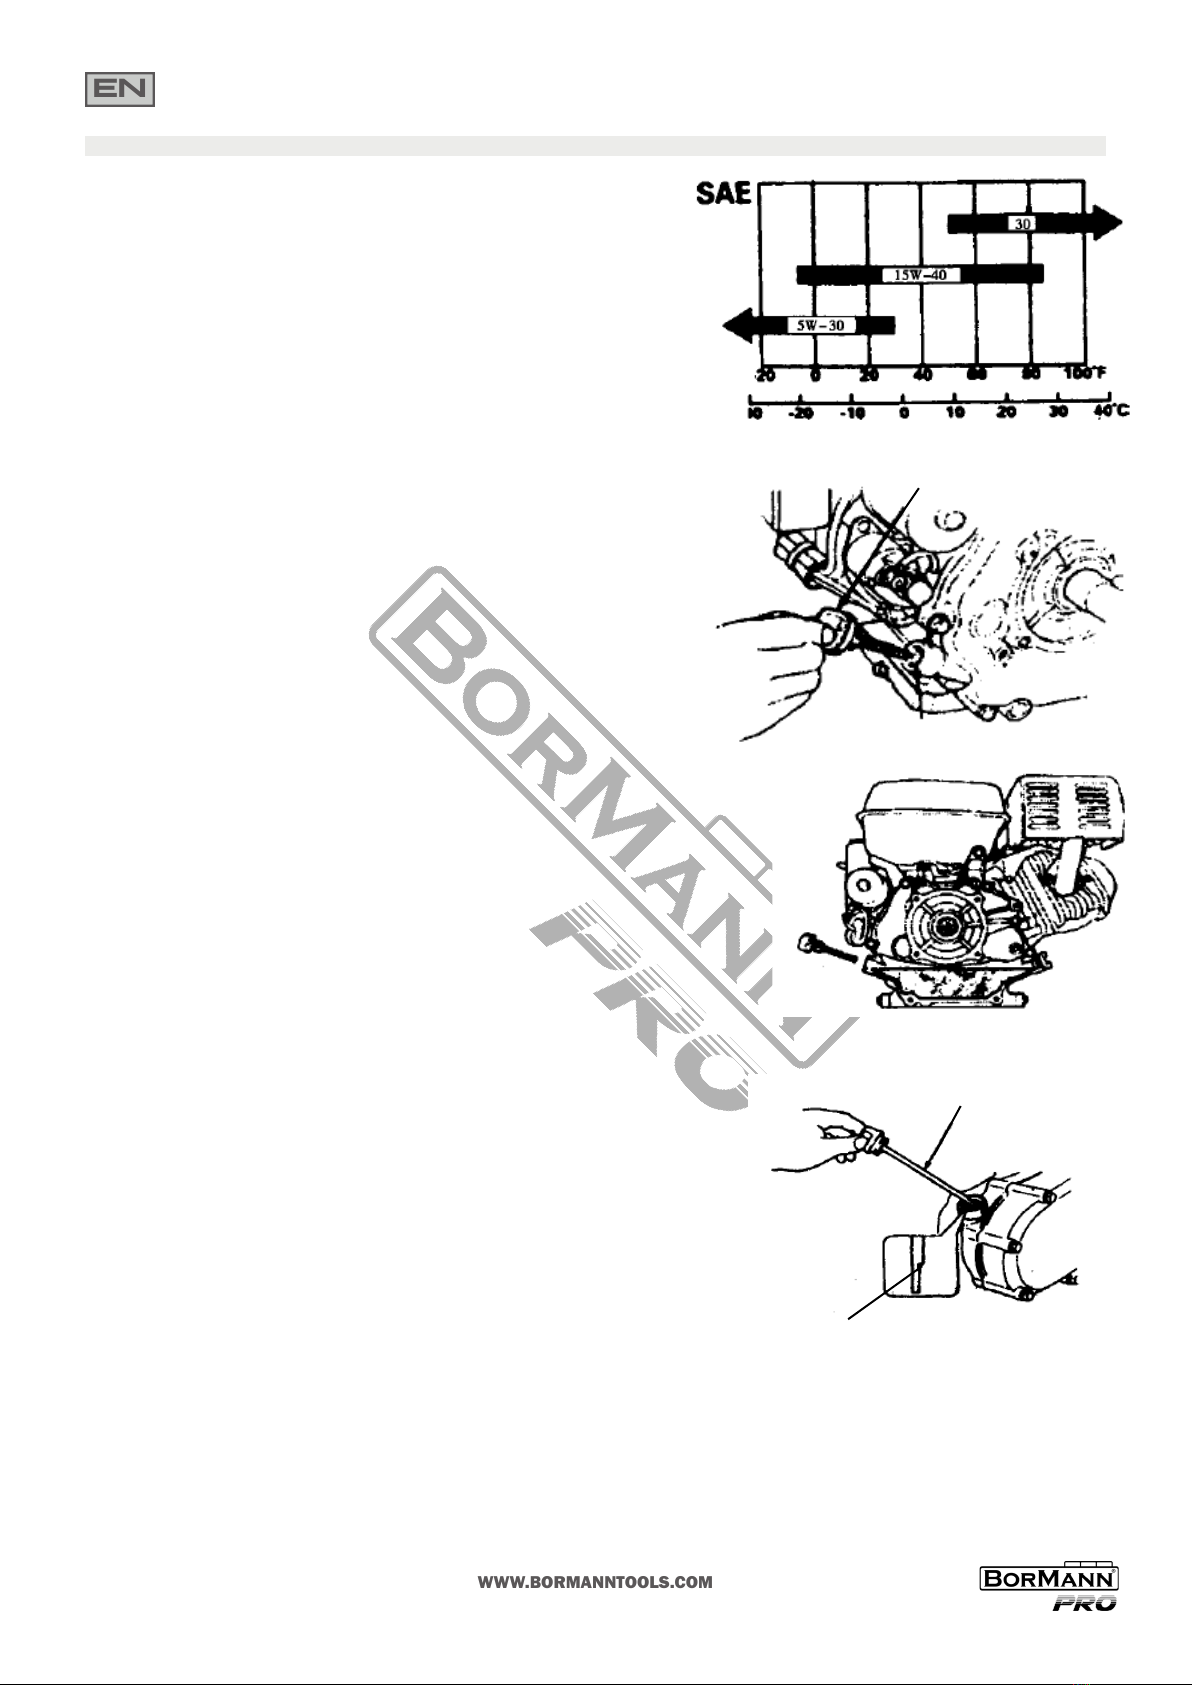
Dipsck
Upper level mark