manuals.online logo
Brands
  1. Home
  2. •
  3. Brands
  4. •
  5. Bosch
  6. •
  7. Vacuum Cleaner
  8. •
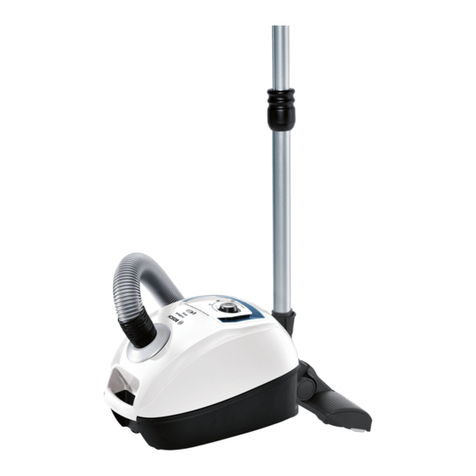
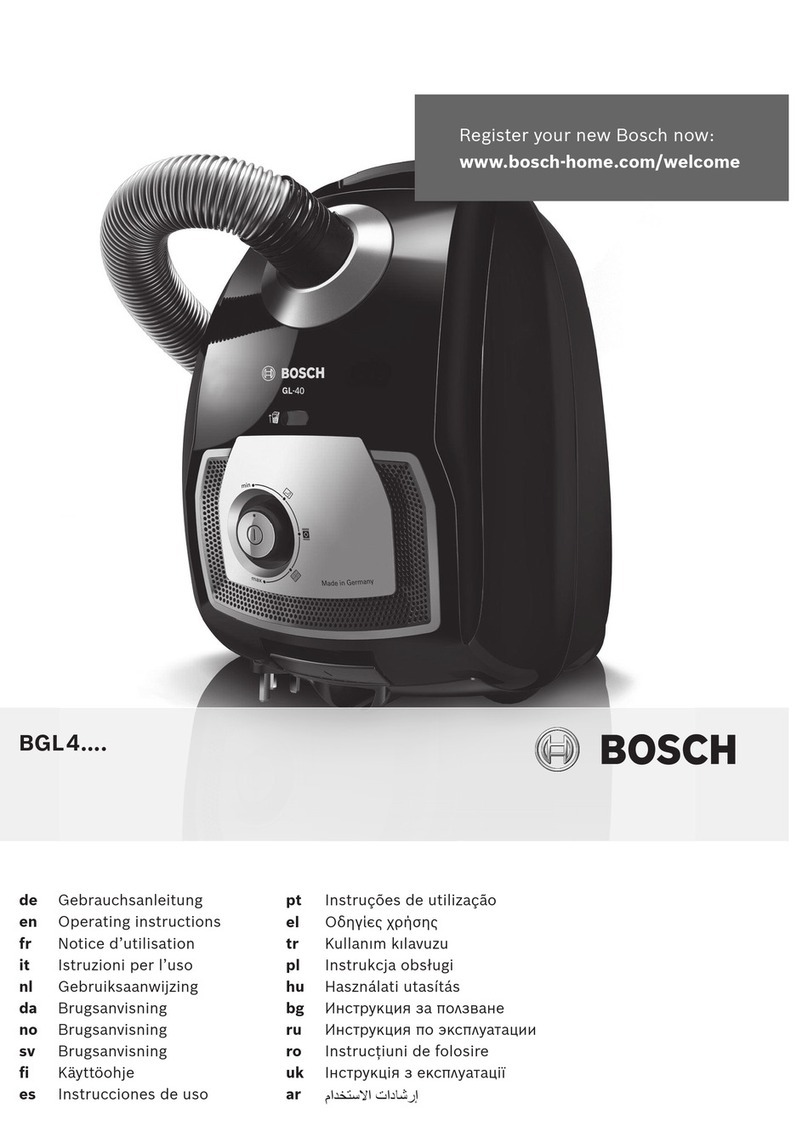
  9. Bosch BSGL5 SERIES User manual

Bosch BSGL5 SERIES User manual

Register your new Bosch now:
www.bosch-home.com/welcome
de Gebrauchsanweisung
en Operating instructions
fr Notice d’utilisation
it Istruzioni per l’uso
nl Gebruiksaanwijzing
da Brugsanvisning
no Brugsanvisning
sv Brugsanvisning
fi Käyttöohje
es Instrucciones de uso
pt Instruções de utilização
el Οδηγίες χρήσης
tr Kullanım kılavuzu
pl Instrukcja obsługi
hu Használati utasítás
bg Инструкция за ползване
ru Инструкция по эксплуатации
ro Instrucţiuni de folosire
uk Інструкція з експлуатації
arǬϡ΍ΪΨΘγϻ΍Ε΍ΩΎηέ·
BSGL5..
 
 
use
PowerProtect
D stbag
Typ G ALL
for best
performance
All manuals and user guides at all-guides.com
all-guides.com
1
de Sicherheitshinweise . . . . . . . . . . . . . . . . . . . . . . . . . . . . . . . . . . . . . . . . . . . . . . . . . . .2
ebrauchsanleitung . . . . . . . . . . . . . . . . . . . . . . . . . . . . . . . . . . . . . . . . . . . . . . . . . .34
en Safety information . . . . . . . . . . . . . . . . . . . . . . . . . . . . . . . . . . . . . . . . . . . . . . . . . . . .3
Instructions for use . . . . . . . . . . . . . . . . . . . . . . . . . . . . . . . . . . . . . . . . . . . . . . . . . .37
fr Consignes de sécurité . . . . . . . . . . . . . . . . . . . . . . . . . . . . . . . . . . . . . . . . . . . . . . . . .5
Mode d`emploi . . . . . . . . . . . . . . . . . . . . . . . . . . . . . . . . . . . . . . . . . . . . . . . . . . . . . .41
nl Veiligheidsvoorschriften . . . . . . . . . . . . . . . . . . . . . . . . . . . . . . . . . . . . . . . . . . . . . . . .8
ebruiksaanwijzing . . . . . . . . . . . . . . . . . . . . . . . . . . . . . . . . . . . . . . . . . . . . . . . . . . .48
da Sikkerhedsanvisninger . . . . . . . . . . . . . . . . . . . . . . . . . . . . . . . . . . . . . . . . . . . . . . . . .9
Brugsanvisning . . . . . . . . . . . . . . . . . . . . . . . . . . . . . . . . . . . . . . . . . . . . . . . . . . . . . .52
no Sikkerhetsanvisninger . . . . . . . . . . . . . . . . . . . . . . . . . . . . . . . . . . . . . . . . . . . . . . . .11
Bruksanvisning . . . . . . . . . . . . . . . . . . . . . . . . . . . . . . . . . . . . . . . . . . . . . . . . . . . . . .55
sv Säkerhetsanvisningar . . . . . . . . . . . . . . . . . . . . . . . . . . . . . . . . . . . . . . . . . . . . . . . . .12
Bruksanvisning . . . . . . . . . . . . . . . . . . . . . . . . . . . . . . . . . . . . . . . . . . . . . . . . . . . . . .58
fi Turvaohjeet . . . . . . . . . . . . . . . . . . . . . . . . . . . . . . . . . . . . . . . . . . . . . . . . . . . . . . . .14
Käyttöohje . . . . . . . . . . . . . . . . . . . . . . . . . . . . . . . . . . . . . . . . . . . . . . . . . . . . . . . . .61
pt Indicações de segurança . . . . . . . . . . . . . . . . . . . . . . . . . . . . . . . . . . . . . . . . . . . . . .17
Manual de instruções . . . . . . . . . . . . . . . . . . . . . . . . . . . . . . . . . . . . . . . . . . . . . . . . .68
es Consejos y advertencias de seguridad . . . . . . . . . . . . . . . . . . . . . . . . . . . . . . . . . . . .15
Instrucciones de uso . . . . . . . . . . . . . . . . . . . . . . . . . . . . . . . . . . . . . . . . . . . . . . . . .65
el Υποδείξεις ασφαλείας . . . . . . . . . . . . . . . . . . . . . . . . . . . . . . . . . . . . . . . . . . . . . . . . .18
Οδηγίες Χρήσης . . . . . . . . . . . . . . . . . . . . . . . . . . . . . . . . . . . . . . . . . . . . . . . . . . . . .72
tr üvenlik bilgileri . . . . . . . . . . . . . . . . . . . . . . . . . . . . . . . . . . . . . . . . . . . . . . . . . . . .20
Kullanma kılavuzu . . . . . . . . . . . . . . . . . . . . . . . . . . . . . . . . . . . . . . . . . . . . . . . . . . . .76
hu
Wskazówki dotyczące bezpieczeństwa . . . . . . . . . . . . . . . . . . . . . . . . . . . . . . . . . . .22
Instrukcja uzytkowania . . . . . . . . . . . . . . . . . . . . . . . . . . . . . . . . . . . . . . . . . . . . . . . .79
pl
Biztonsági útmutató . . . . . . . . . . . . . . . . . . . . . . . . . . . . . . . . . . . . . . . . . . . . . . . . . .24
Használati utasitás . . . . . . . . . . . . . . . . . . . . . . . . . . . . . . . . . . . . . . . . . . . . . . . . . . .83
bg Указания за безопасност . . . . . . . . . . . . . . . . . . . . . . . . . . . . . . . . . . . . . . . . . . . . .25
Инструкция за наична на ползване . . . . . . . . . . . . . . . . . . . . . . . . . . . . . . . . . . . . .86
Правила техники безопасности . . . . . . . . . . . . . . . . . . . . . . . . . . . . . . . . . . . . . . .27
Оuписание прибора . . . . . . . . . . . . . . . . . . . . . . . . . . . . . . . . . . . . . . . . . . . . . . . . . 90
Instrucţiuni de siguranţă . . . . . . . . . . . . . . . . . . . . . . . . . . . . . . . . . . . . . . . . . . . . . .28
Instrucţiuni utilizare . . . . . . . . . . . . . . . . . . . . . . . . . . . . . . . . . . . . . . . . . . . . . . . . . 94
Texніка безпеки . . . . . . . . . . . . . . . . . . . . . . . . . . . . . . . . . . . . . . . . . . . . . . . . . . . . .30
Сeкuлaад пилососа . . . . . . . . . . . . . . . . . . . . . . . . . . . . . . . . . . . . . . . . . . . . . . . . . .97
ro
ar
33 . . . . . . . . . . . . . . . . . . . . . . . . . . . . . . . . . . . . . . . . . . . . . . . . . . . . . . .
103 . . . . . . . . . . . . . . . . . . . . . . . . . . . . . . . . . . . . . . . . . . . . . . . . . . .
it Norme di sicurezza . . . . . . . . . . . . . . . . . . . . . . . . . . . . . . . . . . . . . . . . . . . . . . . . . . . .6
Istruizioni per l`uso . . . . . . . . . . . . . . . . . . . . . . . . . . . . . . . . . . . . . . . . . . . . . . . . . .44
ru
uk
All manuals and user guides at all-guides.com
4
!Please note
The mains socket must be protected by at least a 16
amp circuit breaker.
If a circuit breaker is tripped when you switch on the
vacuum cleaner, this may be because other electrical
appliances which have a high current draw are con-
nected to the same power circuit.
To prevent the circuit breaker from tripping, select
the lowest power setting before switching the appli-
ance on, and increase the power only once it is run-
ning.
Disposal information
Packaging
The packaging is designed to protect the vacuum
cleaner from being damaged during transportation.
It is made of environmentally friendly materials and
can therefore be recycled. Dispose of packaging that
is no longer required at an appropriate recycling
point.
Old appliance
Old appliances still contain many valuable materials.
Therefore, please take appliances that have reached
the end of their service life to your retailer or recy-
cling centre so that they can be recycled. For current
disposal methods, please enquire at a retailer or
your local council.
Disposal of filters and dust bags
Filters and dust bags are manufactured from envi-
ronmentally friendly materials. Provided they do not
contain substances that are not permitted in house-
hold waste, you can dispose of them with your nor-
mal household waste.
Notes on the energy label
This vacuum cleaner is a general purpose vacuum
cleaner.
To achieve the declared energy efficiency and cleaning
performance class on carpet, please use the
interchangeable universal nozzle.
To achieve the declared energy efficiency and cleaning
performance class on hard floor with nooks and
crannies, please use the hard floor nozzle provided
The values provided on the energy label have been
determined according to the prescribed measuring
process (in accordance with EN60312-1).
Plastic bags and films must be kept out
of the reach of children before disposal.
=> Risk of suffocation.
Proper use
Only connect and use the vacuum cleaner in accor-
dance with the specifications on the rating plate.
Never vacuum without the dust bag or dust contain-
er, motor protection or exhaust filter.
=> This may damage the vacuum cleaner.
Always keep the vacuum cleaner away from your
head when using nozzles and tubes.
=> This could cause injury!
When vacuuming stairs, the appliance must always
be positioned below the user.
Do not use the power cord or the hose to carry or
transport the vacuum cleaner.
For safety reasons, if this appliance's mains power
cable becomes damaged, it must be replaced by the
manufacturer, their after-sales service department or
a similarlyqualified person.
If using the appliance for longer than 30 minutes,
pull out the power cord completely.
When disconnecting the appliance from the mains,
pull on the plug itself to remove it; do not pull on
the power cord.
Do not pull the power cord over sharp edges or
allow it to be-come trapped.
When the cable is being automatically rewound,
ensure that the mains plug is not thrown towards
persons, body parts, animals or objects.
=> Use the mains plug to guide the power cord.
Pull out the mains plug before carrying out any work
on the vacuum cleaner.
Do not operate the vacuum cleaner if it is damaged.
Unplug the appliance from the mains if a fault is
detected.
For safety reasons, only authorised after-sales
service personnel are permitted to carry out repairs
and fit replacement parts to the vacuum cleaner.
Protect the vacuum cleaner from the weather,
moisture and sources of heat.
Do not pour flammable substances or substances
containing alcohol onto the filters (dust bag, motor
protection filter, exhaust filter, etc.).
The vacuum cleaner is not suitable for use on
construction sites.
=> Vacuuming up building rubble could damage the
appliance.
When not in use, switch off the appliance and pull
out the mains plug.
At the end of its life, the appliance should immedi-
ately be rendered unusable, then disposed of in an
appropriate manner.
All manuals and user guides at all-guides.com
!PLEA E NOTE
Your appliance is a highly efficient vacuum cleaner
that can only achieve its best cleaning results using
genuine dust bags.
Only if high-quality dust bags are used, such as
genuine Bosch dust bags, can the figures specified
on the EU energy label pertaining to energy efficiency
class, suction and dust retention capacity be
achieved.
Additionally, using inferior quality dust bags (e.g.
paper bags) can have a significant impact on the
service life and performance of your appliance.
Warranty claims can only be made if genuine Bosch
dust bags are used.
For more information and to order genuine Bosch
dust bags, go to
www.bosch-home.com/dust-bag
B Hepa filter BBZ154 F
Additional filter for cleaner exhaust air.
Recommended for allergy sufferers. Replace once a
year.
C TURBO-UNIVER AL® brush for upholstery BBZ42TB
All in one brushing and vacuuming of upholstered
furniture, mattresses, car seats, etc. Especially suit-
able for picking up pet hair. The brush roller is dri-
ven by the air flow through the vacuum cleaner.
No separate electrical connection is needed.
D TURBO-UNIVER AL® brush for floors BBZ102TBB
All-in-one brushing and vacuuming of rugs and car-
pets, and for all floor coverings. Particularly suitable
for vacuuming up pet hair. The brush roller is driven
by the air flow through the vacuum cleaner.
No separate electrical connection is needed.
E Hard floor tool BBZ123 D
For vacuuming hard floors
(parquet, tiles, terracotta, etc.)
F Bionic filter BBZ11BF
Combats unpleasant odours over a long period
Please replace the filter once it begins to lose its
effect (after approx. 1 year)
Ordering code: 468637
Before using for the first time
Figure
●Push the handle onto the flexible hose and lock it in
place.
Figure
●Open the accessories compartment.
●Insert the crevice nozzle and upholstery nozzle in the
accessories compartment in the appliance lid.
●Close the accessories compartment.
1*
2
38
Figure
●Open the dust bag compartment lid. Figure
●Remove the motor protection filter from the appliance.
●Place the Bionic filter onto the motor protection filter.
●Push the filters into the appliance and close the dust
bag compartment lid.
Initial use
Figure
a)Push the flexible hose connecting piece into the air
intake opening in the vacuum cleaner lid until it
engages.
b)To remove the flexible hose, press the two locking
catches together and pull out the hose.
Figure
●Push the handle into the telescopic tube until it
locks in place.
●To release the connection, press the locking collar
and pull out the telescopic tube.
Figure
●Push the telescopic tube into the connecting piece
on the floor tool until it locks in place.
●To release the connection, press the locking collar
and pull out the telescopic tube.
Figure
●Move the sliding sleeve in the direction of the arrow
to release the telescopic tube and adjust it to the
length required.
Figure
●olding the power cord by the plug, pull out to the
required length and insert the plug into the mains
socket.
Figure witching on/off
●To switch the vacuum cleaner on or off, press the
ON/OFF button.
Figure Controlling the suction level
The required suction level can be set to the level
required by turning the control knob in the direction
of the arrow.
Low power range =>
For vacuuming delicate
materials, e.g curtains.
Medium power range =>
For the daily vacuuming of light
dirt deposits.
igh power range =>
For vacuuming durable floor coverings,
hard floors and heavy deposits of dirt.
4
5*
3*
21
6*
7*
8
9
10
All manuals and user guides at all-guides.com
39
* Dependent on model
Vacuuming
!Please note:
Depending on the type of hard floor involved (e.g.
rough rustic tiles), floor tools are subject to a certain
amount of wear. Therefore, you must check the
underside of the floor tool at regular intervals. Worn
undersides of floor tools may have sharp edges that
can damage sensitive hard floors, such as parquet or
linoleum. The manufacturer does not accept any
responsibility for damage caused by worn floor tools.
Figure
Adjusting the floor tool:
Rugs and carpets =>
ard floors =>
Figure
●Remove the crevice nozzle or upholstery nozzle from
the accessories compartment in the appliance lid.
Figure Vacuuming with accessories
Attach the nozzles to the suction pipe or handle as
required:
a)Crevice nozzle for vacuuming crevices and corners, etc.
b)Upholstery nozzle for vacuuming upholstered
furniture, curtains, etc.
c) ard-floor tool
For vacuuming hard floor coverings
(tiles, parquet flooring, etc.)
●Push the telescopic tube into the connecting piece
of the hard floor tool until it locks in place.
●To release the connection, press the locking collar
and pull out the telescopic tube.
Figure Professional upholstery nozzle
●For intensive cleaning of upholstered furniture
(attach to the handle or suction pipe, depending on
requirements).
●To clean the professional upholstery nozzle, simply
vacuum it using the handle.
Figure
●After use, place the crevice or upholstery nozzle back
into the accessories compartment in the appliance
lid.
Turbo brush
If your appliance is equipped with a turbo brush,
consult the accompanying instruction manual for
instructions on its use and maintenance.
Figure
●You can use the parking aid on the back of the
appliance if you wish to stop vacuuming for a short
time.
●Once you have switched off the appliance, slide the
hook on the floor tool into the recess on the rear of
the appliance.
11
12
13*
14*
15
16
Figure
To overcome obstacles, e.g. steps, the appliance can
also be carried by the handle on the appliance body.
When the work is done
Figure
●Pull out the mains plug.
●Tug the power cord briefly and then let go
(the power cord retracts automatically).
Figure
●To store or transport the appliance, you can use the
storage aid on the underside of the appliance.
●Stand the appliance up on its end. Slide the catch on
the floor tool into the groove on the underside of the
appliance.
Changing the filter
!Please note: Always switch off the appliance before
changing the filter.
Replacing the bag
Figure
a)If the dust bag change indicator lights up red
continuously when the floor tool is lifted from the
floor and the highest power setting has been
selected, the dust bag must be changed, even
though it may not yet be full. Even if the dust bag is
not full, it may still need changing, due to the type of
dust which has been vacuumed.
First check that the nozzle, suction pipe and flexible
hose are not blocked, as this would also lead to the
dust bag change indicator being triggered.
b)The handle can easily be detached from the hose to
remove blockages.
Figure Opening the lid
●Open the lid by moving the locking lever in the
direction of the arrow.
Figure
a)Seal the dust bag by pulling the sealing plate, and
remove the bag.
b)Slide the new dust bag into the holder up to the stop.
!Please note: the lid will only close if a dust bag has
been inserted.
18
19
20*
21
22
17
All manuals and user guides at all-guides.com
40
Cleaning the motor protection filter
The motor protection filter should be cleaned regularly
by tapping out the dirt and rinsing.
Figure
●Open the dust bag compartment lid. Figure
●Remove the motor protection filter from the appliance
in the direction of the arrow.
●Disconnect the motor protection filter from the Bionic
filter.*
●Clean the motor protection filter by tapping out the
dirt.
●If it is very dirty, the motor protection filter should be
rinsed. The filter must then be left to dry for at least
24 hours.
!Please note: the Bionic filter must not come into
contact with water, as this will adversely affect the
correct operation of the filter.
●After cleaning, place the Bionic filter onto the motor
protection filter as necessary and push both filters
into the appliance.
●Close the dust bag compartment lid.
Replacing the Bionic filter
If your appliance is equipped with a Bionic filter, it
should be replaced once it begins to lose its effect
(after approx. 1 year).
Figure
●Open the dust bag compartment lid. Figure
●Remove the motor protection filter together with the
Bionic filter from the appliance.
●Remove the old Bionic filter from the motor
protection filter and dispose of it.
●Place the Bionic filter onto the motor protection filter.
●Push the filters into the appliance and close the dust
bag compartment lid.
●The motor protection filter must also be inserted into
the appliance if you no longer wish to use the Bionic
filter
Replacing the exhaust filter
Replacing the micro-hygiene filter
This should be replaced with every replacement filter pack.
Figure
●Open the dust bag compartment lid. Figure
●Release the filter holder by turning the locking lever
in the direction of the arrow.
●Remove the micro-hygiene filter. Insert the new
micro-hygiene filter into the appliance.
●Insert the filter holder in the appliance and lock it in
place.
23*
21
24*
21
25
21
* Dependent on model
Replacing the HEPA filter
If your vacuum cleaner is equipped with a EPA filter,
this should be replaced once a year.
Figure
●Open the dust bag compartment lid. Figure
●Unlock the epa filter by turning the locking lever in
the direction of the arrow and remove the filter from
the appliance.
●Insert the new EPA filter and lock it in place.
If you have vacuumed up fine dust particles, clean the
motor protection filter and, if necessary, replace the
micro-hygiene filter or EPA filter.
Care
Always switch off the vacuum cleaner and disconnect
it from the mains before cleaning the vacuum cleaner.
The vacuum cleaner and plastic accessories can be
cleaned with a commercial plastic cleaner.
!Do not use abrasive agents, glass or all-purpose
cleaning products. Never immerse the vacuum
cleaner in water.
If necessary, the dust compartment can be cleaned
with a second vacuum cleaner or simply wiped with
a dry cloth or dusting brush.
Subject to technical modifications.
26*
21
All manuals and user guides at all-guides.com
all-guides.com
111
 
1.             (24)
             . ! 
              
     .
2.      ,      ,
"             
  (      ,   ,  ).
# $      
              
 ,  ,       , 
        BSH  #%    
       
3. &              
     ,    &" (   
)  BSH  #%        
  ,         .
4. 3           '    
         &"  BSH  #%
5. (            &" ( 
  )  BSH  #%.
6.             
 (..  ).
7.           ,
          
         .
8.   :
- ,    "    service
     BSH  #%
- ) , " ,          
      /   , "
      ,     .
- *    .
- +     ,  , , , 
,      ,       
      .
9.           ""  
             
.
10. #           
        &" (    )
 BSH  #%
11.           
.
12.           
  .
BSH #.%.. – 17   # – ) & * 20, ,
SERVICE
#: 17.   # – ) & * 20, , – .: 210-42.77.700
-/:8,3.   -/ – ., * - .: 2310-497.200
* :/ &  – .:2610-330.478
,:  # 23 & ,,  – .:2810-321.573
,: #. . !’ 39, 0 – ) –* .:77778007
EL
All manuals and user guides at all-guides.com
112
All manuals and user guides at all-guides.com
113
All manuals and user guides at all-guides.com
114
ÄËÅÇ÷ͿÖÅ¸ÒÉŹÅÀɼÌÄ¿Á¼ÆÇÅ¿¾¹Å»¿ÃÅÀÆÅ»ÁÅÄÉÇżÃÁÅÄͼÇÄ·¨¬ÅÏÊÄ»¨¿Ã¼ÄÈ¬·ÊȺ¼Ç¼É¼ø¬¡·ÇÂ¼Ç¿¯ÉÇ£ÕÄ̼Ä¹ÈÅÅɹ¼ÉÈɹ¿¿ÈÉǼ¸Å¹·Ä¿Öÿ¾·ÁÅÄÅ»·É¼ÂÓÈɹ·ÅɼÌĿμÈÁÅÃǼºÊ¿ÇŹ·Ä¿¿¿¾·ÁÅÄÅ»·É¼ÂÓÈɹ·Å¾·Ð¿É¼ÆÇ·¹ÆÅÉǼ¸¿É¼Â¼À§ÅÈÈ¿ÀÈÁÅÀ«¼»¼Ç·Í¿¿¦ÇÅ»ÊÁÍ¿ÖÆÒ¼ÈÅÈҩŹ·ÇÄÒÀ¾Ä·Á#PTDI¦¡¥¦¡ÊÊÇÉËÁžÆËÈÉǽÌÃÏÁÁÈÇÊËÇØÆÆÇǺÆÇ»ÄؾËÊØ«¾ÎÆÁоÊÃÁ¾ιɹÃ˾ÉÁÊËÁÃÁÈÉǽÌÃÏÁÁ»ËÇÅÐÁÊľÖÆ¾É¼ÇÖÍ;ÃËÁ»ÆÇÊËÁÈÇÊËÇØÆÆÇÊÇ»¾ÉѾÆÊË»Ì×ËÊØ¨ÉǽÌÃÏÁØɾ¼ÌÄØÉÆÇÈÉÇÎǽÁËǺØÀ¹Ë¾ÄÕÆÌ×ÈÉÇϾ½ÌÉÌÈǽ˻¾É¿½¾ÆÁØÊÇÇË»¾ËÊË»ÁØÊÇ¼Ä¹ÊÆÇ½¾ÂÊË»Ì×Ò¾ÅÌÀ¹ÃÇÆÇ½¹Ë¾ÄÕÊË»Ì¡ÆÍÇÉŹÏÁ×ÇɾÃ»ÁÀÁ˹Î¹ÃË̹ÄÕÆÔÎʾÉËÁÍÁùËÇ»ÊÇÇË»¾ËÊË»ÁØÁÊÉÇùÎÁÎ½¾ÂÊË»ÁØ¹ÃË̹ÄÕÆÌ×ÁÆÍÇÉŹÏÁ×ÇÃĹÊʾÁιɹÃ˾ÉÁÊËÁùÎÖÆ¾É¼ÇÖÍ;ÃËÁ»ÆÇÊËÁÈÉǽÌÃÏÁÁÁÆÍÇÉŹÏÁ×Ǻ¹ÃË̹ÄÕÆÇÅ¹ÊÊÇÉËÁžÆË¾ÈÉǽÌÃÏÁÁÅÇ¿ÆÇÈÇÄÌÐÁËÕÌÇɼ¹ÆÁÀ¹ÏÁÁ»ÔÈÇÄÆØ×Ò¾ÂÍÌÆÃÏÁÁÁÆÇÊËÉ¹ÆÆÇ¼ÇÁÀ¼ÇËÇ»ÁË¾ÄØƹ˾ÉÉÁËÇÉÁÁ©ÇÊÊÁÂÊÃÇÂ¾½¾É¹ÏÁÁ§§§ª®ÔËÇ»¹ØË¾ÎÆÁù¥ÇÊû¹ÌÄ¥¹Ä¹Ø£¹ÄÌ¿ÊùØ½˾ľÍÇÆ͹ÃÊ£ÇÅȹÆÁØ§§§ª®ÔËÇ»¹ØË¾ÎÆÁù¥ÇÊû¹ÌÄ¥¹Ä¹Ø£¹ÄÌ¿ÊùØ½ÇÊÌÒ¾ÊË»ÄØ¾ËÊ»Ç×½¾ØË¾ÄÕÆÇÊËÕÈÇÈǽ˻¾É¿½¾ÆÁ×ÊÇÇË»¾ËÊË»ÁØÈÉǽÌÃÏÁÁÇËÁžÆÁÈÉÇÁÀ»Ç½ÁË¾ÄØºÔËÇ»ÇÂË¾ÎÆÁÃÁ#PTDIƹ¾½ÁÆÇÂ˹ÅÇ¿¾ÆÆÇÂ˾ÉÉÁËÇÉÁÁ«¹ÅÇ¿¾ÆÆÇ¼ÇÊÇ×À¹»ÊÇÇË»¾ËÊË»ÁÁÊ½¾ÂÊË»Ì×ÒÁÅÁ«¾ÎÆÁоÊÃÁÅÁɾ¼Ä¹Å¾ÆË¹ÅÁ»ùоÊË»¾ÌÈÇÄÆÇÅÇÐ¾ÆÆÇ¼Ç¡À¼ÇËÇ»Á˾ľÅÄÁϹ¹˹ÿ¾»ÔÈÇÄÆØ¾ËËɾºÇ»¹ÆÁØÈɾ½ÌÊÅÇËÉ¾ÆÆÔ¾¹ÃÇÆÇÅ©§Ë¾ÎÆÁоÊÃÇÅɾ¼ÌÄÁÉÇ»¹ÆÁÁ½ÄØÄÁϹ»ÔÈÇÄÆØ×Ò¾¼ÇÍÌÆÃÏÁÁÁÆÇÊËÉ¹ÆÆÇ¼ÇÁÀ¼ÇËÇ»ÁË¾ÄØƹ˾ÉÉÁËÇÉÁÁ©ÇÊÊÁÂÊÃÇÂ¾½¾É¹ÏÁÁ¡ÅÈÇÉ˾ÉÇÅ»©ÇÊÊÁÂÊÃÌ×¾½¾É¹ÏÁ×ºÔËÇ»ÇÂË¾ÎÆÁÃÁ#PTDIʾÉËÁÍÁÏÁÉÇ»¹ÆÆÇÂ»ùоÊË»¾ʾÉÁÂÆÇÈÉÇÁÀ»Ç½ÁÅÇÂÇɼ¹ÆÇÅÈÇʾÉËÁÍÁùÏÁÁ©ÇÊ˾ÊË¥ÇÊû¹¹Ë˾Ê˹Ë¹ÃÃɾ½Á˹ÏÁÁ©§ªª36¸¥ÇÊû¹¦¹ÎÁÅÇ»ÊÃÁÂÈÉÇÊÈ˾ľÍÇÆØ»ÄØ¾ËÊØ§§§ª®ÔËÇ»¹ØË¾ÎÆÁù¥ÇÊû¹ÌÄ¥¹Ä¹Ø£¹ÄÌ¿ÊùØ½˾ľÍÇÆÄØÈÉǽÌÃÏÁÁɾ¹ÄÁÀÇ»¹ÆÆÇÂÁÀ¼ÇËÇ»Á˾ľÅ»˾оÆÁ¾ÊÉÇù½¾ÂÊË»ÁØʾÉËÁÍÁù˹ÊÇÇË»¾ËÊË»ÁØÖËÇËʾÉËÁÍÁùË½¾ÂÊË»Á˾ľÆÈÉÁ¾¾ÈÇÊ˹»Ã¾ÈÉǽ¹¿¾ÁÁÊÈÇÄÕÀÇ»¹ÆÁÁÈÉÁžƾÆÁÁ»˾оÆÁ¾ÊÉÇùÊÄÌ¿ºÔÌÊ˹ÆÇ»Ä¾ÆÆÇ¼Ç»ÊÇÇË»¾ËÊË»ÁÁÊÇÊ˹ËÕ¾Â¹ÃÇÆ¹©ÇÀ¹ÒÁ˾Èɹ»ÈÇËɾºÁ˾ľÂªÉÇÃÊÄÌ¿ºÔƹÈÉǽÌÃÏÁ×ÌùÀ¹ÆÈÉÇÁÀ»Ç½Á˾ľÅ»ÄÁÊËǻþ¡ÆÍÇÉŹÏÁØÁÀ¼ÇËÇ»ÁË¾ÄØÇ¼¹É¹ÆËÁÂÆÇÅÁʾɻÁÊÆÇÅǺÊÄÌ¿Á»¹ÆÁÁÊÇÊ˹»ÖÃÊÈÄ̹˹ÏÁÇÆÆÔÎ½ÇÃÌžÆËÇ»Èɾ½ÌÊÅÇËÉ¾ÆÆÔÎÁÀ¼ÇËÇ»Á˾ľÅ½ÄØÈÉǽÌÃÏÁÁÅǼÌË»ÎǽÁËÕƹÊËÇØÒ¹ØÁÆÍÇÉŹÏÁØÁÆÊËÉÌÃÏÁØÉÌÃǻǽÊË»ÇÈÇÖÃÊÈÄ̹˹ÏÁÁÁÆÍÇÉŹÏÁØǺÌÊÄÇ»ÁØÎ¼¹É¹ÆËÁÂÆÇ¼ÇÁʾɻÁÊÆÇ¼ÇǺÊÄÌ¿Á»¹ÆÁØ¥¹ÉÃÁÉÇ»¹ÆÁ¾ÈÉǽÌÃÏÁÁÇÊÌÒ¾ÊË»ÄØ¾ËÊØÁÀ¼ÇËÇ»Á˾ľÅƹËÁÈÇ»ÇÂ˹ºÄÁÐþÁƾÈÇÊɾ½ÊË»¾ÆÆÇƹÌȹÃǻþÈÉÁºÇɹ¹˹ÿ¾ÅÇ¿¾ËÈÉÇÁÀ»Ç½ÁËÕÊØÁÆÔÅÁÊÈÇÊǺ¹ÅÁǺ¾ÊȾÐÁ»¹×ÒÁÅÁ½ÇÊËÌÈÆÇ¾Áƹ¼ÄؽÆÇ¾Èɾ½Ê˹»Ä¾ÆÁ¾ÁÆÍÇÉŹÏÁÁÇÈÉÁºÇɾ»žÊ˹ÎÈÉǽ¹¿¨ÉǽÌÃÏÁØÃÇËÇɹØÈÉÇÑĹÈÉÇϾ½ÌÉÌÈǽ˻¾É¿½¾ÆÁØÊÇÇË»¾ËÊË»ÁØÊÇ¼Ä¹ÊÆÇËɾºÇ»¹ÆÁØÅ«¾ÎÆÁоÊÃÁÎ©¾¼Ä¹Å¾ÆËÇ»«¹ÅÇ¿¾ÆÆÇ¼ÇªÇ×À¹ŹÉÃÁÉ̾ËÊØ¾½ÁÆÔÅÀƹÃÇÅǺɹҾÆÁØÈÉǽÌÃÏÁÁƹÉÔÆÃ¾¼ÇÊ̽¹ÉÊË»ÐľÆÇ»«¹ÅÇ¿¾ÆÆÇ¼ÇÊÇ×À¹¨ÉǽÌÃÏÁØÊÇÇË»¾ËÊË»Á¾ÃÇËÇÉÇÂǺØÀ¹Ë¾ÄÕÆÔÅËɾºÇ»¹ÆÁØÅÈǽ˻¾É¿½¾ÆÇÉÇÊÊÁÂÊÃÁÅÁʾÉËÁÍÁù˹ÅÁ»ÊÁÊ˾ž§ª«©ÄÁºÇ¾½ÁÆÔÅÁ½ÇÃÌžÆË¹ÅÁ«¹ÅÇ¿¾ÆÆÇ¼ÇÊÇ×À¹ŹÉÃÁÉ̾ËÊØÀƹÃÇÅÊÇÇË»¾ËÊË»ÁØ¶ÃÊÈÄ̹˹ÏÁÇÆÆÔ¾½ÇÃÌžÆËÔƹÈÉǽÌÃÏÁ×»ÔÈÇÄÆØ×ËÊØƹÉÌÊÊÃÇÅØÀÔþ¶ÃÊÈÄ̹˹ÏÁÇÆÆÔ¾½ÇÃÌžÆËÔƹ¼ÇÊ̽¹ÉÊË»¾ÆÆÔÎØÀÔùÎ¼ÇÊ̽¹ÉÊË»ÐľÆÇ»«¹ÅÇ¿¾ÆÆÇ¼ÇÊÇ×À¹ÇËÄÁÐÆÔÎÇËÉÌÊÊÃǼÇÈÉÁƹÄÁÐÁÁÊÇÇË»¾ËÊË»Ì×ÒÁÎËɾºÇ»¹ÆÁÂ»À¹ÃÇÆÇ½¹Ë¾ÄÕÊË»¾ÅÇ¿ÆÇº¾À»ÇÀžÀ½ÆÇÈÇÄÌÐÁËÕÌËÇɼÌ×Ò¾ÂÇɼ¹ÆÁÀ¹ÏÁÁɾÀÁ½¾ÆË¹ÊÇÇË»¾ËÊË»Ì×Ò¾¼Ç¼ÇÊ̽¹ÉÊË»¹Ðľƹ«¹ÅÇ¿¾ÆÆÇ¼ÇÊÇ×À¹¡ÆÍÇÉŹÏÁØÇÃÇÅÈľÃ˹ÏÁÁÈÉǽÌÃÏÁÁÈɾ½Ê˹»Ä¾Æ¹»ËÇɼǻÔÎÀ¹Ä¹ÎÅÇ¿¾ËºÔËÕÀ¹ÈÉÇѾƹÈÇ˾ľÍÇÆÌº¾ÊÈÄ¹ËÆÇÂ¼ÇÉØÐ¾ÂÄÁÆÁÁ¹˹ÿ¾½ÇÊËÌÈÆ¹»ÁÆË¾Éƾ˾ƹʹÂ˾ÈÉÇÁÀ»Ç½ÁË¾ÄØXXXCPTDICUSV£Å»¼ÂÓÆÇŸ·Í¿ÅÄÄÒÀɿƨ¼Çɿ˿Á·ÉÈÅÅɹ¼ÉÈɹ¿Ö¨ÉÇ·Ä·¿¾ºÅÉŹ¿É¼ÂÓ§¼º¿ÈÉÇ·Í¿ÅÄÄÒÀÄÅüÇ·É·¹Ò»·Î¿¼ÀÈɹʼÉ»Å#(#7##47$%&¸#¾ÉŹÆÁØ#(#7##47$%&¸#¾ÉŹÆÁØ#(-7##4;7$%&¸#¾ÉŹÆÁØ#(-7##4;7$%&¸#¾ÉŹÆÁØ#(-7##4;7$%&¸#¾ÉŹÆÁØ#(-.077##4;.$%&¸#¾ÉŹÆÁØ#(-.077##4;.$%&¸#¾ÉŹÆÁØ#(-.077##4;.$%&¸#¾ÉŹÆÁØ
All manuals and user guides at all-guides.com
115
£Å»¼ÂÓÆÇŸ·Í¿ÅÄÄÒÀɿƨ¼Çɿ˿Á·ÉÈÅÅɹ¼ÉÈɹ¿Ö¨ÉÇ·Ä·¿¾ºÅÉŹ¿É¼ÂÓ§¼º¿ÈÉÇ·Í¿ÅÄÄÒÀÄÅüÇ·É·¹Ò»·Î¿¼ÀÈɹʼÉ»Å#(-410357##4;.$%&¸#¾ÉŹÆÁØ#(-7##4;7$%&¸#¾ÉŹÆÁØ#(-7##4;7$%&¸#¾ÉŹÆÁØ#(-7##47$%&¸#¾ÉŹÆÁØ#(-7##47$%&¸#¾ÉŹÆÁØ#(47*#497$%&¸#«ÌÉÏÁØ#(47*#497$%&¸#«ÌÉÏÁØ#(47*#497$%&¸#«ÌÉÏÁØ#(47*#497$%&¸#«ÌÉÏÁØ#(47*#497$%&¸#«ÌÉÏÁØ#(47*#497$%&¸#«ÌÉÏÁØ#(47*#497$%&¸#«ÌÉÏÁØ#(4(0-%7*#497$%&¸#«ÌÉÏÁØ#(47$#497$%&¸#£Á˹Â#(44*-"7$#497$%&¸#£Á˹Â#(4;00%&7$#497$%&¸#£Á˹Â#(4;0007$#497$%&¸#£Á˹Â#(47$#497$%&¸#£Á˹Â#(41307$#497$%&¸#£Á˹Â#4"#4$%&¸#¾ÉŹÆÁØ#4"367##47$%&¸#¾ÉŹÆÁØ#4"367##47$%&¸#¾ÉŹÆÁØ#4(367##47$%&¸#¾ÉŹÆÁØ#4(*7##47$%&¸#¾ÉŹÆÁØ#4(7##47$%&¸#¾ÉŹÆÁØ#4(7##47$%&¸#¾ÉŹÆÁØ#4(/7##47$%&¸#¾ÉŹÆÁØ#4(7##47$%&¸#¾ÉŹÆÁØ#4(1307##47$%&¸#¾ÉŹÆÁØ#4(1307##47$%&¸#¾ÉŹÆÁØ#4(-.077##47$%&¸#¾ÉŹÆÁØ#4(-.077##47$%&¸#¾ÉŹÆÁØ#4(-.07&7##47$%&¸#¾ÉŹÆÁØ#4(-.07&7##47$%&¸#¾ÉŹÆÁØ#4(-7##47$%&¸#¾ÉŹÆÁØ#4(-7##47$%&¸#¾ÉŹÆÁØ#4(-7##47$%&¸#¾ÉŹÆÁØ#4(-7##47$%&¸#¾ÉŹÆÁØ#4(-7##4;7$%&¸#¾ÉŹÆÁØ#4(-7##4;7$%&¸#¾ÉŹÆÁØ#4(-7##4;7$%&¸#¾ÉŹÆÁØ#4(-7##4;7$%&¸#¾ÉŹÆÁØ#4(-1307##4;7$%&¸#¾ÉŹÆÁØ#4(-;0007##4;7$%&¸#¾ÉŹÆÁØ#4/367$#47$%&¸#£Á˹Â#4/367$#47$%&¸#£Á˹Â
All manuals and user guides at all-guides.com
all-guides.com

Other manuals for BSGL5 SERIES

9

Other Bosch Vacuum Cleaner manuals

Bosch Professional GAS 25 L SFC User manual

Bosch

Bosch Professional GAS 25 L SFC User manual

Bosch BGL32500 User manual

Bosch

Bosch BGL32500 User manual

Bosch BSG71266 User manual

Bosch

Bosch BSG71266 User manual

Bosch BSG8 series User manual

Bosch

Bosch BSG8 series User manual

Bosch BGL3HYG User manual

Bosch

Bosch BGL3HYG User manual

Bosch BBHMOVE3 User manual

Bosch

Bosch BBHMOVE3 User manual

Bosch GAS 35 L AFC Professional User manual

Bosch

Bosch GAS 35 L AFC Professional User manual

Bosch GAS 50 Professional User manual

Bosch

Bosch GAS 50 Professional User manual

Bosch AquaWash&Clean BWD4 Series User manual

Bosch

Bosch AquaWash&Clean BWD4 Series User manual

Bosch GAS Professional 12-25 User manual

Bosch

Bosch GAS Professional 12-25 User manual

Bosch BGL8310 User manual

Bosch

Bosch BGL8310 User manual

Bosch BGL4 Series User manual

Bosch

Bosch BGL4 Series User manual

Bosch GAS 18V-1 User manual

Bosch

Bosch GAS 18V-1 User manual

Bosch GAS18V-3 Product information sheet

Bosch

Bosch GAS18V-3 Product information sheet

Bosch Cleann'n BGS05A222 User manual

Bosch

Bosch Cleann'n BGS05A222 User manual

Bosch BSA Series User manual

Bosch

Bosch BSA Series User manual

Bosch Unlimited 7 BCS711XXL User manual

Bosch

Bosch Unlimited 7 BCS711XXL User manual

Bosch GS60 User manual

Bosch

Bosch GS60 User manual

Bosch BBHL2 series User manual

Bosch

Bosch BBHL2 series User manual

Bosch Turbobrush User manual

Bosch

Bosch Turbobrush User manual

Bosch BGS4.. Runn'n User manual

Bosch

Bosch BGS4.. Runn'n User manual

Bosch BSG8 series Troubleshooting guide

Bosch

Bosch BSG8 series Troubleshooting guide

Bosch BGB1 Series User manual

Bosch

Bosch BGB1 Series User manual

Bosch BBHF2 Series User manual

Bosch

Bosch BBHF2 Series User manual

Popular Vacuum Cleaner manuals by other brands

Goclever Neo Cleaner HROBVAC quick start guide

Goclever

Goclever Neo Cleaner HROBVAC quick start guide

Thomas BRAVO 20 Instructions for use

Thomas

Thomas BRAVO 20 Instructions for use

Alpine VAC1500 instruction manual

Alpine

Alpine VAC1500 instruction manual

Festool CTL MINI operating instructions

Festool

Festool CTL MINI operating instructions

Samsung VAC6313G Operating lnstructions

Samsung

Samsung VAC6313G Operating lnstructions

Philips AquaTrio quick start guide

Philips

Philips AquaTrio quick start guide

REMEZair MultiClick Pro Aqua RMVC-504 user manual

REMEZair

REMEZair MultiClick Pro Aqua RMVC-504 user manual

Electrolux ZB3214G user manual

Electrolux

Electrolux ZB3214G user manual

Sanyo SC-N525T instruction manual

Sanyo

Sanyo SC-N525T instruction manual

Black & Decker 6600 owner's manual

Black & Decker

Black & Decker 6600 owner's manual

DeWalt DWV015 instruction manual

DeWalt

DeWalt DWV015 instruction manual

Siemens VSC3 Series instruction manual

Siemens

Siemens VSC3 Series instruction manual

Bissell BigGreen Commercial BGCOMP9 user guide

Bissell

Bissell BigGreen Commercial BGCOMP9 user guide

Makita CL107FDZW instruction manual

Makita

Makita CL107FDZW instruction manual

Hoover U4093 owner's manual

Hoover

Hoover U4093 owner's manual

Russell Hobbs RHCC5001 manual

Russell Hobbs

Russell Hobbs RHCC5001 manual

Electrolux Oxygen EL6988A owner's guide

Electrolux

Electrolux Oxygen EL6988A owner's guide

SOLAC AS3260 Instructions for use

SOLAC

SOLAC AS3260 Instructions for use

manuals.online logo
manuals.online logoBrands
  • About & Mission
  • Contact us
  • Privacy Policy
  • Terms and Conditions

Copyright 2025 Manuals.Online. All Rights Reserved.