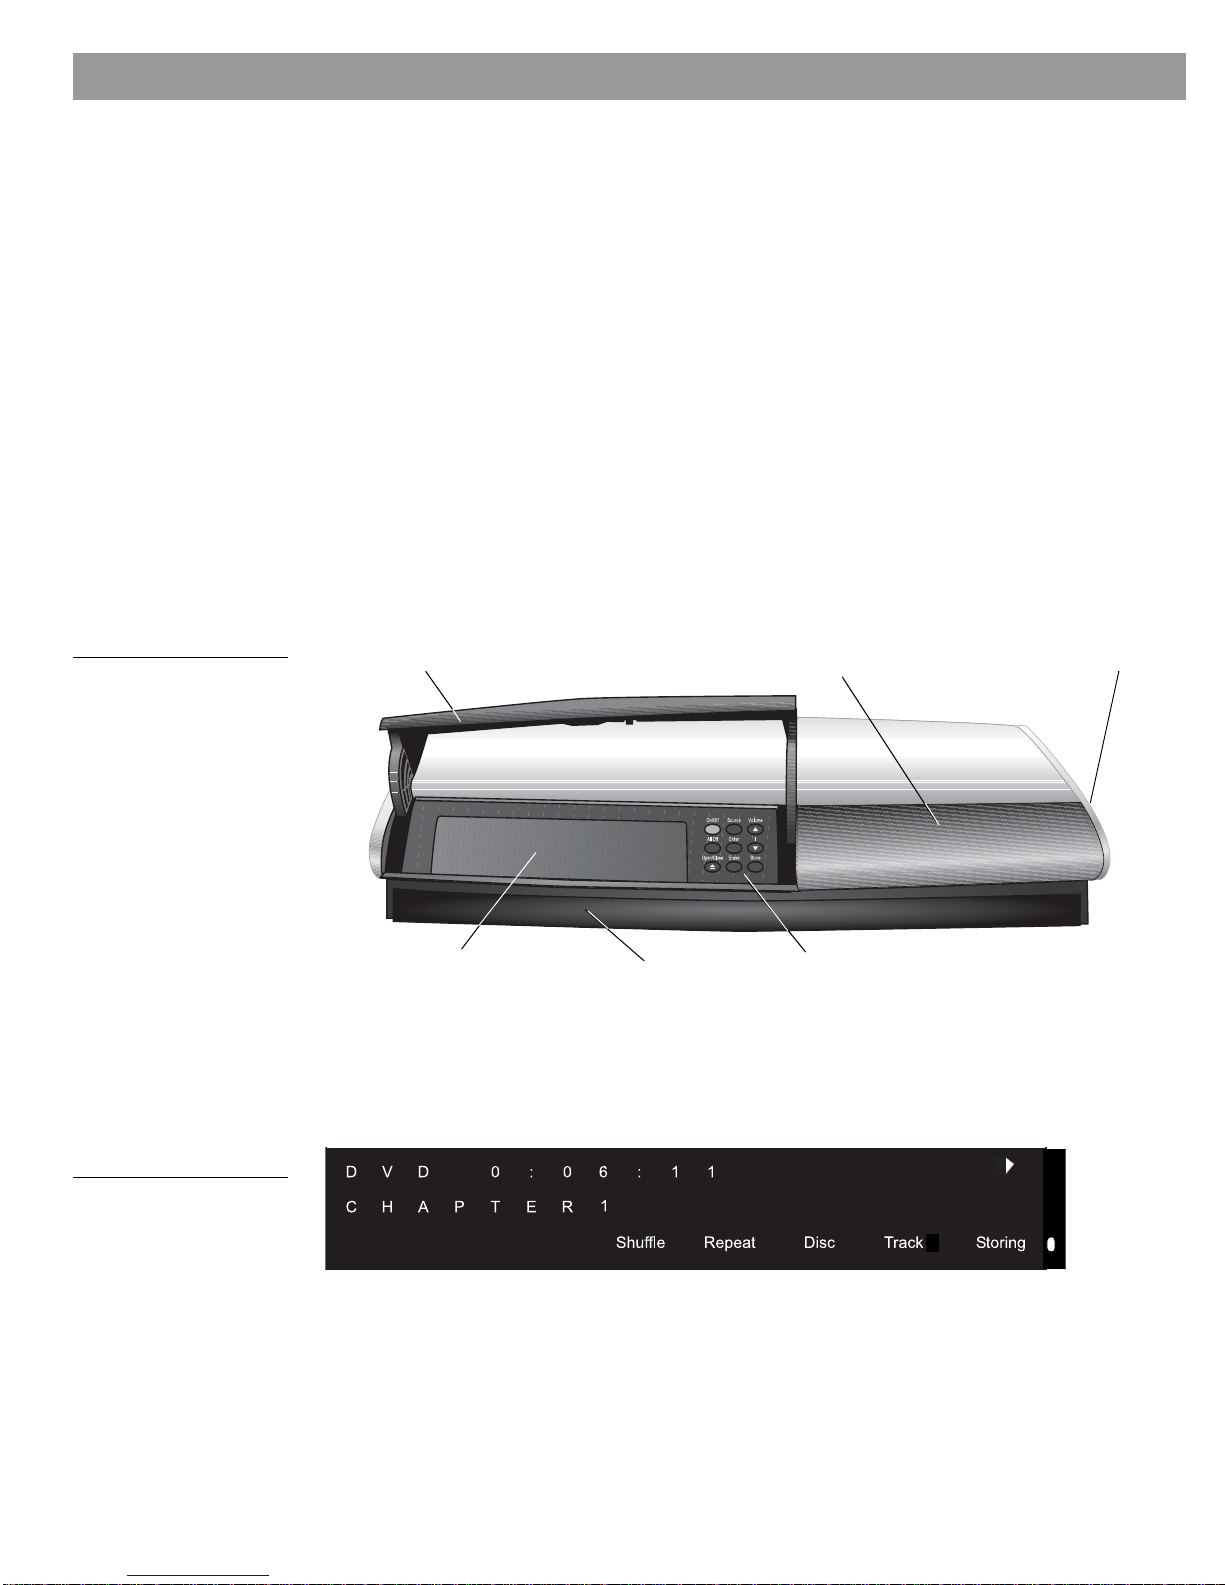
Bose Lifestyle Music Center User manual

LIFESTYLE®DVD Home Entertainment Systems
Operating
Guide

2
Safety Information
Please read this owner’s guide
Please take the time to follow this guide carefully. It will help you set up and operate your system properly and enjoy
all of its advanced features. Save both the Installation Guide and the Operation Guide for future reference.
WARNING: To reduce the risk of fire or electric shock, do not expose the system to rain or moisture
WARNING: This apparatus shall not be exposed to dripping or splashing, and objects filled with liquids, such as vases,
shall not be placed on the apparatus. As with any electronic products, use care not to spill liquids in any part of the sys-
tem. Liquids can cause a failure and/or a fire hazard.
These CAUTION marks are located on your LIFESTYLE®media center and Acoustimass®module enclosures:.
CAUTION: Use of controls or adjustments or performance of procedures other than those specified herein may result
in hazardous radiation exposure. The compact disc player should not be adjusted or repaired by anyone except properly
qualified service personnel.
CAUTION: No naked flame sources, such as lighted candles, should be placed on the apparatus.
Class 1 laser product
The DVD player contained within the media center is classified as a CLASS 1 LASER PRODUCT
according to EN 60825-1:1994 + A11. The CLASS 1 LASER PRODUCT label is located on the bot-
tom of the media center.
Class B emissions limits
This Class B digital apparatus meets all requirements of the Canadian Interference-Causing
Equipment Regulations.
Batteries
Please dispose of used batteries properly, following any local regulations. Do not incinerate.
Additional safety information
See the additional instructions on the Important Safety Instructions sheet enclosed in the shipping carton.
The exclamation point within an
equilateral triangle, as marked on
the system, is intended to alert the
user to the presence of important
operating and maintenance instruc-
tions in this owner’s guide.
The lightning flash with arrowhead
symbol, within an equilateral triangle,
is intended to alert the user to the
presence of uninsulated dangerous
voltage within the system enclosure
that may be of sufficient magnitude
to constitute a risk of electric shock.
CAUTION
RISK OF ELECTRICAL SHOCK
DO NOT OPEN RISQUE DE CHOC ÉLECTRIQUE
NE PAS OUVRIR
AVIS
CLASS 1 LASER PRODUCT
KLASSE 1 LASER PRODUKT
LUOKAN 1 LASER LAITE
KLASS 1 LASER APPARAT
Batteries
©2004 Bose Corporation. No part of this work may be reproduced, modified, distributed or otherwise used without prior written permission.
Manufactured under license from Dolby Laboratories. “Dolby” and the double-D symbol are trademarks of Dolby Laboratories. Confidential
Unpublished Works. ©1992-1997 Dolby Laboratories. All rights reserved.
“DTS” and “DTS Digital Surround” are registered trademarks of Digital Theater Systems, Inc.
MPEG Layer-3 audio compression technology licensed by Fraunhofer IIS and THOMSON multimedia.
This product incorporates copyright protection technology that is protected by method claims of certain U.S. patents and other intellectual prop-
erty rights owned by Macrovision Corporation and other rights owners. Use of this copyright protection technology must be authorized by Mac-
rovision Corporation, and is intended for home and other limited viewing uses only unless otherwise authorized by Macrovision Corporation.
Reverse engineering or disassembly is prohibited.
This product incorporates copyright protected technology and other intellectual property rights owned by Cirrus Logic, Inc. and subject to the
copyright protection of the U.S. as well as other licensing restrictions and protections. Use of this copyright protected technology is limited solely
to use with the Cirrus Logic integrated circuits incorporated in this product. Reverse engineering or disassembly is prohibited.

3
g
p
Contents
Where to find...
Introduction . . . . . . . . . . . . . . . . . . . . . . . . . . . . . . . . . . . . . . . . . . . . . . . . . . . . . . . . . . . . . . . . . . . 5
Welcome . . . . . . . . . . . . . . . . . . . . . . . . . . . . . . . . . . . . . . . . . . . . . . . . . . . . . . . . . . . . . . . . . . 5
What discs you can play . . . . . . . . . . . . . . . . . . . . . . . . . . . . . . . . . . . . . . . . . . . . . . . . . . . . . 5
Check for region number compatibility . . . . . . . . . . . . . . . . . . . . . . . . . . . . . . . . . . . . . . . 5
Glossary of audio terms . . . . . . . . . . . . . . . . . . . . . . . . . . . . . . . . . . . . . . . . . . . . . . . . . . . . . . 5
Controls and Capabilities . . . . . . . . . . . . . . . . . . . . . . . . . . . . . . . . . . . . . . . . . . . . . . . . . . . . . . . . 7
The remote control . . . . . . . . . . . . . . . . . . . . . . . . . . . . . . . . . . . . . . . . . . . . . . . . . . . . . . . . . 7
Menu and program selection . . . . . . . . . . . . . . . . . . . . . . . . . . . . . . . . . . . . . . . . . . . . . . . 8
Play options . . . . . . . . . . . . . . . . . . . . . . . . . . . . . . . . . . . . . . . . . . . . . . . . . . . . . . . . . . . . 9
If the remote does not work as you expect . . . . . . . . . . . . . . . . . . . . . . . . . . . . . . . . . . . . 10
The media center . . . . . . . . . . . . . . . . . . . . . . . . . . . . . . . . . . . . . . . . . . . . . . . . . . . . . . . . . . . 10
Component or progressive scan: activating your selection . . . . . . . . . . . . . . . . . . . . . . . . . . . 12
What makes a LIFESTYLE®38 or 48 system uniquely yours . . . . . . . . . . . . . . . . . . . . . . . . . . 12
Getting your music into the system . . . . . . . . . . . . . . . . . . . . . . . . . . . . . . . . . . . . . . . . . . 12
What you can listen to while storing CDs . . . . . . . . . . . . . . . . . . . . . . . . . . . . . . . . . . 13
How the uMusic™intelligent playback system works for you . . . . . . . . . . . . . . . . . . . . . . 13
Using presets is very important . . . . . . . . . . . . . . . . . . . . . . . . . . . . . . . . . . . . . . . . . . 13
Take advantage of the music databases inside . . . . . . . . . . . . . . . . . . . . . . . . . . . . . . . . . 14
Tips for getting the most enjoyment from stored tracks . . . . . . . . . . . . . . . . . . . . . . . . . . . . . 14
Scheduling time to store it all . . . . . . . . . . . . . . . . . . . . . . . . . . . . . . . . . . . . . . . . . . . . . . 14
How much time to allow for storing CDs . . . . . . . . . . . . . . . . . . . . . . . . . . . . . . . . . . . 15
How many CDs you can store . . . . . . . . . . . . . . . . . . . . . . . . . . . . . . . . . . . . . . . . . . . 15
What to do with tracks you don’t like . . . . . . . . . . . . . . . . . . . . . . . . . . . . . . . . . . . . . 15
System Performance . . . . . . . . . . . . . . . . . . . . . . . . . . . . . . . . . . . . . . . . . . . . . . . . . . . . . . . . . . . 16
Some product pointers to ensure satisfaction . . . . . . . . . . . . . . . . . . . . . . . . . . . . . . . . . . . . . 16
To turn on other components . . . . . . . . . . . . . . . . . . . . . . . . . . . . . . . . . . . . . . . . . . . . . . 16
To watch video . . . . . . . . . . . . . . . . . . . . . . . . . . . . . . . . . . . . . . . . . . . . . . . . . . . . . . . . . . 16
To adjust what you see or hear . . . . . . . . . . . . . . . . . . . . . . . . . . . . . . . . . . . . . . . . . . . . . 17
To enjoy the remarkable LIFESTYLE®38 or 48 system features . . . . . . . . . . . . . . . . . . . . 17
Listening to your stored music (available on LIFESTYLE®38 and 48 systems, only) . . . . . . . 18
Control options . . . . . . . . . . . . . . . . . . . . . . . . . . . . . . . . . . . . . . . . . . . . . . . . . . . . . . . . . 18
Enjoy the added functionality provided by presets . . . . . . . . . . . . . . . . . . . . . . . . . . . . . . . . . 19
Why you should rely on them . . . . . . . . . . . . . . . . . . . . . . . . . . . . . . . . . . . . . . . . . . . . . . 19
Respond actively to speed up the learning process . . . . . . . . . . . . . . . . . . . . . . . . . . . . . 20
Choose Playlist when you want a lineup of tracks . . . . . . . . . . . . . . . . . . . . . . . . . . . . . . 20
How to delete tracks from the Playlist: . . . . . . . . . . . . . . . . . . . . . . . . . . . . . . . . . . . . 20
Use the Music Library to search, play, or browse your collection . . . . . . . . . . . . . . . . . . . . . . 20
No need to search if you just want info . . . . . . . . . . . . . . . . . . . . . . . . . . . . . . . . . . . . . . . 22
Playing a DVD . . . . . . . . . . . . . . . . . . . . . . . . . . . . . . . . . . . . . . . . . . . . . . . . . . . . . . . . . . . . . . 22
Control options . . . . . . . . . . . . . . . . . . . . . . . . . . . . . . . . . . . . . . . . . . . . . . . . . . . . . . . . . 22
Using parental controls . . . . . . . . . . . . . . . . . . . . . . . . . . . . . . . . . . . . . . . . . . . . . . . . . . . 23
Loading and playing a CD . . . . . . . . . . . . . . . . . . . . . . . . . . . . . . . . . . . . . . . . . . . . . . . . . . . . 23
Control options . . . . . . . . . . . . . . . . . . . . . . . . . . . . . . . . . . . . . . . . . . . . . . . . . . . . . . . . . 23
Using the radio . . . . . . . . . . . . . . . . . . . . . . . . . . . . . . . . . . . . . . . . . . . . . . . . . . . . . . . . . . . . . 24
Changing stations . . . . . . . . . . . . . . . . . . . . . . . . . . . . . . . . . . . . . . . . . . . . . . . . . . . . . . . 24
Setting a radio station preset . . . . . . . . . . . . . . . . . . . . . . . . . . . . . . . . . . . . . . . . . . . . . . . 24
Using the headphones jack . . . . . . . . . . . . . . . . . . . . . . . . . . . . . . . . . . . . . . . . . . . . . . . . . . . 25
Using the sleep timer . . . . . . . . . . . . . . . . . . . . . . . . . . . . . . . . . . . . . . . . . . . . . . . . . . . . . . . . 25
To set the sleep timer . . . . . . . . . . . . . . . . . . . . . . . . . . . . . . . . . . . . . . . . . . . . . . . . . . . . 25
Controiling External Sources . . . . . . . . . . . . . . . . . . . . . . . . . . . . . . . . . . . . . . . . . . . . . . . . . . . . . 26
Using your system remote with other components . . . . . . . . . . . . . . . . . . . . . . . . . . . . . . . . . 26
For TV control . . . . . . . . . . . . . . . . . . . . . . . . . . . . . . . . . . . . . . . . . . . . . . . . . . . . . . . . . . 26
For cable/satellite control . . . . . . . . . . . . . . . . . . . . . . . . . . . . . . . . . . . . . . . . . . . . . . . . . 29
For VCR (or DVR) control . . . . . . . . . . . . . . . . . . . . . . . . . . . . . . . . . . . . . . . . . . . . . . . . . . 30
For AUX control . . . . . . . . . . . . . . . . . . . . . . . . . . . . . . . . . . . . . . . . . . . . . . . . . . . . . . . . . 30
Designating one video tuner . . . . . . . . . . . . . . . . . . . . . . . . . . . . . . . . . . . . . . . . . . . . . . . . . . . 31

4
Contents
Changing Source Settings . . . . . . . . . . . . . . . . . . . . . . . . . . . . . . . . . . . . . . . . . . . . . . . . . . . . . . . 32
Making adjustments to a particular source . . . . . . . . . . . . . . . . . . . . . . . . . . . . . . . . . . . . . . . 32
How to see your options . . . . . . . . . . . . . . . . . . . . . . . . . . . . . . . . . . . . . . . . . . . . . . . . . . 32
How to change the settings . . . . . . . . . . . . . . . . . . . . . . . . . . . . . . . . . . . . . . . . . . . . . . . . 33
Tuner setting options (FM or AM radio) . . . . . . . . . . . . . . . . . . . . . . . . . . . . . . . . . . . . . . . . . . 34
CD setting options . . . . . . . . . . . . . . . . . . . . . . . . . . . . . . . . . . . . . . . . . . . . . . . . . . . . . . . . . . 34
Stored CDs setting options . . . . . . . . . . . . . . . . . . . . . . . . . . . . . . . . . . . . . . . . . . . . . . . . . . . 35
DVD setting options . . . . . . . . . . . . . . . . . . . . . . . . . . . . . . . . . . . . . . . . . . . . . . . . . . . . . . . . . 36
TV setting options (for VCR, CBL-SAT, and AUX) . . . . . . . . . . . . . . . . . . . . . . . . . . . . . . . . . . 37
Using System Menus . . . . . . . . . . . . . . . . . . . . . . . . . . . . . . . . . . . . . . . . . . . . . . . . . . . . . . . . . . . 38
Making system adjustments . . . . . . . . . . . . . . . . . . . . . . . . . . . . . . . . . . . . . . . . . . . . . . . . . . . 38
How to see the System menu . . . . . . . . . . . . . . . . . . . . . . . . . . . . . . . . . . . . . . . . . . . . . . 38
. . . . . . . . . . . . . . . . . . . . . . . . . . . . . . . . . . . . . . . . . . . . . . . . . . . . . . . . . . . . . . . . . . . . . . 38
How to make changes . . . . . . . . . . . . . . . . . . . . . . . . . . . . . . . . . . . . . . . . . . . . . . . . . . . . 38
Audio options . . . . . . . . . . . . . . . . . . . . . . . . . . . . . . . . . . . . . . . . . . . . . . . . . . . . . . . . . . . . . . 39
Video options . . . . . . . . . . . . . . . . . . . . . . . . . . . . . . . . . . . . . . . . . . . . . . . . . . . . . . . . . . . . . . 41
Media center options . . . . . . . . . . . . . . . . . . . . . . . . . . . . . . . . . . . . . . . . . . . . . . . . . . . . . . . . 42
Remote control options . . . . . . . . . . . . . . . . . . . . . . . . . . . . . . . . . . . . . . . . . . . . . . . . . . . . . . 43
DVD lock options . . . . . . . . . . . . . . . . . . . . . . . . . . . . . . . . . . . . . . . . . . . . . . . . . . . . . . . . . . . 44
Applying parental control . . . . . . . . . . . . . . . . . . . . . . . . . . . . . . . . . . . . . . . . . . . . . . . . . . 44
To set the restriction level and passwords . . . . . . . . . . . . . . . . . . . . . . . . . . . . . . . . . 45
Stored CD data options . . . . . . . . . . . . . . . . . . . . . . . . . . . . . . . . . . . . . . . . . . . . . . . . . . . . . . 46
Using the Edit Screen . . . . . . . . . . . . . . . . . . . . . . . . . . . . . . . . . . . . . . . . . . . . . . . . . . . . 47
How to change the text . . . . . . . . . . . . . . . . . . . . . . . . . . . . . . . . . . . . . . . . . . . . . . . . 47
Reference . . . . . . . . . . . . . . . . . . . . . . . . . . . . . . . . . . . . . . . . . . . . . . . . . . . . . . . . . . . . . . . . . . . . 49
Remote control care . . . . . . . . . . . . . . . . . . . . . . . . . . . . . . . . . . . . . . . . . . . . . . . . . . . . . . . . . 49
Replacing the remote control batteries . . . . . . . . . . . . . . . . . . . . . . . . . . . . . . . . . . . . . . . 49
Changing house code settings . . . . . . . . . . . . . . . . . . . . . . . . . . . . . . . . . . . . . . . . . . . . . 49
Other switches . . . . . . . . . . . . . . . . . . . . . . . . . . . . . . . . . . . . . . . . . . . . . . . . . . . . . . . 50
For a Bose®link remote in another room . . . . . . . . . . . . . . . . . . . . . . . . . . . . . . . . . . . 50
Setting up a second room with sound . . . . . . . . . . . . . . . . . . . . . . . . . . . . . . . . . . . . . . . . . . . 50
Bose®link to assured compatibility . . . . . . . . . . . . . . . . . . . . . . . . . . . . . . . . . . . . . . . . . . 51
Bose link remote switch settings . . . . . . . . . . . . . . . . . . . . . . . . . . . . . . . . . . . . . . . . . 51
Taking care of your LIFESTYLE®system . . . . . . . . . . . . . . . . . . . . . . . . . . . . . . . . . . . . . . . . . 52
Troubleshooting . . . . . . . . . . . . . . . . . . . . . . . . . . . . . . . . . . . . . . . . . . . . . . . . . . . . . . . . . . . . 53
Contacting customer service . . . . . . . . . . . . . . . . . . . . . . . . . . . . . . . . . . . . . . . . . . . . . . . 54
Limited warranty . . . . . . . . . . . . . . . . . . . . . . . . . . . . . . . . . . . . . . . . . . . . . . . . . . . . . . . . . . . . 55
Technical information . . . . . . . . . . . . . . . . . . . . . . . . . . . . . . . . . . . . . . . . . . . . . . . . . . . . . . . . 55
Media center weight . . . . . . . . . . . . . . . . . . . . . . . . . . . . . . . . . . . . . . . . . . . . . . . . . . 55
Stored CDs Log . . . . . . . . . . . . . . . . . . . . . . . . . . . . . . . . . . . . . . . . . . . . . . . . . . . . . . . . . . . . 56

5
Introduction
Welcome
Thank you for purchasing a Bose
®
LIFESTYLE
®
DVD home entertainment system. Through
proprietary Bose technologies and innovative LIFESTYLE
®
systems design, this elegant and
easy-to-use system delivers superior performance for both music and video programming.
What discs you can play
The system can play the following types of discs having the corresponding logos:
• Video DVDs
• DVD-Rs or DVD-R/Ws
• Video CDs (VCDs)
•AudioCDs
•CD-RsorCD-R/Ws
•MP3CDs
Check for region number compatibility
For any DVD player and DVD disc to be compatible, their region numbers must match.
These numbers are assigned according to where the player and disc are sold.
Check the region number on the bottom of the media center included with your
system. Then be sure to choose only DVD discs that show the same region
number on the disc label or packaging. For example, a Region 1 DVD and
corresponding player should display the mark shown on the right.
Glossary of audio terms
Aspect ratio – The shape of the rectangular picture in a TV set expressed as the width of the
picture relative to the height. For example, if a TV picture has an aspect ratio of 4:3 (read as 4
by 3), the shape of that picture is 4 units wide by 3 units high. The two standard TV aspect
ratios are 4:3 and 16:9.
Chapter – A main division of contents in a DVD title.
Component video – A video signal split into three parts: luminance and two color signals
(marked as YPbPr). It provides the highest resolution video, but cannot be processed by all
television sets.
Composite video – A video signal in which the brightness (black and white) and color infor-
mation are combined. Compatible with most televisions and other video components, com-
posite video cables use RCA jacks.
Dolby Digital – A perceptual coding system for audio, developed by Dolby Laboratories and
accepted as an international standard. Dolby Digital is the most common means of encoding
multi-channel audio.
– The logo representing Dolby Digital.

6
Introduction
DTS – A type of multi-channel surround sound format used on certain CDs and many DVDs.
– The logo representing DTS.
DVD – An abbreviation most commonly known to mean Digital Video Disc or Digital Versatile
Disc. The audio/video/data storage system is based on 12-cm optical discs.
DVD video – A standard for storing and reproducing audio and video on DVD-ROM discs,
based on MPEG video, Dolby Digital audio, and other proprietary data formats.
IR – An abbreviation for infrared. Pertains to the type of remote that sends/receives com-
mands on an infrared light beam.
Letterbox – A video format which has an aspect ratio wider than 4:3 and is shown with black
bars above and below the picture.
MP3 – MPEG-1 Layer III audio. This is a compressed audio format that allows the recording
of many hours of music on a single CD.
NTSC – An abbreviation for National Television System Committee and a label for the video
format standard established by the committee for televisions used in the US and other coun-
tries.
PAL – An acronym for the Phase Alternate Line video prompt used extensively in Western
Europe.
Pan & Scan – The technique of reframing a picture to conform to a different aspect ratio by
cropping parts of the picture. DVD-Video players can use the horizontal offset encoded with
the video on certain DVDs to automatically pan & scan widescreen video to a 4:3 ratio.
PCM – An abbreviation for Pulse Code Modulation. A common form of digital audio signal.
Progressive Scan – A video format which displays all lines of the picture frame in a single
pass, and refreshes the image sixty times a second. This format is not compatible with all
video displays.
RDS – A system that displays radio broadcast station and programming information.This fea-
ture is available on European systems only.
SACD – Anabbreviation for Super Audio Compact Disc and a music formatfor CDaudio and
high-resolution digital audio stored on a CD-sized disc. The new Bose®LIFESTYLE®systems
(with which this guide is included) play the CD-compatible portion of such discs, identified by
the CD disc logo on the front of the disc.
SCMS – A system for preventing second-generation digital copies of copyrighted audio
material. A digital recorder equipped with SCMS will record digitally from another source, but
that recording cannot then be used as a source for a second-generation recording.
S-video –Also called Y/C. A video signal that keeps the brightness and color information sep-
arate, and is significantly better than composite video. Requires the use of an S-video cable
and is compatible with many televisions and other video components.
uMusicTM intelligent playback system – A revolutionary Bose®play mode, which performs
like a veritable DJ by noting listener preferences and playing suitable stored CD tracks in
response.
Videostage®5 – Bose®proprietary Videostage 5 decoding circuitry gives you a five-channel
surround sound experience from everything you listen to – VHS tapes, stereo CDs, even
mono TV programs.
YPbPr – A component analog video signal containing one luminance and two chrominance
components. Also referred to as YUV or Y, B-Y, R-Y.
FedX addition:

7
Controls and Capabilities
The remote control
The advanced radio-frequency remote control provided with the LIFESTYLE®system works
from almost anywhere inside your home. Simply press any button. There is no need to aim
the remote at the media center.
Note: Not all of the buttons shown on the remote at the left are needed for all systems. Several,
which are for use with a Lifestyle 38 or 48 system, only, our shown within a gray outline.
Power and mute
Source and input selection.
*You can choose to set the LIFESTYLE®remote to control your TV, cable or satellite box, or
VCR so it will turn those devices on or off. To do that, refer to “Using your system remote with
other components” on page 26. Until then, however, simply turn on the TV or component
using its power button or remote control.
pages 7 - 9 edited to reflect FedX remot
e
Turns the system on and off. Selects the source last used.
Mutes the volume for all connected speakers (main and in other rooms).
Mutes or unmutes the volume in the current room.
Turns the system on and selects the uMusic™intelligent playback system mode of
stored CD play. Overrides other stored CD modes.
Available with LIFESTYLE 38 and 48 systems only.
Turns the system on and selects the built-in disc player as source.
Turns the system on and selects the built-in FM/AM radio tuner set to the station
last selected. Switches between FM and AM when the radio is on.
Turns the system on and selects an AUX source connected to the media center.
Turns the system on and selects the TV connected to the media center as
source.
When the remote has been set to do so*, turns the TV on and off.
When the remote has been set to do so, scrolls the TV inputs to select one.
The input that connects to the media center is one choice.
Turns the system on and selects a cable box or satellite receiver connected to the
media center.
When the remote has been set to do so*, turns your cable or satellite box on and off.
Turns your system on and elects the VCR connected to the media center as the
sound source.
When the remote has been set to do so*, turns your VCR on and off.

8
Controls and Capabilities
Menu and program selection
*If the TV, cable, or satellite provides that option.
Enters the library of stored CDs on LIFESTYLE®38 & 48 systems only.
Enters or exits the Settings menu for the current source.
Enters or exits the System menu.
Enters or exits the menu of the DVD disc that is currently loaded.
Enters the main menu of a cable or satellite box.
Displays an electronic TV listings guide.*
Exits the Settings and System menus.
Exits the electronic TV listings.*
Tune the FM/AM radio up or down to the next frequency.
Selects the previous or next item in a menu list.
Enters submenus or confirms the selection of a menu item.
Move up, down, left, or right in a menu or screen.
Seek backward or forward to the next strong radio station.
Skip backward or forward to the next CD track, DVD chapter, radiopreset
(NOT stored CD preset), or TV channel.
Raise or lower the volume of the current source.
Pressing +unmutes the current source in the current room only, if it was
muted.
Pressing –lowers the volume.
Apply a negative (–) or positive (+) rating to the stored CD* track playing.
Immediately moves on to a different track whenever a negative rating is
applied.
*Available on LIFESTYLE®38 & 48 systems only.

9
Controls and Capabilities
*If the TV, cable, or satellite provides that option.
Play options
All of the buttons shown below, except Shuffle and Repeat, can be used with your VCR or
DVR after the remote has been set to control it.
Select a DVD chapter, CD track, radio station or stored CD preset,* or TV
channel that corresponds to the numbers pressed. Use to make changes
to some items in the System and Settings menus, when numbers apply.
*Stored CD presets are available on LIFESTYLE®38 and 48 systems only.
Skips to the previous TV channel.*
Displays or exits the cable or satellite information window, if available.
Selects the uMusic™intelligent playback system mode of stored CD play. Over-
rides other stored CD modes. Available with LIFESTYLE 38 and 48 systems only.
Queues up and plays stored CD music of a style similar to the current track.
Plays the tracks from a specific CD when it is pressed just before pressing the
number keys for that stored CD.
Plays all the tracks assigned to the playlist. Can be used in conjunction with other
play mode options, such as similar.
Skips from the track most recently playing to the first track on the CD of origin and
plays that CD from beginning to end.
Stops the disc player.
Note: For DVDs and VCDs only, the system remembers the point where the disc was
stopped. Pressing again clears that memory.
Pauses the disc player.
Starts the disc player.
Skip back or forward to the start of a track or chapter.
Or, when pressed and held, scans back or forward through the
current CD or MP3 disc, or enter DVD motion control.
Plays CD tracks in random order. Press Shuffle again to cancel this mode.
Repeats a whole CD or track, DVD chapter, or DVD title. Press Repeat again
to cancel the repeat mode.

10
Controls and Capabilities
If the remote does not work as you expect
If your system does not respond when you press a button on the remote, it could be time to
change batteries. For information on the type of batteries to use and how to change them,
refer to “Replacing the remote control batteries” on page 49
In some buildings, you may experience “dead spots” where the remote control will not
operate effectively. If this happens, move the remote a foot or two and try again. Also make
sure the cord that connects the power supply to the media center (and contains the remote
antenna) is stretched to its full length. If these efforts do not work, move the media center a
few feet to a location where it provides a better response.
If the batteries are fine and the suggestions concerning “dead spots,” above do not work,
you may need an antenna extender. To contact Bose®customer service to request one, refer
to the address list included with the system.
The media center
The CD/DVD tray and system controls are located under the front panel door of the media
center. To the right of that is the display window (Figure 1).
An IR signal emitter, located under the CD/DVD tray, enables you to control other compo-
nents using the LIFESTYLE®remote. Avoid blocking that emitter, so its signal will have a clear
path to other components or reflective surfaces in the room.
Figure 1
Front view of the media
center
Display window
The media center display window indicates the state of the system, including what source is
playing, details of that program, and what option, if any, is selected (Figure 2).
When Settings menu items or messages appear in the display, they may scroll to reveal infor-
mation that does not fit in the two lines available.
Figure 2
Sample of information that
appears on the media
center display
®
Front panel door – lifts up
Controls
Disc tray
Display window Headphone jac
k
IR emitter

11
Controls and Capabilities
Light indicators
Controls
The nine control buttons work as described below.
Shuffle Shows when a CD, MP-3 disc, or contents of an MP-3 folder contents are playing in
random order.
Repeat Shows when the track or disc playing is set to repeat.
Disc Shows when a disc in the CD/DVD tray is playing.
Track Shows when a track is playing.
Storing Shows when CD tracks are being copied to the harddisk on a LIFESTYLE® 38 or 48
systems only.
Lights briefly when a remote control command is received.
On/Off Source Volume
Enter
Erase Store
All Off
Open/Close
Turns the system on or off in the main room only. Selects the source
last used when it turns the system on.
Turns off the system and all connected speakers (in all rooms).
Opens/closes the disc tray.
Steps through the available source selections.
Begins DVD play when that option appears selected on screen.
Works with the Store button to scan through the system settings
options on the media center display.
Removes a radio station preset.
Raises the volume of the system and unmutes the speakers ifthey were
muted.
Lowers the volume of the system but does not unmute the source.
Copies the tracks from an audio CD to the internal hard drive on the
LIFESTYLE®38 and 48 systems only.
When the system is off, resets the remote control house code.
On/Off
All Off
Open/Close
Source
Enter
Erase
Volume
Store

12
Controls and Capabilities
Component or progressive scan: activating your selection
If you have used a component video connection between the media center and the TV, you
need to make the activation settings as explained below.
With the media center turned off, use the controls on its front panel to follow these steps:
1. Press and hold the Store button on the media center.
2. While holding the Store button down, press the Enter button.
Selections will appear on the media center display each time you press Enter.
Move up and down using the Volume up and down buttons on the media center console.
3. When Video appears as the selection on the display, release the Store and Enter buttons.
4. Use the Volume up and down buttons to scroll through the Video options.
5. Stop scrolling at the proper selection.
• For a component connection only, select:
-NTSC COMPONENT (in N. America)
-PAL COMPONENT (outside North America)
• For a component connection and progressive scan, select NTSC PROGRESSIVE.
Note: The system does not support PAL Progressive video.
6. With the proper selection made, press Enter to confirm the selection and leave the Video
options.
The system is now ready to deliver the DVD video signal you prefer.
What makes a LIFESTYLE®38 or 48 system uniquely yours
Your LIFESTYLE®38 or 48 system includes a breakthrough new feature: the uMusic™
intelligent playback system. Enabled through proprietary Bose®technology, it transforms your
system into a virtual DJ, capable of playing a continuous stream of the music you mostenjoy.
Underlying this new feature is the system capacity to store all of the tracks from hundreds of
CDs in your personal collection. (The actual limit depends on the number and length of the
tracks on each CD.) Used as a personal music bank, this feature saves you the wear and tear
on discs and the time and effort of organizing and searching through them.
Far more than storage, however, the uMusic intelligent playback system also provides a
revolutionary listening experience. With effortless access and the option for uninterrupted
play, you get to hear much more of your music collection, even the tracks you’ve forgotten
you own. And, as if it is listening along with you, the system also learns to play more and
more of what you prefer...for custom-designed listening pleasure.
Getting your music into the system
Before you can enjoy these benefits, some preparation is required. It involves use of the
media center and a simple 3-step procedure for storing your music.
Note: Your system is designed to store the tracks of regular CDs only. It will not store MP3
tracks or the contents of DVDs. If an inappropriate disc type is in the CD/DVD tray when the
Store button is pressed, the media center displays an error message to indicate that storage is
not possible.
added pgs 13 – 15 for FedX

13
Controls and Capabilities
With the system turned on or off, here’s how to begin:
1. Choose one or more CDs you would like to store.
2. Place the first CD into the disc tray of the media center and close the tray.
3. Press the button, located on the media center control panel.
During this process, the media center displays the message CD STORING and shows what
percentage of the task is completed. When it reaches 100%, you can remove that disc and
repeat steps 1-3 for each additional CD you want to store now.
Storing takes about 5 minutes per disc. For more detail, see “Scheduling time to store it all”
on page 14.
To interrupt or stop the storing activity at any time, simply open the disc tray. To resume
storing that same disc, close the tray and press the
button again.
What you can listen to while storing CDs
• You can listen to the AM or FM radio tuner, other CD tracks that are already stored, or other
sources connected to the system (an analog connection is required), like the TV.
• You cannot listen to the CD that is being stored, or watch a DVD using the media center
disc tray.
• As soon as the media center displays 100%, you can listen to the CD you have just stored,
(using the CD player, or Stored as the source), or you can replace that CD with a DVD and
watch a video.
• If your setup includes a Bose®link network, you can continue to listen to the system in
other rooms, too.
• Any digital performance in other rooms may be interrupted. This is a temporary condition,
imposed only while the digital processing capabilities of the system are fully engaged in
storing. But, if you have the source connected using both digital and analog cables, you
can still enjoy listening to it.
How the uMusic™intelligent playback system works for you
The CDs in your collection are one expression of your taste in music. Which CDs you play on
a regular basis is another. And what music you like to hear when you are tired, exuberant,
reminiscent, social, or somber is another.
But making the selections that suit those preferences is no longer your job alone. Finding and
playing what you most want to hear is just what the uMusic™system can do for you.
Using presets is very important
The uMusic system also provides you with 9 Presets, numbered 1 to 9, for your stored listen-
ing preferences.
Using one or more presets enables this intelligent system to distinguish your reactions to
what it plays. You might choose a preset for:
• Different members of your family, different roommates, different generations. Besides its
number, you can assign a name to each preset. The name appears on the media center dis-
play whenever the number for that preset is pressed.
• Different listening times: wakeup, before work, weekends, late night, etc.(You might con-
sider them moods.)
Store
Store

14
Controls and Capabilities
To select your personal preset:
1. Press the
Stored
button on the remote control.
2. Press the number button that represents your preset.
3. As you listen, do what you normally do:
• Skip anything you don’t want to hear right now.
• Repeat any tracks you’d like to hear over, etc.
• Or use the + and – buttons to rate tracks you react to strongly.
Take advantage of the music databases inside
Though it stores the tracks from your CDs, the system draws information for each track from
internal music databases. This data includes the name and length of each track, performing
artist, style of music (genre), and other meaningful information that helps characterize music
you enjoy.
As a further benefit, Bose provides free update CDs to keep the music databases current. So
even your newest CD acquisitions will have this information available.
Note: Sending in your product registration card, included with the system, is very important if
you want to receive database updates. Be sure to fill out the card and return it to Bose.
Beyond just storing this data for your use, however, the system also allows you to edit it to
better reflect your associations with the music. For instance, if the embedded data classifies
a track as “World” music, and you consider it part of your Latin collection, you can simply
change the genre of that track. For any CDs not covered by the database (created at home or
non-commercially produced), the system allows you to add information about that music to
make sure it is filed and displays as you like.
For details on what information can be added or changed and how to make those changes,
refer to “Stored CD data options” on page 46.
Tips for getting the most enjoyment from stored tracks
• Begin storing your favorite CDs first, for the best introductory taste of what the uMusic™
system can do.
• It is not necessary to store them alphabetically.
• Allow the system a little learning time before it makes the choices you would make. But
don’t worry, this novice DJ is a fast learner.
• If several family members store their CD tracks on the system, be sure each one has an
assigned preset and uses that preset when listening.
• It is not necessary to press the positive or negative rating buttons more than once. One
press tells the system you feel strongly about a track.
Scheduling time to store it all
During the storing process, the system holding area may become temporarily full and no
more storage is possible for a while. As an indicator, the media center displays the message:
BUSY PROCESSING CDS.
If you turn the system off, this processing goes faster. If you choose to use the system while it
is processing, the storing activity continues but it takes a little longer.
If your CD collection is extensive, it may take several sessions to store all the tracks. Con-
sider the guidelines below for scheduling those sessions.

15
Controls and Capabilities
How much time to allow for storing CDs
For copying 10 discs: 1 hour
(about 5 minutes per disc, with allowance to insert and eject each disc)
For system to complete the processing of 10 discs: 6 hours, while the system is turned off.
How many CDs you can store
Using a LIFESTYLE®38 system: approximately 200 hours of music or well over 200 CDs
Using a LIFESTYLE®48 system: approximately 350 hours of music pr well over 350 CDs
What to do with tracks you don’t like
The system stores all valid tracks from each CD. However, after it is stored, any track can be
deleted. You can do that in the System menu, under Stored CDs.
Note: For information on how to use the System menu, refer to “Making system adjustments” on
page 38. For details on how to eliminate tracks, refer to “Stored CD data options” on page 46.

16
System Performance
Some product pointers to ensure satisfaction
To turn your system on:
•Pressthe
On/Off
button
on the remote control. Or...
• Press the On/Off control on the media center. Or...
• Press the remote
CD/DVD
,
FM/AM
,
TV
,
CBL/SAT
, or
AUX
button.
This turns the system on and selects the source at the same time.
To use your system with the TV and other components, review the reminders below. They are
provided to help ensure that it all works together smoothly.
Note: For information on how to set the remote to operate other components, refer to “Using
your system remote with other components” on page 26.
To turn on other components
You need to:
1. Turn on the system.
2. Select the source.
3. Turn the source on (if it is an external component).
You can use your LIFESTYLE®remote control to do all of that, once you have set it to operate
the TV and other components.
To watch video
Your installation choices may require some activation settings, as indicated below.
• Getting the image to the TV screen:
-Be sure to select the proper Video Input on your TV (consistent with the video input that
the media center connects to on the back of the TV). Use the
TV Input
button on the
LIFESTYLE®remote control (if the remote is already set to control the TV).
• Using the component video connection option:
-If you have a component video connection between the TV and the media center, be
sure to make that selection on the display of the media center. Until you do, you may
see nothing on your screen when you select DVD as the source.
• Using the progressive scan capability of your TV:
-Make sure there is a component video connection between the TV and the media
center.
-Be sure to make the Progressive selection on the display of the media center. Until you
do, you may see nothing on your screen when you select DVD as the source.
-For othervideo components connected to the mediacenter, make sure the component
is also connected using a component video adapter.
Note: For information on selecting component video or progressive scan on the media center,
refer to “Component or progressive scan: activating your selection” on page 12.S

17
System Performance
To adjust what you see or hear
• For changes to a particular source:
-Press the
Settings
menu button on the LIFESTYLE®remote control.
-To see your choices on the TV, be sure you have the TV on and its Video Input is set for
the media center.
-For details on the changes you can make, refer to “Making system adjustments” on
page 38.
• For changes to system operation:
-Press the
System
button on the LIFESTYLE®remote control.
-Be sure you have the TV on and its Video Input is set for the media center.
-For details on the changes you can make, refer to “Making system adjustments” on
page 38.
To enjoy the remarkable LIFESTYLE®38 or 48 system features
You can use many features of your LIFESTYLE®system as soon as it is installed and the
setup is verified by the two discs that are included with it.
But the most innovative feature, the uMusic™intelligent playback system, is dependent on
CD tracks that are stored in the system. So you need to store at least one CD first. To get the
most impact while listening to your stored music, you really need 20 or more discs stored.
Storing one disc is very simple:
• Place the first CD into the disc tray of the media center and close the tray.
•Pressthe
Store
button, located on the media center control panel.
To store additional CDs, you may want some guidelines and more details. Refer to “Getting
your music into the system” on page 12.
To further understand your options for identifying and playing the tracks you store, be sure to
read “Take advantage of the music databases inside” on page 14.
FedX addition

18
System Performance
Listening to your stored music (available on LIFESTYLE®38 and 48 systems, only)
Press to select the stored music source. If the system is off, this will turn it on to the
uMusic™system mode. It begins with the last-used preset and play mode selected.
Note: This feature is functional only after CDs have been stored on the system. For details on
how to store CDs, refer to“Getting your music into the system” on page 12.
Now you can simply sit back and listen,or make other choices:
• Press any
number
button, 1 to 9, to choose a different preset, as preferred.
•Press to let the system know that you like or dislike the selection playing.
Note: Pressing –tells the system to immediately move on to the next piece. Pressing + gives the
system a strong message that you like the piece playing, and you want it to continue playing.
•Press to hear more music like the piece playing.
•Press to hear the other tracks from the same CD as the track that is playing.
•Press , followed by its reference number, to hear a specific CD.
If you have used the space provided inside the back cover of this guide to log the list of
CDs you have stored, refer to that log to identify the number of a CD you want to hear.
Control options
If you want to: Do this:
Pause the selection playing… Press .
Resume play… Press again or .
Stop a selection… Press once. Then press to continue playing
from where the track stopped.
Or, press twice to stop and reset. Then press
to restart at the beginning of the track or whole CD.
Skip to another selection… Press up.
Skip to a previous selection… Press down twice, or once only, if the track you
Repeat a selection… Press while the track or whole CD you want to
repeat is playing.
Search backward or forward… Press and hold the arrows, according to
the direction you want to search
Added page for FedX
want to skip has barely begun to play.

19
System Performance
Note: For information on the quick adjustments you can make to Stored CD settings, refer
to“Stored CDs setting options” on page 35. Instructions on how to enter the menu to makethose
changes are available in “How to see your options” on page 32.
Enjoy the added functionality provided by presets
Enjoying the broad array of your private music collection in powerful, lifelike multi-speaker
performance is the primary benefit of your uMusic™intelligent playback system.
But to get the very most from this sophisticated, multi-faceted feature, you need to set up
and use the stored CD presets reserved just for that.
Why you should rely on them
A stored music preset is where your listening preferences get recorded over time. Consider
each one as a different “station” that you tune to so the system can “listen” and learn about
your taste.
When you first select Stored as your source, the system automatically takes you to Preset 1
(Figure 3).
Figure 3
Preset 1 as indicated on the
music center display
If you have previously stored CDs, you can use this preset for now:
1. Press the
Stored
button on your LIFESTYLE®remote.
2. Check the media center display to see what play mode is selected.
• If it says UMUSIC you are ready to listen and enjoy.
• If it says SIMILAR CD#, PLAYLIST, or WHOLE CD, press the
uMusic
button on the remote.
3. Just listen for a while.
Notice there’s no identifiable order to what plays: not by CDs that were stored first, nor by
common artist or genre. It’s more like a freewheeling stream of tracks you may or may not
have heard recently.
Search for a particular CD… Press and choose to search by:
Genre, Album, Artist...
as it applies to the CD you want to hear.
Hear music of one type or by
one performer… Press and choose to search by:
Genre, Artist...
as it applies to the type of music
you want to hear.
Add a selection to the Playlist... Press and hold while the selection is playing.
Hear your Playlist selections... Press .
added this and next page for FedX
S T O R E D 2 : 0 6
1 P R E S E T CD : 1 2 5

20
System Performance
4. While in Stored source, you can press a numbered button, from 2 to 9, to move to a dif-
ferent preset.
Note: You can also name each preset for the person using it. For details on on how to do that,
refer to “Stored CDs setting options” on page 35.
Respond actively to speed up the learning process
If you hear a piece you don’t like or are not in the mood for, you have several choices:
• Skip the piece by pressing the button.
The system moves to the next track, notes your negtive response, and gets ready to learn
more.
• Press the – rating button.
The system logs your strongly negative response and moves to another track immediately.
If one track stands out as a favorite:
• Press the + rating button.
The system logs your response as positive and continues playing the track. You are likely to
hear that same track again, sooner than some others.
Choose Playlist when you want a lineup of tracks
The system includes a ready-to-use playlist, for your selection of specific tracks to play on
command. The playlist can be useful in a variety of situations.
For example:
• During a dinner party when the music should set an amiable tone.
• When an old friend and avid blues devotee will be spending the weekend.
• For parent-mandated study sessions, to satisfy your teen’s required inspiration.
• To deliver a continuous stream of the show tunes sung only by your favorite tenor.
How to add music to the Playlist provided:
While listening to a track in Stored source, press and hold the
Playlist
button on the remote.
Locate selections using the Music Library, then press and hold the
Playlist
button to add them
to a Playlist one by one.
Or, you can press the Settings menu and compile the entire list without listening.
How to delete tracks from the Playlist:
Info to come. Not included for Home Eval.
Use the Music Library to search, play, or browse your collection
Imagine: While using your LIFESTYLE®38 or 48 system, you hear music — on FM, or perhaps
the score of a movie — and suddenly you think of another cut you want to hear. You know
you own it, though the name eludes you. But it won’t stop running through your head.
This is a perfect scenario for using the Music Library. If your system is turned on and the
Stored source is selected
1. Press the
Library
button on the remote to see your choices for locating a track.
• The inital library information appears on the media center display (Figure 4).
• If your TV is on and the Video Input that connects the media center to the TV is
selected, the library screen appears there (Figure 5).
• Genre is selected and ready to browse the genre options.
Other manuals for Lifestyle Music Center
16
Table of contents
Other Bose Car Video System manuals
Popular Car Video System manuals by other brands

Sony
Sony XAV-W650BT operating instructions

10-8 Video Digital Evidence Solutions
10-8 Video Digital Evidence Solutions In-Car Video System Installation & user manual

Roadmaster
Roadmaster RM-V700 XBG user manual

KAP
KAP FORD-SYNC3-TDC2 instruction manual

XZENT
XZENT ARGO Series Mounting instruction

Eonon
Eonon 12.1 TFT-LCD DVD owner's manual