manuals.online logo
Brands
  1. Home
  2. •
  3. Brands
  4. •
  5. Bose
  6. •
  7. Speakers System
  8. •
  9. Bose Acoustimass 6 Series II User manual

Bose Acoustimass 6 Series II User manual

!'.!R"'dhr-A
d'utililRation
Thank
You
We
appreciate your choice
of
the
Bose®
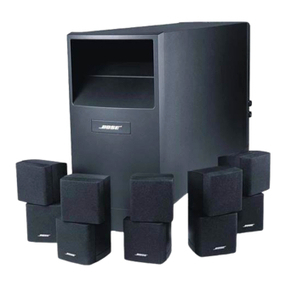
Acoustimass® 6home theater speaker system With
these Virtually
Invisible®
speakers you'll surround yourself with realistic sound, without alot
of
equipment Your system features next generation Acoustimass cube speakers, aproduct
of
the continuous research and development at Bose Corporation These cube speakers deliver
more lifelike sound and better overall performance than their predecessors
Please
Read
This
Owner's
Guide
The setup and operation
of
your Acoustimass 6home theater speaker system is significantly
different from other speakers Please take the time to read this owner's guide carefully It will
help you set up and operate your system properly and enjoy
all
of
its features Save your
owner's guide for future reference
Declaration
of
Conformity
We,
the offerer
Bose®
Corporation, The Mountain
Framingham,
MA
01701-9168 USA
acknowledge our sole responsibility, that the product
Kind
of
equipment
Type designation Loudspeakers
Acoustimass®6
Home
Theater Speaker System
in accordance with EMC Directive 89/336/EEC and Article 10(1)
of
the Directive,
is
in
compliance with the following norm(s)
or
document(s)
Technical regulations EN50081-1, EN50082-1
Accredited
by
Bose Corporation
5June 1999
~
Bose B
V,
Nijverheidstraat 8Nic MerkS
1135 GE Edam, Vice President, Bose Europe
The Netherlands Manufacturer's authorized
EU
representative
2
Where to find ...
Setting Up Your Acoustimass@ 6 Speaker System 4
Before you begin 4
Unpacking the system 5
Placing your Acoustimass 6 speakers to achieve realistic home theater sound 6
Selecting locations for your speakers 7
Connecting the speakers 9
Checking your connections 12
Attaching the module end cover 13
Operating Your Acoustimass 6 Speaker System 14
Listening to realistic home theater sound 14
Using your Dolby Pro-Logic receiver 14
Using your Dolby Digital (AC-3) receiver 15
Maintaining Your Acoustimass 6 Speaker System 16
Cleaning your speakers 16
Troubleshooting 16
Warranty period 17
Customer Service 17
Product Information 18
Technical Information 18
Accessories 18
Bose@Corporation Inside back cover
For your records
Serial numbers are located on the connection panel of the Acoustimass module
Serial number
Dealer name
Dealer phone Purchase date
We suggest you keep your sales slip and warranty card together with this owner’s guide
4
4
5
6
7
9
12
13
14
14
14
15
16
16
16
17
17
18
18
18
Inside back cover
Setting Up Your Acoustimass® 6Speaker System
Before you begin
Unpacking the system
Placing yourAcoustimass 6speakers
to
achieve realistic home theater sound
Selecting locations for your speakers
Connecting the speakers
Checking your connections
Attaching the module end cover
Operating Your Acoustimass 6Speaker System
Listening
to
realistic home theater sound
Using your Dolby Pro-Logic receiver
Using your Dolby Digital (AC-3) receiver
Maintaining Your Acoustimass 6Speaker System
Cleaning your speakers
Troubleshooting
Warranty period
Customer Service
Product Information
Technical Information
Accessories
Bose®
Corporation
Where
to
find
...
For
your
records
Serial numbers are located on the connection panel
of
the Acoustimass module
Serial number _
Dealer name
Dealer phone Purchase date
We
suggest you keep your sales slip and warranty card together with this owner's guide
,
••
,•
••
,I'.I1~
••
".f"_~
B_I'.~
••.
I.m
"
1~
d:~
=
=:=
Before
you
begin
Bose®
Virtually
Invisible®
speaker technology allows you
to
enjoy lifelike home performances
from the very latest surround sound encoded movies, CDs, and television shows, without a
room full
of
speakers
Your video sound source (stereo
VCR,
laserdisc or digital video player, or stereo television)
sends the encoded program material
to
the surround sound receiver, which interprets it by
distributing various sounds to particular speakers Although the sound mix varies with
different types
of
programs, dialogue is usually sent
to
the center speaker while sounds from
the left
or
right side
of
the picture
go
to the left
or
right front speakers Ambient sounds and
special effects are directed
to
one
or
both
of
the surround
(rear)
speakers The unique, easy-
to-hide Acoustimass® module delivers bass for all channels At any point
in
asurround sound
performance, you may hear sound from
all
or just afew
of
the speakers, but the overall
experience puts you
in
the center
of
the action
To
select surround-encoded program material, look for any
of
the terms Surround, Dolby*
Surround, Dolby Pro-Logic and the double-D symbol
[][]IDDLBYBUIlIlOUNDI
*on tapes and discs, and
the word "surround" preceding a
TV
broadcast Your Acoustimass 6home theater speakers
are also compatible with Dolby Digital (AC-3)* receivers and program material (Instructions
on using your surround
or
digital receiver with the Acoustimass 6speaker system are pro-
vided on pages 14 and 15 )
You
can also enjoy awide variety
of
stereo programming that is not surround-encoded with
your Acoustimass 6speakers Simply adjust your receiver
as
described on page 14
*Dolby, Dolby Surround, Dolby Pro-Logic, Dolby Digital (AC-3),
and
the double-D symbol are trademarks
of
Dolby
Laboratories Licensing Corporation
4
Unpacking
the
system
A. WARNING:
The
Acoustimass® module weighs 19 pounds
(86
kg) Use
good
lifting practice
to
avoid injury
To
avoid danger
of
suffocation, keep the plastic bags that wrap these speak-
ers out
of
the reach
of
children
Unpack
the
system
carefully
1
Remove
any
staples
from
the
opened
carton
flaps
2
Lift
out
the
two
brown
inner
cartons
3
Remove
the
five
cube
speakers
from
their
packaging
4
Remove
the
Acoustimass
module
end
cover
from
its
packaging
5
Gently
roll
the
carton
over
onto
its
side
and
then
onto
its
opening
6
Carefully
lift
the
carton
from
around
the
Acoustimass
module
and
packing
cushions
7
Do
not
detach
the
removable
cables
connected
to
the
Acoustimass
module
8
If
the
speakers
or
the
Acoustimass
module
appear
damaged,
do
not
use
them
Repack
everything
in
the
original
carton
and
contact
your
authorized
Bose®
dealer
immediately
.1
Note:
Nowis a
good
time to record the serial number
of
these speakers on
page
3
of
this
guide
and
on your warranty card It
is
a
good
idea
to
save allpacking materials for possible
future use
Figure 1
What comes
in
the carton
[]
Acoustimass
module
c===;r------,
System
input
cable
(20'
[6
m])
Front
speakers
cable
(20'
[6
m])
Surround
speakers
cable
(50'
[15
m])
Placing
your
Acoustimass@ 6
speakers
to
achieve
realistic
home
theater
sound
The center speaker localizes action and dialogue on your screen Sound from the center
speaker should seem
to
come from within the picture
The left and right front speakers create asound image wider than the screen that seems
natural
to
viewers sitting anywhere
in
the room
The surround speakers add subtle sounds and special effects that expand the visual image,
bringing the viewer into the center
of
the action The surround speakers should be positioned
to
allow the sound
to
reach the viewer from both sides, rather than from directly behind
You
can place the front and center speakers near a
TV
screen with no picture interference,
because all
of
the cube speakers are magnetically shielded
The Acoustimass module is not magnetically shielded and should be at least 2feet
(60
cm)
from your screen, but at the same end
of
the room as the front and center speakers
Bose®
Acoustimass speaker technology takes advantage
of
the fact that the source
of
bass sound
is difficult
to
locate, so you can hide the Acoustimass module conveniently out of sight
Placing it near acorner increases bass output trom the module
Asuggested home theater layout that conforms to the guidelines described above
is
shown
in
Figure 2
You
may choose
to
place the speakers differently, to take advantage
of
the sound character-
istics
of
different rooms For instance, where walls are absent or the room is large, you may
prefer not to angle the left and right speakers as shown
You
can experiment
to
find the best
position
Your speakers come with sufficient cable lengths to allow you
to
have the following distances
between components
•Up
to
20 feet
(6
m)
between the Acoustimass module and the receiver
•Up
to
20 feet
(6
m)
between the Acoustimass module and the front and center cube
speakers
•Up to 50 feet
(15
m)
between the Acoustimass module and the surround speakers
Figure
2
Speakerplacement
6
Selecting
locations
for
your
speakers
The lengths
of
cable supplied with your Acoustimass® 6system provide agreat deal
of
flexibility
in
speaker placement Optional
Bose®
extension cable, add-on connectors, wall
brackets, and floor stands can add
to
your choices See "Accessories" on page 17
'-eft
and
right front
cube
speakers
There are several ways to achieve
an
accurate left and right sound image (Figure
3)
•Place the front speakers on either side of your
TV,
at least 6feet
(2
m),
or
as
much as 15
feet
(5
m)
apart
•Place them
in
line with the horizontal center
of
the screen for the best sound balance
(position
1)
Placing them
in
aline above the
top
of
the
TV
is another choice (position
2)
•Aim the speakers inward for more accurate imaging
or
outward
for
amore spacious effect
Adjust them according to your preference
•The speaker on the left
as
you face the
TV
connects to the left
(L)
OUTPUTS jack on the
Acoustimass module
Figure3
Suggested choices for left
and
right front speakerplacement
A
CAUTION:
Choose astable
and
level surface for your speakers Vibration can cause the
cube speakers
to
move, particularly on smooth surfaces like marble, glass, orhighlypolished
wood
If
you are placing the center speaker on top
of
the television, use the smaller
of
the two
sets
of
rubber feet provided
You
mayobtain additionalrubber feet (part no
178321),
free
of
charge,
by
contacting BoseCustomer Service (see listings on the inside
back
cover)
Center
cube
speaker
Sound from the center speaker should seem
to
come from within the picture Figure 4shows
suggested positions for the center speaker
•Place the center cube speaker above, below, or on top
of
your television If below, be sure
that the cube speaker
is
not supporting the weight
of
the television
in
any way
•Aim this speaker straight ahead for on-screen imaging
•Keep it
as
close
to
the vertical center
of
the screen
as
possible,
for
the most accurate
dialogue reproduction (positions 1or
2)
Figure4
Suggested choices for center
speakerplacement
7
Surround
cube
speakers
Left and right rear channel sound should reach the viewer from both sides, rather than from
directly behind (Figure
5)
•Put one on the left and the other on the right, beside
or
just to the rear
of
the home theater
seating area
•Position them so they do not create adirect sound path to the listener's ears (position
1)
•Generally aim them away from the viewers, toward the rear
or
side walls (position 2
or
3)
•If you want these speakers directly behind the seating area, make sure they are not
directed at the viewers
•The rear speaker
to
your left
as
you face the
TV
connects
to
the left surround
(LS)
jack on
the Acoustimass® module
FigureS
Suggested choices for surround
(rear) speakerplacement
8
Acoustimass® module
Bose®
recommends putting your Acoustimass module at the same end
of
the room as the
television
To
prevent interference, keep the module at least 2feet
(60
cm) from the television
•
You
may hide the Acoustimass module behind or under furniture, but
do
not block the
opening
Be
sure there
is
at least 2inches
(5
cm) between the opening and any surface
•Placing the module close to acorner increases the bass output Moving it toward the
center
of
the wall reduces the output
•If the opening faces the wall, it further increases the bass If it faces away, it decreases the
bass For the most bass response, place the opening 2
to
3inches
(5
to
8cm) from awall
or corner
•Stand the module vertically
or
horizontally (Figure
6)
Attach the large set
of
rubber feet to
the bottom surface If you plan to stand the module on the cable connection end,
do
not use the module end cover, but be sure
to
attach the large rubber feet to protect
the connections
Figure6
Acoustimass@
module positions
:
;(
Uk
CAUTION: Before making anyconnections, turn offyour receiver oramplifier
and
unplug
it
from the outlet (AG
power
mains) Not doing so may result
in
damage
to
your system
CAUTION: Never use broken or frayed wiring which can result
in
electricalshock
or
dam-
age
to
your system
The
supplied
cables
make
it
easy
for
you
to
connect
your
system
The
connections
at
the
Acoustimass
module
are
already
made
for
you
There
are
three
sets of
cables,
joined
together
to
form
ribbons,
which
may
be
separated
or
"unzipped"
(Figure
7)
as
needed
to
comfortably
reach
the
speakers
Connecting
the
speakers
A
A
Figure 7
Separating cables
9
Separate the wire pairs
as
you
layout
the cable lengths
You
may want
to
keep unextended
lengths
of
cable joined, making them easier
to
hide Refer to Figure 8on for
an
overview
of
the completed connections
•Use the 20 foot
(6
m)
front speakers cable with three pairs
of
wires
to
connect the
Acoustimass module to the center, left front, and right front cube speakers
•Use the 50 foot
(15
m)
surround speakers cable with two pairs
of
wires
to
connect the
Acoustimass module to the left and right surround cube speakers
•Use the 20 foot
(6
m)
system input cable with five pairs
of
wires
to
connect the
Acoustimass module
to
the outputs on the receiver Separate these wires just enough to
reach the connectors
J
Note:
Ifyou have already installed cable behind walls orunder floors, or believe you need
to
splice the supplied cables for anyother reason, inquire about the add-on connectors
and
extension cable available from
Bose@
Customer Service Refer
to
page
17 for details on these
accessories Bose Customer Service telephone numbers are listed on the inside
back
cover
FigureS
System Connections
+
10
Surround
speakers
cable
Front
speakers
cable
System
input
cable
Connecting
the
Acoustimass® module
to
the
center
and
front
cube
speakers
CAUTION: Never connect the cubes directly
to
the receiver Always connect the cube
speakers
to
the Acoustimass module, then connect the Acoustimass module
to
the receiver
Use the 20 foot
(6
m)
cable with three pairs
of
wires to connect the Acoustimass module
to
the center and front cube speakers Refer
to
Figure 8
Connect the wire pair marked CENTER to the cube speaker you have placed
in
the center
position Press the terminal tab on the back
of
the speaker (Figure
9)
Then insert the
marked wire
(+)
into the red terminal and the plain wire (-) into the black terminal Release
the tab to secure the wires
in
place
Figure9
Speaker cable connections
to
the cube speaker o
2
In
the same way as
in
step
1,
connect the wire pair marked RIGHT
to
the cube speaker
you have placed
in
the right front position (to the right
of
the
TV
as
you face
it)
3
In
the same way as
in
step
1,
connect the wire pair marked LEFT to the cube speaker you
have placed
in
the left front position (to the left
of
the TV
as
you face
it)
At the Acoustimass module, check to be sure the connectors are firmly inserted into the
proper OUTPUTS TO CUBE SPEAKERS jacks
•The black Lconnector goes into the Ljack
•The gray Cconnector goes into the Cjack
•The black Rconnector goes into the Rjack
Connecting
the
Acoustimass module
to
the
surroundcube
speakers
Use the 50 foot
(15
m)
cable with
two
pairs
of
wires to connect the right and left surround
cube speakers
to
the Acoustimass module Refer to Figure 8
1Connect the wire pair marked RIGHT SURROUND to the right surround cube speaker
(on
your right
as
you face the
TV)
Press the terminal tab
on
the back
of
the speaker (Figure
9)
Then insert the marked wire
(+)
into the red terminal and the plain wire (-) into the black
terminal Release the tab
to
secure the wires
in
place
2
In
the same way as
in
step
1,
connect the wire pair marked
LEFT
SURROUND to the left
surround cube speaker
(on
your left as you face the
TV)
At the Acoustimass module, make sure the gray connectors are firmly inserted into the
LS
and
RS
OUTPUTS TO CUBE SPEAKERS jacks
11
Connecting
the
Acoustimass·
module
to
your
receiver
CAUTION:
00
not connect the Acoustimass module directly
to
your television unless the
television provides surround decoding circuitry
and
amplified outputs for all channels
Use the 20 foot
(6
m)
cable with five wire pairs
to
connect the Acoustimass module
to
your
surround sound receiver Refer
to
Figure 8
1Connect all wires
to
the receiver in phase
(+
to +and -
to-)
aConnect each wire marked with ared collar
(+)
to
the appropriate red
(+)
output
bConnect each plain wire (-)
to
the appropriate black (-) output
2Match the label on the red collar
of
each wire pair
to
the SPEAKER OUTPUT label on the
receiver
aLEFT wires
go
to
the LEFT FRONT SPEAKER OUTPUT connections
bCENTER wires
go
to
the CENTER SPEAKER OUTPUT connections
cRIGHT wires
go
to
the RIGHT FRONT SPEAKER OUTPUT connections
dLEFT SURROUND wires
go
to
the LEFT SURROUND (rear) SPEAKER OUTPUT
connections
eRIGHT SURROUND wires
go
to
the RIGHT SURROUND (rear) SPEAKER OUTPUT
connections
3At the Acoustimass module, check
to
make sure all connectors are firmly inserted into the
proper INPUTS FROM RECEIVER OR AMPLIFIER jacks Black connectors
go
into
Land
R
jacks Gray connectors
go
into C, LS, and
RS
jacks
Checking
your
connections
Check all connections from the receiver
to
the Acoustimass module and the module
to
the
cube speakers Check
to
be sure all speakers are connected
to
the proper terminals accord-
ing
to
their position in your room Refer
to
Figure 8
At the receiver, make sure the wires are connected in phase
(+
to
+and -
to
-)
Incorrect
wiring can result
in
atotal loss
of
Acoustimass module output
Be sure
to
correct any wiring problems before you plug your receiver in and turn it on
ACAUTION:
00
notallow exposed wires
to
brush against each other, this could damage your
receiver
12
Attaching
the
module
end
cover
The module end cover is designed
to
hide the cabling and extend the smooth, clean lines
of
the Acoustimass® module However, because the cover has abeveled surface, you cannot
stand the module on that end with the cover
in
place
Ifyou plan
to
use the cover, attach it
to
the cable end
of
the module after all connections
have been checked (Figure
10)
Gently push the end cover into the grommets on the Acousti-
mass module
Your set up is complete Enjoy your Acoustimass 6speaker system
Figure
10
The
module
end
cover fits over
the cables
13
Listening
to
realistic
home
theater
sound
Each speaker produces only the sound directed
to
it by the steering logic
in
your surround
sound receiver During asurround sound program, the front and center speakers will emit
sound almost constantly, while the surround speakers may be silent for periods
of
time
)
Note:
Ifyour television has surround sound or anysound enhancement feature built
in
("wide"
or
"enhanced"), turn it off Set the
TV
for stereo playback only
Using
your
Dolby
Pro-Logic
receiver
For use
in
video applications, be sure the SURROUND SOUND centermode
of
your receiver
is
set
to
NORMAL (Figure
11)
You
may depress the Loudness button (Bass Boost or Super
Bass on some receivers) to see if you prefer that video sound
Figure 11
ADolbyPro-Logic receiver set
for NORMAL center mode
~c
000
~)O
~~t:::::::J~~~OO'
~
14
Usingyourreceiver's
test
tone
to
verifyconnections
and
adjust
the
volume
level
1Press test tone
ON
at the remote
2Listen and confirm that each speaker reproduces sound
as
the tone moves from speaker
to speaker
in
this order
LEFT,
CENTER,
RIGHT,
SURROUND One tone should come from
both SURROUND speakers at the same time
3Adjust the volume levels
of
the CENTER and SURROUND speakers to achieve the
balance you prefer for your listening area
Instructions for this process
vary,
depending on the brand and model
of
receiver you are
using Follow your receiver owner's guide instructions for more details on using the test tone
Balancing
the
bass
and
treble
Upholstered furniture, wall-to-wall carpets,
or
heavy drapes can muffle treble (high notes),
making your speaker system sound bass heavy Bare floors and walls and hard surface
furniture can make your speaker system sound too shrill After listening to your speakers, you
may want
to
adjust the balance
of
bass and treble
You
can use the bass and treble controls
on your receiver
Listening
to
spacious
stereo
sound
Try
setting your receiver to the HALL, DANCE,
or
JAZZ surround mode while listening
to
music from a
CD
or
cassette tape This enables you to enjoy awide stereo image reproduced
by the front speakers, plus the ambience and spaciousness provided by your surround
speakers
Using
your
Dolby
Digital
(AC.3J
receiver
Your Acoustimass® 6speakers are compatible with the output from Dolby Digital (AC-3)
receivers
Take
special care
to
set the channel output according to the specifications listed
in
the chart below The Acoustimass speaker system
is
afull-range system and must be set as
LARGE speakers on the Dolby Digital screen menu An exception
is
the center speaker, which
must be set as SMALL Turn the subwoofer OFF and turn the
LFE
(low-frequency effects) ON
Receiver channel output
Left and Right Front
Center
Left and Right Surround
Subwoofer
LFE
(low-frequency effects)
Proper setting
LARGE
SMALL
LARGE
OFF
ON
Follow the receiver owner's guide instructions for using the receiver test tone
to
verify your
connections and to adjust the volume levels
of
the speakers
15
Cleaning
your
speakers
Wipe the cube speakers using adamp cloth Do not use solvents
or
chemicals
Do
not allow
liquids
to
spill on
or
objects
to
drop into the Acoustimass® module or the speaker grilles
You
may vacuum the grilles carefully, the drivers are directly behind the grille cloth No other
maintenance is needed
Troubleshooting If you have aproblem with your Acoustimass 6speaker system, turn off your sound source
and try the solutions below If you still have aproblem, contact your
Bose®
dealer
to
arrange
for service
To
contact Bose directly, refer
to
the inside back cover
of
this guide
Problem
System does not function
at
all
No sound
No surround sound
16
What
to
do
•Make sure the power cord of the receiver
is
plugged into
an
operating AC wall outlet and
the receiver
is
turned on
•
Be
sure to select asource at the receiver (video, CD, tuner)
•Check the cube speaker and Acoustimass module connections Turn on the receiver
•Check connections of external components
to
the receiver
•Increase the volume
•Disconnect any headphones
•If your surround sound receiver
is
Pro-Logic, be sure your receiver is connected to astereo
sound source
(TV,
VCR,
laserdisc
or
DSS player) by
an
RCA stereo cable If the receiver is
connected directly
to
a stereo television, make sure that all other program sources
(VCR,
laserdisc or DSS player) are connected to the
TV
using RCA stereo cables as well
•If your surround sound receiver is Dolby Digital (AC-3), be sure the sound source
(DSS,
laserdisc or
DVD
player) is connected directly
to
your receiver as shown
in
the owner's
guide
•On your
T\I,
turn off enhanced surround sound, if available Set your
TV
for stereo only
Problem
Sound
is
distorted
No bass
What
to
do
•Make sure speaker cable
is
not damaged
•Reduce the volume
of
any external components connected to the receiver
•Make sure speaker connections at the receiver or amplifier are correct
(+
to +and -
to-)
•If you are using the Dolby Pro-Logic mode, make sure surround sound
is
turned on and the
center channel is set to NORMAL
•If you are using Dolby Digital (AC-3) programming, verify that the settings are correct at the
receiver Also, be sure the source material (laserdisc or broadcast programming)
is
Dolby
Digital
or
AC-3 encoded
Not enough
or
too much bass •Move the Acoustimass module closer to awall
or
corner
to
increase bass Move it farther
from awall
or
corner to decrease bass
•Adjust the bass or treble control on the receiver slightly
Warranty
period
The Bose Acoustimass 6speaker system is covered by alimited five-year transferable
warranty Details
of
the coverage are provided on the warranty card that came with your
speakers Please fill out the information section on that card, detach, and mail it to Bose
Customer
Service
For help
in
ordering accessories or solving problems, contact Bose Customer Service See
the inside back cover for offices and phone numbers
17
OUR COMMITMENT TO YOU
We
take great pride in designing each
of
our products with the goal
of
providing the high-
est accuracy musical performance possible in the price range
of
that product
We
strive to
reproduce the musical sounds as closely as possible to those
of
the original performance
And we strive to avoid flashy sounds such as those associated with accentuated bass and/or
treble frequencies While those sounds may be initially attractive to the novice, they are not
real and are not enduring In addition, we use only the highest quality parts and the latest
assembly and quality control techniques to ensure the reliability and long life
of
our
products
Our reputation rests on our steadfast pursuit
of
this policy in sound systems for the home,
the automobile, and businesses
At
Bose®
we reinvest 100%
of
our earnings back into the company This enables us to
support research that continually gives rise to new technologies for improving sound
reproduction.
When you purchase any product from Bose, we encourage you to compare it, as we do, to
competitive products for musical accuracy
We
believe that this process will enhance your
appreciation
of
the product you select
With best wishes from all
of
us at Bose for many years
of
enjoyable listening
BOSE COf1E'ORATION, THE MOUNTAIN, FRAMINGHAM, MA 01701-9168
USA
7. Please Indicate your gender and age /Anglv venligst Deres kon
og alder /
In
welche Gruppe fallen Sie? /Por favor Indique su sexo
yedad /Veuillez Indiquer votre sexe et votre age /La preghlamo
di Indicare sesso ed eta /Gelieve geslacht
en
ouderdom aan
te
dUiden /Ange
ditt
kan och din alder
6. City and store where purchased /By og forretnlng, hvor
De
kobte
produktet /
Wo
kauften Sie das Produkt? (Stadt und Geschiift) /
Ciudad ytienda donde fue adqulndo /Ville et magasln ou I'achat a
ete fait /Citta enegozlo d'acqUisto /Stad
en
winkel van aankoop /
Butik och ort far Inkapet
8. Do you have any comments about
Bose®
or its products you
would like
to
share?
Har
De
kommentarer
om
Bose eller Boses produkter?
Was halten Sie von Bose oder Bose Produkten?
Por favor Indique cualqUier comentano sobre Bose 0sus
productos que consldere pertinente.
Commentalres sur Bose ou ses produits?
Commenti che desldera condivldere reiativi alia Bose ed
al
SUOI
prodotti.
Heeft uenlge opmerklngen te maken aangaande Bose of Bose
produkten?
Har du nagra kommentarer med avseende pa Bose eller faretagets
produkter?
026-34
o66+
ofemale /KVlnde /
Frau
/
MUJer
Femlnln /Femmlnile /Vrouw
KVlnna
o
19-25
o
51-65
00-18
035-50
omale /Mand /Mann
Varon /Masculin
Maschile /Man

Other manuals for Acoustimass 6 Series II

2

Other Bose Speakers System manuals

Bose L1 Pro Series Use and care manual

Bose

Bose L1 Pro Series Use and care manual

Bose Model 101 Music Monitor Series II User manual

Bose

Bose Model 101 Music Monitor Series II User manual

Bose FreeSpace 3 User manual

Bose

Bose FreeSpace 3 User manual

Bose AM-25P II Owner's manual

Bose

Bose AM-25P II Owner's manual

Bose 301 Series III User manual

Bose

Bose 301 Series III User manual

Bose 101 Series II User manual

Bose

Bose 101 Series II User manual

Bose 901 Series IV User manual

Bose

Bose 901 Series IV User manual

Bose Acoustimass 6 Series III User manual

Bose

Bose Acoustimass 6 Series III User manual

Bose Companion 3 User manual

Bose

Bose Companion 3 User manual

Bose Smart Ultra Soundbar User manual

Bose

Bose Smart Ultra Soundbar User manual

Bose 901 User manual

Bose

Bose 901 User manual

Bose L1 Compact User manual

Bose

Bose L1 Compact User manual

Bose Speaker System User manual

Bose

Bose Speaker System User manual

Bose 10.2 Stereo Everywhere User manual

Bose

Bose 10.2 Stereo Everywhere User manual

Bose Pro Roommate User manual

Bose

Bose Pro Roommate User manual

Bose L1 Model II Instruction Manual

Bose

Bose L1 Model II Instruction Manual

Bose Acoustimass 3 Series User manual

Bose

Bose Acoustimass 3 Series User manual

Bose Acoustimass 5 User manual

Bose

Bose Acoustimass 5 User manual

Bose 131 User manual

Bose

Bose 131 User manual

Bose 301 Series User manual

Bose

Bose 301 Series User manual

Bose 901 User manual

Bose

Bose 901 User manual

Bose Computer MusicMonitor User manual

Bose

Bose Computer MusicMonitor User manual

Bose FreeSpace DS 100SE Guide

Bose

Bose FreeSpace DS 100SE Guide

Bose Acoustimass 15 Series II User manual

Bose

Bose Acoustimass 15 Series II User manual

Popular Speakers System manuals by other brands

Sony SRS-Z1 Service manual

Sony

Sony SRS-Z1 Service manual

Genius SP-E06S Service guide

Genius

Genius SP-E06S Service guide

JVC EX-D5 instructions

JVC

JVC EX-D5 instructions

Jarre AeroSkull HD user guide

Jarre

Jarre AeroSkull HD user guide

TDK iCUBIC Setup guide

TDK

TDK iCUBIC Setup guide

Omnitronic XFM-212AP user manual

Omnitronic

Omnitronic XFM-212AP user manual

Sony SRS-PC45 operating instructions

Sony

Sony SRS-PC45 operating instructions

Trevi SB 8315 TV user guide

Trevi

Trevi SB 8315 TV user guide

Fbt PROMAXX114 user manual

Fbt

Fbt PROMAXX114 user manual

Alphasonik AKDJ8BAT operating instructions

Alphasonik

Alphasonik AKDJ8BAT operating instructions

Louroe Electronics ASK-4 304-DV Installation and operating instructions

Louroe Electronics

Louroe Electronics ASK-4 304-DV Installation and operating instructions

EAW FR-100 Specifications

EAW

EAW FR-100 Specifications

Yamaha PDX-B11 owner's manual

Yamaha

Yamaha PDX-B11 owner's manual

Bowers & Wilkins DM550 Specification sheet

Bowers & Wilkins

Bowers & Wilkins DM550 Specification sheet

Lab.gruppen PLM 10000Q Technical data

Lab.gruppen

Lab.gruppen PLM 10000Q Technical data

Samson Expedition Express+ owner's manual

Samson

Samson Expedition Express+ owner's manual

KLING & FREITAG ELA MK II user manual

KLING & FREITAG

KLING & FREITAG ELA MK II user manual

Klipsch Synergy Quintet III owner's manual

Klipsch

Klipsch Synergy Quintet III owner's manual

manuals.online logo
manuals.online logoBrands
  • About & Mission
  • Contact us
  • Privacy Policy
  • Terms and Conditions

Copyright 2025 Manuals.Online. All Rights Reserved.