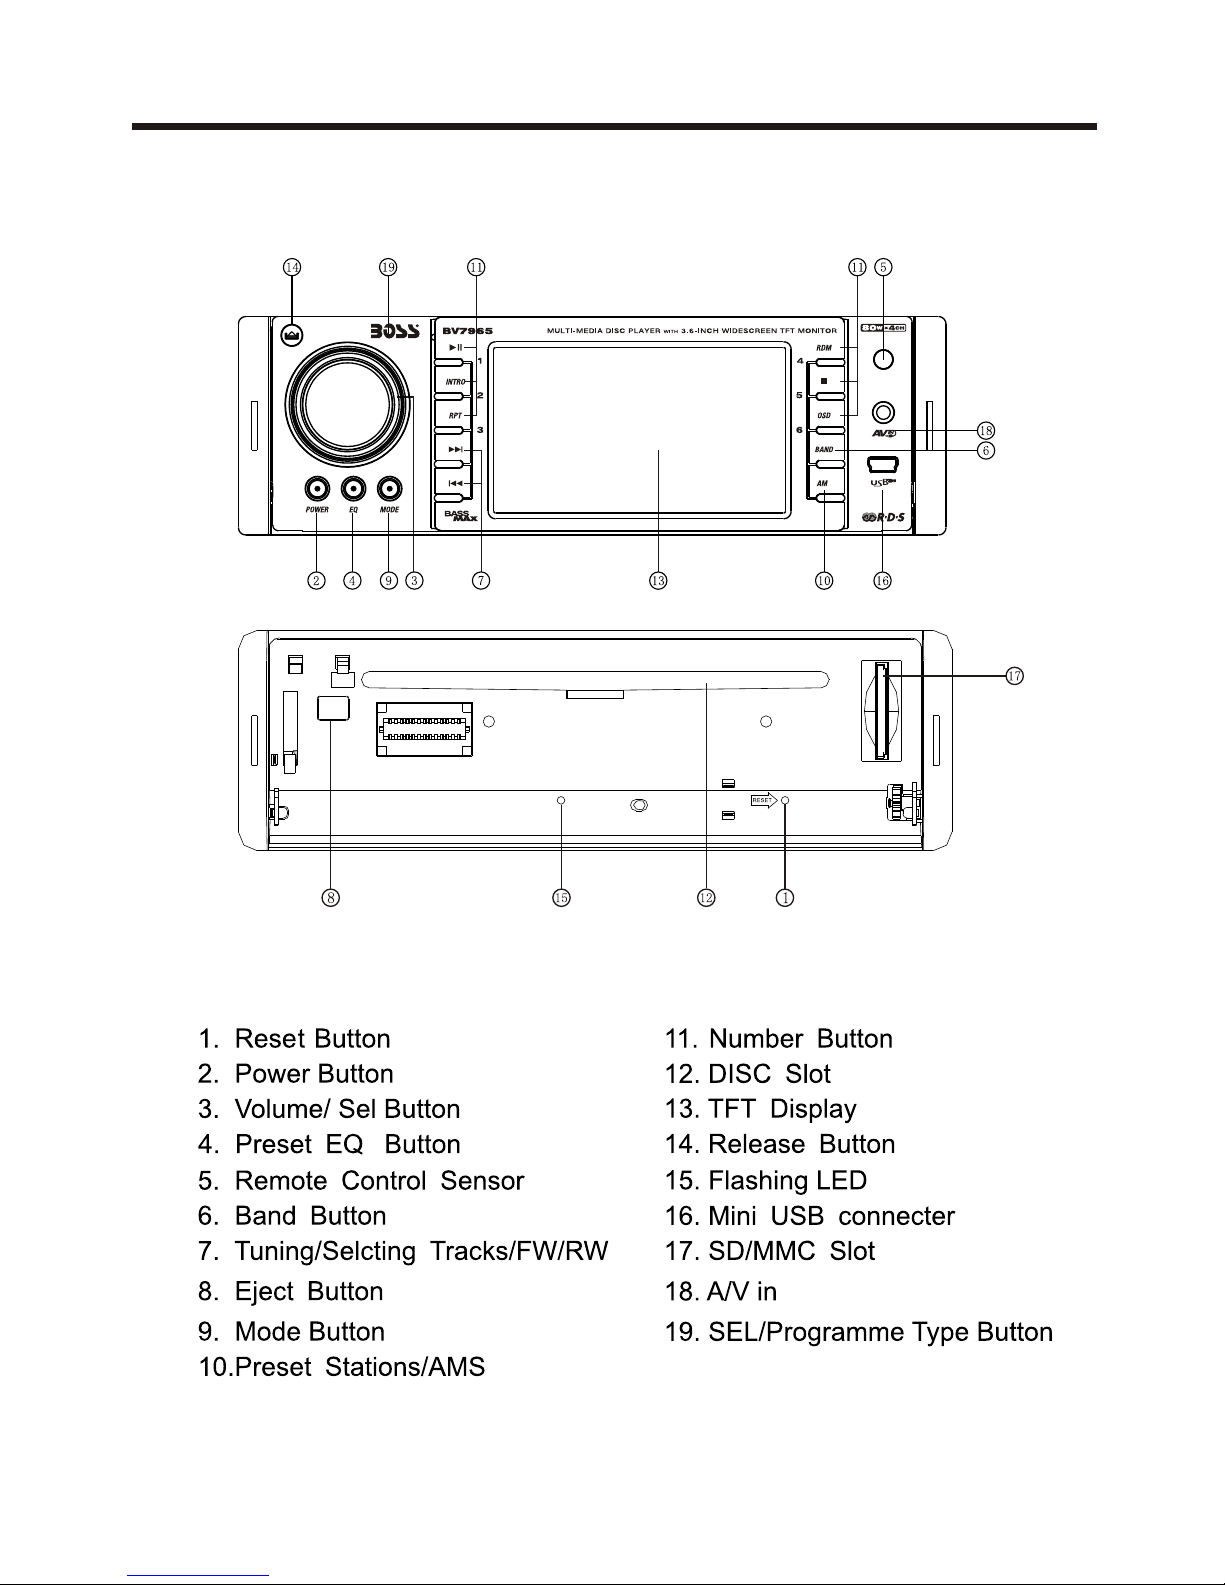
Boss Audio Systems BV7965 User manual
Other Boss Audio Systems Car Receiver manuals

Boss Audio Systems
Boss Audio Systems BV7348B User manual

Boss Audio Systems
Boss Audio Systems 560BRGB User manual

Boss Audio Systems
Boss Audio Systems BV9965 User manual

Boss Audio Systems
Boss Audio Systems BV9348B User manual

Boss Audio Systems
Boss Audio Systems BV7336 User manual

Boss Audio Systems
Boss Audio Systems 748UAI User manual

Boss Audio Systems
Boss Audio Systems 3160 User manual

Boss Audio Systems
Boss Audio Systems BV9979B User manual

Boss Audio Systems
Boss Audio Systems 760DI User manual

Boss Audio Systems
Boss Audio Systems BV7340 User manual

Boss Audio Systems
Boss Audio Systems 810DBI User manual

Boss Audio Systems
Boss Audio Systems CD-3125R User manual

Boss Audio Systems
Boss Audio Systems 728CA User manual

Boss Audio Systems
Boss Audio Systems BV9958B User manual

Boss Audio Systems
Boss Audio Systems 720CA User manual

Boss Audio Systems
Boss Audio Systems BV9993 User manual

Boss Audio Systems
Boss Audio Systems AVA-2695R User manual

Boss Audio Systems
Boss Audio Systems BV9348B User manual

Boss Audio Systems
Boss Audio Systems 506CA User manual

Boss Audio Systems
Boss Audio Systems 630U User manual