manuals.online logo
Brands
  1. Home
  2. •
  3. Brands
  4. •
  5. Boston Acoustics
  6. •
  7. Speakers System
  8. •
  9. Boston Acoustics SoundWare XS Digital Cinema User manual

Boston Acoustics SoundWare XS Digital Cinema User manual

2
IMPORTANT
SAFETY
INSTRUCTIONS
This symbol found on the apparatus indicates hazards
arising from dangerous voltages.
This symbol found on the apparatus indicates the user
should read all safety statements found in the user manual.
This symbol found on the apparatus indicates
double insulation.
Warning!
To
reduce the risk
of
fire or electrical shock, do not
expose this apparatus to rain or moisture.
1.
Read these instructions.
2. Keep these instructions.
3.
Heed all warnings.
4.
Follow all instructions.
5. Do not use this apparatus near water.
6. Clean only with dry cloth.
1.
Do not block any ventilation openings. Install in accordance with
the manufacturer's instructions.
a.
Do not install near any heat sources such as radiators, heat
registers, stoves, or other apparatus (including amplifiers) that
produce
he
at.
9.
Do not defeat the safety purpose
of
the polarized
or
grounding-
type plug.A polarized plug has two blades with one wider than the
other. A grounding-type plug has two blades and a third grounding
prong. The wide blade or the third prong is provided for your
safety.
If
the provided plug does not fit into your outlet, consult an
electrici
an
for replacement of the obsolete outlet.
10. Protect the power cord from being walked on or pinched particularly
at plugs, convenience receptacles, and the point where they exit
from the apparatus.
11
. Only use attachments/accessories specified by the manufacturer.
12. Unplug this apparatus during lightning storms or when unused for
long periods of time.
13. Refer all servicing to qualified service personnel. Servicing is
required when the apparatus has been damaged
in
any
way,
such
as power
-s
upply cord or plug is damaged, liquid has been spi
ll
ed
or objects have fallen into the apparatu
s,
the apparatus has been
exposed to rain or moisture, does not operate normally, or has
been dropped.
14. Maintain a minimum distance of
2"
(50mm) around the
fro
nt, rear,
and sides of the apparatus for sufficient ventilation. The ventilation
should not be impeded by covering the ventilation openings or
placing on or around the apparatus items such as newspapers,
table-cloths, curtain
s,
etc.
15. No open flame sources, such as lighted candles, shou
ld
be
placed
on
the apparatus.
16
. The apparatus shall not be exposed to dripping or splashing.
No objects filled with liquids, such as vases, shall
be
placed on
the apparatus.
17. Either
th
e power inlet connector on the rear of the apparatus or
the power plug at the wall must remain accessible, to be able to
disconnect power from the apparatus.
18.
To
completely disconnect this apparatus from the AC Ma
in
s,
disconnect the power supply co
rd
plug from the AC receptacle.
~
===
American Users:
Note: This equipment has been tested and found to comply with
the limits for a Class B digital device, pursuant to part 15 of the FCC
Rules. These limits are designed to provide reasonable protection
against harmful interference
in
a residential installation. Th
is
equip-
ment generates, uses, and can radiate radio frequency energy and, if
not installed and used in accordance with the instructions, may cause
harmful interference
to
radio communications. However, there is no
guarantee that interference will not occur
in
a particular installation.
If
this equipment does cause harmful interference to radio or television
reception, which can be determined by turning the equipment off and
on, the user is encouraged to try to correct the interference by one or
more of the following measures:
Reorient or relocate the receiving antenna.
Increase the separation between the equipment and receive
r.
Connect the equipment into an outlet on a circuit different from
that to which the receiver is connected.
Consult the dealer or an experienced radio/TV technici
an
for help.
Caution: Unauthorized changes or modifications to the receiver could
void the use
rs
authority
to
operate the equipment.
This
device
complies
with
Industry
Canada
license-exempt
RSS
standard(s). Operation is Subject to the following two conditions:
(1) this device may not cause
in
terference, and (2) this device must
accept any interference, including interference that may cause
undesired operation of the device.
HJ
Canadian Users:
This class B digital apparatus complies with Canadian ICES-003.
Get appare
il
numerique de classe B est conforme
a
Ia norme
NMB-003 du Canada.
(
E:
(])
European Users:
RLAN -Radio Local Area Network Equipment
AT
cz
Fl
IS
LT
PT
SE
FR
BE
DK
DE
IE
MT
SK
CH
IT
EE
GR
LV
NL
51
TR
LU
CY
HU
PL
ES
GB
NO
This equipment m
ay
only
be
used indoors in FR.
This equipment may only
be
used
in
one's own premises in IT.
This equipment is for private use only in
LU
Operation is not allowed within a radius of 20 km from the centre
of Ny-A
ie
sund in
NO
.
Hereby, Boston Acoustics, In
c.
300 Jubilee Drive, Peabody, MA 01960
USA, declares that this SoundWare XS Digital Cinema is in compliance
with the essential requirements and other relevant provisions of Directive
1999/5/
EC
. A copy of the Declaration
of
Conformity (DOC) m
ay
be
obtained from:
Oliver Kriete
Boston Acoustics, Division of D&M Europe B.V.
Beemdstraat
11
5653 MA Eindhoven
The Netherla
nd
s
[I]
DOLBY.
DIGITAL I
Introduction
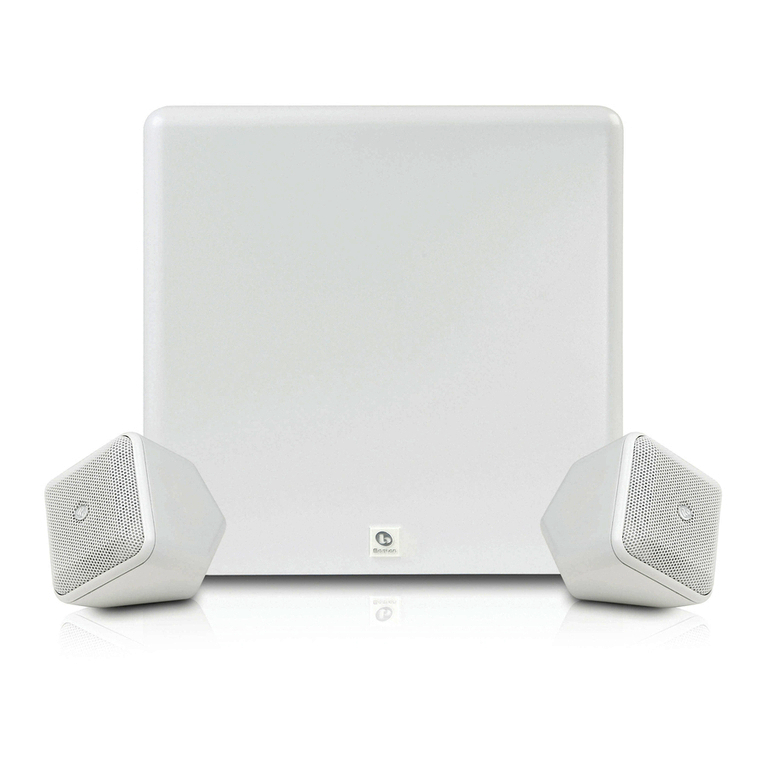
Thanks for choosing Boston Acoustics and selecting
the
SoundWare
XS
Digital Cinema
as
your
home
thea
te
r speaker
system.This manual includes important information
on
setting
up
and using your new system,
as
well
as
troubleshooting
information in
case
you have any difficulties.
Key Features:
·Incredibl
y small speakers provide big, high performance sound
·Dolb
y Digital decoding and Boston
's
Digitally Optimized Virtual Surround for theater-like surround sound
• Dedicated music and movie playback settings -Sound is
opt
imized
for
your
content
·Included
wall brackets can be positioned any almost any angle
• Blu
etooth
enabled for music streaming (no docking needed, keep
your
s
martpho
ne
with
you)
•
BassTrac®
circu
itr
y for deep, powerful
bass
Additional Features:
·Control
Pod
learns your existingTV remote
contro
l
·Uni
que
SoundWare shape and ultra-compact
size
allow for maximum placement flexibility
·Durable high-glossfinish for a
modern
look
·Sat
ellite speakers
fea
ture
V2
-inch t
wee
terand 2-
V2
-inch woofer
·
Ea
sy-gui
de
wire channels for fast
hoo
k-
up
· Front-firi
ng
subwoofer features 8-inch woofer
·Two
AUX
inputs for connection
to
iPod or
other
sour
ces
Specifications
Total System Power:
Frequency Range:
Satellite Drivers:
Subwoofer:
250 watts
39Hz
to
20
kH
z
2Y2''
(64mm)
woo
fers
Y2"(
13mm) tweeters
8"(203mm) woofer
Crossover Frequencies:
4kHz
Sate
llit
e,
180Hz Subwoofer
WirelessTechnologies:
Dimensions:
(H
xWx
D)
Weight:
supports Bluetooth v2.1
+
EDR,
A2DP
v1
.2
Sa
tellite
Subwoofer
Sate
llite
S
ubw
oofer
45
/16 X
4V2
X
33,4"
(1
08 X
113
X 94mm)
915/
16
X
9Y2
X
11
% (
25
1X 240 X 288
mm
)
1
lb
(.Skg)
11
l
bs
(5kg)
3
1
2
3
4
5
7
Control
Pod
@
©
©
©
Remote
Control
@ 8
6
ST
Aifll6Y
@
Subwoofer
i
20
!
I
13
1415
16
17
18
'"
D
0
SP
EAKE
AS
l!iD
cmm
CONTROl
~
AU
Xl
POD
~
0
IN
~
@
0
OPTICAL
DIGITAL
Qo
a
"
0
SUBWOOFEA
VOLUME
c
(J)
Boston
·SoundWa
re
XS
Digital
Cinema
""
_
_.....
.........
,"'
...
'f(
.....
...
""',_"....,....
..
...
_1'
•"'""""""
'';
"'
"
"'
""'''""'"·'-""""""'
..
___
_
....
p
.....
-
...
....,._..
...
,.,......,0"<,...,,_
:':t..~
,';"'~.,
,
....
..-
--
""'""''"""
""
-
.....
"""--"""'""a'"'"
c...,.,_......,.,...,..,..,
~
......
.
.,.
,
......
_••
....,.
_
...
,
....
,...,.
[l]OOLB"t
~
0
Bluetooth
'
X
f[J1
,@.
=
(D.
!&
~
&
!
-~LI5T1D
....
8 @ i
j
ao.""
'
""""'""·"''
" ""o<>ody
,
IMU>A.....:.
~n
r
•""'o.""'
'
O<Jmw
....
...
_.c
_,
..
..
~
j
I
0 0 C
j
\.-
---
--
--
-----------·--
·
------------
·--··
-·
--·--
--·
-
_
__
_
__/
9
~
=
11
PAIR
10
@
12
LEARN
~
Boston
Q Q
21
23
24
Control
Pod
1
IR
Sensor -
Re
ceiv
es
re
mo
te commandsto co
nt
rol the
sys
tem.
2
Input
Mode
-
Li
ghtsin
va
rious colors to indicate which playing mode isoperating.
3
Music/Movies-
Li
g
ht
sin
va
ri
ous col
or
s
to
indicate
op
erating
sta
tu
s.
4 Power/Remote-
Lig
ht
sin
va
riouscolorsto indicate p
ow
er
sta
t
us
.
Remote
Control
5
Standby
Button
- S
wit
c
hes
the
sys
tem from stand
by
to
ac
ti
ve.
6
Input
Button
-
Se
lectswhich in
put
so
ur
ce
ispl
ay
ing.
7
Mute
Button-
Lets you
tempor
arily
mute
system.
8
Music/Movie
Button
-
Se
lectsthe
st
yle
of
sound you want to h
ea
r.
M
us
ic m
od
e
is
for mu
sic
and Movie mode isfor movi
es
and televisio
n.
9
10
11
12
Subwoofer
13
14
15
16
17
18
19
20
21
22
23
4
24
Blutooth
Pairing
Button
- U
se
th
is
butt
on to
pa
ir w
it
h a Bluetoo
th
source
de
vi
ce.
Learn
Button-
Acti
va
tesr
emot
e co
nt
rol learning mod
e.
Volume
Up
Button
-Lets
yo
u adj
us
t
th
e volu
me
of
the
sys
tem.
Volume
Down
Button
-Letsyou adju
st
the volume of the system.
Control
Pod
Input
-Connects the Con
tr
ol Pod here.
AUX 1
(RCA
Jacks) -Receivesanalog audio inputs through
th
e inclu
de
d Audio Connection Cable
24
.
AUX 2 (3.Smm
Miniplug)
-Recei
ves
analog audio inputs
thr
ough a
3.5
mm
miniplug
ca
ble (not included).
Optical
Digitalin-
The pre
fe
rred in
pu
t for the
sys
tem
us
ing the s
upp
lied Opt
ica
l cable
21
.
SubwooferVolume
-
Ad
ju
st
vo
lu
me
of su
bw
oo
fer for best
ba
lance wi
th th
e
sat
ellit
es.
Speaker
Terminals-
Co
nnect the satellit
es
to the
outp
ut speaker ter
min
al
s
on
the su
bwoo
fe
r.
PowerON/OFF Switch -Turns the
sys
tem on or o
ff
.Norma
ll
y it ison a
ll
the time.
Power
Input
-
Co
nnect
th
e p
ow
er s
upp
ly
23
her
e.
Optical
Digital
Cable -
Best
choice for connecting yourTV to the
sys
tem.
SpeakerWire
(2)
-
Fo
r connecting
sa
tellites
to
s
ub
woofer.
PowerCord -
Pl
ug
it
in
to
the wa
ll
and connect it
to
the power i
nput
20.
Stereo
Audio
Cable -A
na
l
og
cable for connecting
to
the TV, or o
th
er
so
ur
ce.
PlaceYour System
Decide on
the
location and position
of
the system
bef
ore making
an
y co
nn
ect
ions.
Speaker Location
Plac
e
the
speakers
to
the l
ef
t and right
of
the
te
levision.
For
best performance, pl
ac
e each speaker
no
farther than
4ft
(1.2m)
from side
of
the television.
0 0
On
table, cabinet, or
shelf
On
wall
Placement Options
The
Sou
nd
Ware speaker can
be
wall mounted
us
ing
the
supplied hardware
or
simply placed
on
a shelf. If
it
is
be
ing placed
on a shelf you c
an
s
imp
ly attach
the
adhesive-backed rubber feet and c
on
nect
the
speaker wires.
Attaching the Pivoting Ball
Mount
If you plan
to
use the mounting b
ra
cketsyou must attach the pivoting ba
ll
mo
unt
to
the speaker.
Use
the
four supplied flat-head machine screws
as
shown in the illustratio
n.
MountingtheWall Bracket
Br
acketsfor mounting the spe
ak
ers
on afl
at
wa
ll
or in a corner are supplied.One th
in
g
that
is
not s
up
plied isha
rd
ware to attach the bracket to the wal
l.
Wh
y?
Beca
u
se
thereare so
many different kinds
of
s
urf
ac
eson which t
he
sp
ea
kerscould be mo
unt
ed. It c
ou
ld
be
basic drywall
which may or may not have a stud behind it. It could be a
wo
od panel or even a concrete foundati
on
wall. There
is
no one type
of
fa
st
ener that we could supply that would work in all the
poss
ible situa-
\
\
\
\'
\
\'
\
' '
tion
s.
So taking into acco
unt
th
e surface
th
e sp
ea
ker is being
mo
unted o
n,
ac
quire the appr
op
ri
ate
ty
pe
of
f
aste
ner
s.
You'll n
eed
four for each spe
ak
er If you're n
ot
sure what type
of
fastener to u
se
,take
th
e
mo
unt
ing bracket to af
ri
endly
ha
rd
w
ar
e store, tell
th
em abo
ut
the w
all
you'
re
mounting the
spea
ker on, and
ask
them to reco
mm
end
an
appr
op
ri
ate fastener. Keep in mind t
he
weight of
th
e speaker.
Connecting the Speakers (22)
U
se
th
e s
upp
lied sp
ea
ker
wir
e
22
to connect
th
e speak
ers
to the s
ubw
oo
fer.
If
yo
u need lon
ge
r wi
re
-for
exa
mpl
e if
yo
u are
running
wir
es
t
hr
o
ugh
the wa
ll-
u
se
18 gauge wi
re
as
it
w
ill
simp
li
fy
connec
ti
on
to
th
e speaker termin
als
.All
th
e
spea
k
ers
in asystem mu
st
be hooked
up
wi
th
the
sa
me
po
larity or"in phas
e:'
Th
e terminalson
th
e
So
undWare speakersand s
ub
woo
fer
are color coded to identify th
e"
+"
(r
ed) and"- "(bl
ac
k) connection
s.
(
5
6
Connecting
the
Speakers (Continued)
Push
down
on the
top
of
the
terminal
to
open
the
ho
le for
the
wir
e.
Insert the
wire and rel
ea
se
th
e terminal
to
se
cure it.
Be
sure there a
re
no
loose strands
of
wire.
Note
: there
is
a channel in
the
back
of
the
speakerfor
the
wi
re
(for wires
up
to
16 gauge), to keep it neatand out
of
sigh
t.
Mounting
the
Speakers
Once you
ha
ve
t
he
bracket mounted and the speaker connected
th
e
res
t
is
ea
sy
.
1.
Put
the
rounded end
of
the
speaker
mount
in
the
bracket
and sli
de
it
down
to
lock it in pl
ac
e.
\
2.
3.
Optional -Insert and tigh
te
n
the
screw to
sec
u
re
everything
S
nap
the
cover over the brac
ket.
Pivot Set
Screw
The SoundWare speake
rs
pivot on the
ir
mou
nts.
Ve
rti
ca
ll
y they can
go
fr
om
facing strai
ght
out
to
being tilted
down
40 degre
es
.When
the
fla
t wall mounting
bracket
is
used they can pi
vot
side
to
side
20
degr
ees.
(Note: Corner m
ount
ing
wi
ll
not
a
ll
ow
the
speaker to piv
ot
side-to-sid
e.)
Loosen
the
pivot set
scre
w
on
th
e front
of
the pivoting ball
mount,
pivot
th
e speaker
into
positi
on
and
retigh
ten
th
e
scre
w.
SubwooferLocation
Pla
ce
the subwoofer on the floor near the
televisio
n.
Be careful to avoid obstructing the
gr
ill
e,
whe
re the
so
und
com
es
out.
Also,
avoid
placing the s
ubw
oo
fer in a position where
curtains or blankets obstruct
ai
rflow
aro
und
the r
ea
r pane
l.
'
pivots
20°
;a
ch
w
ay
OK
pivots
down
40
°
J
Placing
the
Control Pod
The Control Pod includes status lights and al
so
the
sensor for the remote
control.
Place
the Control
Pod
abo
ve
or
below
your television.If you wish,
use
the
already a
tt
ached double-sided tape
to
make
the
placement more
secure. Make
su
re you can
see
the Control
Pod
cl
ea
rly from your
li
stening
position. Pl
ug
the
Control
Pod
i
nto
the
back
of
the
subwoofer.
13
Connect
your
system
Next you need
to
connect the subwoofer
to
Subwoofer
your television.
Television
CO
M
POSITE
COMPON
E
NT
INPVT
INP
UT
AU
DI6
@)
AU
D
~
@}
AUDIO
OUTPUT
L
@
~:
>-----~~
R® .
@w.,
@
;;
l!lD
llll!llll
C
cc
(':o
Option 1
(For Best Results)
Optical digital cable (included).
Note: The optical cable isa glass fiber;
be careful to avoid kinking
the
cable.
R® R
@)
V
IDE
O @ Y
(@)
OPT
I
CALO'Jl
p
,®
~
P
•@>
HEA
DPHONE
OU
TPU
T
@
2
Audio
Connection
Cable
f
t1
1
[_
__o
"
-Or-
1
Opt
ical digital cable
Option 2
Stereo audio cable (included).
Connect Power
1.
Connect the s
ubwoof
er power cord
to
the subwo
of
e
r.
Plug into an
AC
power o
ut
let.
2.
Turn
ON
the r
ear
panel power switch on the subwoofe
r.
19
Power/RemoteLight 4
Green: P
ow
er o
n.
Note: The
li
ghts only illuminate temporarily
to
show a
mode
or
funct
ion chang
e.
How
do
I watchTV?
Select an input 8
,
-~--"'
I
~
8
e
Use
the
supplied
re
mot
e
Input
Bu
tton
6
to
choose
an
input.
Each
time
the
butt
on
is
pressed,
the
input
chang
es
in
se
qu
ence from Optical Digital Input to an
al
og
a
udio
Aux 1
input
to a
na
log audio Aux 2 inp
ut
to
Bluetooth input, back
to
o
pti
ca
l
digi
t
al.
The color of
th
e Inp
ut
Mod
e Light indicateswhich i
nput
isselected.
@
~
~
®
liJ
~
Input
Mode
Light 2
Green: Optic
al
Digital I
nput
is
se
le
ct
ed.
Red:
R
CA
Analog Input is selected.
Orange: 3
.5
mm
Analog
Input
isselected.
Blue:
Blu
et
o
oth
Input is selected.
Control Pod
~
©
©
©
1
2
3
4
Bo
ston
IR
Sensor -Receives
re
mo
te commands
to
control the
sy
s
tem
.
InputMode -Lightsin
va
ri
ouscol
or
s
to
indicate
wh
ich playing mode isoperatin
g.
Music/Movies-
Li
g
ht
sin va
ri
ouscolors
to
indicate operating
st
atus.
Power/Remote - L
ight
sin
va
ri
ouscolors
to
indicate
pow
er status.
7
Adjust
the
Volume
000
Use
th
e supplied remote vol
um
e up and
do
wn
bu
tto
ns
to
adjust
the
volume
.U
se
the
mu
te
bu
tton
to
mute
the audio.
To
cancel audio
mu
ting,
pu
sh the
mu
te,
volum
e up, or volume
dow
n butto
ns
.
Power/Remote
Mode
Light4
Green Blinking:
Mut
e
mo
de ison.
Music
I
Movie
selection •
Use the
mu
sic
/movie bu
tt
on
to
cho
os
e
th
e style
of
sou
nd you want to
hear.
Movie mo
de
isli
ke
a
mo
vie
th
eater
or
su
rround
so
und s
ys
tem
an
d
ha
sa
wi
d
e,
s
pa
cio
us
soun
d.
We
recommend Movie
Mode
for bo
th
TVand movie playb
ac
k.
For
en
hanced
playback
of
musi
c,
the
Mu
sic mode isl
ik
e a t
ra
ditional stereo
mu
sic
sys
tem,o
ptimi
ze
d
fo
r
pur
e audio accu
racy.
Ei
ther
mode
ca
n
be
used for any type
of
inp
ut
or au
dio
.The
sys
tem wi
ll
remember whatever
mo
de was l
ast
chosen foreach input.Th
is
is
convenien
t,
because you can use Movie
Mode
for the dig
it
al
audio i
np
ut (televis
io
n) a
nd
music
mod
e f
or
Blue
too
th (music
from a
portab
le
dev
ic
e)
Music/Movie
Mode
Light 3
Green: Playing
in
M
ov
ie Mod
e.
Orange:
Playi
ng in
Mu
sic Mode.
Adjusting
the
subwoofer sound level
Use the volume kn
ob
on the
rea
rof the su
bwoofer
to adjust its so
und
outpu
t level
In
most r
oo
ms, setting between
10
and 2 o'clock will
so
und good. Once set,
you t
yp
i
ca
lly won't need
to
adjust this
cont
rol
Programming your
TV
Remote
~
0
MIN
I
\MAX
SUBWOOFER
VOLUME
Your
sys
tem
can
le
arn to
re
spond to your
own
televi
sio
n
's
r
emote
con
tr
ol, or the r
emote
for a cable box or D
VR.
However,
pl
ease
n
ote
that the l
ea
rni
ng
pr
ocess
works best wi
th th
e o
ri
ginal tel
ev
isi
on
remote.
Al
so the su
pp
lied remote will
co
ntinue
to
work
even a
ft
er
your
sys
tem learns a
new
r
emote
command.
A P
ress
and hold
Learn
button on
th
e s
upp
l
ie
d remote for 3 seconds
unt
il the Power/Re
mot
e Mode lig
ht
4 1i
ght
fl
as
h
es
orang
e.
8
Pr
ess
Vo
lume Up bu
tto
n on the su
pp
lied remote
unt
il Power/Remote Mode
li
ght
4 turns
sol
id orange.
C
Ho
ld your television remote
1
ft (30cm)
poin
ting at the fr
on
t
of
th
e Control
Pod,
Pr
ess
Volume Up b
utto
n
on
your tel
ev
isi
on
remote
4
timesw
it
h a brief pause (abo
ut
1-
2 seconds) until Power/Re
mote
Mode li
ght
4
fl
as
h
es
green.
Rep
ea
t Steps Ato C
to
set up Volume Down, MU
TE
, Inpu
t,
Mu
si
c/Mov
ie buttons, and Standby.
Attention cable/satellite
users:
Ifyou have tr
oub
le programming, wi
th
a cable/sat
el
li
te universal remote, you m
ay
h
ave
be
tte
r r
es
ul
ts
to initiate programming u
si
ng your
or
igi
na
ltelevision r
emote
.After co
mp
le
ting programming with your origin
al
televisi
on
remote you
ca
n begin u
si
ng your
ca
ble/sat
el
lite remote to
cont
rol your system.
A
Fl
ao
s
lllng
8
"'~
fe'
c
Fl
ashes
:f
Orange
Or
ang~."
e
e
:
5
~
0
'0
~
.....--...
~
~
8
Using Bluetooth
Use
the
Bluetooth wirel
ess
input
to receive music
or
any audio from a
compatible
B
luetooth
device,such
as
a smartphone
or
compu
ter.The device
must
be capable
of
transmitting
audio
with
the
Bluetoo
th
A2
DP
(Advanced Audio Distribution Profile).
Pairing
the
system
to
a Compatible Bluetooth Device
Use
the
Input Button on the supplied remote
to
se
lect
the
Bluetooth input, indicated by
the
Input Mode
21
ight being blue. If no
device
has
b
ee
n previously pai
re
d,the SoundWare
XS
Digital Cinema will automat
ica
lly enter
the
pairing
mod
e,
and
the
Input
Mode lig
ht
will blink
bl
ue.
Set
the Bluetooth device
to
pairing
or
discovery mode (check device's user manual for instruction
s).
On your Blueto
ot
h device,
SoundWare
XS
Digit
al
Cinema will be
li
sted
as
"XS
Digital Cinema:'
If
yourdevice requests a pairing code, enter
the
number0 0 0 0.
Once paired, the
Inp
ut
Mode lig
ht
will be
so
lid blue for
severa
l second
s.
Your
sys
tem
ca
n be paired
to
morethan one device
(a
l
though
onlyone such device
ca
n play music v
ia
Blueto
oth
at atime
).
•
To
pair additional devices, first u
se
the
In
put
Button
to
select the Bluetooth input.Then
press
and hold Blueto
ot
h Pair
button
'
PAIR
for 3 seconds. Pairing
mode
will
be
sta
rted
as
above, indicated
by
a blinking blue light.
UsingYour CompatibleBluetooth Device
with
the
system
After at l
eas
t one device h
as
been pair
ed
to
the
system, it will
automat
i
ca
lly
sea
rch for available paired devi
ces
wh
en you
choose
the
Bluetooth
input
(i
ndicated by a s
low
flashing blue light).Typically a
sma
rtphone
or
compute
r will need to be
in a music-playi
ng
mode
(l
ike
the
iPod
or
iTunes mode) before
your
system wi
ll
link and play
th
e mus
ic.
Once linked to one
Bluetooth source, your system will stay linked to
that
de
vice until
the
device isturned off, moved
out
of
range,
or
Bluet
ooth
is
disabled on
the
device. If you
want
to
change
to
anot
h
er
Bluetooth
so
urce device, you will need to stop t
he
Bluetooth link (by
changing
to
a non-
Bi
u
etooth
inpu
t
on
your system AND disabling Blu
etoo
th
on
the co
nn
ect
ed
device).Then you can select
the
Blue
too
th i
npu
t on system again, and link to
the
se
con
d device.
Note:
If
the
sys
tem
loses itsco
nne
ct
ion
with
a
so
ur
ce Bluet
oot
h device while in Bl
uetooth
mode
,
the
syst
em
will
tr
y
tore-
conn
ect
for 5 minut
es
,indicated
by
a sl
ow
flashing
blue
light.Typically this will a
ll
ow
a smartphone user
to
mov
e
out
of
range
and
th
en return, and have your system re-link and
co
nt
inue
to
pl
ay
mu
sic.
The
typ
i
ca
l receiving range for Bl
uetoo
th
is
40ft.
(12
meter
s)
or l
ess.
Thisdepe
nd
son
the
so
urce Blu
etoot
h devi
ce,
as
we
ll
as
other
devicest
hat
sha
re
the same broadcast frequenc
ies
such
as
Wi-Fi a
nd
microwave ovens.
Troubleshooting
the
SoundWare
XS
Digital
Cinema
System does
not
power
on.
·I
s
the
power
cord pl
ugged
into
a live wall
out
let?
· Isthe
power
cord properly connected
to
the
su
bwoofer7
• Is
the
rea
r panel
power
switch in
the
"on"position7
Note:
The
co
ntrol
Pod
lights are norma
ll
y off. P
re
ss
Vo
l
ume
up
to
ill
uminate
the
light
sand confirm
the
sys
tem ison.
No sound from
the
system.
·I
sthe
sys
tem connected to an audio
so
urce
th
at is pl
ay
i
ng
audio t
hr
ough
its output?
·I
s
th
e sys
tem
set
to
the
co
rre
ct
input
so
urce7
·I
s
th
e system receiving
pow
er and turned on7
·Turn up
the
vo
l
ume
of
the
system.
·Turn
up
the
vo
l
ume
of
th
e television
or
cable box
the
system is connect
ed
to.
· Check
Mu
te
status-
isthe status indicator blinking
gr
ee
n?
•
For
digital
TVs
or
ot
her digital sources, make sure
th
e ou
tput
format is
se
t
to
"Dolby Digital
:'
(See
the source pr
oduc
t
's
set
-
up
menu)
·
For
digit
al sources, make sure
th
e
opti
cal
ca
ble is
not
kinked or broken. (
Th
is
stops
th
e dig
it
al
li
g
ht
signal)
Bass
not
loud enough.
·Turn
up
th
e s
ubwooferV
ol
ume
con
tro
l.
· Place t
he
subwoo
fercloser to a wall
or
corner in
the
room.
9
·Some
televisions and cable boxes have a mode
that
limits
the
bass.
Check
that
product
's
audio set-up menu and set
the
audio
mode
to
"w
ide"rather than"normal"or"narrow:·
The system won't learn
my
remote control commands.
·
Ca
refully follow the programming instructions (page
8).
·Hold
th
e remote steady and 12 inches (30cm) from the front
of
the Control
Pod.
·P
r
ess
and release
the
remote control buttons s
I
o
w
I
y
!
·Che
ck the remote control's batteries.
Note:
The system learns almost aiiiR
comma
n
ds,
but
some
IR
protocols cannot be programmed.
Volume
of
my television speakers gets louderthan
my
SoundWare
XS
Digital Cinema overtime.
·When the remote control volume button
is
held
down
your
te
levision may change volume levelsfaster than the system.
·If
possible,
use
the
te
levision's set
up
menu
to
mute
the
te
le
vision's
own
speakers.
Bluetooth inputwill
not
pair witha source Bluetooth device.
·Make
sure
the
SoundWare
XS
Digital Cinema isin Bluetooth pairing mode.
(See
instructions on the previous page.)
·Make
sure
your Bluetooth source device
is
in Bluetooth pairing mode.
(See
instructions for
that
product.)
·Make
su
re your Bluetooth source device supports
A2DP
(Advanced Audio Distribution
Pro
fil
e).
Note that some products
with Bluetooth
only
wor
k with Bluetooth
ke
yboards
or
headsets
but
may
not
have A2DP
·Make sure your Bluetooth source
is
within
lOft
(3m) during
the
pairing proc
ess
.
·T
urn the Bluetooth device
off
and on
(comp
lete
power
off
and reboot) and
try
to
pair agai
n.
Bluetooth inputwill
not
playa Bluetooth source
that
hasalready been paired.
·Make sure the system
is
not linked
to
a different Bluetooth source device.
·Make
sure
your desired Bluetooth source
de
vice
is
playing music or some audio source.
·Note
that some programs and apps may
not
support Blu
etooth
audio broadcast
out
of
your source device. (Ifyou
are
unsur
e,
consult the instructions for
the
program
or
app.)
·Move
poss
ible sources
of
interference, pa
rt
icu
la
rly those operating at
2.4
GHz (Wi-
Fi,
microwave ovens, cordl
ess
phones.)
LimitedWarranty
Boston Acoustics warrants to
the
original purchaser
of
our
SoundWare
XS
Digital System
that
it
wi
ll
be free
of
defects in ma-
terials and workmanship in its mechanical partsfor a period
of
5 years from
the
date
of
pur
ch
ase.
The warranty period for
the
electrical components
of
the system is 1year.
Your responsibilities are
to
install and
use
them
according
to
the instructions supplied,
to
provi
de
safe
and secure transp
ort
ation
to
an authorized Boston Acoustics
se
rvice representative, and
to
present
proof
of
purchase in the form
of
your
sa
l
es
slip
when
requesting service.
Excluded from this warranty isdamage
th
at r
es
ults from abuse,
mi
s
us
e,
imp
roper in
sta
ll
at
ion, accidents,
sh
ipping,
or
repair
s/
modifications
by
anyone
othe
rthan
an
authorized Boston Acoustics
se
rvice representative.
Thiswarranty islimited
to
th
e Boston Acoustics pr
oduct
and does
no
t cover damage
to
any
asso
ciated equipment.
Thiswarrantydoes
not
c
ov
er
th
e cost
of
removal or
re
insta
ll
ation.This warranty isvoid
if
the
se
rial
number
has
been removed
or
defaced.This warranty giv
es
you specific legal rights, and you may
al
so
ha
ve
ot
her rights
whi
ch vary from state
to
sta
te.
10
If
Service Seems Necessary
United States
First,
contact
the
dealer from
whom
you purc
ha
sed
the
product. If that is
not
possible, send
an
email to: sup
po
[email protected]
or
write to:
Boston Acous
ti
cs,
Inc.
1
00 Corporate Drive
Mahwah,
NJ
07490
USA
Canada
Fir
st,
contact t
he
dealer from
whom
y
ou
purchased
the
product. If
that
is
not
possibl
e,
send
an
email to:
su
pport@dmcanada.
ca
All O
th
er Countries
Contact
the
dealer fr
om
whom
yo
u purchased
the
product
or
contact
your
local distributor.
For more information, please vi
si
t bostonacoustics.
com
/
support
This symbol
found
on
t
he
produ
ct indicates that
th
e
produ
ct must n
ot
be disposed of wi
th
household
waste. Instead,
it
may
be
placed in a separate co
ll
ect
ion facili
ty
for elec
tr
on
ic waste or re
turned
to
a retailer
when
purchasing similar product.The producer paid
to
recycle this product. Doing this
contr
ibutes
to
reuse
and recycling,
minimi
z
es
adverse e
ff
ects
on
the
envi
ronm
ent and human hea
lth
and avoids any fines for
incorrect disposal.
11
(!)Boston
" 300
Ju
D
ri
ve,
Peabody,
MA
01960
www.bostonacoustics.com
Bo
sto
n,
Boston
Acoust
ics,
th
e Bo
st
on
Acoustics
l
ogo
, a
nd
B/Ae
llip
se
symbo
lare re
gi
stered
tr
adema
r
ks
of
Bosto
n
Aco
u
stics
,
In
c.
Specifications are subj
ect
to chan
ge
wit
ho
ut notice. Dolby is a r
eg
ister
ed
tr
ademark of
Do
lby l
abo
rato
ri
es
. iPod and iTunes
are r
egis
tered t
rade
marks
of
Apple I
nc
.B
lu
etooth isa registered trademarkof
Blu
etooth SI
G,
In
c.
© 2012 Boston Acoustics,
In
c.
142-004178
-1
Connecting
your
SoundWare
XS
Digital Cinema
Connexion de votre SoundWare
XS
Digital Cinema/Conexi6n de
Ia
SoundWare
XS
Digital Cinema/
Collegamento della SoundWare
XS
Digital Cinema/Koppla ljudlimpan/Anschluss lhrer SoundWare
XS
Digital Cinema
1
Optical
Digital
Cable
(included)
1
Stereo
Audio
Cable
(included)
2
Control
Pod
Cable
Gble
Optical
Cab
le
Op
ti
cal
Cava
del
Opti
ca
l
-:®-·
lu
1
<p
@
Optica
i-Ka
be
l
Opticai-Kabel
mD""c:ma
©!{:,}!a
%J;
a
[g
~Bo
sto
l\
"•<•
•
••
'"'
(
~~
c=
J
,--------
------,
3
Speaker
Connection
Cables
Cable
del
al
tavoz
Fils
des
haut-parleurs
Cav
i
deg
lialtoparlanti
-:@.
,
6 @
il
Htigtalarsladdar
La
ut
sp
recher
kabe
l
[gJ
~
Boston
..
,-::
;r
~
';'
iQ .
Right Speaker
derecho
droit
G b
le
RCA
Cab
le
RCA
Cavodel
RCA
R
CA-Ka
bel
RCA
-
Kabe
l
mi"
im
~1
Oa
n•
4
Connect
Power
Potencia
Alimentation
Alimentazione
~
0
~
St
r6mf6rs6rjning
Strom
T
elev
isi
on,
Te
levis
ion,
Te
levis
i
On
Tel
evis
io
ne,
T
V,
Fernseher
.-----
-1
IDD
..........
cz:D
r}'
t~)
D
-:@.,
Oi
(jp
iJ
1
.-01.
Ul•
(F1J
~
Bu.'->tDn
Ll-j
)
llJ!liltHY
o~e'OO!
O
_lg]·!l;
•;•
(])
·~~
Gb
le
Co
nt
ro
l
Po
d
Cont
ro
lPod-
Kabel
Cab
le
Cont
rol
Po
d Control
Pod
-K
abe
l
Cava
del
Con
trol
Pod
--
((j
J ©=
~
..
Q_
C.l
<>
•
·
~
,
II
I
rw-
1;
;;
\...,!W-l
~
Boston
rtlo
2!;~.·
O
ffiuetovtb
-
[9}-·${-·,·
;-
CD~
5
Pull
Tab
and
Adjust
Volume
Ora
s<'i
kr
i
ngs
-och ju
stera
volym
en
L
asche
und
Rege
ln S
ie
die Lautst
<'irke
~
MIN I
\MAX
SUBWOOFER
VOLUME
~~~~~~~n
Boston
Acoustics®
Product
Registration
for
U.S. and Canada
purchases
only.
Thank you for purchasing a Boston Acoustics product. Your feedback will help
us
to continue providing
consumers with the best possible products and service. Data
provided
is
the
confidential
property
of
Boston
Acoustics,
Inc. and
is
not
distributed
or
sold
to
third
parties.
Please print below, or register your new product online at: bostonacoustics.com/prodreg
First
Name----------------------
Last Name
--------------------------
Street Address
---------------------------------------
Apt.#
______
_
City State
____
_
ZIP----------
E-mail
________________________________________
_ Phone
__
Age Group: Under20 20 to
29
30
to 39 40 to 49 50 to 59 60 to 69 70 to 79 80 and over
Marital Status: Single _ Married Gender: Male Female
Education: High
School_
Some
College_
Associate/Jr. College
Degree_
4-Year College
Degree_
Graduate School
What type of Boston Acoustics product did you purchase? Home Stereo/Theater Car In-Wall/In-Ceiling _ Multimedia/PC
Date of Purchase I /
____
_ Model Name
________
_
Serial#
---------------------
(Located on a silver label on the outside of packaging.)
Store Name City
_______________
_ State
___
_
How did
you
hear about this product? Boston Acoustics advertisement
Store display _ Online review
Other
Store salesperson _ Store advertisement _ Magazine review _
Trade show
PC
manufacturer Friend/family _
----------------------------------------------------------
What other brand(s) and model(s) did you consider when making this purchase?
Brand(s)
---------------------------------------------
Model(s)
______________________________________________
_
Thank
you
for
completing
this
form.
If
you
have
any
technical
questions
or
are interested in
other
Boston
Acoustics
products,
visit
us
on
the
Web
at
bostonacoustics.com,
or
call (978) 538-5000.
©2007 Boston Acoustics, Inc. All Rights Reserved. 142-001601-3
Boston
acoustics®
ATTN: PRODUCT REGISTRATION
BOSTON ACOUSTICS INC
300
JUBILEE
DR
PEABODY
MA
01960-4030
lll
••••••
lll.t
••• lt
••
lt••••t
••
lll
•••••
tl.ll
•••
lt••• ll••• t
•••
ll
Postage
Required
Post Office will
not deliver
without proper
postage.

Other manuals for SoundWare XS Digital Cinema

3

Other Boston Acoustics Speakers System manuals

Boston Acoustics SoundWare XS Digital Cinema User manual

Boston Acoustics

Boston Acoustics SoundWare XS Digital Cinema User manual

Boston Acoustics Horizon Series HS 60 User manual

Boston Acoustics

Boston Acoustics Horizon Series HS 60 User manual

Boston Acoustics BA635 User manual

Boston Acoustics

Boston Acoustics BA635 User manual

Boston Acoustics SoundWare XS 5.1 User manual

Boston Acoustics

Boston Acoustics SoundWare XS 5.1 User manual

Boston Acoustics MM220 Owner's manual

Boston Acoustics

Boston Acoustics MM220 Owner's manual

Boston Acoustics TVee One User manual

Boston Acoustics

Boston Acoustics TVee One User manual

Boston Acoustics BA4800 User manual

Boston Acoustics

Boston Acoustics BA4800 User manual

Boston Acoustics Horizon i-DS2 User manual

Boston Acoustics

Boston Acoustics Horizon i-DS2 User manual

Boston Acoustics VRi793 User manual

Boston Acoustics

Boston Acoustics VRi793 User manual

Boston Acoustics BA7500 User guide

Boston Acoustics

Boston Acoustics BA7500 User guide

Boston Acoustics Indoor / Outdoor Speaker User manual

Boston Acoustics

Boston Acoustics Indoor / Outdoor Speaker User manual

Boston Acoustics MM 220 User manual

Boston Acoustics

Boston Acoustics MM 220 User manual

Boston Acoustics SoundWare XS 2.1 User manual

Boston Acoustics

Boston Acoustics SoundWare XS 2.1 User manual

Boston Acoustics Voyager 70 User manual

Boston Acoustics

Boston Acoustics Voyager 70 User manual

Boston Acoustics DSi495 User manual

Boston Acoustics

Boston Acoustics DSi495 User manual

Boston Acoustics MM226 User manual

Boston Acoustics

Boston Acoustics MM226 User manual

Boston Acoustics SoundWare XS 5.1 User manual

Boston Acoustics

Boston Acoustics SoundWare XS 5.1 User manual

Boston Acoustics Voyager Voyager 40 User manual

Boston Acoustics

Boston Acoustics Voyager Voyager 40 User manual

Boston Acoustics Horizon Series HS 460 User manual

Boston Acoustics

Boston Acoustics Horizon Series HS 460 User manual

Boston Acoustics Micro90t User manual

Boston Acoustics

Boston Acoustics Micro90t User manual

Boston Acoustics HORIZON MCS90 User manual

Boston Acoustics

Boston Acoustics HORIZON MCS90 User manual

Boston Acoustics VRS User manual

Boston Acoustics

Boston Acoustics VRS User manual

Boston Acoustics DSI455 User manual

Boston Acoustics

Boston Acoustics DSI455 User manual

Boston Acoustics SoundWare XS Digital Cinema User manual

Boston Acoustics

Boston Acoustics SoundWare XS Digital Cinema User manual

Popular Speakers System manuals by other brands

LG LAS350B manual

LG

LG LAS350B manual

MadBoy SCREAMER-206 owner's manual

MadBoy

MadBoy SCREAMER-206 owner's manual

Sharp HT-SB250 Operation manual

Sharp

Sharp HT-SB250 Operation manual

LY International PP-8430UR manual

LY International

LY International PP-8430UR manual

ELAC Integrator Series operating instructions

ELAC

ELAC Integrator Series operating instructions

iLive IT153B user guide

iLive

iLive IT153B user guide

Behringer EUROLIVE B207MP quick start guide

Behringer

Behringer EUROLIVE B207MP quick start guide

EAW UB12S Technical specifications

EAW

EAW UB12S Technical specifications

iLive ITB190B user guide

iLive

iLive ITB190B user guide

August SE30 user manual

August

August SE30 user manual

Nady Systems MPA-400 owner's manual

Nady Systems

Nady Systems MPA-400 owner's manual

Phonic RoadGear 160 Plus user manual

Phonic

Phonic RoadGear 160 Plus user manual

Sharp CD-C1W Service manual

Sharp

Sharp CD-C1W Service manual

Yamaha NS-AC142 owner's manual

Yamaha

Yamaha NS-AC142 owner's manual

Wet Sounds STEALTH-XT owner's manual

Wet Sounds

Wet Sounds STEALTH-XT owner's manual

Yamaha NS-AC143 owner's manual

Yamaha

Yamaha NS-AC143 owner's manual

Bose L1 Pro Series Firmware update

Bose

Bose L1 Pro Series Firmware update

Audio Pro ADDON T10 owner's manual

Audio Pro

Audio Pro ADDON T10 owner's manual

manuals.online logo
manuals.online logoBrands
  • About & Mission
  • Contact us
  • Privacy Policy
  • Terms and Conditions

Copyright 2025 Manuals.Online. All Rights Reserved.