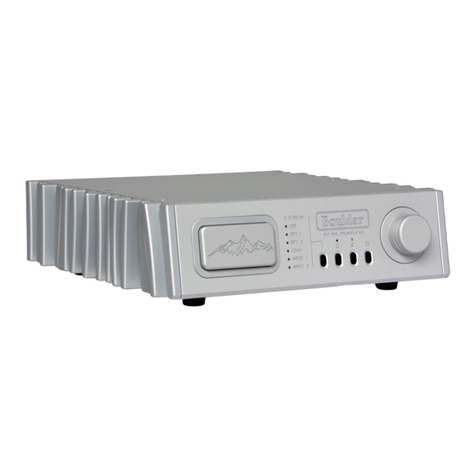
Boulder 1110 User manual

1110 Preamplier
Boulder Ampliers, Inc.
255 S. Taylor Ave.
Louisville, CO 80027
(303) 449-8220
www.boulderamp.com
2/1/2018
Rev. 1.0
P/N: 91054

About
About Boulder Ampliers, Inc.
Boulder was founded in 1984 and is the last high-performance audio
manufacturer operating in North America to still perform all of its own
design, engineering and manufacturing in-house. While this form of
production may be more costly than outsourcing, the resulting quality
control and reliability of the nished products are never compromised.
In 2016, Boulder moved into a new, purpose-built production facility to
increase manufacturing efciency and offer space for expansion to meet
the needs of future growth.

Thank You
Congratulations and thank you for selecting the Boulder 1110 Preamplier
for your high-performance sound system. We are certain it will provide you
with many years of listening pleasure.
The 1110 represents the concerted efforts of numerous Boulder designers,
engineers, and technicians working to bring you the best audio playback
components in the world. Please take a few minutes to read through this
instruction manual prior to using your 1110. This will help you understand
the many functions and capabilities of the preamplier. It will also allow
you to maximize the convenience and performance for which it was
engineered.
Your Boulder 1110 Preamplier has undergone extensive laboratory tests
for safety, functionality and technical excellence. In addition, it has been
individually subjected to rigorous listening trials in our sound room utilizing
a wide range of musical material. No product ever leaves our factory until
we are totally satised that it achieves its full potential.

Table of Contents
Getting Started
Introduction •••••••••••••••••••••••••••••••••••••••••••••••••••••••••1-1
Analog Features ••••••••••••••••••••••••••••••••••••••••••••••••••••• 1-1
Operational Features •••••••••••••••••••••••••••••••••••••••••••••••••1-1
Unpacking and Care•••••••••••••••••••••••••••••••••••••••••••••••••• 1-2
Before You Start •••••••••••••••••••••••••••••••••••••••••••••••••••••1-2
How to Clean the Casework ••••••••••••••••••••••••••••••••••••••••••• 1-3
Placement and Installation of the 1110 Preamplier •••••••••••••••••••••••1-4
Connecting the Inputs ••••••••••••••••••••••••••••••••••••••••••••••••1-5
Connecting to an Unbalanced Source •••••••••••••••••••••••••••••••••••1-6
Connecting the Outputs to a Balanced Power Amplier••••••••••••••••••••1-8
Connecting the Outputs to an Unbalanced Power Amplier •••••••••••••••• 1-9
Polarity •••••••••••••••••••••••••••••••••••••••••••••••••••••••••••••1-9
Connecting to a Network •••••••••••••••••••••••••••••••••••••••••••••1-10
Connection to AC Mains ••••••••••••••••••••••••••••••••••••••••••••• 1-11
Operation
Front Panel Controls and Screen Modes ••••••••••••••••••••••••••••••••2-1
Front Panel Control Knob Functions••••••••••••••••••••••••••••••••••2-3
Control Knob Volume •••••••••••••••••••••••••••••••••••••••••••••••2-3
Front Panel Button Functions: Home Screen ••••••••••••••••••••••••••2-5
Inputs 1-5 •••••••••••••••••••••••••••••••••••••••••••••••••••••••••2-5
Option ••••••••••••••••••••••••••••••••••••••••••••••••••••••••••••2-7
Mute ••••••••••••••••••••••••••••••••••••••••••••••••••••••••••••••2-7
Standby •••••••••••••••••••••••••••••••••••••••••••••••••••••••••••2-9
Front Panel Button Functions: Option Screen •••••••••••••••••••••••••2-9
Balance •••••••••••••••••••••••••••••••••••••••••••••••••••••••••••2-9
Display••••••••••••••••••••••••••••••••••••••••••••••••••••••••••• 2-11
Polarity Absolute ••••••••••••••••••••••••••••••••••••••••••••••••••2-12
Polarity Right Channel •••••••••••••••••••••••••••••••••••••••••••••2-13
Return to Home •••••••••••••••••••••••••••••••••••••••••••••••••••2-14
Setup ••••••••••••••••••••••••••••••••••••••••••••••••••••••••••••2-14

Table of Contents
Front Panel Button Functions: Setup Screen •••••••••••••••••••••••••2-15
Input Settings •••••••••••••••••••••••••••••••••••••••••••••••••••••2-15
Input Trim ••••••••••••••••••••••••••••••••••••••••••••••••••••••••2-16
Input Polarity •••••••••••••••••••••••••••••••••••••••••••••••••••••2-17
Input Balance •••••••••••••••••••••••••••••••••••••••••••••••••••••2-18
Input Theater Mode••••••••••••••••••••••••••••••••••••••••••••••••2-19
Theater Mode•••••••••••••••••••••••••••••••••••••••••••••••••••••2-19
Volume Settings ••••••••••••••••••••••••••••••••••••••••••••••••••2-21
Volume Scale •••••••••••••••••••••••••••••••••••••••••••••••••••2-21
Volume Resolution •••••••••••••••••••••••••••••••••••••••••••••••2-22
Volume Default••••••••••••••••••••••••••••••••••••••••••••••••••2-23
Volume Max ••••••••••••••••••••••••••••••••••••••••••••••••••••2-24
Mute Level •••••••••••••••••••••••••••••••••••••••••••••••••••••2-25
System Info •••••••••••••••••••••••••••••••••••••••••••••••••••••2-26
Serial Number •••••••••••••••••••••••••••••••••••••••••••••••••••2-26
IP Address ••••••••••••••••••••••••••••••••••••••••••••••••••••••2-26
MAC Address •••••••••••••••••••••••••••••••••••••••••••••••••••2-26
Firmware Version ••••••••••••••••••••••••••••••••••••••••••••••••2-27
Update Available•••••••••••••••••••••••••••••••••••••••••••••••••2-27
Remote Address •••••••••••••••••••••••••••••••••••••••••••••••••2-27
Restore Factory Defaults •••••••••••••••••••••••••••••••••••••••••••2-29
Return Home •••••••••••••••••••••••••••••••••••••••••••••••••••••2-30
Remote Control
Remote Control Button Layout •••••••••••••••••••••••••••••••••••••••••3-1
Replacing the Remote Control’s Batteries •••••••••••••••••••••••••••••••3-2
Changing the Remote Address •••••••••••••••••••••••••••••••••••••••••3-3
Remote Control Button Functions and Use•••••••••••••••••••••••••••• 3-5
Standby ••••••••••••••••••••••••••••••••••••••••••••••••••••••••••• 3-5
Input Selection, 1-5 •••••••••••••••••••••••••••••••••••••••••••••••••3-5
Balance Left and Balance Right •••••••••••••••••••••••••••••••••••••• 3-5
Volume Up and Volume Down •••••••••••••••••••••••••••••••••••••••• 3-6
Mute ••••••••••••••••••••••••••••••••••••••••••••••••••••••••••••••3-6
Polarity•••••••••••••••••••••••••••••••••••••••••••••••••••••••••••• 3-7
Display•••••••••••••••••••••••••••••••••••••••••••••••••••••••••••• 3-8

Table of Contents
Programming
HTML Programming ••••••••••••••••••••••••••••••••••••••••••••••••••4-1
IP Address •••••••••••••••••••••••••••••••••••••••••••••••••••••••••• 4-1
Page Tabs ••••••••••••••••••••••••••••••••••••••••••••••••••••••••••4-2
Main Tab •••••••••••••••••••••••••••••••••••••••••••••••••••••••••••4-3
Master Volume •••••••••••••••••••••••••••••••••••••••••••••••••••••4-3
Settings •••••••••••••••••••••••••••••••••••••••••••••••••••••••••••4-4
Mute ••••••••••••••••••••••••••••••••••••••••••••••••••••••••••••••4-4
Balance •••••••••••••••••••••••••••••••••••••••••••••••••••••••••••4-5
Inputs •••••••••••••••••••••••••••••••••••••••••••••••••••••••••••••4-5
Input Trim ••••••••••••••••••••••••••••••••••••••••••••••••••••••••• 4-6
Toggle Standby• • • • • • • • • • • • • • • • • • • • • • • • • • • • • • • • • • • • • • • • • • • • • • • • • • • • • 4-6
Upload Logs •••••••••••••••••••••••••••••••••••••••••••••••••••••••4-7
Version••••••••••••••••••••••••••••••••••••••••••••••••••••••••••••4-7
Serial Number •••••••••••••••••••••••••••••••••••••••••••••••••••••4-7
Options Tab •••••••••••••••••••••••••••••••••••••••••••••••••••••••• 4-8
Mute ••••••••••••••••••••••••••••••••••••••••••••••••••••••••••••••4-8
Display Brightness•••••••••••••••••••••••••••••••••••••••••••••••••• 4-8
Polarities •••••••••••••••••••••••••••••••••••••••••••••••••••••••••4-9
Polarity Absolute•••••••••••••••••••••••••••••••••••••••••••••••••• 4-9
Polarity Right Channel••••••••••••••••••••••••••••••••••••••••••••4-10
Setup Tab ••••••••••••••••••••••••••••••••••••••••••••••••••••••••• 4-11
Inputs •••••••••••••••••••••••••••••••••••••••••••••••••••••••••••• 4-11
Name •••••••••••••••••••••••••••••••••••••••••••••••••••••••••••• 4-11
Balance ••••••••••••••••••••••••••••••••••••••••••••••••••••••••••4-12
Polarity•••••••••••••••••••••••••••••••••••••••••••••••••••••••••••4-13
Theater Mode •••••••••••••••••••••••••••••••••••••••••••••••••••••4-13
Restore Default Input Names••••••••••••••••••••••••••••••••••••••••4-14
Room ••••••••••••••••••••••••••••••••••••••••••••••••••••••••••••4-14
Volume Resolution•••••••••••••••••••••••••••••••••••••••••••••••••4-15
Volume Default••••••••••••••••••••••••••••••••••••••••••••••••••••4-15
Max Volume ••••••••••••••••••••••••••••••••••••••••••••••••••••••4-16
Mute Level •••••••••••••••••••••••••••••••••••••••••••••••••••••••4-17
Settings ••••••••••••••••••••••••••••••••••••••••••••••••••••••••••4-18
Restore Factory Defaults •••••••••••••••••••••••••••••••••••••••••••4-18
Boulder Net••••••••••••••••••••••••••••••••••••••••••••••••••••••••4-18

Appendix
Technical Specications••••••••••••••••••••••••••••••••••••••••••••••• 5-1
Weights & Dimensions ••••••••••••••••••••••••••••••••••••••••••••••••5-2
1110 Preamplier Dimension Diagram ••••••••••••••••••••••••••••••••••5-3
Troubleshooting•••••••••••••••••••••••••••••••••••••••••••••••••••••• 5-4
Notes••••••••••••••••••••••••••••••••••••••••••••••••••••••••••••••• 5-5
Table of Contents

1-1
Getting Started
Getting Started
Introduction
The 1110 Preamplier embodies years of development and is one of the
most advanced preampliers available. Here are some of the features that
set the 1110 apart from the competition:
Analog features:
• Proprietary, fully-balanced Boulder volume control
• Five pairs of balanced inputs on XLR connectors
• Fully-balanced audio path utilizing Boulder’s own 983 gain stages
• Two pairs of balanced outputs for each channel
• Low power-consumption Standby mode
Operational features:
• Large, full-color, 6.2 inch, 640 x 240 LCD front panel display
• Display shows: input source, volume (dB), balance, polarity, mute,
options and setup
• Automatic software updates when connected to the Internet
• Comprehensive option and setup congurations
• IP control with two-way communication for external control
systems
• HTML setup page for access to additional customizable features

1-2
Getting Started
Getting Started
Unpacking and Care
The 1110 preamplier is heavy and features nely nished casework.
Please use care when unpacking, lifting, and installing the preamplier to
avoid personal injury or damage to the casework and furniture. The 1110
Preamplier weighs 35 lbs. (16 kg). If possible, two people should unpack
and place it into position.
Be sure to save all packing materials! The 1110 is shipped in a foam wrap
to protect the preamplier’s ne nish. Try not to damage this wrap in the
event that the unit must be transported elsewhere in the future.
Before You Start
You should have received a large, heavy box. The pieces included inside
the box are:
1. 1110 Preamplier
2. Accessory Box #1, containing:
• AC power cable
3. Accessory Box #2, containing:
• Handheld IR Remote Control
• #1 Phillips Screwdriver for IR Remote Control
• Instruction Manual
If any of these pieces are missing or damaged, please contact your
authorized Boulder dealer immediately before continuing with the
installation.

1-3
Getting Started
Getting Started
How to Clean the Casework
If the 1110 must be cleaned, use only a soft, lint-free cloth moistened with
plain water.
Never use any type of chemical cleaner unless recommended by your
dealer or the Boulder factory.
Do not use bleach! Bleach will remove the anodized surface of the case-
work.
Never use any type of abrasive to clean the casework.
If you have any questions, please contact your authorized Boulder dealer.

1-4
Getting Started
Getting Started
Placement and Installation
Your Boulder 1110 Preamplier is designed to reduce the effects that exter-
nal magnetic elds and radio frequencies (RF) have on its circuitry. While
placement is not critical, known magnetic elds should be avoided whenev-
er possible. Also, the preamplier must have a visible line-of-sight from the
intended listening position to the front panel. This is necessary for the IR
remote control to function properly.
Because it is heavy, the 1110 system must be placed on a sturdy, stable
surface.
Do not place in an enclosed rack without ventilation. The 1110 must have
at least 3 inches (8 cm) of airspace around the chassis for proper cooling
and airow.
Be sure to leave access to the AC mains and interconnect cables when
installing the preamplier. Depending on how easy it is to access the back
panel of the 1110, it may be wise to pre-install the power and interconnect
cables before placement.

1-5
Getting Started
Getting Started
Connecting the Inputs
To get started listening, you only need to connect sources to the 1110 as
you would any other preamplier. Please take note of the following:
WARNING: The polished volume control is attractive and is optically con-
trolled. It has no stops! It is very tempting to spin it. DO THIS ONLY WITH
THE POWER OFF! The volume knob must be given respect as it can
rotate quickly and has ability to raise the volume very fast. You should hear
music by the time you have turned the volume up to -40.0 dB with a source
connected and playing. If not, do not continue to raise the volume until the
problem is solved. Please see the troubleshooting section on page 5-4.
The 1110 can be connected to many different types of analog sources
and will provide excellent sound quality for each. To fully realize the sonic
potential of your 1110 Preamplier, use balanced cable connections when-
ever possible. Balanced cables minimize interference from magnetic and
RF sources.t
Connect each source to one of the ve inputs provided on the rear panel
of the 1110. Later, you will be able to program each input with the source’s
name (see HTML Programming: Setup on page 4-11), so you may want to
make a list of each source as you connect them.

1-6
Getting Started
Getting Started
Connecting to an Unbalanced Source
Although the inputs are all of the 3-pin XLR type, an unbalanced source
can easily be accommodated by using a special cable. This cable has an
RCA phono-type connector on the source end and a 3-pin XLR connector
for the input on the 1110 Preamplier end.
The negative input (pin 3) should be wired to ground only at the RCA
phono connector. This brings the inverted input reference of the 1110 to the
unbalanced source ground, thus reducing ground loops.
Another option for connecting unbalanced sources is the Boulder ABL2
input adapter. It converts a balanced input into a RCA phono input at the
rear of the 1110. Like the above cable, the negative input of the 1110 is
connected to the ground of the RCA phono. However, this negative side
will then share the shield wire with the chassis ground and will not have the
best hum rejection.
UNBALANCED INPUT CABLE
2-POS INPUT
3-NEG INPUT
1-GROUND

1-7
Getting Started
Getting Started
When connecting various sources, make a list of what component is
connected to each input so that you do not forget the order in which they
are connected. You will then be able to name the inputs on the front panel
display later (see HTML Programming: Setup on page 4-11). This list will
be very helpful at that time.
Connections from sources such as a D/A Converter, DVD player, phono
preamplier, tuner, or cable/satellite receiver can be made to the analog
input connections.
The Ethernet connections are for Internet access in order to program input
names or download software updates for the 1110. One of the Ethernet
jacks should be connected to a network with an active Internet feed.
Because they are switched, it does not matter which jack is used.

1-8
Getting Started
Getting Started
Connecting the Outputs to a Balanced Power Amplier
With your 1110 Preamplier’s balanced outputs driving the balanced input
of a power amplier, you can realize the sonic advantage of having short
speaker cables and correspondingly longer interconnect (input) cables.
With the low output impedance of the 1110, distances of more than 50 me-
ters between preamplier and power amplier are practical.
The 1110 can support connections to more than one amplier. For a basic,
single amplier system, please follow these instructions:
Connect the Left Analog and Right Analog MAIN OUTPUT interconnects
from the 1110 to your amplier. To maintain the best sound quality, Boulder
recommends that balanced interconnections always be used.
For systems where more than one amplier may be connected, please
consult your authorized Boulder dealer.

1-9
Getting Started
Getting Started
Connecting to an Unbalanced Power Amplier
A special cable is required to make this connection. This cable connects
pin 1 to the shield and pin 2 to the center pin of the RCA. It leaves the neg-
ative output (pin 3) unconnected.
Connecting the unused output pin (usually pin 3) to ground will cause
excessive ground currents and degrade performance. Use an ohmmeter or
continuity checker to determine how your cable is wired.
Polarity
Please note that the 1110 Preamplier conforms to the standard of Pin 2
as high or “hot” for all analog balanced inputs and outputs. Because input
and output polarities are handled through the Setup menu and the remote
control, concern for polarity is unnecessary while connecting sources.

1-10
Getting Started
Getting Started
Connecting to a Network:
In order for the 1110 to automatically download software updates, you will
need to connect it to a network with an active Internet connection. This will
allow the 1110 to download software updates when available and notify you
when they are ready for installation.
Connect a network cable between the 1110 and your network router or
switch. Use either Ethernet connector on the rear panel of the 1110; it does
not matter which one you use.
It is possible to conrm that the 1110 is connected to a network. To do so,
press the Option button on the front panel, then the Setup button, then
press the System Info button. System Information will be listed, including
“IP Address:”. If an IP address is shown, then the 1110 is properly con-
nected to a network.
If you are having problems with your network setup, please contact your
authorized Boulder dealer.
Ethernet

1-11
Getting Started
Getting Started
Connection to AC Mains
Your 1110 Preamplier is supplied with an AC mains power cord appropri-
ate for the location where it was purchased.
Connect the AC power cord to the Master AC Power Switch connection on
the rear panel of the 1110 as shown and plug the other end into AC mains.
AC Mains


2-1
Operation
Operation
Front Panel Controls and Screen Modes
The 1110 features a full-color LCD display and a large Control Knob on
the right-hand side of the front panel. The Control Knob will adjust different
functions of the 1110, depending on the mode that the preamplier is in.
The 1110 also has 8 buttons located below the display. These buttons will
align with various functions shown on the display. The unit will power on
with the Home Screen displayed. Different screen modes can be selected
by pressing the Option and Setup buttons.
When Option or Setup modes are selected, some button functions will
change and control different operations and some will need to be adjusted
with the use of the Control Knob. Other button functions will remain the
same if the button does not have a specic role within the selected mode.
Table of contents
Other Boulder Amplifier manuals
Boulder
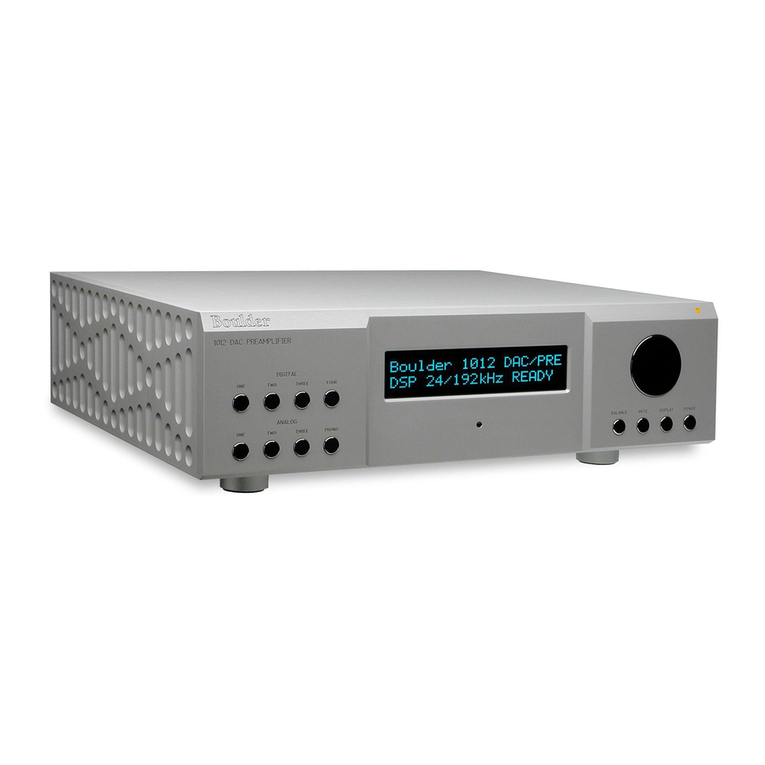
Boulder 1012 DAC Preamplifier User manual
Boulder
Boulder 810 User manual
Boulder
Boulder 160 User manual
Boulder
Boulder 860 User manual

Boulder
Boulder 1160 User manual
Boulder
Boulder 2120 User manual
Boulder
Boulder 3050 User manual

Boulder
Boulder 3060 User manual
Boulder
Boulder 2150 User manual
Boulder
Boulder 1008 User manual
Boulder
Boulder 812 User manual
Boulder
Boulder 2108 User manual
Boulder
Boulder 2008 User manual

Boulder
Boulder 861 User manual
Boulder
Boulder Integrated Amplifier 865 User manual
Boulder
Boulder 850 User manual
Boulder
Boulder 508 User manual
Boulder
Boulder 3010 User manual
Boulder
Boulder 2010 User manual

Boulder
Boulder 2010 User manual
