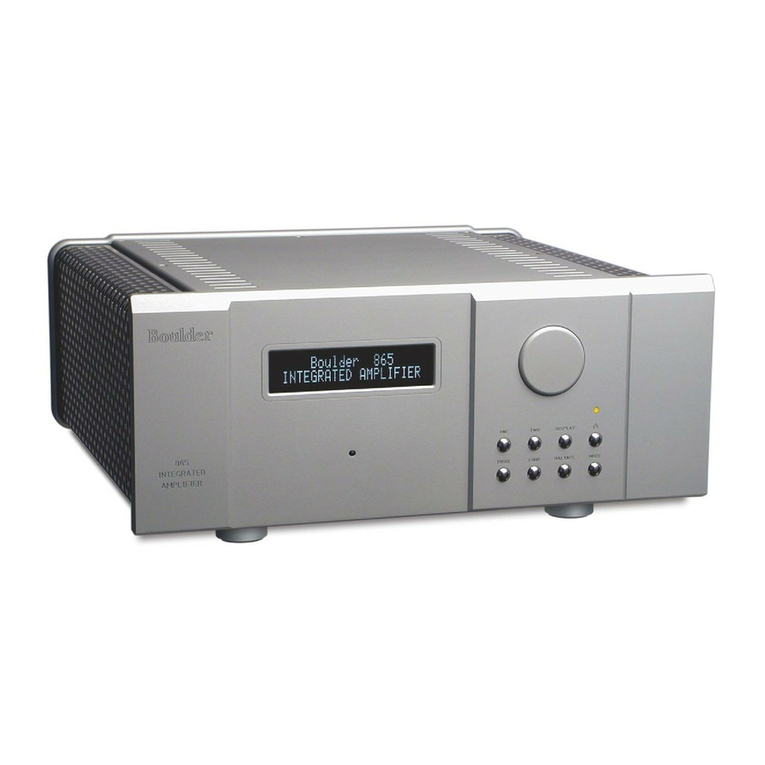
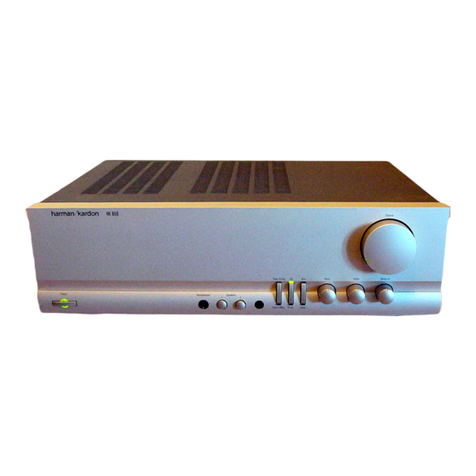
Boulder 866 Analog User manual

i
255 South Taylor Avenue Louisville, Co 80027 U.S.A Tel: 303-495-2260x116 E-mail: sales@boulderamp.com Web: www.boulderamp.com
Boulder Ampliers, Inc.
255 S. Taylor Avenue
Louisville, CO 80027
(303) 449-8220, x110
www.boulderamp.com
BoulderAmpliersInc
@boulderampliers
@BoulderAmps
866 Analog

1-1
About Boulder Ampliers, Inc.
Boulder was founded in 1984 and is the last high-performance audio manufacturer operating
in North America to still perform all of its own design, engineering and manufacturing in-
house. While this form of production may be more costly than outsourcing, the resulting quality
control and reliability of the nished products are never compromised.
In 2016, Boulder moved into a new, purpose-built production facility to increase manufacturing
eciency and oer space for expansion to meet the needs of future growth.

2-2
Congratulations and thank you for selecting the Boulder 866 Integrated for your high-
performance sound system. We are certain it will provide you with many years of listening
pleasure.
e 866 represents the concerted eorts of numerous Boulder designers, engineers, and
technicians working to bring you the best audio playback components in the world. Please take
a few minutes to read through this instruction manual prior to using your 866. is will help
you understand the many functions and capabilities of the preamplier. It will also allow you to
maximize the convenience and performance for which it was engineered.
Your Boulder 866 Integrated has undergone extensive laboratory tests for safety, functionality
and technical excellence. In addition, it has been individually subjected to rigorous listening
trials in our sound room utilizing a wide range of musical material. No product ever leaves our
factory until we are totally satised that it achieves its full potential.

2-3
Table of Contents
About - - - - - - - - - - - - - - - - - - - - - - - - 1-1
ank You - - - - - - - - - - - - - - - - - - - - - - 2-2
Introduction - - - - - - - - - - - - - - - - - - - - - - 3-6
Analog Features: . . . . . . . . . . . . . . . . . . . 3-6
Operational Features: . . . . . . . . . . . . . . . . . . 3-6
Unpacking and Care . . . . . . . . . . . . . . . . . . 3-7
Before You Start . . . . . . . . . . . . . . . . . . . 3-7
How to Clean the Casework . . . . . . . . . . . . . . . 3-8
Placement and Installation . . . . . . . . . . . . . . . . 3-9
Connections - - - - - - - - - - - - - - - - - - - - - 4-10
Connecting the Analog Inputs . . . . . . . . . . . . . . . 4-10
Connecting to an Unbalenced Analog Source. . . . . . . . . . 4-11
Connection to AC Mains . . . . . . . . . . . . . . . . 4-12
Controlling the 866 with Mobile Device or Tablet . . . . . . . . 4-14
Connectiong the 866 to a Home Network . . . . . . . . . . . 4-15
Operation- - - - - - - - - - - - - - - - - - - - - - 5-16
Front Panel Controls and Screen Modes . . . . . . . . . . . 5-16

2-4
Front Panel Buttons . . . . . . . . . . . . . . . . . . 5-17
Volume . . . . . . . . . . . . . . . . . . . . . . 5-18
Mute . . . . . . . . . . . . . . . . . . . . . . . 5-19
Standby . . . . . . . . . . . . . . . . . . . . . . 5-20
Touch-Screen Functions: Home Screen . . . . . . . . . . . . 5-21
Setup . . . . . . . . . . . . . . . . . . . . . . . 5-22
Volume Options . . . . . . . . . . . . . . . . . . . 5-22
Volume Type. . . . . . . . . . . . . . . . . . . . . 5-22
Max Volume . . . . . . . . . . . . . . . . . . . . . 5-23
Mute Level . . . . . . . . . . . . . . . . . . . . . 5-24
Input Settings . . . . . . . . . . . . . . . . . . . . 5-25
Input Trim . . . . . . . . . . . . . . . . . . . . . 5-25
eater Mode . . . . . . . . . . . . . . . . . . . . 5-26
Input Image . . . . . . . . . . . . . . . . . . . . . 5-27
Display Settings. . . . . . . . . . . . . . . . . . . . 5-28
System Settings . . . . . . . . . . . . . . . . . . . . 5-29
Network Settings . . . . . . . . . . . . . . . . . . . 5-29
Factory Defaults . . . . . . . . . . . . . . . . . . . 5-31
Input Defaults . . . . . . . . . . . . . . . . . . . . 5-32
Programming - - - - - - - - - - - - - - - - - - - - 6-33
Web Based Programming . . . . . . . . . . . . . . . . 6-33

2-5
Boulder Net . . . . . . . . . . . . . . . . . . . . . 6-34
Appendix - - - - - - - - - - - - - - - - - - - - - - 7-35
Technical Specications . . . . . . . . . . . . . . . . . 7-35
Weights and Dimensions . . . . . . . . . . . . . . . . 7-36
866 Integrated Dimensions . . . . . . . . . . . . . . . . 7-37
Troubleshooting . . . . . . . . . . . . . . . . . . . 7-38
Notes: . . . . . . . . . . . . . . . . . . . . . . . 7-39

3-6
e 866 Integrated embodies years of development and is one of the most advanced integrated
ampliers available. Here are some of the features that set the 866 apart from the competition:
Analog Features:
• Boulder volume attenuator.
• ree pairs of balanced inputs on XLR connectors.
• Fully-balanced audio input path.
• Low contact resistance output binding posts.
• Low power-consumption Standby mode
Operational Features:
• Large, full-color, 7-inch LCD touch screen front panel display.
• Display shows: input source, volume, mute, setup and now playing screen.
• Sophisticated soware updates when connected to the Internet.
• Conguration capabilities.
• Boulder control app for Android and Apple devices.
• HTML Control and Setup page for access to additional customizable features.

3-7
Unpacking and Care
e 866 Integrated is heavy and features nely nished casework. Please use care when
unpacking, liing, and installing the integrated amplier to avoid personal injury or damage
to the casework and furniture. e 866 weighs 54 lbs. (25 kg). If possible, two people should
unpack and place it into position.
Be sure to save all packing materials! e 866 is shipped in a foam wrap to protect the
preamplier’s ne nish. Try not to damage this wrap in the event that the unit must be
transported elsewhere in the future.
Before You Start
You should have received a large, heavy box. e pieces included inside the box are:
1. 866 Integrated
2. Quick Start Guide
3. Power cord
If any of these pieces are missing or damaged, please contact your authorized Boulder dealer
immediately before continuing with the installation.

3-8
How to Clean the Casework
If the 866 must be cleaned, use only a so, lint-free cloth moistened with plain water.
Never use any type of chemical cleaner unless recommended by your dealer or the Boulder
factory.
Do not use bleach! Bleach will remove the anodized surface of the casework.
Never use any type of abrasive to clean the casework.
If you have any questions, please contact your authorized Boulder dealer.

3-9
Placement and Installation
Your Boulder 866 Integrated is designed to reduce the eects that external magnetic elds and
radio frequencies (RF) have on its circuitry. While placement is not critical, known magnetic
elds should be avoided whenever possible.
Because it is heavy, the 866 must be placed on a sturdy, stable surface.
Do not place in an enclosed rack without ventilation. e 866 must have at least 3 inches (8 cm)
of airspace around the chassis for proper cooling and airow.
Be sure to leave access to the AC mains and interconnect cables when installing the integrated
preamplier. Depending on how easy it is to access the back panel of the 866, it may be wise to
pre-install the power and interconnect cables before placement.

4-10
Connecting the Analog Inputs
To get started listening, you only need to connect sources to the 866 as you would any other
integrated amplier. Please take note of the following:
e 866 can be connected to many dierent types of analog sources and will provide excellent
sound quality for each. To fully realize the sonic potential of your 866 Integrated, use balanced
cable connections whenever possible. Balanced cables minimize interference from magnetic and
RF sources.
Connect each analog source to one of the three inputs provided on the rear panel of the 866.
Later, you will be able to program each input with the source’s name and photo (please see Input
Settings on page 6-31), so you may want to make a list of each source as you connect them.
Analog 3
Analog 2
Analog 1

4-11
Connecting to an Unbalenced Analog Source
Although the inputs are all of the 3-pin XLR type, an unbalanced source can easily be
accommodated by using a special cable. is cable has an RCA type connector on the source end
and a 3-pin XLR connector for the input on the 866 Integrated end.
e negative input (pin 3) should be wired to ground only at the RCA type connector. is
brings the inverted input reference of the 866 to the unbalanced source ground, thus reducing
ground loops.
Another option for connecting unbalanced sources is the Boulder ABL2 input adapter. It
converts a balanced input into an RCA input at the rear of the 866. Like the above cable, the
negative input of the 866 is connected to the ground of the RCA connecter. However, this
negative side will then share the shield wire with the chassis ground and will not have the best
hum rejection.

4-12
Connection to AC Mains
Your 866 Integrated is supplied with an AC mains power cord appropriate for the location where
it was purchased.
Connect the AC power cord to the Master AC Power Switch connection on the rear panel of the
866 as shown and plug the other end into AC mains.
NOTE: We reccomend before starting your 866 to make all your audio connections.
NOTE: Double check voltage and make sure its appropriate for what you’re plugging your 866 into.
(100V, 120V, 240V)

4-13
When connecting various sources, make a list of what component is connected to each input so
that you do not forget the order in which they are connected. You will then be able to name the
inputs on the front panel display with the Boulder control app. is list will be very helpful at
that time.
Connections from sources such as a phono preamplier, tuner, or cable/satellite receiver can be
made to the analog input connections.
e Ethernet connections Internet access to program input names or download soware updates
for the 866. e Ethernet jack should be connected to a network with an active Internet feed.

4-14
Controlling the 866 with Mobile Device or Tablet
THE 866 CAN EASILY BE CONTROLLED VIA A MOBILE DEVICE AS LONG AS THE
866 AND THE MOBILE DEVICE ARE ON THE SAME NETWORK.
To connect the mobile device and control the 866, follow these instructions:
1. Using a wired connection, connect the 866 to a network and then turn it ON via the AC
mains master switch on the rear panel.
2. Connect the Apple or Android device to the same network.
3. In the upper-le corner of the 866’s front panel display, there will be a settings icon (3
Stacked lines) Touch this icon on the front panel. e dropdown menu will say “Settings” press
that and then the display will show the setting options.
4.Press “System Settings” which will pull up more options. (See page 6-35) From those
options press “Network Settings.” e screen will pull up the 866 QR code.
5.Touch the camera icon on the Boulder app on your mobile device. is will activate the
mobile device’s camera.
6. Center the 866’s QR code in the Boulder app camera screen. When the QR code is
properly centered, the app will automatically use the information from the QR code to nd the
866.
7. e 866’s IP address will then appear on the app under the words “Server URL” and the
button marked “GO” will turn BLUE. Press the GO button and the app will connect to the 866
through your network. e app display will then change to the main control screen.
If you are having problems with your network setup, please contact your authorized Boulder dealer.
NEXT PAGE WITH VISUAL REPRESENTATION

4-15
Connectiong the 866 to a Home Network

5-16
Front Panel Controls and Screen Modes
e 866 features a full-color touch-screen LCD display and four buttons on the right-hand side
of the front panel. e display and buttons will control or adjust dierent functions of the 866.
e four buttons on the front panel of the 866 are (L to R) Volume Down, Volume Up, Mute,
and Standby.

5-17
Front Panel Buttons
When the display is showing the Home Screen, the buttons will control the Volume, Mute and
Standby modes of the 866 and the touch screen will be used to select inputs. When the 866 is
in the Setup mode, the touch screen will be used to adjust programmable features of the 866’s
operation.
Pressing the Volume Up button will increase the volume and an indication such as “45.0”
will appear in the Volume portion of the display. At this point you should hear music from the
system.
Pressing the Volume Down button will decrease the volume.
Pressing the Mute button will attenuate the volume by a programmable level (please see
Settings: Mute Level on page 27).
Pressing the Standby button will turn ON or place the 866 in Standby.
CAUTION: THE VOLUME CONTROL MUST BE ADJUSTED CAREFULLY, AS IT HAS
THE ABILITY TO GET LOUD VERY QUICKLY.
WARNING: IF THE SELECTED INPUT IS PROGRAMMED FOR “THEATER MODE,”
THE VOLUME CONTROL WILL HAVE NO EFFECT. VOLUME CAN ONLY BE
CONTROLLED BY THE SURROUND SOUND PROCESSOR.

5-18
e 866 has a large, full-color display located on the le-hand side of the front panel. ere are
four buttons to control Volume Up, Volume Down, Mute, and Standby located on the right-
hand side of the front panel.
Volume
Pressing the Volume Up or Volume Down button will change the output volume level of the
866. e 866’s volume can be displayed two ways, 100 steps from 0 to 100, or in decibels from
-100 to 0. e default mode is from 0 to 100. (Please see Volume Options: Volume Type on
page 6-25)
In 0 to 100 mode, the Volume portion of the display will show “0” to indicate innite
attenuation, or no output. e volume range maximum indication is “100.”
In decibel mode, the Volume portion of the display will show “-100” to indicate innite
attenuation, or no output. e volume range maximum indication is “0” to indicate no
attenuation.
e volume can be adjusted in 100 equal steps.
Pressing the Volume Up button will increase the volume and the indicator in the bottom right
portion of the display will change to show the selected volume level. At this point you should
hear music from the system.
Pressing the Volume Down button will decrease the volume.
e Volume function will continue to operate in Mute mode as long as the volume is decreased.
Pressing the Volume Down button will decrease the volume setting even though the output will
remain muted.
Pressing the Volume Up button will immediately bring the 866 out of Mute mode.
e function of the Mute button will always remain the same, regardless of screen mode.

5-19
Mute
It is possible to Mute the 866’s outputs so that they are reduced by a preprogrammed level.
e Mute feature allows for temporary volume reduction without losing the original volume
setting. For example, engaging the Mute function will attenuate the output to a level suitable for
conversation. is level of attenuation can be adjusted in the Setup menu. e default Mute level
is -20. (Please see Settings: Mute Level on page 6-28)
Pressing the Mute button will immediately attenuate the output and the front panel display will
show this icon:
Pressing the Mute button will immediately return the output to the original volume level and the
front panel display will show only the volume setting.
NOTE: e Mute output level is relative to the normal listening level. erefore, if the Mute
level is set to -60.0 dB, the volume will be decreased by an additional 60 dB from its current level
when “Mute” is engaged.
Table of contents
Other Boulder Amplifier manuals
Boulder
Boulder 1110 User manual
Boulder
Boulder 861 User manual
Boulder
Boulder 2120 User manual
Boulder
Boulder 1060 User manual
Boulder
Boulder 2150 User manual
Boulder
Boulder 2110 User manual
Boulder
Boulder 2008 User manual
Boulder
Boulder 812 User manual
Boulder
Boulder 2010 User manual

Boulder
Boulder 1160 User manual
Boulder
Boulder 860 User manual
Boulder
Boulder 508 User manual
Boulder
Boulder 850 User manual
Boulder
Boulder 2108 User manual
Boulder
Boulder 1012 DAC Preamplifier User manual
Boulder
Boulder 1008 User manual
Boulder
Boulder 812 User manual
Boulder
Boulder 3050 User manual
Boulder
Boulder 810 User manual

Boulder
Boulder 2010 User manual

