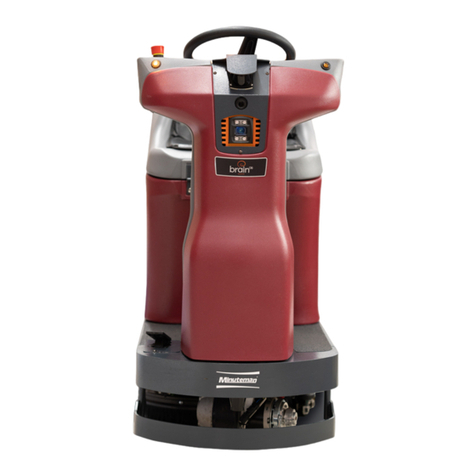
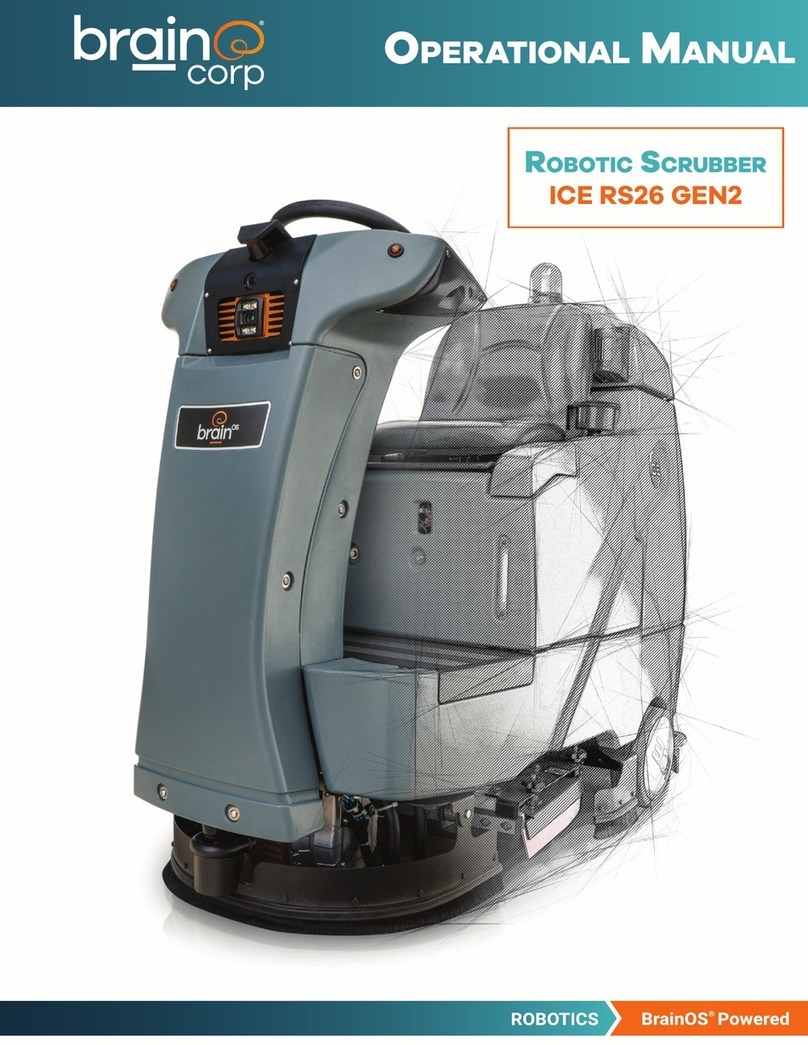
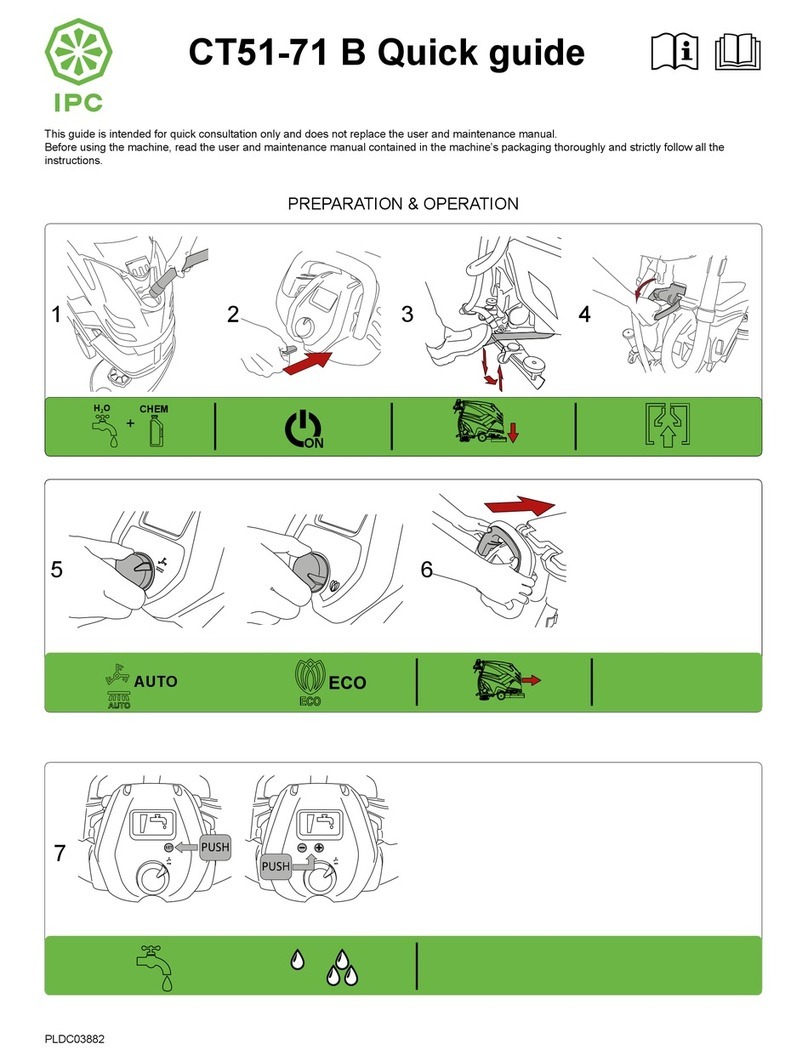
Brain Corp ICE Robotics RS26 Quick start guide

OPERATIONAL
MANUAL

V4.0119 •Content Subject to Change
2
I NTRODUCTION
This operator manual is provided with each new model and contains information to allow for quick start-up
of your new ICE RS26 Robotic Scrubber, powered by BrainOS. This manual may be periodically updated or
revised. The robotic scrubber can be used in manual mode or in robotic (self-driving/autonomous) mode. Use
in robotic mode requires a subscription to Brain Corp’s Autonomy Services. Follow all provided instructions
and warnings. Failure to adhere to directions could result in damage to the machine and injury to the operator
and public.
Brain Operating System (BrainOS) is the name of Brain Corp’s artificial intelligence (AI) and autonomous
navigation software that provides robotic operating capabilities to the robotic scrubber. ICE China is Intelligent
Cleaning Equipment Holdings Co. Ltd., a British Virgin Islands limited company, having its principal place of
business at Sea Meadow House, P.O. Box 116, Blackburne Highway, Road Town, Tortola, British Virgin Islands.
ICE RS26 ROBOTIC SCRUBBER DESCRIPTION
The ICE RS26 Robotic Scrubber is a commercial floor scrubber that is powered by BrainOS software. The
robotic scrubber is capable of functioning in either manual or robotic mode. When in robotic mode, the robotic
scrubber is driven by the BrainOS navigation software. This manual uses the term robotic mode, which is
equivalent to autonomous mode.
The robotic scrubber may be covered by one or more patents or pending patent applications. See www.
braincorporation.com/patents for details. Discrete portions of this product were made possible by open source
software. See www.braincorp.com/open-source-attributions for details.
I NTENDED USE AND PRECAUTIONS
The robotic scrubber is a collaborative robot that is intended for supervised commercial use. Use the robotic
scrubber exclusively on hard floors in an indoor environment. Do not use on soil, grass, artificial turf, or
carpeted surfaces. Only use the robotic scrubber with accessories approved by Brain Corp or ICE. The
robotic scrubber should only be used by operators trained by Brain Corp or Brain Corp-approved trainers in a
controlled, restricted environment approved by Brain Corp.
Additional training materials may be provided as to the intended use of the robotic scrubber, and it should only
be used in accordance with such training. Use the machine in approved environments in accordance with the
Autonomy Services Agreement (ASA) and the Autonomous Navigation Software End User License Agreement
(EULA).
The operator is responsible for the use of the robotic scrubber in both manual and robotic mode. Therefore,
each operator must be mindful to use the machine in accordance with its intended use, precautions, and
warnings at all times. Operators will not engage in any of the following conduct or activities with respect to
Autonomy Services or BrainOS:
a. Transmission of any software or other materials that contain any viruses, worms, trojan horses, defects,
spyware, spiders, screen-scrapers, or other items of a destructive or disruptive nature;
b. Exploitation of the Autonomy Services, BrainOS, or the machine’s hardware in any unauthorized manner,
including trespassing or burdening server or network capacity or infrastructure;
c. Framing, mirroring, or reselling any part of the Autonomy Services or BrainOS without Brain Corp’s
prior written authorization;
d. Unauthorized collection of user information;
e. Attempting to deliberately damage or undermine the legitimate operation of the Autonomy Services or
BrainOS;
f. The machine’s onboard cameras may capture images of people who happen to be in its surrounding.
There may be additional jurisdictional laws of operation relating to use of technology with cameras.
Please comply with all applicable laws, including using signage or obtaining consents as required.

3
V4.0419 • Content Subject to Change
I NTRODUCTION
Read completely and understand this manual before operating or servicing the
machine.
This robotic scrubber offers superior service and delivers best results when:
• Operated with reasonable care.
• Appropriately and regularly maintained, as per maintenance instructions provided.
• Recommended accessories are used, such as squeegee blades, scrub brushes/pads, etc.
P ROTECT THE ENVIRONMENT
Dispose of packaging materials, used batteries, and fluids in an environmentally
safe way according to local waste disposal regulations. Remember to recycle.
Pay special attention when any of the following symbols/indicators are used in this manual.
WARNING:Notification of hazards or unsafe practices that could result in physical or property
damage, physical injury, or death.
Provides specific steps or actions that must be followed to ensure safe operation of the robotic
scrubber and/or its components.
Provides helpful tips and tricks to maximize the use of the robotic scrubber.
NOTE:Provides additional information for reference.

V4.0119 • Content Subject to Change
4
C ONTENTS
IMPORTANT SAFETY INSTRUCTIONS 6
GENERAL SAFETY 6
ENVIRONMENTAL SAFETY 7
OPERATIONAL SAFETY 8
MAINTENANCE AND SERVICE SAFETY 9
ROBOTIC SCRUBBER COMPONENTS 10
MACHINE SETUP 14
UNCRATING MACHINE 14
OPERATION OF CONTROLS 15
DIRECTIONAL SWITCH 15
VACUUM BUTTON 15
ONE-TOUCH BUTTON 15
SOLUTION FLOW CONTROL 16
WATER FLOW CONTROL 16
BRUSH PRESSURE CONTROL 16
START/PAUSE BUTTON 17
EMERGENCY STOP BUTTON 17
UI (USER INTERFACE) TOUCHSCREEN 17
HOW THE MACHINE WORKS 18
PRE-OPERATION CHECKS 19
MANUAL MODE OPERATION 20
DOUBLE SCRUBBING (MANUAL MODE ONLY) 21
ROBOTIC MODE OPERATION 22
ESTABLISH HOME LOCATION CODES 21
REGION 23
ROC: ROBOT OPERATIONS CENTER 24
PAIR APHONE TO THE ROC 24
LEARNING CENTER 25
TEACH AROBOTIC ROUTE 26

5
V4.0419 • Content Subject to Change
C ONTENTS
RUN AROBOTIC ROUTE 29
ALERTS DURING OPERATION 31
EMERGENCY STOP 33
DELETE AROUTE 34
AFTER USE 36
DRAIN AND CLEAN TANKS 36
CLEAN SQUEEGEES 38
CLEAN SENSORS 38
PARKING AND STORAGE 39
CHARGE BATTERIES 40
TROUBLESHOOTING TIPS 41
MAINTENANCE 43
MAINTENANCE CHART 43
PERIMETER SKIRTS 44
TANK SEALS 44
RECOVERY TANK SEAL 44
CLEAN WATER TANK SEAL 44
SQUEEGEES 45
ROTATE OR REPLACE SIDE SQUEEGEE BLADES 45
ROTATE OR REPLACE REAR SQUEEGEE BLADES 46
ADJUST SIDE SQUEEGEE HEIGHT 47
ADJUST REAR SQUEEGEE HEIGHT 48
SCRUB BRUSHES AND PADS 49
ROTATE OR REPLACE SCRUB BRUSHES/PADS 49
BRAKE RELEASE PROCEDURE 50
SPECIFICATIONS 51

V4.0119 • Content Subject to Change
6
G ENERAL SAFETY
• Operators must be appropriately trained on the use of the robotic scrubber.
• Operators must read and understand this manual before operating or maintaining the robotic scrubber.
• Train all personnel who will be operating the robotic scrubber. The robotic scrubber is not intended for
users with reduced physical, sensory, or mental capabilities, nor by untrained users.
• Report any damage or faulty operation immediately. Do not use the robotic scrubber if it is damaged in any
way.
• Avoid moving parts.
• Do not allow children to play with the robotic scrubber.
• Do not use the robotic scrubber in a manner other than what is described in this manual.
• Do not clean with a pressure washer.
• Only plug the external charger into an outlet with an appropriate electrical rating: 100 to 240V, 50/60 Hz,
8 A. In North America, the standard grounded outlet emits 120V, which is in the appropriate electrical
rating.
• Do not disconnect the offboard charger’s DC cord from the machine’s receptacle when the charger is
operating. Arcing may result. If battery charging must be interrupted, disconnect the AC power supply
cord first.
• Do not pull on the battery charger cord to unplug. Grasp plug at outlet and pull.
• Only use approved batteries and chargers. Use of unapproved parts may impair safety and potentially
damage the machine and/or cause a fire.
I MPORTANT SAFETY
I NSTRUCTIONS
K EEP THESE INSTRUCTIONS
The following safety labels are attached to the machine. Replace any damaged or missing labels.
Located directly in front of the operator seat. Located underneath the operator seat.

7
V4.0419 • Content Subject to Change
I MPORTANT SAFETY
I NSTRUCTIONS
E NVIRONMENTAL SAFETY
• The robotic scrubber is not designed or intended for use in environments requiring fail-safe performance
including, but not limited to any application in which failure of the robotic scrubber could lead directly to
death, personal injury, or severe physical or property damage.
• Do not use on soil, grass, artificial turf, or carpeted surfaces.
• Indoor use only.
• Do not use on public paths or roads.
• The robotic scrubber should only be used to scrub flat, hard surfaces with little to no inclines (up to 2%
incline when operating in manual mode; 0% incline when operating in robotic mode).
• All drops, stairs, escalators, moving platforms, or cliffs near the robotic scrubber must be guarded by a
physical barrier when operating in robotic mode.
• Do not use temporary elevated platforms (e.g. ladders or scaffolds) near the robotic scrubber during
operation.
• Do not leave electrical cords or low-profile items (e.g. items with a height of less than 7 inches [18
centimeters] from the ground) in the robotic scrubber’s area of operation.
• Place Wet Floor signs in areas where the robotic scrubber is operating. See the ASA and EULA for further
uses and restrictions.
• Operating and storage temperature is 35°F - 100°F (2°C - 38°C).
• Store indoors in a dry environment.
• Use caution when moving the robotic scrubber into or out of areas that are below freezing temperatures.
Any water in the tanks or hoses can cause damage to the robotic scrubber.
• Park and store the robotic scrubber on a level surface only.
• Some objects may be difficult for the robotic scrubber to detect, such as diffusive black finishes, highly
polished/reflective surfaces, or Plexiglas. Avoid cleaning in robotic mode where these objects are present.
• Avoid using the robotic scrubber in proximity to other products that are sensitive to electromagnetic noise.
• Do not use in low traction environments (e.g. ice, oil, etc.).
• Avoid use in environments where stopping could result in a safety risk, such as blocking an emergency
exit.
• Avoid use in environments with inconsistent terrain texture (excessively bumpy) or many floor transitions.

V4.0119 •Content Subject to Change
8
I MPORTANT SAFETY
I NSTRUCTIONS
O PERATIONAL SAFETY
•Keep hands and feet clear of moving parts while the robotic scrubber is in operation.
•Locate and make sure all safety devices (e.g. operator seat sensor, yellow safety straps, and emergency
stop buttons) are in place and fully functional.
•All doors and covers must be positioned as indicated in the instruction manual before using the robotic
scrubber.
•Keep all third parties, especially children and animals, at least 3 feet away from the machine during
operation.
•The operator is responsible for supervising and monitoring safe operation of the robotic scrubber.
•Do not ride the robotic scrubber when it is operating in robotic mode.
•Do not grab the steering wheel when operating in robotic mode, as it may move rapidly and unexpectedly.
•All wheels/tires need to be in contact with the floor at all times. Avoid abrupt maneuvers while using in
manual mode.
•Do not use flammable cleaning agents.
•Do not operate the robotic scrubber near flammable materials such as solvents, thinners, fuels, grain
dust, etc. Electric motors and components can cause an explosion when operated near explosive materials
or vapors.
•The robotic scrubber is not suitable for picking up hazardous substances.
•Use appropriate personal protective equipment, as recommended by the cleaning chemical safety data
sheet, when adding cleaning chemicals or draining fluids.
•Observe the legal directives and local regulations for disposal of cleaning chemicals or detergents.
•In case of accidental contact or spillage of cleaning chemicals or detergents, follow guidelines provided by
the manufacturer.
•Only use brushes/pads provided with the robotic scrubber or those specified by Brain Corp or ICE. Use of
unauthorized brushes/pads may impair safety and potentially damage the robotic scrubber.
•Do not leave the robotic scrubber unattended without first turning the ignition key off and removing
the key. When the robotic scrubber is operating in robotic mode, remove the ignition key to prevent
unauthorized use.
•Drain all tanks and hoses prior to storing the robotic scrubber.
•Prevent unauthorized use of the robotic scrubber by storing with the ignition key removed.
•Do not charge batteries when open flames or sparks are present. Do not smoke.
•If the battery charger or power supply cord is damaged, it must be replaced. Do not use damaged parts.

9
V4.0419 • Content Subject to Change
M AINTENANCE AND SERVICE SAFETY
• Repairs and specified maintenance tasks must be performed by authorized personnel only.
• Only use approved replacement parts. Use of unapproved parts may impair safety and potentially damage
the machine.
• Read all instructions before performing any service or maintenance function.
• Take precautions to prevent hair, jewelry, or loose clothing from becoming caught in moving parts.
• Only work on the machine when it is parked on a level surface and appropriately stabilized via safety
blocks or support stands, if necessary.
• Do not lay tools or metal objects on top of the batteries.
• Remove all jewelry, watches, and other conductive materials when working near electrical components.
• Dispose of depleted batteries that can no longer be recharged in accordance with your local environmental
regulations.
I MPORTANT SAFETY
I NSTRUCTIONS

V4.0119 • Content Subject to Change
10
ROBOTIC SCRUBBER
C OMPONENTS
# COMPONENT DESCRIPTION
1 Hose Fill Clean Water Port Input for clean water
2 Clean Water Tank Holds clean water received via Hose Fill Clean Water Port
3 Scrub Deck Deck that raises/lowers scrub brush during cleaning
4 Rear Squeegee Removes debris and liquid from floor during cleaning
5 Side Perimeter Skirt Protects the machine from oversized debris
6 Side Squeegee Removes debris and liquid from floor during cleaning
7 Lower LIDAR Constantly surveys the machine’s surroundings for obstacles
8 Accelerator Pedal Press to drive the machine
9 Brake Pedal Press if fast stopping is needed or operating on an incline
10 Front 3D Camera Constantly surveys the machine’s surroundings for obstacles
11 Front 2D Camera Constantly surveys the machine’s surroundings for obstacles
12 Upper LIDAR Constantly surveys the machine’s surroundings for obstacles
1
2
3
4
5
7
8
9
10
11
12
6

11
V4.0419 • Content Subject to Change
ROBOTIC SCRUBBER
C OMPONENTS
# COMPONENT DESCRIPTION
13 Emergency Stop Button Press to immediately stop the machine in emergency situations
14 Side 3D Camera Constantly surveys the machine’s surroundings for obstacles
15 Side 2D Camera Constantly surveys the machine’s surroundings for obstacles
16 Battery Charger Receptacle Input for battery charger’s DC cord
17 Front Drive Wheel Drives the machine when the accelerator pedal is pressed
18 Front Perimeter Skirt Protects the machine from oversized debris
19 10 Inch Wheels Rear wheels and tires (one on each side)
20 Solution Level View Window View window that shows the volume of solution
21 Solution Port Input for approved cleaning solution
22 Recovery Tank Recipient of vacuum’s dirty water and debris
23 Recovery Tank Cover Provides sealed cover for Recovery Tank
24 Retractable Safety Straps Yellow safety straps that block off the operator seat
19
20
21
22
23
2413
14
16
17
18
15

V4.0119 • Content Subject to Change
12
ROBOTIC SCRUBBER
C OMPONENTS
#COMPONENT DESCRIPTION
25 Warning Light Signals machine operation
26 Rear Signal Lights Signals turns during robotic operation
27 Start/Pause Button Press to begin or pause a robotic route
28 Recovery Tank Drain Hose Use to empty the Recovery Tank
29 Clean Water Tank Drain Hose Use to empty the Clean Water Tank
30 Vacuum Hose Hose where vacuumed debris flows from the floor to the Recovery Tank
31 Front Signal Lights Signals turns during robotic operation
32 UI (User Interface) Touchscreen Provides user access to BrainOS software
33 Cup Holder Holds cup
34 Operator Seat Seat for manual operation or joyride prevention during robotic operation
35 Seat Adjustment Handle Use to adjust the operator seat forward or backward
36 Steering Wheel Use to steer the machine
37 Control Panel Consists of a number of manual controls for customized scrubbing
37
36
35
34
31
32
33
25
26
28
29
30
27

13
V4.0419 • Content Subject to Change
R OBOTIC SCRUBBER
COMPONENTS
# COMPONENT DESCRIPTION
38 Ignition Key Switch Turns machine on and off
39 Directional Switch Controls whether the machine drives forward or backward
40 Vacuum Button Turns the vacuum on and off
41 One-Touch Button Engages all cleaning components (scrub brush, vacuum, & squeegee)
42 Horn Button Press to sound the machine’s horn
43 Brush Pressure Control Regulates the amount of scrub brush pressure used during cleaning
44 Water Flow Control Regulates flow of water discharged during cleaning
45 Solution Flow Control Regulates flow of solution discharged during cleaning
46 Emergency Stop Button Press to immediately stop machine in emergency situations
38
39
40 41
42
43
44
45
46

V4.0119 • Content Subject to Change
14
MACHINE SETUP
U NCRATING MACHINE
Perform the following steps to uncrate the machine:
1. Check the packing crate and immediately report
any damage to the carrier.
2. Remove the top and side walls from the pallet.
3. Check the contents of the crate to ensure all
items are included.
4. Place the top board on the edge of the pallet by
the rear of the machine.
5. Make sure that the scrub brush and squeegee
assemblies are securely attached.
6. Lift the operator seat and prop open to expose
the battery compartment.
7. Remove the tape from the two red battery
connectors and attach together.
8. Lower the operator seat.
9. Sit on the operator seat, insert the ignition key
and turn to the right (clockwise) to turn on the
machine.
10. Make sure the scrub brush and squeegee
assemblies are raised.
11. Press the down arrow of the directional switch.
12. Slowly drive the machine backwards off the ramp
and onto the floor.

15
V4.0419 • Content Subject to Change
O PERATION OF CONTROLS
D IRECTIONAL SWITCH
The directional switch controls whether the robotic scrubber drives
forward or backward when the accelerator pedal is pressed. The
up arrow instructs the machine to drive forward. The down arrow
instructs it to drive backward. When a direction is selected, the
corresponding arrow light will illuminate. When the down arrow is
pressed, the squeegee will automatically raise to prevent damage.
NOTE:BE SURE TO INSPECT THE FLOOR FOR ANY RESIDUAL WATER AFTER DRIVING THE MACHINE
BACKWARD.
V ACUUM BUTTON
Pressing the Vacuum button turns the vacuum on. When the vacuum
is turned on and the directional switch is set to forward, the Vacuum
button’s indicator light illuminates and the squeegee automatically
lowers. When the vacuum is turned off, the squeegee will stay down
for a few seconds and then raise. The vacuum continues to run for up
to 15 seconds and then turns off.
O NE-TOUCH BUTTON
The One-Touch button engages the scrub brush, vacuum, and
squeegee, allowing for immediate operation of the machine. When
pressed, the One-Touch button’s indicator light illuminates, the scrub
brush and squeegees are lowered, and the vacuum turns on. The
machine is now ready to scrub. When scrubbing is complete, press
the One-Touch button again to disengage cleaning operations. The
indicator light turns off and the scrub brush will rise off the floor. The
squeegee will remain down for a few seconds and then rise as well.
After the squeegee has risen, the vacuum will remain on for a few
additional seconds to clear any remaining water in the hose and then
turn off.
O PERATION

V4.0119 • Content Subject to Change
16
S OLUTION FLOW CONTROL
The solution flow control regulates the amount of cleaning detergent or
solution that is discharged during cleaning. Solution is not dispensed
by the machine unless the One-Touch button is selected. The solution
flow control defaults to the lowest setting every time the machine is
turned on, as cleaning needs may change from day-to-day. For low
soilage conditions, set the solution flow control on the lowest setting.
For moderate or heavy soilage, set the solution flow control higher, as
needed.
W ATER FLOW CONTROL
The water flow control regulates the amount of water that is discharged
during cleaning. Water is not dispensed by the machine unless the One-
Touch button is selected. The water flow control defaults to the lowest
setting every time the machine is turned on, as cleaning needs may
change from day-to-day. For low soilage conditions, set the water flow
control on the lowest setting. For moderate or heavy soilage, set the
water flow control higher, as needed.
B RUSH PRESSURE CONTROL
The brush pressure control regulates the amount of scrub brush
pressure (down force) used during cleaning. The scrub deck is not
lowered unless the One-Touch button is selected. The brush pressure
control defaults to the lowest setting every time the machine is turned
on, as cleaning needs may change from day-to-day. For low soilage
conditions, set the brush pressure control to the lowest setting. For
moderate or heavy soilage, set the brush pressure control higher, as
needed.
O PERATION

17
V4.0419 • Content Subject to Change
S TART/PAUSE BUTTON
The machine is equipped with a Start/Pause button on the back that
is used to start a robotic route or pause an in-process robotic route.
When an existing navigation route is selected on the UI touchscreen, the
Start/Pause button flashes. When pressed to start the route in robotic
mode, the Start/Pause button stops flashing and remains consistently
illuminated during robotic operation. The Start/Pause button is not
illuminated when operating the machine in manual mode.
E MERGENCY STOP BUTTONS
The machine is equipped with two emergency stop buttons, one on the
control panel and one on the recovery tank cover on the rear of the
machine. Only use the emergency stop buttons in emergency situations,
as this potentially releases fluids onto the floor causing a slipping hazard.
Press either emergency stop button in an emergency to halt the machine
power. Twist the same emergency stop button used to stop the machine
to the right to disengage the emergency stop function. (See Emergency
Stop for details.)
UI (USER INTERFACE) TOUCHSCREEN
The machine is equipped with BrainOS software that is accessible via the UI (User Interface) touchscreen
located to the left of the steering wheel. BrainOS technology offers a robotic route feature that provides the
ability for the machine to perform floor cleaning by following one of the saved navigation routes without direct,
real-time operator control.
When the machine is turned on, the BrainOS software will automatically initialize. Once initialized, a security
PIN must be entered to access BrainOS software and use its robotic functionality.
O PERATION

V4.0119 •Content Subject to Change
18
H OW THE MACHINE WORKS
The robotic scrubber is capable of both manual and robotic operation, thanks to BrainOS technology. A
subscription to Brain Corp’s Autonomy Services is required to use the machine’s robotic functions.
The machine consists of a solution bottle, clean water tank, scrub brushes or pads, squeegees, vacuum fan,
and recovery tank that all work together to provide efficient floor scrubbing. The Vacuum button turns the
vacuum on/off and raises/lowers the squeegees. The One-Touch button engages the solution, clean water,
vacuum, scrub brushes/pads, and squeegees with the press of a single button. The solution flow, water flow,
and brush pressure levels are configurable via their corresponding controls on the control panel. This allows
customized cleaning based on current cleaning needs.
The directional switch and steering wheel determine the direction the machine travels, while the accelerator
pedal controls the speed of the machine. Releasing pressure entirely from the accelerator pedal causes the
machine to stop. Pressing the brake pedal will immediately stop the machine.
The machine is equipped with BrainOS software that is accessible via the UI (User Interface) touchscreen.
BrainOS technology offers a robotic mode feature that provides the ability for the machine to perform floor
cleaning by following one of the saved navigation routes without direct, real-time operator control. The
machine can only operate in robotic mode in areas where cleaning routes have been taught and saved. It
allows an operator to teach the scrubber new cleaning routes, run existing cleaning routes in robotic mode,
and access triggered alert messages and notifications. It also provides constant visibility to the current
battery life, number of hours the machine has operated, and Robotic Operation Center (ROC) connection
status.
Home Location Codes must be permanently installed before you can begin using the machine in robotic
mode. A Home Location Code is a unique scan code identifier that the machine scans to determine its current
location, as well as any routes that have been saved to that specific Home Location Code. The machine is
designed to work with up to 10 Home Location Codes. Each Home Location Code can store up to 6 routes for a
total of 60 routes.
When operating in standard manual mode, solution and clean water are dispensed on the floor as the machine
is driven. The scrub brushes/pads scrub this combination as the machine travels forward. The side squeegees
help control the path of the fluids. The rear squeegee collects the dirty water. The vacuum picks up this dirty
water and transports it to the recovery tank.
When operating in double scrubbing mode, solution and clean water are dispensed on the floor as the machine
is manually driven. The scrub brushes/pads scrub this combination as the machine travels forward. However,
the squeegees and vacuum are not engaged when double scrubbing. This allows the cleaning solution to
remain on the floor longer for a deeper clean.
O PERATION

19
V4.0419 • Content Subject to Change
O PERATION
P RE-OPERATION CHECKS
Before using the ICE RS26 Robotic Scrubber, always perform the following checks to ensure proper operation:
□Clear all obstacles from the areas to be cleaned to ensure maximum floor coverage.
□Be sure you understand the functions of all components of the machine.
□Check the horn, warning light, and front and rear signal lights to ensure proper operation.
□Check the machine for fluid leaks.
□Check the tank cover seals for damage and excessive wear.
□Drain and clean the recovery tank, if necessary.
□Clean the vacuum fan inlet filter, if necessary.
□Check the vacuum hose for debris or blockage; flush out any obstacles.
□Check the squeegee blades for damage, excessive wear, and deflection. Rotate or replace as needed.
□Check that the scrub brushes/pads is properly installed and is clean of restricting debris such as string,
banding, plastic wrap, etc.
□Make sure the batteries are fully charged and free of damage.
□Check the brakes and steering to ensure proper operation.
□Check that all cameras and LIDARs are clean and free of dust, dirt, and smudges. Clean with the
provided microfiber cloth, as needed.
□Fill the clean water tank with clean water via the hose fill clean water port of the left side of the machine
or via the bucket-fill port located under recovery tank. If using the bucket-fill port, ensure the recovery
tank is empty before accessing.
□Using appropriate personal protective equipment, fill the solution bottle with an approved cleaning
solution.
Before using any cleaning chemicals:
1) Review the Safety Data Sheet (SDS) for the cleaning chemical.
2) Use appropriate personal protective equipment, as recommended by the cleaning chemical
SDS or chemical company.
3) Follow instructions and noted precautions in the SDS and on the container.
4) Provide appropriate cleaning chemical safety training.
WARNING:Do not put any flammable materials into the solution bottle or clean water tank. This
can cause an explosion or fire.

V4.0119 • Content Subject to Change
20
M ANUAL MODE OPERATION
Before turning on the robotic scrubber, make sure it is fully charged and free of damage.
Perform the following steps to manually operate the machine:
1. Disconnect the AC power supply from the outlet
and then from the external battery charger.
2. Disconnect the DC cord from the machine’s
battery charger receptacle.
3. Fill the solution bottle with an approved cleaning
solution.
4. Fill the clean water tank with clean water via the
hose fill clean water port on the left side of the
machine or via the bucket-fill port located under
the recovery tank. If using the bucket-fill port,
make sure the recovery tank is empty before
accessing.
5. Sit in the operator seat, insert the ignition key
and turn to the right (clockwise) to turn on the
machine. Wait for the UI touchscreen to initialize.
6. Enter the 4-digit PIN via the UI touchscreen.
Upon successful PIN entry, the UI touchscreen
displays the Main Menu.
7. Press the One-Touch button to engage the
cleaning components.
8. Select the desired cleaning settings using the
solution flow, water flow, and brush pressure
controls.
9. Press the up arrow of the directional switch to
drive forward.
NOTE: THE MACHINE CAN ONLY SCRUB WHEN
DRIVING FORWARD.
10. Press the accelerator pedal to begin scrubbing.
Speed is adjusted via the force applied to the
pedal - light is slow, heavy is fast.
NOTE: COMPLETE REMOVAL OF PRESSURE
FROM THE ACCELERATOR PEDAL STOPS THE
MACHINE. PRESS THE BRAKE PEDAL IF FAST
STOPPING IS NEEDED OR IF OPERATING ON AN
INCLINE OR DECLINE.
11. When finished scrubbing, remove pressure from
the accelerator pedal and press the One-Touch
button to disengage the cleaning components.
The cleaning components will turn off after a
brief delay.
O PERATION
Table of contents
Other Brain Corp Scrubber manuals
Popular Scrubber manuals by other brands
Crescent
Crescent SC250 troubleshooting guide

Truvox
Truvox Orbis MotorScrubber 20 user manual
Nederman
Nederman WeldFilter EC10 instruction manual
LEMA
LEMA KSM 1050 TRANSLATION OF ORIGINAL INSTRUCTIONS

Lavor
Lavor SPRINTER il lavasciuga manual

SapphireScientific
SapphireScientific Dri-Eaz HVE3000 owner's manual
