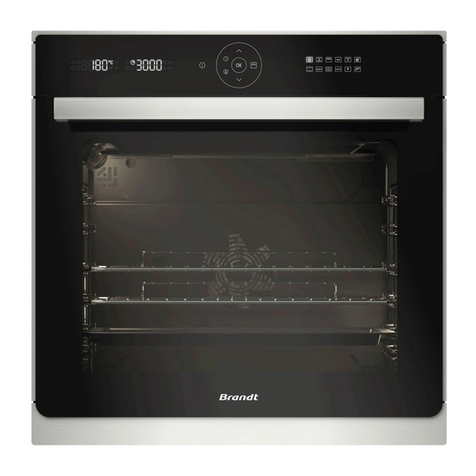
Brandt BKC7142LX Installation instructions

BVCert.6011825
CZ2100068_00
USER INSTRUCTION EN
OVEN

Contents
https://brandt.com/
BVCert.6011825
Important:
Before switching on your appliance, please read this guide carefully in order to fa-
miliarize yourself more quickly with its operation.
The label "Origine France Garantie" assures the consumer the traceabi-
lity of a product by giving a clear and objective indication of source. The
BRANDT brand is proud to ax this label on products from our French
factories based in Orléans and Vendôme.
Dear Client,
You have just purchased a BRANDT product and we thank you for the trust you
have placed in us.
We designed and manufactured this product with you, your lifestyle, your needs in
mind, so that it best meets your expectations. We put our know-how, our spirit of
innovation and all the passion that has driven us for over 60 years.
In a permanent concern to always better satisfy your requirements, our consumer
service is at your disposal and at your disposal to answer all your questions or
suggestions.
Also log on to our website www.brandt.com where you will nd our latest
innovations, as well as useful and complementary information.
BRANDT is happy to support you on a daily basis and wishes you to fully enjoy your
purchase.

3
Contents
SAFETY INSTRUCTIONS .................................................................4
ENVIRONMENT AND ENERGY SAVING ......................................7
Environment ...................................................................................... 7
Energy saving advice....................................................................... 7
INSTALLATION OF YOUR DEVICE ................................................7
Choice of location and installation................................................ 7
Electrical connection ....................................................................... 8
DESCRIPTION OF YOUR DEVICE .................................................9
Presentation of the oven ................................................................. 9
Display and control keys ................................................................ 10
Accessories...................................................................................... 11
USING YOUR DEVICE.................................................................13
Settings............................................................................................. 13
Settings menu.................................................................................. 14
Cooking modes .............................................................................. 17
The Flavor Guide function.............................................................. 19
CARING FOR YOUR DEVICE......................................................20
Interior - exterior cleaning.............................................................. 20
Faults and solutions......................................................................... 20
AFTER SALES SERVICE ................................................................22
Interventions .................................................................................... 22

4
Safety instructions
When you receive the appliance,
unpack it or have it unpacked im-
mediately. Check its general appea-
rance. Make a note of any reserva-
tions on the delivery slip and keep
a copy.
This appliance must be installed
more than 850mm up o the ground.
In order to avoid overheating, the ap-
pliance must not be installed behind
a decorative door.
Centre the oven in the unit so as to
ensure a minimum distance of 10
mm between the appliance and the
surrounding unit The material of the
unit supporting the appliance must
be heat-resistant (or covered with a
heat-resistant material). For greater
stability, attach the oven to the unit
with 2 screws through the holes pro-
vided on the side panels.
It must be possible to disconnect
the appliance from the power sup-
ply, either using a plug or by tting
a switch on the xed wiring system
in accordance with installation rules.
The electrical plug must remain ac-
cessible after installation.
If the power cable is damaged, it
should be replaced by the manufac-
turer, its after-sales service depart-
ment or by a similarly qualied per-
son in order to avoid danger.
WARNING:
It is dangerous for anyone other
than a qualied person to perform
maintenance or repairs that requires
the removal of the cover providing
protection against exposure to mi-
crowave power.
This appliance is designed to cook
with the door closed.
This appliance is designed to be
used for domestic and similar ap-
plications such as: kitchen areas for
the sta of shops, oces and other
professional premises; farms; use
by clients of hotels, motels and other
residential type establishments;
guest house type environments.
This appliance may be used by
children aged 8 years and older, and
by persons with impaired physical
sensorial or mental capacities, or
without experience or knowledge,
if they are supervised or have re-
ceived prior instructions on how to
use the appliance safely and have
understood the risks involved.
Children must not be allowed to
play with the appliance. Cleaning
and maintenance operations must
not be carried out by children wit-
hout supervision.
Children must be supervised to
prevent them from playing with the
appliance.
IMPORTANT SAFETY INSTRUCTIONS - READ CAREFULLY
AND RETAIN FOR FUTURE USE.
This user guide is available for download on the brand’s website.

5
Safety instructions Safety instructions
WARNING :
The appliance and its accessible
parts become hot during use. Be
careful not to touch the heating ele-
ments inside the oven. Children un-
der 8 years old must not be allowed
near it unless they are supervised at
all times.
WARNING:
If the appliance is being used in
combination mode, it is recom-
mended that children only use the
oven under adult supervision due to
the temperatures generated.
Only use utensils suitable for usage
in microwave ovens.
Metal food and beverage containers
are not permitted for microwave
cooking.
The microwave oven is designed to
heat food and drinks.
Drying food or linen or heating
cushions, slippers, sponges, wet
linen and other similar items may
cause injury, risk of inammation or
re.
WARNING:
Liquids and other foods must not be
heated in sealed containers, as they
may explode.
While heating food items in plastic
or paper containers, monitor the mi-
cro-wave’s contents, since there is a
risk of spontaneous combustion.
If smoke appears, stop or unplug
the oven and leave the door closed
to smother any ames that may ap-
pear.
Heating beverages in the microwave
oven can cause the sudden and/or
delayed splattering of boiling liquid,
so care must be taken when hand-
ling their containers.
The contents of baby bottles and
baby food jars must be stirred or
rearranged and the temperature
must be checked before consump-
tion, so as to prevent burning.
It is not recommended to heat eggs
in their shells or whole hardboiled
eggs in a microwave oven, as they
may explode, even after cooking
has ended.
It is recommended that you clean
your oven regularly and to remove
any food build-up.
If the appliance is not cleaned re-
gularly, its surface could become
damaged, permanently aecting the
appliance’s lifespan and possibly
causing a safety hazard.
WARNING:
If the door or door seal is damaged,
the oven should not be used until it
has been repaired by an authorised
person.
Do not use abrasive cleaning pro-
ducts or hard metal scrapers for
cleaning the oven’s glass door, as
they could scratch the surface and
cause the glass to shatter.
Do not use a steam cleaner.

Installing your device Environment and energy saving
6
Environment and energy saving Installing your device
ENERGY SAVING ADVICE
Keep the oven door closed during cooking.
ENVIRONMENT
The packaging materials for this device are re-
cyclable. Participate in their recycling and thus
contribute to the protection of the environment by
depositing them in the municipal containers provi-
ded for this purpose.
Your device also contains many recy-
clable materials. It is therefore mar-
ked with this logo to indicate that
used devices must not be mixed with
other waste.
The recycling of the devices organized
by your manufacturer will therefore
be carried out under the best conditions, in ac-
cordance with the European directive in force on
waste electrical and electronic equipment.
Contact your town hall or your retailer to nd the
collection points for used appliances closest to
your home.
Thank you for your cooperation in protecting the
environment.

Installing your device Environment and energy saving
7
Installing your device
CHOICE OF LOCATION AND FITTING
The diagrams determine the dimensions of a
piece of furniture that will accommodate your
oven. This device can be installed either in
column (A) or under plan (B). If the cabinet
is open, its opening must be 70 mm maximum
at the back (C and D). Secure the oven in the
cabinet. To do this, remove the rubber stops
and pre-drill a Ø 2 mm hole in the wall of the
furniture to prevent the wood from splintering.
Secure the oven with the 2 screws.
Replace the rubber stops.
Tip
To be certain that you have properly ins-
talled your appliance, do not hesitate to call
on a household appliance specialist.
Warning :
If the electrical installation in your residence
requires any changes in order to hook up
your appliance, contact a professional elec-
trician.If the oven malfunctions in any way,
unplug the appliance or remove the fuse cor-
responding to the sector where the oven is
hooked up.
447
550
547
550 450
AB
Warning :
This device must be installed more than
850 mm from the ground. It can be ins-
talled in column as shown on the installa-
tion diagram (g. A).
If the bottom of the furniture is open, the
space between the wall and the board on
which the oven rests must be a maximum
of 70 mm (g.B).

Presentation of your device
8
Installing your device Installing your device
Presentation of your device
Neutral
(N)
Phase
(L)
Blue
wire
Green / yellow wire
Black, brown or
red wire
WARNING
The safety wire (green-yellow) is connected
to the appliance’s terminal and must be
connected to the earth terminal of the elec-
trical set-up.
The fuse in your set-up must be 16 amperes.
ELECTRICAL CONNECTION
Your oven must be connected with a (standard)
power cable with 3 conductors of 1.5mm2 (1 live
+ 1 neutral + earth) which must be connected to
a 220-240V~ single-phase grid by means of a 1
live + 1 neutral + earth CEI 60083 standard power
socket or via an all-poles cut-o device in com-
pliance with the installation rules.
We cannot be held responsible for any acci-
dent resulting from inexistent, defective or
incorrect earthing.

Presentation of your deviceInstalling your device Installing your device
9
Presentation of your device
PRÉSENTATION OF THE OVEN
1
2
3
A
B
C
Control panel
Door
Handle
A
B
C
DISPLAY AND CONTROL KEYS
• Control panel
COOKING MODE SELECTOR SETTING SELECTOR
A B
AB

10
Presentation of your device Presentation of your device
• keys
• Display
DISPLAY AND CONTROL KEYS
timer
End of cooking
Cooking time
Keypad lock
Temperature indicator
Power indicator
Weight
Turntable stop
Keypad lock
Validation
Control +
control -
Add +30 seconds to cooking time

11
Presentation of your device Presentation of your device
Tip:
An d’éviter le dégagement de fumées du-
rant la cuisson de viandes grasses, nous vous
recommandons d’ajouter une faible quantité
d’eau ou d’huile au fond de la lèche-frites.
ACCESSORIES
• Anti-tip safety grid
This allows you to toast, brown or grill.
The rack should never be used with other metal
cookware on the microwave, grill + microwave or
forced air + microwave modes.
However, you can reheat food in an aluminium
tray providing this is isolated from the rack using
a plate.
• Multi-purpose tray, drip tray.
This can be used half-lled with water for
double-boiler cooking methods in
fan cooking. It can be used as a cooking dish.
to roast and retain the cooking juices, place the
rack on the drip tray.
• Rack + Multi-purpose tray, drip tray.
• The shelf supports
2 hanging supports allow you to use the rack at
three heights.

Using your device Using your device
12
Presentation of your device Presentation of your device
It may be used as a cooking dish. For easy removal, wells are provided on either side.
Rotation is controlled by the drive shaft and the wheel support.
If you take out the support with the drive spindle, make sure you do not let water get into the motor
spindle orifice.
Remember to put back the support, the support wheels and the glass turntable.
When the turntable is in the stop position, large dishes can be used which cover the entire surface
of the oven. In this case, it is necessary to turn the container or to mix its content half-way through
the programme.
Warning
Do not try to rotate the glass turntable manually, as you could damage the drive system. If
it does not turn smoothly, make sure that there is nothing in the well beneath the turntable.
The turntable ensures equal cooking of food throughout with no need to intervene.
It rotates in both directions. If it does not turn, verify that all components are properly positioned.
• The turntable
If you think that there is not enough space for it to rotate freely in the oven, you can stop the turntable
before or during the programme.
Press the for a few seconds.
The symbol symbol appears in the display.
• Restarting the turntable
Press for a few seconds until the symbol appears in the display.
• CONTROLLING THE TURNTABLE
ACCESSORIES

13
Using your device Using your devicePresentation of your device Presentation of your device
SETTINGS
Set the time using the + and - buttons. Conrm with the OK key.
In the event of a power failure, the time ashes. Make the same adjustment.
Turn the adjustment lever to the "SETTINGS" position.
Using the + and - keys navigate through the dierent parameters, select "TIME" and conrm with the OK
key. Change the time and conrm with the OK button.
Return the lever to the zero position.
Turn the adjustment lever to the "TIMER" position. The timer ashes.
Set the timer with the + or - buttons. Validate with the OK key the countdown starts. Once the time has
elapsed, an audible signal sounds. To stop it, press any key.
• Setting the time
• Changing the time
• Timer
When the power is turned on, the display ashes at 12:00.
The function lever must be in position 0

14
Using your device Using your device
To unlock it, press the button again until the symbol disappears from the screen.
You can intervene on dierent parameters of your oven for this:
Turn the adjustment lever to the "ADJUSTMENTS" position. Using the + and - keys navigate through the
dierent parameters scrolling on the screen.
CLOCK :
Allows setting or modication of the time.
SOUNDS - BEEPS - KEYS:
ON position, active sounds.
OFF position, no sounds.
DEMO MODE:
ON position, function activated, demonstration mode used in exhibition.
OFF position, function deactivated, your oven is operational.
• Keypad lock (child lock)
SETTINGS MENU
Press the key until the symbol is displayed on the screen.
Press the OK key to conrm your choice. Using the + and - keys activate or deactivate the various pa-
rameters, see table.

15
Using your device Using your device
SETTINGS MENU
To exit the “Settings menu” put function lever in position 0.
BRIGHTNESS:
Adjusts the brightness of the display.
DISPLAY STANDBY:
ON position, display o after few minutes.
OFF position, reduction of display brightness after few minutes.
LANGUE :
FR/EN/OFF(no text displayed)
The temperature rise starts immediately. The time indicator shows you how long the oven has been run-
ning. The oven heats up and the temperature indicator ashes. A series of beeps sounds when the oven
reaches the set temperature.
The display should not ash.Turn the setting knob to the power mode.
Turn the function knob to the Microwave mode and then turn the adjustment knob to the +/- power posi-
tion. Adjust the power with the + or - button. Conrm by pressing OK.
• Changing the temperature
Turn the temperature control knob. The temperature display ashes, adjust the temperature with the +
or - keys. Conrm by pressing OK.
• Adjusting the power of a microwave cooking process

16
Using your device Using your device
Cook immediately and then turn the knob for a longer period of time.
The time display ashes and the setting can be made. Use the + or - button to set the cooking time,
conrm with OK.
• Setting the cooking time
• Changing the end of cooking time
Turn the adjusting knob to the end time. The end time display ashes, setting is then possible. Adjust with
the + or - keys to set the end of cooking time, conrm with the OKkey.

17
Using your device Using your device
COOKING MODES:
This oven gives you access to 4 dierent types of cooking modes :
- The microwave function.
- The combined microwave functions (microwave + traditional cooking).
- Traditional cooking functions.
- Automatic cooking functions.
Rapid heating of drinks, water and dishes contai-
ning a large amount of liquid.
Cooking of foods containing a lot of water (soups,
sauces, tomatoes, etc...).
Turn the function knob to the +/- Microwave position, then turn the adjustment knob to the +/- Power
position. Adjust the power with the + or - button. Conrm by pressing OK.
Cooking of fresh or frozen vegetables.
Warming on 2 levels.
Cooking of dried vegetables on low heat. Rehea-
ting or cooking of fragile egg-based foods.
Cooking of dairy products and jams over a low
heat.
1000W
900W/800W
500W
200W
100W
Manual defrosting. Soften butter, ice cream.
• MICROWAVE FUNCTIONS
700W
600W
Cooking sh and shellsh.
400W/300W
Defrosting pastries containing cream.
Caution : Do not use
the
Multi-purpose
tray, drip tray.
Melting chocolate

18
Using your device Using your device
COOKING MODES
FAN COOKING + MICROWAVE
( min 50°C maxi 200°C)
(min 100W maxi 300W)
MEDIUM GRILL + MICROWAVE
(Level Grill min 1 maxi 4)
( min 100W maxi 700W)
This function lets you use the grill and the mi-
cro-wave simultaneously, which makes cooking
very quick.
This function lets you cook and brown foods such
as gratin dishes and meats.
It can be used before or after cooking, depending
on the recipe.
• COMBINED MICROWAVE FUNCTIONS
DEFROSTING + MICROWAVE
(min 30°C maxi 50°C)
(200W)
This function combines microwave cooking with
fan cooking to save you a considerable amount of
time. Recommended for meat, chicken and roasts
placed in a dish.
FULL GRILL + MICROWAVE
(Level Grill min 1 maxi 4)
(min 100W maxi 700W)
Cooking in full grill + microwave to g and sh.
• TRADITIONAL COOKING FUNCTIONS
GRILL FULL GRILL
(position 1 à 4)
PULSED FULL GRILL
(min 50°C maxi 200°C)
Roasts and poultry are juicy and crisp all over.
To retain the moist texture of sh steaks.
Fan cooking*
(min. 50°C max. 220°C)
Recommended to keep the softness of white
meats, sh, vegetables.
Recommended to keep their fondant to the sh
steaks.
Rapid rise in temperature: some dishes can be
placed in a cold oven.
Note: In combination with the microwave
you can use the
Multi-purpose tray, drip
tray
with the grill.

19
Using your device Using your device
• THE AUTOMATIC DEFROSTING FUNCTIONS
• FLAVOR GUIDE
This oven allows you to access 3 dierent types of programmes in the defrost mode
- Automatic defrost P1, P2 or P3.
You simply select the type of programme and enter the weight.
P1: The automatic defrost mode for meat, poultry and ready-made meals.
P2: The automatic defrost mode for sh.
P3: The automatic defrost mode for bread and pastries.
NB: A delayed start cannot be programmed for defrost functions.
The timer should only display the time. The time should not ash.
- Select
- Select automatic defrosting using the + and - buttons and conrm by pressing OK.
- A proposed weight ashes on the display.
Example: P3 --> weight, 100G.
-Adjust the weight using the + and - keys.
Example: 350g.
- Conrm by pressing OK.
- The pictogram of the baking used and the automatically calculated time are displayed. The oven starts.
The "Flavour Guide" function selects for you the appropriate cooking parameters according to the food
to be prepared and its weight.
Turn the function knob to Flavour Guide. Use the + and - keys to select a pre-programmed food from the
following list:
Conrm by pressing the OK button. A proposed
weight ashes on the screen. Use the + and -
keys to enter the actual weight of the food and
press OK to conrm.
The ideal cooking time is displayed and calcu-
lated automatically.
The oven starts.
COOKING MODES
Food
14 Recipes
Fibrous fresh vegetables P01
Fresh vegetables P02
Frozen vegetables P03
Poultry (combined function) P04
Beef (combined function) P05
Fish P06
Fresh pizza (combined function) P07
Frozen pizza (combined function) P08
Frozen pizza (Traditional cooking) P09
Prepared fresh meal (Microwave) P10
Prepared frozen meal P11
Prepared fresh meal (combined function) P12
Savoury tart P13
Potato gratin quiche P14

Using your device Caring for your device
20
Caring for your device Function suitability tests
ANOMALIES AND SOLUTIONS
The appliance does not start.
Check the correct connection of your appliance.
Check that the oven door is closed properly.
The appliance is noisy.
The tray does not rotate properly.
Clean the castors and the bearing area under
the turntable.
Check that the castors are correctly positioned.
You notice steam on the glass.
Wipe off the condensation water with a cloth.
The food is not heated in the microwave
programme.
Check that the utensils are suitable for
microwave ovens and that the power level is
correct.
The appliance produces sparks.
Clean the appliance thoroughly: remove
grease, cooking particles, etc.
Keep all metal parts away from the walls of the
oven.
The oven does not heat up.
Check that the oven is properly connected or
that the fuse of your installation is not out
of order. Check that the oven is not set to
"DEMO" mode (see settings menu).
Warning
Do not use scouring cleansers, abrasive sponges or metal scrapers to clean the oven glass
door, as this could scratch the surface and cause the glass to shatter.
For any intervention on the lamp, contact the After-Sales Service or a qualied professional who is a
trademark agent.
LAMP REPLACEMENT
CLEANING THE EXTERIOR SURFACE
We recommend that you clean the oven regularly and remove any food deposits inside
and outside the appliance. Use a damp, soapy sponge. If the appliance is not kept clean,
its surface could degrade and inexorably affect its life and lead to a dangerous situation.
The use of abrasive products, alcohol or thinner is not recommended; they may damage the
appliance.
If the door or door seal is damaged, the oven must not be used until it has been repaired by a
competent person.
If there is an odour or the oven is dirty, boil water with lemon juice or vinegar in a cup for 2
minutes and clean the walls with a little washing-up liquid.
The tray can be removed for easy cleaning. To do so, take it out through the access areas provided.
If you remove the driver, avoid getting water into the hole in the motor shaft. Do not forget to put
the trainer, the roller holder and the turntable back on.
CLEANING OF THE INSIDE SURFACE
Table of contents
Other Brandt Oven manuals

Brandt
Brandt FE610-ML Instruction Manual

Brandt
Brandt BOE1000X User manual

Brandt
Brandt FP 228 Guide

Brandt
Brandt Four User manual

Brandt
Brandt FC-26MEW User manual

Brandt
Brandt BOC8000X User manual

Brandt
Brandt BXE6538XS User manual

Brandt
Brandt BXP6575XS User manual

Brandt
Brandt BKFC2070X User manual

Brandt
Brandt BKS7131BB User manual

Brandt
Brandt FC 224 User manual

Brandt
Brandt BXP6575X User manual

Brandt
Brandt BXP6332X User manual

Brandt
Brandt BOH7534BB User manual

Brandt
Brandt BXP6575X User manual

Brandt
Brandt FC16C Series User manual

Brandt
Brandt Kleenmaid TO60X Owner's manual

Brandt
Brandt BXP6555XS User manual

Brandt
Brandt FE1222X User manual

Brandt
Brandt BFC8500X User manual