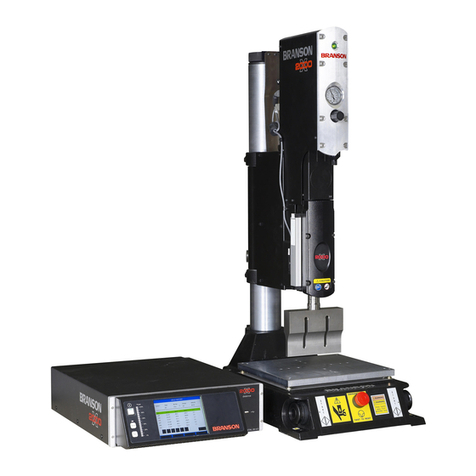
Branson Emerson Ultraseal 20 User manual

ii DCM00051 REV. 10
Manual Change Information
At Branson, we strive to maintain our position as the leader in ultrasonics metal welding,
plastics joining, cleaning, and related technologies by continually improving our circuits
and components in our equipment. These improvements are incorporated as soon as they
are developed and thoroughly tested.
Information concerning any improvements will be added to the appropriate technical
documentation at its next revision and printing. Therefore, when requesting service
assistance for specific units, note the Revision information found on this document, and
refer to the printing date which appears on this page.
Copyright and Trademark Notice
Copyright © 2022 Branson Ultrasonics Corporation. All rights reserved. Contents of this publication may not be
reproduced in any form without the written permission of Branson Ultrasonics Corporation.
Any trademarks and service marks mentioned herein are held by their respective owners.

DCM00051 REV. 10 iii
Foreword
Congratulations on your choice of a Branson system!
The Branson Ultraseal 20 Series system is process equipment for the joining of metal
parts using ultrasonic energy. It is the newest generation of product using this
sophisticated technology for a variety of customer applications. This Operating Manual is
part of the documentation set for this system, and should be kept with the equipment.
Thank you for choosing Branson!
Introduction
This manual is arranged into several structured chapters which will help you find the
information you may need to know to safely handle, install, set up, program, operate,
and/or maintain this product. Please refer to the Table of Contents of this manual to find
the information you may be looking for. In the event you require additional assistance or
information, please contact our Product Support department (see 1.4 How to Contact
Branson for information on how to contact them) or your local Branson representative.

iv DCM00051 REV. 10

DCM00051 REV. 10 v
Table of Contents
Chapter 1: Safety and Support
1.1 Safety Requirements and Warnings . . . . . . . . . . . . . . . . . . . . . . . . . . . . . . . . . . . 2
1.2 General Precautions. . . . . . . . . . . . . . . . . . . . . . . . . . . . . . . . . . . . . . . . . . . . . . 4
1.3 Warranty . . . . . . . . . . . . . . . . . . . . . . . . . . . . . . . . . . . . . . . . . . . . . . . . . . . . . 5
1.4 How to Contact Branson . . . . . . . . . . . . . . . . . . . . . . . . . . . . . . . . . . . . . . . . . . . 7
1.5 Returning Equipment for Repair . . . . . . . . . . . . . . . . . . . . . . . . . . . . . . . . . . . . . 8
1.6 Obtaining Replacement Parts . . . . . . . . . . . . . . . . . . . . . . . . . . . . . . . . . . . . . . .10
Chapter 2: The Ultraseal 20 Actuator
2.1 Models Covered. . . . . . . . . . . . . . . . . . . . . . . . . . . . . . . . . . . . . . . . . . . . . . . . .12
2.2 Overview of These Models . . . . . . . . . . . . . . . . . . . . . . . . . . . . . . . . . . . . . . . . .13
2.3 Features. . . . . . . . . . . . . . . . . . . . . . . . . . . . . . . . . . . . . . . . . . . . . . . . . . . . . .15
2.4 Controls . . . . . . . . . . . . . . . . . . . . . . . . . . . . . . . . . . . . . . . . . . . . . . . . . . . . . .16
2.5 Ultrasonic Theory . . . . . . . . . . . . . . . . . . . . . . . . . . . . . . . . . . . . . . . . . . . . . . .17
2.6 Terminology . . . . . . . . . . . . . . . . . . . . . . . . . . . . . . . . . . . . . . . . . . . . . . . . . . .23
Chapter 3: Shipping and Handling
3.1 Shipping and Handling . . . . . . . . . . . . . . . . . . . . . . . . . . . . . . . . . . . . . . . . . . . .28
3.2 Receiving and Unpacking . . . . . . . . . . . . . . . . . . . . . . . . . . . . . . . . . . . . . . . . . .29
3.3 Returning Equipment . . . . . . . . . . . . . . . . . . . . . . . . . . . . . . . . . . . . . . . . . . . . .30
Chapter 4: Installation and Setup
4.1 About Installation . . . . . . . . . . . . . . . . . . . . . . . . . . . . . . . . . . . . . . . . . . . . . . .32
4.2 Handling and Unpacking. . . . . . . . . . . . . . . . . . . . . . . . . . . . . . . . . . . . . . . . . . .33
4.3 Take Inventory of Small Parts. . . . . . . . . . . . . . . . . . . . . . . . . . . . . . . . . . . . . . .34
4.4 Installation Requirements. . . . . . . . . . . . . . . . . . . . . . . . . . . . . . . . . . . . . . . . . .35
4.5 Installation Steps . . . . . . . . . . . . . . . . . . . . . . . . . . . . . . . . . . . . . . . . . . . . . . .40
4.6 Safety Devices . . . . . . . . . . . . . . . . . . . . . . . . . . . . . . . . . . . . . . . . . . . . . . . . .44
4.7 Ultrasonic Stack Assembly . . . . . . . . . . . . . . . . . . . . . . . . . . . . . . . . . . . . . . . . .45
4.8 Testing the Installation . . . . . . . . . . . . . . . . . . . . . . . . . . . . . . . . . . . . . . . . . . .48
4.9 Still Need Help?. . . . . . . . . . . . . . . . . . . . . . . . . . . . . . . . . . . . . . . . . . . . . . . . .49
Chapter 5: Technical Specifications
5.1 Technical Specifications . . . . . . . . . . . . . . . . . . . . . . . . . . . . . . . . . . . . . . . . . . .52
Chapter 6: Operation
6.1 Actuator Controls . . . . . . . . . . . . . . . . . . . . . . . . . . . . . . . . . . . . . . . . . . . . . . .54
6.2 Initial Actuator Settings . . . . . . . . . . . . . . . . . . . . . . . . . . . . . . . . . . . . . . . . . . .55
6.3 Operating the Actuator. . . . . . . . . . . . . . . . . . . . . . . . . . . . . . . . . . . . . . . . . . . .58
6.4 Safety Circuit Alarms . . . . . . . . . . . . . . . . . . . . . . . . . . . . . . . . . . . . . . . . . . . . .60
Chapter 7: Maintenance
7.1 Periodic and Preventive Maintenance . . . . . . . . . . . . . . . . . . . . . . . . . . . . . . . . . .62
7.2 Calibration . . . . . . . . . . . . . . . . . . . . . . . . . . . . . . . . . . . . . . . . . . . . . . . . . . . .65
7.3 Troubleshooting . . . . . . . . . . . . . . . . . . . . . . . . . . . . . . . . . . . . . . . . . . . . . . . .68
7.4 Parts Lists . . . . . . . . . . . . . . . . . . . . . . . . . . . . . . . . . . . . . . . . . . . . . . . . . . . .73

DCM00051 REV. 10 9
List of Figures
Chapter 1: Safety and Support
Figure 1.1 Safety Label found on the Ultraseal 20 actuator . . . . . . . . . . . . . . . . . . . . . . . . . . 3
Figure 1.2 CE Mark . . . . . . . . . . . . . . . . . . . . . . . . . . . . . . . . . . . . . . . . . . . . . . . . . . . . . . 5
Chapter 2: The Ultraseal 20 Actuator
Figure 2.1 The Ultraseal 20 Actuator . . . . . . . . . . . . . . . . . . . . . . . . . . . . . . . . . . . . . . . . . .13
Figure 2.2 How does Ultrasonic Welding Work? . . . . . . . . . . . . . . . . . . . . . . . . . . . . . . . . . .17
Figure 2.3 Weld Power Graph for clean components, dirty components and when part is
missing . . . . . . . . . . . . . . . . . . . . . . . . . . . . . . . . . . . . . . . . . . . . . . . . . . . . . .19
Figure 2.4 Pressure Variable with Increased Power . . . . . . . . . . . . . . . . . . . . . . . . . . . . . . . .19
Figure 2.5 Pressure Variable with Increased Time . . . . . . . . . . . . . . . . . . . . . . . . . . . . . . . . .20
Figure 2.6 Scrubbing Action on Weld Interface . . . . . . . . . . . . . . . . . . . . . . . . . . . . . . . . . . .20
Figure 2.7 Amplitude’s Influence on Weld Power and Time. . . . . . . . . . . . . . . . . . . . . . . . . . .21
Figure 2.8 Harmonic Resonance on Ultrasonic Tooling. . . . . . . . . . . . . . . . . . . . . . . . . . . . . .21
Chapter 3: Shipping and Handling
Chapter 4: Installation and Setup
Figure 4.1 Controller Dimensional Drawing (VersaGraphiX) . . . . . . . . . . . . . . . . . . . . . . . . . .36
Figure 4.2 Controller Dimensional Drawing (Touch Screen) . . . . . . . . . . . . . . . . . . . . . . . . . .37
Figure 4.3 Ultraseal 20 Actuator Dimensional Drawing . . . . . . . . . . . . . . . . . . . . . . . . . . . . .38
Figure 4.4 Connections on Rear of a VersaGraphiX Controller. . . . . . . . . . . . . . . . . . . . . . . . .40
Figure 4.5 Connections on Rear of a Touch Screen Controller. . . . . . . . . . . . . . . . . . . . . . . . .40
Figure 4.6 Electrical Connections from Controller to an Ultraseal 20 Actuator . . . . . . . . . . . . . .42
Figure 4.7 Setting Height Proximity Switch . . . . . . . . . . . . . . . . . . . . . . . . . . . . . . . . . . . . .43
Figure 4.8 Exploded Ultrasonic Stack Assembly . . . . . . . . . . . . . . . . . . . . . . . . . . . . . . . . . .46
Figure 4.9 Mounting the Stack on the Ultraseal 20 Actuator . . . . . . . . . . . . . . . . . . . . . . . . . .47
Chapter 5: Technical Specifications
Chapter 6: Operation
Figure 6.1 Tool Gap Setting . . . . . . . . . . . . . . . . . . . . . . . . . . . . . . . . . . . . . . . . . . . . . . . .57
Chapter 7: Maintenance
Figure 7.1 Cutting and Crash Gap . . . . . . . . . . . . . . . . . . . . . . . . . . . . . . . . . . . . . . . . . . . .63
Figure 7.2 Exploded Ultrasonic Stack Assembly . . . . . . . . . . . . . . . . . . . . . . . . . . . . . . . . . .64
Figure 7.3 Encoder Board Calibration . . . . . . . . . . . . . . . . . . . . . . . . . . . . . . . . . . . . . . . . .65
Figure 7.4 Stack Feeler Gage . . . . . . . . . . . . . . . . . . . . . . . . . . . . . . . . . . . . . . . . . . . . . . .67
Appendix A: Ultraseal 20 Interconnect Diagram
Figure A.1 Ultraseal 20 Interconnect Diagram . . . . . . . . . . . . . . . . . . . . . . . . . . . . . . . . . . .76
Appendix B: Declaration of Conformity
Figure B.1 Declaration of Conformity. . . . . . . . . . . . . . . . . . . . . . . . . . . . . . . . . . . . . . . . . .78

10 DCM00051 REV. 10

DCM00051 REV. 10 11
List of Tables
Chapter 1: Safety and Support
Chapter 2: The Ultraseal 20 Actuator
Table 2.1 Calculating Power . . . . . . . . . . . . . . . . . . . . . . . . . . . . . . . . . . . . . . . . . . . . . . .18
Table 2.2 Calculating Energy. . . . . . . . . . . . . . . . . . . . . . . . . . . . . . . . . . . . . . . . . . . . . . . 18
Chapter 3: Shipping and Handling
Table 3.1 Environmental Requirements . . . . . . . . . . . . . . . . . . . . . . . . . . . . . . . . . . . . . . .28
Table 3.2 Inspecting the Ultraseal 20 Actuator upon delivery . . . . . . . . . . . . . . . . . . . . . . . .29
Chapter 4: Installation and Setup
Table 4.1 Standard small parts included with Controller and/or Actuator . . . . . . . . . . . . . . . .34
Table 4.2 Environmental Specifications . . . . . . . . . . . . . . . . . . . . . . . . . . . . . . . . . . . . . . . 35
Table 4.3 Input Power requirements . . . . . . . . . . . . . . . . . . . . . . . . . . . . . . . . . . . . . . . . .38
Chapter 5: Technical Specifications
Table 5.1 Environmental Specifications . . . . . . . . . . . . . . . . . . . . . . . . . . . . . . . . . . . . . . . 52
Table 5.2 Ultraseal 20 Actuator Performance Specifications . . . . . . . . . . . . . . . . . . . . . . . . .52
Chapter 6: Operation
Table 6.1 Preferred Copper Tube Properties . . . . . . . . . . . . . . . . . . . . . . . . . . . . . . . . . . . .55
Table 6.2 Tooling Torque Check. . . . . . . . . . . . . . . . . . . . . . . . . . . . . . . . . . . . . . . . . . . . .56
Table 6.3 Start Point Reference for Various Tube Sizes. . . . . . . . . . . . . . . . . . . . . . . . . . . . .58
Chapter 7: Maintenance
Table 7.1 Ultrasonic Stack Assembly items . . . . . . . . . . . . . . . . . . . . . . . . . . . . . . . . . . . . .64
Table 7.2 Troubleshooting Chart . . . . . . . . . . . . . . . . . . . . . . . . . . . . . . . . . . . . . . . . . . . .68
Table 7.3 Available Accessories . . . . . . . . . . . . . . . . . . . . . . . . . . . . . . . . . . . . . . . . . . . . .73
Table 7.4 Primary Spare Items . . . . . . . . . . . . . . . . . . . . . . . . . . . . . . . . . . . . . . . . . . . . .73
Appendix A: Ultraseal 20 Interconnect Diagram
Appendix B: Declaration of Conformity

12 DCM00051 REV. 10

DCM00051 REV. 10 1
Chapter 1: Safety and Support
1.1 Safety Requirements and Warnings. . . . . . . . . . . . . . . . . . . . . . . . . . . 2
1.2 General Precautions . . . . . . . . . . . . . . . . . . . . . . . . . . . . . . . . . . . . . . . 4
1.3 Warranty. . . . . . . . . . . . . . . . . . . . . . . . . . . . . . . . . . . . . . . . . . . . . . . . 6
1.4 How to Contact Branson. . . . . . . . . . . . . . . . . . . . . . . . . . . . . . . . . . . . 7
1.5 Returning Equipment for Repair. . . . . . . . . . . . . . . . . . . . . . . . . . . . . . 8
1.6 Obtaining Replacement Parts. . . . . . . . . . . . . . . . . . . . . . . . . . . . . . . 10

2 DCM00051 REV. 10
1.1 Safety Requirements and Warnings
This chapter contains an explanation of the different Safety Notice symbols and icons
found both in this manual and on the product itself and provides additional safety
information for ultrasonic welding. This chapter also describes how to contact Branson
Metal Welding for assistance.
1.1.1 Symbols Found in This Manual
These symbols used throughout the manual warrant special attention:
WARNING Indicates a possible damaging situation
If these risks are not avoided, death or severe injury might result.
CAUTION Indicates a possible danger
If these risks are not avoided, slight or minor injury might result.
NOTICE Indicates a possible damaging situation
If this situation is not avoided, the system or something in its vicinity
might get damaged.
Application types and other important or useful information are
emphasized.

DCM00051 REV. 10 3
1.1.2 Symbols Found on the Product
The Ultraseal 20 Actuator has several warning labels on it to alert the user of items of
concern or hazard. The following warning symbols appear on the Ultraseal 20 Actuator:
Figure 1.1 Safety Label found on the Ultraseal 20 actuator

4 DCM00051 REV. 10
1.2 General Precautions
Take the following precautions before servicing the Controller:
• To prevent the possibility of an electrical shock, always plug the Controller into a grounded power
source
• Controllers produce high voltage. Before working on the power supply module, do the following:
• Turn off the Controller;
• Unplug main power; and
• Allow at least 2 minutes for capacitors to discharge
• High voltage is present in the Controller. Do not operate with the cover removed
• High line voltages exist in the ultrasonic power supply module. Common points are tied to circuit
reference, not chassis ground. Therefore, use only non-grounded, battery-powered multimeters
when testing these modules. Using other types of test equipment can present a shock hazard
• Be sure power is disconnected from the Controller before setting a DIP switch
• Keep hands from under the horn. Up force (pressure) and ultrasonic vibrations can cause injury
• Do not cycle the welding system if either the RF cable or converter is disconnected
• Avoid situations where fingers could be pinched between the horn and the Anvil
• Do not operate the system without guards or covers in place
CAUTION
Be sure the power switch is in the Off position before making any
electrical connections.
WARNING
Sound level emissions of up to 84.9 dB have been measured using a
standard test load. To prevent the possibility of hearing loss, use
appropriate hearing protection.
NOTICE
Sound level and frequency of the noise emitted during the ultrasonic
assembly process may depend upon a. type of application, b. size,
shape and composition of the material being assembled, c. shape and
material of the holding fixture, d. welder setup parameters and e.
tool design. Some parts vibrate at an audible frequency during the
process. Some or all of these factors may result in sound levels of up
to 84.9 dB. In such cases operators may need to be provided with
personal protective equipment. See 29 CFR (Code of Federal
Regulations) 1910.95 Occupational Noise Exposure. For all other
countries, follow your local regulations.

DCM00051 REV. 10 5
1.2.1 Intended Use of the System
The Branson Metal Welding Controller and Ultraseal 20 Actuator are components of an
ultrasonic welding system. These are designed to crimp, cut and seal copper tubing.
1.2.2 Regulatory Compliance
The Branson Ultraseal 20 Actuator is designed to be in compliance with the following U.S.
regulatory and agency guidelines and standards:
• ANSI Z535.1 Safety Color Code
• ANSI Z535.3 Criteria for Safety Symbols
• ANSI Z535.4 Product Safety Signs and Labels
• ANSI Z535.6 Product Safety Information in Product Manuals, instructions
• NFPA 70 National Electric Code Article 670 Industrial Machinery
• NFPA 79 Electrical Standard for Industrial Machinery
• 29 CFR 1910.212 OSHA General Requirements for all machines
• 47 CFR Part 18 Federal Communications Commission
The Branson Ultraseal 20 Actuator is designed to be in compliance with the following
European standards as specified by the Directives issued by the European Parliament and
The Council of the European Union:
• Machinery Directive 2006/42/EC
• Low Voltage Directive 2014/35/EU
• EMC Directive 2014/30/EU
• BS EN ISO 13850 Safety of Machinery - Emergency stop equipment, Functional aspects -
Principles for design
• EN ISO 12100 Safety of Machinery - Risk assessment - Part 1: Principles
• EN 13849-1 Safety of Machinery - Safety Related Parts of Control Systems.
• EN 55011 Limits and methods of measurement of radio disturbance of industrial, scientific and
medical radio-frequency equipment
• EN 60204-1 Safety of Machinery - Electrical Equipment of machines
• EN 61000-6-2 Electromagnetic Compatibility - Generic standards - Immunity for industrial
environments
• EN 61310-2 Safety of Machinery - Indication, marking, actuation
All Ultraseal 20 Actuators are CE Compliant (see Figure 1.2 below).
Figure 1.2 CE Mark

6 DCM00051 REV. 10
1.3 Warranty
For warranty information please reference the warranty section of Terms and Conditions
found at: www.emerson.com/branson-terms-conditions.

DCM00051 REV. 10 7
1.4 How to Contact Branson
Branson is here to help you. We appreciate your business and are interested in helping
you successfully use our products. To contact Branson for help, use the following
telephone numbers, or contact the field office nearest you.
•Brookfield Main Number (all Departments): (203) 796-0400 (Eastern Time Zone)
•Parts Store: Direct Number for Parts Store in Brookfield (203) 796-9807
Tell the operator which product you have and which person or department you need. If
after hours, please leave a voice message with your name and return telephone number.
1.4.1 Before Calling Branson for Assistance
This manual provides information for troubleshooting and resolving problems that could
occur with the equipment (see Chapter 7: Maintenance). If you still require assistance,
Branson Product Support is here to help you. To help identify the problem, use the
following questionnaire which lists the common questions you will be asked when you
contact the Product Support department.
Before calling, determine the following information:
1. Your company name and location
2. Your return telephone number
3. Have your manual with you
4. Know your equipment model and serial numbers (found on a gray data label on the units).
Information about the Horn (part number, gain, etc.) or other tooling may be etched into the
tooling. Software- or firmware-based systems may provide a BIOS or software version number,
which may be required
5. What tooling (horn) and booster are being used?
6. What are the setup parameters and mode?
7. Is your equipment in an automated system? If so, what is supplying the “start” signal?
8. Describe the problem; provide as much detail as possible. For example, is the problem
intermittent? How often does it occur? How long before it occurs if you are just powering up? If
an error is occurring, which error (give error number or name)?
9. List the steps you have already taken
10. What is your application, including the materials being processed?
11. Have a list of service or spare parts you have on hand (tips, horns, etc.)
12. Notes:___________________________________________________________________
_________________________________________________________________________
_________________________________________________________________________

8 DCM00051 REV. 10
1.5 Returning Equipment for Repair
Before sending equipment for repair, provide as much information with the equipment to
help determine the problem with the system. Use the following page to record necessary
information.
If you are returning equipment to Branson for repair, you must first call the Repair
department to obtain a Returned Goods Authorization (RGA) number. (If you request
it, the repair department will fax a Returned Goods Authorization form to fill out and
return with your equipment.)
Branson Repair Department
120 Park Ridge Road
Brookfield, Connecticut 06804 U.S.A.
direct telephone number: (203) 796-0575
fax number: (203) 796-0574
• Provide as much information as possible that will help identify the need for repair
• Carefully pack the equipment in original packing cartons
• Clearly label all shipping cartons with the RGA number on the outside of cartons as well as on
your packing slip, along with the reason for return
• Return general repairs by any convenient method. Send priority repairs by air freight
• You must prepay the transportation charges FOB Brookfield, Connecticut, U.S.A.
1.5.1 Get an RGA Number
RGA# _____________
If you are returning equipment to Branson, please call the Repair Department to obtain a
Returned Goods Authorization (RGA) number. (At your request, the Repair Department
will fax an RGA form to fill out and return with the equipment).
1.5.2 Record Information About the Problem
Before sending equipment for repair, record the following information and send a copy of it
with the equipment. This will greatly increase Branson’s ability to address the problem.
1. Describe the problem; provide as much detail as possible.
For example, is the problem intermittent? How often does it occur? How long before it occurs
after powering up?
_______________________________________________________________________
_______________________________________________________________________
_______________________________________________________________________
_______________________________________________________________________
NOTICE
To return equipment to Branson, you must first obtain an RGA
number from a Branson representative, or the shipment may be
delayed or refused.

DCM00051 REV. 10 9
2. Is your equipment in an automated system? NO / YES
3. If the problem is with an external signal, which signal? ______________________
If known, include plug/pin # (e.g., P29, pin #3) for that signal: _________________
4. What are the Weld Parameters?
_______________________________________________________________________
_______________________________________________________________________
5. What is your application? (Type of weld, metal material, etc.)
_______________________________________________________________________
6. Name and phone number of the person most familiar with the problem:
_______________________________________________________________________
_______________________________________________________________________
7. Contact the Branson office prior to shipping the equipment.
8. For equipment not covered by warranty, to avoid delay, include a Purchase Order.
Send a copy of this page with the equipment being returned for repair.
1.5.3 Contact Information
Call your local Branson Metal Welding Representative, or contact Branson by calling (203)
796-0400.
1.5.4 Pack and Ship the Equipment
1. Carefully pack the system in original packing material to avoid shipping damage. Plainly show
the RGA number on the outside of cartons as well as inside the carton along with the reason for
return. Make a list of all components packed in the box. KEEP YOUR MANUAL.
2. Return general repairs by any convenient method. Send priority repairs by air freight. Prepay the
transportation charges FOB the repair site (either the Branson field office or Brookfield,
Connecticut USA location).
NOTICE
Items that are sent Freight Collect will be refused.

10 DCM00051 REV. 10
1.6 Obtaining Replacement Parts
You can reach Branson Parts Store at the following telephone numbers:
• Direct Telephone Number: (203) 796-9807
• Fax number: (203) 926-2678
Many parts can be shipped the same day if ordered before 2:30 p.m., Eastern time.
A parts list is found in Chapter 7: Maintenance of this manual, listing descriptions and EDP
part numbers. If you need replacement parts, coordinate the following with your
purchasing agent:
• Purchase order number
• ‘Ship to’ information
• ‘Bill to’ information
• Shipping instructions (air freight, truck, etc.)
• Any special instructions (for example, “Hold at the airport and call”). Be sure to give a name and
phone number
• Contact name information
Table of contents
Other Branson Controllers manuals
Popular Controllers manuals by other brands

Oriental motor
Oriental motor FSP200-1 Connection and Operation Manual

Contro l4
Contro l4 AVM-HTC1-B Installation and user guide

Show Tec
Show Tec SCANMASTER 3 user manual

RainMaster
RainMaster DX3 quick start guide

KiWi Lighting
KiWi Lighting TopLedLight BY-CON-DR1680B manual

Contro l4
Contro l4 C4-4SF120 Series installation guide

United CoolAir
United CoolAir Marvel Plus Installation, operation and maintenance manual

M-Elec
M-Elec ML-2820-US3 quick start guide

iMAG Systems
iMAG Systems THUNDER TH800DS manual

Procom
Procom ECON-A operating instructions

Integrated Controls, Inc.
Integrated Controls, Inc. DMX-IT 12 user manual

Hobby-Wing
Hobby-Wing Platinum HV 200A SBEC V4.1 user manual