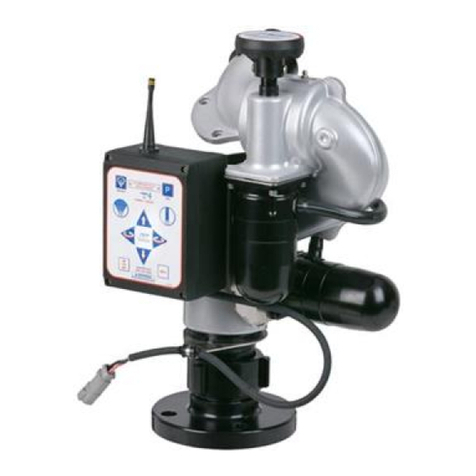
BRASS Akron Style 3414 Apollo Installation and operation manual

116737
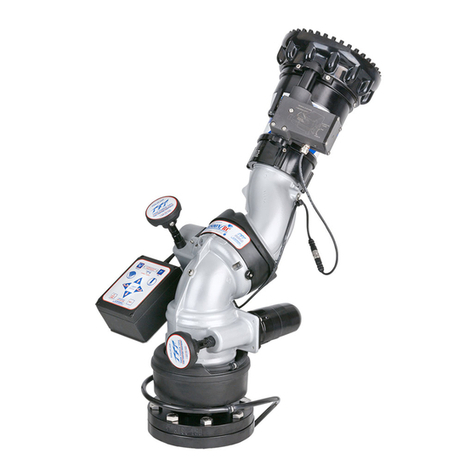
STYLE 3414 APOLLO™ S.I. MONITOR WITH FOLDING LEGS
OPERATING & MAINTENANCE INSTRUCTIONS
WITH SPECIAL L.A. COUNTY SPECIFICATIONS
The Akron Style 3414 Apollo Monitor is designed to provide efficient trouble-free operation for many years. The following operating
and maintenance instructions are provided to assist in obtaining the best possible performance for this unit.
PRODUCT RATINGS
Maximum Flow:
Style 3414 600 GPM (3800 LPM) Portable Base
1250 GPM (4800 LPM) Direct Mount
Maximum Pressure:
Style 3414 200 PSI (1380 Kpa, 13.8 BARS)
PRODUCT WARNINGS
WARNING: Read and follow the Warning Tag Instructions on the Lock Pin Lanyard.
WARNING: If an Upper Deck or similar device is used to raise the Apollo 18” above the height of the standard direct mount
flange, the increased loads must be taken into consideration when developing the structural support. Inadequate
structural support can result in damage to the inlet piping, causing injury to the operator or others.
WARNING: A 1/4turn shut off valve should not be used with the Apollo. If any other type of shut off valve is used, it must be
opened and closed slowly. Opening and closing a valve too quickly may result in damage to the Apollo and other
equipment, which can result in an injury to the operator or others.
WARNING: Read and follow the Safety Chain Warning Tag located on the Ground Mount Tag.
WARNING: Read and follow the Plunger Pin Caution Tag.
WARNING: Under freezing conditions the monitor must be drained to prevent damage.
WARNING: Read and follow the Tip Pressure Tag located on the Ground Mount Tag.
WARNING: Read and follow the Set Up Instruction Tag located on Inlet Body.
WARNING: Incorrect hose layout may cause instability.
GENERAL INSTRUCTIONS
While operating in the direct mount flange or portable base,
THE TWO CONNECTING PINS MUST BE FULLY ENGAGED AT ALL TIMES.
A. REMOVE THE MONITOR
To remove the monitor from either the direct connect flange base or portable base, hold
the monitor securely by the carrying handle and pull each lock pin straight out. (See Figure 1)

B. INSTALL THE MONITOR
To install the monitor onto either the direct connect flange base or the portable base, place the monitor
onto the appropriate base so that the holes in the ears are aligned. Then take one lock pin at a time and
insert it through the holes in the ears.
MAKE SURE BOTH PINS ARE FULLY ENGAGED BEFORE OPERATING. (See Figure 1)
When changing from the direct connect flange base to the portable flange base,
BE SURE THE OUTLET ELBOW IS ABOVE THE 35˚ VERTICAL SAFETY STOP.
ENSURE THAT ALL FOLDING LEGS ARE FULLY DEPLOYED BEFORE USE. This is essential for proper stability in the portable mode.
An adjustable safety chain with a hook is provided in the front of the portable base as an additional safety precaution. Connect the
hook to a rigid stationary object such as a parking meter, manhole, car wheel, etc., in front of the unit, and pull the chain tight.
DO NOT OPERATE THE UNIT IN THE PORTABLE BASE WITHOUT SAFETY CHAIN SECURED. To release the hook and/or lengthen the
chain, hold the spring loaded latch open and pull the chain through the eye of the hook.
OPERATING INSTRUCTIONS
When the Apollo monitor is used with the portable base on concrete, each spike must be “set” with the head of the safety hook, a
16 oz. hammer or equivalent. After the Apollo is hooked up and ready to flow, set the spikes in rotation by striking the hex head bolt,
over each ground spike, with a sharp blow from a hammer or another tool sufficient to drive the spike at least 1/8” (3mm) into the
concrete. This process must be repeated each time the unit is repositioned on a concrete surface. As with any portable monitor, the
Apollo should always be secured with the safety chain or ropes before using on any surface.
CAUTION: Wear safety glasses or face shield when setting the spikes.
The portable base is designed to grip by imbedding the ground spikes into the surface on which it is operating. These spikes will not
grip on metal, marble, or similar hard surfaces. Do not operate on these surfaces without securing the unit with rope or some other
stable means, in addition to the safety chain.
The ground spikes in the portable base are made of a special hardened tool steel to remain sharp through extended use. If, after use,
the flats on the ends of the spikes exceed 1/16” (1.5mm) diameter, the spikes must be sharpened or replaced. (See Maintenance
Instruction Section)
Each spike must be in uniform contact with ground surface at all times during use. Make sure that no large rocks or other debris are
under the portable base during use, for this may cause the spikes to come out of contact with the ground surface. The maximum
safe operating pressure for this unit is 200 PSI. (1400 kPa).
The Apollo monitor is designed with a safety stop at 35˚ above horizontal to maintain stability when used in the portable base. Do
not release the elevation stop and operate below that point unless the unit is secured in the direct connect flange base.
Figure 1
2

3
A. STYLES 3414 APOLLO S.I.
When used in the portable base, the unit should not be operated at more than 600 GPM. Therefore, do not exceed the following
discharge pressures with straight tips unless the unit is secured in the direct connect flange base:
Also, do not exceed 1000 GPM (3800 LPM) when using a fog nozzle, unless the unit is secured in the direct connect flange base.
Be sure the storz or swivel is attached securely.
For Use with 4”, 4-1/2” or 5” hose only.
Setup Instructions:
The following hose set-up must be used to provide necessary stability when operating the Style 3414. (See Figure 2)
Aim center leg toward target. Slide buckles to end of tie-down straps. Connect straps loosely around hose.
DO NOT tighten.
Set spikes with hammer.
Ensure lock pins are fully engaged.
Aim discharge upward.
Secure safety chain.
Charge hose slowly.
Tighten straps around hose until it contacts hose stop.
If unit moves while charging, reset spikes.
When the unit is operating in the portable base, do not attempt to move or pickup any part of the base itself, the hose loop, or
the 10 feet (3m) of straight hose ahead of the hose loop.
When the unit is stored in the direct base or truck mount, it is recommended that the nozzle or tips be lowered against a rigid
support or removed during transportation.
TIP SIZE PSI kPa
1 1/4” 80 550
1 1/2” 80 550

4
ROPE TIE DOWN METHOD
Important instructions for using the Style 3414 Apollo below 35° elevation in the portable mode.
WARNING - Read and follow the maximum discharge flow and pressure tag located on the ground base leg.
1. Use the Standard Apollo SI hose loop method with 4” or larger hose (see attached standard operating instructions.)
2. Using two ropes, (maximum 50 foot length of the standard LA County F.D. 1/2” Kern mantle rope - do not substitute) tie one end
through the eyelets of the left and front right legs, using a non-slip knot.
3. Tie the other end of each rope to an immovable object at no more than a 45° angle from the center front leg, using a
non-slip knot.
4. The standard Apollo SI safety chain must also be attached to an immovable object as a backup.
5. Once set-up, the monitor and hose should be pulled backwards to take some of the slack out of the ropes. Movement will occur
at elevations below 35°.
6. Aim the discharge upwards while charging the hose slowly, then lower the discharge to the desired elevation not going below 15°
above horizontal. Have the outlet pointed straight forward (in line with the center leg).
7. Do not sweep the discharge outside the angle of the tie-down ropes.
Figure 2
BUCKLE

WARRANTY AND DISCLAIMER: We warrant Akron Brass products for a period of five (5) years after purchase against defects in materials or workmanship. Akron Brass will repair or replace product
which fails to satisfy this warranty. Repair or replacement shall be at the discretion of Akron Brass. Products must be promptly returned to Akron Brass for warranty service.
We will not be responsible for: wear and tear; any improper installation, use, maintenance or storage; negligence of the owner or user; repair or modification after delivery; damage; failure to follow
our instructions or recommendations; or anything else beyond our control. WE MAKE NO WARRANTIES, EXPRESS OR IMPLIED, OTHER THAN THOSE INCLUDED IN THIS WARRANTY STATEMENT,
AND WE DISCLAIM ANY IMPLIED WARRANTY OF MERCHANTABILITY OR FITNESS FOR ANY PARTICULAR PURPOSE. Further, we will not be responsible for any consequential, incidental or
indirect damages (including, but not limited to, any loss of profits) from any cause whatsoever. No person has authority to change this warranty.
REVISED: 7/11
PHONE: 330.264.5678 or 800.228.1161 I FAX: 330.264.2944 or 800.531.7335 I akronbrass.com
ISO 9001 REGISTERED COMPANY © Akron Brass Company. 2011 All rights reserved. No portion of this can be reproduced without the express written consent of Akron Brass Company.
WARNING: Movement of the Apollo will occur when taking the outlet down to 15°. Do not operate the Apollo
from behind the unit. Stand to the side and ensure adequate clearance is available behind when the
Apollo moves backwards.
The Apollo will slide sideways when sweeping below the safety stop. Always operate from the side which the discharge is pointed.
The Apollo will slide sideways in the opposite direction. Also ensure adequate clearance to allow for this sliding movement.
Do not sweep rapidly back and forth. Sweep in a slow controlled manner.
NOTE: Read the standard Apollo SI operating instructions for other standard operating requirements before use.
ROUTINE MAINTENANCE INSTRUCTIONS
Style 3414 Apollo™Portable Monitor
The following maintenance procedures will extend the service life of this appliance.
A. Four grease fittings are provided for lubrication. Use Low-Temp Lubriplate®or equivalent.
1. The horizontal and vertical swivel joints should be lubricated until a small amount of grease appears through the holes in
the swivel plugs on either side of the grease fitting.
CAUTION: Avoid excessive pressure when using the grease gun. This may damage the O-Ring Seals in the joints.
2. The elevating mechanism must be lubricated in two places—the lower elevation arm and the upper adjustment bushing.
NOTE: The upper grease fitting is designed to lubricate the whole threaded rod. It may be necessary to adjust the elevation
while greasing the unit to ensure lubrication of the full rod length.
B. Examine the points of the ground spikes in the portable base. If the flat of any spike exceeds 1/16” (1.5mm) diameter, it must be
sharpened or replaced. To sharpen, use a flat file or grinder and maintain the same taper as the original spikes. If a grinder is
used, do not allow the spikes to become hot, or change color, since this will reduce the hardness and spikes will not remain
sharp in service.
C. Check the spring loaded spike holders in the portable base to ensure that they move freely. Use a dry spray lubricant if
lubrication is required.
D. Check that the elevation stop operates properly and must be released to lower the unit below 35˚ elevation.
E. Check both the inlet clappers function properly. Lubrication is not normally required in this area.
F. Check that the horizontal brake operates freely and apply a small amount of oil to the brake shaft.
G. Check that the latch of the safety chain hook engages properly in the chain.
H. If any of the parts do not function properly, contact Akron Brass for repair instructions or return the unit to either Akron Brass
Company or Akron Manufacturing Company at the address listed on the back page.
Table of contents
Popular Firefighting Equipment manuals by other brands

Grundfos
Grundfos Hydro EN Safety instructions and other important information

klimaoprema
klimaoprema FDC25 Series product manual

Amerex
Amerex B571 Installation, operating & servicing instructions

American Flow Control
American Flow Control B-84-B-5 Testing

ELKHART BRASS
ELKHART BRASS Copperhead RF 8593-04 Installation, operating, & maintenance instructions

Eaton
Eaton EFCV2Z Installation and operation manual

The Fountainhead Group
The Fountainhead Group D.B. Smith Indian FSV500 use and care manual

AWG
AWG Z2 operating manual

FoamPRO
FoamPRO 3012 Installation and operation manual

FireFlex
FireFlex 1230 Owner's operation and maintenance manual

Mueller
Mueller Super Centurion 350 operating instructions

Bosch
Bosch D7030X-S8 installation guide