Bravo IND-2065 User manual
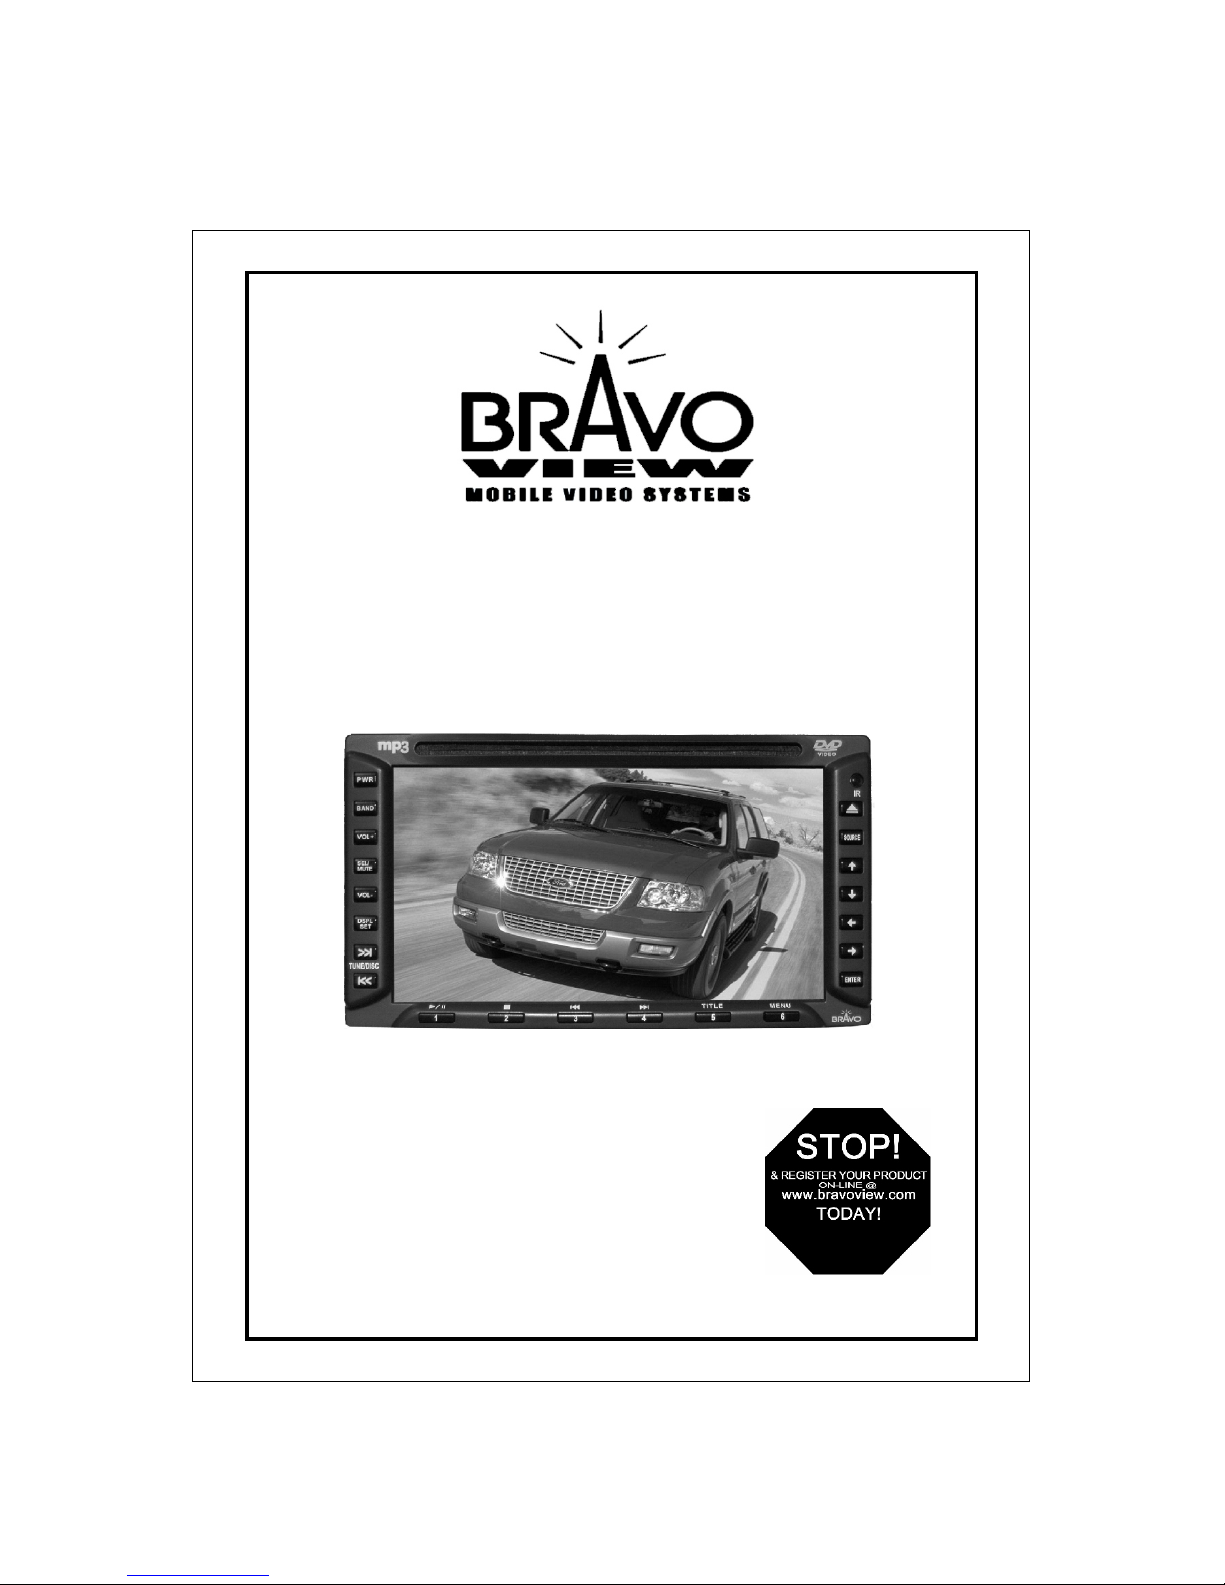
Model: IND-2065
6.5” DOUBLE DIN CAR STEREO
USER MANUAL
V1.2
Bravo View Technology
20153 Paseo Del Prado
Walnut, California 91789
United States of America
909-869-0699
www.bravoview.com

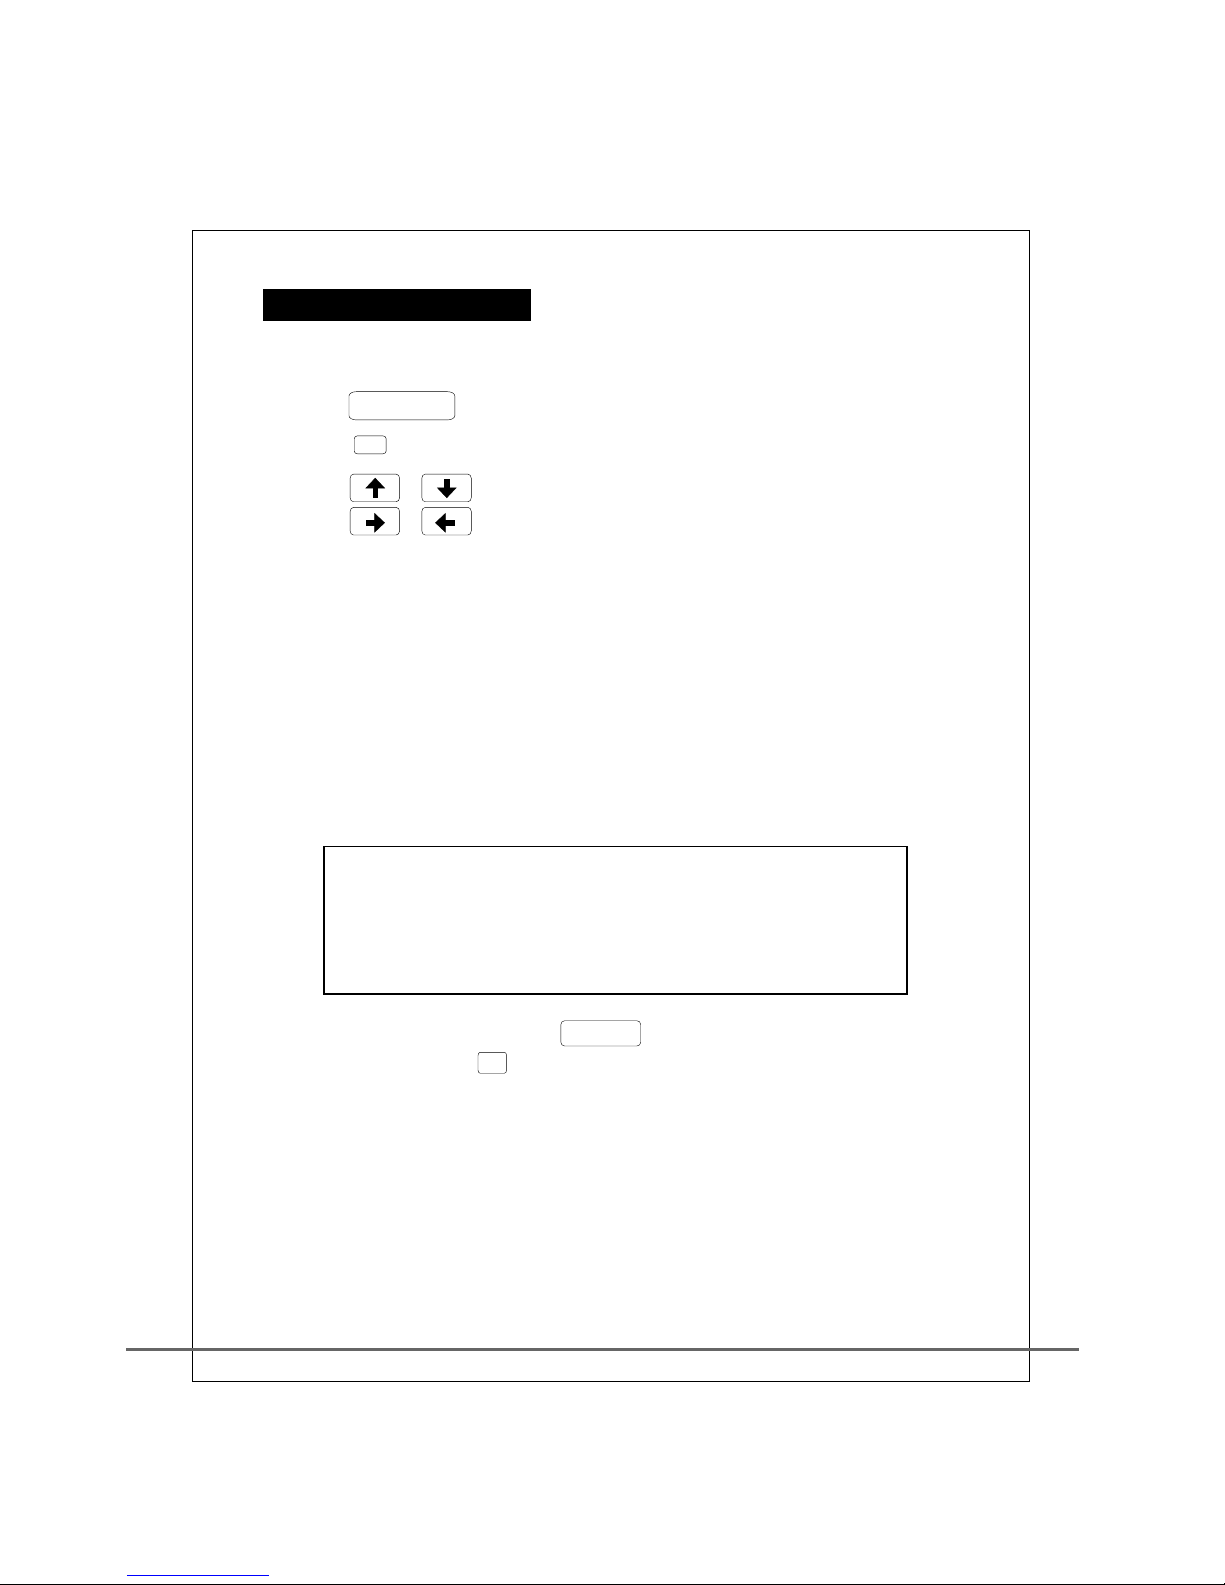
MENU
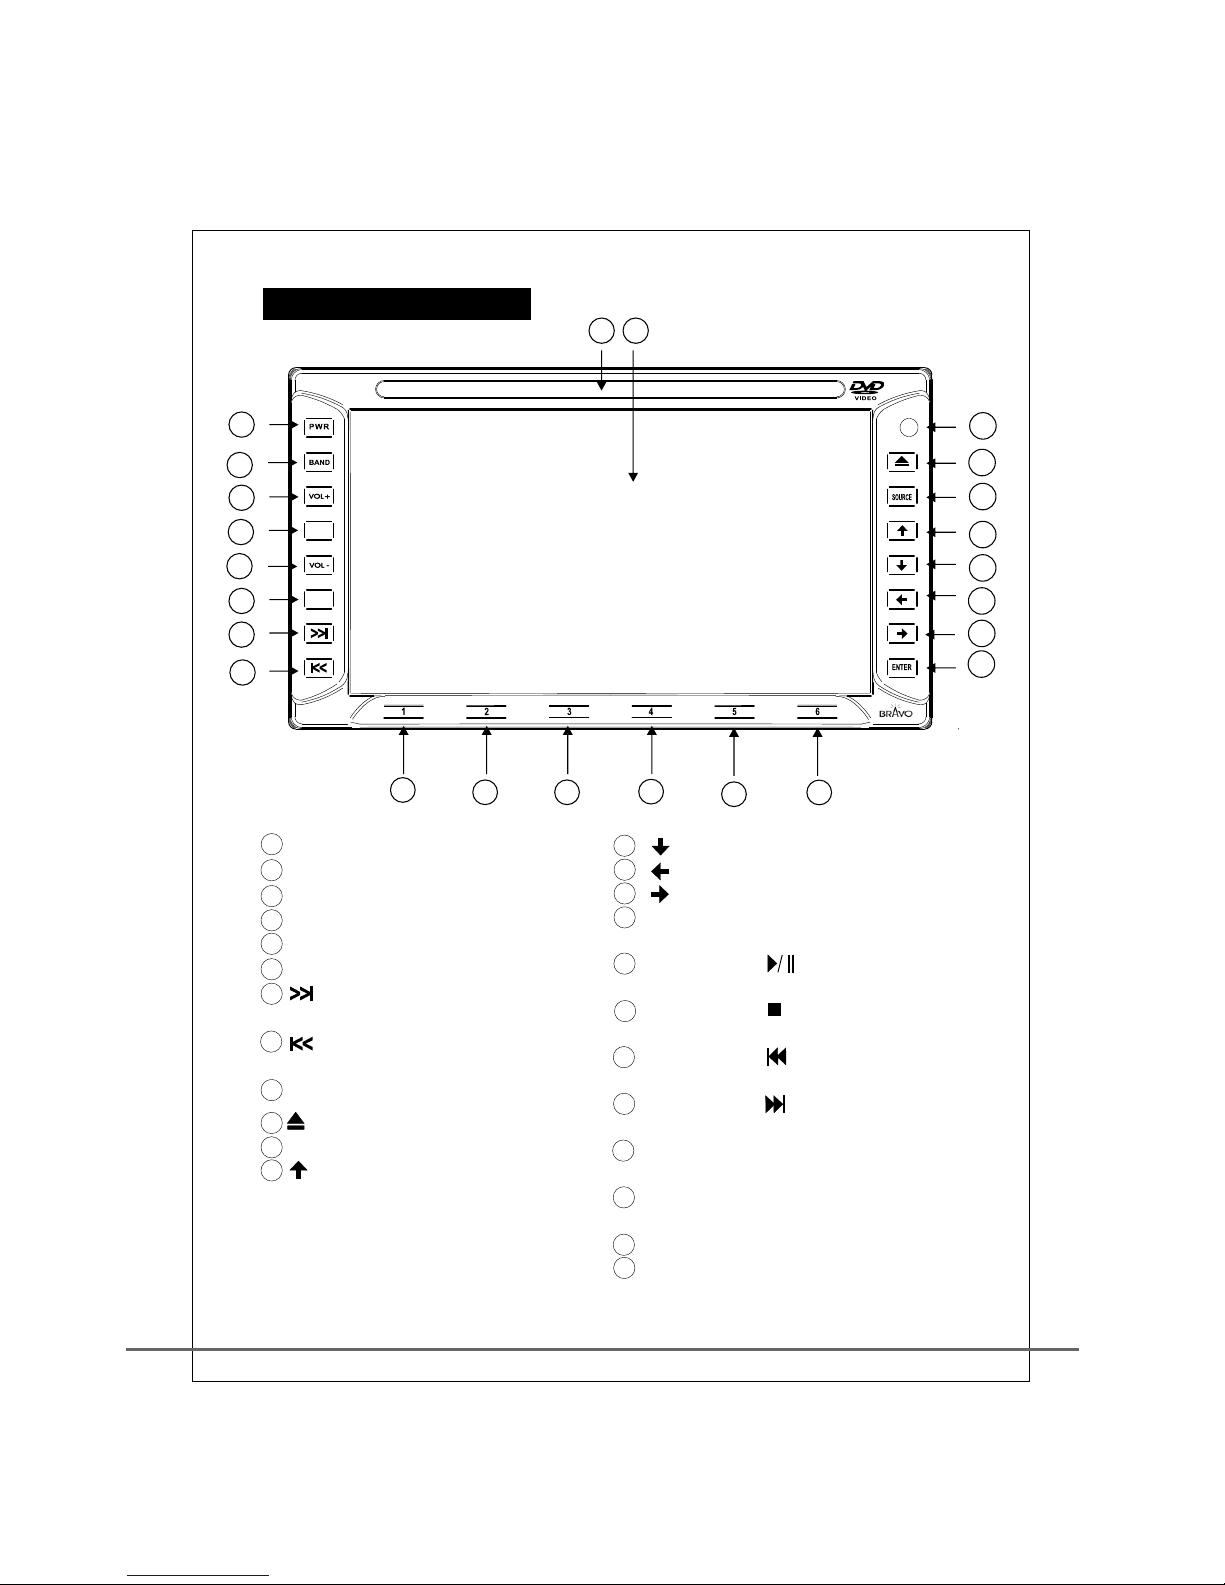
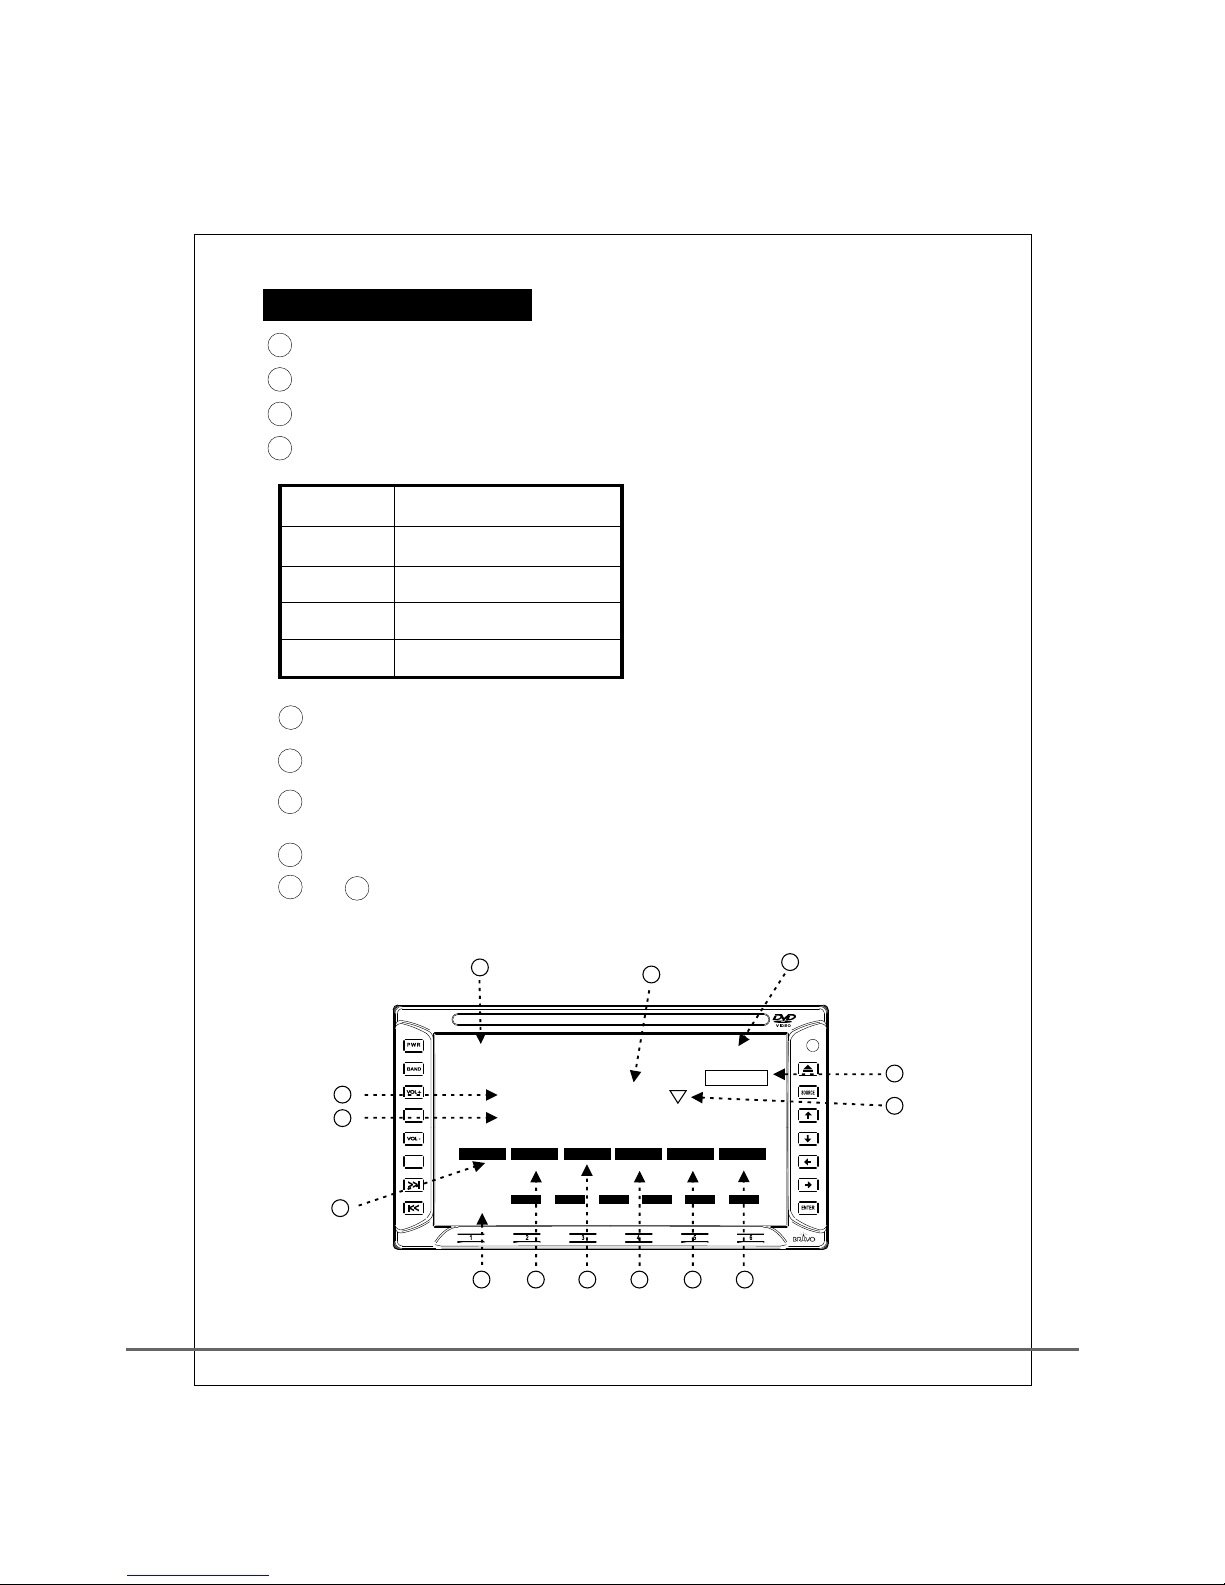
Front Panel
General operation
Radio function
DVD disc reader function
CD changer function
External function
RGB
Power on/off
Volume control
Radio screen
Radio operation
DVD reader operation
CD changer menu operation
OSD operation
Remote control operation maunal
Other buttons operation
CCD Back up camera operation
Basic installation
Installation Instruction
Accessories
1
2
3
4
5
6
7
8
9
10
11
13
17
17
18
6
19
12
20
21
TABLE OF CONTENTS
1
2
3
4
5
6
7
8
9
10
11
12
13
14
15
16
17 18 19 20 21 22
23 24
13
14
15
16 ENTER
17
18
19
20
21
22
23
24
: Menu goes down
: Menu goes left
: Menu goes right
: Menu function
confirmation
Preset band 1/
disc playing/pause
Preset band 2/
disc playing/stop
Preset band 3/
go back to the last track
Preset band 4/
go to the next track
Preset band 5/TITLE
goes back to the initial playing position
Preset band 6/MENU
goes to menu function
Disc Input
Lcd Display
1
2
3
4 SEL / MUTE
5
6 DESP SET
7
8
9
PWR: power ON/OFF
BAND: Band(AM/FM)selection
VOL+: Volume control, increase
: Frequency selection
VOL-: Volume control, decrease
: Date/time display
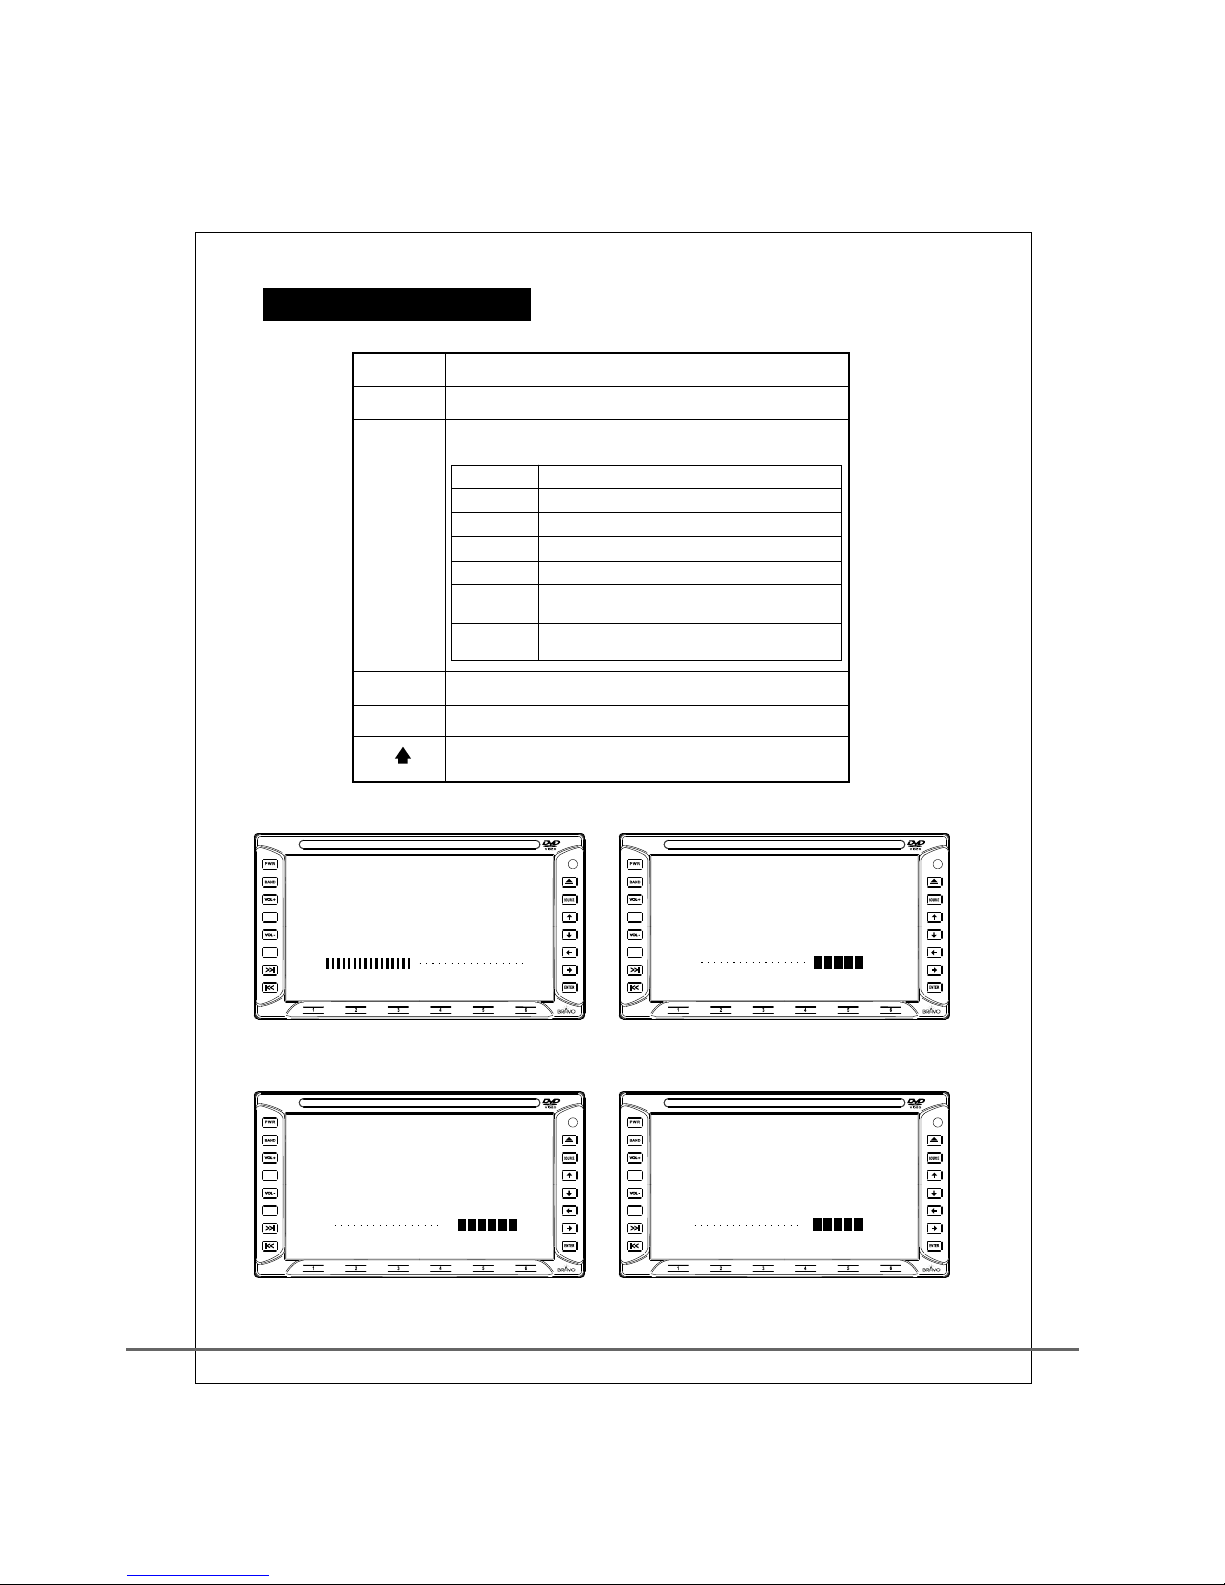
Band frequency
increases/disc goes down
: Band frequency
decreases/disc goes up
IR receiver window
10
11 SOURCE
12
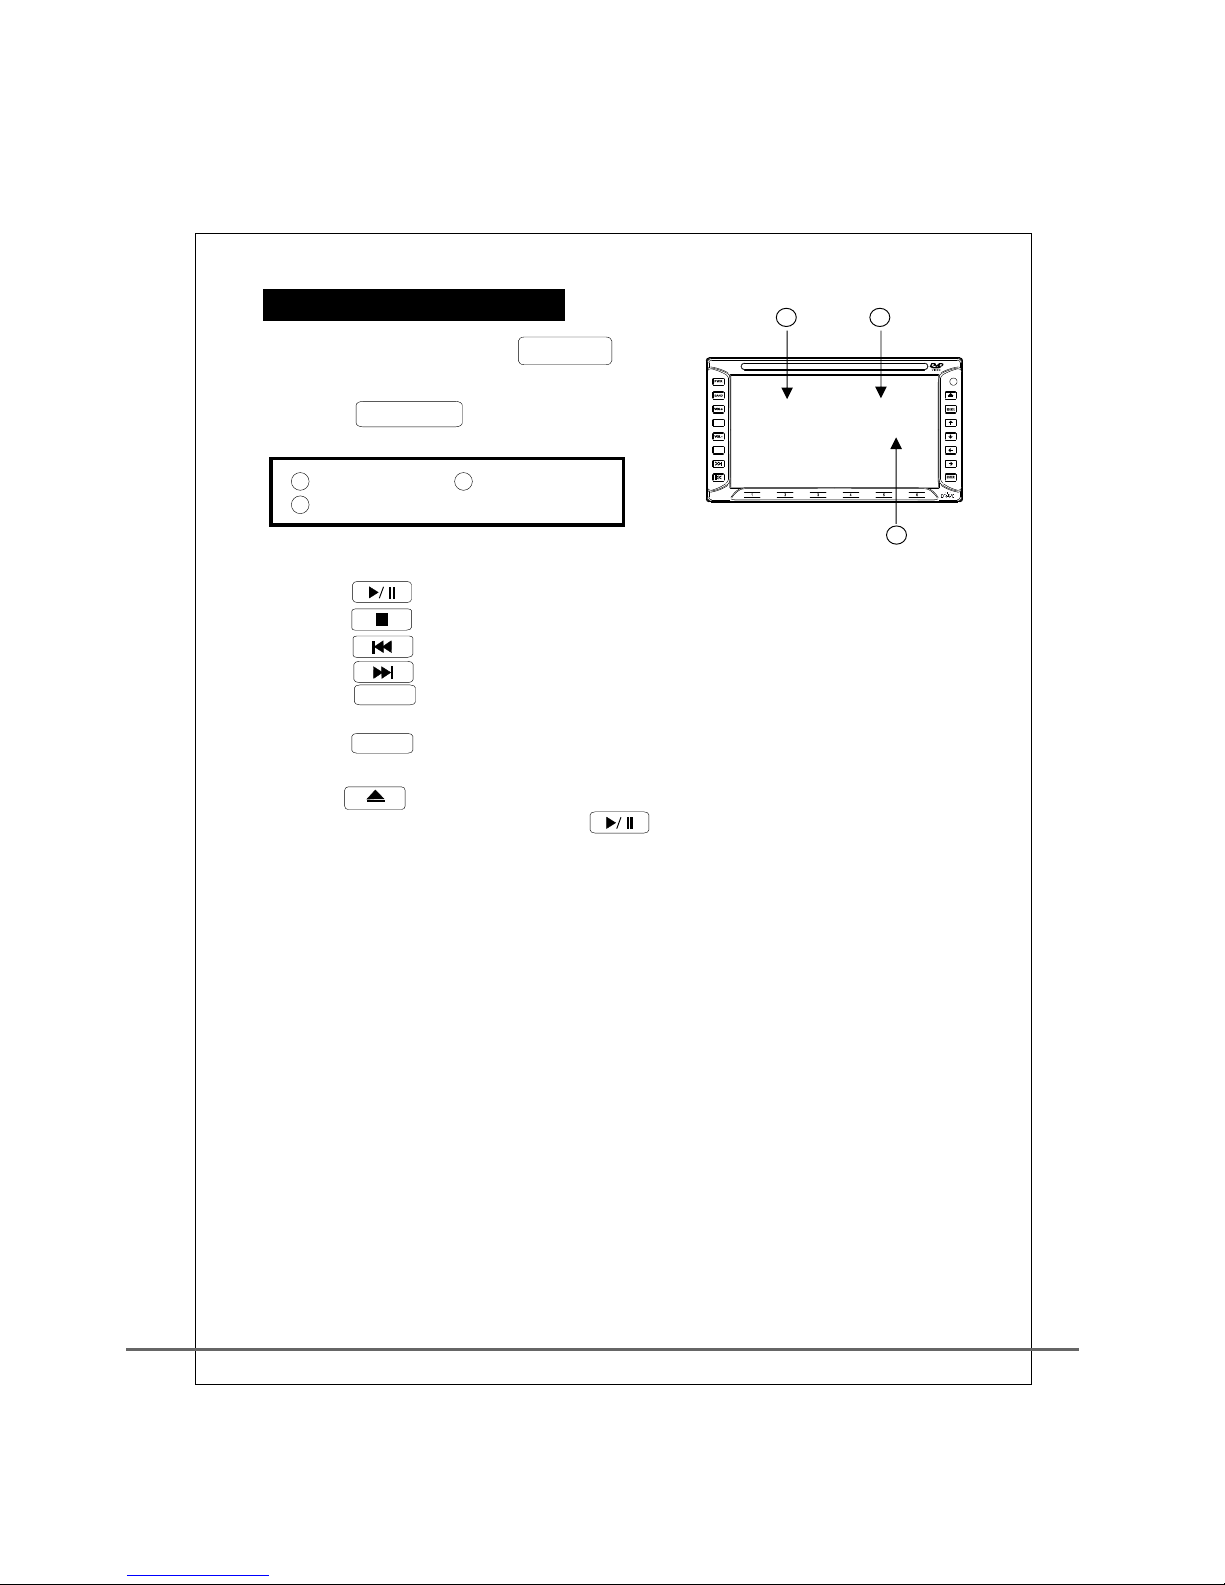
: Disc eject
: Playback function selection
: Menu goes up
1
IND-2065
S E L /
MUTE
DSPL
SET
MP3
FRONT PANEL
2
BASS +5
TREBLE +6
BALANCE R3
VOLUME +24
VOLUME BALANCE
TREBLE BASS
PWR
VOL+ Increase the volume
SEL
Power ON/OFF
Set up volume adjustment function
(accompanied with VOL+/VOL- for adjustment)
Preset VOLUME main volume adjustment, 0 to 48
Press 2 times BASS: Bass adjustment +8 to -8
Press 3 times TREBLE: Treble adjustment +8 to -8
Press 4 times FADER: front and back volume adjustment F8 to R8
Press 5 times BALANCE: left and right volume adjustment R8 to L8
Press 6 times Go back to preset
(VOLUME: main volume adjustment)
Press for
a long time Mute function
VOL-
Decrease volume
Time and date display and setup
Press for 3 seconds to turn off LCD screen.
/MUTE
DSPL
SET
S E L /
MUTE
DSP L
SET
MP3
S E L /
MUTE
DSP L
SET
MP3
S E L /
MUTE
DSP L
SET
MP3
S E L /
MUTE
DSP L
SET
MP3
GENERAL OPERATION
S E L /
MUTE
DSPL
SET
MP3
7
8
1
2
3
4
5
6
10
11
BAND
3 seconds
to present current radio station
3 seconds
to present current radio station
3 seconds
to present current radio station
3 seconds
to present current radio station
3 seconds
to present current radio station
3 seconds
to present current radio station
Enter to switch the radio channel
Search for next channel manually
(or press for a long time to search for the next channel)
Search for next channel manually
(or press for a long time to search for the last channel)
Channel fast selection or press for
Channel fast selection or press for
Channel fast selection or press for
Channel fast selection or press for
Channel fast selection or press for
Channel fast selection or press for
Automatic search for the last channel
1
2
3
4
5
6
9
FADER
FA D ER R 6FA D ER R 6
1
2
3
10
11
4 5 6 7 8 9
3
1
2
3
4
5
6
7
8
TUNE
TUNE
S E L /
MUTE
DSPL
SET
MP3
Automatic search for the next channel
RADI O FUNCTION

S E L /
MUTE
DSPL
SET
MP3
4
78910 11 12
2
3
4
5
6
1
13
SOURCE Enter DVD disc changer function
(Please turn on the power after it has been installed)
DVD menu goes up
(The function depends on the disc)
DVD menu goes down
(The function depends on the disc)
DVD menu goes left
(The function depends on the disc)
DVD menu goes right
(The function depends on the disc)
ENTER DVD menu execution
(The function depends on the disc)
Play the video or pause
Pause or stop the playing
Last section or last song or for rewinding
Next section or next song or for forwarding
TITLE Playback from the start
MENU Menu of functions
1
2
3
4
5
6
7
8
9
10
11
12
13 Chang the optical disc
Note: This function only works when an optional changer is installed.
DVD DISC READER FUNCTION

5
《 OPTIONAL 》
Enter CD changer function
(Please turn on the power after it has been installed)
Next disc1→2→3→4.....
Last disc10→9→8→7.....
DVD menu goes up
(The function depends on the disc)
DVD menu goes down
(The function depends on the disc)
DVD menu goes left
(The function depends on the disc)
DVD menu goes right
(The function depends on the disc)
DVD menu execution
(The function depends on the optical disc)
Last section or last song or press for 3 seconds for rewarding
Pause or stop the playing
Last section or last song or press for a long time for rewarding
Next section or next song or press for a long time for forwarding
TITLE Playback from the start
MENU Menu of functions
11
12
13
14
10
9
8
7
6
5
4
3
2
1
910 11 12 13 14
2
3
1
4
5
6
7
8
S E L /
MUTE
DSPL
SET
MP3
SOURCE
ENTER
CD CHA NGER FUNCTION
■ Insert the optical disc under any non-DVD function
(such as receiving RADIO), it will jump immediately to DVD function.
■ Notice: If there is already optical disc in the DVD, you can only use
FUNC button to enter DVD.
In order to protect the machine, when you leave the DVD Source, you can
not enter DVD again within 5 seconds.

6
RGB
CD CHANGER/AUX1/AUX2
1. Press button for 3 seconds to enter RGB display
source directly,screen will be switched to RGB .
SOURCE
SOURCE
EXTERNAL FUNCTION

7
1. Start the engine of the car.
2. Press PWR button to turn on the machine.
3. Press SOURCE to play the radio.
4. Press SOURCE button to play the DVD disc reader.
5. Press SOURCE button to play disc changer
(This function will not be available if it is not
connected to disc changer).
6. Press SOURCE button repeatedly to
play the external AUX signal.
Power on:
Power off:
1. Press PWR button to turn off the machine.
66
2
3
S E L /
MUTE
DSPL
SET
MP3
S E L /
MUTE
DSPL
SET
MP3
POWER ON/OFF
8
Main volume adjustment:
1. Press VOL+ to increase the volume.
2. Press VOL- to decrease the volume.
Bass adjustment:
1. Press SEL / MUTE to switch to bass.
2. Press VOL+ to strengthen bass.
3. Press VOL- to weaken bass.
Treble adjustment:
1. Press SEL / MUTE to switch to TREBLE.
2. Press VOL+ to strengthen TREBLE.
3. Press VOL- to weaken TREBLE.
Front and back volume ratio adjustment:
1. Press SEL / MUTE to switch to FADER.
2. to increase right speaker volume.
3. Press VOL- to decrease right speaker volume.
Left and right volume ratio adjustment:
1. Press SEL / MUTE to switch to BALANCE.
2. Press Vol + to increase right volume channel output power to more than
left channel.
3. Press Vol - to decrease left volume channel output power to more than
right channel Loudness.
Loudness adjustment:
Press SEL / MUTE for 3 seconds to enter the menu, press 3
to enter AUDIO menu, press to LOUDNESS,
then press or switch.
Press VOL+
VOLUME CONTROL
5 Fast band search indicator.
6 FM micro adjustment indication.
7 Reception frequency indication.
8 ~ 13 Indication of band frequency.
1 Date display.
2 Time display.
3 MONO/STEREO broadcasting indication.
4 Band indication.
FM1 First FM band.
FM2 Second FM band.
FM3 Third FM band.
AM1 First AM band.
AM2 Second AM band.
9
14 Indication of signal strength or search progress table.
00/00 0:0700/00 0:07
--RADIO--------------------------------- MONO--RADIO--------------------------------- MONO
875875
900900
980980
106106
108108
875875
S.METERS.METER
112233445566
4
7
8
14 9 10 11 12 13
5
2
3
6
1
90 90 ..1 1
M M H H Z Z
F F
..1 1
M M
..
2 2
S E L /
MUT E
DSPL
SET
MP3
RADI O SCREEN

10
1. Turn the power on.
2. Press BAND to enter radio mode.
3. Press TUNE to search forward for the band.
4. Press TUNE for or it will search forward for
available bands.
5. Press TUNE to search backward for the band.
6. Press TUNE for or , it will search backward for
available bands.
7. To save your favorite radio station tune into it, press and hold
1 - 6 for 3 seconds.
8. Press any one button of 1 to 6 to go back to any previously
stored station..
9. While playing the radio, press BAND to switch the band
FM I/FM II/FM III/AM I/AM II .
3 seconds
3 seconds
RADI O OPERATION
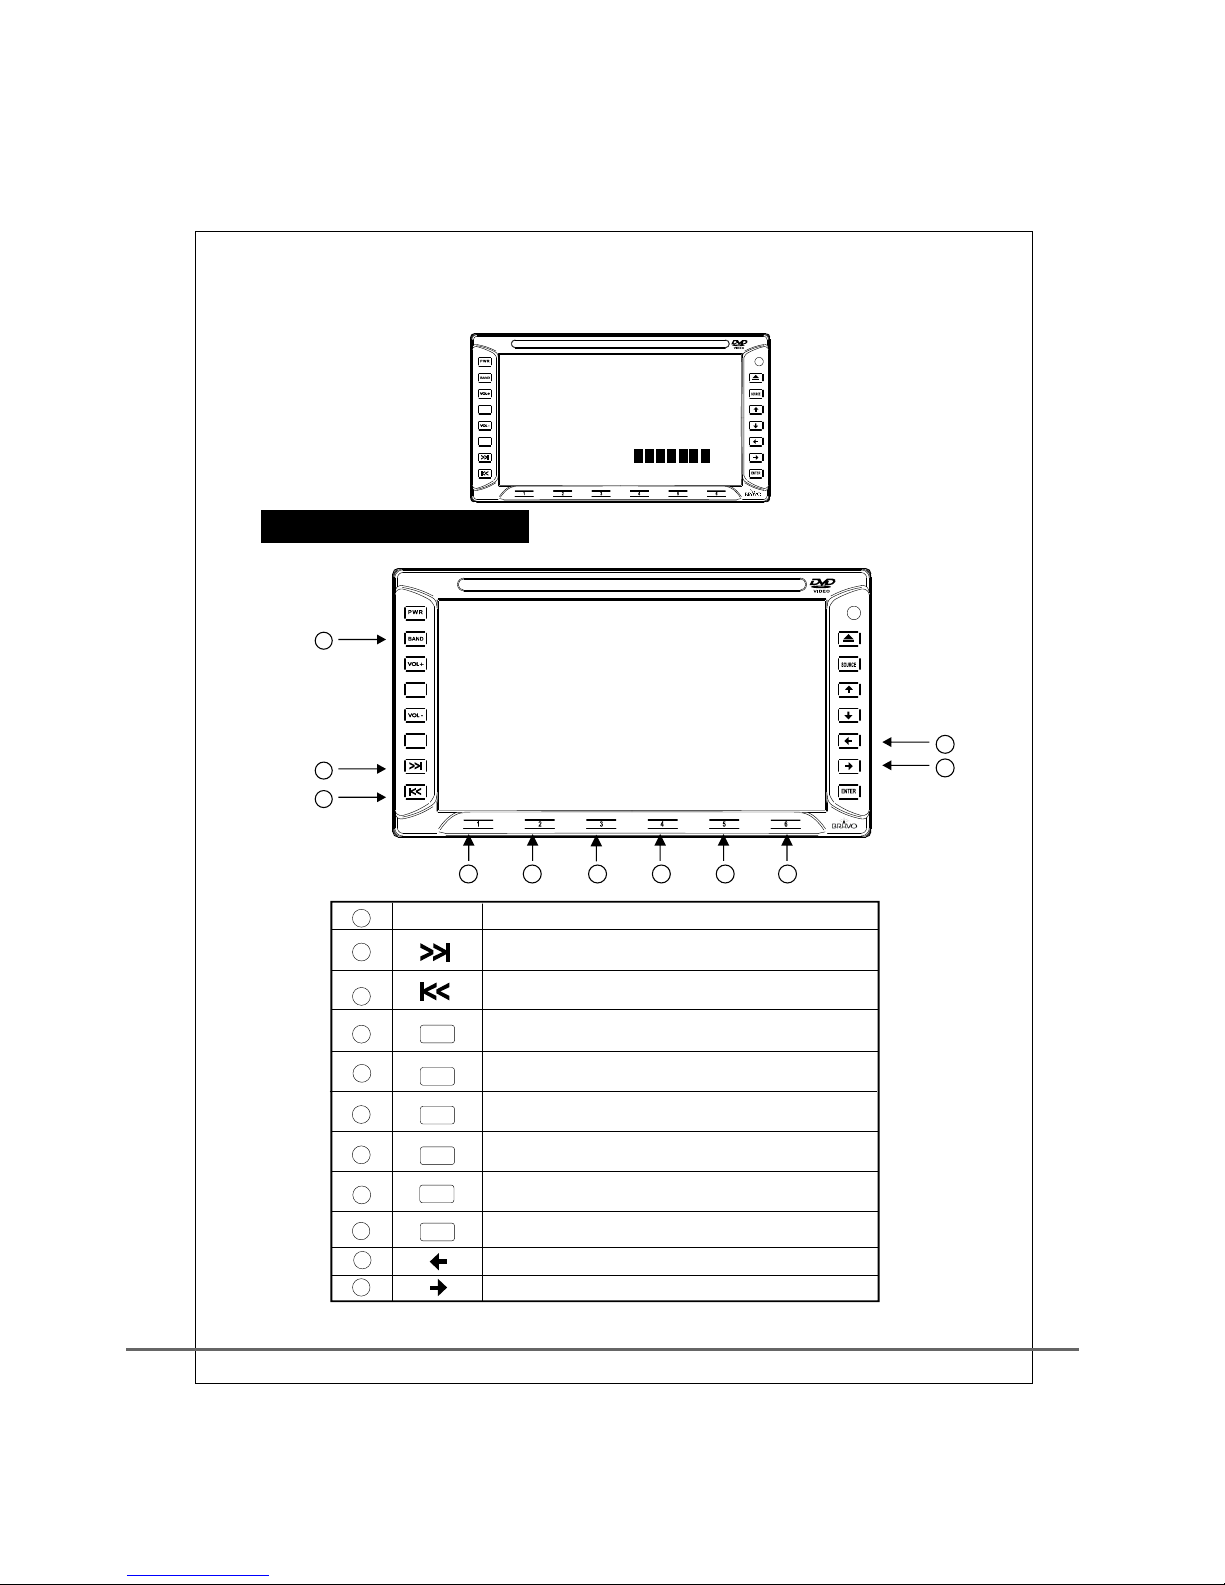
1. Turn on the power, press SOURCE button
to select the DVD/VCD function.
2. Press DSPL SET to display
or hide the time track.
1 3
2
Current time Playing track
Current playing time
11
TRACK 02 6:30
00:05:20
TRACK 02 6:30
00:05:20
3 1
2
3. Put DVD, VCD, CD or MP3 disc into the player.
4. Press to play the video or music.
5. Press to pause or stop playing.
6. Press to the last section of the track .
7. Press to the next section of he track.
8. Press TITLE button to play the disc from the beginning
(effective for DVD/VCD).
9. Press MENU button to play MENU (effective for DVD/VCD).
10. Press button to take out the disc.
11. During CD or VCD playing, press the button for 3 seconds
can be used to switch among MONO→LEFT→
MONO-RIGHT→MIX-MONO→STEREO,pressing and holding the
button will switch between them.
S E L /
MUTE
DSPL
SET
MP3
READER OPERATION
12
Note: Depends on your optional cd changer model, the following function may
be a little bit different or is not supported.
1. Press MENU to start the menu.
2. Press / to select different function.
3. Press ENTER to execute function.
4. Press MENU to exit menu.
5. GO TO DISC N to jump directly to designated disc.
6. REPEAT to play the disc repeatedly.
7. SCAN to play shortly the initial of each song.
8. RANDOM to play the song randomly.
CD CHANGER MENU OPERATION
13
OSD OPERATION
A Set up the time.
1. Press DISP/SET to enter setup menu.
2. Press 1 to set up time.
3. Press / to move the optical rod.
4. Press / to adjust numeric value.
5. Press YEAR to adjust 2000 to 2099.
6. Select MONTH to adjust the month, 1 to 12.
7. Select DAY to adjust the date, 1 to 31.
8. Select HOUR to adjust time, 0 to 23.
9. Select MINUTE to adjust minute, 0 to 59.
12. Select SAVE and EXIT, press to store and exit.
13. Select EXIT or press 6 button, it will exit without saving.
14. During the saving process, if the date is set up wrong,
it will be unable to exit, please modify and try it again. .
ENTER
1 : (A.D.) yy/mm/dd week hour/minute
2 : mm/dd week hour/minute
3 : mm/dd hour/minute
4: week hour/minute
5 : hour/minute
6 : yy/mm/dd hour/minute
10. Week is designed by the system automatically, it can not be adjusted.
11. Select TYPE to adjust the time format to be displayed (except the radio).

14
B VIDEO setup screen
1. Press DISP/SET to enter OSD setup, then press 2 button
to enter setup screen.
2. Press / button to move the bright bar.
3. Press / to adjust numeric value.
4. Select CONTRAST to adjust the contrast.
5. Select COLOR to adjust color.
6. Select BRIGHT to adjust brightness.
7. Select TINT to adjust the tint.
8. Select MIRROR to reverse the screen in the left to right direction.
9. Select SCREEN to set up the screen display mode (the same as ASPECT).
10. Select DIMMER to set up night lamp mode.This reduces the amount
of ambient light coming from the sureen
11. Select LCD OFF to set up LCD Panel function or not mode.
MANUAL turn on and off LCD
(Use button, please refer to general
function descriptions).
12. Select RESET to reset all the above settings to the default value.
13. Press 6 button to exit.
OFF
AUTO
NORMAL 4 : 3 screen
FULL 16 :9 screen
WITHOUT DIMMER FONCTION
DIMMER FONCTION
IF choose Auto at DIMMER Mode,THE LCD will be turned off
automaticaly when there in no action on keypad during Raido function.
15
1. Press DSPSET for 3 seconds to enter ON SCREEN DISPLAY (OSD) set up ,
2. Press / button to move the optical rod.
3. Press / to adjust numeric value.
4. Select RADIO to singly adjust the volume gain of the radio.
5. Select DVD to singly adjust the volume gain of the DVD player.
6. Select EXTERNAL to singly adjust the external volume input gain.
7. Select MUTE to turn on or off the speaker.
8 Select LOUDNESS to turn on or off the loudness control.
9 After pressing 6 button to exit, the default value
will then be used.
.
.
C AUDIO setup screen
※Depends on the machine model, this function might not be
available for some models.
Then press 3 button to enter setup screen.

16
D DEVICE setting screen
A. Setting of the DVD player
1. When the DVD player is in use.
2. Press DSPLSET for 3 seconds,to enter OSD setting,
then press to set up.
3. Press to move the optical rod.
4. Press to execute the order.
5. Press ANGLE to select next angle (depends on different types of DVD, this function
will be disabled if it is not DVD disc).
6. Select ZOOM to enlarge the screen.
7. Select to turn on PBC or turn off PBC.
8. Select SHUFFLE to turn on SHUFFLE.
9. Select REPEAT AB to start the AB repeat function.
B. Setting for Radio
1. When the radio is in use.
2. Press DSPLSET for 3 seconds to enter OSD setting, then press 4 to set up.
3. Press to move the optical rod.
4. Press to adjust the numeric value.
5. Press SENSITIVE to adjust the sensitivity of band search
(1 weak Dx ~5 strong Lo).When weak is selected, it can automatically
search all searchable bands, but if strong is selected, only bands of stronger signals
will be searched.
6. Select NARROW to turn on and off the filtering function,
when it is turned on, it can filter out neighboring interfered bands.
7. Press 6 button to exit.
C.Setting for CD changer
1. When the disc changer is in use.
2. Press DSPLSET to enter OSD setting, then press 4 to set up.
3. Press / to move the optical rod.
4. Press ENTER to execute the order.
5. Select GO TO DISC X to change " directly" to disc X.
6. Select other order is the same as a dedicated remote
control, please refer to the operation manual of DVD disc changer.
10. Select 3D to set up sound effect.
11. Press 6 button to exit.

17
POWER
BAND
FUNC
MUTE
VOL
AUDIO
VOL
TUNE
TUNE
VIDEO
1
2
3
4
5
6
7
8
9
0
DISP/CLOCK
ASPECT
TITLE
SUBTITLE
ENTER/SAVE
REPEAT
Power swit ch
Switch or setting of time display
Screen display mode switch
The same as panel 6
The same as TIME on the panel
Can be adjusted in VIDEO setting
RADIO functio n
DVD or EXTERNAL functio n
Speaker mute
Increase the volume
Adjust and switch the volume function
Decrease the volume
Select band in the radio mode or
disc change in the disc changer
Adju st the im age settin g
Adju st the im age settin g
Fast sele ction of radio band
The same as panel 5
The same as panel 4
The same as panel 3
The same as panel 2
The same as panel 1
Long press on MENU
The same as TUNE
The same asTUNE
The same as VOL- on the panel
The same as SEL on the panel
The same as VOL+ on the panel
The same as POWER on the panel
The same as BAND on the panel
The same as FUNC on the panel
Reward
Forward
Play or pause
Pause or stop
Play repeatedly
The same as , for a long press.
The same as , for a lo ng press.
The same as PLAY
The same as STOP on the panel
The same as RPT on the panel
Jump to DVD TITLE
DVD/MENU ENTER
Last section
Next section
The same as
The same as
Fast sele ction of radio band
Fast sele ction of radio band
Fast sele ction of radio band
Fast sele ction of radio band
Fast sele ction of radio band
on the panel
on the panel
1. Press or button for 3 seconds to display or not display to LCD
(Volume will not be affected).
2. Press panel button PWR and together to RESET the system
(the setup values will not be affected).
The same as TITLE on the panel
The same as ENTER on the panel
Language Selection
REMOTE CONTROL OPERATION MANUALREMOTE CONTROL OPERATION MANUAL
OTHER BUTTONS OPERATION

18
《 OPTIONAL 》
A.
" "
Installation
1. The Green camera trigger wire must be connected to the car reverse wire.
(This is usually found on the rear tail lights and shows a positive 12 volt
signal when vehicle is in reverse )
2. The CCD Back up Camera must be connected to
CCD IN on the back of the machine, which is a yellow RCA connector.
B. Operation
1. When installed correctly, the screen will automatically show the camera
image while the vehicle is in reverse gear.
2. While the vehicle is in reverse, this will supersede what ever is on the
display.
CCD BACK UP CAMERA
Other Bravo Car Receiver manuals


