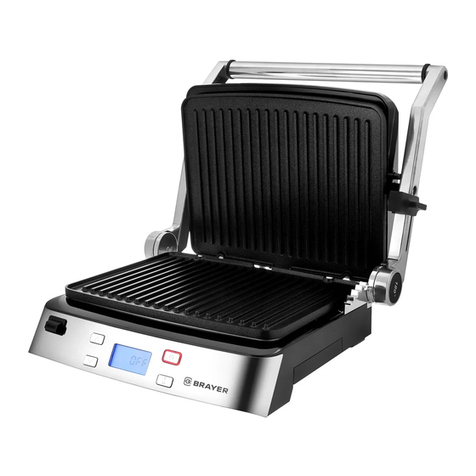
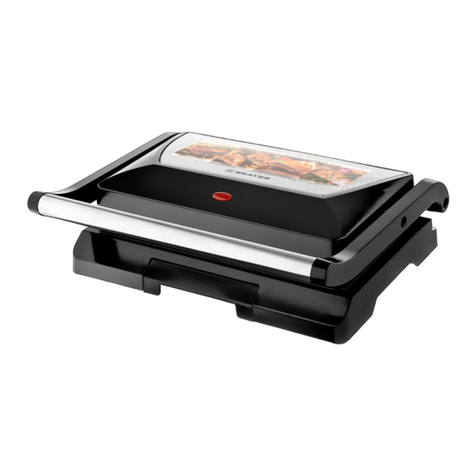
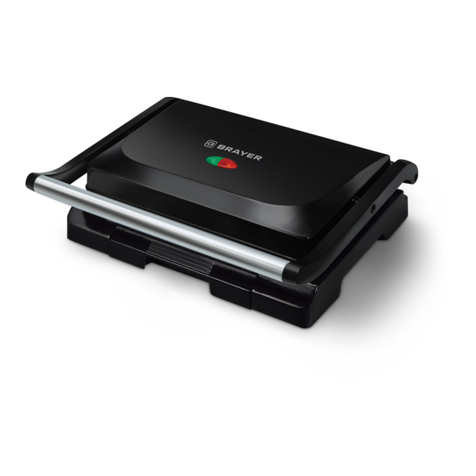
BRAYER BR2004 User manual

Instruction manual
Инструкция по эксплуатации
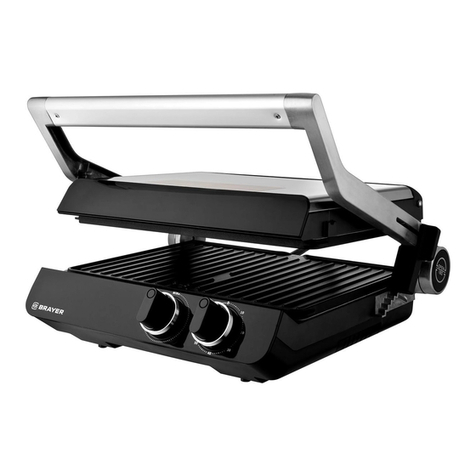
Electric grill press BR2004
Электрический гриль-пресс BR2004
brayer.ru

СОДЕРЖАНИЕ
EN......................................................................................................................................3
DE....................................................................................................................................12
RU ...................................................................................................................................22
KZ....................................................................................................................................32

3
EN
PRESS GRILL BR2004
The grill is used for cooking meat, sh or
vegetables. The unit can be used as a press grill
or a at frying surface.
DESCRIPTION
1. Lower part of the grill
2. Tray
3. Handle
4. Control/indication panel
5. Upper and lower parts lock
6. Operation time and frying plate temperature
setting buttons «+/-»
7. Operation time digits «Time»
8. Frying plates temperature digits «Temp»
9. Time/temperature setting mode button « »
10. Grill on/o button « »
11. Light indicator
12. Default mode button «Grill»
13. Operation/keep warm indicator « »
EN
ATTENTION!
For additional protection it is reasonable to install a
residual current device (RCD) with nominal operation
current not exceeding 30 mA into the mains. To install
RCD, contact a specialist.
Grill
TempTime
°C
1
5
2
4
3

4
EN
Pic. 1
Pic. 4
Pic. 7
Pic. 2
Pic. 5
Pic. 8
Pic. 6
Pic. 9
Pic. 3
Grill
TempTime
°C
Grill
TempTime
°C
Grill
TempTime
°C
Grill
TempTime
°C
TempTime
°C
TempTime
°C
225
TempTime
°C
TempTime
°C
TempTime
°C
TempTime
°C
TempTime
°C
Pic. 10
6 7 8 9
13 12
10 11

5
EN
SAFETY MEASURES AND OPERATION
RECOMMENDATIONS
Read the operation manual carefully before using
the press grill; after reading, keep it for future
reference.
• Use the press grill for its intended purpose only, as
specied in this manual.
• Mishandling the grill can lead to its breakage and
cause harm to the user or damage to the user’s
property, which is not covered by warranty.
• Make sure that the operating voltage of the unit
indicated on the label corresponds to your home
mains voltage.
• Connect the power plug to the socket with reliable
grounding contact.
• Do not connect the unit to external timers or remote
control mains sockets.
• To avoid re, do not use adapters for plugging the
press grill in.
• Install and use the press grill on a at, dry, steady
and heat-resistant surface with free access to the
mains socket.
• Do not use the unit outdoors.
• It is recommended not to use the unit during lightning
storms.
• Protect the grill from impacts, falling, vibrations and
other mechanical stress.
• Never leave the unit connected to the mains
unattended.
• Do not use the unit near heating appliances, heat
sources or open ame.
• Do not use the grill in places where aerosols are
used or sprayed, and in proximity to inammable
liquids.
• Do not use the grill in proximity to the kitchen sink, in
bathrooms, near swimming pools or other containers
lled with water.
• If the grill is dropped into water, unplug it immediately,
and only then you can take the unit out of water.
• Do not let the power cord touch hot surfaces and
sharp edges of furniture.
• The press grill body heats up strongly during
operation, do not touch hot surfaces marked with
«» to avoid burns.
• Do not move the press grill when it is hot; wait until it
cools down completely.
• Use the unit in places with proper ventilation.
• Use only the removable parts supplied with the press
grill.
• Do not switch the press grill on without products.
• Do not use the grill for cooking frozen food,
• defrost frozen food before cooking.
• Beware of steam output from the gaps between the
operating surfaces, do not touch and do not place
open parts of your body near the gaps between the
frying plates.

6
EN
• Take the products out of the press grill right after
cooking; keeping products in the operating grill for a
long time can cause their ignition.
• Never use metal objects to take the cooked food
out, as they can damage the non-stick coating of the
frying plates; use the kitchen tools intended for non-
stick surfaces.
• Unplug the unit after usage or before cleaning. When
unplugging the grill, hold the power plug and carefully
remove it from the mains socket, do not pull the
power cord, as this can lead to its damage and cause
a short circuit.
• Do not touch the unit body, the power cord and the
power plug with wet hands.
• For child safety reasons do not leave polyethylene
bags used as packaging unattended.
ATTENTION!
Do not allow children to play with polyethylene bags
or packaging lm. Danger of suocation!
• During the unit operation and breaks between
operation cycles, place the unit out of reach of
children.
• The unit is not intended for usage by physically or
mentally disabled persons (including children) or by
persons lacking experience or knowledge if they are
not under supervision of a person who is responsible
for their safety or if they are not instructed by this
person on the usage of the unit.
• From time to time check the power cord integrity.
• If the power cord is damaged, it should be replaced
by the manufacturer, a maintenance service or
similar qualied personnel to avoid danger.
• Do not repair the unit by yourself. Do not
disassemble the unit by yourself, if any malfunction
is detected, and after the unit was dropped, unplug it
and apply to the authorized service center.
• To avoid damages, transport the unit in the original
package.
• Keep the unit in a dry cool place out of reach of
children and disabled persons.
THE UNIT IS INTENDED FOR HOUSEHOLD USE
ONLY, DO NOT USE THE UNIT FOR COMMERCIAL
OR LABORATORY PURPOSES
• The unit is not intended for usage by children.
• Do not leave children unattended to prevent using
the unit as a toy.
• Do not allow children to touch the operating surface,
the unit body, the power cord or the power plug
during operation of the unit.
• Be especially careful if children or disabled persons
are near the operating unit.

7
EN
BEFORE THE FIRST USE
After unit transportation or storage at negative
temperature, unpack it and wait for 3 hours before
using.
• Unpack the unit and remove all the packaging
materials.
• Keep the original package.
• Read the safety measures and operating
recommendations.
• Check the delivery set.
• Examine the unit for damages, in case of damage do
not plug it into the mains.
• Make sure that specied specications of power
supply voltage of the unit correspond to the
specications of your mains.
• Clean the grill body surface with a slightly damp cloth
and then wipe it dry.
• Move the lock (5), take the handle (3) and open the
grill.
• Remove the tray (2).
• Wash the frying plates and the tray (2) with warm
water and neutral detergent, rinse them and wipe dry.
• Place the grill keeping at least a 20 cm gap between
the grill body and the walls and 60 cm of space
above the grill.
• Use the grill on a at steady surface, away from
sources of moisture,
• heat and open ame with free access to the mains
socket.
• Do not place and do not use the grill near highly
inammable objects
• or liquids and objects subject to thermal deformation.
• Use the unit in places with proper ventilation.
• Make sure that the tray (2) is installed to its place.
• Before using the grill open it and oil the frying plates
slightly.
• Close the grill.
• Plug the power cord into an electrical outlet, you will
hear a beep and the display backlight will turn blue
(Pic. 1).
Note: if no actions are performed, the display
illumination will go out in 1 minute.
• To switch the grill on, press and hold the button (10)
«» for 2 seconds, the light indicator (11) will light
up, and the time digits (7) «--:--» will be ashing on
the display. Press the button (12) «Grill», the display
illumination will light up orange. The heating elements
will switch on and the temperature digits (8) 235°С
will appear (pic. 2).
• After about 5-6 minutes turn the grill o by pressing
and holding the « » button (10), unplug the grill
and wait until it cools down completely. Take the
handle (3), open the grill and remove the remaining
vegetable oil from the frying plates with a paper
towel.
• The grill is ready to use.

8
EN
Notes: when using the unit for the rst time, a foreign
smell or some smoke from the heating elements
can appear — this is normal and it is not covered by
warranty.
FOOD COOKING WITH THE GRILL
ATTENTION!
- The press grill body heats up strongly during
operation, do not touch hot surfaces marked with «
» to avoid burns.
- Beware of steam output from the gaps between
the operating surfaces, do not touch and do not
place open parts of your body near the gaps
between the frying plates.
- Do not use the grill for cooking frozen food.
- Do not cook meat with large bones.
- Frying time depends on the products used.
- Before using the grill make sure that the tray (2) is
installed to its place.
- Do not open the grill after switching it on, the frying
plates (7) heat up faster and more even in the
closed position.
- Before eating make sure that the food is cooked
through.
- Take the products out of the press grill right after
cooking; keeping products in the operating grill for
a long time can cause their ignition.
- Never use metal objects to take the cooked food
out, as they can damage the non-stick coating of
the frying plates; use the kitchen tools intended for
non-stick surfaces.
COOKING EXAMPLES
Chicken quarters
• Prepare the necessary products.
• Connect the power plug to the mains socket, you will
hear a sound signal and the display illumination will
light up blue (pic. 1).
Note: if no action is taken, the display illumination will be
o in a minute.
• To switch the grill on, press and hold the button (10) «
» for 2 seconds, the light indicator (11) will light up,
and the time setting digits (7) «--:--» will be ashing on
the display.
• To set the time, press the button (9) « » and set the
operation time «10:00» with the buttons (6) «+/-». The
time digits (7) will be ashing for 3 seconds and then
will glow constantly (pic. 3).
• Time setting range is from 1 to 30 minutes with a step
1 minute.
Note: after setting the time (the time digits (7) glow
constantly) you cannot reset it. To reset the time you have
to switch the grill o, then switch it on again and set the
necessary time.

9
EN
• To set the temperature, press again the button (9) «
» and set the frying plates temperature 225°С
with the buttons (6) «+/-». The temperature digits
(8) will be ashing for 3 seconds and then will glow
constantly (pic. 3).
• Temperature setting range is from 75°С to 235°С with
a step 10°С.
• The grill will be switched on in preheating mode,
the display illumination will glow orange. The
indicator (13) « » will rotate and the preheating
time countdown will start, the digits (7) will show the
preheating time.
• In 5 minutes the preheating will stop and you will
hear 2 sound signals.
• Take the handle (3) and open the grill, carefully
put the food products on the lower frying plate. Be
careful to avoid burns by splashing fat or juice from
the products. Lower the upper part of the grill on the
products.
• After the preset time is over, you will hear 2 sound
signals which mean that the preset cooking time is
over.
• Take the handle (3) and open the grill, put the cooked
food in a suitable container using wooden or heat-
resistant plastic kitchen tools.
Note: during cooking the grill will be switching from the
heating mode to the keep warm mode, and the display
illumination color will be switching from orange to purple
(pic. 4, 5).
• Switch the grill o by pressing and holding the
button (10) « », disconnect the power plug from
the socket, wait until the grill cools down completely.
Then open the grill and wipe the frying plates.
• Remove the tray (2) and pour the liquid out of it,
wash the tray, wipe it and install back to its place.
Cooking a steak
• Prepare the necessary products.
• To switch the grill on, press and hold the button
(10) « » for 2 seconds, the light indicator (11) will
light up, and the time setting digits (7) «--:--» will be
ashing on the display.
• To set the time, press the button (9) « » and set
the operation time «5:00» with the buttons (6) «+/-».
The time digits (7) will be ashing for 3 seconds and
then will glow constantly (pic. 6).
Note: after setting the time (the time digits (7) glow
constantly) you cannot reset it. To reset the time you
have to switch the grill o, then switch it on again and
set the necessary time.
• To set the temperature, press again the button (9) «
» and set the frying plates temperature 235°С
with the buttons (6) «+/-». The temperature digits
(8) will be ashing for 3 seconds and then will glow
constantly (pic. 6).
• The grill will be switched on in preheating mode,
the display illumination will glow orange. The

10
EN
indicator (13) « » will rotate and the preheating
time countdown will start, the digits (7) will show the
preheating time.
• In 5 minutes the preheating will stop and you will
hear 2 sound signals.
• Take the handle (3) and open the grill, carefully
put the food products on the lower frying plate. Be
careful to avoid burns by splashing fat or juice from
the products. Lower the upper part of the grill on the
products.
• After the preset time is over, you will hear 2 sound
signals which mean that the preset cooking time is
over.
• Take the handle (3) and open the grill, put the cooked
food in a suitable container using wooden or heat-
resistant plastic kitchen tools.
Note: during cooking the grill will be switching from the
heating mode to the keep warm mode, and the display
illumination color will be switching from purple to orange
(pic. 7, 8).
• Switch the grill o by pressing and holding the
button (10) « », disconnect the power plug from
the socket, wait until the grill cools down completely.
Then open the grill and wipe the frying plates.
• Remove the tray (2) and pour the liquid out of it,
wash the tray, wipe it and install back to its place.
«Grill» operating mode
• Switch the grill on by pressing and holding the
button (10) « » for 2 seconds, press the button (12)
«Grill», only the temperature digits (8) will appear on
the display (pic. 2).
• You can set the required temperature of the heating
plates with the buttons (6) «+/-». In this mode the
operation time 1 hour is set by default. You can
switch the grill o at any moment by pressing and
holding the button (10) « ».
Keep warm mode and grill automatic switch-o
• After the cooking cycle is nished (there were 2
sound signals), the ashing time (7) and temperature
(8) digits will appear on the display. The grill will
switch to the countdown mode within 3 minutes. If
no actions are performed within 3 minutes, the keep
warm mode will switch on for 60 minutes (pic. 9).
• In 60 minutes you will hear sound signals, and the
grill will switch o in 2 seconds (pic. 10).
MALFUNCTION SYMBOLS
• In case of malfunction a sound signal will be heard,
the display illumination will glow blue, the quickly
ashing symbols «ER 1», «ER 2» or «ER 3» will be
shown the display, the buttons on the control panel
(8) will be inactive.

11
EN
ATTENTION! In all cases when the malfunction symbols
«ER 1», «ER 2» or «ER 3» appear on the display,
disconnect the power plug from the socket, wait for the
grill to cool down, put it back in its original packaging
and contact an authorized service center.
CLEANING AND CARE
• Clean the frying plates of the grill after every use.
• Turn the grill o by pressing and holding the «
» button (10), disconnect the power plug from the
socket, wait until the grill cools down completely.
• Clean the grill body surface with a slightly damp cloth
and then wipe it dry.
• Take the handle (3) and open the grill.
• Remove the tray (2) and pour the liquid out of it.
• Wipe the frying plates and the tray (2), wash them
with warm water and neutral detergent, rinse them
and wipe dry.
• Do not use metal brushes, abrasives or solvents to
clean the frying plates and the grill body.
• Do not immerse the grill, the power cord and the
power plug into water or any other liquids.
STORAGE
• Before taking the grill away for storage, clean the
frying plates (7) and the grill body.
• Press together the lower and the upper parts of the
grill and move the lock (5).
• You can store the folded press grill in vertical
position.
• Keep the unit in a dry cool place out of reach of
children and disabled persons.
DELIVERY SET
1. Press grill — 1 pc.
2. Tray — 1 pcs.
3. Manual — 1 pc.
TECHNICAL SPECIFICATIONS
• Power supply: 220-240 V, ~ 50 Hz
• Rated input power: 2000 W
RECYCLING
To prevent possible damage to the
environment or harm to the health of
people by uncontrolled waste disposal,
after service life expiration of the unit or
the batteries (if included), do not discard
them with usual household waste, deliver
the unit and the batteries to specialized centers for
further recycling.
The waste generated during the disposal of the unit
is subject to mandatory collection and consequent
disposal in the prescribed manner.

12
EN
The unit operating life is 3 years
The manufacturing date is specied in the serial
number.
In case of any malfunctions promptly apply to the
authorized service center.
For further information about recycling of this product
apply to a local municipal administration, a disposal
service or to the shop where you purchased this
product.
The manufacturer reserves the right to change the
appearance, design and specications not aecting
general operation principles of the unit, without prior
notice.

13
DE
GRILL BR2004
Der Grill wird für das Garen von Fleisch-, Fisch-
oder Gemüselebensmittel verwendet. Das Gerät
kann als Kontaktgrill oder oene Bratächen
verwendet werden.
BESCHREIBUNG
1. Grillunterteil
2. Schale
3. Gri
4. Bedienungs-/Anzeigeplatte
5. Grillober- und Unterteilverriegelung
6. Betriebszeit- und Arbeitsächentemperatureinstell
tasten «+/-»
7. Betriebszeitzahlensymbole «Time»
8. Arbeitsächentemperaturzahlensymbole «Temp»
9. Zeit-/Temperatureinstellbetriebstasten « »
10. Grill-Ein-/Ausschalttaste « »
11. Kontrolleuchte
12. Standardbetriebseinschalttaste «Grill»
13. Betriebs-/Temperaturhaltungsanzeige « »
DE
ACHTUNG!
Als zusätzlicher Schutz ist es zweckmäßig,
den FI-Schalter mit Nennstrom bis 30 mA im
Stromversorgungskreis aufzustellen; wenden Sie sich
dafür an einen Spezialisten.
Grill
TempTime
°C
1
5
2
4
3

14
DE
Abb. 1
Abb. 4
Abb. 7
Abb. 2
Abb. 5
Abb. 8
Abb. 6
Abb. 9
Abb. 3
Grill
TempTime
°C
Grill
TempTime
°C
Grill
TempTime
°C
Grill
TempTime
°C
TempTime
°C
TempTime
°C
225
TempTime
°C
TempTime
°C
TempTime
°C
TempTime
°C
TempTime
°C
Abb. 10
6 7 8 9
13 12
10 11

15
DE
SICHERHEITSHINWEISE UND
GEBRAUCHSANLEITUNG
Bevor Sie den Grill benutzen, lesen Sie die
Bedienungsanleitung aufmerksam durch und
bewahren Sie sie zum späteren Gebrauch auf.
• Benutzen Sie den Grill nur bestimmungsmäßig und
laut dieser Bedienungsanleitung.
• Der Missbrauch des Geräts kann zu seiner
Störung führen, den Benutzer oder sein Eigentum
beschädigen und ist kein Garantiefall.
• Vergewissern Sie sich, dass die auf dem
Bezeichnungszettel angegebene Betriebsspannung
und die Netzspannung übereinstimmen.
• Stecken Sie den Netzstecker in eine Steckdose mit
einem zuverlässigen Erdungskontakt.
• Schließen Sie das Gerät an keine externen
Schaltuhren oder elektrischen Steckdosen mit
Fernbedienung an.
• Verwenden Sie keine Adapterstecker beim
Anschließen des Grills ans Stromnetz, um das
Brandrisiko zu vermeiden.
• Stellen und benutzen Sie den Grill auf einer ebenen,
trockenen, standfesten und hitzebeständigen
Oberäche mit immer freiem Zugang zur Steckdose
auf.
• Es ist nicht gestattet, das Gerät draußen zu
benutzen.
• Es ist nicht empfohlen, das Gerät bei Gewitter zu
benutzen.
• Schützen Sie den Grill vor Stößen, Stürzen,
Vibrationen und anderen mechanischen
Einwirkungen.
• Lassen Sie das ans Stromnetz angeschlossene
Gerät nie unbeaufsichtigt.
• Benutzen Sie das Gerät in direkter Nähe von
Heizgeräten, Wärmequellen oder oenem Feuer
nicht.
• Es ist verboten, den Grill an den Orten, wo
Sprays verwendet werden, sowie in der Nähe von
leichtentzündbaren Flüssigkeiten, zu benutzen.
• Benutzen Sie den Grill in der Nähe von Spülbecken,
in Badezimmern und neben den Wasserbecken oder
anderen mit Wasser gefüllten Behältern nicht.
• Falls der Grill ins Wasser gefallen ist, ziehen Sie
den Netzstecker aus der Steckdose sofort heraus,
erst danach holen Sie das Gerät aus dem Wasser
heraus.
• Achten Sie darauf, dass das Netzkabel heiße
Oberächen und scharfe Möbelkanten nicht berührt.
• Während des Betriebs wird das Grillgehäuse stark
erhitzt, berühren Sie die mit « » gekennzeichneten
heißen Oberächen nicht, um Verbrennungen zu
vermeiden.
• Bewegen Sie den heißen Grill nicht, warten Sie ab,
bis er vollständig abkühlt.
• Benutzen Sie das Gerät in gut belüfteten Räumen.

16
DE
• Benutzen Sie nur die mitgelieferten abnehmbaren
Grillteile.
• Schalten Sie den Grill ohne Lebensmittel nicht ein.
• Grillen Sie die gefrorene Lebensmittel nicht, tauen
Sie sie vor dem Grillen auf.
• Hüten Sie sich vor dem Dampfaustritt aus dem
Zwischenraum der Arbeitsächen, halten Sie
Ihre Hände und andere oene Körperteile vom
Zwischenraum der Arbeitsächen fern.
• Nach der Zubereitung nehmen Sie die Lebensmittel
aus dem Grill sofort heraus, ihr längeres Bleiben
im eingeschalteten Grill kann zu ihrer Entzündung
führen.
• Es ist verboten, die zubereiteten Lebensmittel mit
Metallgegenständen, die die Antihaftbeschichtung
der Arbeitsächen beschädigen können,
herauszunehmen; verwenden Sie das
Küchenzubehör für die Antihaftoberächen.
• Trennen Sie das Gerät nach dem Gebrauch oder
vor der Reinigung vom Stromnetz unbedingt ab.
Wenn Sie den Grill vom Stromnetz abtrennen, halten
Sie den Netzstecker fest und ziehen Sie ihn aus
der Steckdose vorsichtig heraus; ziehen Sie das
Netzkabel nicht, da es zu seiner Beschädigung und
einem Kurzschluss führen kann.
• Berühren Sie das Gerätegehäuse, das Netzkabel
und den Netzstecker mit nassen Händen nicht.
• Aus Kindersicherheitsgründen lassen Sie
Plastiktüten, die als Verpackung verwendet werden,
nie ohne Aufsicht.
ACHTUNG!
Lassen Sie Kinder mit Plastiktüten oder
Verpackungsfolien nicht spielen. Erstickungsgefahr!
• Das Gerät ist nicht für Kinder bestimmt.
• Beaufsichtigen Sie Kinder, damit sie das Gerät als
Spielzeug nicht benutzen.
• Lassen Sie Kinder die Arbeitsäche, das
Gerätegehäuse, das Netzkabel oder den Netzstecker
während des Gerätebetriebs nicht berühren.
• Besondere Vorsichtsmaßnahmen sind in den
Fällen angesagt, wenn sich Kinder oder behinderte
Personen während des Gerätebetriebs in der Nähe
aufhalten.
• Während des Betriebs und der Pausen zwischen
den Betriebszyklen stellen Sie das Gerät an einen für
Kinder unzugänglichen Ort auf.
• Dieses Gerät ist für Personen (darunter Kinder)
mit Körper-, Nerven- und Geistesstörungen
oder Personen ohne ausreichende Erfahrung
und Kenntnisse nicht geeignet, wenn sie sich
unter Aufsicht der Person, die für ihre Sicherheit
verantwortlich ist, nicht benden oder entsprechende
Anweisungen über die Nutzung des Geräts nicht
bekommen haben.
• Prüfen Sie die Unversehrtheit des Netzkabels von
Zeit zu Zeit.

17
DE
• Wenn das Netzkabel beschädigt ist, soll es vom
Hersteller, vom Kundendienst oder von ähnlich
qualiziertem Personal ersetzt werden, um Gefahren
zu vermeiden.
• Es ist nicht gestattet, das Gerät selbständig
zu reparieren. Es ist nicht gestattet, das Gerät
selbständig auseinanderzunehmen; bei der
Feststellung jeglicher Beschädigungen, sowie im
Sturzfall, trennen Sie es vom Stromnetz ab und
wenden Sie sich an einen Kundendienst.
• Um Beschädigungen zu vermeiden, transportieren
Sie das Gerät nur in der Fabrikverpackung.
• Bewahren Sie das Gerät an einem trockenen,
kühlen und für Kinder und behinderte Personen
unzugänglichen Ort auf.
DAS GERÄT IST NUR FÜR DEN GEBRAUCH IM
HAUSHALT GEEIGNET, ES IST VERBOTEN, DAS
GERÄT ZU HANDELS- ODER LABORZWECKEN ZU
BENUTZEN.
VOR DER ERSTEN NUTZUNG
Packen Sie das Gerät aus und warten Sie 3 Stunden,
bevor Sie es bei einer negativen Temperatur
transportieren oder bewahren.
• Packen Sie das Gerät aus und entfernen Sie alle
Verpackungsmaterialien.
• Bewahren Sie die Originalverpackung auf.
• Lesen Sie die Sicherheitsmaßnahmen und
Bedienungsempfehlungen durch.
• Prüfen Sie die Komplettheit.
• Prüfen Sie das Gerät auf Beschädigungen; wenn
es beschädigt ist, schließen Sie es ans Stromnetz
nicht an.
• Vergewissern Sie sich, dass die angegebenen
Parameter der Geräteversorgungsspannung und die
Stromnetzparameter übereinstimmen. Beim 60-Hz-
Stromnetz-Gerätebetrieb sind keine zusätzlichen
Maßnahmen erforderlich.
• Wischen Sie das Grillgehäuse mit einem leicht
angefeuchteten Tuch, danach trocknen Sie es ab.
• Schieben Sie den Riegel (5) greifen Sie den Gri (3)
und machen Sie den Grill auf.
• Nehmen Sie die Schale (2) heraus.
• Waschen Sie die Arbeitsächen und die Schale
(2) mit Warmwasser und einem neutralen
Reinigungsmittel, spülen und dann trocknen Sie sie
ab.
• Stellen Sie den Grill so auf, dass die Wänden und
das Grillgehäuse relativ zueinander mindestens 20
cm entfernt sind und der Freiraum über dem Grill
mindestens 60 cm beträgt.
• Benutzen Sie den Grill auf einer ebenen, standfesten
Oberäche fern von Feuchtigkeitsquellen,
• Wärme und oenem Feuer und mit immer freiem
Zugang zur Steckdose.
• Installieren oder verwenden Sie den Grill in der
Nähe von leichtentzündbaren Materialien oder
Flüssigkeiten, sowie den Gegenständen, die durch
Wärme verzogen werden können, nicht.

18
DE
• Benutzen Sie das Gerät in gut belüfteten Räumen.
• Vergewissern Sie sich, dass die Schale (2) zurück
aufgestellt ist.
• Vor dem Grillbetrieb machen Sie den Grill auf und
ölen Sie die Arbeitsächen mit Panzenöl leicht ein.
• Machen Sie den Grill zu.
• Stecken Sie das Netzkabel in eine Steckdose, Sie
hören einen Piepton und die Hintergrundbeleuchtung
des Displays wird blau (Abb. 1).
Anmerkung: wenn der Grill nicht betrieben wird,
erlischt die Bildschirmbeleuchtung nach 1 Minute.
• Um den Grill einzuschalten, halten Sie die Taste (10)
«» 2 Sekunden lang gedrückt, dabei leuchtet die
Kontrolleuchte (11), und die Zeitsymbole (7) «-:-»
blinken auf dem Bildschirm. Drücken Sie die «Grill»-
Taste (12), dabei leuchtet die Bildschirmbeleuchtung
orange, die Heizelemente werden eingeschaltet, und
die Temperaturzahlensymbole (8) 235°C werden
angezeigt (Abb. 2).
• Schalten Sie den Grill nach ca. 5-6 Minuten aus,
indem Sie die Taste « » (10) gedrückt halten,
ziehen Sie den Netzstecker aus der Steckdose
heraus, warten Sie, bis der Grill vollständig abgekühlt
ist, greifen Sie am Gri (3), machen Sie den Grill auf
und entfernen Sie das restliche Panzenöl von den
Arbeitsächen mit einer Papierserviette.
• Der Grill ist betriebsbereit.
Anmerkungen: bei erster Nutzung können ein
Fremdgeruch und eine kleine Menge Rauch von den
Heizelementen entstehen, es ist normal und kein
Garantiefall.
GRILLEN
ACHTUNG!
- Während des Betriebs wird das Grillgehäuse
stark erhitzt, berühren Sie die mit « »
gekennzeichneten heißen Oberächen nicht, um
Verbrennungen zu vermeiden.
- Hüten Sie sich vor dem Dampfaustritt aus dem
Arbeitsächenzwischenraum, halten Sie Ihre
Hände und andere oene Körperteile vom
Arbeitsächenzwischenraum fern.
- Benutzen Sie den Grill zum Garen von gefrorenen
Lebensmitteln nicht.
- Grillen Sie keine Fleischstücke an großen
Knochen.
- Die Grillenzeit hängt von den benutzten
Lebensmitteln ab.
- Vergewissern Sie sich vor dem Grillen, dass die
Schale (2) zurück aufgestellt ist.
- Machen Sie den Grill nach dem Einschalten nicht
auf, im geschlossenen Zustand erwärmen sich die
Arbeitsächen schneller und gleichmäßiger.
- Vergewissern Sie sich vor dem Essen, dass die
Lebensmittel durchgegrillt sind.

19
DE
• Der Zeiteinstellungsbereich reicht von 1 bis 30
Minuten mit einem 1-Minuten-Einstellungsschritt.
Anmerkung: nachdem Sie die Zeit eingestellt haben
(die Zeitzahlensymbole (7) leuchten konstant), können
Sie sie nicht ändern; um die Zeit zu ändern, müssen Sie
den Grill ausschalten, nach dem Einschalten des Grills
stellen Sie die gewünschte Zeit neu ein.
• Um die Temperatur einzustellen, drücken Sie
die Taste (9) « » erneut und stellen Sie die
Arbeitsächentemperatur auf 225°C mit den Tasten
«+/-» (6) ein, die Temperaturzahlensymbole (8)
blinken 3 Sekunden lang und leuchten dann konstant
(Abb. 3).
• Der Temperatureinstellbereich reicht von 75°C bis
235°C mit einem 10°С-Einstellungsschritt.
• Der Grill schaltet sich in den Vorheizbetrieb um, die
Bildschirmbeleuchtung leuchtet orange, die Anzeige
«» (13) dreht sich, die Vorheizzeit wird rückgezählt
und mit den Zahlensymbolen (7) angezeigt.
• Nach 5 Minuten endet das Vorheizen, dabei ertönen
2 Tonsignale.
• Fassen Sie den Gri (3) an und machen Sie den
Grill auf, legen Sie die Nahrungsmittel auf die untere
Arbeitsäche vorsichtig aus; hüten Sie sich vor
Verbrennungen durch mögliche Nahrungsmittelfett-
oder Saftspritzer, lassen Sie den Grilloberteil auf die
Nahrungsmittel herunter.
• Nach Ablauf der eingestellten Zeit ertönen 2
Tonsignale, um das Ende der eingestellten Grillenzeit
anzuzeigen.
- Nach der Zubereitung nehmen Sie die
Lebensmittel aus dem Grill sofort heraus, ihr
längeres Bleiben im eingeschalteten Grill kann zu
ihrer Entzündung führen.
- Es ist verboten, gegrillte Lebensmittel mit den
Metallgegenständen, die die Antihaftbeschichtung
der Arbeitsächen beschädigen können,
herauszunehmen; verwenden Sie das
Küchenzubehör für antihaftbeschichtete
Oberächen
GRILLBEISPIELE
Hähnchenschenkel
• Bereiten Sie die erforderlichen Lebensmittel vor.
• Stecken Sie den Netzstecker in eine Steckdose ein,
ein Tonsignal ertönt, und die Bildschirmbeleuchtung
leuchtet blau (Abb. 1).
Anmerkung: wenn der Grill nicht betrieben wird,
erlischt die Beleuchtung des Bildschirms in einer
Minute.
• Um den Grill einzuschalten, halten Sie die Taste (10)
«» 2 Sekunden lang gedrückt, dabei leuchtet die
Kontrolleuchte (11), und die Zeitsymbole (7) «-:-»
blinken auf dem Bildschirm.
• Um die Zeit einzustellen, drücken Sie die Taste (9) «
» und stellen Sie die Betriebszeit auf «10:00» mit
den Tasten «+/-» (6) ein, die Zeitzahlensymbole (7)
blinken 3 Sekunden lang und leuchten dann konstant
(Abb. 3).

20
DE
• Fassen Sie den Gri (3) an und machen Sie den Grill
auf, legen Sie das Gegrillte mit einem Holz- oder
hitzebeständigem Kunststoküchenzubehör in ein
geeignetes Geschirr um.
Anmerkung: während des Grillens schaltet sich der
Grill vom Heizbetrieb in den Temperaturhaltungsbetrieb
um, dabei ändert sich die Bildschirmbeleuchtung von
orange nach purpur (Abb. 4, 5).
• Schalten Sie den Grill aus, indem Sie die Taste (10) «
» gedrückt halten, ziehen Sie den Netzstecker aus
der Steckdose heraus, warten Sie ab, bis der Grill
vollständig abkühlt, machen Sie den Grill auf und
wischen Sie die Arbeitsächen ab.
• Entfernen Sie die Schale (2) und gießen Sie die
Flüssigkeit ab, spülen Sie die Schale aus, wischen
Sie sie ab und setzen Sie sie zurück auf.
Steakgrillen
• Bereiten Sie die erforderlichen Nahrungsmittel vor.
• Um den Grill einzuschalten, halten Sie die Taste (10)
«» 2 Sekunden lang gedrückt, dabei leuchtet die
Kontrolleuchte (11), und die Zeitsymbole (7) «-:-»
blinken auf dem Bildschirm.
• Um die Zeit einzustellen, drücken Sie die Taste (9) «
» und stellen Sie die Betriebszeit auf «5:00» mit
den Tasten «+/-» (6) ein, die Zeitzahlensymbole (7)
blinken 3 Sekunden lang und leuchten dann konstant
(Abb. 6).
Anmerkung: nachdem Sie die Zeit eingestellt haben
(die Zeitzahlensymbole (7) leuchten konstant), können
Sie sie nicht ändern; um die Zeit zu ändern, müssen Sie
den Grill ausschalten, nach dem Einschalten des Grills
stellen Sie die gewünschte Zeit neu ein.
• Um die Temperatur einzustellen, drücken Sie
die Taste (9) « » erneut und stellen Sie die
Arbeitsächentemperatur auf 225°C mit den Tasten
«+/-» (6) ein, die Temperaturzahlensymbole (8)
blinken 3 Sekunden lang und leuchten dann konstant
(Abb. 6).
• Der Grill schaltet sich in den Vorheizbetrieb um, die
Bildschirmbeleuchtung leuchtet orange, die Anzeige
«» (13) dreht sich, die Vorheizzeit wird rückgezählt
und mit den Zahlensymbolen (7) angezeigt.
• Nach 5 Minuten endet das Vorheizen, dabei ertönen
2 Tonsignale.
• Fassen Sie den Gri (3) an und machen Sie den
Grill auf, legen Sie die Nahrungsmittel auf die untere
Arbeitsäche vorsichtig aus; hüten Sie sich vor
Verbrennungen durch mögliche Nahrungsmittelfett-
oder Saftspritzer, lassen Sie den Grilloberteil auf die
Nahrungsmittel herunter.
• Nach Ablauf der eingestellten Zeit ertönen 2
Tonsignale, um das Ende der eingestellten Grillenzeit
anzuzeigen.
• Fassen Sie den Gri (3) an und machen Sie den Grill
auf, legen Sie das Gegrillte mit einem Holz- oder
hitzebeständigem Kunststoküchenzubehör in ein
geeignetes Geschirr um.
Table of contents
Languages:
Other BRAYER Grill manuals

BRAYER
BRAYER BR2002 User manual

BRAYER
BRAYER BR2001 User manual

BRAYER
BRAYER BR2006 User manual

BRAYER
BRAYER BR2031 User manual

BRAYER
BRAYER BR2030 User manual

BRAYER
BRAYER BR2010 User manual

BRAYER
BRAYER BR2007 User manual

BRAYER
BRAYER BR2003 User manual

BRAYER
BRAYER BR2008 User manual

BRAYER
BRAYER BR2000 User manual
Popular Grill manuals by other brands

Dyna-Glo
Dyna-Glo DGA480BSN user manual

Chef Tested
Chef Tested CEG-2000BSA instruction manual

GBG
GBG GBGHSGRLR manual

CORE PRO COOKING
CORE PRO COOKING CP-CB24-M Installation & operation manual

Electrolux
Electrolux Thermaline 9CHG584114 Installation and operating instructions

Unold
Unold 48765 Instructions for use