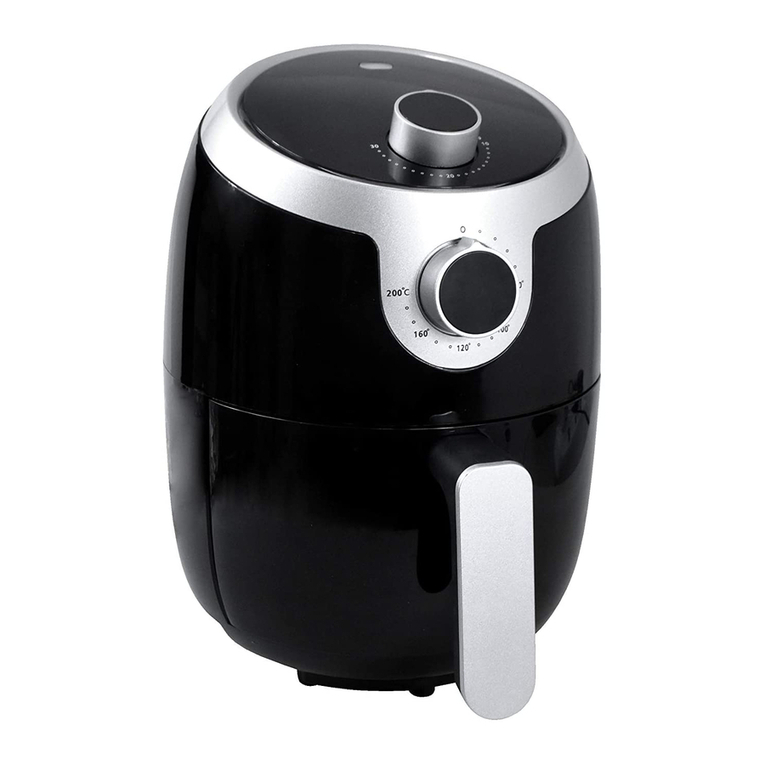
Brentwood Select AF-32MBK Quick guide

AIR FRYER 3.2 L / 3.4 QT. CAPACITY
Model No. AF-32MBK
Operating and Safety Instructions
-FOR INDOOR HOUSEHOLD USE ONLY-

2
IMPORTANT SAFEGUARDS
When using this or any other electrical appliance, always follow these basic safety precautions,
especially when children are present.
READ ALL INSTRUCTIONS BEFORE USE
WARNING-- To reduce the risk of fire, electric shock, serious personal injury and property
damage please note the following:
•Never immerse the housing, which contains electrical components and the heating
elements, in water or rinsing under the tap
•Avoid any liquid enter the appliance to prevent electric shock or short circuit.
•Keep all ingredients in the basket or prevent any contact from heating elements.
•Do not cover the air inlet and the air outlet when the appliance is working.
•Fill the pan with oil may cause a fire hazard.
•Don't touch the inside of the appliance while it is operating.
•Check if the voltage indicated on the appliance fits the local mains voltage.
•o not use the appliance if there is any damage on plug, mains cord or other parts.
•Do not go to any unauthorized person to replace or fix damaged main cord.
•Keep the mains cord away from hot surfaces.
•Do not plug in the appliance or operate the control panel with wet hands.
•Do not place the appliance against a wall or against other appliances. Leave at least 6 in.
free space on the back and sides and 6 in. free space above the appliance.
•Do not place anything on top of the appliance.
•Do not use the appliance for any other purpose than described in this manual.
•Do not let the appliance operate unattended.
•During hot air frying, hot steam is released through the air outlet openings, Keep your
hands and face at a safe distance from the steam and from the air outlet openings.
•Be careful of hot steam and air when you remove the pan from the appliance.
•Any accessible surfaces may become hot during use
•Immediately unplug the appliance if you see dark smoke coming out of the appliance. Wait
for the smoke emission to stop before you remove the pay from the appliance.
•Ensure the appliance in placed on a horizontal, even and stable surface.
•This appliance is designed for household use only. It may not suitable to be safely used in
environments such as staff kitchens, farms, motels, and other non-residential
environments. Nor is it intended to be used by clients in hotels, motels, bed and breakfasts
and other residential environments.
•If the appliance is used improperly or for professional or semi-professional purposes or it is
not used according to the instructions in the user manual, the guarantee becomes invalid
and we could refuse any liability for damage caused.
•Always unplug the appliance while not using.
•The appliance needs approximately 30 minutes to cool down for handle or cleaning safely.

3
SPECIAL INSTRUCTIONS:
A short power supply cord is provided to reduce the risk of becoming entangled in or tripping
over a longer cord. An extension cord is not recommended for use with this product, but if
one must be used:
The marked electrical rating must be at least as great as that of the product;
If the product is of a 3-prong grounding type, the extension cord must be a grounding-
type 3-wire cord.
Arrange the extension cord so that it will not drape over the countertop or tabletop
where it can be tripped over or pulled.
WARNING: This product is equipped with a polarized plug (one blade
is wider than the other blade) to reduce the risk of electrical shock.
This is a safety feature. The plug will fit into a polarized outlet only one
way. If you are unable to insert the plug into the electrical outlet, try
reversing the plug. If the plug still does not fit, contact a qualified electrician. Never use the
plug with an extension cord unless you can fully insert the plug into the extension cord. Do
not alter the plug. Do not attempt to defeat the safety purpose of the polarized plug.
SAVE THESE INSTRUCTIONS
FOR FUTURE REFERENCE
Parts:
Handle
Front Back
Timer
Temperature Control Knob
Cord Storage
Exhaust

4
Before First Use
IMPORTANT: Please check all packaging material carefully before discarding as there may be
accessory parts contained within the packaging material.
WARNING: Do not place any part of the product in a dishwasher.
1. Make sure the Fryer is unplugged.
2. To remove any dust that may have accumulated, wash the Fryer Basket with warm soapy
water and dry thoroughly. Wipe the interior and exterior of the Fryer with a damp towel.
Dry thoroughly.
Note: NEVER immerse the fryer body, cord or plug in water.
3. Unlock by pressing the Release Button.
4. Remove the Frying Basket by pushing the Handle release button and pulling the Fryer
Basket out.
Using Your Fryer:
Attention: First use may cause a slight odor or small smoking upon heating, it is normal. This
is a result of the heating element chemical reaction. It quickly goes away.
1. Carefully pull the pan out of the fryer and Put the ingredients in the basket.
2. Slide the pan back into the fryer, carefully align with the guides in the body of the fryer.
WARNING: Never use the pan without the basket in it.
3. To switch on the appliance, turn the timer knob to the required preparation time
4. Turn the temperature control knob to the required temperature.
Note: If you want, you can also let the appliance preheat without any ingredients inside. In
that case, turn the timer knob to more than 3 minutes and wait until the heating-up
light goes out (after approx. 3 minutes). Then fill the basket and turn the timer knob to
the required preparation time.
5. Some ingredients require shaking halfway through the preparation time. To shake the
ingredients, pull the pan out of the appliance by the handle and shake it. Then slide the
pan back into the fryer.
Caution: Do not press the button the handle during shaking.
Frying basket
Handle and Basket
Release Button
Quick Temp./
Time Guide
Frying pan

5
Tip: To reduce the weight, you can remove the basket from the pan and shake the basket
only. To do so, pull the pan out of the appliance, place it on a heat-resistant surface and press
the button of handle. and lift the basket out of the pan
6. When you hear the timer bell, the set preparation time has elapsed. Pull the pan out of
the appliance. Check if the ingredients are ready.
7. To remove ingredients, pull the pan out of the fryer and press the basket release button
and lift the basket out of the pan.
Cleaning Your Fryer:
WARNING: Always turn the appliance to “Off” and unplug the product, allow it to cool before
cleaning or storing it.
1. Wipe the outside of the appliance with a moist cloth.
2. Clean the pan and basket with hot water, dish soap and a non-abrasive sponge.
3. You can use degreasing liquid to remove any remaining food.
Tip: If food is stuck to the basket or the bottom of the pan, fill the pan with hot water with
some washing-up liquid. Put the basket in the pan and let the pan and the basket soak
for approximately 10 minutes.
4. Clean the inside of the appliance with hot water and non-abrasive sponge.
IMPORTANT: Never submerge the base or clean under running water.
Temperature Guide:
Min-max
Amount (oz)
Time
(min.)
Temperature
(°F)
Shake
Extra information
Potato & Fries
Thin frozen fries
300-400
18-20
400
shake
Thick frozen fries
300-400
20-25
400
shake
Potato gratin
500
20-25
400
shake
Meat & Poultry
Steak
100-500
10-15
355
Pork chops
100-500
10-15
355
Hamburger
100-500
10-15
355
Sausage roll
100-500
13-15
400
Drumsticks
100-500
25-30
355
Chicken breast
100-500
15-20
355
Snacks
Spring rolls
100-400
8-10
400
shake
Use oven-ready
Frozen chicken
nuggets
100-500
6-10
400
shake
Use oven-ready
Frozen fish fingers
100-400
6-10
400
Use oven-ready
Frozen bread crumbed
cheese snacks
100-400
8-10
355
Use oven-ready
Stuffed vegetables
100-400
10
320
Baking
Cake
300
20-25
320
Use baking tin
Quiche
400
20-22
355
Use baking tin/oven dish
Muffins
300
15-18
400
Use baking tin
Sweet snacks
400
20
320
Use baking tin/oven dish

6
Recipes
Tip: A variety of pre-made packaged foods can be cooked in the Air fryer. As a guide, lower the conventional
oven temperature by 70 degrees and reduce the cooking time by half. Exact times and temperatures will
vary by food.
“Bloomin’ Onion”
Serves 4
Ingredients
•1 Large white onion
•1 Large white onion
•1/4 cup Milk, nonfat
•1/4 cup Milk, nonfat
•2 Large eggs
•2 Large eggs
•3/4 cup Panko Bread Crumps
•3/4 cup Panko Bread Crumps
•1 1/2 teaspoon Paprika
•1 1/2 teaspoon Paprika
Directions
1. To slice onion: slice 1 inch off the top and bottom of the onion and remove the papery skin. Use a thin
knife to cut a 1 inch diameter core out of the middle of the onion. Now use a very sharp, large knife to
slice the onion several times down the center to create 'petals': First slice through the center of the
onion to about three-fourths of the way down. Turn the onion 90 degrees and slice it again in an X
across the first slice. Keep slicing the sections in half, very carefully until the onion has been cut 8-16
times. Do not cut down to the bottom of the onion. (The last 8 slices will be difficult, be careful).
2. Place sliced onion in ice water for at least 2 hours / overnight. Remove from water, pat dry. Open
onion so “Petals” are exposed.
3. Place onion on a tray or in a bowl.
4. Mix breadcrumbs with olive oil & Cajun seasoning.
5. In a dish, mix the milk and egg.
6. In a separate dish mix remaining seasonings with Panko.
7. Sprinkle onion generously with egg mixture. Make sure to get in between all petals. Turn onion upside
down to remove excess
8. Using a ladle, ladle the egg mixture into every crevice. Lift up onion and turn to make sure excess egg
drips off.
9. Sprinkle onion very generously with Panko mixture. Press into place.
10. Place the blooming onion into the Fry Basket of the Power Air Fryer XL. Cover the top with aluminum
foil like a tent. Place the Fry Basket into the Fryer
12. Set cooking time to 10 minutes at 360°. Leave foil on.
13. When timer is done, check crispness of the onion. Cook 5-10 more minutes to desired crispness.
When done, remove carefully and serve with Ranch dressing.
French Fries
Serves 4
Ingredients
•2 Russet potatoes
•2 Russet potatoes
•1 tablespoon olive oil
•1 tablespoon olive oil
Directions
1. Blanch the potatoes in water until tender.
2. Let cool. Cut into fries.
3. Toss with olive oil and salt and pepper.
4. Place the potatoes into the Fry Basket and then into the Power Air Fryer XL. Press the M Button.
5. Scroll to the French Fries Icon.
6. Press the Power Button & adjust cooking time to 18 minutes at 400 degrees.
7. Half way through cooking, toss the fries. Shake periodically.

7
Turkey Breast with Maple Glaze
Serves 4
Ingredients
•1.5 teaspoons olive oil
•1.5 teaspoons olive oil
•3 lbs turkey breast cup pure maple syrup, or
more as needed
•3 lbs turkey breast cup pure maple syrup, or
more as needed
•1 teaspoon liquid smoke flavoring (optional)
•1 teaspoon liquid smoke flavoring (optional)
•1 teaspoon ground paprika
•1 teaspoon ground paprika
•1/2 teaspoon salt
•1/2 teaspoon salt
Directions
1. Pre-heat air fryer to 350°F.
2. Brush the olive oil all over the turkey breast.
3. Mix together the maple syrup, smoke flavoring, paprika, salt, pepper, garlic powder, onion powder,
thyme, and cayenne pepper in a bowl, stirring to combine well. Brush the syrup mixture all over the
turkey roast.
4. Transfer the seasoned turkey breast to the air fryer basket and air-fry at 350°F for 20 minutes. Turn
the turkey breast on its side and air-fry for another 10 minutes. Turn the turkey breast on the opposite
side and air-fry for another 10 minutes. The internal temperature of the turkey breast should reach
165ºF when fully cooked.
5. While the turkey is air-frying, combine the maple syrup, mustard and butter in a small saucepan.
When the cooking time is up, return the turkey breast to an upright position and brush the glaze all
over the turkey. Air-fry for a final 5 minutes, until the skin is nicely browned and crispy. Let the turkey
rest, loosely tented with foil, for at least 5 minutes before slicing and serving.
Doughnuts
Serves 4
Ingredients
•1 cup Self Raising Flour
•1Tsp Baking Powder
•3.5 Tbsp Butter
•1/8 Cup +1.5 Tbsp White Sugar
•2.5 Tbsp Butter
•½ Cup Icing Sugar
•1/8 Cup +1.5 Tbsp Brown Sugar
•1 Large Egg
•½ Tsp Pink Food Coloring
• 1 cup Whole Milk
•Strawberry Icing
•1Tbsp Whipped Cream
•¼ Cup Fresh Strawberries (blended)
Directions:
1. Preheat the air fryer to 180c.
2. In a medium sized mixing bowl whisk together your butter, self-rising flour,
3. In another bowl mix together your milk, butter and egg.
4. Gently mix in the second bowl into the first and make sure you don’t over mix as you just want the
ingredients to be combined.
5. Using a cutter remove the center from the doughnut shapes so that they look like a pre-cooked
doughnut.
6. Grease a baking sheet inside the air fryer and add your doughnuts. Cook for 15 minutes at 180c or
until they spring back when lightly pressed.
7. Allow to cool for 5 minutes while you make your icing. Cream the butter and gradually add the icing
sugar until you have a creamy mixture. Add the food coloring, whipped cream and blended
strawberries and mix well.
8. When the doughnuts have cooled place the icing over the top and serve.
Note: This recipe is for making four doughnuts. You can place four in the bottom of your air fryer easily
and if you want more double your recipe and do two rounds in it.

8
ONE-YEAR LIMITED WARRANTY
FOR ONE YEAR FROM THE DATE OF PURCHASE, WHEN THIS APPLIANCE IS OPERATED AND
MAINTAINED ACCORDING TO INSTRUCTIONS FURNISHED WITH THE PRODUCT, BRENTWOOD
APPLIANCES, INC. WILL REPLACE THE PRODUCT WITH AN EQUIVALENT UNIT OR A NEW UNIT, SOLEY
AT OUR OPTION.
TO OBTAIN WARRANTY SERVICE AND TROUBLESHOOTING INFORMATION:
Call Customer Service at 1-888-903-0060 in the U.S.
BRENTWOOD will not pay for:
1. Service calls to correct the installation of your appliance, to instruct you how to use your
appliance, to replace house fuses or correct house wiring, or to replace light bulbs.
2. Repairs when your appliance is used in other than normal, single-family household use.
3. Pickup and delivery
4. Damage resulting from accident, alteration, misuse, abuse, fire, flood, improper installation,
acts of God, or use of products not approved by Brentwood Appliances.
5. Repairs to parts or systems resulting from unauthorized modifications made to the
appliance.
6. Service or warranty support for units located and/or operated outside the United States.
NO WARRANTIES, WHETHER EXPRESS OR IMPLIED, INCLUDING BUT NOT LIMITED TO, ANY
IMPLIED WARRANTIES OF MERCHANTABILITY FOR A PARTICULAR PURPOSE, OTHER THAN THOSE
EXPRESSLY DESCRIBED ABOVE SHALL APPLY. MANUFACTURER FURTHER DISCLAIMS ALL
WARRANTIES AFTER THE EXPRESS WARRANTY PERIOD STATED ABOVE. NO OTHER EXPRESS
PRODUCTS SHALL BE BINDING ON BRENTWOOD APPLIANCES, INC. REPAIR OR REPLACMENT IS
THE EXCLUSIVE REMEDY OF THE CONSUMER. BRENTWOOD APPLIANCES, INC. SHALL NOT BE
LIABLE FOR ANY INCIDENTAL OR CONSEQUENTIAL DAMAGES CAUSED BY THE USE, MISUSE OR
INABILITY TO USE THE PRODUCT. NOT WITHSTANDING THE FOREGOING CONSUMERS RECOVERY
AGAINST BRENTWOOD SHALL NOT EXCEED THE PURCHASE PRICE OF THE PRODUCT SOLD BY
BRENTWOOD. THIS WARRANTY SHALL NOT EXTEND TO ANYONE OTHER THAN THE ORIGINAL
CONSUMER WHO PURCHASED THE PRODUCT AND IS NOT TRANSFERABLE.
Some states or provinces do not allow the exclusion or limitation of incidental or consequential
damage or allow limitations on warranties, so limitation or exclusions may not apply to you. This
warranty gives you specific legal rights, and you may have other rights that vary from state to
province. Outside the 50 United States, this warranty does not apply. Contact you authorized
Brentwood Dealer to determine if another warranty applies.
Keep this Warranty and your sales slip together for future references. You must provide proof of
purchase for in-warranty service.
Write down the following information about your appliance to better help you obtain assistance
or service if you ever need it. You will need to know your complete model number and serial
number. You can find this information on the model and number label / plate.
CUSTOMER RECORD
Date of Purchase _______Store/Dealer
Model No: Serial No.:

9
FREIDORA 3.2 L / 3.4 QT. de Capacidad
Model No. AF-32MBK
Instrucciones de Operación y Seguridad
-SOLO PARA USO DOMESTICO-

10
MEDIDAS DE SEGURIDAD IMPORTANTES
Al usar este o cualquier otro electrodoméstico, siga las precauciones básicas de seguridad,
especialmente cuando niños están presentes.
LEA TODAS LAS INSTRUCTIONES
ANTES DE USAR
ADVERTENCIA - Para reducir el riesgo de incendio, choque eléctrico, lesiones personales
graves y daños a la propiedad, por favor tenga en cuenta lo siguiente:
•No sumerja nunca la carcasa, que contiene componentes eléctricos y elementos de
calentamiento, en agua o enjuague bajo el grifo
•Evitar que el líquido entre en el aparato para evitar descargas eléctricas o cortocircuitos.
•Mantenga todos los ingredientes en la cesta o evite cualquier contacto de los elementos
de calefacción.
•No cubra la entrada de aire y la salida de aire cuando el aparato esté funcionando.
•Llenar el recipiente con aceite puede provocar un incendio.
•No toque el interior del aparato mientras está en funcionamiento.
•Compruebe si la tensión indicada en el aparato se ajusta a la tensión de red local.
•No utilice el aparato si hay algún daño en el enchufe, el cable de alimentación u otras
piezas.
•No vaya a ninguna persona no autorizada para reemplazar o arreglar el cable principal
dañado.
•Mantenga el cable de alimentación alejado de superficies calientes.
•No conecte el aparato ni utilice el panel de control con las manos mojadas.
•No coloque el aparato contra una pared o contra otros aparatos. Deje al menos 10 cm de
espacio libre en la parte posterior y los laterales y 10 cm de espacio libre encima del
aparato.
•No coloque nada encima del aparato.
•No utilice el aparato con ningún otro fin que el descrito en este manual.
•No permita que el aparato funcione sin vigilancia.
•Durante la cocción con aire caliente, se libera vapor caliente a través de las aberturas de
salida de aire, Mantenga las manos y la cara a una distancia segura del vapor y de las
aberturas de salida de aire.
•También tenga cuidado con el vapor y el aire caliente cuando retire la sartén del aparato.
•Las superficies accesibles pueden calentarse durante el uso (Fig.2)
•Desenchufe inmediatamente el aparato si el humo oscuro sale del aparato. Espere a que la
emisión de humo se detenga antes de quitar la paga del aparato.
•Asegúrese de colocar el aparato en una superficie horizontal, uniforme y estable.
•Este aparato está diseñado para uso doméstico solamente. Puede que no sea adecuado
para ser utilizado con seguridad en entornos tales como cocinas de personal, granjas,

11
moteles y otros entornos no residenciales. Tampoco está destinado a ser utilizado por
clientes en hoteles, moteles y otros entornos residenciales.
•Si el aparato se utiliza de forma incorrecta o para fines profesionales o semiprofesionales
con las instrucciones del manual del usuario, Podría rechazar cualquier responsabilidad por
los daños causados.
•Siempre desenchufe el aparato mientras no lo use.
•El aparato necesita aproximadamente 30 minutos para enfriarse para el mango o la
limpieza con seguridad.
INSTRUCCIONES ESPECIALES:
Un cable de suministro eléctrico corto para reducir el riesgo de enredarse o tropezarse con
un cable más largo. Un cable de extensión no se recomienda para su uso con este producto,
pero si se debe utilizar:
El voltaje eléctrico debe ser al menos tan grande como la del producto
Si el producto es de un tipo de conexión a tierra de 3 patas, el cable de extensión debe
ser un cable de toma de tierra de 3 hilos
Organice el cable de extensión de manera que no cuelgue del mostrador o de la mesa
donde alguien se pueda tropezar con él ni tirar.
ADVERTENCIA: Este producto está equipado con un enchufe polarizado
(una pata es más ancha que la otra) para reducir el riesgo de descarga
eléctrica. Esta es una característica de seguridad . El enchufe encajará en
un tomacorriente polarizado de una sola manera. Si no puede insertar el
enchufe en la toma de corriente , intente invertir el enchufe. Si aún así no encaja,
comuníquese con un electricista calificado. No utilice nunca el enchufe con un cable de
extensión a menos que pueda insertar completamente el enchufe en el cable de extensión.
No altere el enchufe. No intente anular la característica de seguridad del enchufe polarizado.
GUARDE ESTAS INSTRUCCIONES
COMO REFERENCIA

12
Partes:
Antes del Primer Uso:
IMPORTANTE: Por favor, revise todo el material de empaque con cuidado antes de
tirar ya que puede haber partes accesorias contenidas en el material de empaque.
ADVERTENCIA: No coloque el cuerpo del motor en el agua.
1. Asegúrese que la freidora este desconectada.
Frying
basket
Handle and Lock
Release Button
Handle
Quick Temp.
Guide
Front Back
Timer
Temperature Control Knob
Cord Storage
Exhaust

13
2. Para quitar el polvo que se haya acumulado, lavar la cesta de la freidora con agua
tibia y jabón y secar bien. Limpie el interior y el exterior de la freidora con una toalla
húmeda. Secar a fondo.
Nota: NUNCA sumerja el cuerpo de la freidora, el cable o el enchufe en agua.
3. Desbloquear la tapa presionando el botón de liberación de la tapa.
4. Retire la cesta freidora pulsando el botón de liberación de la manija y levante la
cesta para freír.
Utilización de su freidora;
Atención: En el primer uso puede salir un ligero olor o pequeño humo tras el
calentamiento, es normal. Este es un resultado de la reacción química del elemento
de calentamiento. Rápidamente se va.
1. Retire cuidadosamente la sartén de la freidora y coloque los ingredientes en la cesta.
2. Deslice el recipiente hacia atrás en la freidora, alinee cuidadosamente con las guías en el
cuerpo de la freidora.
ADVERTENCIA: Nunca utilice la sartén sin la cesta en ella.
3. Para encender el aparato, gire el mando del temporizador hasta el tiempo de preparación
requerido
4. Gire la perilla de control de temperatura a la temperatura deseada.
Nota: Si lo desea, también puede dejar que el aparato se precaliente sin ingredientes en su
interior. En ese caso, gire la perilla del temporizador a más de 3 minutos y espere a que se
apague la luz de calentamiento (después de aproximadamente 3 minutos). Luego llene la
cesta y gire la perilla del temporizador hasta el tiempo de preparación requerido.
5. Algunos ingredientes requieren agitar a medio camino durante el tiempo de preparación.
Para sacudir los ingredientes, tire de la sartén del aparato por el mango y agítelo. A
continuación, deslice la bandeja de nuevo en la freidora.
Precaución: No presione el botón de la manija durante el temblor.
Sugerencia: Para reducir el peso, puede retirar la cesta de la cacerola y agitar la cesta
solamente. Para ello, tire de la bandeja del aparato, colóquela en una superficie resistente
al calor y presione el botón del mango. Y levante la cesta de la sartén
6. Cuando oiga el timbre del temporizador, el tiempo de preparación del set ha transcurrido.
Tire de la sartén del aparato. Compruebe si los ingredientes están listos.
7. Para quitar los ingredientes, tire de la sartén de la freidora y presione el botón de
liberación de la cesta y levante la cesta de la sartén.
Limpieza de la freidora:
ADVERTENCIA: Siempre apague el aparato en "Off" y desenchufe el producto, deje que
se enfríe antes de limpiarlo o almacenarlo.
1. Limpie el exterior del aparato con un paño húmedo.
2. Limpie la cacerola y la cesta con agua caliente, jabón para platos y una esponja no
abrasiva.
3. Puede usar el líquido desengrasante para quitar cualquier alimento restante.

14
Sugerencia: Si el alimento está pegado a la canasta oa la parte inferior de la sartén,
llene la cacerola con agua caliente con un poco de detergente. Coloque la canasta
en la sartén y deje que la cacerola y la cesta se remojen durante aproximadamente
10 minutos.
4. Limpie el interior del aparato con agua caliente y una esponja no abrasiva.
IMPORTANTE: Nunca sumerja la base ni limpie con agua corriente.
Tiempos de Fritura y Guía de Temperatura:
Los tiempos de fritura en esta tabla son una guía y se deben ajustar para adaptarse a
las diferentes cantidades, grosores y sabores.
Min-max
Amount (oz)
Tiempo
(min.)
Temperatura
(°F)
Notas
Patatas fritas
300-400
18-20
400
Fritas congeladas finas
300-400
20-25
400
Patatas congeladas
gruesas
500
20-25
400
Gratinado de patatas
Carne de ave
100-500
10-15
355
filete
100-500
10-15
355
Chuletas de cerdo
100-500
10-15
355
Hamburguesa
100-500
13-15
400
Rollo de salchicha
100-500
25-30
355
Baquetas
100-500
15-20
355
Pechuga de pollo
Aperitivos
100-400
8-10
400
Utilisez un four prêt
à l'emploi
Rollitos de primavera
100-500
6-10
400
Utilisez un four prêt
à l'emploi
Pepitas de pollo
congeladas
100-400
6-10
400
Utilisez un four prêt
à l'emploi
Dedos de pescado
congelados
100-400
8-10
355
Utilisez un four prêt
à l'emploi
Pan congelado
desmenuzado
100-400
10
320
Bocadillos de queso
Verduras rellenas
300
20-25
320
Utilisez un four prêt
à l'emploi
Horneando
400
20-22
355
Utilisez un four prêt
à l'emploi
pastel
300
15-18
400
Utilisez un four prêt
à l'emploi
Quiche
400
20
320
Utilisez un four prêt
à l'emploi

15
FRITEUSE DE 3.2 L / 3.4 QT.
Model No. AF-32MBK
Consignes de sécurité et de fonctionnement
-POUR USAGE DOMESTIQUE INTÉRIEUR SEULEMENT-

16
IMPORTANTES MESURES DE SÉCURITÉ
Lorsque vous utilisez cet appareil ou tout autre appareil électrique, suivez toujours ces
précautions de base, surtout en présence d’enfants.
LISEZ TOUTES LES INSTRUCTIONS
AVANT USAGE
AVERTISSEMENT - Pour réduire le risque d’incendie, d’électrocution, de blessures graves
ou de dommages matériels, veuillez noter ce qui suit:
•Ne plongez jamais le boîtier, qui contient des composants électriques et les éléments
chauffants, dans de l'eau ou rinçage sous le robinet
•Évitez tout liquide entrant dans l'appareil pour éviter les chocs électriques ou les courts-
circuits.
•Conservez tous les ingrédients dans le panier ou évitez tout contact avec les éléments
chauffants.
•Ne couvrez pas l'entrée d'air et la sortie d'air lorsque l'appareil fonctionne.
•Remplir la casserole avec de l'huile peut provoquer un risque d'incendie.
•Ne pas toucher l'intérieur de l'appareil pendant son fonctionnement.
•Vérifiez si la tension indiquée sur l'appareil correspond à la tension secteur locale.
•o ne pas utiliser l'appareil s'il y a des dommages sur la fiche, le cordon d'alimentation ou
d'autres pièces.
•Ne passez à aucune personne non autorisée pour remplacer ou corriger le cordon
principal endommagé.
•Gardez le cordon d'alimentation loin des surfaces chaudes.
•Ne branchez pas l'appareil ou n'utilisez pas le panneau de commande avec les mains
humides.
•Ne placez pas l'appareil contre un mur ou contre d'autres appareils. Laissez au moins 6 po
d'espace libre sur le dos et les côtés et 6 pouces d'espace libre au-dessus de l'appareil.
•Ne placez rien sur le dessus de l'appareil.
•N'utilisez pas l'appareil à d'autres fins que celles décrites dans ce manuel.
•Ne laissez pas l'appareil fonctionner sans surveillance.
•Pendant la friture à l'air chaud, de la vapeur chaude est libérée dans les ouvertures de
sortie d'air, gardez vos mains et votre visage à une distance de sécurité de la vapeur et des
ouvertures de sortie d'air.
•Faites attention à la vapeur et à l'air chaud lorsque vous retirez la casserole de l'appareil.
•Toute surface accessible peut devenir chaude pendant l'utilisation
•Débranchez immédiatement l'appareil si vous voyez de la fumée sombre sortir de
l'appareil. Attendez que les émissions de fumée s'arrêtent avant de retirer le solde de
l'appareil.
•Assurez-vous que l'appareil est placé sur une surface horizontale, uniforme et stable.
•Cet appareil est conçu uniquement pour usage domestique. Il peut ne pas convenir d'être
utilisé de manière sûre dans des environnements tels que des cuisines de personnel, des

17
fermes, des motels et d'autres environnements non résidentiels. Il n'est pas non plus
destiné à être utilisé par les clients dans les hôtels, motels, chambres d'hôtes et autres
environnements résidentiels.
•Si l'appareil est utilisé de manière incorrecte ou à des fins professionnelles ou semi-
professionnelles ou qu'il n'est pas utilisé conformément aux instructions du manuel
d'utilisation, la garantie devient invalide et nous pouvons refuser toute responsabilité pour
les dommages causés.
•Toujours débrancher l'appareil sans l'utiliser.
•L'appareil nécessite environ 30 minutes pour refroidir pour la poignée ou le nettoyage en
toute sécurité
RECOMMANDATIONS ADDITIONNELLES :
Un court cordon d’alimentation est fourni afin de réduire les risques de s’enchevêtrer ou de
trébucher dans un cordon plus long. L’utilisation d’une rallonge n’est pas recommandée avec
ce produit, mais si elle doit être utilisée :
La puissance nominale indiquée sur la corde doit être au moins aussi grande que celle
de l’appareil;
Si le cordon de l’appareil est relié à la terre à 3 fils, la corde de rallonge doit aussi être
reliée à la terre à 3 fils.
Installer la rallonge de façon à ce qu’elle ne pende pas du comptoir ou de la table où l’on
pourrait s’y accrocher ou trébucher.
AVERTISSEMENT: Cet appareil est muni d'une fiche d’alimentation
polarisée (une broche est plus large que l'autre). Il s'agit là d'une
mesure de sécurité. Pour réduire le risque d’électrocution, la fiche
doit être insérée d’une seule façon dans une prise de courant
polarisée. Si le branchement n’est pas complet, inversez la fiche. Si
la fiche ne s’insère toujours pas, contactez un électricien qualifié. N'utilisez jamais la fiche
avec une rallonge, à moins de pouvoir l’insérer parfaitement dans la rallonge. Ne tentez pas
de modifier la fiche polarisée et respectez à la lettre cette mesure de sécurité.
CONSERVEZ CES INSTRUCTIONS
À TITRE DE RÉFÉRENCE

18
Pièces:
Avant la première utilisation
IMPORTANT: Vérifiez attentivement tout le matériel d’emballage avant de le jeter
pour vous assurer qu’aucun accessoire n’est resté à l’intérieur.
AVERTISSEMENT: Aucune pièce de cet appareil ne va au lave-vaisselle.
1. Assurez-vous que la friteuse est débranchée.
2. Pour vous assurer qu’il n’y a aucune accumulation de poussière dans le panier à
friture, lavez-le à l’eau chaude savonneuse et séchez-le correctement. Essuyez
l’intérieur et l’extérieur de la friteuse avec un chiffon humide. Séchez correctement.
Frying
basket
Handle and Lock
Release Button
Handle
Quick Temp.
Guide
Front Back
Timer
Temperature Control Knob
Cord Storage
Exhaust

19
Note: NE JAMAIS immerger le boîtier, le cordon ou la fiche dans l’eau.
3. Déverrouillez le couvercle en pressant le bouton de dégagement du couvercle.
4. Retirez le panier à friture en pressant le bouton de déblocage de la poignée et en
soulevant le panier vers le haut.
Utilisation de votre friteuse :
Attention : Une légère odeur ou un peu de fumée peuvent se dégager de l’appareil lors de la
première utilisation. Cela est normal et est causé par la réaction chimique de l’élément
chauffant. Le tout se résorbera rapidement.
1. Retirez délicatement la casserole de la friteuse et mettez les ingrédients dans le panier.
2. Faites glisser le récipient dans la friteuse, alignez-vous soigneusement avec les guides dans
le corps de la friteuse.
AVERTISSEMENT: N'utilisez jamais la casserole sans le panier.
3. Pour allumer l'appareil, tournez le bouton de la minuterie au temps de préparation requis
4. Tournez le bouton de contrôle de la température à la température requise.
Remarque: Si vous le souhaitez, vous pouvez également laisser l'appareil préchauffer sans
aucun ingrédient à l'intérieur. Dans ce cas, tournez le bouton de la minuterie à plus de 3
minutes et attendez que le témoin de chauffage s'éteigne (environ 3 minutes environ).
Ensuite, remplissez le panier et tournez le bouton de la minuterie au temps de préparation
requis.
5. Certains ingrédients nécessitent un tremblement à mi-chemin du temps de préparation.
Pour secouer les ingrédients, retirez la casserole de l'appareil par la poignée et secouez-la.
Ensuite, faites glisser le récipient dans la friteuse.
Attention: ne pas appuyer sur le bouton de la poignée pendant le secoussement.
Note: Pour réduire le poids, vous pouvez retirer le panier de la casserole et secouer le
panier uniquement. Pour ce faire, retirez la casserole de l'appareil, placez-le sur une
surface résistant à la chaleur et appuyez sur le bouton de la poignée. Et soulevez le panier
hors de la casserole
6. Lorsque vous entendez la sonnerie de la minuterie, le temps de préparation réglé s'est
écoulé. Retirez la casserole de l'appareil. Vérifiez si les ingrédients sont prêts.
7. Pour enlever les ingrédients, retirez la casserole de la friteuse et appuyez sur le bouton de
déverrouillage du panier et soulevez le panier hors du bac.
Nettoyage de votre friteuse:
AVERTISSEMENT: Éteignez toujours l’appareil (“Off”), débranchez-le et laissez-le
refroidir avant de le nettoyer ou le ranger.
1. Essuyez l'extérieur de l'appareil avec un chiffon humide.
2. Nettoyez la casserole et le panier avec de l'eau chaude, du savon à vaisselle et une
éponge non abrasive.
3. Vous pouvez utiliser un liquide dégraissant pour éliminer tout aliment restant.

20
Note: Si les aliments sont collés au panier ou au fond de la casserole, remplir le
poêle avec de l'eau chaude avec du liquide vaisselle. Mettez le panier dans la poêle
et laissez la carpe et le panier tremper pendant environ 10 minutes.
4. Nettoyez l'intérieur de l'appareil avec de l'eau chaude et de l'éponge non abrasive.
IMPORTANT: Ne jamais immerger la base ou nettoyer sous l'eau courante.
Guide de temps et température de friture :
Les temps de friture affichés dans ce tableau sont à titre indicatif seulement et
devront être ajustés en tenant compte des différentes quantités, épaisseurs et
préférences.
Min-max
Amount (oz)
Temps
(min.)
Température
(°F)
Note
Frites
300-400
18-20
400
Frites congelées fines
300-400
20-25
400
Frites épaisses épaisses
500
20-25
400
Gratin dauphinois
Viande de volaille
100-500
10-15
355
Steak
100-500
10-15
355
Côtes de porc
100-500
10-15
355
Hamburger
100-500
13-15
400
Rouleau de saucisse
100-500
25-30
355
Pilons
100-500
15-20
355
Poitrine de poulet
Snacks
100-400
8-10
400
Utiliser un four prêt à
l'emploi
Rouleaux de printemps
100-500
6-10
400
Utiliser un four prêt à
l'emploi
Nuggets de poulet congelés
100-400
6-10
400
Utiliser un four prêt à
l'emploi
Doigts de poisson surgelés
100-400
8-10
355
Utiliser un four prêt à
l'emploi
Pain glacé congelé
100-400
10
320
Collations au fromage
Légumes farcis
300
20-25
320
Utiliser un plat de
cuisson au four / four
Cuisson
400
20-22
355
Utiliser un plat de
cuisson au four / four
Gâteau
300
15-18
400
Use baking tin
Quiche
400
20
320
Utiliser un plat de
cuisson au four / four
Table of contents
Languages:
Other Brentwood Select Fryer manuals
Popular Fryer manuals by other brands
Cecilware
Cecilware F-100 Operation & service manual
Linea 2000
Linea 2000 DOMO DO1014FR Instruction booklet

Kuppersbusch
Kuppersbusch VKEF3500.0 Instructions for use
Henny Penny
Henny Penny LOV LVE-100 Series quick start guide
izzy
izzy IZ-8204 instruction manual
Lotus
Lotus F10T-63ETX Installation and operating instructions
