Bresser Connect User manual

Bresser Connect
Art. No. 70-20000
Bedienungsanleitung
Instruction Manual
Mode d’emploi
Gebruiksaanwijzing
Istruzioni per l‘uso
Instrucciones de uso

2
DE Bedienungsanleitung .................4
GB Instruction Manual ................... 15
FR Mode d’emploi .........................25
NL Handleiding .............................. 37
IT struzioni per l’uso .................... 47
ES Instrucciones de uso ............... 58
Garantie & Service / Warranty & Service
Garantie et Service / Garantía y servicio
Garanzia e assistenza .................... 69
DE Medien zu diesem Produkt
Über folgenden QR-Code/Weblink können Sie weiterführende Medien (Anleitungen, Fachinformationen, Videos etc.)
über die BRESSER Website abrufen*. *Angebot abhängig von der Verfügbarkeit von Medien.
GB Media about this product
You can dowload further media (manuals, technical information, videos, etc) from the BRESSER website* over the
following QR code/weblink. * Offer subject to the availability of media.
FR Infos produit
Le code QR / lien ci-dessous vous permet d’accéder à d’autres médias (notices, informations spécialisées, vidéos etc.)
via notre site web BRESSER*. *Offre en fonction de la disponibilité des médias.
NL Aanvullende informatie over dit product
Met deze QR code/weblink kunt u aanvullende informatie (handleidingen, vakinformatie, video’s etc.) ophalen via de
BRESSER website*. *Aanbod afhankelijk van de beschikbaarheid van media.
IT Materiali relativi a questo prodotto
Attraverso il seguente codice QR/link web si può accedere a ulteriori materiali (istruzioni, informazioni specialistiche,
filmati ecc.) nel sito web BRESSER*. *L’offerta dipende dalla disponibilità dei materiali.
ES Informaciones sobre el producto
Siguiendo el código QR o enlace web encontrará más informaciones (instrucciones, fichas técnicas, vídeos, etc.)
sobre nuestros productos en nuestra página web BRESSER*. *Esta oferta está sujeta a la disponibilidad de las informaciones.
www.bresser.de/7020000

3
A B C D E F G
Fig. 1
Fig. 2
Fig. 3
Fig. 5
Fig. 7
Fig. 4
Fig. 6
Sockets &
Sensors
LAN
Internet
Home Control
Remote Access
1 2 3 4
56
Do not insert the probe into the
soil beyond this line
Soil moisture sensor

15
General Information
About this Instruction Manual
These operating instructions are to be considered a component of the device. Please read the safety instructions and
the operating instructions carefully before use. Keep these instructions for renewed use at a later date. When the device is
sold or given to someone else, the instruction manual must be provided to the new owner/user of the product.
The device is intended only for indoor use.
DANGER!
You will find this symbol in front of every section of text which deals with the risk of severe injury or even death in the event
of improper use.
NOTE!
You will find this symbol in front of every section of text which deals with the risk of damage to property or the environment.
General Warnings
RISK of bodily injury!
Children should only use the device under adult supervision. Keep packaging material, like plastic bags and rubber bands,
out of the reach of children, as these materials pose a choking hazard.
RISK OF ELECTRIC SHOCK
This device contains electronic components that operate via a power source (batteries). Children should only use the device
under adult supervision. Only use the device as described in the manual; otherwise, you run the risk of an electric shock.
RISK OF CHEMICAL BURN!
Leaking battery acid can lead to chemical burns. Avoid contact of battery acid with skin, eyes and mucous membranes. In
the event of contact, rinse the affected region immediately with a plenty of water and seek medical attention.
RISK OF FIRE/EXPLOSION!
Do not expose the device to high temperatures. Use only the recommended batteries. Do not short-circuit the device or
batteries, or throw them into a fire. Excessive heat or improper handling could trigger a short-circuit, a fire or an explosion.
RISK of property damage!
Do not disassemble the device. In the event of a defect, please contact your dealer. The dealer will contact the Service
Centre and can send the device in to be repaired, if necessary.
Protect the device from severe shocks!
Use only the recommended batteries. Always replace weak or empty batteries with a new, complete set of batteries at
full capacity. Do not use batteries from different brands or with different capacities. The batteries should be removed from
the unit if it has not been used for a long time.
Never recharge normal, non-rechargeable batteries. This could lead to explosion during the charging process. The
manufacturer is not liable for damage related to improperly installed batteries.
DE
GB
FR
NL
IT
ES
Garantie
Warranty

16
BRESSER Connect
Home Automation with Remote Access for iOS & Android Devices
Thank you for purchasing the new BRESSER Connect system. This instrument will allows you to use your iOS / Android
devices to monitor and control your home sensors and power devices wirelessly via your home network or Internet. Read
this manual carefully to fully explore the features and functions of the new product
Scope of deliveries (Fig. 1)
Before installing please check the completeness of the scope of deliveries:
A) Wind meter with mount brackets and screws
B) Rain gauge with cement dowel and fixing screws
C) Thermo-hygromneter
D) Soil moisture sensor
E) Energy meter socket
F) Gateway
G) Mains adapter
User manual
Instruction Manual
To operate the devices contained in the set, the following batteries are required (not included):
4 x AA, 2 x AAA, 1 x CR2450, 3 x LR44
Parts Scheme (Fig. 2 and 3)
Basic functions:
1. Gateway: Communicates between the remote devices (sensors & sockets) and the WiFi router
2. Wind meter: Provides wind speed/ direction, temperature & humidity measurements
3. Rain gauge: Provides rainfall measurements
4. Thermo-hygrometer: Provides temperature & humidity measurements
5. Soil moisture sensor: Provides soil moisture, soil temperature & air temperature measurements
6. Energy meter socket: Provides energy, electricity power & cost measurements
Additional tools needed for installation
• Small Phillips screwdriver
• Hexagonal Key
• Electric drill
• Pencil
• Level
• Mast, 1 – 1.25 inch (2.54 – 3.18 cm) in diameter (to mount the wind meter)
App download (BRESSER Connect)
Please download and install the app from Apple Store (iOS device) or Google Play (Android device).
Name of the app: BRESSER Connect
Note: Please setup the WiFi gateway before the other sensors, then setup the sensor one by one. (Do not set up multiple
sensors at the same time!)
Setting up the gateway (Fig. 2, 1)
1) Connects LAN cable of the gateway to one of the available port on the back of your WiFi router
2) Connects the 4.5V adapter to the gateway and the green LED will flash quickly for initial startup. Wait until the LED
stops the continuous flashing and the startup is completed
(Make sure the WiFi router is turned on before switching on the gateway)

17
Note: Please refer to “Router compatibility” and “Troubleshooting” sections if you encounter any problem when setting up
the gateway.
Wind meter (Fig. 3, 2)
• 1. Registration and setup
1) Align and connect the wind speed cups and wind vane to the wind meter and tighten the screws.
2) Place the wind meter next to the gateway.
3) Enable your WiFi reception on your iOS / Android device and run the “ BRESSER Connect” app .
4) Select “Weather” and then tap the “ i ” on the upper right corner to enter the setting display.
5) Tap “Wind, Temperature, Humidity”.
6) Tap ”+” on the upper right to add a new wind meter.
7) Open the battery door of the wind meter.
8) Use the compass on the wind meter and turn the wind vane so it is pointing due north (Fig. 4).
9) Hold the wind vane pointing due north and do not allow it to turn. Insert 2 pieces of AA batteries according to the
polarity indicated. The red LED indicator above the battery cover of the wind meter will flash few times right after battery
installation. Be sure the vane is pointing due north at the moment when red LED flashes and the calibration is now
completed.
10) If the wind vane is not pointing due north when the red LED first flashes, remove batteries and repeat step 8 and 9.
11) Tap “Connect” on the app within 30 seconds of battery installation to search for the wind meter.
12) Once connected, “Sensor is connected” appears and you have successfully registered your wind meter. You may
proceed to change the name and photo. Tap the “Save” icon on the upper right corner anytime to save and exit.
Replace the battery cover and tighten the screws on the wind meter
13) Return to the “Weather” main display and the wind speed/ direction, temperature and humidity readings will appear
within a short period.
• 2. Testing the effective transmission range
It is recommended to perform a simple transmission test before mounting the wind meter so as to ensure it is within the ef-
fective transmission range.
1) Select a mounting location for the wind meter that is:
- outdoors, not blocked on top or sides, so wind can freely reach the wind meter
- within 100 meter (328 feet) open area from the gateway. The distance is reduced when obstacles are between
the wind meter and the gateway
- Place the wind meter 1 meter above ground to simulate the minimum height after mounting
2) If there is wind when testing, let the wind meter run freely and follow the steps below:
- Run the app and go to the “Weather” page (make sure your WiFi is enabled on your iOS / Android device and
you are within the WiFi coverage area)
- If wind speed/direction readings continue to change and update every few minutes, your wind meter is within the
effective transmission range. Go to below section for mounting your wind meter.
3) If there is no wind when testing, wait for 25 minutes and follow below steps:
- Run the app and goes to the “Weather” page (make sure your WiFi is enabled on your iOS / Android device and
you are within the WiFi coverage area)
- If wind speed/direction reading still appears on the screen, your wind meter is within the effective transmission
range. Go to below section for mounting your wind meter
- If “---“ appears on the wind speed/direction page or “sensor is not connected” appears on its setting page, the
wind meter is out of the range.
Shorten the distance between the wind meter and the gateway. Go to the wind meter setting page and tap [Connect]
again to reconnect the sensor. Repeat this procedure until the sensor is connected.
Note: If you have run the Connect system for a long period of time, and one day your wind meter fails to connect with the
system while the rest of the sensors work fine, it’s likely that the battery level in the wind meter is low. Please reinstall new
batteries and follow the setup procedure in the manual to reconnect with your Connect system.
DE
GB
FR
NL
IT
ES
Garantie
Warranty

18
• 3. Mounting the wind meter (Fig. 5)
Important: Before mounting, be sure the wind meter and gateway are within the effective transmission range
Hinweis: To mount the wind meter, you need a mast (not supplied) about 1 – 1.25 inches (2.54 – 3.1 cm) in diameter, and
the hardware necessary to fasten it to the mounting location. If you previously installed such a mast (for mounting antenna, for
example), you can mount the anemometer on that mast.
1. If necessary, mount and ground a mast as directed in the instructions provided with the mast.
2. Place the supplied U-shaped metal plates around the mast. Insert 4 pieces of the supplied hex screws through the
holes of the U-shaped plates and the holes on the wind meter’s mounting bracket.
(The wind vane is above the wind cup and the metal bar of the wind meter is in horizontal level)
3. Tighten the supplied Hex nut onto both ends of each screw.
Rain gauge (Fig. 3, 3)
• 1. Registration and setup
1) Place the rain gauge next to the gateway.
2) Enable your WiFi reception on your iOS / Android device and run the “BRESSER Connect” App.
3) Select “Weather” and then tap the “ i ” on the upper right corner to enter the setting display.
4) Tap “Rainfall”.
5) Tap ”+” on the upper right to add a new rain gauge.
6) Press the tabs back as indicated in fig. 6 to unlock the rain gauge cover.
7) Lift the rain gauge cover off its base. Then carefully remove the packing tape from the bucket assembly.
8) Open the battery cover .
9) Tap “Connect” on the app to search for the rain gauge
10) Insert 2 pieces of AA batteries according to the polarity indicated and close the battery cover within 30 seconds
after tapping the “Connect”.
11) Once connected, “Sensor is connected” appears and you have successfully registered your rain gauge. You may
proceed to change the name and photo. Tap the “Save” icon on the upper right corner anytime to save and exit.
12) Replace and lock the rain gauge cover on the base.
13) Return to the “Weather” main display and the rainfall reading will appear after a short time.
• 2. Testing the effective transmission range
It is recommended to perform a simple transmission test before mounting the rain gauge so as to ensure it is within the effec-
tive transmission range.
1) Select a mounting location for the rain gauge that is:
- a flat, level surface and look for a location where the rain gauge can be placed 1 meter or more above ground level
for best transmission
- Within 50 meter (164 feet) open area from the gateway. Reduced distance if obstacles are between the rain gauge
and the monitor
- In an area not blocked on the top or sides, so rain can freely reach the rain gauge (for example, not under an
overhang or too close to a building or fence)
Cautions:
• To prevent false rainfall readings caused by water splashes, do not choose a location that is not level or that is too close
to the ground, a swimming pool, lawn sprinklers, or anywhere water might accumulate or run off
• The screen in the cylinder of the rain gauge filters most debris (such as leaves) that might fall into the rain gauge. To avoid
frequent build-up of debris in the cylinder, do not mount the rain gauge too close to trees or plants
2) If there is rain when testing, let the rain gauge work freely and follow below steps:
• Run the app and go0 to the “Weather” page (make sure your WiFi is enabled on your iOS / Android device and you are
within the WiFi coverage area)
• If rainfall readings continue to change and update every few minutes, your rain gauge is within the effective transmission
range. Go to below section for mounting your rain gauge.
3) If rainfall readings continue to change and update every few minutes, your rain gauge is within the effective
transmission range. Go to below section for mounting your rain gauge.
• Run the app and go to the “Weather” page (make sure your WiFi is enabled on your iOS / Android device and you are
within the WiFi coverage area)

19
• If rainfall readings still appear on the screen, your rain gauge is within the effective transmission range. Go to below sec-
tion for mounting your rain gauge.
• If “---“ appears on the rainfall reading area or “sensor is not connected” appears on its setting page, your rain gauge is
out of the range. Shorten the distance between the rain gauge & gateway. Go to the rain gauge settings page and tap
[Connect] again to reconnect the sensor. Repeat this procedure until the sensor is connected.
NOTE: If you have run the BRESSER Connect system for a long period of time, and one day your rain gauge fails to con-
nect with the system while the rest of the sensors work fine, it’s likely that the battery level in the rain gauge is low. Please
reinstall new batteries and follow the setup procedure in the manual to reconnect with your BRESSER Connect system.
• 3. Mounting the rain gauge
Before mounting the rain gauge, be sure the rain gauge & monitor are within the effective transmission range and that batteries
are installed.
1) Hold the base of the rain gauge flat against the mounting surface then use a level to make sure the rain gauge
(as it resst on the mounting surface) is horizontally level.
2) Use a pencil to trace the inside of the mounting holes on the base of the rain gauge to mark the screw locations.
3) Drill a hole in the center of each marked location and insert the supplied plastic screw plugs
Hold the rain gauge against the mounting surface so the holes on the base are aligned with the plugs, then thread
the supplied washer head screws into each hole and use a screwdriver to tighten them.
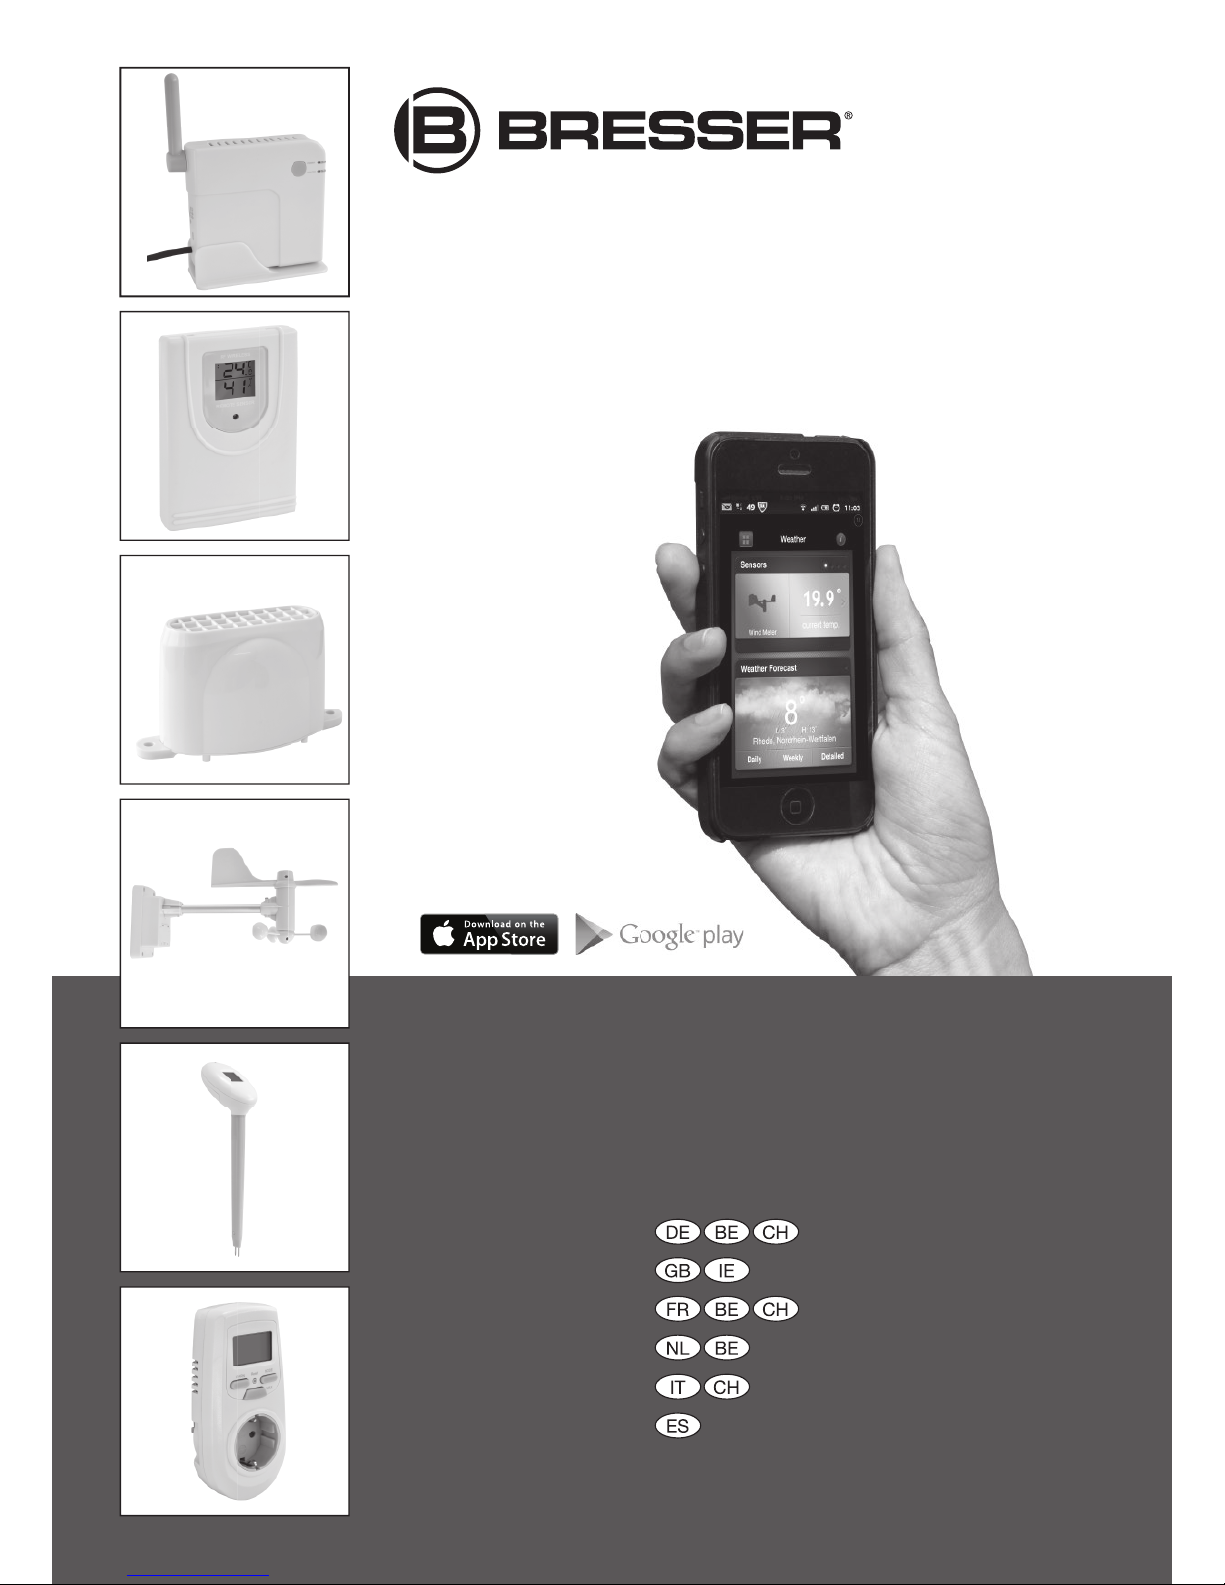
Thermo-hygrometer (Fig. 3, 3)
• 1. Registration and setup
1) Place the thermo-hygrometer next to the gateway
2) Enable your WiFi reception on your iOS / Android device and run the “BRESSER Connect” app
3) Select “Weather” and then tap the “ i ” on the upper right corner to enter the setting display
4) Tap “Temperature, Humidity”
5) Tap ”+” on the upper right to add a new thermo-hygrometer
6) Open the battery door on the thermo-hygrometer
7) Tap “Connect” on the app to search for the thermo-hygrometer
8) Insert 2 pieces of AAA batteries according to the polarity within 30 seconds after tapping the “Connect”.
9) Once the connection is established, “Sensor is connected” appears and you have successfully registered your sensor.
You may proceed to change the name & photo. Tap the “Save” icon on the upper right corner anytime to save and exit.
Close the battery door of the sensor
10) Return to the “Weather” main display and the temperature & humidity reading will appear after a short time
• 2. Testing the effective transmission range & setup
1) Select a location that is within the effective transmission range (100meters open area) and place the
hermo-hygrometer there. Reduce distance if obstacles are between the thermo-hygrometer & the gateway.
2) The thermo-hygrometer should be placed 1 meter above ground and avoid direct sunlight.
3) Wait for 25 minutes and follow below steps:
- Run the app and go to the “Weather” page (make sure your WiFi is enabled on your iOS / Android device and
you are within the WiFi coverage area)
- If temperature and humidity readings of the thermo-hygrometer still appear on the screen, your sensor is within the
effective transmission range and the sensor can be mounted.
- If “---“ appears on the thermo-hygrometer page or “sensor is not connected” appears on its setting page, your t
hermo-hygrometer is out of the range. Shorten the distance between the sensor and the gateway. Go to the
“temperature & humidity” setting page and tap [Connect] again to reconnect the sensor. Repeat this procedure until
the sensor is connected
NOTE: If you have run the BRESSER Connect system for a long period of time, and one day your thermo-hygrometer fails
to connect with the system while the rest of the sensors work fine, it’s likely that the battery level in the thermo-hygrometer is
low. Please check the sensor and if the low battery icon appears on the LCD display, please reinstall new batteries and follow
the setup procedure in the manual to reconnect with your BRESSER Connect system.
DE
GB
FR
NL
IT
ES
Garantie
Warranty

20
Soil moisture sensor (Fig. 3, 5)
• 1. Registration
1) Place the soil sensor next to the gateway
2) Enable your WiFi reception on your iOS / Android device and run the “BRESSER Connect” app
3) Select “Garden” and then tap the “ i ” on the upper right corner to enter the setting display
4) Tap “OK” in the [Install a new sensor now?] or tap “Sensor list” and tap “+” to add a new sensor
5) Tap “Connect” on the app to search for the soil sensor.
6) Pull out the plastic strip from the battery compartment (or insert 1 piece of CR2450 battery inside the battery
compartment) of the soil sensor within 30 seconds after tapping the “Connect”. Once connection is established,
“Sensor is connected” appears and you have successfully registered your soil sensor. You may proceed to change
the name & photo. Tap the “Save” icon on the upper right corner anytime to save and exit.
7) Return to the “Garden” main display. Swipe up or down and the soil moisture readings will appear.
• 2. Setup
1) Select a location for the soil sensor that is within the effective transmission range (30 meter in open area). Reduce
distance if obstacles are between the soil sensor and the gateway.
- Remove the protecting tube from the soil sensor (fig. 7, B). Always clean the 2 metal pins located on the bottom of
the probe before use or taking another reading from a different pot or location
- Softly push the probe into soil to avoid damage to the 2 metal pins located at the front of the probe
- Insert the probe straight up as vertically as possible. If you are using a pot, insert about halfway between the plant
stem and the edge of the pot. For pots over 12 inch diameter, position the probe about a third of the way between the
stem and the edge of the pot.
- Push the probe down until the soil moisture sensor (or soil temperature sensor) reaches the root (or seedbed) level
or about two thirds of the depth of the pot. Never insert the probe beyond the level as shown in fig. 7 (A).
2) If your sensor is within the effective transmission range, the soil moisture reading will remain on the screen after
25 minutes of setup. If “---“ reading appears or “sensor is not connected” appears on its setting page after 25 minutes
of setup, your soil sensor is out of range. Shorten the distance between the sensor and the gateway. Go to the
“garden” setting page and tap [Connect] again to reconnect the sensor. Repeat this procedure until the sensor is
connected.
NOTE: If you have run the BRESSER Connect system for a long period of time, and one day your soil sensor fails to con-
nect with the system while the rest of the sensors work fine, it’s likely that the battery level in the soil sensor is low. Please
check the sensor and if the low battery icon appears on the LCD display, please reinstall new batteries and follow the setup
procedure in the manual to reconnect with your BRESSER Connect system
Notes:
• The soil sensor measures electric current flowing between the 2 metal pins on the probe and converts the signal into
soil moisture level indication. Due to the fact that electrical conductivity varies between different type & density of soils
and fertilizers as well as the positioning & depth of the probe, the moisture level reading may vary accordingly and this is
normal. The soil moisture level is to provide general reference of the soil moisture condition only and the manufacturer
does not take any liability for any loss or damage caused to your plants.
• The soil sensor may not be able to measure the soil moisture accurately for very coarse or grave soils due to possible
non-conductive air gaps or spacing hidden inside the soil. In this case the soil moisture reading may be lower than ex-
pected and this is normal.
• The sensing cycle of the soil moisture is around 10 minute. After watering, wait for around 10 minute or more before the
soil moisture level is updated on display and allow time for the water to penetrate into the soil for about 10 minutes.
• The operating temperature range of soil sensor is 0°C to 50°C. Accurate measurements and proper function of the sen-
sors are not guaranteed when parts of the BRESSER Connect are out of the range of the operating temperature.
• WATERING
Different plants require different level of soil moisture. Some plants prefer drier soil conditions and some like to be kept moist.

21
Energy Meter (Fig. 3, 6)
• 1. Registration & Setup
1) Select a electrical outlet for the energy meter socket that is within 100meter (330 feet) open area from the gateway.
Reduce distance if obstacles are between the remote socket and the gateway.
2) Plug the energy meter socket into the electrical outlet.
3) Enable the WiFi reception on your iOS / Android device and run the “BRESSER Connect” app.
4) Select “Energy Meter” and then tap the “ i ” on the upper right corner to enter the settings display
5) Tap “OK” in the menu [Install a new sensor now?] or tap “Sensor list” and tap “+” to add a new sensor
6) Tap “Connect” on the app to search for the energy meter socket
7) Hold the large “LEARN” button on the socket for 3 seconds to start connection
8) Once connection is established, “Sensor is connected” appears and you have successfully registered your energy
meter. You may proceed to change the name and photo. Tap the “Save” icon on the upper right corner anytime to save
and exit. Return to the “Energy Meter” main display and your energy meter socket will appear
9) If connection fails, find another electrical outlet that is closer to the gateway and repeat steps 6 to 8 until a connection
is established
10) Connect an electrical device to the your energy meter socket and it will provide power, energy & cost readings on
your app
Internet Remote Access
If you are not at home, you can still access to your sensors and sockets via the Internet
Activate the remote access function
• Enter the home screen and tap the “i” icon on the top left
• Tap “Remote Access Setting”
• Tap “Activate Remote Access” and create a password to activate the remote access function
Note: You can have multiple smart phones or tablets to access your sensors remotely via the Internet. Follow above pro-
cedure to activate remote access function for each of your iOS / Android devices one by one.
IMPORTANT: You must always enter the same password that was created by the first device!
Remote access
Once the remote access function has been activated on your iOS / Android device, you can access your sensors and socket
via the Internet, using your mobile data (cellular data) network or remote WiFi network.
• Make sure your iOS / Android device has access to the Internet
• Run the BRESSER Connect app
• Enter the password as requested
Password
To change your password
• Connect your iOS / Android device to the gateway via your home’s WiFi Gateway
• Enter the home screen and tap the “i” icon on the top left
• Tap “Remote Access Setting”
• Tap “Change Remote Access Password” and recreate new password
Note: You cannot change your remote access settings in remote access mode.
IMPORTANT: If you forget your password, the only way is to follow above procedure to recreate a new password.
Other Settings:
Weather Forecast’s location
1) In “Weather” main display, tap the “ i ” on the upper right corner to enter the setting display.
2) Tap “Location Setting”.
3) Tap “+” on the upper right to add a new city.
4) Follow the steps and select the city name.
Note: You need to have Internet access enabled on the WiFi router in order to access the weather forecast information.
General Setting
“General setting” is available in the “Weather”, “Garden” and “Energy meter” menue.
Weather: Temperature, rainfall and wind speed unit setting
Garden: Temperature unit setting
Energy Meter: Setting for tariff rates, currency and date
DE
GB
FR
NL
IT
ES
Garantie
Warranty

22
Creating groups of devices (Group lists)
Specific groups of devices can be created with enery meters.
1) In “Energy meter” main display, tap the “ i ” on the upper right corner to enter the setting display.
2) Tap “Group List”.
3) Tap ”+” on the upper right to add a group.
4) Select one or more energy meters for the new group.
5) Tap “+” to form a new group.
6) You may change the name and photo of the group. Tap the “Save” button on the upper right corner anytime to save
and exit.
Notes
1) Please ensure the sensors are switched on and registered one by one.
2) When opening the “BresserConnect” App, it will directly go to the last sensor page displayed before exititing the
last time. It may need some time to refresh the sensor data. So please wait for several seconds for updated
measurements to be displayed.
Trouble shooting
General
If you have run the Connect system for a long period of time and one day one of your weather or soil sensor fails to connect
with the system while the rest of the sensors work fine, it’s likely that the battery level in this sensor is low. Please reinstall new
batteries and follow the instruction in the manual to reconnect the sensor to your Connect system again.
Gateway
• 1. New Sensors cannot be successfully registered on the App.
a) Please check whether the App can effectively communicate with the gateway. After pressing the “Connect” button
on the App to register a new sensor, the green LED will start flashing for around 30 seconds. If not, power off the
router and the gateway and then power them on again and retry.
b) The sensor may be too far away from the gateway or there is radio frequency interference nearby. Please put the
sensor closer to the gateway, preferably within direct line-of-sight. Shut off all electrical appliances nearby and retry.
• 2. Sensor data are not updated or no sensor data is displayed or the remote sockets cannot be controlled.
a) Please power off the gateway and power on again and observe the LEDs on the gateway as listed in paragraph 4
below. If no abnormal status is found, please turn off the WiFi feature of your iOS or Android device and then turn it
on again to reconnect to the router. Run the app again.
b) Otherwise, please check on the App whether the sensor status is ‘disconnected’. If yes, please follow the
recommendations in point 3 below.
c) If the problem persists please switch router and Gateway off and on again and try again.
e) If there are many sensors of the same type installed, the memory (RAM) size of your iOS or Android device may
not support the display of all the sensor images on one page. Please delete some of the sensors to see if the
situation can be improved. If this is the cause, you may need a more sophisticated iOS or Android device model
with a larger memory.
• Sensor status has become ‘disconnected’ (an exclamation mark next to the sensor list).
Please try the 3 steps below:
a) Power off the gateway. After a while, power it on again and wait for around 30 seconds until the green LED on the
gateway stops flashing. After powering up, the gateway will scan the presence of the installed sensors within the
flashing period and reconnect them, if the sensors are found.
b) Wait until the next day. At midnight each day, the gateway automatically performs scanning of and reconnection
with installed sensors.
c) If the sensor disconnection is due to a short period radio frequency inteference, it will be automatically reconnected
after the interference has gone. However, if the interference period is long (i.e. more than one hour), then the sensor
can only be reconnected by means of method 1) or 2) above.
• 3.If the reconnection still fails, then it may be caused by one or more of the following reasons:
• The sensor location is marginal or out of reach of the radio frequency reception range. Please move the sensor to a closer
or less blocked location and retry.
• The battery level may be relatively low. Please retry with new batteries.
• The sensor operation software is hung up. Please remove and re-insert the batteries into the sensor and go to the sensor
management page on the BRESSER Connect App and press the RECONNECT button within 30 seconds.

23
• 4. Status of the gateway (after power on)
Green LED:
• Continuous flashing for about 30 seconds: scanning for installed sensors or registering new sensors
• Always lit up and flashing once every 30 seconds: normal operation (receiving sensor data)
• Continuous flashing for a long time or not lit up for a long time: abnormal behavior
Red LED:
• Light up for around 3 seconds: system start-up
• Always off: App is not running or remote access is not yet activated. Otherwise abnormal.
• Flashing every 5 seconds: LAN cable is not properly connected to the gateway and/or an IP address has not been as-
signed to the gateway (no connection to the internet). Check the cable connection and whether DHCP is set in router
configuration (please refer to the router user manual on how to check).
• Always lit up: App is running and/or remote access is activated. Otherwise abnormal
• 5. Firmware upgrade
When starting to run the app, there will be a pop-up message asking for a firmware upgrade if either one or both of the
gateway firmware versions are found outdated. There are two firmware – device firmware (router-gateway) and RF firmware
(gateway-sensors) and the upgrade has to be done one after the other separately. After upgrade, the system may become idle
for several minutes and then reboot automatically (the red and green LEDs will flash). If the automatic reboot fails (either one
or both LEDs do not flash after several minutes), please manually power off and then power on the gateway, and wait several
minutes for reboot. To check whether the upgrade has been successful, press the ‘i’ icon on the top left corner to see the
firmware version numbers.
Soil moisture sensor
• 1. Soil sensor does not increase moisture level immediately after watering:
Cause: Soil moisture sensing cycle is 10 minutes
Solution: Wait for up to 10 minutes until the next cycle of soil moisture sensing has updated the moisture level displayed after
watering. If the sensor is inserted deeply into the soil, wait for some more time to allow for water to diffuse through the covering
soil.
• 2. Soil moisture reading shows lower level than expected
Cause #1: Soil texture may affect the measurement result
Solution: Avoid using soil sensor in soil with extreme texture (too much sand or clay), or adjust the meaning of the levels ac-
cording to the observed soil moisture conditions
Cause #2: Some air space is hidden inside the soil
Solution: Remove and insert again the sensor in another position of soil.
Cause #3: Sensor probe is not inserted deep enough into the soil.
Solution: Push the probe down until the soil moisture sensor (or soil temperature sensor) reaches the root (or seedbed) level
or about two thirds of the depth of the pot. Never insert the sensor deeper than the maximum indicated in fig. 7 (A).
Cause #4: The metal pins of the sensor probe are oxidized or coated with dirt
Solution: Slightly polish the surface of the metal pins (Fig. 7, B).
Router compatibility
Please visit the link below for details of router compatibility
http://iConnect.netinfostation.com
Any conventional router for home networking applications that is allowing network devices to connect to it should be able to
work with the gateway.
Check the user manual and FAQ of your router model, or ask the router manufacturer to find out if inter-device communication
is enabled by default.
Technical Specification
System requirements:
• iOS version 4.3 or above (iPhone 3GS or above; iPod touch 4th generation or above; iPad)
• Android version 2.3.3 or above (Android phone with a display resolution of 320 x 480 pixels or above)
• Wireless WiFi router that supports inter-communication between the devices that are connected to different ports of the
router.
• Internet connection
• Mobile internet connection for remote access of the BRESSER Connect if outside of the WiFi connection area
(Please visit http://iConnect.netinfostation.com or “Router Compatibility” section for more details of the Smartphone com-
patibility)
Note: Due to variations in the Internet protocol implementation, some Android devices that meet the above requirements,
can still cause problems while running the app.
(Please visit http://iConnect.netinfostation.com for more details of the Smartphone compatibility)
DE
GB
FR
NL
IT
ES
Garantie
Warranty

24
Gateway:
Connection: LAN connection with wireless router (LAN cable included)
RF Frequency: Wireless RF connection with sensors and sockets 868MHz (Europe), 915MHz (US)
Power: 4.5V (0.5A) AC/DC Adapter (included)
Wind meter:
Wind speed range: : 0 – 30m/s
: 0 – 108 km/h
: 0 – 67 mph
: 0 – 58.3 knots
: 0 - 11 Beaufort
Wind direction: 16 resolutions of direction
Temperature measurement: -20°C to +60°C (-4 F to +140 F)
Humidity measurement: 20% - 99% RH
Transmission range between sensor & gateway: up to 100M (330 feet) in open area
RF frequency: 868MHz (Europe); 915MHz (US)
Power: 2 x AA batteries
Rain Gauge:
Rainfall reading: 0 – 9999 mm
Transmission range between sensor & gateway: up to 50m (164 feet) in open area (1m above ground level)
RF frequency: 868MHz (Europe); 915MHz (US)
Power: 2 x AA batteries
Thermo-hygrometer:
Temperature measurement: -20 C to +60 C (-4 F to +140 F)
Humidity measurement: 20% - 99% RH
Transmission range between sensor & gateway: up to 100m (330 feet) in open area
RF frequency: 868MHz (Europe); 915MHz (US)
Power: 2 x AAA batteries
Soil Sensor:
Soil moisture: 4 Levels (Wet, Moist, Semi-Dry, Dry)
Soil temperature: 0 to 50°C (+32 F to +122 F)
Air temperature: 0 to 50°C (+32 F to +122 F)
Transmission range between sensor & gateway: up to 30m (98 feet) in open area
RF frequency: 868MHz (Europe); 915MHz (US)
Power: 1 x CR2450 battery
Energy meter socket:
Maximum loading current: 16A (Europe); 10A (US)
Transmission range between socket & gateway: up to 100m (330 feet) in open area
RF frequency: 868MHz (Europe); 915MHz (US)
Power: AC 220V, 50Hz (Europe); AC 120V, 60Hz (US) 3 x LR44 batteries
Cleaning and Maintenance
Before cleaning the device, disconnect it from the power supply (remove batteries)!
Only use a dry cloth to clean the exterior of the device. To avoid damaging the electronics, do not use any cleaning fluid.
Protect the device from dust and moisture. The batteries should be removed from the unit if it has not been used for a long
time.
Disposal
Dispose of the packaging materials properly, according to their type, such as paper or cardboard. Contact your local
waste-disposal service or environmental authority for information on the proper disposal.
Do not dispose of electronic devices in the household garbage!
As per Directive 2002/96/EC of the European Parliament on waste electrical and electronic equipment and its adapta-
tion into German law, used electronic devices must be collected separately and recycled in an environmentally friendly
manner.
EC Declaration of Conformity
BRESSER GmbH declares that this device (Connector Set / Item code 70-20000) is in accordance with basic re-
quirements of all guidelines described in 1999/5/EG. Bresser GmbH has issued a “Declaration of Conformity” in
accordance with applicable guidelines and corresponding standards. This can be viewed any time upon request.

25
Informations générales
A propos de ce manuel
Le présent mode d‘emploi doit être considéré comme faisant partie intégrante de l’appareil.
Avant d’utiliser l’appareil, veuillez lire attentivement les consignes de sécurité et le mode d’emploi.
Conservez celui-ci afin de pouvoir le réutiliser ultérieurement le cas échéant. En cas de revente ou de cession de l’appareil,
le mode d’emploi doit être remis à tout propriétaire ou utilisateur suivant du produit.
Cet appareil est uniquement destiné à une utilisation en intérieur.
DANGER!
Ce symbole précède un passage destiné à mettre l’utilisateur en garde face à un danger susceptible de résulter d’un usage
inapproprié et pouvant entraîner des blessures graves voire mortelles.
REMARQUE!
Ce symbole précède un passage destiné à mettre l’utilisateur en garde face à un danger susceptible de résulter d’un usage
inapproprié et pouvant entraîner des dommages matériels ou de l‘environnement.
Consignes générales de sécurité
RISQUE de dommages corporels!
Les enfants ne doivent utiliser cet appareil que sous surveillance. Maintenez les enfants éloignés des matériaux d’emballage
(sacs plastiques, bandes en caoutchouc, etc.)! RISQUE D’ETOUFFEMENT!
RISQUE D’ELECTROCUTION!
Cet appareil contient des pièces électroniques raccordées à une source d’alimentation électrique (batteries). Ne jamais
laisser les enfants manipuler l’appareil sans surveillance! L’utilisation de l’appareil doit se faire exclusivement comme décrit
dans ce manuel, faute de quoi un RISQUE d’ELECTROCUTION peut exister!
RISQUE DE BLESSURE!
L’écoulement de l‘électrolyte d’une batterie peut entraîner des blessures par brûlure due à l’acidité du produit! Evitez tout
contact de l’électrolyte avec la peau, les yeux et les muqueuses. En cas de contact avec l‘acide, rincez abondamment
et immédiatement les parties du corps concernées en utilisant de l’eau claire et consultez un médecin dans les meilleurs
délais.
RISQUE D’EXPLOSION / D’INCENDIE!
Ne pas exposer l’appareil à des températures trop élevées. N’utilisez que les batteries conseillées. L’appareil et les batteries
ne doivent pas être court-circuitées ou jeter dans le feu! Toute surchauffe ou manipulation inappropriée peut déclencher
courts-circuits, incendies voire conduire à des explosions!
RISQUE de dommages matériels!
Ne pas démonter l’appareil ! En cas de défaut, veuillez vous adresser à votre revendeur spécialisé. Celui-ci prendra contact
avec le service client pour, éventuellement, envoyer l’appareil en réparation.
Ne pas exposer l‘appareil aux chocs!
N‘utilisez que les batteries conseillées. Remplacez toujours les batteries trop faibles ou usées par un jeu complet de
nouvelles batteries disposant de toute sa capacité. N’utilisez pas de batteries de marques, de types ou de capacités
différentes. Les batteries doivent être enlevées de l’appareil lorsque celui-ci est destiné à ne pas être utiliser pendant un
certain temps!
Le fabricant récuse toute responsabilité en cas de dommage résultant d’une alimentation électrique inappropriée due à
des batteries mal insérées!
DE
GB
FR
NL
IT
ES
Garantie
Warranty

26
BRESSER Connect
Domotique avec Remote Access (accès à distance) pour appareils iOS et Android
Merci d’avoir choisi le nouveau système BRESSER Connect. Vous pourrez utiliser ce produit avec votre appareil iOS ou
Android afin de contrôler et commander sans fil les capteurs et les compteurs d’énergie à partir d’un réseau domestique ou
Internet. Lisez soigneusement ce mode d’emploi pour vous familiariser avec les propriétés de ce produit et ses fonctions.
Volume de livraison (graph. 1)
Avant installation, vérifiez que vous disposez bien de toutes les pièces suivantes:
A) Anémomètre avec colliers de fixation
B) Pluviomètre
C) Thermo-hygromètre
D) Capteur de sol
E) Compteur d’énergie
F) Passerelle
G Bloc d’alimentation
Mode d’emploi
Mode d’emploi
Les piles suivantes sont nécessaires pour le fonctionnement des appareils livrés dans ce set (piles non incluses dans le vo-
lume de livraison) : 4 x AA, 2 x AAA, 1 x CR2450, 3 x LR44
Aperçu des pièces (graph. 2+3)
Fonctions de base :
1. Passerelle: Relie les capteurs et les compteurs d’énergie à votre routeur WLAN
2. Anémomètre: Permet de mesurer la vitesse du vent ainsi que sa direction, la température ainsi que l’humidité de l’air
3. Pluviomètre: Permet de mesurer la pluie
4. Thermo-hygromètre: Permet de mesurer la température ainsi que l’humidité de l’air
5. Capteur de sol: Permet de mesurer l’humidité du sol ainsi que la température du sol et de l’air
6. Compteur d’énergie: Permet de mesurer l’énergie, le courant ainsi que les coûts de courant
Outils supplémentaires nécessaires à l’installation :
• Petit tournevis cruciforme
• Clé Allen
• Perceuse
• Crayon
• Niveau à bulle
• Mât, 2,54 – 3,18 cm (1 – 1,5 pouces) de diamètre (pour le montage de l’anémomètre)
Télécharger l’appli (Bresser Connect)
Téléchargez l’appli gratuite à partir de l’Apple Store ou de Google Play et installez-la sur votre appareil iOS ou Android.
Nom de l’appli : Bresser Connect
Remarque :
Commencez par établir une connexion WLAN avec la passerelle avant d’installer capteurs et compteurs d’énergie. Installez
alors l’un après l’autre les capteurs ainsi que les compteurs d’énergie (Ne jamais installer plusieurs capteurs et compteurs
d’énergie à la fois !)
Installation de la passerelle (graph. 2, 1)
1) À l’aide du câble LAN, reliez la passerelle à votre routeur WLAN.
2) Reliez le bloc d’alimentation de 4,5 V à la passerelle et branchez la fiche de secteur dans la prise de courant (240 V).
La LED verte clignote rapidement lors de la mise en service. Attendez qu’elle ne clignote plus. La mise en service
est alors terminée. (Assurez-vous que le routeur WLAN est bien allumé avant de le relier à la passerelle)

27
Remarque: Référez-vous aux paragraphes « Compatibilité du routeur » et « Dépannage » en cas de problèmes lors de l’ins-
tallation de la passerelle.
Capteur de vent (anémomètre) (graph. 3, 2)
• 1. Inscription et installation
1) Fixez les hélices et la girouette sur l’anémomètre et serrez les vis.
2) Placez l’anémomètre à côté de la passerelle.
3) Activez WLAN sur votre appareil iOS ou Android et démarrez l’appli « Bresser Connect ».
4) Sélectionnez « Weather » et appuyez sur le « i » en haut à droite afin de procéder aux installations.
5) Touchez « Wind, Temperature, Humidity ».
6) Touchez « + » en haut à droite afin d’ajouter un nouvel anémomètre.
7) Ouvrez le couvercle du compartiment à piles de l’anémomètre.
8) Utilisez la boussole sur l’anémomètre afin d’orienter la girouette vers le Nord (graph. 4).
9) Tenez la girouette orientée vers le Nord et ne la laissez pas tourner. Placez 2 piles AA dans le compartiment à piles
en respectant la polarité indiquée. L’affichage LED rouge au-dessus du couvercle du compartiment à piles de
l’anémomètre clignotera plusieurs fois après l’insertion des piles. Veillez à ce que la girouette pointe bien vers le Nord
lorsque l’affichage LED rouge clignote. Le calibrage est maintenant terminé.
10) Si la girouette ne pointait pas vers le Nord lorsque l’affichage rouge clignotait, commencez par retirer les piles puis
reprenez les étapes 8 et 9.
11) Dans les 30 secondes après avoir placé les piles, touchez sur « Connect » dans l’appli afin de chercher l’anémomètre.
12) Si une connexion a pu être établie, « Sensor is connected » est affiché et l’anémomètre aura été connecté avec
succès. Vous pouvez maintenant continuer et changer le nom et la photo. Touchez le symbole « Save » en haut à
droite afin de terminer l’appli et de sauvegarder les réglages. Fermez le couvercle du compartiment à piles de
l’anémomètre et serrez bien les vis.
13) Retournez au mode d’affichage « Weather » et, peu de temps après, s’afficheront à l’écran la vitesse et la direction
du vent ainsi que les valeurs de la température et de l’humidité de l’air.
• 2. Test de la distance de transmission radio effective
Il est recommandé d’effectuer un simple test de transmission avant le montage de l’anémomètre afin de s’assurer qu’il se trouve
dans le périmètre effectif de transmission radio.
1) Pour monter l’anémomètre, choisissez un endroit…
- … à l’extérieur (aucun objet devant ni à côté de l’appareil) pour que le vent puisse librement atteindre l’anémomètre.
- … libre de tout obstacle dans un périmètre de 100 mètres (328 pieds) autour de la passerelle pour garantir une trans
mission optimale du signal. La distance se réduit lorsque des obstacles se trouvent entre l’anémomètre et la passerelle.
- … à un mètre au-dessus du sol afin de simuler la hauteur minimale après le montage.
2) S’il y a du vent durant le test, commencez par laisser l’anémomètre tourner librement, puis effectuez les étapes suivantes:
- Démarrez l’appli et passez à l’affichage « Weather ». (Assurez-vous que le WLAN est activé sur votre appareil iOS ou
Android et que vous vous trouvez à un endroit avec couverture WLAN)
- Si les informations de vitesse et direction du vent changent et sont actualisées en quelques minutes, c’est que votre
anémomètre se trouve à l’intérieur du périmètre effectif de transmission radio. Continuez avec « 3. Montage de
l’anémomètre ».
3) S’il n’y a pas de vent durant le test, commencez par attendre 25 minutes, puis effectuez les étapes suivantes :
- Démarrez l’appli et passez à l’affichage « Weather ». (Assurez-vous que le WLAN est activé sur votre appareil iOS ou
Android et que vous vous trouvez à un endroit avec couverture WLAN)
- Si les informations de vitesse et direction du vent continuent à être affichées sur l’écran, c’est que votre anémomètre
se trouve à l’intérieur du périmètre effectif de transmission radio. Continuez avec « 3. Montage de l’anémomètre ».
- Si « --- » est affiché dans l’affichage de la vitesse du vent ou « sensor is not connected » est affiché dans le menu de
Setup, c’est que votre anémomètre se trouve hors du périmètre effectif de transmission radio. Raccourcissez la distance
entre l’anémomètre et la passerelle. Passez à « Wind, Temperature, Humidity » dans le menu Setup puis touchez
« Connect » afin de connecter à nouveau le capteur. Recommencez cette étape jusqu’à ce que le capteur soit
connecté avec votre système Connect.
DE
GB
FR
NL
IT
ES
Garantie
Warranty

28
REMARQUE:
Si votre système Connect est allumé pendant un certain temps et que, brusquement, votre anémomètre ne se trouve plus
relié au système alors que les autres capteurs fonctionnent, ce sont probablement les piles de l’anémomètre qui sont vides.
Prenez des piles neuves et suivez le processus d’installation décrit dans les instructions afin de connecter à nouveau l’ané-
momètre au système Connect.
• 3. Montage de l’anémomètre (graph. 5)
Important : Avant le montage, assurez-vous que l’anémomètre et la passerelle se trouvent bien dans la zone effective de
transmission radio.
Remarque : Pour monter l’anémomètre, vous avez besoin d’un mât (non inclus à la livraison) d’un diamètre de 2,54 à 3,1
cm (1 à 1,25 pouces) ainsi que de la fixation nécessaire au montage du mât à l’endroit souhaité.
Une fois que vous avez dressé un tel mât (par exemple pour le montage d’une antenne) vous pouvez y monter l’anémomètre.
1) Montez le mât et reliez-le à la terre comme décrit dans la notice de montage du mât.
2) Placez autour du mât les colliers de fixation en forme de U inclus à la livraison. Introduisez les vis à six pans creux avec
rondelles dans les trous de fixation de l’anémomètre puis dans les trous des colliers de fixation en forme de U.
(La girouette se trouve au-dessus de l’hélice, et le bras métallique de l’anémomètre se trouve à un niveau horizontal)
3) Placez un écrou hexagonal avec rondelle sur chaque vis et serrez bien les écrous hexagonaux.
Pluviomètre (Fig. 3, 3)
• 1. Inscription et installation
1) Placez le pluviomètre à côté de la passerelle.
2) Activez WLAN sur votre appareil iOS ou Android et démarrez l’appli « Bresser Connect ».
3) Sélectionnez « Weather » et appuyez sur le « i » en haut à droite afin de procéder aux installations.
4) Touchez « Rainfall ».
5) Touchez « + » en haut à droite afin d’ajouter un nouveau pluviomètre.
6) Repoussez le levier de blocage du pluviomètre comme décrit au graph. 6 afin de déverrouiller la protection du
pluviomètre.
7) Décrochez la protection du support du pluviomètre. Retirez ensuite doucement le ruban adhésif de la disposition
des pales.
8) Ouvrez le couvercle du compartiment à piles.
9) Dans l’appli, touchez « Connect » afin de chercher le pluviomètre.
10) Placez 2 piles AA dans le compartiment à piles en respectant la polarité indiquée, puis refermez le couvercle du
compartiment à piles dans les 30 secondes après avoir touché « Connect ».
11) Si une connexion a pu être établie, « Sensor is connected » s’affiche et le détecteur de pluie a été connecté avec
succès. Vous pouvez maintenant continuer et changer le nom et la photo. Touchez le symbole « Save » en haut à
droite afin de terminer l’appli et de sauvegarder les réglages.
12) Placez à nouveau doucement la protection du détecteur de pluie sur le support, puis verrouillez-la.
11) Retournez au mode d’affichage « Weather » et l’affichage de la pluviosité sera indiqué en peu de temps.
• 2. Test de la distance de transmission radio effective
Il est recommandé d’effectuer un simple test de transmission avant le montage du détecteur de pluie afin de s’assurer qu’il se
trouve à l’intérieur du périmètre effectif de transmission radio.
1) Pour monter le détecteur de pluie, choisissez un endroit…
- … situé sur une surface plate et plane à au moins un mètre au-dessus du sol et qui garantit une transmission radio
optimale.
- … libre de tout obstacle dans un périmètre de 50 mètres (164 pieds) autour de la passerelle pour garantir une
transmission optimale du signal. La distance se réduit lorsque des obstacles se trouvent entre le pluviomètre et la
passerelle.
- … à l’extérieur (aucun objet devant ou à côté de l’appareil) pour que la pluie puisse librement atteindre le pluviomètre
(par exemple pas sous une corniche ou bien trop près d’un bâtiment ou d’une clôture).

29
Remarques :
• Afin d’éviter d’obtenir des valeurs de pluviométrie erronées dues à des éclaboussures, choisissez un emplacement pas
trop près du sol, d’une piscine ou d’un arroseur, et où l’eau peut s’écouler sans problèmes à la partie inférieure du dé-
tecteur de pluie.
• Le filtre collecteur à l’entrée du détecteur de pluie collecte la plupart des corps étrangers (par exemple feuilles) qui
pourraient tomber dans le pluviomètre. Afin d’éviter que les dépôts s’accumulent à l’entrée du pluviomètre, montez le
détecteur de pluie assez loin d’arbres et de plantes.
2) S’il y a de la pluie durant le test, commencez par laisser le détecteur de pluie travailler automatiquement, puis
effectuez les étapes suivantes :
• Démarrez l’appli et passez à l’affichage « Weather ». (Assurez-vous que le WLAN est activé sur votre appareil iOS ou
Android et que vous vous trouvez à un endroit avec couverture WLAN)
• Si les informations de la quantité de pluie changent et sont actualisées en quelques minutes, c’est que votre pluviomètre
se trouve à l’intérieur du périmètre effectif de transmission radio. Continuez avec « 3. Montage du pluviomètre ».
3) S’il ne pleut pas durant le test, commencez par attendre 25 minutes, puis effectuez les étapes suivantes :
- Démarrez l’appli et passez à l’affichage « Weather ». (Assurez-vous que le WLAN est activé sur votre appareil iOS
ou Android et que vous vous trouvez à un endroit avec couverture WLAN)
- Si les informations de quantité de pluie continuent à être affichées sur l’écran, c’est que votre pluviomètre se trouve
dans un périmètre effectif de transmission radio. Continuez avec « 3. Montage du pluviomètre ».
- Si « --- » est affiché dans l’affichage de la pluviosité ou « sensor is not connected » est affiché dans le menu de
Setup, c’est que votre pluviomètre se trouve en dehors de la plage effective de transmission radio. Raccourcissez
la distance entre le pluviomètre et la passerelle. Passez à « Rainfall » dans le menu Setup puis touchez « Connect »
afin de connecter à nouveau le capteur. Recommencez cette étape jusqu’à ce que le capteur soit connecté avec
votre système Connect.
REMARQUE :
Si votre système Connect est allumé pendant un certain temps et que votre pluviomètre n’est brusquement plus relié au sys-
tème alors que les autres capteurs fonctionnent, ce sont probablement les piles du pluviomètre qui sont vides.
Utilisez des piles neuves et suivez le processus d’installation décrit dans les instructions afin de connecter à nouveau le plu-
viomètre au système Connect.
• 3. Montage du détecteur de pluie
Avant le montage, assurez-vous que le détecteur de pluie et la passerelle se trouvent bien dans le périmètre effectif pour la
transmission radio et que des piles ont bien été insérées dans le détecteur de pluie.
1) Placez le détecteur de pluie avec les pieds à plat sur la surface de montage. Utilisez un niveau à bulle afin de vous
assurer que le détecteur de pluie est bien positionné à l’horizontale.
2) Utilisez un crayon afin de marquer la position des vis à travers les trous de fixation dans les pieds du détecteur de
pluie sur la surface de montage.
3) Percez un trou au centre de chaque emplacement marqué et insérez les chevilles en plastique incluses à la livraison.
Placez le détecteur de pluie sur la surface de montage de façon que les trous de fixation du détecteur de pluie
se trouvent exactement au-dessus des trous percés et dotés des chevilles en plastique. Introduisez alors à travers
les trous de fixation et dans les chevilles en plastique les vis incluses à la livraison et serrez-les à l’aide d’un tournevis.
Thermo-hygromètre (Fig. 3, 4)
• 1. Inscription et installation
1) Placez le thermo-hygromètre à côté de la passerelle.
2) Activez WLAN sur votre appareil iOS ou Android et démarrez l’appli « Bresser Connect ».
3) Sélectionnez « Weather » et touchez le symbole « i » en haut à droite afin de procéder aux installations.
4) Touchez « Temperature, Humidity ».
5) Touchez « + » en haut à droite afin d’ajouter un nouveau thermo-hygromètre.
6) Ouvrez le couvercle du compartiment à piles du thermo-hygromètre.
7) Dans l’appli, touchez « Connect » afin de chercher le thermo-hygromètre.
8) Dans les 30 secondes après avoir touché « Connect », introduisez 2 piles AAA dans le compartiment à piles en
respectant la polarité indiquée.
9) Si une connexion a pu être établie, « Sensor is connected » s’affiche et le thermo-hygromètre a été connecté avec
succès. Vous pouvez maintenant continuer et changer le nom et la photo. Touchez le symbole « Save » en haut à
droite afin de terminer l’appli et de sauvegarder les réglages. Fermez le couvercle du compartiment à piles.
10) Retournez à l’affichage « Weather », et l’affichage de la température ainsi que celui de l’humidité de l’air seront
indiqués en peu de temps.
DE
GB
FR
NL
IT
ES
Garantie
Warranty

30
• 2. Test de la distance de transmission radio effective
1) Pour votre thermo-hygromètre, choisissez un emplacement à l’intérieur du périmètre effectif de transmission
(surface libre dans un périmètre de 100 m). Réduisez la distance lorsque des obstacles se trouvent entre le
thermo-hygromètre et la passerelle.
2) Il convient de placer le thermo-hygromètre à 1 mètre au-dessus du sol. Évitez toute exposition directe au soleil.
3) Attendez 25 minutes puis effectuez les étapes suivantes :
- Démarrez l’appli et passez à l’affichage « Weather » (assurez-vous que le WLAN est activé sur votre appareil iOS
ou Android et que vous vous trouvez à un endroit avec couverture WLAN)
- Si les informations de température et d’humidité de l’air s’affichent sur l’écran, c’est que votre thermo-hygromètre
se trouve à l’intérieur du périmètre effectif de transmission radio. Le capteur peut être monté
- Si « --- » apparait dans l’affichage du thermo-hygromètre ou « sensor is not connected » dans le menu de Setup,
c’est que votre thermo-hygromètre se trouve en dehors du périmètre effectif de transmission radio. Raccourcissez
la distance entre le thermo-hygromètre et la passerelle. Passez à « temperature & humidity » dans le menu Setup puis
touchez « Connect » afin de connecter à nouveau le capteur. Recommencez cette étape jusqu’à ce que le capteur
soit connecté à votre système Connect.
REMARQUE :
Si votre système Connect est allumé pendant un certain temps et que votre thermo-hygromètre n’est brusquement plus relié
au système alors que les autres capteurs fonctionnent, ce sont probablement les piles du thermo-hygromètre qui sont vides.
Utilisez des piles neuves et suivez le processus d’installation décrit dans les instructions afin de connecter à nouveau le ther-
mo-hygromètre au système Connect.
Capteur de sol (graph. 3, 5):
• 1. Enregistrement
1) Placez le capteur de sol à côté de la passerelle.
2) Activez WLAN sur votre appareil iOS ou Android et démarrez l’appli « Bresser Connect ».
3) Sélectionnez « Garden » et appuyez sur le symbole « i » en haut à droite afin de procéder aux installations.
4) Touchez « OK » dans le menu [Install a new sensor now?] ou bien touchez « Sensor list » puis « + » afin d’ajouter un
nouveau capteur.
5) Dans l’appli, touchez « Connect » afin de chercher le capteur de sol.
6) Retirez la bande en plastique hors du compartiment à piles (ou bien placez une pile CR2450 dans le compartiment
à piles) du capteur de sol dans les 30 secondes après avoir touché « Connect ». Une fois la connexion établie,
« Sensor is connected » s’affiche à l’écran et votre capteur de sol a été connecté avec succès. Vous pouvez
maintenant continuer afin de changer le nom et la photo. Touchez le symbole « Save » en haut à droite afin de terminer
à tout moment l’appli et de la sauvegarder.
7) Avec votre doigt, touchez l’écran et balayez vers le haut ou vers le bas. Les valeurs mesurées pour l’humidité du sol
apparaitront.
• 2. Installation
1) Pour votre capteur de sol, choisissez un emplacement à l’intérieur du périmètre effectif de transmission (surface
libre dans un périmètre de 30 m). Réduisez la distance lorsque des obstacles se trouvent entre le thermo-hygromètre
et la passerelle.
- Retirez la gaine de protection du capteur de sol. Nettoyez les deux tiges en métal (graph. 7, B) sur la partie
inférieure du capteur de sol avant chaque utilisation ou bien à chaque fois que vous changez l’emplacement à mesurer.
- Enfoncez délicatement le capteur de sol dans la terre afin d’éviter d’endommager les deux tiges métalliques sur
la partie inférieure du capteur de sol.
- Glissez la sonde de façon la plus droite et la plus verticale possible dans le pot. Placez le capteur à mi-chemin
entre la tige de la plante et le bord du pot. En cas de pot au diamètre supérieur à 12 cm, positionnez le capteur à
environ un tiers de la distance entre la tige de la plante et le bord du pot.
- Enfoncez la sonde jusqu’à ce que le capteur de sol ait atteint le niveau de la racine (ou du semis) ou bien environ
les deux tiers de la profondeur du pot. N’enfoncez jamais le capteur plus profondément dans la terre que le
marquage indiqué (v. graph. 7, A).

31
2) Si après, 25 minutes après l’installation, les valeurs mesurées de l’humidité du sol continuent de s’afficher à l’écran,
c’est que le capteur se trouve à l’intérieur du périmètre de transmission effectif.
Si, après 25 minutes, « --- » s’affiche à l’écran ou « sensor is not connected » s’affiche dans le menu de Setup, c’est
que votre capteur de sol se trouve hors du périmètre effectif de transmission radio.
Raccourcissez la distance entre le capteur et la passerelle. Passez à « Garden » dans le menu Setup puis touchez
« Connect » afin de connecter à nouveau le capteur. Recommencez cette étape jusqu’à ce que le capteur soit
connecté avec votre système Connect.
REMARQUE :
Si votre système Connect est allumé pendant un certain temps et que, brusquement, votre capteur de sol ne se trouve plus
relié au système alors que les autres capteurs fonctionnent, ce sont probablement les piles du capteur de sol qui sont vides.
Contrôlez sur le capteur de sol si le symbole de batterie faible apparait à l’écran LCD.
Prenez des piles neuves et suivez le processus d’installation décrit dans les instructions afin de connecter à nouveau le cap-
teur de sol au système Connect.
REMARQUES :
• Le capteur de sol mesure le courant électrique actuel entre les deux tiges métalliques et transforme ces informations en
signal pour l’affichage de l’humidité du sol. L’affichage du niveau d’humidité peut varier étant donné que la conductivité
électrique dépend fortement du type et de la densité du sol, de l’engrais ainsi que du positionnement et de la profondeur
de la tige de mesure. L’affichage du niveau d’humidité du sol n’est conçu que comme une référence générale des condi-
tions d’humidité du sol. Le fabricant ne saurait être tenu pour responsable de tout dommage éventuel causé aux plantes.
• Le capteur de sol ne peut pas mesurer avec précision l’humidité du sol en cas de sols très irréguliers ou durs étant donné
que les espaces ou les fissures ne sont pas conducteurs. Dans ce cas, l’humidité mesurée du sol sera plus faible qu’elle
ne l’est en réalité. Ce qui est normal.
• La mesure de l’humidité du sol se renouvèle environ toutes les 10 minutes. Après avoir arrosé une plante, il faut attendre
environ 10 minutes avant que l’eau soit répartie dans le sol et que l’humidité actualisée du sol s’affiche sur l’écran. Ce qui
est également normal.
• La plage de température de service se trouve entre 0° C et 50° C. La précision de la mesure ainsi que le fonctionnement
de base ne peuvent pas être garantis lorsque la température se trouve en dehors de cette plage.
• ARROSAGE
Les diverses plantes ont besoin de niveaux d’humidité du sol différents. Certaines plantes aiment un sol plus sec, d’autres
préfèrent un sol plutôt humide.
Compteur d’énergie (graph. 3, 6)
• 1. Inscription et installation
1) Pour votre compteur d’énergie, choisissez une prise de courant à l’intérieur du périmètre effectif de transmission (
surface libre dans un périmètre de 100 m / 330 pieds). Réduisez la distance lorsque des obstacles se trouvent entre
le compteur d’énergie et la passerelle.
2) Branchez le compteur d’énergie dans la prise de courant.
3) Activez WLAN sur votre appareil iOS ou Android et démarrez l’appli « Bresser Connect ».
4) Sélectionnez « Energy Meter » et touchez le symbole « i » en haut à droite afin de procéder aux installations.
5) Touchez « OK » dans le menu [Install a new sensor now?] ou bien touchez « Sensor list » puis « + » afin d’ajouter un
nouveau capteur.
6) Dans l’appli, touchez « Connect » afin de chercher le compteur d’énergie.
7) Appuyez pendant 3 secondes sur la touche « LEARN » du compteur d’énergie afin de démarrer la connexion.
8) Une fois la connexion établie, « Sensor is connected » s’affiche à l’écran, signalant que votre compteur d’énergie a
été connecté avec succès. Vous pouvez maintenant continuer afin de changer le nom et la photo. Touchez le symbole
« Save » en haut à droite afin de terminer l’appli et de sauvegarder les réglages. Retournez à l’affichage « Energy Meter
» et votre compteur d’énergie sera indiqué en peu de temps.
9) Si la connexion ne se fait pas, utilisez une autre prise de courant plus proche de la passerelle et recommencez les
étapes 6 à 8 jusqu’à obtenir une connexion.
10) Raccordez un appareil électrique au compteur d’énergie. Dans l’appli, vous pouvez voir le rendement électrique,
l’énergie ainsi que les couts.
DE
GB
FR
NL
IT
ES
Garantie
Warranty
Other manuals for Connect
1
Table of contents
Languages:
Other Bresser Home Automation manuals
Popular Home Automation manuals by other brands

TKB Home
TKB Home TKBETZ67-G manual

RADEMACHER
RADEMACHER Start2Smart Commissioning Guide

Moeller
Moeller Xcomfort Room-Manager CCRMA-00 Series Assembly instructions

2gig Technologies
2gig Technologies EDGE quick start guide

Comm Net Systems
Comm Net Systems v30/30 Setup and operation manual

Panasonic
Panasonic KX-HNA101 installation guide