manuals.online logo
Brands
  1. Home
  2. •
  3. Brands
  4. •
  5. Breville
  6. •
  7. Water Dispenser
  8. •
  9. Breville URN6 User manual

Breville URN6 User manual

Breville Urn
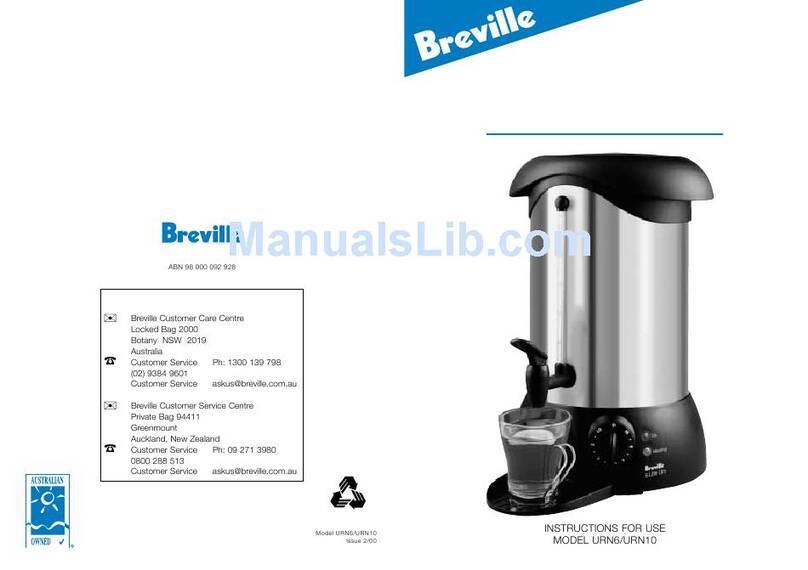
Instruction Book – URN6
2
IMPORTANT
SAFEGUARDS
READ ALL
INSTRUCTIONS BEFORE
USE AND SAVE FOR
FUTURE REFERENCE
•Remove and safely
discard any packaging
material and promotional
labels before using the
urn for the first time.
•To eliminate a choking
hazard for young children,
remove and safely discard
the protective cover fitted
to the power plug of
this urn.
•This urn has been
designed specifically
for the purpose of
boiling drinking quality
water only. Under no
circumstances should
this product be used to
boil any other liquids or
foodstuffs.
Contents
BREVILLE
RECOMMENDS
SAFETY FIRST
At Breville we are very safety
conscious. We design and
manufacture consumer
products with the safety of you,
our valued customer, foremost
in mind. In addition, we ask
that you exercise a degree
of care and adhere to the
following precautions.
2 Breville recommends safety first
7 Components
8 Using your Breville urn
9 Care, cleaning & storage
3
•Do not place the urn near
the edge of a bench or
table during operation.
Ensure that the surface
is level, clean and free
of water and other
substances.
•Do not operate the urn
on a sink drain board.
•Do not place the urn
on or near a hot gas
burner, electric element
or where it could touch a
heated oven.
•Keep the urn clear of
walls, curtains and other
heat or steam sensitive
materials. Minimum
20cm distance.
•Always ensure the urn
is properly assembled
before use. Follow the
instructions provided in
this booklet.
•Do not move the urn
while it is in operation.
•Do not operate the urn on
an inclined surface.
•Do not leave the urn
unattended when in use.
•The urn is not intended
to be operated by means
of an external timer or
separate remote control
system.
•Do not operate the urn
without water in the vessel.
•Do not place the urn under
any object, such as in a
cupboard, when the urn
is in use, as the escaped
steam may cause damage
to the overhead objects
due to heating or water
condensation.
•Do not touch hot surfaces.
Use the carry handles for
lifting and carrying the urn.
•Do not place anything on
top of the lid.
•Always switch the urn to
‘STAND BY’, switch off
at the power outlet and
then remove the plug from
the power outlet before
attempting to move the
urn, when the urn is not in
use and before cleaning
or storing.
4
IMPORTANT
SAFEGUARDS FOR
ALL ELECTRICAL
APPLIANCES
•Fully unwind the power
cord before use.
•Connect only to a 230V
or 240V power outlet.
•The appliance must
be used on a properly
grounded outlet. If it is
not sure, please consult a
qualified electrician.
•Do not, under any
circumstances, modify the
power plug or use a power
plug adapter.
•Do not place this
appliance on or near a
heat source, such as hot
plate, oven or heaters.
•Position the appliance at
a minimum distance of
20cm away from walls,
curtains and other heat or
steam sensitive materials
and provide adequate
space above and on all
sides for air circulation.
•Use caution when
dispensing water from the
urn, as boiling water and
steam will scald. Do not
pour the water too quickly.
•To protect against electric
shock, do not immerse
the urn, power cord or
power plug in water or
allow moisture to come in
contact with these parts.
•Do not open the lid
during operation.
•Do not overfill the urn
past the maximum water
level mark. If the urn is
overfilled, boiling water
may be ejected.
•Position the lid so that the
steam holes are located to
the rear side of the urn.
•Steam may escape from
steam holes on top of the
urn. Exercise caution at
all time.
•Keep the urn clean. Follow
the cleaning instructions
provided in this book.
5
•Do not let the power cord
hang over the edge of
a bench or table, touch
hot surfaces or become
knotted.
•This appliance is for
household use only. Do
not use this appliance
for anything other than
its intended use. Do not
use in moving vehicles or
boats. Do not use outdoors.
Misuse may cause injury.
•The appliance is not
intended for use by persons
(including children) with
reduced physical, sensory
or mental capabilities,
or lack of experience
and knowledge, unless
they have been given
supervision or instruction
concerning use of the
appliance by a person
responsible for their safety.
•Children should be
supervised to ensure that
they do not play with the
appliance.
•Always turn the appliance
to the OFF position, switch
off at the power outlet and
unplug at the power outlet
when the appliance is not
in use.
•Before cleaning, always
turn the appliance to the
OFF position, switch off at
the power outlet, unplug
at the power outlet and
remove the power cord,
if detachable, from the
appliance and allow all
parts to cool.
•To protect against electric
shock, do not immerse
the power cord, power
plug or appliance in water
or any other liquid or
allow moisture to come
in contact with the parts,
unless it is recommended
in the cleaning
instructions.
•Any maintenance other
than cleaning should be
performed at an authorised
Breville Service Centre.
6
•It is advisable that a
safety switch with a rated
residual operating current
not exceeding 30mA be
installed in the electrical
circuit supplying the
appliance. See a qualified
electrician for professional
advice.
•During electrical storms,
the appliance should be
disconnected from the
power source at the wall
socket to prevent any
electrical surges that may
arise during the storm and
which may inadvertently
cause damage to the
appliance and its
electronic componentry.
•It is recommended to
regularly inspect the
appliance. To avoid a
hazard, do not use the
appliance if power cord,
power plug or appliance
becomes damaged in
any way. Return the
entire appliance to
the nearest authorized
Breville Service Centre
for examination and/or
repair.
•The installation of
a residual current
device (safety switch)
is recommended to
provide additional safety
protection when using
electrical appliances.
FOR HOUSEHOLD USE ONLY
SAVE THESE INSTRUCTIONS
7
Components
A. 6 litre capacity
B. Stainless steel body
C. 1800 watt concealed element
D. Non-drip tap with 2 way
pouring action
E. External water gauge
F. Variable heat control
G. Locking lid with ergonomic
handles
H. Automatic boil dry cut-out protects
against overheating
I. Power ‘on’ and ‘heating’ lights
J. Extra-long cord with cord storage
K. Drip tray
L. Steam holes (on top of lid)
A
G
L
B
C
I
K
J
D
F
E
8
6. Turn the variable heat control to setting 5
(maximum) for fast boiling. The heating
light will remain on. When the unit has
boiled, select the desired setting between 1
(Minimum) to 4 to maintain temperature
(Breville recommends setting 2 or 3 for
tea or coffee). The heating light will cycle
on and off maintaining the temperature
selected.
7. To pour hot water, place a cup in the drip
tray and push the non-drip tap down. For
continuous pouring, lift the tap in the
vertical position.
WARNING
The lid should always be fitted and locked into
position when in use.
Use caution when pouring water from your
Urn, as boiling water will scald.
Do not pour the water too quickly.
Do not open the lid when in operation as steam
may escape from the top.
Steam may escape from the steam holes on top
of the Urn. Exercise caution at all times.
Always empty the Urn before moving to a new
position.
Never carry the Urn when in operation.
Always use the handles to carry the Urn.
USING YOUR BREVILLE URN
BEFORE FIRST USE
It is recommended that before the first use, the
Urn is filled to the maximum level, boiled and
the water discarded.
1. Fully unwind power cord from base.
2. Place the Urn on a dry level surface and
position the drip tray at the front of the Urn
(tilt the Urn back slightly and slide the drip
tray under to secure in place).
3. To fill with water, turn the locking lid
anti-clockwise and remove. Use a smaller
container to fill the Urn between the
minimum and maximum marks. Too little
water will result in the Urn switching off
before the water has boiled.
WARNING
Do not fill above the maximum fill line on the
external water gauge as boiling water may
splash out from the Urn.
4. After filling the Urn, ensure that the lid is
replaced and locked into position.
5. Plug the power cord into a 230/240V
power outlet and switch the outlet on. The
red power 'on' light will illuminate.
9
SAFETY BOIL DRY PROTECTION
The Urn is fitted with a safety device which
protects against overheating should the Urn be
operated with insufficient water or has boiled
dry. If this occurs, the Urn will stop heating.
Both the red and orange lights will turn off.
Switch off at the power outlet and allow the Urn
to cool down completely. The safety device will
then automatically reset and the Urn is now
ready for use.
CARE AND CLEANING
Always switch the Urn to Stand By, switch the
power off at the power outlet and then remove
the plug before cleaning. Never immerse the
Urn controls or cord in water, or allow moisture
to come in contact with these parts.
REMOVAL OF MINERAL DEPOSITS
Mineral deposits in tap water may cause the
Urn interior to discolour. This may be removed
by using a commercial kettle descaler which
is available from most leading supermarkets,
departments and hardware stores.
TO CLEAN THE POLISHED EXTERIOR
The stainless steel surface may be wiped over
with a damp cloth and polished with a soft dry
cloth.
WARNING
Do not use chemical, steel wool, or abrasive
cleaners to clean the outside of the Urn.
Care, Cleaning
& Storage
10
Notes
11
Notes
Breville, the Breville logo and Master Every Moment
are trademarks of Breville Pty. Ltd. A.B.N. 98 000 092 928.
Copyright Breville Pty. Ltd. 2020.
Due to continued product improvement, the products illustrated/photographed
in this brochure may vary slightly from the actual product.
URN6 A20
Web: www.breville.comWeb: www.breville.com
Australian Customers
Phone: 1300 139 798
New Zealand Customers
Phone: 0800 273 845
Breville Customer Service Centre

Other manuals for URN6

1

Other Breville Water Dispenser manuals

Breville Hot Cup User manual

Breville

Breville Hot Cup User manual

Breville HotCup VKJ367 User manual

Breville

Breville HotCup VKJ367 User manual

Breville AquaStation Hot User manual

Breville

Breville AquaStation Hot User manual

Breville BRITA Instant HotCu User manual

Breville

Breville BRITA Instant HotCu User manual

Breville hotcup vkj476 User manual

Breville

Breville hotcup vkj476 User manual

Breville Hot Cup vkj142 User manual

Breville

Breville Hot Cup vkj142 User manual

Breville vkj784 User manual

Breville

Breville vkj784 User manual

Breville HotCup VKJ367 User manual

Breville

Breville HotCup VKJ367 User manual

Breville HotCup VKT111 User manual

Breville

Breville HotCup VKT111 User manual

Breville HotCup VKT241 User manual

Breville

Breville HotCup VKT241 User manual

Breville HotCup VKT124 User manual

Breville

Breville HotCup VKT124 User manual

Breville Hot Cup User manual

Breville

Breville Hot Cup User manual

Breville BRITA HotCup User manual

Breville

Breville BRITA HotCup User manual

Breville HotCup VKJ142 User manual

Breville

Breville HotCup VKJ142 User manual

Breville URN6 User manual

Breville

Breville URN6 User manual

Popular Water Dispenser manuals by other brands

Coffee Queen COFFEE user manual

Coffee Queen

Coffee Queen COFFEE user manual

Halsey Taylor HydroBoost HTHBHACG8BL 1B Series owner's manual

Halsey Taylor

Halsey Taylor HydroBoost HTHBHACG8BL 1B Series owner's manual

Halsey Taylor GBVAKC C owner's manual

Halsey Taylor

Halsey Taylor GBVAKC C owner's manual

Clover D14A Service manual

Clover

Clover D14A Service manual

Euhomy WC-C user manual

Euhomy

Euhomy WC-C user manual

Aquasana AQ-5200 installation instructions

Aquasana

Aquasana AQ-5200 installation instructions

Field Controls 46300500 manual

Field Controls

Field Controls 46300500 manual

Meco Electric Water Cooler Service manual

Meco

Meco Electric Water Cooler Service manual

East Midlands Water Company SUMO manual

East Midlands Water Company

East Midlands Water Company SUMO manual

LifeStraw LSPHF017 user manual

LifeStraw

LifeStraw LSPHF017 user manual

Halsey Taylor HAC8EECQ 1E Series owner's manual

Halsey Taylor

Halsey Taylor HAC8EECQ 1E Series owner's manual

Crystal Mountain Storm Service manual

Crystal Mountain

Crystal Mountain Storm Service manual

Orbegozo DA 5650 instruction manual

Orbegozo

Orbegozo DA 5650 instruction manual

Frost Italy BOREA Operation manual

Frost Italy

Frost Italy BOREA Operation manual

Zenith HydroTap G4 Series user guide

Zenith

Zenith HydroTap G4 Series user guide

Avanti WDTZ000 instruction manual

Avanti

Avanti WDTZ000 instruction manual

Quooker Scale Control Plus installation guide

Quooker

Quooker Scale Control Plus installation guide

Verbatim CP005E user manual

Verbatim

Verbatim CP005E user manual

manuals.online logo
manuals.online logoBrands
  • About & Mission
  • Contact us
  • Privacy Policy
  • Terms and Conditions

Copyright 2025 Manuals.Online. All Rights Reserved.