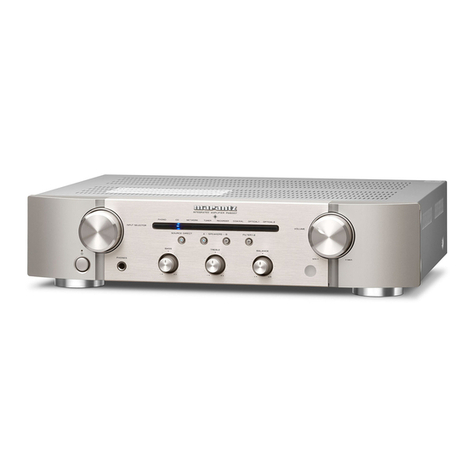
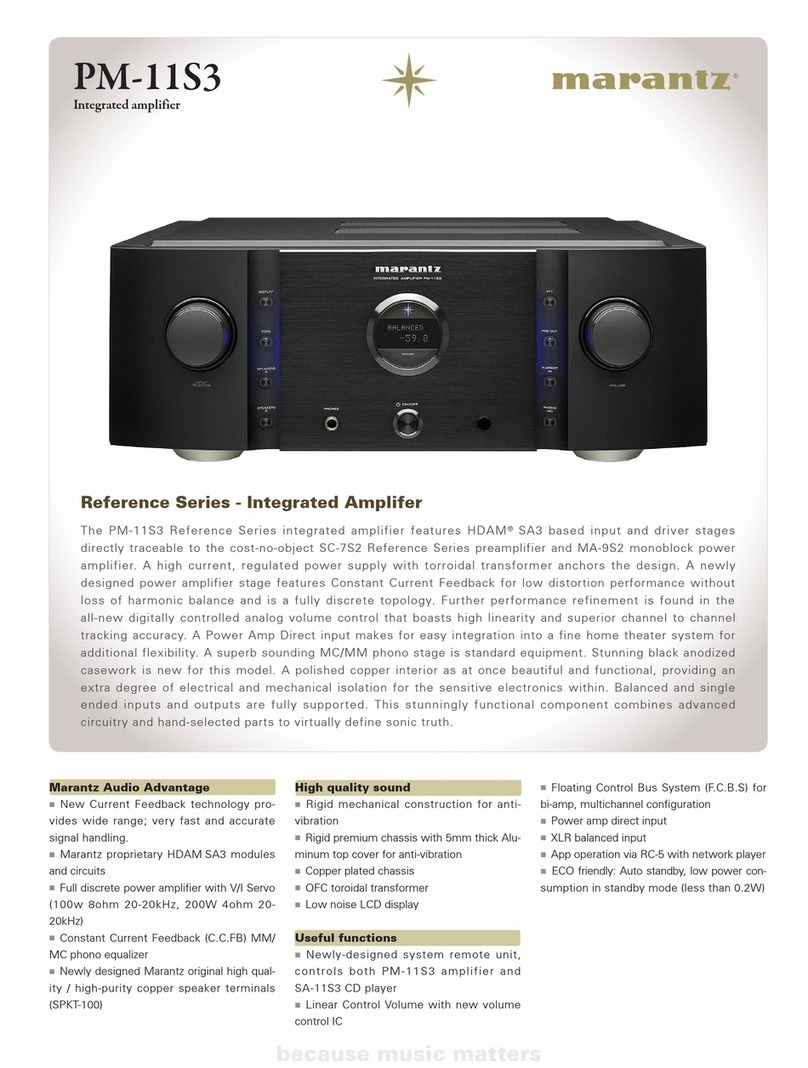
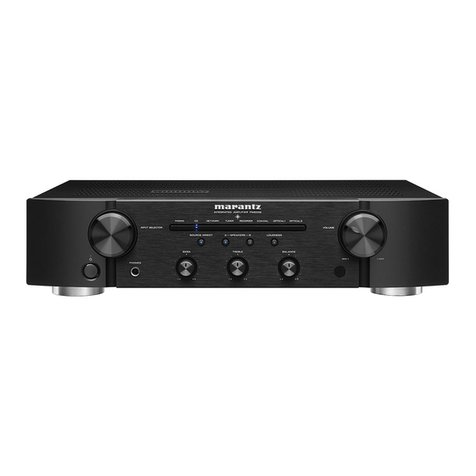
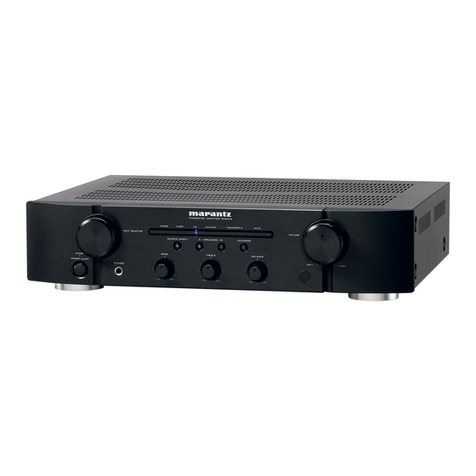
Marantz PM-14S1 User manual

Integrated Amplifier
Model PM-14S1 Owner’s Manual
1.PM14S1N_ENG_Final_0708.indd 1 2013/07/11 19:13:58

1.PM14S1N_ENG_Final_0708.indd 2 2013/07/11 19:13:59

ENGLISHDEUTSCHFRANÇAISITALIANOESPAÑOLNEDERLANDSSVENSKA
РУССКИЙPOLSKI
I
nSAFETY PRECAUTIONS
CAUTION
RISK OF ELECTRIC SHOCK
DO NOT OPEN
CAUTION:
TO REDUCE THE RISK OF ELECTRIC SHOCK, DO NOT REMOVE COVER (OR BACK).
NO USER-SERVICEABLE PARTS INSIDE. REFER SERVICING TO QUALIFIED SERVICE
PERSONNEL.
The lightning flash with arrowhead symbol, within an equilateral triangle, is intended to alert
the user to the presence of uninsulated “dangerous voltage” within the product’s enclosure
that may be of sufficient magnitude to constitute a risk of electric shock to persons.
The exclamation point within an equilateral triangle is intended to alert the user to the
presence of important operating and maintenance (servicing) instructions in the literature
accompanying the appliance.
WARNING:
TO REDUCE THE RISK OF FIRE OR ELECTRIC SHOCK, DO NOT EXPOSE THIS
APPLIANCE TO RAIN OR MOISTURE.
IMPORTANT SAFETY INSTRUCTIONS
1. Read these instructions.
2. Keep these instructions.
3. Heed all warnings.
4. Follow all instructions.
5. Do not use this apparatus near water.
6. Clean only with dry cloth.
7. Do not block any ventilation openings.
Install in accordance with the manufacturer’s instructions.
8. Donotinstallnearanyheatsourcessuchasradiators,heatregisters,stoves,orotherapparatus(includingampliers)
that produce heat.
9. Protect the power cord from being walked on or pinched particularly at plugs, convenience receptacles, and the
point where they exit from the apparatus.
10. Onlyuseattachments/accessoriesspeciedbythemanufacturer.
11.
Useonlywiththecart,stand,tripod,bracket,ortablespeciedbythemanufacturer,orsoldwith
the apparatus. When a cart is used, use caution when moving the cart/apparatus combination to
avoid injury from tip-over.
12. Unplug this apparatus during lightning storms or when unused for long periods of time.
13. Referallservicingtoqualiedservicepersonnel.Servicingisrequiredwhentheapparatushas
been damaged in any way, such as power-supply cord or plug is damaged, liquid has been spilled
or objects have fallen into the apparatus, the apparatus has been exposed to rain or moisture, does not operate
normally, or has been dropped.
14. Batteriesshallnotbeexposedtoexcessiveheatsuchassunshine,reorthelike.
nNOTE ON USE / HINWEISE ZUM GEBRAUCH /
OBSERVATIONS RELATIVES A L’UTILISATION
WARNINGS WARNHINWEISE AVERTISSEMENTS
•Avoidhightemperatures.
Allowforsucientheatdispersion
wheninstalledinarack.
•Handlethepowercordcarefully.
Holdtheplugwhenunpluggingthe
cord.
•Keeptheunitfreefrommoisture,
water,anddust.
•Unplugthepowercordwhennot
usingtheunitforlongperiodsof
time.
•Donotobstructtheventilationholes.
•Donotletforeignobjectsintothe
unit.
•Donotletinsecticides,benzene,and
thinnercomeincontactwiththeunit.
•Neverdisassembleormodifythe
unitinanyway.
•Ventilationshouldnotbeimpeded
bycoveringtheventilationopenings
withitems,suchasnewspapers,
tableclothsorcurtains.
•Nakedamesourcessuchaslighted
candlesshouldnotbeplacedon
theunit.
•Observeandfollowlocalregulations
regardingbatterydisposal.
•Donotexposetheunittodrippingor
splashinguids.
•Donotplaceobjectslledwith
liquids,suchasvases,ontheunit.
•Donothandlethemainscordwith
wethands.
•WhentheswitchisintheOFF
position,theequipmentisnot
completelyswitchedofrom
MAINS.
•Theequipmentshallbeinstallednear
thepowersupplysothatthepower
supplyiseasilyaccessible.
•Donotkeepthebatteryina
placeexposedtodirectsunlight
orinplaceswithextremelyhigh
temperatures,suchasnearaheater.
•VermeidenSiehoheTemperaturen.
BeachtenSie,dasseineausreichende
Belüftunggewährleistetwird,wenn
dasGerätaufeinRegalgestelltwird.
•GehenSievorsichtigmitdem
Netzkabelum.
HaltenSiedasKabelamStecker,
wennSiedenSteckerherausziehen.
•HaltenSiedasGerätvon
Feuchtigkeit,WasserundStaubfern.
•WenndasGerätlängereZeitnicht
verwendetwerdensoll,trennenSie
dasNetzkabelvomNetzstecker.
•DeckenSiedenLüftungsbereich
nichtab.
•LassenSiekeinefremden
GegenständeindasGerätkommen.
•LassenSiedasGerätnicht
mitInsektiziden,Benzinoder
VerdünnungsmittelninBerührung
kommen.
•VersuchenSieniemalsdasGerät
auseinanderzunehmenoderzu
verändern.
•DieBelüftungsollteaufkeinen
FalldurchdasAbdeckender
Belüftungsönungendurch
Gegenständewiebeispielsweise
Zeitungen,Tischtücher,Vorhängeo.
Ä.behindertwerden.
•AufdemGerätsolltenkeinerlei
direkteFeuerquellenwie
beispielsweiseangezündeteKerzen
aufgestelltwerden.
•BittebeachtenSiebeider
EntsorgungderBatteriendieörtlich
geltendenUmweltbestimmungen.
•DasGerätsolltekeinertropfenden
oderspritzendenFlüssigkeit
ausgesetztwerden.
•AufdemGerätsolltenkeinemit
FlüssigkeitgefülltenBehälterwie
beispielsweiseVasenaufgestellt
werden.
•DasNetzkabelnichtmitfeuchten
odernassenHändenanfassen.
•WennderSchalterausgeschaltetist
(OFF-Position),istdasGerätnicht
vollständigvomStromnetz(MAINS)
abgetrennt.
•DasGerätsollteinderNäheeiner
Netzsteckdoseaufgestelltwerden,
damitesleichtandasStromnetz
angeschlossenwerdenkann.
•LagernSiedieBatterienichtaneinem
Ort,andemsiedirektemSonnenlicht
oderextremhohenTemperaturen
ausgesetztist,wiez.B.inderNähe
einesHeizgeräts.
•Eviterdestempératuresélevées.
Tenircompted’unedispersionde
chaleursusantelorsdel’installation
suruneétagère.
•Manipulerlecordond’alimentation
avecprécaution.
Tenirlapriselorsdudébranchement
ducordon.
•Protégerl’appareilcontrel’humidité,
l’eauetlapoussière.
•Débrancherlecordond’alimentation
lorsquel’appareiln’estpasutilisé
pendantdelonguespériodes.
•Nepasobstruerlestrousd’aération.
•Nepaslaisserdesobjetsétrangers
dansl’appareil.
•Nepasmettreencontactdes
insecticides,dubenzèneetun
diluantavecl’appareil.
•Nejamaisdémonteroumodier
l’appareild’unemanièreoud’une
autre.
•Nepasrecouvrirlesoricesde
ventilationavecdesobjetstelsque
desjournaux,nappesourideaux.
Celaentraveraitlaventilation.
•Nejamaisplacerdeammenuesur
l'appareil,notammentdesbougies
allumées.
•Veillezàrespecterlesloisenvigueur
lorsquevousjetezlespilesusagées.
•L’appareilnedoitpasêtreexposéà
l’eauouàl’humidité.
•Nepasposerd’objetcontenantdu
liquide,parexempleunvase,sur
l’appareil.
•Nepasmanipulerlecordon
d’alimentationaveclesmains
mouillées.
•Lorsquel’interrupteurestsurla
positionOFF,l’appareiln’estpas
complètementdéconnectédu
SECTEUR(MAINS).
•L’appareilserainstalléprèsdela
sourced’alimentation,desorte
quecettedernièresoitfacilement
accessible.
•Neplacezpaslapiledansunendroit
exposéàlalumièredirectedusoleil
oudansdesendroitsprésentantdes
températuresextrêmementélevées,
parexempleprèsd’unradiateur.
1.PM14S1N_ENG_Final_0708.indd 3 2013/07/11 19:13:59

ENGLISH DEUTSCH FRANÇAIS ITALIANO ESPAÑOL NEDERLANDS SVENSKA РУССКИЙ POLSKI
II
nNOTE SULL’USO / NOTAS SOBRE EL USO / ALVORENS TE GEBRUIKEN / OBSERVERA ANGÅENDE ANVÄNDNINGEN /
ЗАМЕЧАНИЯ ПО ЭКСПЛУАТАЦИИ / WSKAZÓWKI DOTYCZĄCE OBSŁUGI
AVVERTENZE ADVERTENCIAS WAARSCHUWINGEN VARNINGAR ПРЕДОСТЕРЕЖЕНИЕ OSTRZEŻENIE
•Evitatediesporrel’unitàa
temperatureelevate.
Assicuratevichevisiaun’adeguata
dispersionedelcalorequando
installatel’unitàinunmobileper
componentiaudio.
•Manneggiateilcavodialimentazione
conattenzione.
Tenetefermalaspinaquando
scollegateilcavodallapresa.
•Tenetel’unitàlontanadall’umidità,
dall’acquaedallapolvere.
•Scollegateilcavodialimentazione
quandoprevedetedinonutilizzare
l’unitàperunlungoperiododitempo.
•Noncopriteiforidiventilazione.
•Noninseritecorpiestraneiall’interno
dell’unità.
•Assicuratevichel’unitànonentriin
contattoconinsetticidi,benzoloo
solventi.
•Nonsmontatenémodicatel’unità
inalcunmodo.
•Leaperturediventilazionenon
devonoessereostruitecoprendole
conoggetti,qualigiornali,tovaglie,
tendeecosìvia.
•Nonposizionatesull’unitàamme
libere,comeadesempiocandele
accese.
•Prestateattenzioneagliaspetti
legatiallatuteladell’ambientenello
smaltimentodellebatterie.
•L’apparecchiaturanondeveessere
espostaagoccioliiospruzzi.
•Nonposizionatesull’unitàalcun
oggettocontenenteliquidi,comead
esempioivasi.
•Nontoccareilcavodialimentazione
conlemanibagnate.
•Quandol’interruttoreènella
posizioneOFF,l’apparecchiatura
nonècompletamentescollegatada
MAINS.
•L’apparecchiovainstallato
inprossimitàdellafontedi
alimentazione,inmodoche
quest’ultimasiafacilmente
accessibile.
•Nontenerelabatteriainluoghi
espostiallalucesolaredirettao
contemperatureestremamente
elevate,adesempioinprossimitàdi
dispositividiriscaldamento.
•Evitealtastemperaturas.
Permitelasucientedispersióndel
calorcuandoestáinstaladoenla
consola.
•Manejeelcordóndeenergíacon
cuidado.
Sostengaelenchufecuando
desconecteelcordóndeenergía.
•Mantengaelequipolibrede
humedad,aguaypolvo.
•Desconecteelcordóndeenergía
cuandonoutiliceelequipopor
muchotiempo.
•Noobstruyalosoriciosde
ventilación.
•Nodejeobjetosextrañosdentrodel
equipo.
•Nopermitaelcontactode
insecticidas,gasolinaydiluyentes
conelequipo.
•Nuncadesarmeomodiqueel
equipodeningunamanera.
•Laventilaciónnodebequedar
obstruidaporhabersecubierto
lasaperturasconobjetoscomo
periódicos,mantelesocortinas.
•Nodeberáncolocarsesobreel
aparatofuentesinamablessin
protección,comovelasencendidas.
•Alahoradedeshacersedelaspilas,
respetelanormativaparaelcuidado
delmedioambiente.
•Noexponerelaparatoalgoteoo
salpicadurascuandoseutilice.
•Nocolocarsobreelaparatoobjetos
llenosdelíquido,comojarros.
•Nomanejeelcabledealimentación
conlasmanosmojadas.
•Cuandoelinterruptorestáenla
posiciónOFF,elequiponoestá
completamentedesconectadodela
alimentaciónMAINS.
•Elequiposeinstalarácercadela
fuentedealimentacióndemanera
queresultefácilaccederaella.
•Nocoloquelaspilasenunlugar
expuestoalaluzdirectadel
solodondelatemperaturasea
extremadamentealta,comocercade
unacalefacción.
•Vermijdhogetemperaturen.
Zorgerbijinstallatieineenaudiorack
voor,datdedoorhettoestel
geproduceerdewarmtegoedkan
wordenafgevoerd.
•Hanteerhetnetsnoervoorzichtig.
Houdhetsnoerbijdestekkervast
wanneerdezemoetwordenaan-of
losgekoppeld.
•Laatgeenvochtigheid,waterofstof
inhetapparaatbinnendringen.
•Neemaltijdhetnetsnoeruithet
stopkontaktwanneerhetapparaat
gedurendeeenlangeperiodeniet
wordtgebruikt.
•Deventilatieopeningenmogenniet
wordenbeblokkeerd.
•Laatgeenvreemdevoorwerpenin
ditapparaatvallen.
•Voorkomdatinsecticiden,benzeen
ofverfverdunnermetdittoestelin
contactkomen.
•Dittoestelmagnietgedemonteerd
ofaangepastworden.
•Deventilatiemagniet
wordenbelemmerddoorde
ventilatieopeningenaftedekkenmet
bijvoorbeeldkranten,eentafelkleed
ofgordijnen.
•Plaatsgeenopenvlammen,
bijvoorbeeldeenbrandendekaars,
ophetapparaat.
•Houdusteedsaande
milieuvoorschriftenwanneeru
gebruiktebatterijenwegdoet.
•Stelhetapparaatnietblootaan
druppelsofspatten.
•Plaatsgeenvoorwerpengevuldmet
water,bijvoorbeeldeenvaas,ophet
apparaat.
•Raakhetnetsnoernietmetnatte
handenaan.
•AlsdeschakelaaropOFFstaat,
ishetapparaatnietvolledig
losgekoppeldvandenetspanning
(MAINS).
•Deapparatuurwordtindebuurtvan
hetstopcontactgeïnstalleerd,zodat
ditaltijdgemakkelijktoegankelijkis.
•Bewaardebatterijennietopeen
plaatswaardezeblootstaanaan
directzonlichtofopplaatsenwaar
zeerhogetemperaturenheersen,
zoalsindebuurtvaneenkachel.
•Undvikhögatemperaturer.
Setillattdetnnsmöjlighettillgod
värmeavledningvidmonteringiett
rack.
•Hanteranätkabelnvarsamt.
Hållikabelnnärdenkopplasfrån
el-uttaget.
•Utsättinteapparatenförfukt,vatten
ochdamm.
•Kopplalossnätkabelnomapparaten
intekommerattanvändasilångtid.
•Täppintetillventilationsöppningarna.
•Setillattfrämmandeföremålinte
trängeriniapparaten.
•Setillattinteinsektsmedelpå
spraybruk,bensenochthinner
kommerikontaktmedapparatens
hölje.
•Tainteisärapparatenochförsökinte
byggaomden.
•Ventilationenbörinte
förhindrasgenomatttäckaför
ventilationsöppningarnamedföremål
såsomtidningar,bordsdukareller
gardiner.
•Placerainteöppeneld,t.ex.tända
ljus,påapparaten.
•Tänkpåmiljöaspekternanärdu
bortskaarbatterier.
•Apparatenfårinteutsättasför
vätska.
•Placerainteföremålfylldamed
vätska,t.ex.vaser,påapparaten.
•Hanteraintenätsladdenmedvåta
händer.
•Ävenomströmbrytarenståri
detavstängdalägetOFF,såär
utrustningeninteheltbortkopplad
fråndetelektriskanätet(MAINS).
•Utrustningenskavarainstallerad
näraströmuttagetsåatt
strömförsörjningenärlättatttillgå.
•Förvaraintebatterietpåenplats
somutsättsfördirektsolljus
ellerpåplatsermedextremt
högatemperaturer,somnäraett
värmeelement.
•Избегайтевысокихтемператур.
Учитывайтезначительное
распределениетеплапри
установкеустройстванаполку.
•Будьтеосторожныпривключении/
отключениикабеляпитания.
Привключении/отключениикабеля
питанияберитесьзавилку.
•Неподвергайтеустройство
воздействиювлаги,водыипыли.
•Еслиустройствонебудет
использоватьсявтечение
длительноговремени,отключите
кабельпитанияотсети.
•Незакрывайтевентиляционные
отверстия.
•Следите,чтобыпосторонние
предметынепопадаливнутрь
устройства.
•Предохраняйтеустройствоот
воздействияядохимикатов,
бензинаирастворителей.
•Никогданеразбирайтеине
модифицируйтеустройство.
•Незакрывайтевентиляционные
отверстиятакимипредметами,как
газеты,скатерти,шторыидр.
•Неразмещайтенаповерхности
аппаратаисточникиоткрытого
огня,напримерсвечи.
•Обратитевниманиена
экологическиеаспектыутилизации
батарейпитания.
•Следите,чтобынаустройствоне
проливаласьвода.
•Нерасполагайтеемкости,в
которыхсодержитсявода,на
устройстве.
•Неприкасайтеськсетевомушнуру
мокрымируками.
•Когдапереключательустановлен
вположениеВЫКЛ,оборудование
неполностьюотключеноотСЕТИ
ПИТАНИЯ.
•Оборудованиеследует
устанавливатьвозлеисточника
питания,чтобыегоможнобыло
легкоподключить.
•Нехранитеэлементыпитанияв
месте,подверженномупрямому
солнечномусвету,иливместах
счрезвычайновысокими
температурами,например,возле
обогревателя.
•Unikaj wysokich temperatur.
Jeśliurządzeniejestustawione
wszafce,należyzapewnić
odpowiedniącyrkulacjępowietrza.
•Obchodźsięostrożniez
przewodemzasilającym.
Odłączającprzewódzgniazda
elektrycznego,trzymajzawszeza
wtyczkę.
•Chrońurządzenieprzedwilgocią,
wodąipyłem.
•Odłączprzewódzasilającyzsieci,
jeśliurządzenieniejestużywane
przezdłuższyczas.
•Niezakrywajotworów
wentylacyjnych.
•Zwróćuwagę,abydośrodka
urządzenianiedostałysiężadne
obceprzedmioty.
•Chrońurządzenieprzedkontaktem
zśrodkamiowadobójczymi,
benzynąorazrozpuszczalnikiem.
•Nierozbierajurządzeniaoraznie
dokonujwnimżadnychmodykacji.
•Nienależyograniczaćwentylacji
urządzenia,np.poprzezzakrycie
otworówwentylacyjnychgazetami,
obrusem,zasłonamiitp.
•Naurządzeniuniewolnostawiać
żadnychźródełotwartegoognia,
np.zapalonychświec.
•Przestrzegajlokalnychprzepisów
dotyczącychutylizacjibaterii.
•Chrońurządzenieprzez
zachlapaniemlubkapaniem
wszelkichcieczy.
•Niestawiajnaurządzeniużadnych
przedmiotównapełnionychwodą,
np.wazonów.
•Niedotykaćprzewoduzasilającego
mokrymirękoma.
•Gdywyłącznikznajdujesięw
położeniuOFF(wył.),urządzenie
niejestcałkowicieodłączoneod
zasilania.
•Urządzenienależyustawićw
pobliżuźródłazasilania,aby
zapewnićdoniegołatwydostęp.
•Nieprzechowywaćbateriinasłońcu
aniwbardzociepłychmiejscach,
np.wpobliżugrzejnika.
1.PM14S1N_ENG_Final_0708.indd 4 2013/07/11 19:13:59

ENGLISHDEUTSCHFRANÇAISITALIANOESPAÑOLNEDERLANDSSVENSKA
РУССКИЙPOLSKI
III
• DECLARATION OF CONFORMITY
Our products following the provisions of EC/EU directives, that as follows;
LV: 2006/95/EC
EMC: 2004/108/EC
RoHS:2011/65/EU
ErP: EC regulation 1275/2008 and its frame work directive 2009/125/EC
• ÜBEREINSTIMMUNGSERKLÄRUNG
Unsere Produkte unterliegen den Bestimmungen der folgenden EG/EU-Richtlinien:
LV: 2006/95/EC
EMC: 2004/108/EC
RoHS:2011/65/EU
ErP: EG-Vorschrift 1275/2008 und deren Rahmenrichtlinie 2009/125/EC
•DECLARATION DE CONFORMITE
Nos produits sont conformes aux dispositions des directives CE/UE comme suit ;
LV: 2006/95/EC
EMC: 2004/108/EC
RoHS:2011/65/EU
ErP: Réglementation CE 1275/2008 et sa directive cadre 2009/125/CE
•DICHIARAZIONE DI CONFORMITÀ
InostriprodottisonoconformiaquantoprevistodalledirettiveEC/EU,comespecicatodiseguito:
LV: 2006/95/EC
EMC: 2004/108/EC
RoHS:2011/65/EU
ErP: Norma EC 1275/2008 e relativa legge quadro 2009/125/EC
•DECLARACIÓN DE CONFORMIDAD
Nuestros productos cumplen las disposiciones de las directivas de la CE/UE siguientes:
LV: 2006/95/EC
EMC: 2004/108/EC
RoHS:2011/65/EU
ErP: Normativa de la CE 1275/2008 y su directiva marco 2009/125/CE
•EENVORMIGHEIDSVERKLARING
OnzeproductenvolgendevoorwaardenvandeEG/EU-richtlijnenzoalsvolgt;
LV: 2006/95/EC
EMC: 2004/108/EC
RoHS:2011/65/EU
ErP:EG-verordening1275/2008enzijnkaderrichtlijn2009/125/EG
•ÖVERENSSTÄMMELSESINTYG
Våra produkter uppfyller följande föreskrifter i EC/EU-direktiv:
LV: 2006/95/EC
EMC: 2004/108/EC
RoHS:2011/65/EU
ErP: EU-direktiv 1275/2008 och dess ramdirektiv 2009/125/EC
•СЕРТИФИКАТ СООТВЕТСТВИЯ
НашипродуктысоответствуютследующимположениямидирективыЕЭС/ЕС:
LV: 2006/95/EC
EMC: 2004/108/EC
RoHS:2011/65/EU
ErP:ЗаконодательныеактыЕЭС1275/2008иихосновополагающаядиректива2009/125/EC
•DEKLARACJA ZGODNOŚCI
NaszeproduktyzgodniezpostanowieniamiKE/UE,tj.
LV: 2006/95/EC
EMC: 2004/108/EC
RoHS:2011/65/EU
ErP:ZrozporządzeniemKE1275/2008orazpowiązanąznimdyrektywąramową2009/125/WE
Marantz Europe
A division of D&M Europe B.V. Beemdstraat 11, 5653 MA Eindhoven,The Netherlands
Hotsurfacemark
CAUTION:
HOT SURFACE. DO NOT TOUCH.
The top surface over the internal heat sink may become hot
when operating this product continuously.
Do not touch hot areas, especially around the “Hot surface
mark” and the top panel.
VORSICHT:
HEISSE OBERFLÄCHE.
NICHT ANFASSEN.
Die Oberseite über dem inneren Kühlkörper könnte heiß
werden, wenn dieses Produkt dauerhaft betrieben wird.
Berühren Sie keine heißen Bereiche, hier besonders
um die Kennzeichnung “Hot surface mark” und die
Oberseite.
PRECAUTION:
SURFACE CHAUDE. NE PAS TOUCHER.
La surface supérieure du dissipateur de chaleur peut
devenirchaudesivousutilisezceproduitencontinu.
Netouchezpasleszoneschaudes,toutparticulièrement
vers l’inscription “Hot surface mark” et le panneau
supérieur.
ATTENZIONE:
SUPERFICIE CALDA. NON TOCCARE.
Lasuperciesuperiorealdisopradeldissipatoreinterno
può riscaldarsi quando si adopera questo prodotto in
maniera continuativa.
Non toccare parti calde, in particolare quelle intorno alla
dicitura “Hot surface mark” e al pannello superiore.
PRECAUCIÓN:
SUPERFICIE CALIENTE. NO TOCAR.
Lasuperciesuperiorsobreeldisipadordecalorinterno
podría llegar a calentarse al operar este producto de
forma continua.
No toque las áreas calientes, especialmente las situadas
alrededor de la “Hot surface mark” y del panel superior.
WAARSCHUWING:
HEET OPPERVLAK. NIET AANRAKEN.
Bij ononderbroken bediening van dit product kan het
oppervlak boven de interne koelplaat heet worden.
Raak het toestel niet aan waar het heet is, vooral niet in
de buurt van het “Hot surface mark” en het bovenpaneel.
FÖRSIKTIHETSMÅTT:
VARM YTA. RÖR EJ.
Ytan ovanför den interna kylänsen kan bli varm när
produktenanvändskontinuerligt.
Rör inte varma områden. Var särskilt försiktig vid
märkningen“Hotsurfacemark”ochpåtoppanelen.
ОСТОРОЖНО:
ГОРЯЧАЯ ПОВЕРХНОСТЬ.
НЕ ПРИКАСАТЬСЯ.
Поверхность внутреннего теплоотвода может
нагреватьсяпринепрерывнойработеустройства.
Не касайтесь “Hot surface mark”, особенно верхней
панелииповерхностивокруготметки.
UWAGA:
GORĄCA POWIERZCHNIA.
NIE DOTYKAĆ.
Górnapowierzchnianadwewnętrznymradiatoremmoże
się mocno nagrzać w przypadku długotrwałej pracy
amplitunera.
Nie dotykać gorących powierzchni, szczególnie wokół
symbolu“Hotsurfacemark”ipanelugórnego.
1.PM14S1N_ENG_Final_0708.indd 5 2013/07/11 19:14:00

ENGLISH DEUTSCH FRANÇAIS ITALIANO ESPAÑOL NEDERLANDS SVENSKA РУССКИЙ POLSKI
IV
CAUTION:
To completely disconnect this product from the mains, disconnect the plug
from the wall socket outlet.
The mains plug is used to completely interrupt the power supply to the unit
and must be within easy access by the user.
VORSICHT:
UmdiesesGerät vollständigvonder Stromversorgungabzutrennen,ziehen
SiebittedenSteckerausderWandsteckdose.
DerNetzsteckerwirdverwendet,umdieStromversorgungzumGerätvöllig
zuunterbrechen;ermussfürdenBenutzergutundeinfachzuerreichensein.
PRECAUTION:
Pour déconnectercomplètementceproduitducourantsecteur,débranchezla
prise de la prise murale.
La prise secteur est utilisée pour couper complètement l’alimentation de
l’appareil et l’utilisateur doit pouvoir y accéder facilement.
ATTENZIONE:
Per scollegare completamente questo prodotto dalla rete di alimentazione
elettrica, scollegare la spina dalla relativa presa a muro.
Laspinadiretevieneutilizzataperinterromperecompletamentel’alimentazione
all’unità e deve essere facilmente accessibile all’utente.
PRECAUCIÓN:
Paradesconectarcompletamenteesteproductodelaalimentacióneléctrica,
desconecte el enchufe del enchufe de la pared.
Elenchufedelaalimentacióneléctricaseutilizaparainterrumpirporcompleto
elsuministrodealimentacióneléctricaalaunidadydebedeencontrarseenun
lugar al que el usuario tenga fácil acceso.
WAARSCHUWING:
Om de voeding van dit product volledig te onderbreken moet de stekker uit
het stopcontact worden getrokken.
De netstekker wordt gebruikt om de stroomtoevoer naar het toestel volledig
te onderbreken en moet voor de gebruiker gemakkelijk bereikbaar zijn.
FÖRSIKTIHETSMÅTT:
Koppla loss stickproppenfråneluttagetförattheltskiljaproduktenfrånnätet.
Stickproppenanvändsförattheltbrytaströmförsörjningentillapparaten,och
denmåstevaralättillgängligföranvändaren.
ОСТОРОЖНО:
Для того чтобы полностью отключить данный продукт от сети, выньте
штепсельнуювилкукабеляпитанияизрозеткиt.
При установке данного продукта убедитесь в том, что используемая
розетканаходитсявзонедосягаемости.
UWAGA:
W celu całkowitego odłączenia tego urządzenia od zasilania, należy wyjąć
wtyczkęzgniazdaelektrycznego.
Przewód zasilający umożliwia całkowite odłączenie dopływu zasilania do
urządzeniaimusibyćłatwodostępnydlaużytkownika.
A NOTE ABOUT RECYCLING:
Thisproduct’spackagingmaterialsarerecyclableandcanbereused.Pleasedisposeofanymaterialsinaccordancewiththelocal
recyclingregulations.
Whendiscardingtheunit,complywithlocalrulesorregulations.
Batteriesshouldneverbethrownawayorincineratedbutdisposedofinaccordancewiththelocalregulationsconcerningbattery
disposal.
Thisproductand the supplied accessories, excluding the batteries, constitutetheapplicable product according to the WEEE
directive.
HINWEIS ZUM RECYCLING:
DasVerpackungsmaterialdiesesProduktesistzumRecycelngeeignetundkannwiederverwendetwerden.BitteentsorgenSie
alleMaterialienentsprechendderörtlichenRecycling-Vorschriften.
BeachtenSiebeiderEntsorgungdesGerätesdieörtlichenVorschriftenundBestimmungen.
DieBatteriendürfennichtindenHausmüllgeworfenoderverbranntwerden;bitteentsorgenSiedieBatteriengemäßderörtlichen
Vorschriften.
DiesesProduktunddasimLieferumfangenthalteneZubehör(mitAusnahmederBatterien!)entsprechenderWEEE-Direktive.
UNE REMARQUE CONCERNANT LE RECYCLAGE:
Lesmatériauxd’emballagedeceproduitsontrecyclablesetpeuventêtreréutilisés.Veuillezdisposerdesmatériauxconformément
auxloissurlerecyclageenvigueur.
Lorsquevousmettezcetappareilaurebut,respectezlesloisouréglementationsenvigueur.
Lespilesnedoiventjamaisêtrejetéesouincinérées,maismisesaurebutconformémentauxloisenvigueursurlamiseaurebut
despiles.
Ceproduitetlesaccessoiresinclus,àl’exceptiondespiles,sontdesproduitsconformesàladirectiveDEEE.
NOTA RELATIVA AL RICICLAGGIO:
Imaterialidiimballaggiodiquestoprodottosonoriutilizzabiliericiclabili.Smaltireimaterialiconformementeallenormativelocalisulriciclaggio.
Perlosmaltimentodell’unità,osservarelenormativeoleleggilocaliinvigore.
Nongettarelebatterie,néincenerirle,masmaltirleconformementeallanormativalocalesuiriutichimici.
Questoprodottoegliaccessoriinclusinell’imballaggiosonoapplicabilialladirettivaRAEE,adeccezionedellebatterie.
ACERCA DEL RECICLAJE:
Losmaterialesdeembalajedeesteproductosonreciclablesysepuedenvolverautilizar.Dispongadeestosmaterialessiguiendolosreglamentos
dereciclajedesulocalidad.
Cuandosedeshagadelaunidad,cumplaconlasreglasoreglamentoslocales.
Laspilasnuncadeberántirarseniincinerarse.Deberádisponerdeellassiguiendolosreglamentosdesulocalidadrelacionadosconlosdesperdicios
químicos.
EsteproductojuntoconlosaccesoriosempaquetadoseselproductoaplicablealadirectivaRAEEexceptopilas.
EEN AANTEKENING MET BETREKKING TOT DE RECYCLING:
Hetinpakmateriaalvanditproductisrecycleerbaarenkanopnieuwgebruiktworden.Erwordtverzochtomzichvanelkafvalmateriaalteontdoen
volgensdeplaatselijkevoorschriften.
Volgvoorhetwegdoenvandespelerdevoorschriftenvoordeverwijderingvanwit-enbruingoedop.
Batterijenmogennooitwordenweggegooidofverbrand,maarmoetenvolgensdeplaatselijkevoorschriftenbetreendechemischafvalworden
verwijderd.
Opditproductendemeegeleverdeaccessoires,m.u.v.debatterijenisderichtlijnvoorafgedankteelektrischeenelektronischeapparaten(WEEE)
vantoepassing.
OBSERVERA ANGÅENDE ÅTERVINNING:
Produktensemballageäråtervinningsbartochkanåteranvändas.Kasseradetenligtlokalaåtervinningsbestämmelser.
Närdukasserarenhetenskadugöradetiöverensstämmelsemedlokalareglerochbestämmelser.
Batterierfårabsolutintekastasisopornaellerbrännas.Kasserademenligtlokalabestämmelserförkemisktavfall.
DennaapparatochdetillbehörsomlevererasmeddenuppfyllergällandeWEEE-direktiv,medundantagavbatterierna.
ПРИМЕЧАНИЕ О ПЕРЕРАБОТКЕ:
Упаковочный материал данного продукта может быть переработан и повторно использован. Пожалуйста, сортируйте материалы в
соответствиисместнымитребованиямипереработки.
Приутилизацииопределенныхблоковсоблюдайтеместныеправилаутилизации.
Невыбрасывайтеинесжигайтебатарейки,соблюдайтеместныеправилаутилизациихимическихотходов.
ДанныйпродуктиаксессуарывупаковкесоответствуютдирективеWEEE,исключаябатарейки.
INFORMACJE DOTYCZĄCE RECYKLINGU:
Opakowanie urządzenia zostało wykonane z materiałów nadających się do wtórnego przetworzenia. Utylizację wszelkich materiałów należy
przeprowadzićzgodniezobowiązującymilokalnymiprzepisamidotyczącymirecyklingu.
Urządzenienależyzutylizowaćzgodniezlokalnymiprzepisami.
Bateriiniewolnowyrzucaćdośmiecilubpalić.Należyjezutylizowaćzgodniezobowiązującymizasadamidotyczącymiutylizacjibaterii.
Niniejszyproduktorazdostarczonewrazznimakcesoria(opróczbaterii)stanowiąwłaściwyprodukt,zgodniezdyrektywąWEEE.
1.PM14S1N_ENG_Final_0708.indd 6 2013/07/11 19:14:00

ENGLISHDEUTSCHFRANÇAISITALIANOESPAÑOLNEDERLANDSSVENSKA
РУССКИЙPOLSKI
nCautions on installation / Vorsichtshinweise zur aufstellung /
Précautions d’installation / Precauzioni sull’installazione /
Emplazamiento de la instalación / Voorzorgsmaatregelen bij de installatie /
Försiktighet vid installationen / Меры предосторожности при установке /
Uwagi dotyczące instalacji
z z
z
Wall
Wand
Paroi
Parete
Pared
Muur
Vägg
Стена
Ściana
z
zFor proper heat dispersal, do not install this unit in a conned space, such as a bookcase or similar enclosure.
•More than 0.3 m is recommended.
zStellen Sie das Gerät nicht an einem geschlossenen Ort, wie in einem Bücherregal oder einer ähnlichen
Einrichtung auf, da dies eine ausreichende Belüftung des Geräts behindern könnte.
•Empfohlen wird über 0,3 m.
zPour permettre la dissipation de chaleur requise, n’installez pas cette unité dans un espace conné tel qu’une
bibliothèque ou un endroit similaire.
•Une distance de plus de 0,3 m est recommandée.
zPer una dispersione adeguata del calore, non installare questa apparecchiatura in uno spazio ristretto, come ad
esempio una libreria o simili.
•Siraccomandaunadistanzasuperioreai0,3m.
zPara la dispersión del calor adecuadamente, no instale este equipo en un lugar connado tal como una librería
o unidad similar.
•Serecomiendadejarmásde0,3malrededor.
zPlaats dit toestel niet in een kleine afgesloten ruimte, zoals een boekenkast e.d., omdat anders de warmte niet
op gepaste wijze kan worden afgevoerd.
•Meer dan 0,3 m is aanbevolen.
zFör att tillförsäkra god värmeavledning får utrustningen inte installeras i instängda utrymmen, som t.ex. en
bokhylla eller liknande.
•Merän0,3mrekommenderas.
zЧтобы не препятствовать отводу тепла, не устанавливайте блок в закрытое ограниченное пространство,
например, в книжный шкаф и т.п.
•Рекомендуемоерасстояние-неменее0,3м.
zZe względu na prawidłowe odprowadzanie ciepła, należy pamiętać o zachowaniu odpowiedniej przestrzeni
wokół urządzenia. Nie należy umieszczać urządzenia w zamkniętych szafkach lub podobnych ograniczonych
przestrzeniach.
•Zalecanejestzachowanieodległościpowyżej0,3metra.
V
1.PM14S1N_ENG_Final_0708.indd 7 2013/07/11 19:14:01

ИНТЕГРИРОВАННЫЙ
УСИЛИТЕЛЬ
Marantz
PM-14S1
(РУКОВОДСТВО ПО ЭКСПЛУАТАЦИИ)
Выприобрелиустройствоусилительное/преобразовательноепроизводствакомпании“D&MХолдингсИнк”,Япония(“D&MHoldingsInc.”,Japan).Модель
PM-14S1
являетсяинтегрированнымусилителемипредназначенадляусиленияаудиосигналоввдомашнихаудиосистемах.Этоизделиеширокоизвестно
вкругахистинныхценителейвысококлассногозвука.Качествоибезопасностьподтвержденымножествомтестов,проведенныхкакзарубежными,таки
российскимииспытательнымилабораториями.
Изготовительвтечение3лет(срокслужбы)послевыпускаданногоизделияобеспечиваетналичиекомплектующихвцеляхвозможностипроведенияремонта
итехническогообслуживания,поистечениикоторогоэксплуатацияитехническоеобслуживаниепродолжаетсявсоответствиисдействующиминормативными
документами.Изделиеостаетсябезопаснымдляжизни,здоровьячеловекаиокружающейсредывтечениевсегосрокаэксплуатации.Гарантийныйсрок-1год.
Информация о Российской сертификации
No сертификата
соответствия
Орган по
сертификации Нормативные документы Наименование сертифицированной
продукции
Срок действия
сертификата
РОССJP.АИ49.B04813
ИСПЫТАТЕЛБНАЯ
ЛАЪОРАТОРИЯ
ЭЛЕКТРОТЕХНИЧЕСКОЙ
ГІРОДУКШИИЭМС
ГОСТРМЭК60065-2009
ГОСТ22505-97
ГОСТР51515-99
ГОСТР51317.3.2-2006Разд.6,7
ГОСТР51317.3.3-2008
Устройстваусилительные/
преобразовательныет.м.
До10.02.2014
Основные технические характеристики
См.вконцеинструкции
ВНИМАНИЕ:ЕслиВыприобрелиаудиоаппаратурунадлежащегокачества,то,поРоссийскимзаконам,онанеподлежитвозвратуилиобменунааналогичныйтовардругих
размера,формыит.д.
D&MХолдингсИнк
ЗданиеD&M,2-1Ниссин-тё
Кавасаки-ку,Кавасаки-си,Канагава
2108569,Япония
D&M Holdings Inc.
D&M Building, 2-1 Nisshin-Cho
Kawasaki-Ku,Kawasaki-Shi,Kanagawa
2108569, Japan
VI
1.PM14S1N_ENG_Final_0708.indd 8 2013/07/11 19:14:01

1
Connections Playback Settings Tips Appendix
ENGLISH
Preparation
Accessories
Checkthatthefollowingpartsaresuppliedwiththeproduct.
qOwner’smanual........................................................... 1
wPowercord................................................................... 1
eRemotecontrol(RC001PMSA).................................... 1
rR03/AAAbatteries....................................................... 2
we
About this manual
nOperation buttons
Theoperationsdescribedinthismanualarebasedmainly
onremotecontroloperation.
nSymbols
vThissymbolindicatesareferencepageon
whichrelatedinformationisdescribed.
Thissymbolindicatesasupplementary
informationandtipsforoperations.
NOTE Thissymbolindicatespointstoremember
operationsorfunctionlimitations.
nIllustrations
Note that the illustrations in these instructions are for
explanationpurposesandmaydifferfromtheactualunit.
ThankyouforpurchasingthisMarantzproduct.Toensureproperoperation,pleasereadthisowner’smanualcarefullybeforeusingtheproduct.
Afterreadingthemanual,besuretokeepitforfuturereference.
Preparation
Preparation···············································································1
Accessories··················································································1
About this manual·····································································1
About the remote control ······················································2
Insertingthebatteries······························································2
Operatingrangeoftheremotecontrolunit·························2
Cautions on handling·······························································2
Features························································································3
Part names and functions·······················································4
Frontpanel·················································································4
Rearpanel···················································································5
Remotecontrolunit··································································6
Connections·············································································7
Cables used for connections··················································7
Connecting the speakers·························································7
Connectingthespeakerscables············································7
Speakerconnections································································8
Connecting players···································································8
Connecting recorders·······························································9
F.C.B.S. connection·································································10
PreparationforF.C.B.S.connection·····································10
Stereocompletebi-ampconnection····································11
Connectionfor5.1multi-channelplayback·························12
Connecting P.DIRECT IN connectors·································14
Connecting PRE OUT connectors·······································14
Connecting devices with remote control connectors···15
PerformingoperationsbyRConthisunitwithout
visualcontact···········································································15
RemotelyconnectingMarantzdevices·······························15
Connecting the power cord··················································15
Playback···················································································16
Turning the power on····························································16
Turningthepowerstandby···················································16
Turningthepowero·····························································16
Turning speaker output on···················································16
Selecting the input source····················································16
Adjusting the volume·····························································16
Turning o the sound temporarily·····································17
Settingtheattenuationlevelwhensoundismuted·········17
Adjusting the left and right channel balance··················17
Adjusting the tone··································································17
Settings····················································································18
Setting ID number for F.C.B.S·············································18
Setting the power amp direct mode·································18
Turningpowerampdirectmodeon····································18
Turningpowerampdirectmodeo····································18
Switching the illumination lamp setting ························19
Turningtheilluminationlampo··········································19
Turningtheilluminationlampon··········································19
Setting the Auto Standby mode·········································19
TurningAutoStandbymodeo···········································19
TurningAutoStandbymodeon············································19
Tips·····························································································20
Tips······························································································20
Troubleshooting······································································20
Errormessages·······································································23
Appendix··················································································24
Explanation terms···································································24
About the protection circuit·················································24
Specifications···········································································25
Index····························································································25
Contents
1.PM14S1N_ENG_Final_0708.indd 1 2013/07/11 19:14:01

2
ENGLISH
Operating range of the remote control unit
Point the remote control unit at the remote sensor when
operatingit.
30°
Approx.7m
30°
NOTE
•Thesetmayfunctionimproperlyortheremotecontrolunit
maynotoperateiftheremotecontrolsensorisexposedto
direct sunlight, strong articial light from an inverter type
uorescentlamporinfraredlight.
•When using 3D video devices that transmit radio
communication signals (such as infrared signals etc)
betweenthevariousunits(suchasthemonitor,3Dglasses,
3D transmitter unit etc), the remote control unit may not
operateduetointerferencefromthoseradiocommunication
signals.Ifthisoccurs,adjustthedirectionanddistanceofthe
3Dcommunicationforeachunit,andcheckthattheremote
controlunitoperationisnotaectedbythesesignals.
Cautions on handling
•Before turning the power on
Checkonce againthat allconnections are correctand that
therearenoproblemswiththeconnectioncables.
•Poweris supplied to some of thecircuitry even when the
unitissettothestandbymode.Whengoingonvacationor
leavinghomeforlongperiodsoftime,besuretounplugthe
powercordfromthepoweroutlet.
•About condensation
If there is a major dierence in temperature between the
insideoftheunitandthesurroundings,condensation(dew)
mayformontheoperatingpartsinsidetheunit,causingthe
unitnottooperateproperly.
Ifthishappens,lettheunitsitforanhouror twowiththe
power turned o and wait until there is little dierence in
temperaturebeforeusingtheunit.
•Cautions on using mobile phones
Usingamobilephone nearthisunit mayresultinnoise. If
that occurs, move the mobile phone away from this unit
whenitisinuse.
•Moving the unit
Turn o the power and unplug the power cord from the
power outlet. Next, disconnect the connection cables to
othersystemunitsbeforemovingtheunit.
•About care
•Wipethecabinetandcontrolpanelcleanwithasoftcloth.
•Followtheinstructionswhenusingachemicalcleaner.
•Benzene,paintthinnerorotherorganicsolventsaswellas
insecticidemay causematerial changes anddiscoloration
ifbroughtintocontactwiththeunit,andshouldtherefore
notbeused.
About the remote control
ThesuppliedremotecontrolcanbeusedtocontrolMarantz
IntegratedAmplierandMarantzSuperAudioCDplayer.
•Theremotecontrolmaynotoperatesomeproducts.
Inserting the batteries
ePuttherearcoverbackon.
qRemovetherearlidinthe
directionofthearrowand
removeit.
wLoadthetwobatteries
properlyasindicatedby
themarksinthebattery
compartment.
NOTE
•Insertthespeciedbatteriesintheremotecontrolunit.
•Replace the batteries with new ones if the set does not
operateevenwhentheremotecontrolunitisoperatedclose
to the unit. (The supplied batteries are only for verifying
operation.Replacethemwithnewbatteriesatanearlydate.)
•Wheninsertingthebatteries,besuretodosointheproper
direction, following the q and w marks in the battery
compartment.
•Topreventdamageorleakageofbatteryuid:
•Donotuseanewbatterytogetherwithanoldone.
•Donotusetwodierenttypesofbatteries.
•Donotattempttochargedrybatteries.
•Do not short-circuit, disassemble, heat or dispose of
batteriesinames.
•Donotkeepthebatteryinaplaceexposedtodirectsunlight
orinplaceswithextremelyhightemperatures,suchasnear
aheater.
•Ifthebatteryuidshouldleak,carefullywipetheuidothe
insideofthebatterycompartmentandinsertnewbatteries.
•Removethebatteriesfromtheremotecontrolunitifitwill
notbeinuseforlongperiods.
•Usedbatteriesshouldbedisposedofinaccordancewiththe
localregulationsregardingbatterydisposal.
•The remote control unit may function improperly if
rechargeablebatteriesareused.
1.PM14S1N_ENG_Final_0708.indd 2 2013/07/11 19:14:02

3
Connections Playback Settings Tips Appendix
ENGLISH
Preparation
Features
HDAM®SA3 Module
This unit includes the HDAM®SA3 which had been
developed for high-end models. The HDAM®SA3 is
incorporatedintomanycomponents, such as the current
feedbackphonoequalizer.
Constant Current Feedback Phono Equalizer
Thisunitincorporatestheconstantcurrentfeedbackphono
equalizerwhichhadbeendevelopedforhigh-endmodels.
Thisequalizer,developedbyMarantz,hastheadvantages
of both NF-type and CR-type phono equalizers, and it
supportsbothMMandMCcartridges.
Linear Control Volume
Thecontrolknobhadadoptedthehigh-endmodeldesign
concept. For better S/N ratio, the MAS6116 from Micro
AnalogSystemsandtheHDAM®SA3havebeencombined,
whichenablessmoothadjustmentintherangeof0to−100
dBinunitsof±0.5dB.
F.C.B.S.
A Floating Control Bus System (F.C.B.S.) enables the
user to connect up to four PM-14S1 units, making a
diversity of applications possible with complete bi-amp
and multichannel connections. Moreover, a ground loop
isnotformedamong multiple PM-14S1 units connected;
therefore,soundqualityisnotadverselyaected.
BI-AMP Mode
Completebi-ampconnectionproposedbyMarantzenables
a level of reproduction of the acoustic eld never before
achieved.SynchronizedoperationoftwoPM-14S1unitsis
madepossiblebyF.C.B.S. (Floating Control Bus System)
connection,witheachPM-14S1inBi-Ampmodeworking
asamonauralintegratedamplier.
Power Amplifier Direct In Mode
In this mode, this unit works as a power amplier. This
modewillbeusefulinhometheatersystems.
Display
ThisunitadoptsanLCD(LiquidCrystalDisplay)todisplay
the input source and volume level. Compared with other
typesofdisplaypanels,anLCDrequireslessdrivepower
and generates less radiation noise, which minimizes any
adverseeectonsoundquality.
1.PM14S1N_ENG_Final_0708.indd 3 2013/07/11 19:14:03

4
ENGLISH
Part names and functions
Forbuttonsnotexplainedhere,seethepageindicatedinparentheses().
q INPUT SELECTOR knob
Thisselectstheinputsource(vpage16).
w DISPLAY button
Thisturnstheilluminationlampon/o(vpage19).
e Speaker output button/indicator (SPEAKERS)
Thisswitchesspeakeroutputon/o(vpage16).
•Indicatesthestatusoftheunit’sasfollows:
•Speakeron:Blue
•Speakero:O
r TONE button/indicator
Thisturnsthetonecontrolon/o(vpage17).
•Indicatesthestatusoftheunit’sasfollows:
•Tonecontrolon:Blue
•Tonecontrolo:O
tHeadphone jack (PHONES)
Usedtoconnectheadphones.
•Turnospeakeroutputwhenusingheadphones
(vpage16).
NOTE
To prevent hearing loss, do not raise the volume level
excessivelywhenusingheadphones.
yRemote control sensor
Thisreceivessignalsfromtheremotecontrolunit
(vpage2).
uPower operation button (X)
Thisturnsthepoweron/o(vpage16).
iBASS control knob
Thisadjuststhebass(vpage17).
oTREBLE control knob
Thisadjuststhetreble(vpage17).
Q0 Power amplifier direct mode button/indicator
(P.DIRECT IN)
Thisswitchesthepowerampdirectmodeon/o
(vpage18).
•Indicatesthestatusoftheunit’sasfollows:
•Poweramplierdirectmodeon:Blue
•Poweramplierdirectmodeo:O
Q1 Phono equalizer button/indicator (PHONO MC)
Thisswitchissetaccordingtothetypeofplayercartridge
tobeused.
Set this switch to MM or MC according to the type of
cartridgeusedonyourturntable.
•Indicatesthestatusoftheunit’sasfollows:
•MC:Blue
•MM:O
Front panel
Q5Q7 Q6 Q3Q4 Q4
e u Q1i ot ywq r Q0 Q2
Q2 Attenuator button (ATT.)
Thismutesthevolume(vpage17).
Q3 VOLUME control knob
Thisadjuststhevolumelevel(vpage16).
Q4 Illumination lamp
Theilluminationlamplights(blue).
Q5 Display
Thisdisplaysvariouspiecesofinformation.
Q6 POWER indicator
Thisislitasfollowsaccordingtothepowerstatus:
•Poweron:Blue
•Standby:O
•Powero:O
Q7 STANDBY indicator
Thisislitasfollowsaccordingtothepowerstatus:
•Poweron:O
•Standby:Red
•Powero:O
1.PM14S1N_ENG_Final_0708.indd 4 2013/07/11 19:14:03

5
Connections Playback Settings Tips Appendix
ENGLISH
Preparation
q SIGNAL GND (ground) terminal
Usedtoconnecttheearthwireofaturntable.
NOTE
Thisterminalisnotasafetyground.
w Audio input connectors (AUDIO IN)
Used to connect devices equipped with analog audio
connectors(vpage8).
e Input/output connectors (Recordings)
(RECORDER-1, RECORDER-2)
Usedtoconnecttoarecordingdevice(vpage9).
r Speaker system terminals
(SPEAKER SYSTEMS)
Usedtoconnectspeakers(vpage7).
tREMOTE CONTROL connectors
UsedtoconnecttoaMarantzaudiodevicethatiscompatible
withtheremotecontrolfunction(vpage15).
Rear panel
Q0 o
q t y u iw e r
yAMPLIFIER MODE switch
Used to switch the amplier mode (STEREO/BI-AMP)
(vpage11,12).
uF.C.B.S. connectors
Usedtoconnectahighqualityplaybacksystemusingtwo
ormoreoftheseunits(vpage10).
iAC inlet (AC IN)
Usedtoconnectthepowercord(vpage15).
o Power amplifier direct connectors
(POWER AMP DIRECT IN)
Usedtoconnectapre-amplierwhenthisunitisusedasa
poweramplier(vpage14).
Q0 PRE OUT connectors
Use this to add such equipment as a power amplier or
subwoofer(vpage14).
Part names and functions
1.PM14S1N_ENG_Final_0708.indd 5 2013/07/11 19:14:03

6
ENGLISH
Remote control unit
nButtons for amplifier nButtons for Super Audio CD player
q
e
r
w
y
u
i
t
qMENU button
Thisdisplaysthevolumebalance
adjustmentmenu(vpage17).
wInput source select buttons (INPUT df)
Thisselectstheinputsource
(vpage16).
eAmplifier power button (XAMP)
Thisturnsthepoweron/o(standby)
(vpage16).
rRemote control mode button
(AMP MODE)
Thisswitchestheremotecontrolto
ampliercontrolmode.
tCursor buttons (df0 1)
Thisadjuststhevolumebalance
outputfromtheleftandrightspeakers
(vpage17).
yTone control button (TONE)
Thisturnsthetonecontrolon/o
(vpage17).
uVolume control buttons (VOLUME df)
Thisadjuststhevolumelevel
(vpage16).
iAttenuator button (ATT)
Thismutesthevolume(vpage17).
•Thesuppliedremotecontrolcanbeused
tocontrolMarantzIntegratedAmplierand
MarantzSuperAudioCDplayer.
•Whenusing thisremote control, alsorefer
to the operating instructions of the other
devices.
NOTE
The remote control may not operate some
products.
q
Q6
Q7
w
e
r
t
y
u
i
o
Q0
Q1
Q2
Q3
Q4
Q5
Q8
Q9
W0
W1
W2
W3
Part names and functions
qSuper Audio CD player power button
(X CD)
wMENU button
eRemote control mode button
(CD MODE)
rCursor buttons (df0 1)
tENTER button
yInformation display button (INFO)
uInput source select buttons
(DISC/INPUT)
iPause button (3)
oSkip buttons (8, 9)
Q0 Playback button (1)
Q1 Stop button (2)
Q2 RANDOM button
Q3 PROGRAM button
Q4 Number buttons (0 – 9, +10)
Q5 FILTER button
Q6 NOISE SHAPER button
Q7 PHONES button
Q8 SOUND MODE button
Q9 Disc tray open/close button
(OPEN/CLOSE)
W0 REPEAT button
W1 CLEAR button
W2 DC FILTER button
W3 DISPLAY button
1.PM14S1N_ENG_Final_0708.indd 6 2013/07/11 19:14:04

7
Playback Settings Tips Appendix
ENGLISH
ConnectionsPreparation
NOTE
•Disconnectthisunit’spowerplugfromthepoweroutletbeforeconnectingthespeakers.
•Connectthespeakercablessotheydonotstickoutofthespeakerterminals.Theprotection
circuitmaybeactivatedifthewirestouchtherearpanelorifthe+and–sidestoucheach
other(vpage24“Protectioncircuit”).
•Nevertouchthespeakerterminalswhilethepowercordisconnected.Doingsocouldresult
inelectricshock.
•Usespeakerswithanimpedanceof4–8Ω/ohms.
Cables used for connections
Providenecessarycablesaccordingtothedevicesyouwanttoconnect.
Speakercable
Audiocable
R
L
R
L
Remoteconnectorcable
Connections
Connecting the speakers
Connecting the speakers cables
Carefullychecktheleft(L)andright(R)channelsand+(red)and–(white)polaritiesonthe
speakers being connected to the unit, and be sure to connect the channels and polarities
correctly.
1Peel o about 10 mm of sheathing from the tip of the speaker
cable, then either twist the core wire tightly or apply solder
to it.
2Turn the speaker terminal counterclockwise to loosen it.
3Insert the speaker cable’s core wire to all the way into the
speaker terminal.
4Turn the speaker terminal clockwise to tighten it.
Spade lug connector
1.PM14S1N_ENG_Final_0708.indd 7 2013/07/11 19:14:06

8
ENGLISH
Connecting the speakers
Speaker connections
w q w q
(R) (L)
Connecting players
Youcanconnectturntables,tuners,CDplayersandnetworkaudioplayerstothisunit.
SetphonoequalizerbuttonbythetypeofyourcartridgetobeusedMMorMC.Ifyousetthis
unit’sinputsourceto“PHONO”andyouaccidentallyincreasethevolumewithouthavinga
turntableconnected,youmayhearahumnoisefromthespeakers.
AUDIO OUT
R
L
AUDIO OUT
R
L
AUDIO OUT
R
L
GND AUDIO
OUT
R
L
R
L
R
L
R
L
Turntable
CD player
Network
Audio
Player
Tuner
NOTE
Thegroundline(SIGNALGND)onthisunitisnotasafetyground.Connectittoreducenoise
whennoiseisexcessive.Notethatdependingonthe turntable,connectingthegroundline
mayhavethereverseeectofincreasingnoise.Inthiscase,itisnotnecessarytoconnectthe
groundline.
1.PM14S1N_ENG_Final_0708.indd 8 2013/07/11 19:14:07

9
Preparation Playback Settings Tips Appendix
ENGLISH
Connections
Connecting recorders
AUDIO OUT
R
L
AUDIO IN
R
L
AUDIO OUT
R
L
AUDIO IN
R
L
R
L
R
L
R
L
R
L
R
L
R
L
R
L
R
L
Recorder-1 Recorder-2
1.PM14S1N_ENG_Final_0708.indd 9 2013/07/11 19:14:08

10
ENGLISH
F.C.B.S. connection
TheMarantzF.C.B.S.(FloatingControlBusSystem)isthehighqualitysoundsystemforlink
controlbetweenmultiplePM-14S1units(upto4units).EachunitiscontrolledviaitsIDnumber
registeredbeforehand.
TheIDnumbersneedtobesettoanoperatingunit(master)andasubordinate unit(slave)
receivingthecommandfromthemaster.Forslaveunits,registerIDnumbersintheorderof
commandreceptionfromthemaster.
OnceregisteredtheIDnumbers,theunitswillenable linkcontroloperationssuch asinput
selection,volumecontrol,on/oselectionofmuting,display,tonecontrol,etc.
Furthermore,F.C.B.S.connection ofmultipleunits hasthefeature thatswitchesthis unit's
outputfrom stereoto monauralso thatthe unitcan worksas amonaural outputamplier.
Followtherespectiveinstructionstomakethenecessarysettings.
FordetailsontheIDnumbersettings,seevpage18“SettingIDnumberforF.C.B.S”.
Preparation for F.C.B.S. connection
nMaking the F.C.B.S. connection
TousemultiplePM-14S1units,makethisconnectioninadditiontoaudioconnection.
Fordetailsoneachconnectionfeature,refertotherespectiveinstructions.
Preparethecorrectnumberofportableaudioconnectioncablesforthenumberofunitsto
beconnected.Eitherofthefollowingtypesofconnectioncablesareadequate.
•Monauralminiplug"!monauralminiplugconnectingcable
•Stereominiplug"!stereominiplugconnectingcable
NOTE
Donotuseconnectingcablesthatcontainresistance.
nConnection example
Inthe connection of the following example, anunitwith ID number 1 acts as amaster
ampliertocontrolalltheotherslaveunitswithIDnumbers2to4.
ID 1 Master
ID 2 Slave
ID 4 Slave
ID 3 Slave
NOTE
•The PM-14S1 F.C.B.S. function is only valid between the same PM-14S1 models. This
functionmaynotoperatecorrectlyifotherMarantzmodels(PM-11S3,etc.)areconnected.
•ToturnthepowerofmultipleF.C.B.S.-connectedunitson/o,switchthepoweroninorder
oflowesttohighestIDnumber,andswitchthepoweroinorderofhighesttolowestID
number.
1.PM14S1N_ENG_Final_0708.indd 10 2013/07/11 19:14:09

11
Preparation Playback Settings Tips Appendix
ENGLISH
Connections
Stereo complete bi-amp connection
Thismodeenablesthetwoampliersconnectedtothisunit
tofunctionasonemonauralamplier.Tousethismode,two
F.C.B.S.connectedPM-14S1unitsarerequired.
Toswitch the mode, use the amplier mode switch onthe
rearpanelwhilethepoweriso.
Theguresbelow showexampledisplays inthestereo and
bi-ampmodes.
Bi-ampmode
Bi-amp mode indicator
Bi-ampmodeindicator
Stereomode
Inbi-amp mode, connectto the left channelinput jack. The
rightchannelinputisdisabled.
The same signals are output from the left and right output
jacks.
NOTE
•Alwaysturn thepower tothe unito beforechanging the
operatingmodeswitchsetting.Turningthepoweronagain
activatesthenewsetting.
•Wheninbi-ampmode,theRchannelinputjackscannotbe
used.
•Wheninbi-ampmode,thesignalsinputintotheLchannel
areoutputfrombothchannels.Therefore,thesamesignals
areoutputfromtheLchannelandRchannelinRECORDER
OUT,PREOUT,PHONESOUT.
•Speaker systems connected using complete bi-amp
connections must support bi-amp connections. Before
connecting your speakers, check in the owner’s manual
thatcamewiththespeakersorcontactthemanufacturerto
conrmwhethertheysupportbi-ampconnection.
Set PM-14S1
for L channel
to ID 1.
MF
/
HF
LF
MF
/
HF
LF
R
R
L
L
•SetSPEAKERbuttononfrontpanel
inonposition.
•Setto“BI-AMP”.
Topoweroutlet. Topoweroutlet.
Remove
shortingbar. Lchannel
speaker
Remove
shortingbar.
Remove
shortingbar. Rchannel
speaker
Remove
shortingbar.
Set PM-14S1
for R channel
to ID 2.
SetSPEAKERbuttononfrontpanelin
onposition.
•Setto“BI-AMP”.
Super Audio CD player, etc.
:Signalow
F.C.B.S. connection
1.PM14S1N_ENG_Final_0708.indd 11 2013/07/11 19:14:10

12
ENGLISH
Connection for 5.1 multi-channel playback
ThethreeunitsareconnectedusingF.C.B.S.FortheF.C.B.Sconnection,prepare3audioconnectioncables,andrefertoF.C.B.S.(vpage10).
Connecttheoutputsofplayersthathave5.1channelanalogoutputstoeachofthethreeunits.
Ifusinganactivesubwoofer,seetheowner’smanualthatcamewiththesubwooferforfurtherinstructions.
SettheIDnumbersforthethreeampliersasexplainedinHowtosetIDnumberforF.C.B.S.(vpage18).
•WhentheID1unitisoperated,ID2andID3unitswilloperateinsync.
FRONT RFRONT LSURROUND R
MULTI CHANNEL AUDIO OUT
SURROUND LSUB-WOOFER CENTER
•SetSPEAKERbuttononfrontpanelinON
position.
•Setto“STEREO”.
•SetSPEAKERbuttononfrontpanelinONposition.
•Setto“STEREO”.
For front L/R speakers
Set PM-14S1 to ID 1.
For center speaker or
subwoofer
Set PM-14S1 to ID 2.
For surround speakers
Set PM-14S1 to ID 3.
Topower
outlet.
Topower
outlet.
Topower
outlet.
Rchannelfront
speaker
Lchannelfront
speaker
Active
subwoofer
Tolineinput
jack
Frontcenter
speaker
Rchannel
surround
speaker
Lchannel
surround
speaker
Super Audio CD multi-channel player, etc.
•SetSPEAKERbuttononfrontpanelinON
position.
•Setto“STEREO”.
F.C.B.S. connection
:Signalow
1.PM14S1N_ENG_Final_0708.indd 12 2013/07/11 19:14:11
Other manuals for PM-14S1
6
Table of contents
Other Marantz Amplifier manuals

Marantz
Marantz PM8004 User manual

Marantz
Marantz 240 User manual

Marantz
Marantz PM7000 User manual

Marantz
Marantz MA-9S1 User manual

Marantz
Marantz PM6005 User manual

Marantz
Marantz PM7001 KI User manual

Marantz
Marantz SC-8 User manual

Marantz
Marantz AV8805A User manual

Marantz
Marantz SR2100/N1S User manual

Marantz
Marantz 4140 User manual

Marantz
Marantz PM5005 User manual

Marantz
Marantz PM4000 User manual

Marantz
Marantz PM5005 User manual

Marantz
Marantz SC-7S2 User manual

Marantz
Marantz PM8004 User manual

Marantz
Marantz PM-KI-PEARL User manual

Marantz
Marantz PM4400 User manual

Marantz
Marantz PM7000N User manual

Marantz
Marantz PM6004/N1SG User manual

Marantz
Marantz MA500 User manual