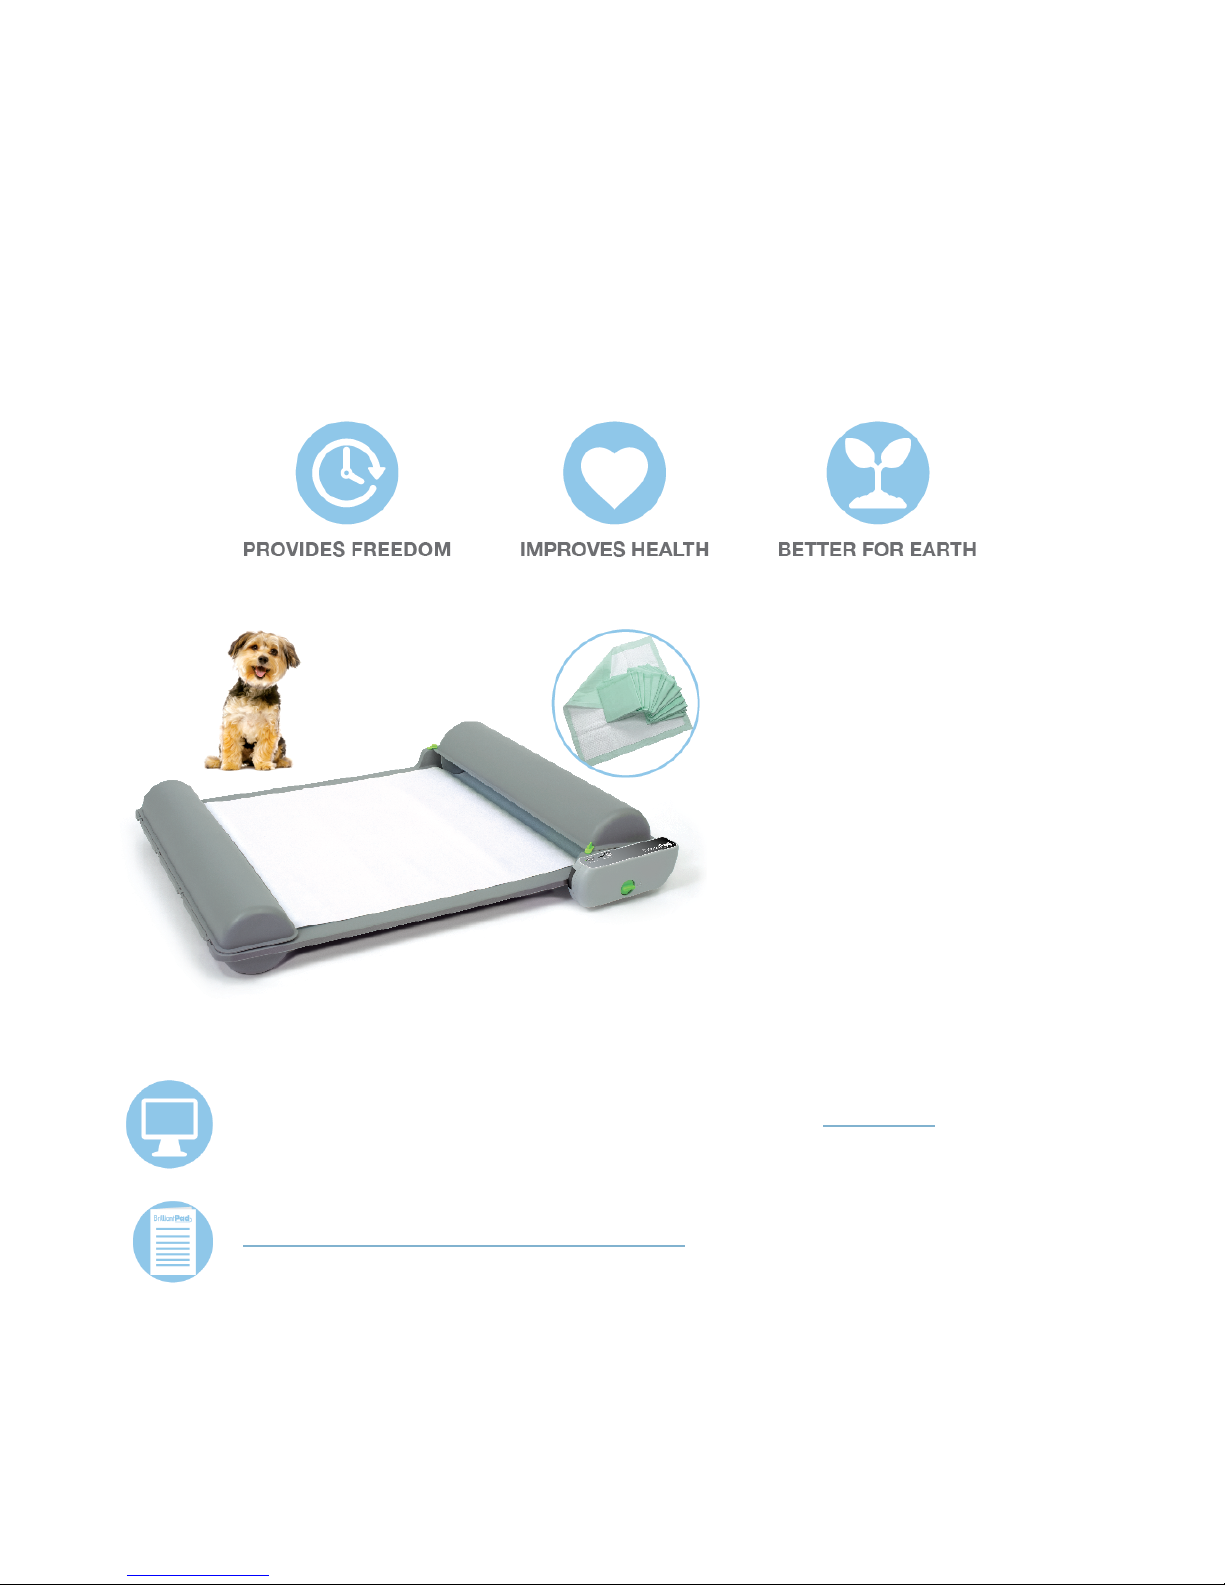
Brilliant Pad BrilliantPad User manual


Welcome to BrilliantPad™
BrilliantPad offers tremendous benefits for you and your dog:
• Superior hygiene by eliminating the handling of messy waste and soiled pads
• Reduces accidents from “holding it” too long
• Minimizes animals eating waste or playing with soiled pads
• Uses less paper than leading pads for a better environment
Some training, similar to
teaching a dog to use puppy
pads, is required.
Transition pads and easy to
follow instructions will help you
train your dog to adapt to using
BrilliantPad.
BrilliantPad is easy to setup, use and maintain. Watch this setup video to get started
- or -
click here to download this instruction manual.

Table of Contents
Machine Setup Instructions - 6
Pad Roll Installation - 9
Recommended Location - 12
System Controls - 13
Soiled Pad Removal - 16
Troubleshooting Tips - 17
Training Guide - 19
Cleaning Instructions - 19
Your Total Satisfaction - 19
Subscription Plan - 20
Warranty Information - 20
Important Safeguards - 21
Corporate Information - 22

System Overview
BrilliantPadTM automatically replaces a soiled potty pad with a clean, fresh
pad so you don’t have to handle messy waste or dirty pads
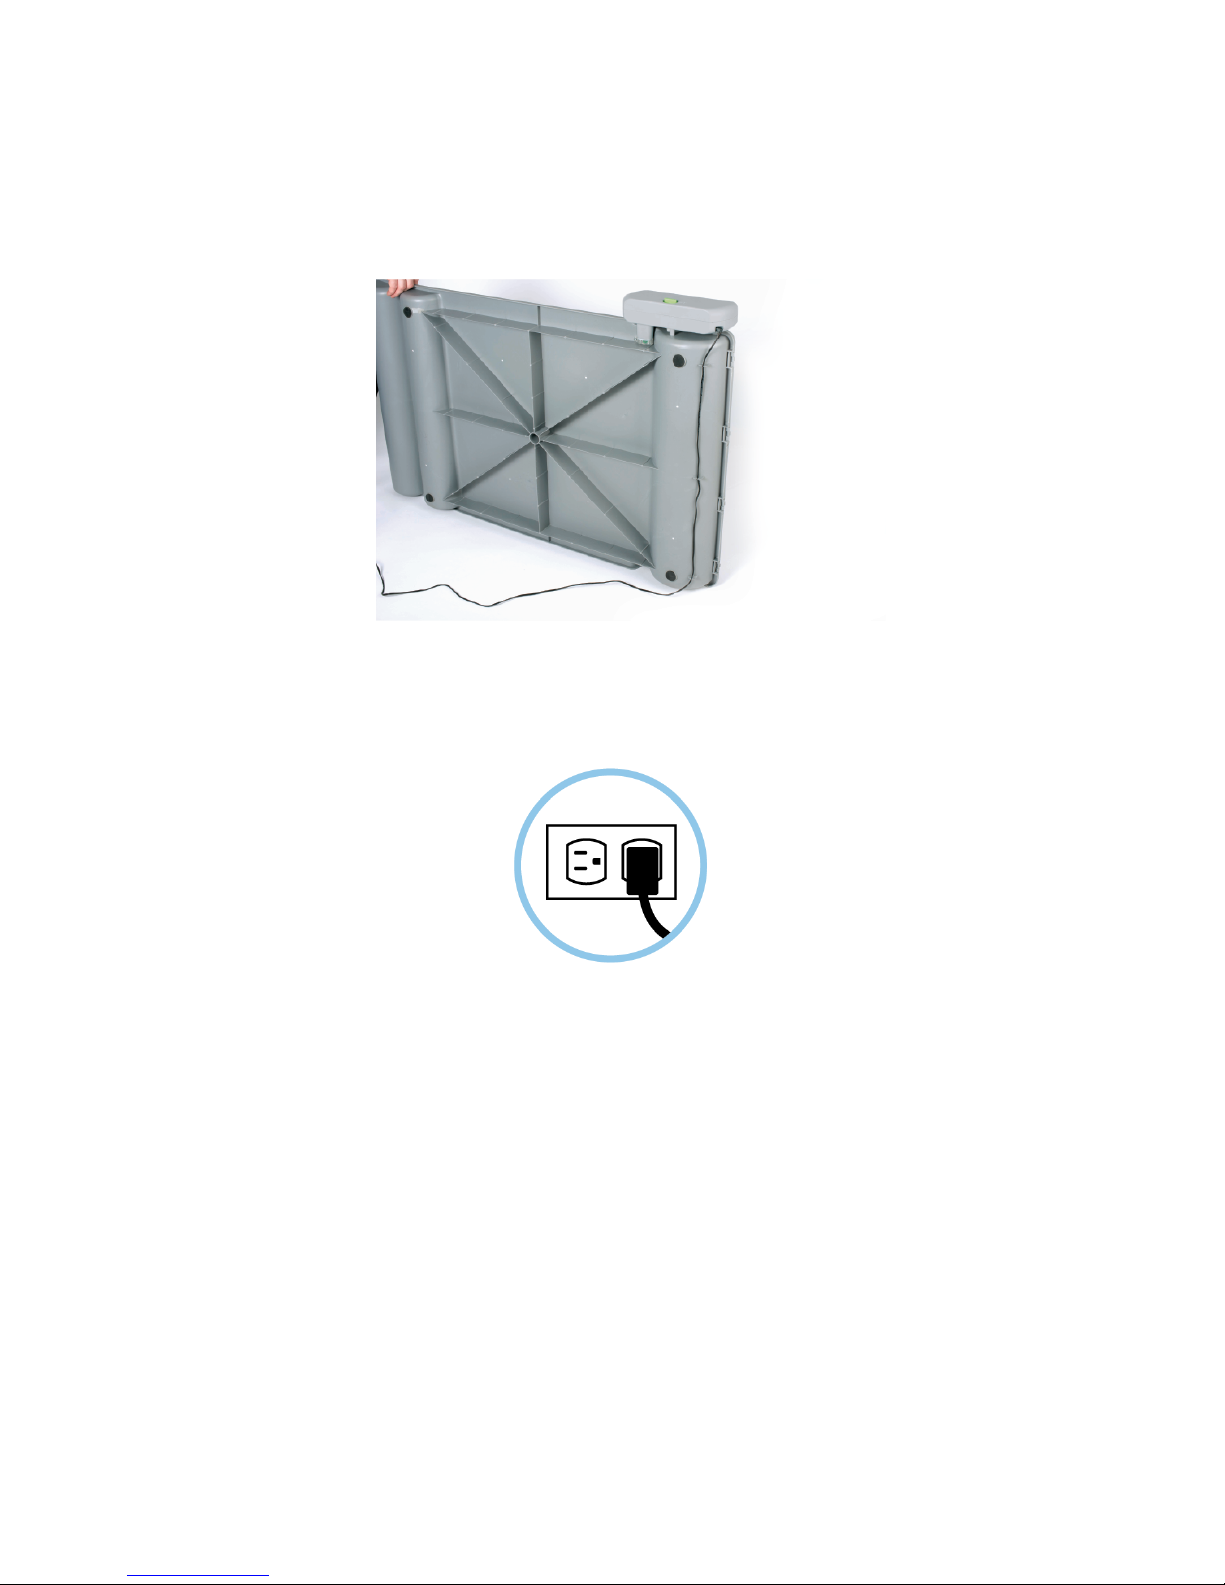
BrilliantPad seals waste to lock away odors and the system can be left
alone for days or even weeks at a time!
When the roll is used up, disposal is fast, easy and clean. Your hands
stay mess free the entire time.
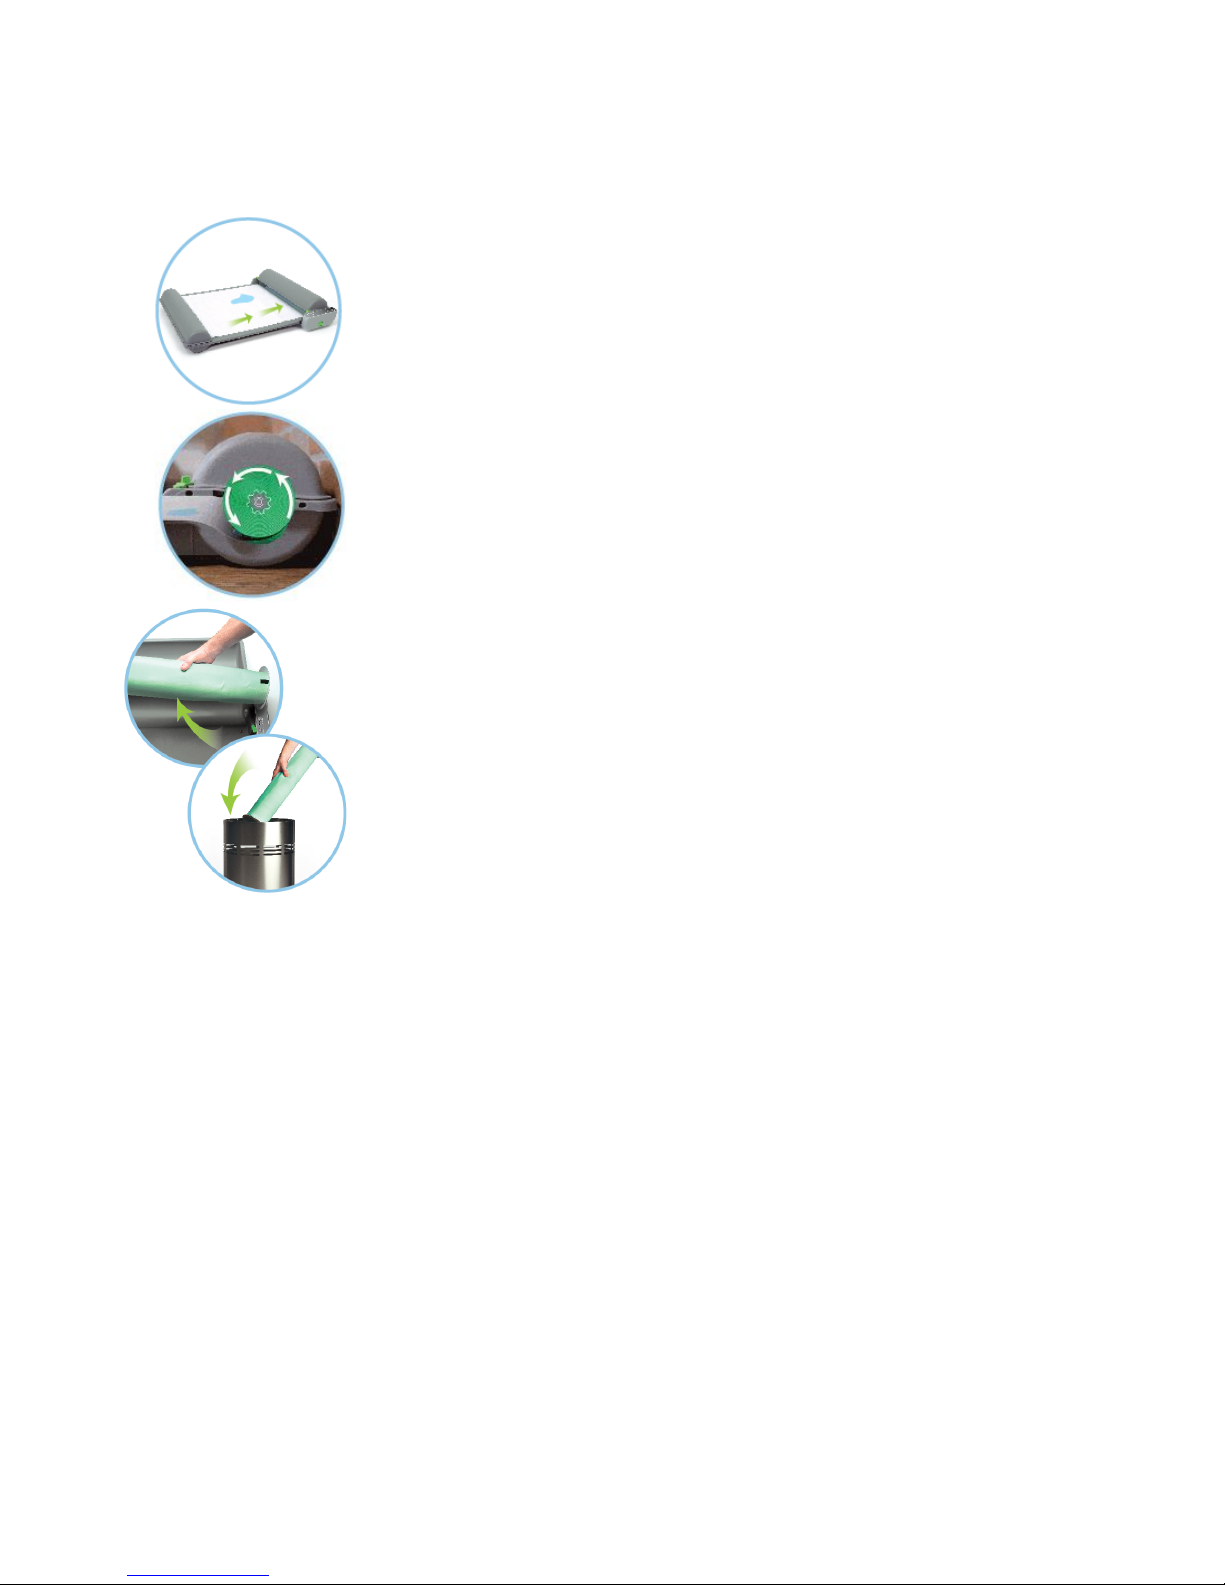
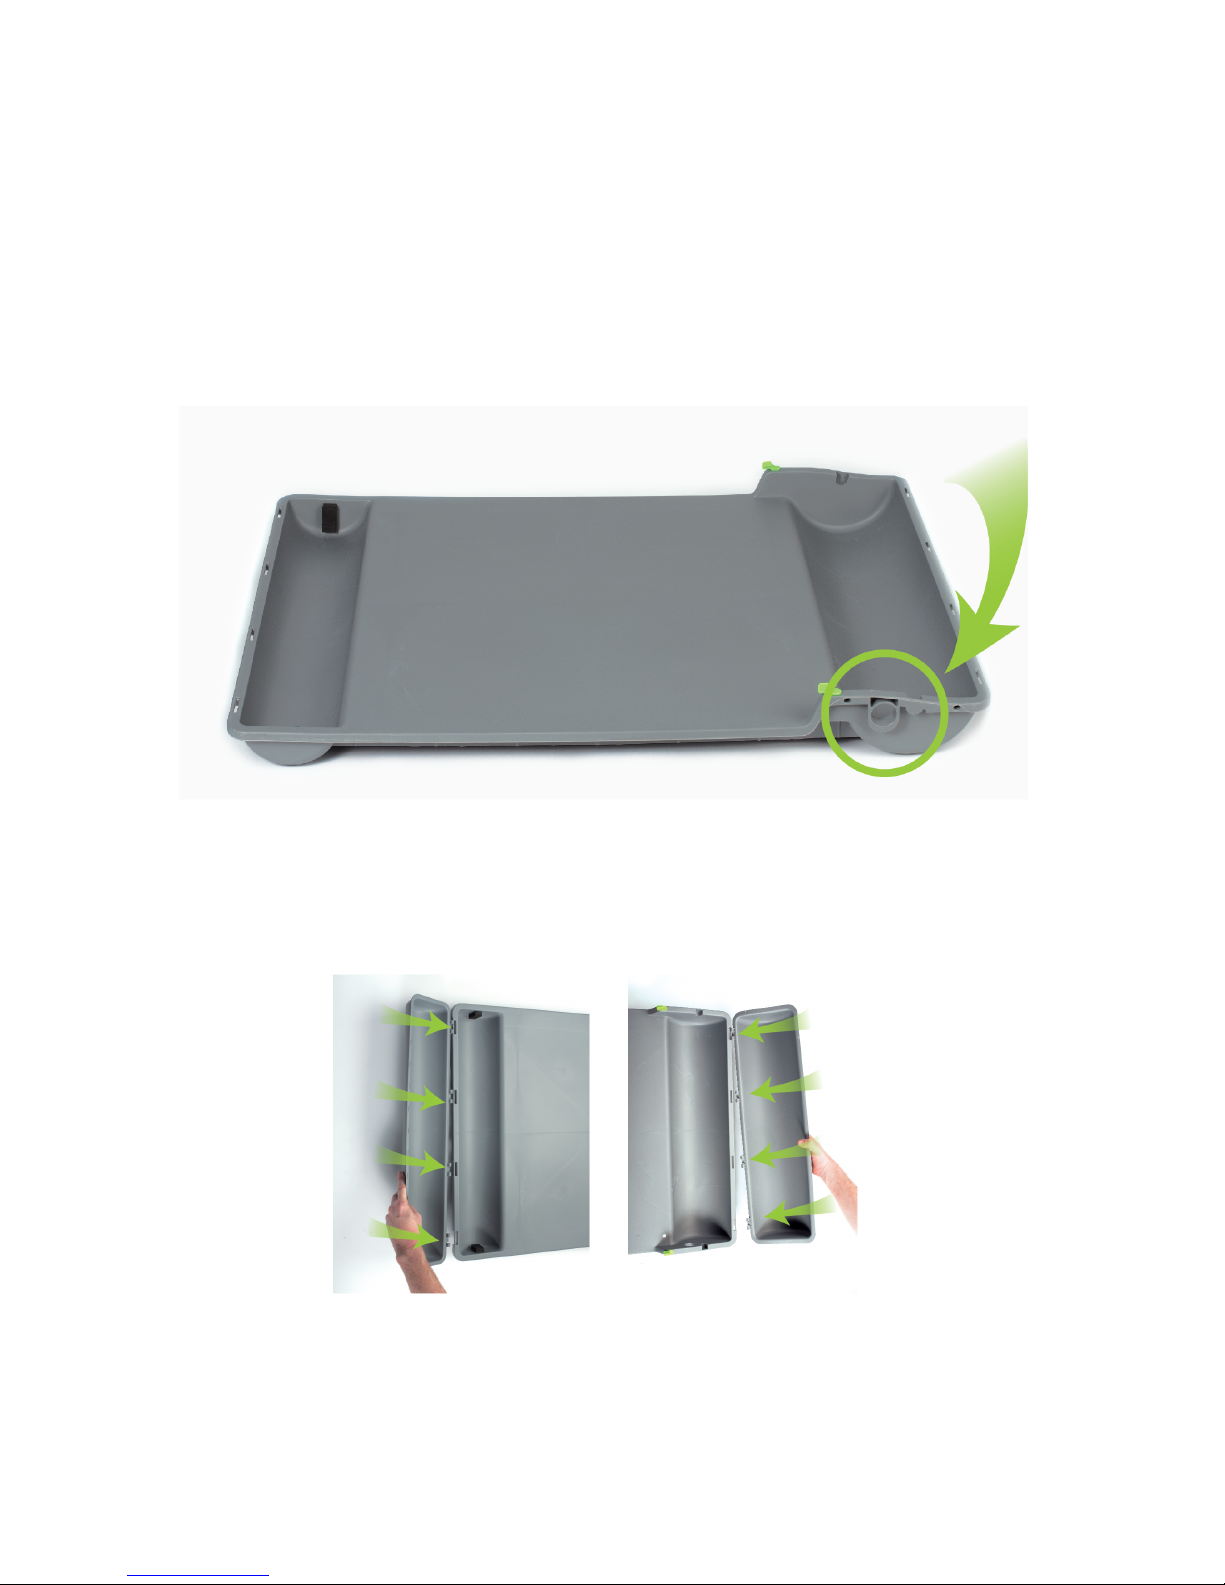
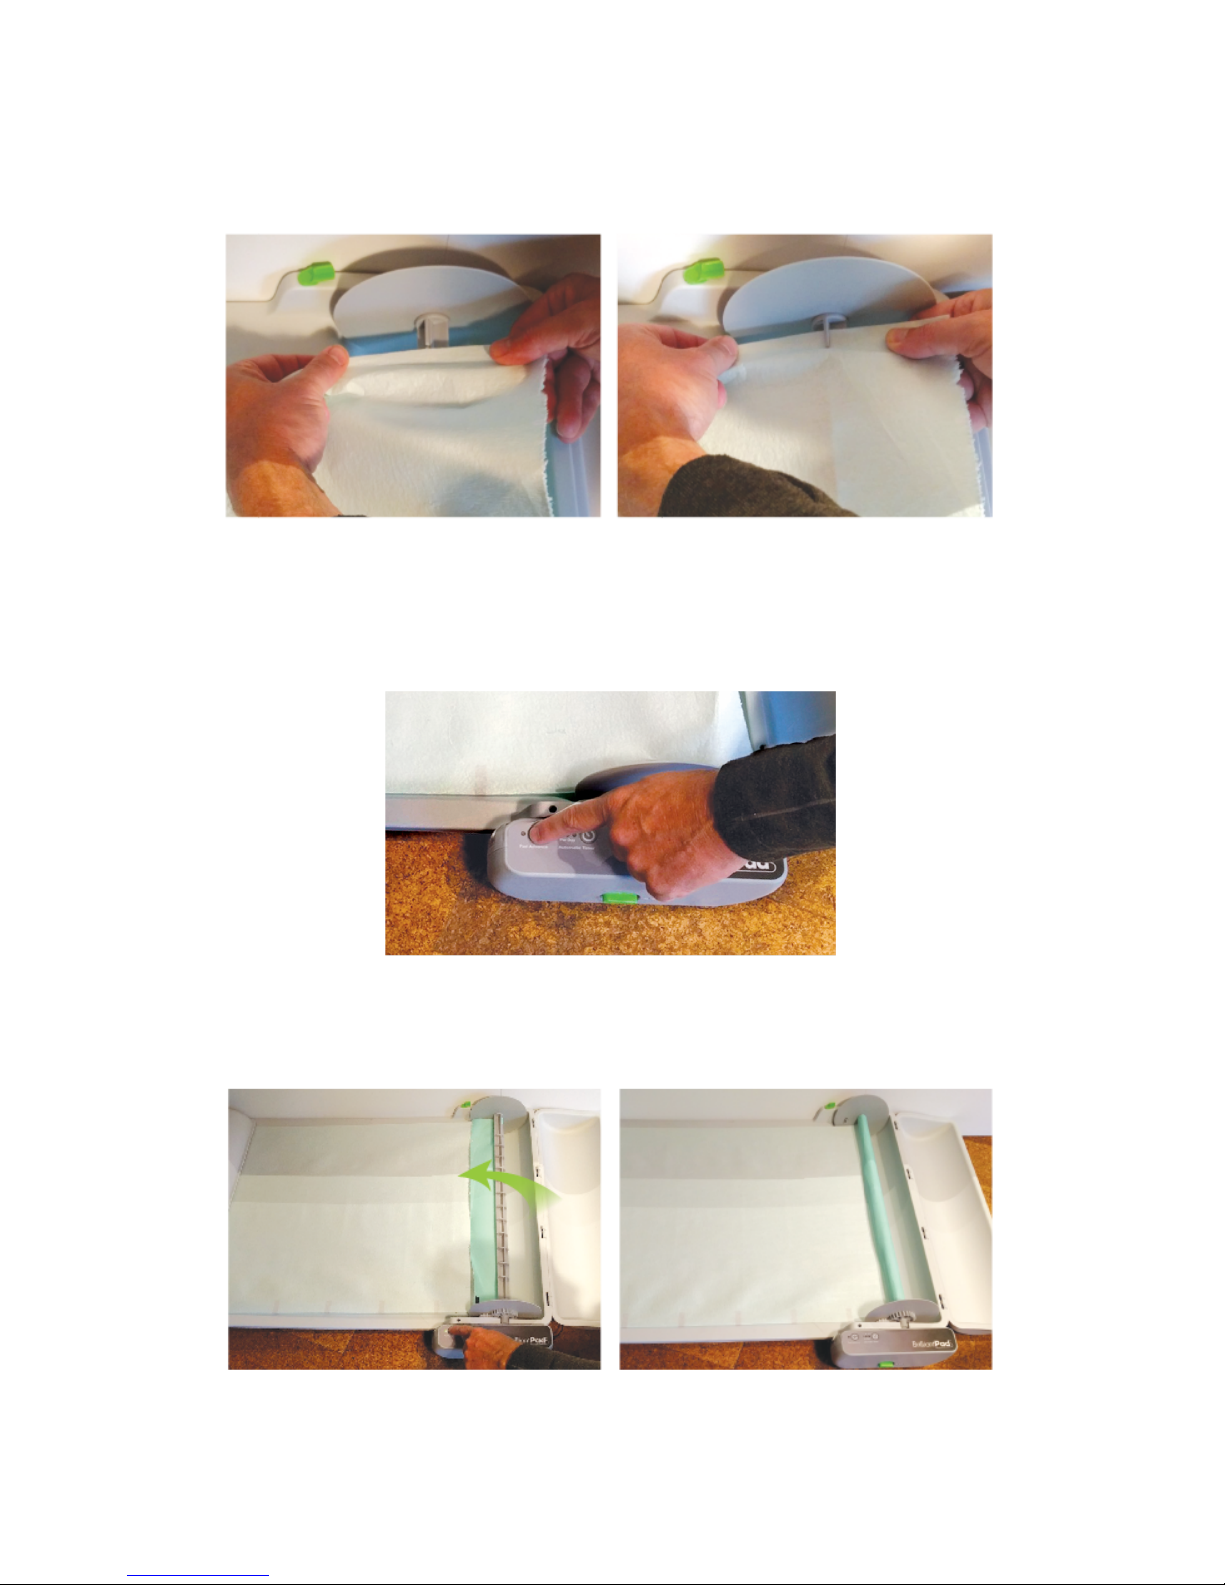
How It Works
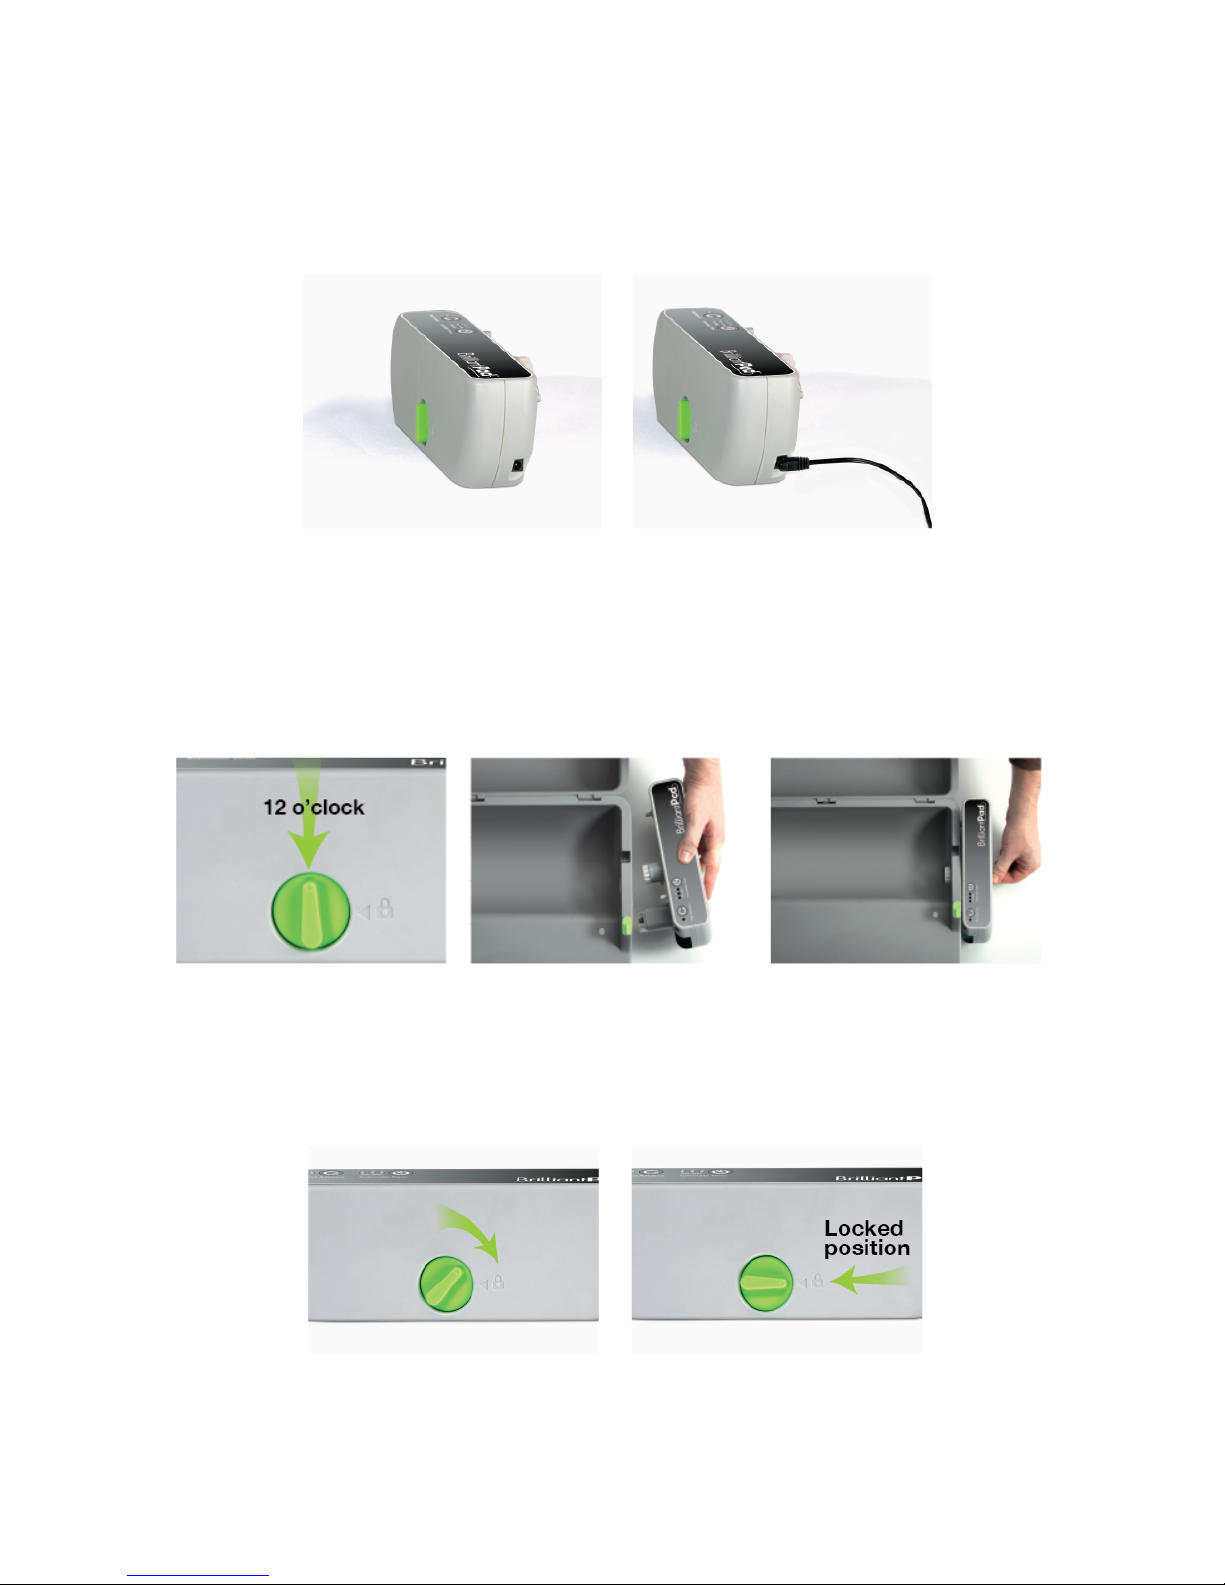
Control Module replaces pad automatically or when you manually press Pad Advance button.
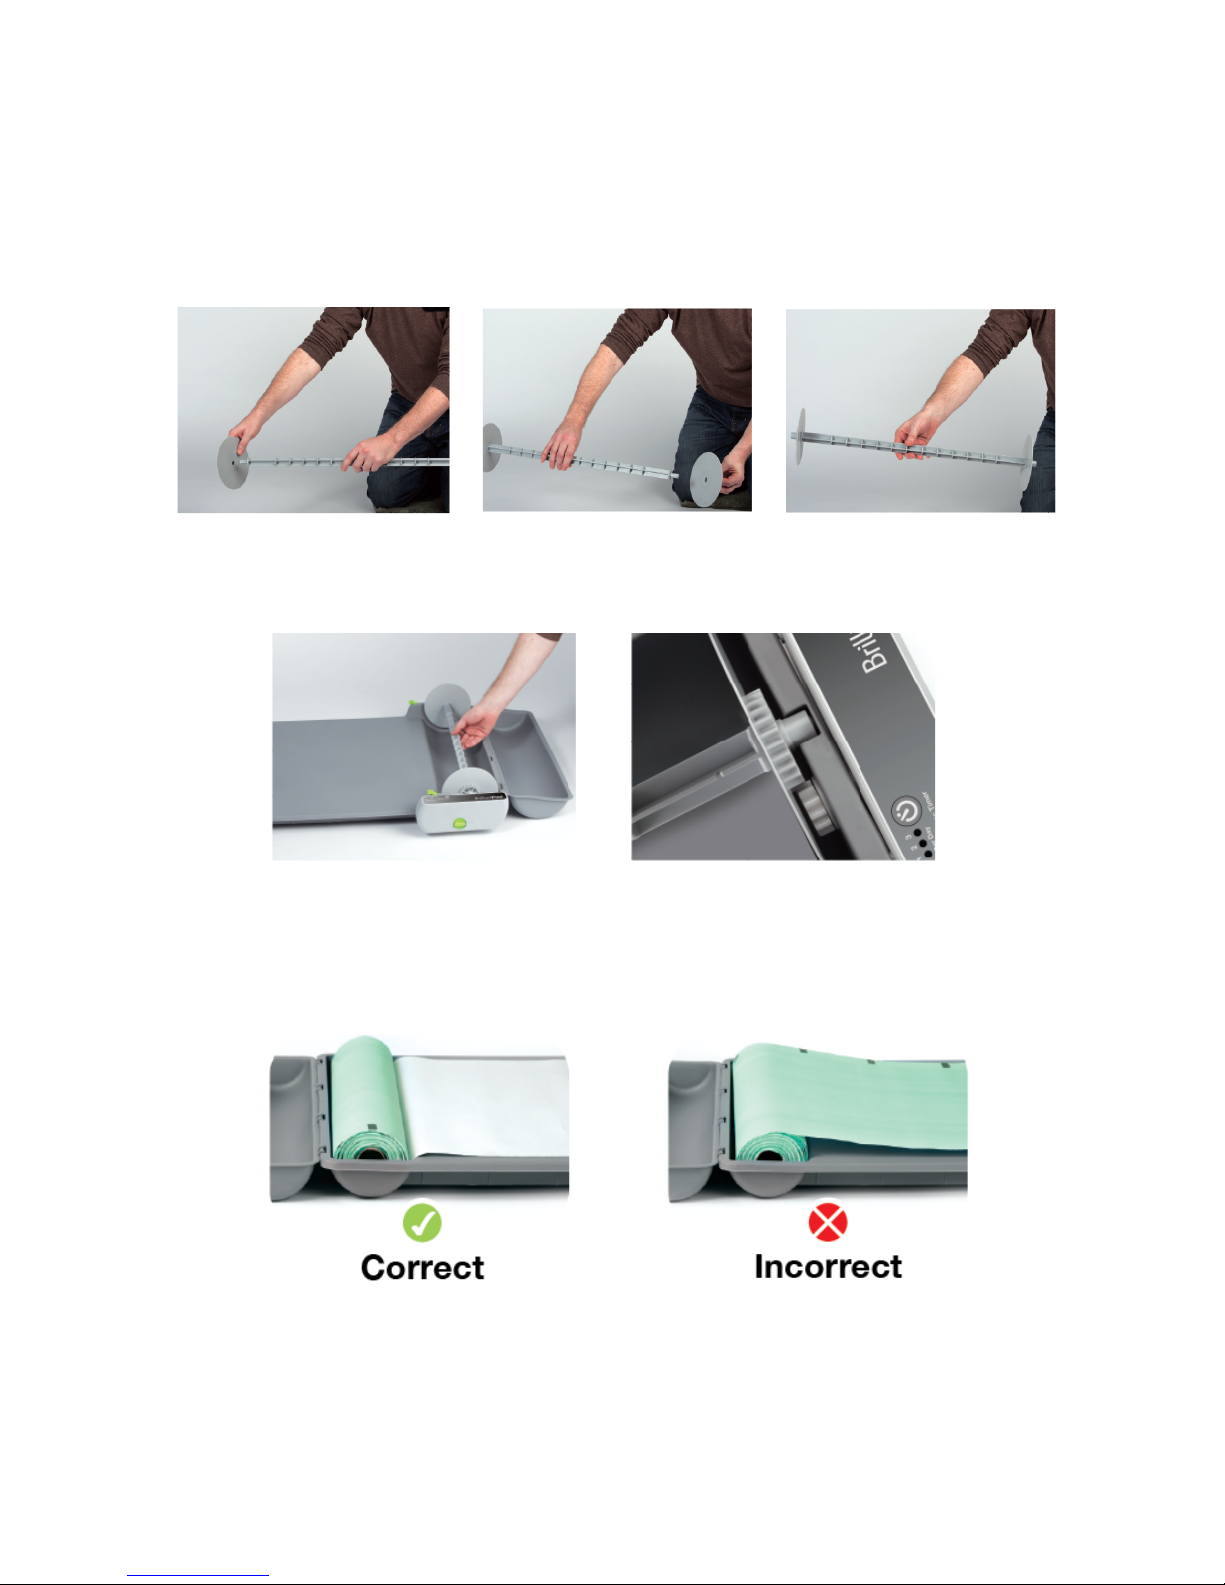
BrilliantPad pads have super absorbent polymer to soak up urine and dry out solids. A plastic
barrier under each pad seals waste to keep the machine and your floor clean.
Plastic barrier also provides clean grasp surface and the end caps prevent waste from leaking
or spilling. Everything that gets soiled or dirty is discarded and replaced.
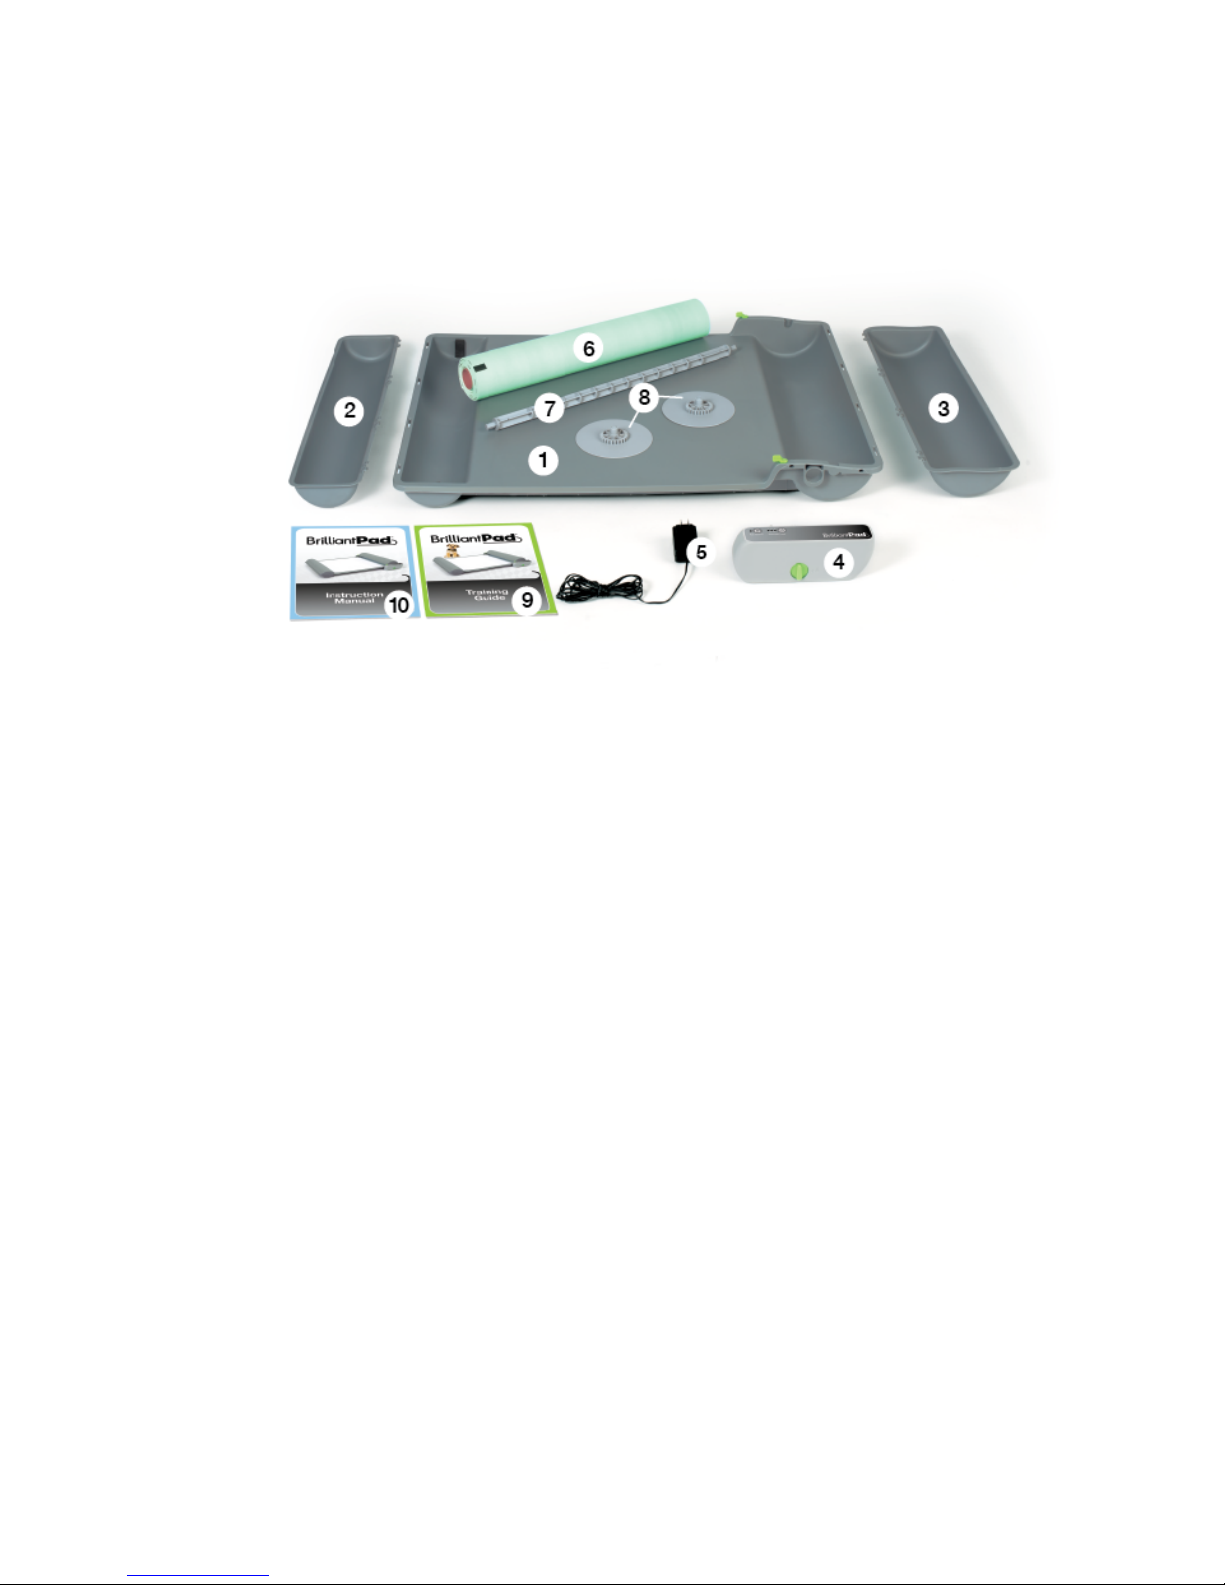
Replacement pad rolls come with all necessary accessories for use with BrilliantPad.

Package Contents
1. Base (Platform) 6. Pad Roll
2. Supply Cover 7. Take-up Rod
3. Waste Cover 8. Gear Caps (2)
4. Control Module 9. Training Guide
5. Power Supply 10. Instruction Manual
Read this Instruction Manual and BrilliantPad™ Training Guide completely
and carefully before setting up and using BrilliantPad™.

Machine Setup
Read this Instruction Manual and BrilliantPad™ Training Guide
completely
and
carefully
before setting up and using BrilliantPad.
Step 1: Put Base on Level Floor
Set base on a hard, flat surface. Feet will contact the floor and platform will face upwards
towards the ceiling. Orient the base so the round hole is facing you and on your right:
Step 2: Attach Covers
Covers may get unseated during shipping, so ensure the covers are properly installed.
To install the covers, simply press the clips on the covers onto the bars on the base:

Step 3: Attach Power Cord
The BrilliantPadTM Control Module contains a motor, computer and user control panel. Connect
power cord to control module.
Step 4: Install Control Module
Orient the Control Module so the BrilliantPad logo faces upwards. Make sure the green knob is
turned to the unlocked position, i.e., facing upwards at 12 o’clock.
Push the Control Module gear through the hole in the base. Press it all the way through the hole
until two small pegs on the drive module fit into the two small slots in base:
To secure Control Module, lock it by turning the knob clockwise so the knob points sideways to
the 3 o’clock position:

Step 5: Tuck in wires and plug into wall
To avoid loose wires, tuck cord into cleats under base.
The plug power cord into wall.

Pad Roll Installation
Step 1:
Prepare the take-up assembly by snapping a Gear Cap onto each end of the Take-up Rod:
Step 2:
Drop take-up assembly into waste area near Control Module. Gear Cap will mate to Control
Module gear:
Step 3:
Put Pad Roll into supply-chamber. Be sure roll feeds from the bottom, not the top. Then pull roll
3 to 6 inches past the take-up rod. When properly installed the white absorbent surface will face
the ceiling and the colored plastic lining will face downwards to the platform:

Step 4:
Tuck paper into upwardly facing clips on each end of the Take-up Rod.
Step 5:
Press the Pad Advance button on the Control Module to roll up the paper. If the Pad Roll slips
out of the clips, re-insert the Pad Roll into the clips.
Step 6:
Hold Pad Advance button on the Control Module until paper rotates backwards around the rod
several times.

Step 7:
Close the Supply and Waste Covers:
Step 8:
Rotate latches to secure the Waste and Supply Covers:

Recommended Location
Put BrilliantPadTM where you typically use puppy or potty pads. Select a location that provides
unobstructed access for your dog, ideally in an area that allows direct access to all four sides of
the machine. If you must place BrilliantPad near walls or furniture, provide as much free access
as possible.

System Controls
INDICATOR LIGHT Illuminates when power supply is connected:
GREEN
STEADY
Unit has power
GREEN
FLASHING
Animal is detected
RED
STEADY
Pad roll has been
completely used up
RED
FLASHING
System requires attention,
motor has stalled
Manual Pad Advance:
PRESS AND HOLD Pad Advance button to advance pad. Release button to turn off motor.
PRESS TWICE IN RAPID SUCCESSION to advance a full sheet.

Timer Control:
Press button to cycle through adjustable timed intervals:
1. If an Adjustable Timer mode is selected, the first automatic pad advance will occur 8, 12 or 24
hours after interval is selected. Then system will advance pad again every 8, 12 or 24 hours
until Adjustable Timer is changed or deactivated.

2. Pad advance will not occur automatically if system detects the presence of an animal on the
platform. If an animal is detected when the Adjustable Timer is scheduled to activate motor,
system will wait until dog leaves the platform before activating motor.
3. Manually advancing the paper when an Adjustable Timer mode is selected will not reset the
Adjustable Timer.
4. If you want to stop the system once the Automatic Timer starts advancing the pad, press any
button to turn off the motor. The System will go out of timed mode and the pad will no longer
advance automatically. The desired time mode will need to be reset.
5. When the paper supply runs out, the system will automatically deactivate the Adjustable
Timer and the main indicator light will turn steady red. Manual Pad Advance will continue to
work. Press the Pad Advance button to reset the system and turn the indicator light to steady
green. When ready to reactivate the timer, press the Adjustable Timer button to select desired
automatic pad advance cycle.

Soiled Roll Removal
When fresh Pad Roll supply is empty, unlatch and open the Waste Cover to access the soiled
Pad Roll:
The Pad Roll is designed to be fast, easy and clean to replace. There is no need to save the
Take-up Rod or Gear Caps since they are biodegradable in most landfills. Simply lift the entire
roll assembly from the machine and dispose in trash. The plastic backing provides a clean grasp
surface and the Gear Caps prevent waste from leaking or spilling.
The entire Take-up assembly is disposable and made from earth-friendly materials, so you can
feel good when you discard them with soiled Pad Roll.
Install new Pad Roll according to previous instructions.
For more information about the materials and process used to make the Take-up Rod and Gear
Caps, visit www.BrilliantPad.com/earth.

Troubleshooting Tips
Error Condition
Solution
Indicator light steady red
Pad Roll is used up. Install a new Pad Roll. Press
Pad Advance button to reset the system and
Indicator light will turn steady green.
Indicator light flashing red
The system has detected excessive force required
to advance the Pad Roll. Try these steps:
●Check for obstructions or objects caught
in Pad Roll.
●Make sure the Pad Roll is installed
correctly, with the paper feeding from
the bottom.
●Make sure Pad Roll material is tracking
properly and winding onto the take-up
assembly between the Gear Caps.
●Remove Control Module and advance the
pad material by hand by rotating take-up
assembly -- the paper should advance
freely.
●Reinstall and lock Control Module in
place.
Press Pad Advance button to reset system. The
Indicator light will turn steady green.
Indicator light turns steady red after every full
pad sheet advance
The system is not detecting the marks on the
underside of Pad Roll.
●Check to make sure that the paper is
tracking and centered on the take-up
assembly.
●Check that the small clear circular
window in the platform is not obstructed.
This window allows the system sensor to
“see” the pad marks.
●Make sure the Control Module is
attached fully and locked securely to the
Base (Platform).

The system is non-responsive, nothing happens
when the Pad Advance and Adjustable Timer
Buttons are pressed.
Ensure electric outlet is on. Remove power brick
from wall and press back into wall. If still no
power, cycle power to the system by unplugging
power cord from Control Module and then
reconnecting power cord.
Motor turns, but pad material does not advance
Make sure pad material is secured to the take-up
assembly.
Pad is not absorbing liquid
Make sure the white adsorbent layer is facing
upward and color surface with black marks is
facing floor.
IMPORTANT: Some training is required!
All dogs require some training to adopt new behavior. University-based veterinarians and animal
behaviorists helped develop our three-step framework so your dog can become a BrilliantPadTM
dog:

Training Plans
The specific steps vary according to age and current habits of your dog, and it takes anywhere
from a few days to a few weeks to complete each step.
Remember to have patience. Most dogs can be trained to use BrilliantPadTM with enough praise,
love and treats. We can help with your training with our individualized training guides.
If your dog has trouble with a specific training step, relax! Sometimes it
takes more than one try. If necessary take a break for a few days and try
again.
Visit: www.BrilliantPad.com/Training for our training video, training tips and
training guides.
__________________________________________________________________________
Cleaning Instructions
1. Remove Control Module and disconnect power.
2. Wipe all surfaces with mild soap and water.
3. Ensure optical windows are clean and not blocked or scratched.
Do not immerse Control Module in water or spray down Control Module.
Do not expose system to excessive sunlight or moisture.
To discourage recurrence of accidents, clean all inappropriately soiled areas with an
enzymatic cleaner such TidyShot
by BrilliantPadTM, Urine
Off
, Liquid
Alive
, etc.
Buy cleaner here.

YOUR TOTAL SATISFACTION IS OUR #1 OBJECTIVE
We appreciate your business and want to do everything we can to ensure your complete
satisfaction with BrilliantPadTM. If you have any questions, contact us directly at
BrilliantPad.com/Help. Please do not contact retail store.
If you enjoy using BrilliantPad, please leave a positive comment or review. However, if you are
not completely happy, please contact us before giving us a negative review. We will do
whatever it takes to make sure you become a tremendous fan of BrilliantPad.
Please visit BrilliantPad.com/Help for help with any issue.
Need More Rolls?
BrilliantPad.com/Subscribe to order replacement pad rolls direct to your home.
Feeling The Love?
BrilliantPad.com/Refer for discounts and special offers you can share with your
friends.
Need Some Help?
Register For Free One year extension of the BrilliantPad Warranty
Register your product online and extend your warranty from one year to two
years: BrilliantPad.com/register. Please visit BrilliantPad.com/warranty for
complete details.
Table of contents
Popular Pet Care Product manuals by other brands

PetNovations
PetNovations CatGenie 120 Operation guide

Kogan
Kogan SmarterHome KACAMPETFDA quick start guide

Jorvet
Jorvet BUSTER ICU Cage manual

Security Boss
Security Boss MaxSeal installation instructions

Savic
Savic Dog Barrier door Assembly instructions

Petsafe
Petsafe Passport PPA19-20559 operating guide