manuals.online logo
Brands
  1. Home
  2. •
  3. Brands
  4. •
  5. Brinno
  6. •
  7. Security Camera
  8. •
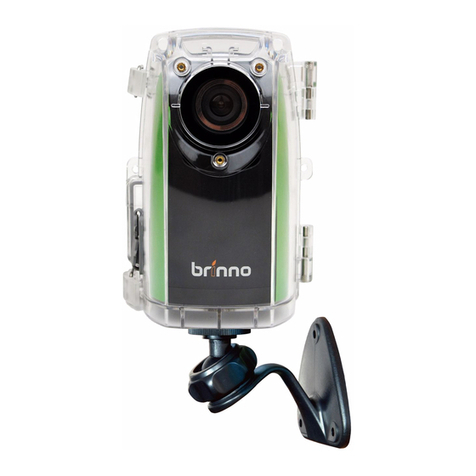
  9. Brinno TimeLapse BMC100 User manual

Brinno TimeLapse BMC100 User manual

Other Brinno Security Camera manuals

Brinno BCC100 TimeLapse User manual

Brinno

Brinno BCC100 TimeLapse User manual

Brinno MAC200 DN User manual

Brinno

Brinno MAC200 DN User manual

Brinno HEALTH DEFENDER BBT2000 User manual

Brinno

Brinno HEALTH DEFENDER BBT2000 User manual

Brinno PeepHole User manual

Brinno

Brinno PeepHole User manual

Brinno PHV MAC User manual

Brinno

Brinno PHV MAC User manual
Brinno MAC 200 User manual

Brinno

Brinno MAC 200 User manual

Brinno MAC200 DN User manual

Brinno

Brinno MAC200 DN User manual

Brinno MAC 200 User manual

Brinno

Brinno MAC 200 User manual

Brinno GardenWatchCam User manual

Brinno

Brinno GardenWatchCam User manual
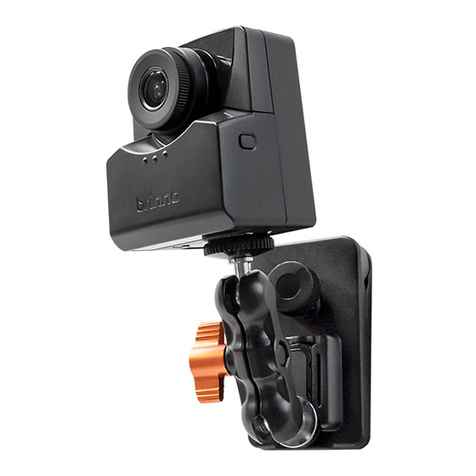
Brinno PHV MAC User manual

Brinno

Brinno PHV MAC User manual

Popular Security Camera manuals by other brands

ADEMCO RapidDome Owners Operating & Installation Guide

ADEMCO

ADEMCO RapidDome Owners Operating & Installation Guide

EverFocus EBA2880 user manual

EverFocus

EverFocus EBA2880 user manual

Honeywell OptiCAM-IR Installation and setup guide

Honeywell

Honeywell OptiCAM-IR Installation and setup guide

Uniq UC-600 user manual

Uniq

Uniq UC-600 user manual

OPTICOM NVD-120-S datasheet

OPTICOM

OPTICOM NVD-120-S datasheet

Steren CCTV-221 instruction manual

Steren

Steren CCTV-221 instruction manual

Arm Electronics C420BCDNVFIR Features

Arm Electronics

Arm Electronics C420BCDNVFIR Features

Eneo PLD-2036PTZ installation guide

Eneo

Eneo PLD-2036PTZ installation guide

Axis AXIS M20 Series installation guide

Axis

Axis AXIS M20 Series installation guide

Panasonic KX-HCM230 operating instructions

Panasonic

Panasonic KX-HCM230 operating instructions

COP-USA CC15NV-SL Specifications

COP-USA

COP-USA CC15NV-SL Specifications

Active Silicon HARRIER H.264 quick start guide

Active Silicon

Active Silicon HARRIER H.264 quick start guide

Motorola Avigilon 1.3C-H5SL-BO1-IR installation guide

Motorola

Motorola Avigilon 1.3C-H5SL-BO1-IR installation guide

INSTEON 2864-232 user manual

INSTEON

INSTEON 2864-232 user manual

Wisenet XNB-6002 quick start guide

Wisenet

Wisenet XNB-6002 quick start guide

Axis M5525-E user manual

Axis

Axis M5525-E user manual

Vitek VTC-IR62NZ922 user guide

Vitek

Vitek VTC-IR62NZ922 user guide

Panasonic WV-SF342 Specifications

Panasonic

Panasonic WV-SF342 Specifications

manuals.online logo
manuals.online logoBrands
  • About & Mission
  • Contact us
  • Privacy Policy
  • Terms and Conditions

Copyright 2025 Manuals.Online. All Rights Reserved.

TimeLapse
BMC100- Motion Activated Camera
BMC100
Quick Guide
w
w
w
.
b
r
i
n
n
o
.
c
o
m
7F, No.75, Zhou Zi St., Taipei City11493, Taiwan
Phone: +886-2-8751-0306 Fax: +886-2-8751-0549
[email protected] www.brinno.com
Made in Taiwan
STEP 5. Finish
301-0054-00 EN A1
SD
While recording, hold the “OK” button until the LCD light turns on
and shows the text “Processing”, it means the camera is processing
le closing. When completed the processing it will display the text
"Ready” This indicates the recording session is complete.
Remove the SD card from the camera, and insert it into your
computer or laptop to enjoy your amazing Time Lapse Videos!
Done!
0
-
Mo
ti
on
B
M
C
1
0
0
10 seconds per triggerCapture Time
4meters (13 feet)
Detection Distance
90˚
Detection Angle
Capture 1~4 frames per second.
(Depends on SD card speed)
Time Interval
Preview screen
Processing
Camera Wall Mount
3
(AWM100) STEP 4. Start Recording
STEP 3.
STEP 2.
STEP 1.
Motion Activated Camera BMC100
Motion Sensor
2
1TimeLapse Camera
(ATM100)
(TLC200 f1.2)
BMC100 - Installation
Install the AWM100.
Install the TLC200 f1.2 .
Set up screen
2
1
1. Switch ON.
2. The LCD will show set up screen.
Preview screen
3
3. Press OK twice to the recording process.
Preview screen
.REC
Install the ATM100 .
Motion
A
By sticker (smooth surface)
B
By screw (brick)
or Use the screw to x on
the wall.
Clean up the at surface, be sure there
is no dust on the surface. Remove the
sticker seal, paste on the wall for at
least 24 hours.
Menu
Overwrite
Mode
AOverwrite
o
on
B
Press MENU, select the Overwrite Mode.
Choose on or o to set up overwrite mode.
Note -Overwrite Mode
The camera will be automatically activated overwrite mode
once Motion Sensor (ATM100) is plug in camera, you can go to
camera setting menu to change if necessary.
A
B